David’s Drawer:
Peter Sefton helps ‘long course’ student David Partington learn the art of drawer making.
Peter Sefton helps ‘long course’ student David Partington learn the art of drawer making
One of the first skills we teach our long course students is the art of dovetail cutting; it’s such a fundamental skill that brings together accurate marking out, sawing to the line and precision chisel work. Making your first perfect dovetail joint is very satisfying. As the course has progressed, the students have learnt the art of drawer making and fitting. David Partington has incorporated a couple of drawers into his brown
oak media unit.
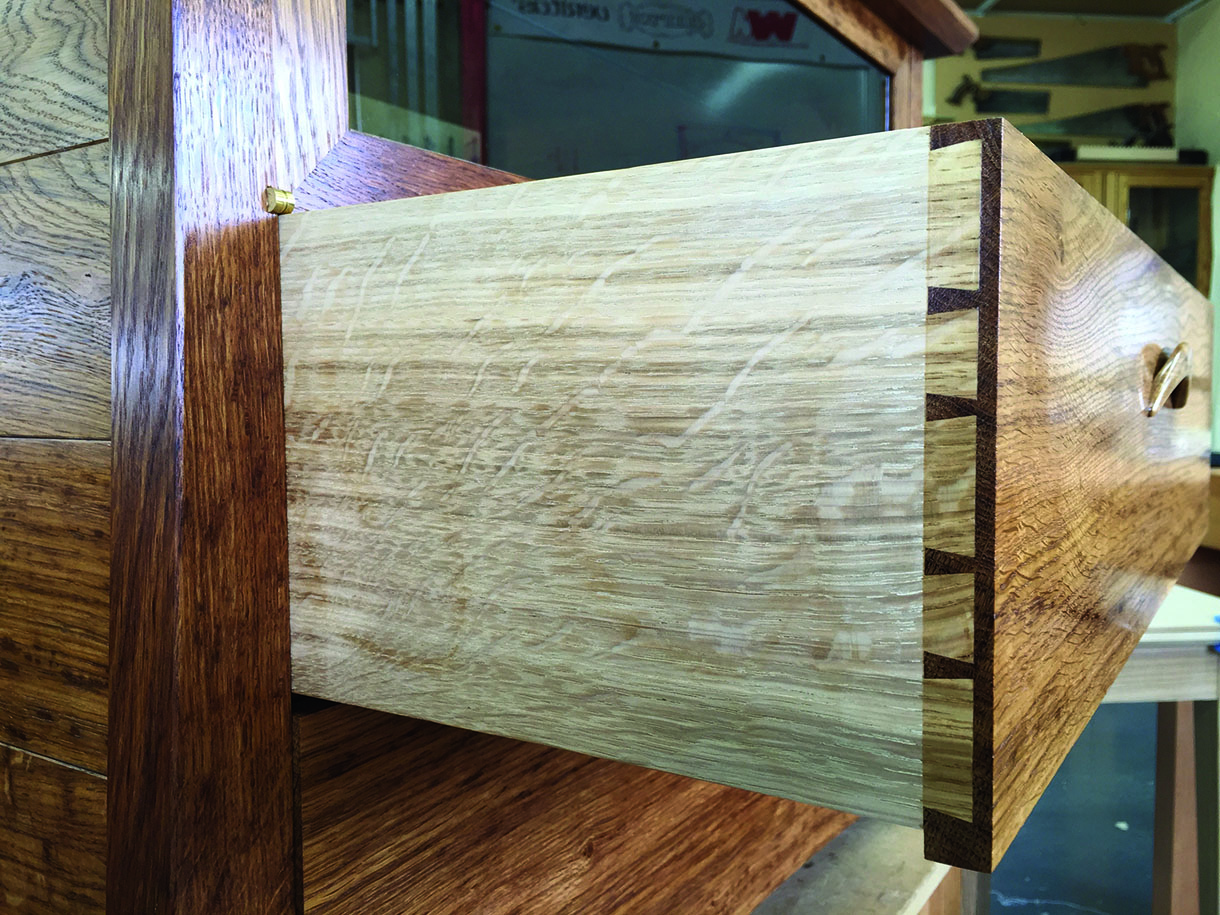
A perfect piston-fit drawer is always considered a sign of quality making, but this relies just as much on the carcass as it does the drawer itself. David’s carcass has been made square and true. The next stage is timber selection for the drawer.
Choice of timber
David has chosen some great brown oak for the drawer fronts, to match the cabinet and some highly figured quartersawn white oak for the drawer sides. The timber is left to settle and acclimatise to our dry workshop before the oak is ‘deeped’ (sawn through its width) to produce thin drawer sides.
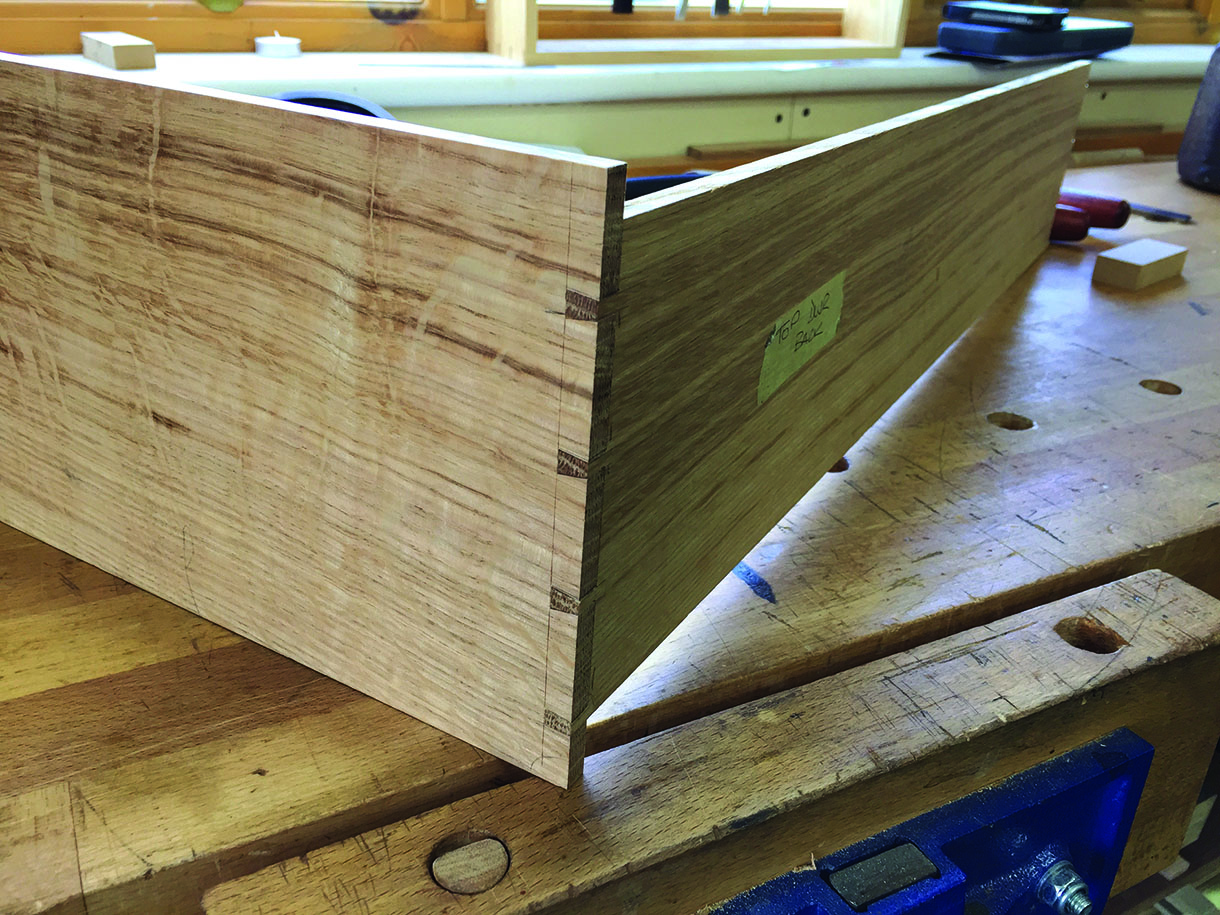
The drawer’s back corner has through dovetails
Wood
• Brown oak (Quercus robur)
• White oak (Quercus alba)
Preparing the wood
In theory, deeping quartersawn boards should be straightforward, but timber doesn’t read the same theory books that we do! An alternative option is to plane down thick boards to their finished thickness. This seems wasteful but does ensure that you will always finish at the correct thickness while removing any defects. Best practice is to remove equal amounts from both sides over two or three machining sessions, leaving adequate time between sessions to allow the timber to move.
The option chosen here, however, is to deep the 27mm thick boards on the bandsaw to produce two book-matched drawer sides which then require planing to thickness. We usually ‘face side’ and skim thickness the boards prior to cutting in half. This ensures you are bandsawing from a flat and straight board rather than following a bent and twisted plank. The outer surface is exposed to fresh air which reduces the timber’s shock when cut in half. Releasing stresses and seeing daylight for the first time can make the boards ‘cup’. These boards have cupped more than expected, so we need a backup plan!
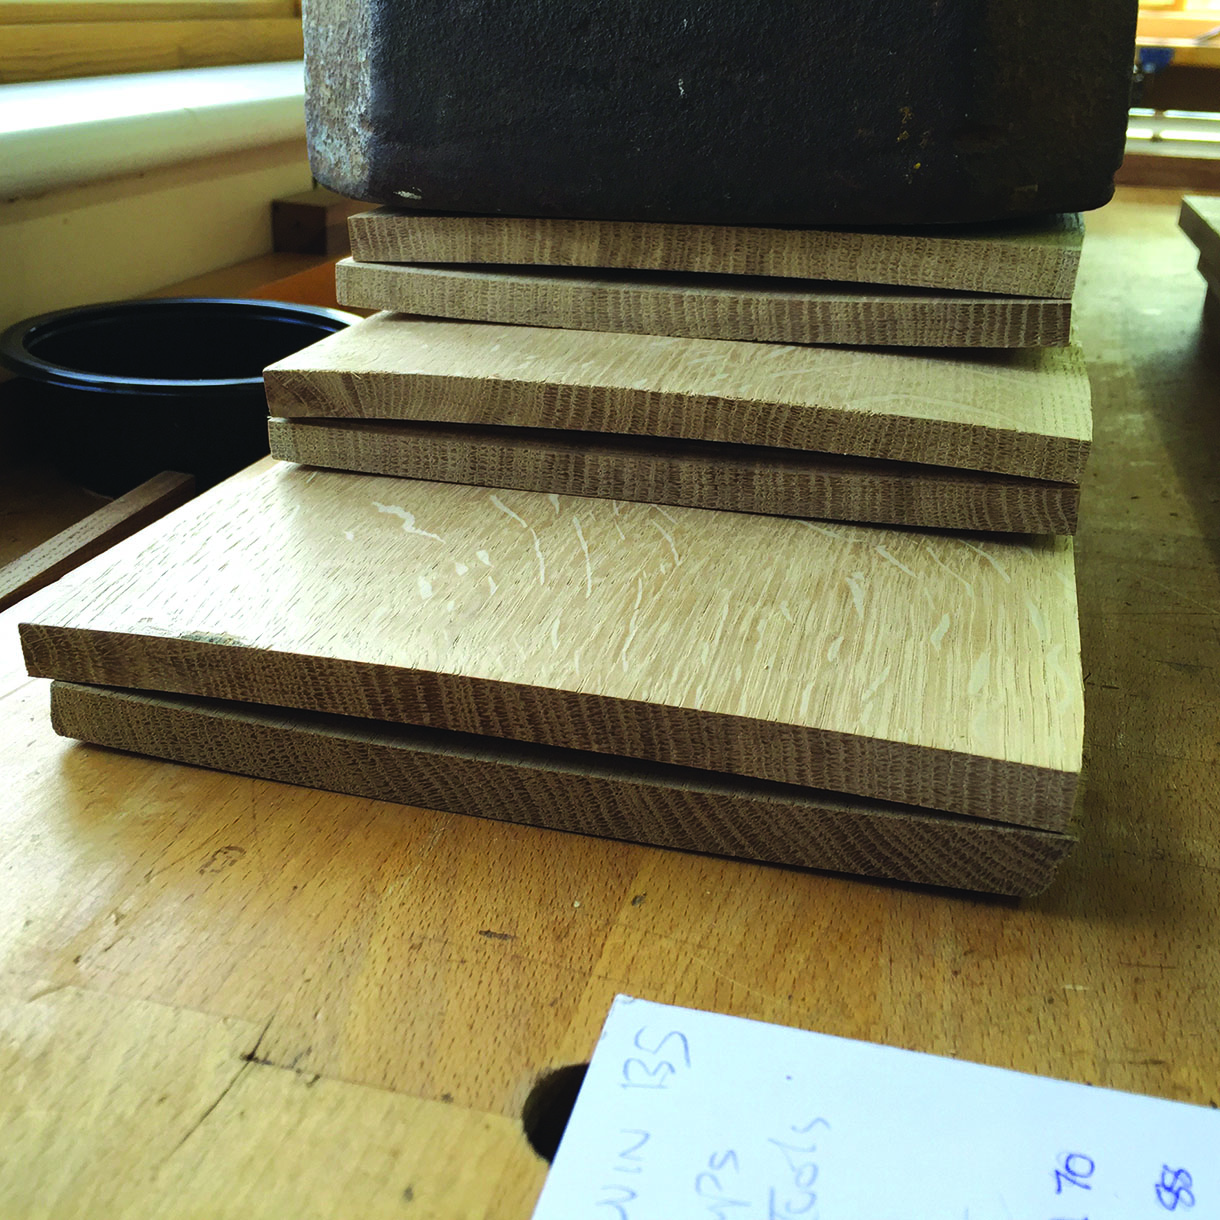
Cupped boards after deeping
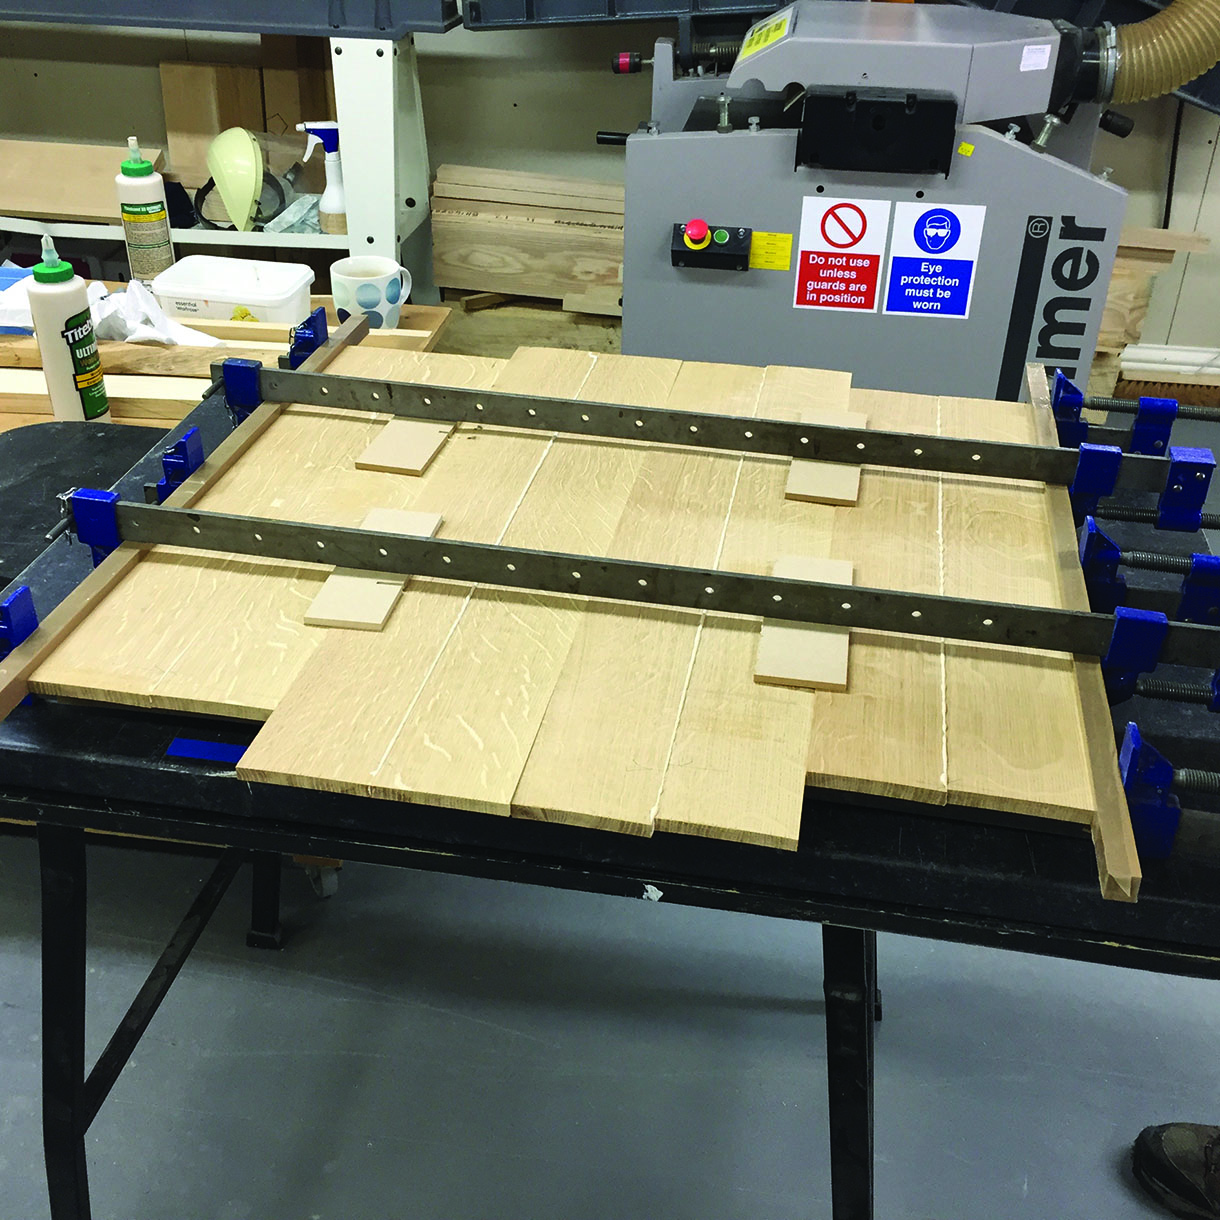
Boards cut in half, edged and back in cramp gluing up
A perfect solution
We have cut the boards in half widthways, edge planed them and glued them back together. This effectively reduces the cupping by half. After surface planing and thicknessing again, we end up with perfectly flat boards that you would never know had caused us problems.
Timber likes to throw curve balls on occasions; the name of the game is adapting your plan to overcome them.


