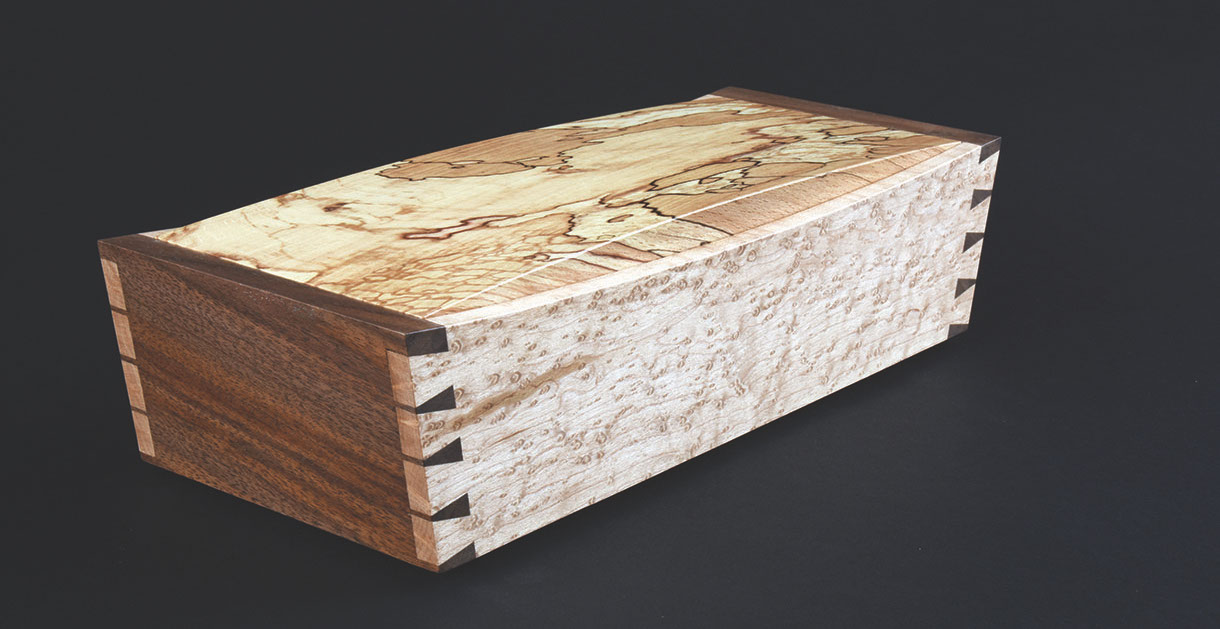
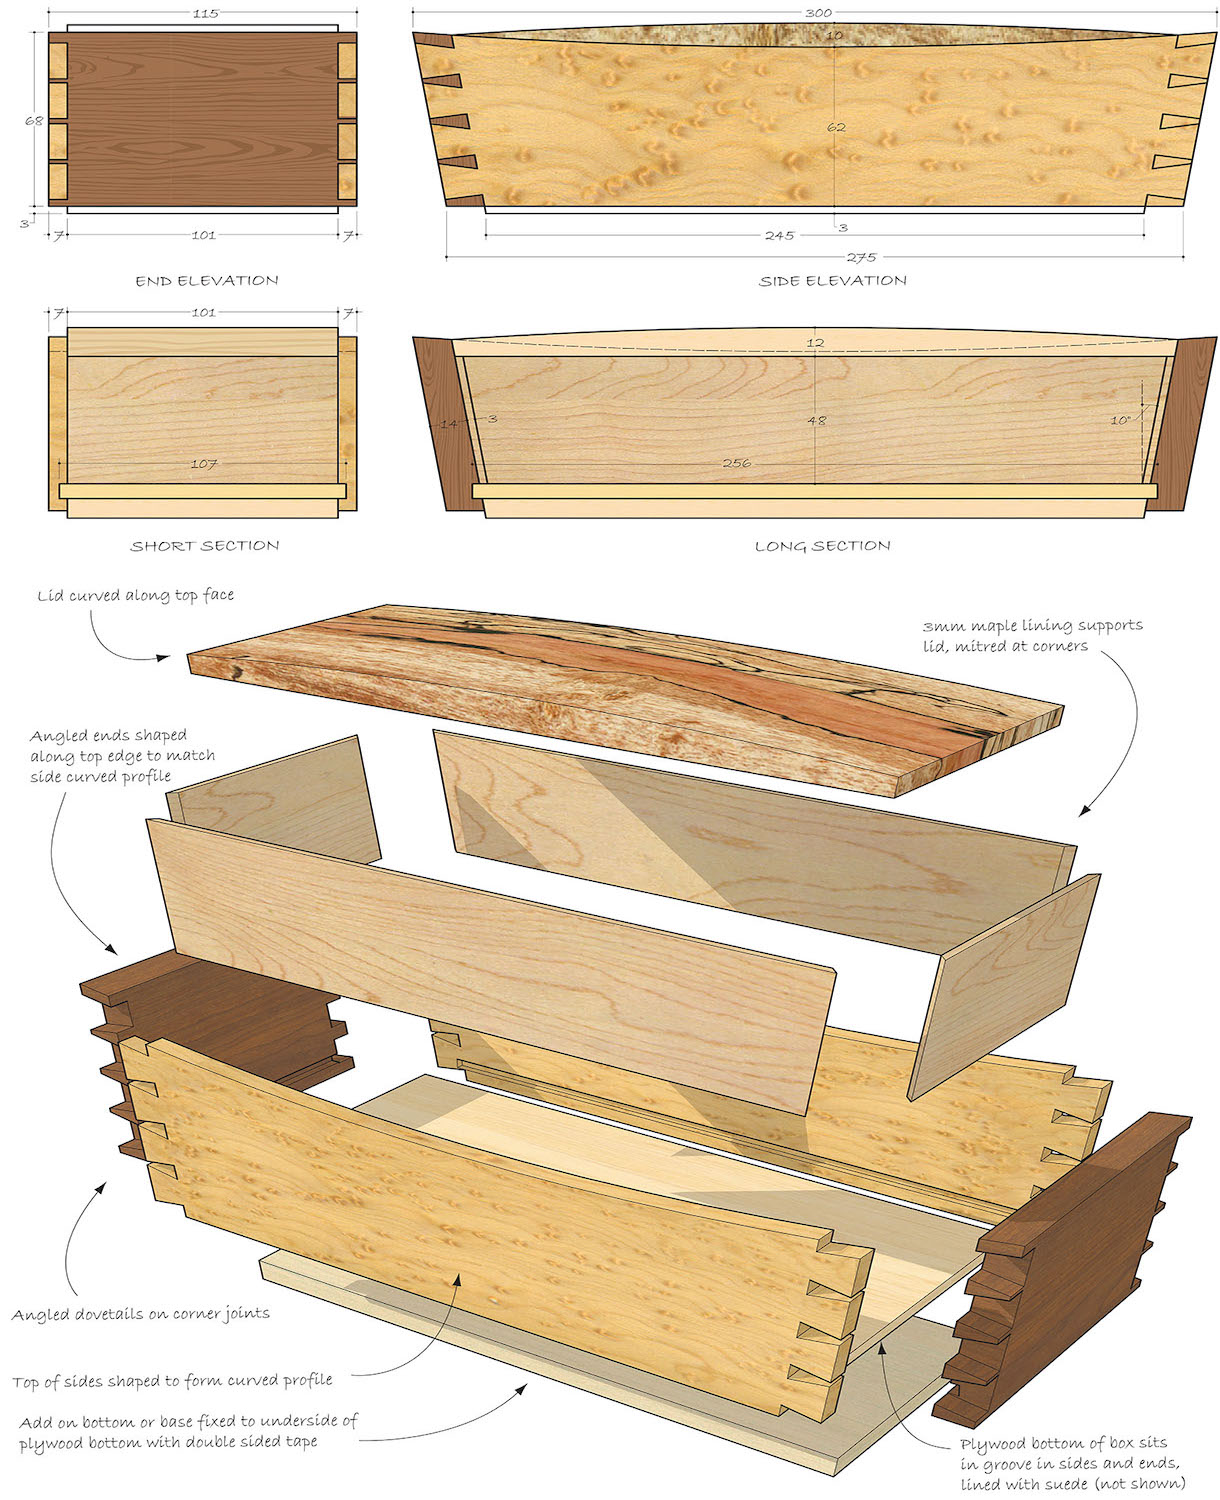
Angled Dovetail Box:
David Barron breaks away from the usual right angles with this angled box.
David Barron breaks away from the usual right angles with this angled box
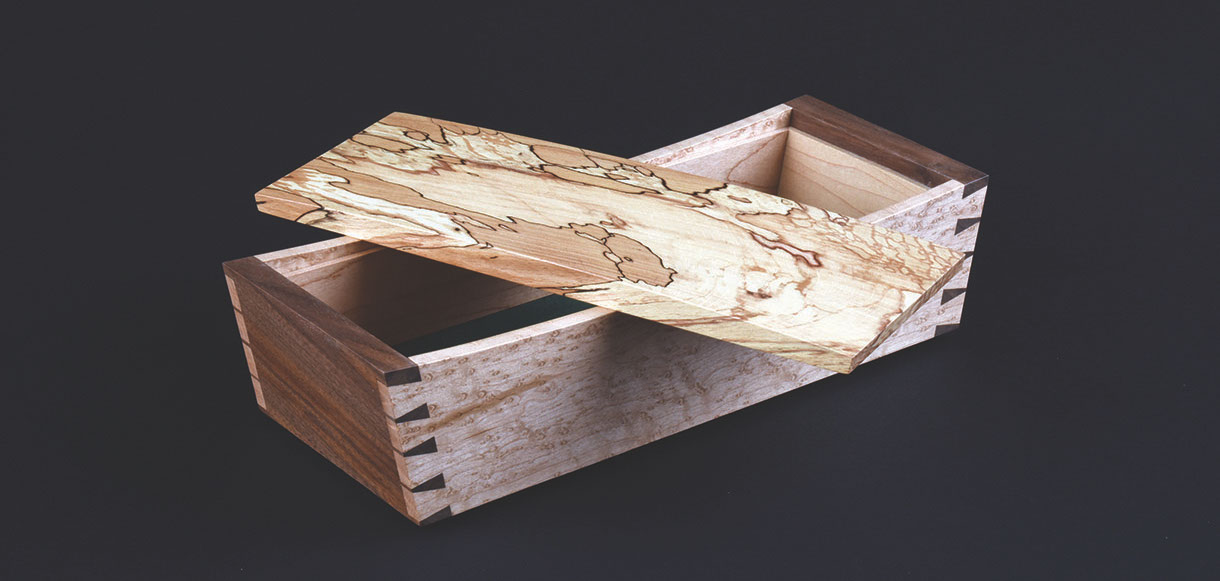
Showing the lid…
…and the lining
I love making dovetail boxes, but wanted to try a box that moved away from the usual right angles that dovetails tend to dictate. Angling all sides involves complicated layout and joinery, but angling just two of the sides makes things a lot easier, while still giving a pleasing effect. This box is the ideal project to get you thinking about slopes and curves and the subtle effects they can have on your designs.
As a precursor to making a box with four sloping sides it will give you an idea of how even the smallest changes to square edge joinery can affect the geometry for laying out neatly spaced dovetails.
Preparation
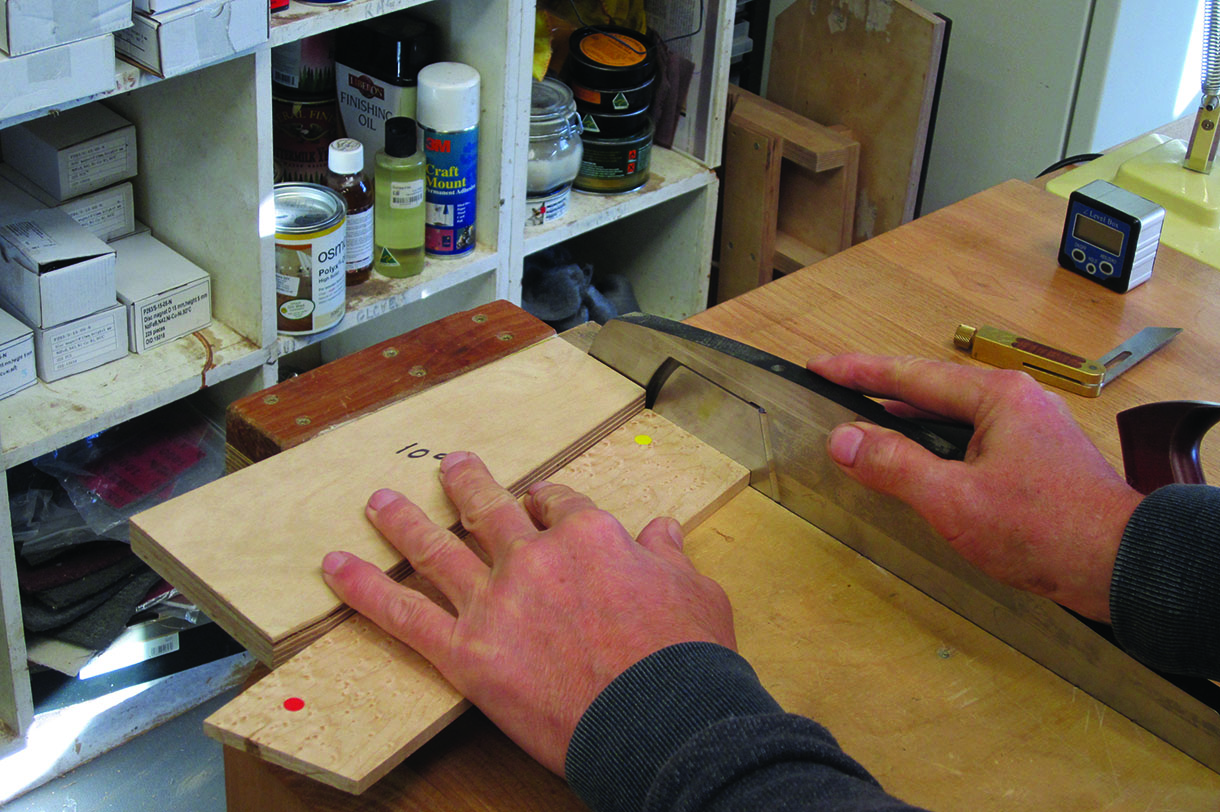
Before you start making it’s a good idea to make a couple of 10° angle blocks; one for horizontal and the other for vertical, these will be used a few times during the build. When cutting the pieces to size it’s important to make the two ends 6mm taller in order to accommodate the angle which needs to be cut on the bottom of the ends. This angle is best done on a shooting board with the support of the vertical 10° block. This same block is also used on the router table to cut the groove for the base, in order for it all to line up. The front and back are cut lying flat with the router table fence in the same position. Stop blocks are used to limit the travel so that the slots don’t go through the ends, which would show in the finished joint.
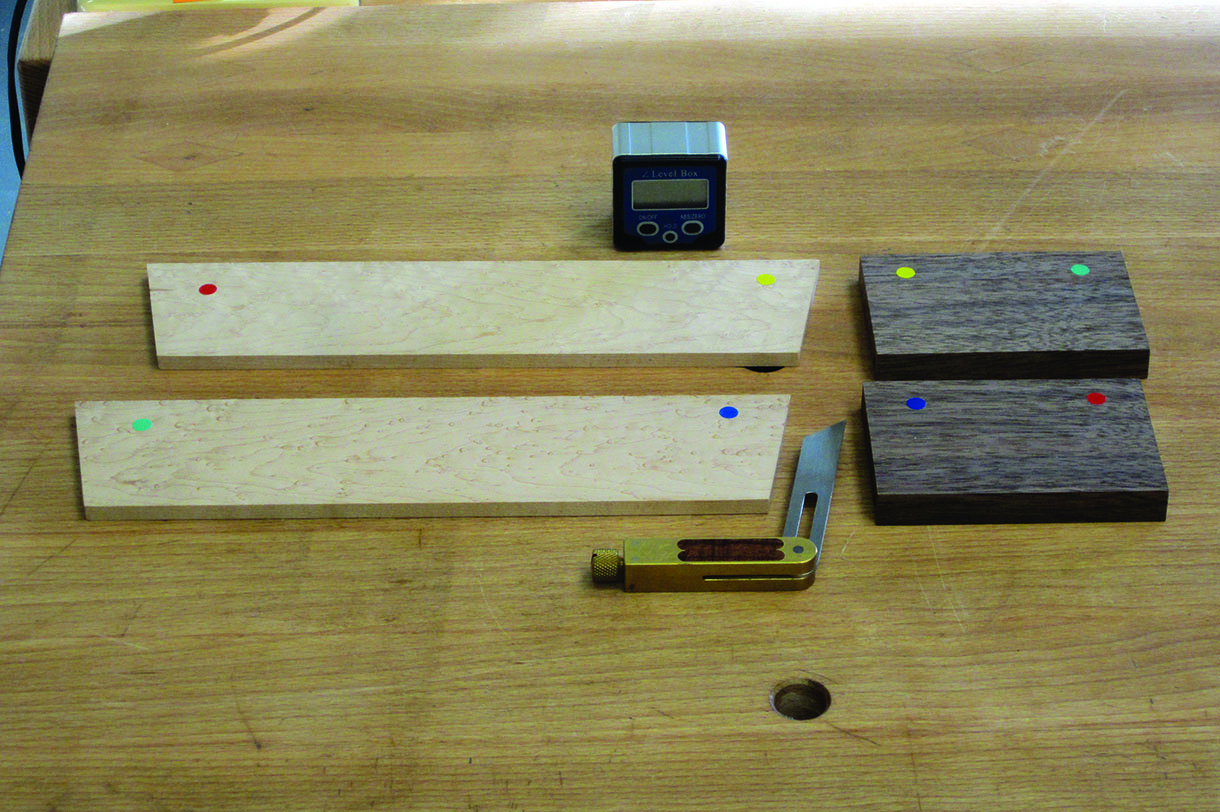
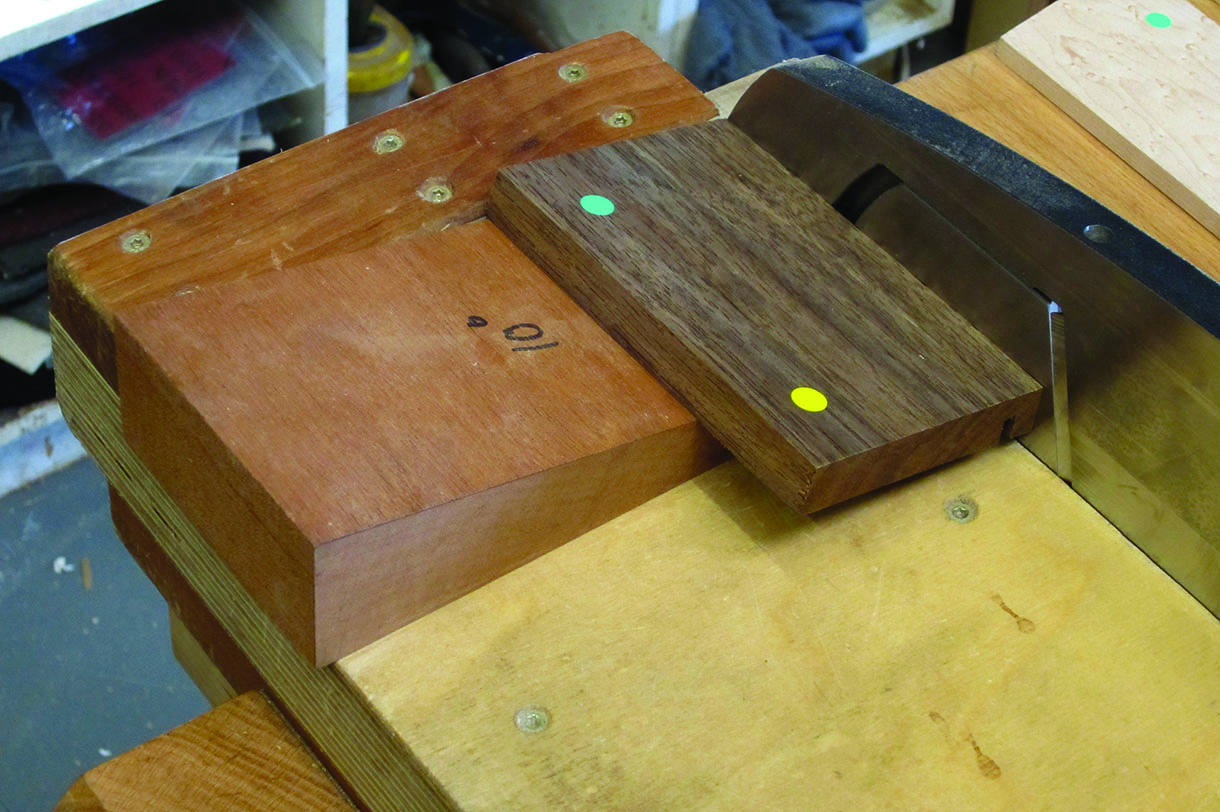
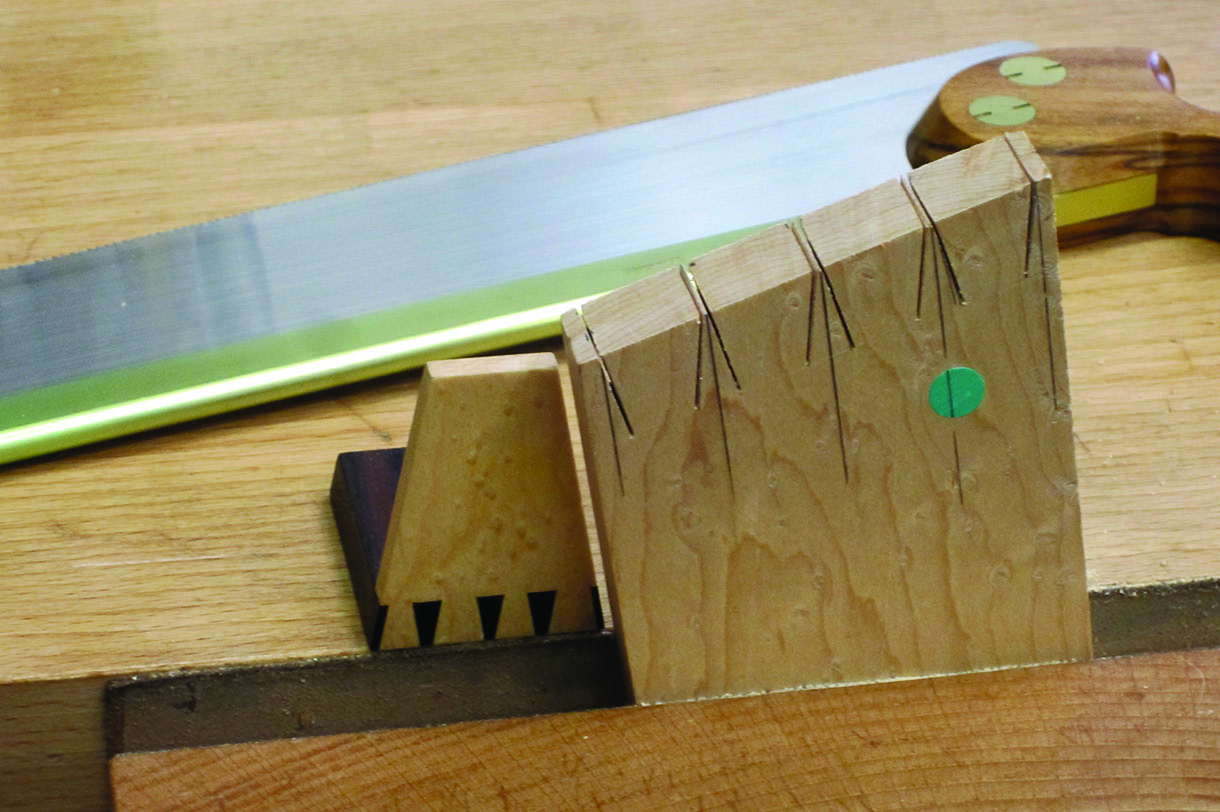
The sides cut to size, note the coloured dots which help you keep track of the pieces
A 10° bevel being shot on the underside of the walnut ends
Cleaning up the edges of the front and back
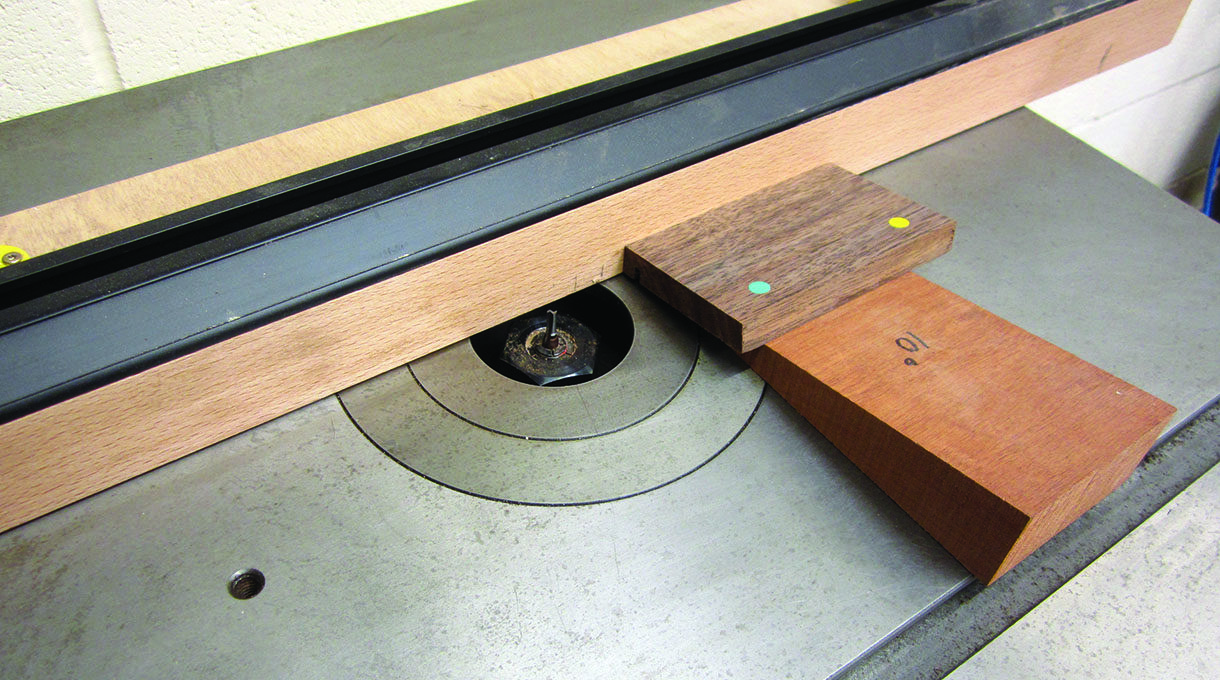
Slots for the base being carefully routed with a 10° block
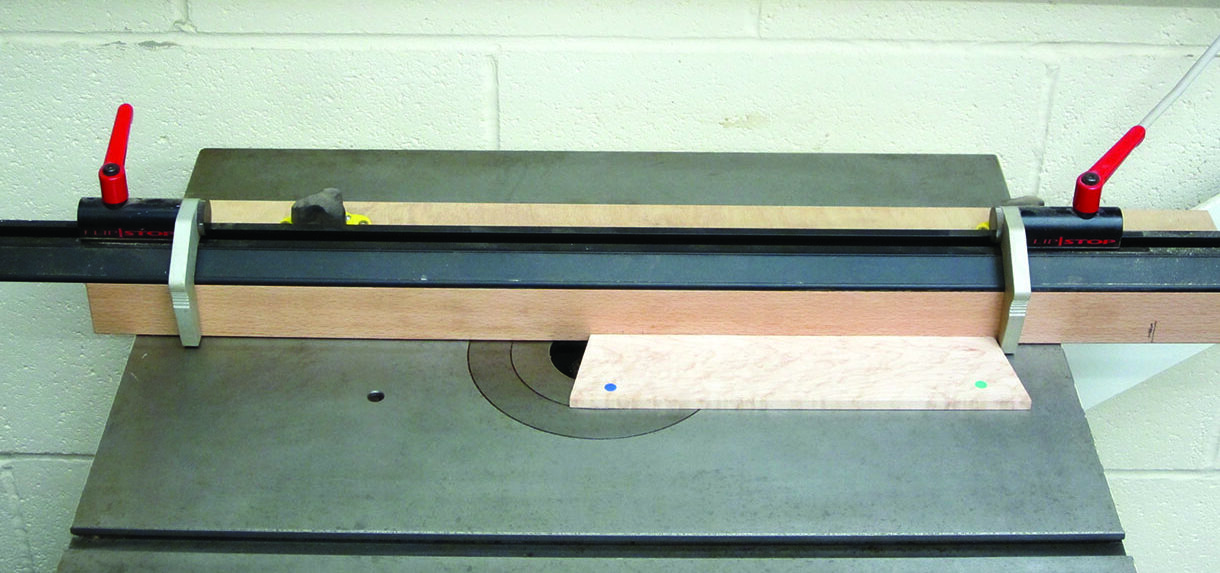
Slots for the front and back being cut, note the stop blocks
Beginning construction
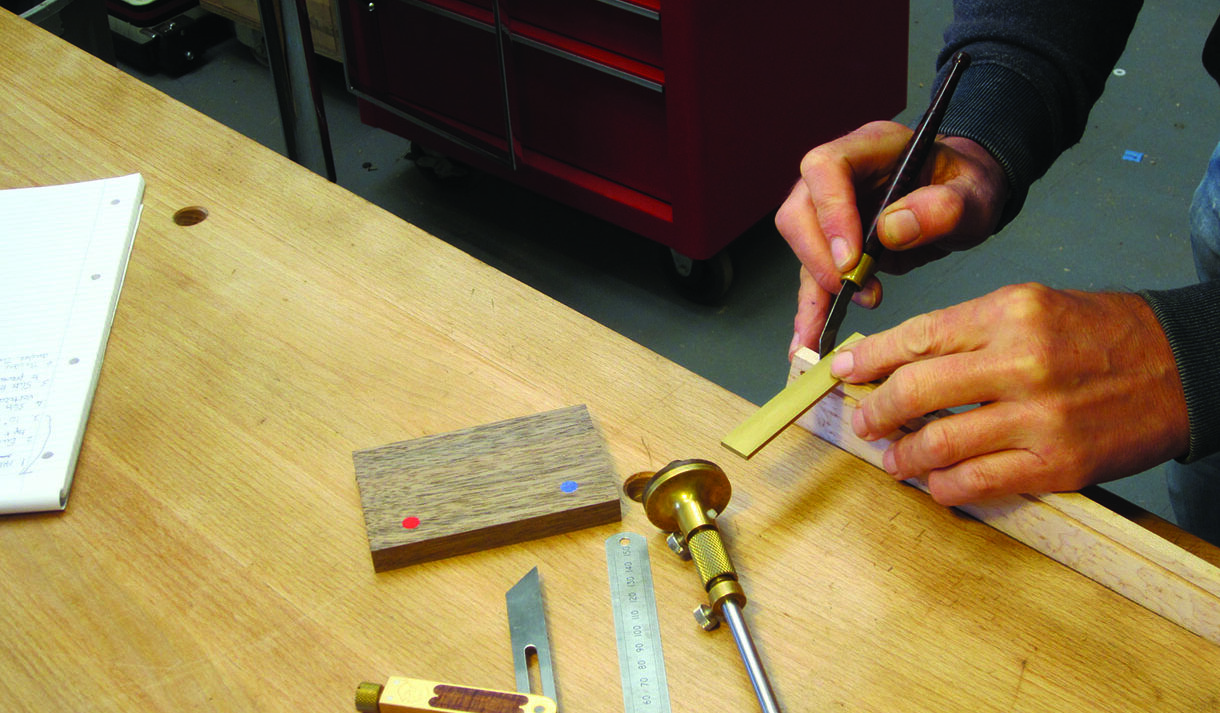
The dovetail base lines can now be marked. Note the ends of the angled tail boards need to be marked with a knife and square, as there is no registration for the stock of the marking gauge. For the dovetails to look right they need to be horizontal, so I drew evenly spaced lines parallel to the bottom edge and then marked in the dovetails to either side of the lines. With a 10° angle and using a 1:6 ratio (also 10°) it means that one of the lines is marked at 90°, with a square, and the other at 70°, with a sliding bevel. If you decide on different angles or dovetail ratio you need to adjust accordingly.
The sides of the tail board being knifed
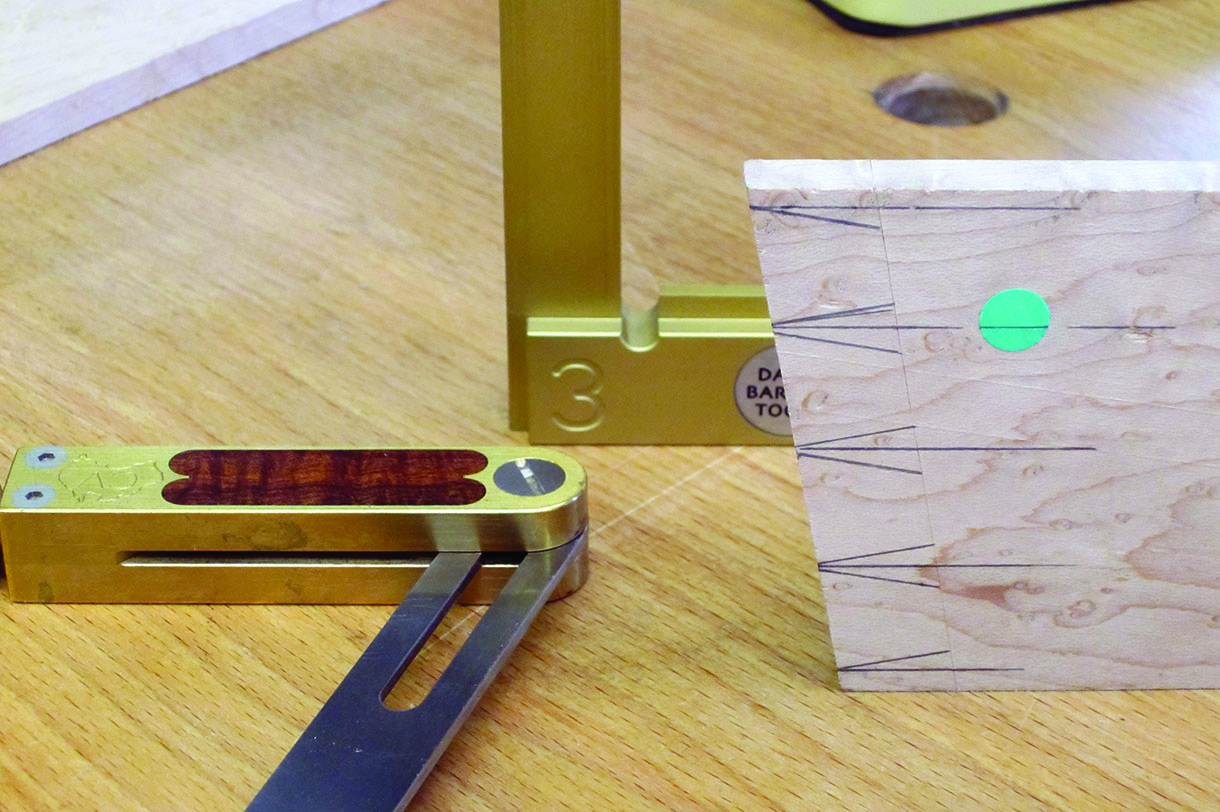
Marking out the tails
Cutting the tails
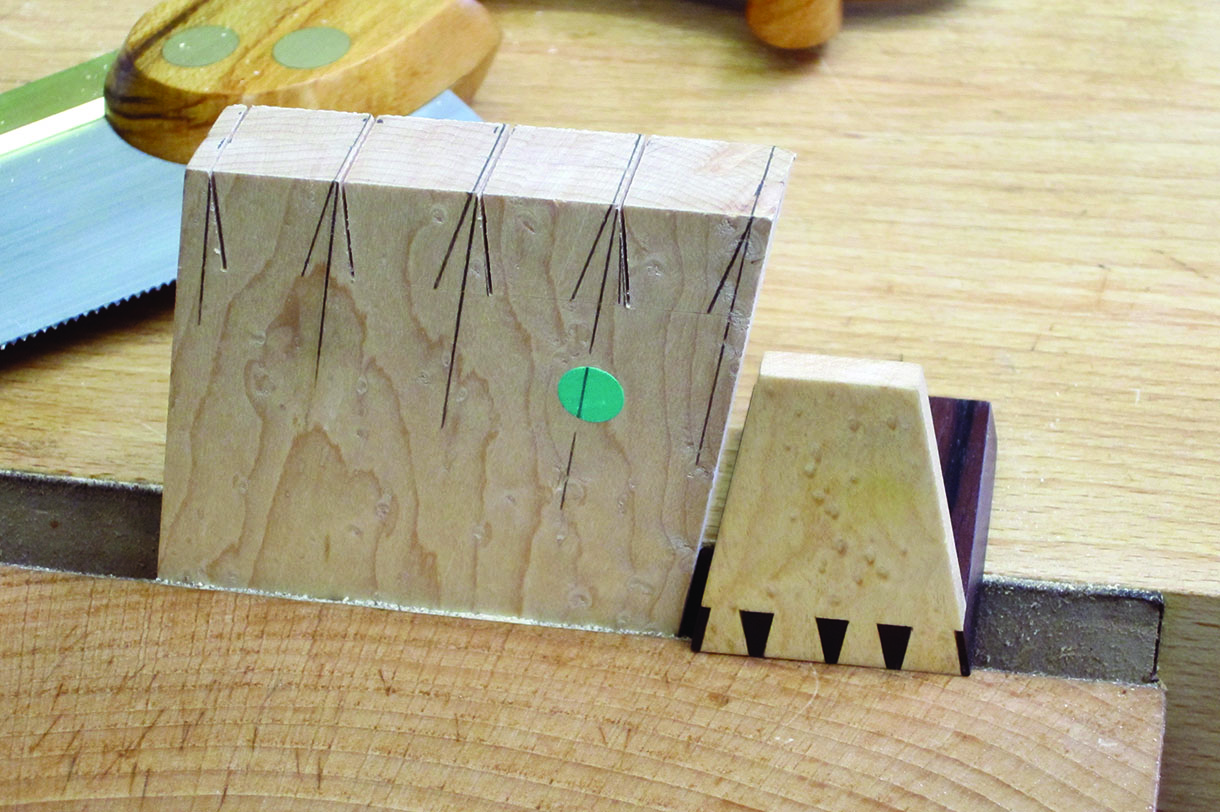
To help cutting the tails at the same angle each time I angled the boards so that the cut is vertical, which is more natural. In addition, to try and keep the cuts dead square, I cut both pieces at the same time which doubles the width of the lines. I used my new Skelton long stroke dovetail which cut beautifully and tracked straight; this is the best English style saw I’ve ever used. The pins were then marked from the tails ensuring the bottom edges were perfectly aligned. Do check the fit of the base all round before committing glue to the joints.
Angling the boards so that the cut is vertical
Cutting the other side vertical as well
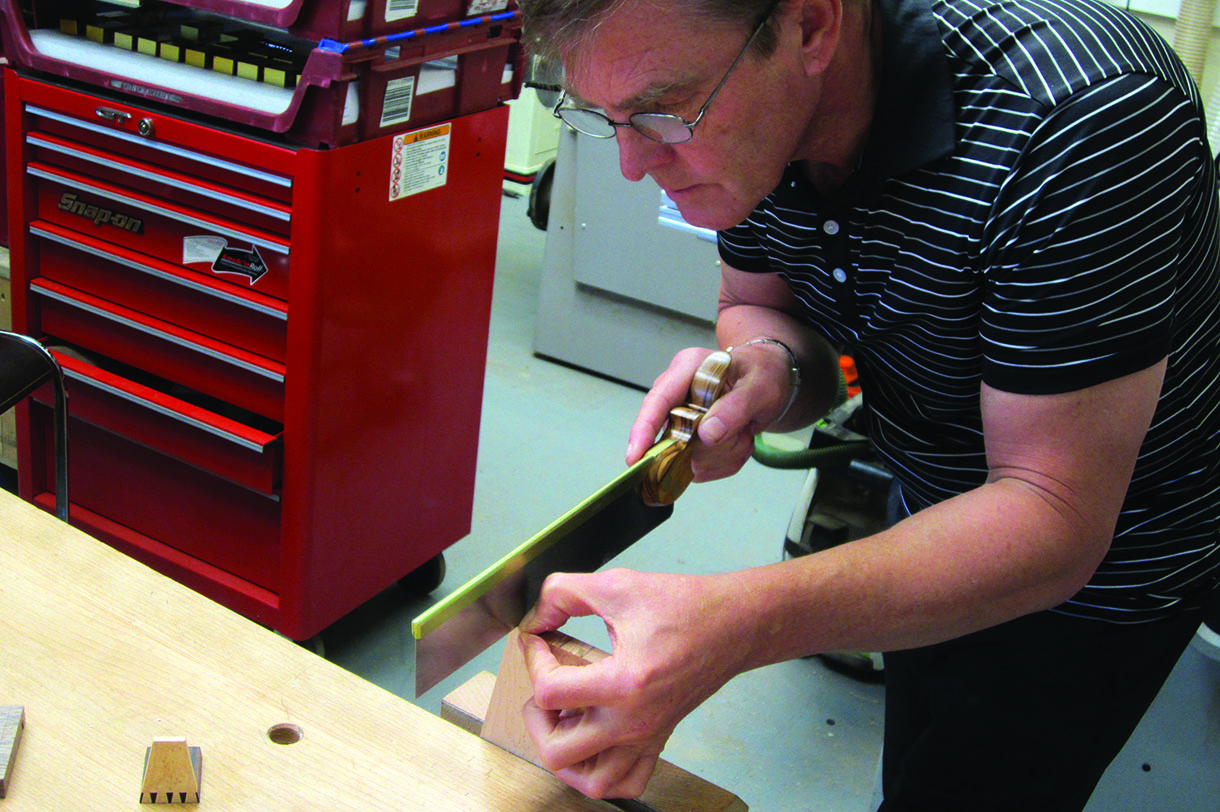
Using my new Skelton dovetail saw
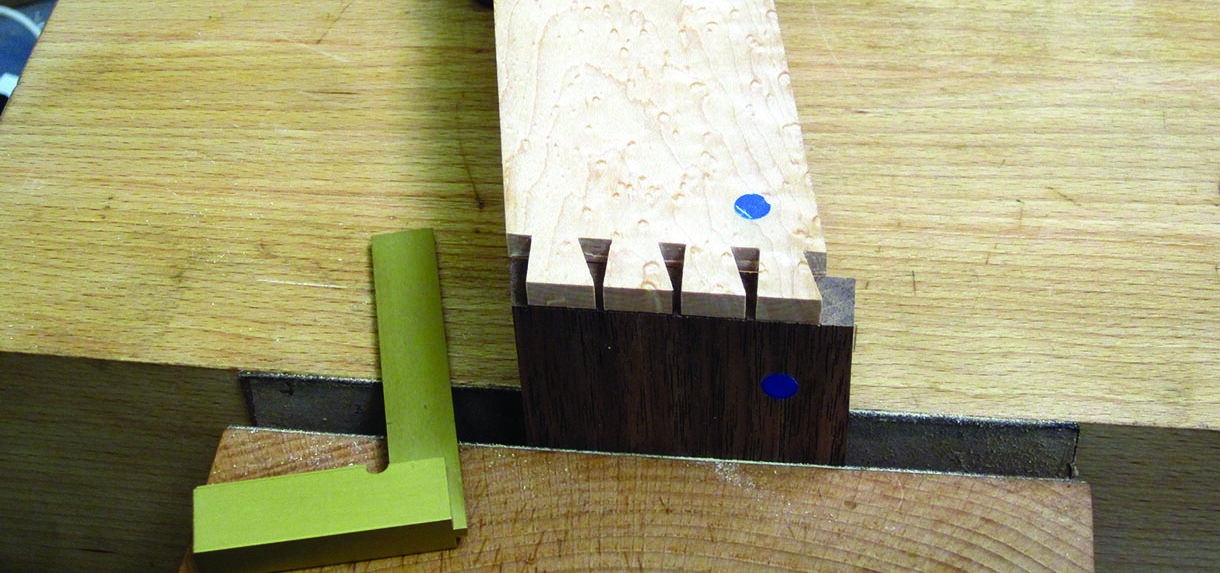
Marking the pins, ensuring the bottom edges are in line
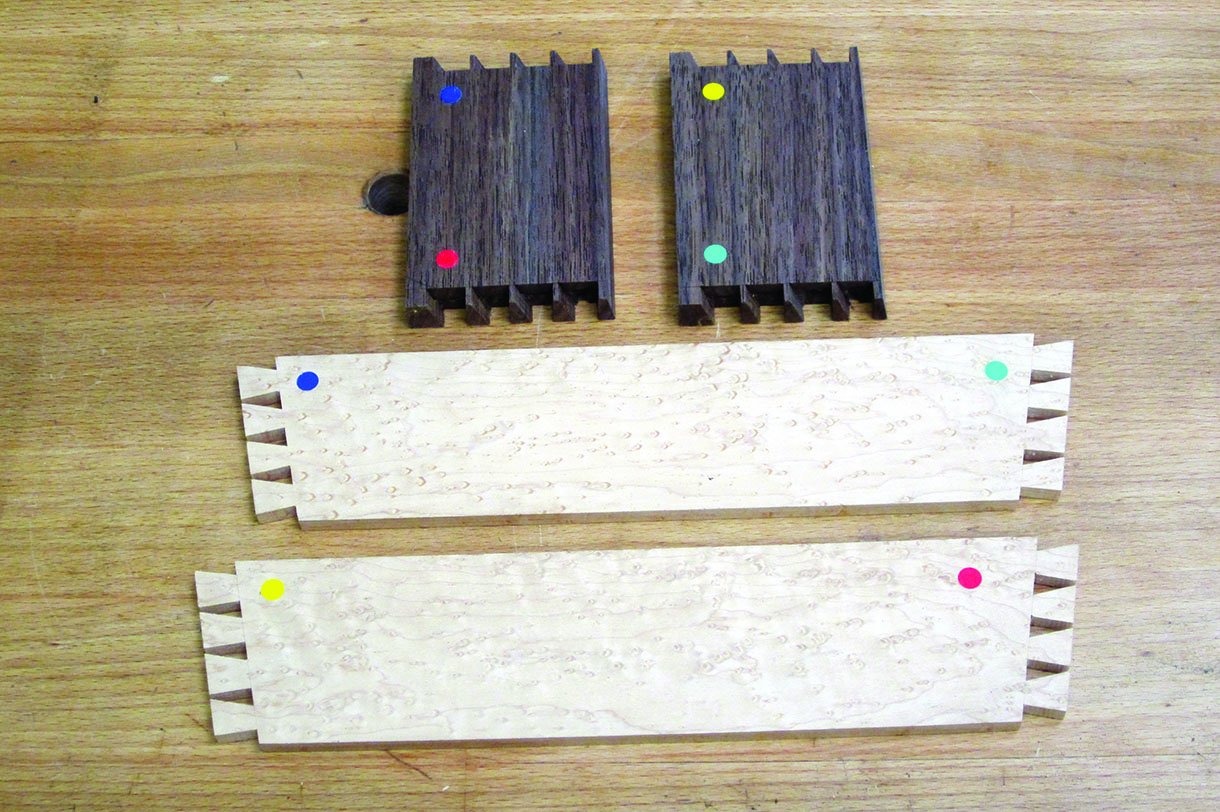
All the parts ready for glue up
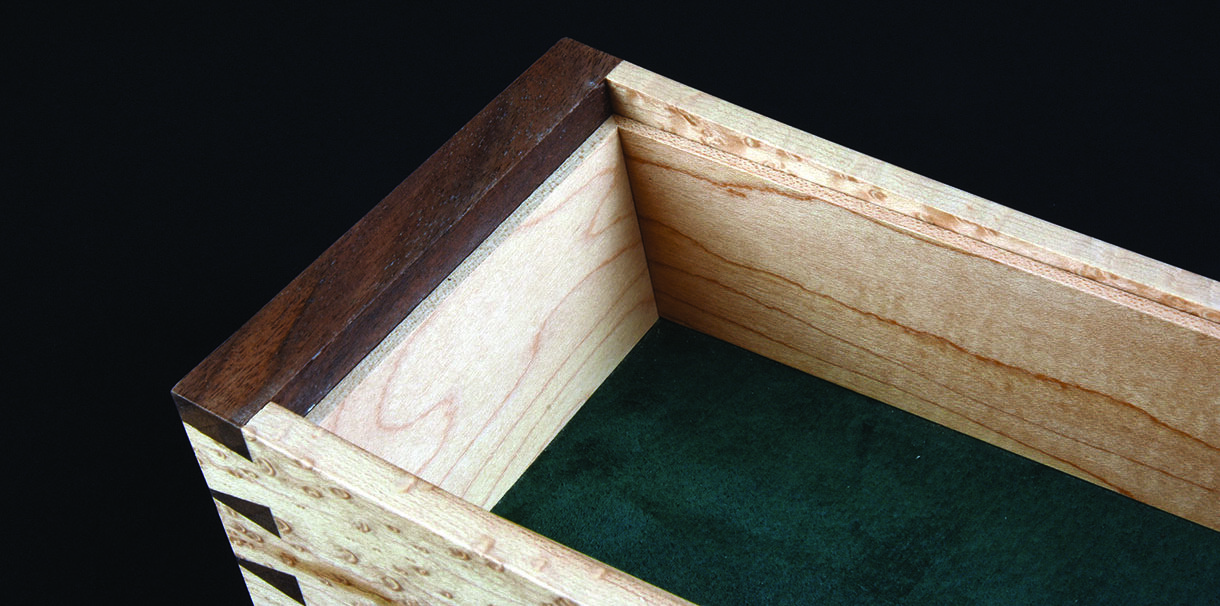
Lining
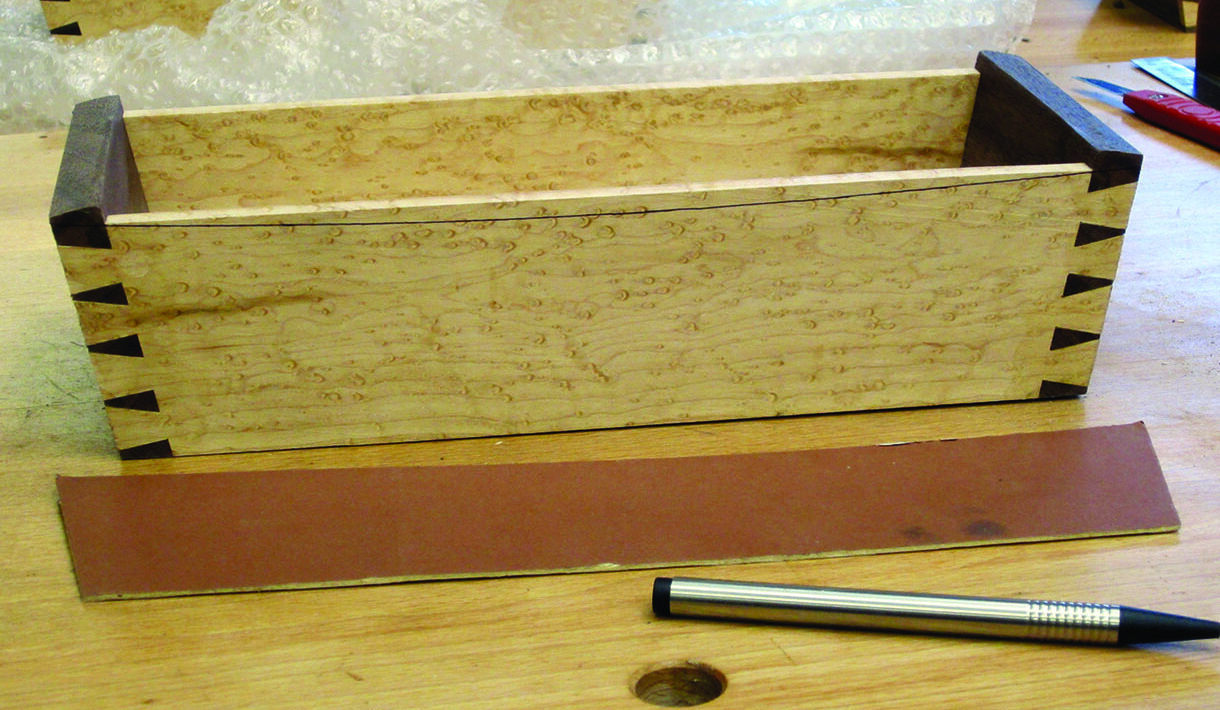
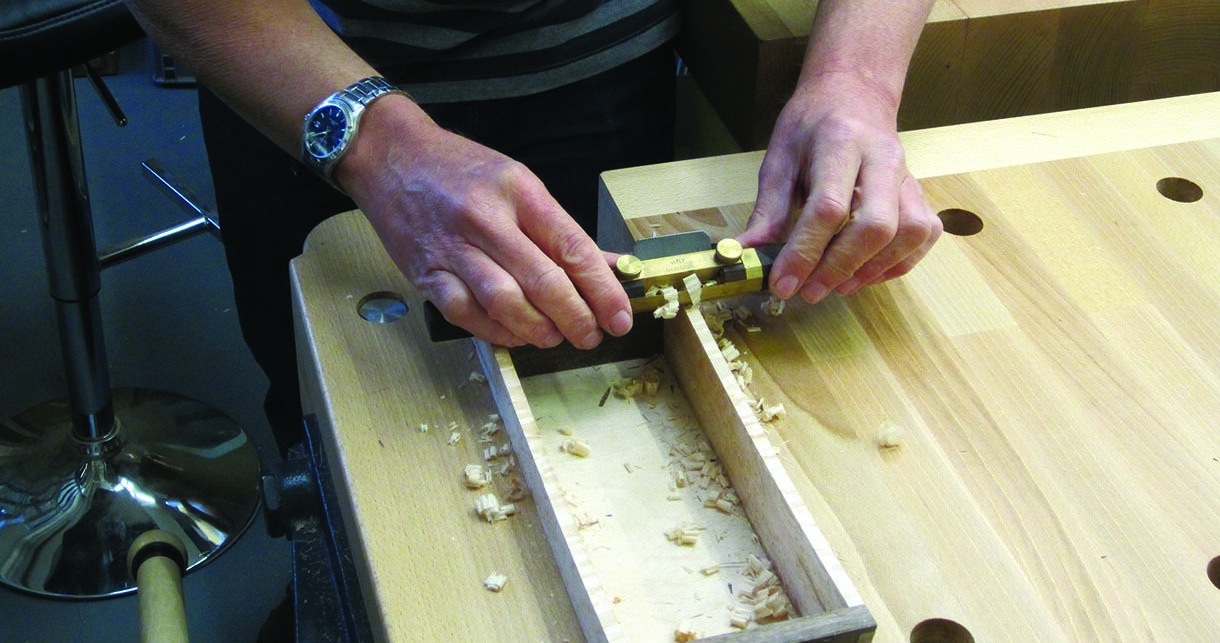
With the box glued up I marked out the shallow curve with a template and this was carefully cut on the bandsaw. Make sure the box is perfectly square with the blade to get an even cut on both sides. The sides were then cleaned up with a spoke shave and sanded smooth using a block that spanned both sides to keep the edges square. The base of the box was lined with pig suede followed by a wooden lining to support the lid. The lining was taken to just under the lowest part of the curve so that the lid didn’t end up too chunky. The 45° mitres were cut on mitre shooting board using the horizontal angle block for the front and back pieces. The vertical block was used to angle the top and bottom of the two end pieces. An easier alternative to fully lining the box would be to just use two end pieces to support the lid.
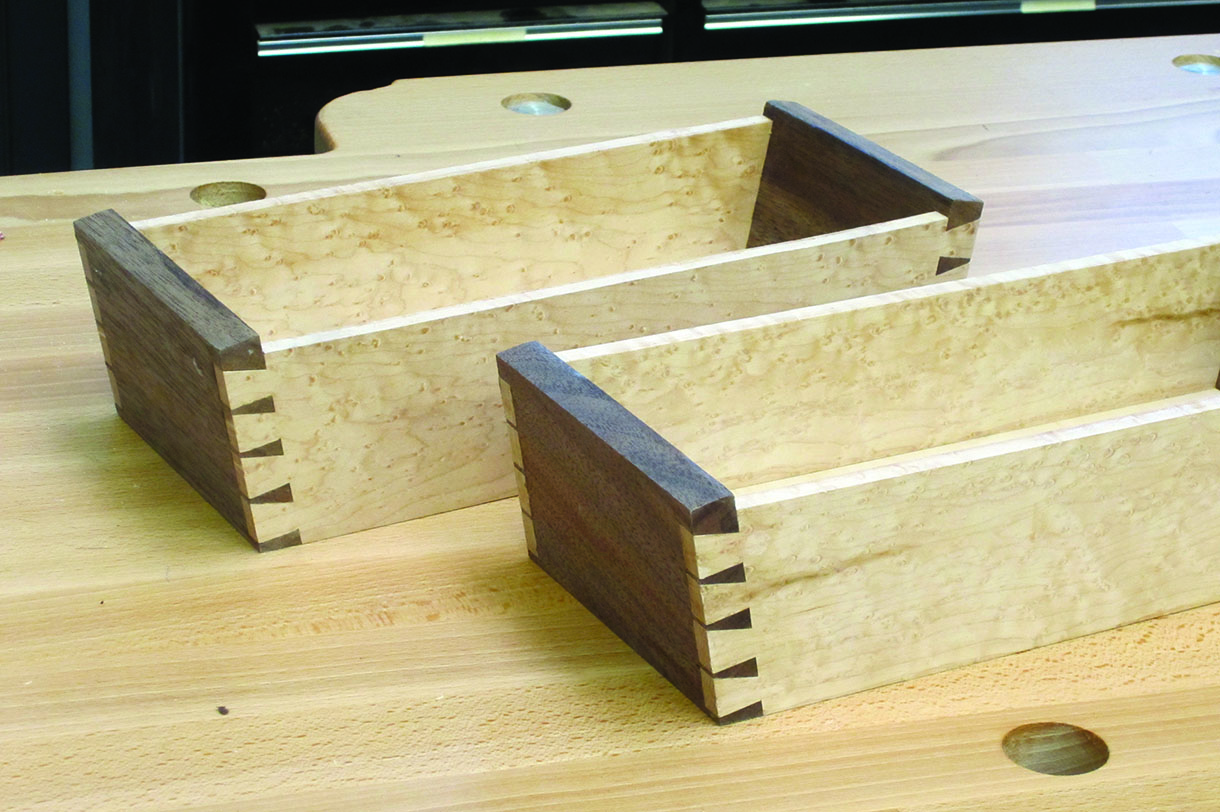
The dovetail box glued up, note the protruding ends
Template used to mark out the gentle curve
Cleaning up the curves with a spoke shave
Trimming the lining on the shooting board
Making the lid
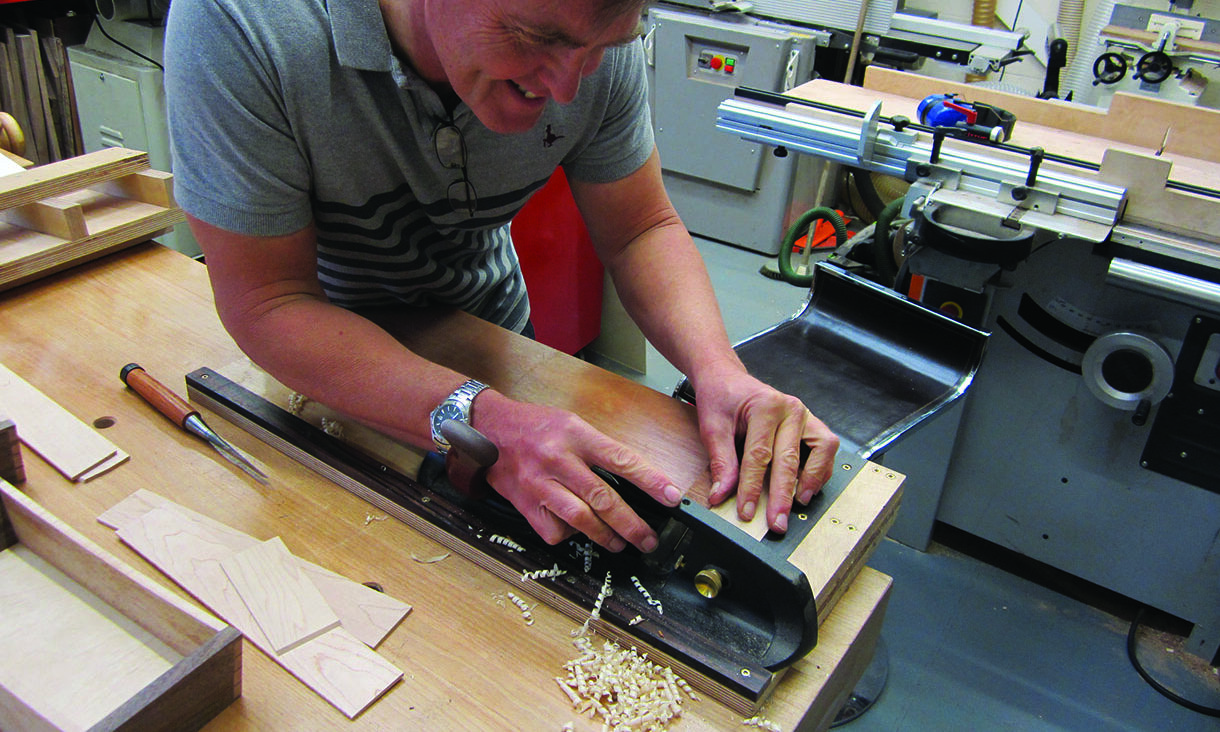
The same curved template was used to cut the matching curve on the lid. I used double-sided tape to stick on an identical support board to make the bandsaw cut more stable and even on both sides. The surface was sanded smooth on a disc sander using a fine 240 grit disc, which gives good control over stock removal. The support board was left on to keep things square, but needs to be removed for final flush fitting of the two ends of the lid. The resulting difference between the opposing curves gives enough finger room to allow the lid to be lifted off with one hand, removing the need for a handle.
The last thing to be done was to build out the base to lift the sides clear of the surface by about 4mm, adding a floating feeling to the box as well as adding welcome low down weight. The add-on base was shot to a snug fit and attached to the plywood base with good quality double-sided tape which would accommodate any small seasonal movement.
In order to maintain the whiteness of the maple and background colour of the spalted beech I used a water-based matte finish, applying three coats with a small sponge. This was left for a week (up to 30 days is ideal) to harden and then cut back with 600 grit Abranet pad to a smooth finish.

Shooting the add on base to fit
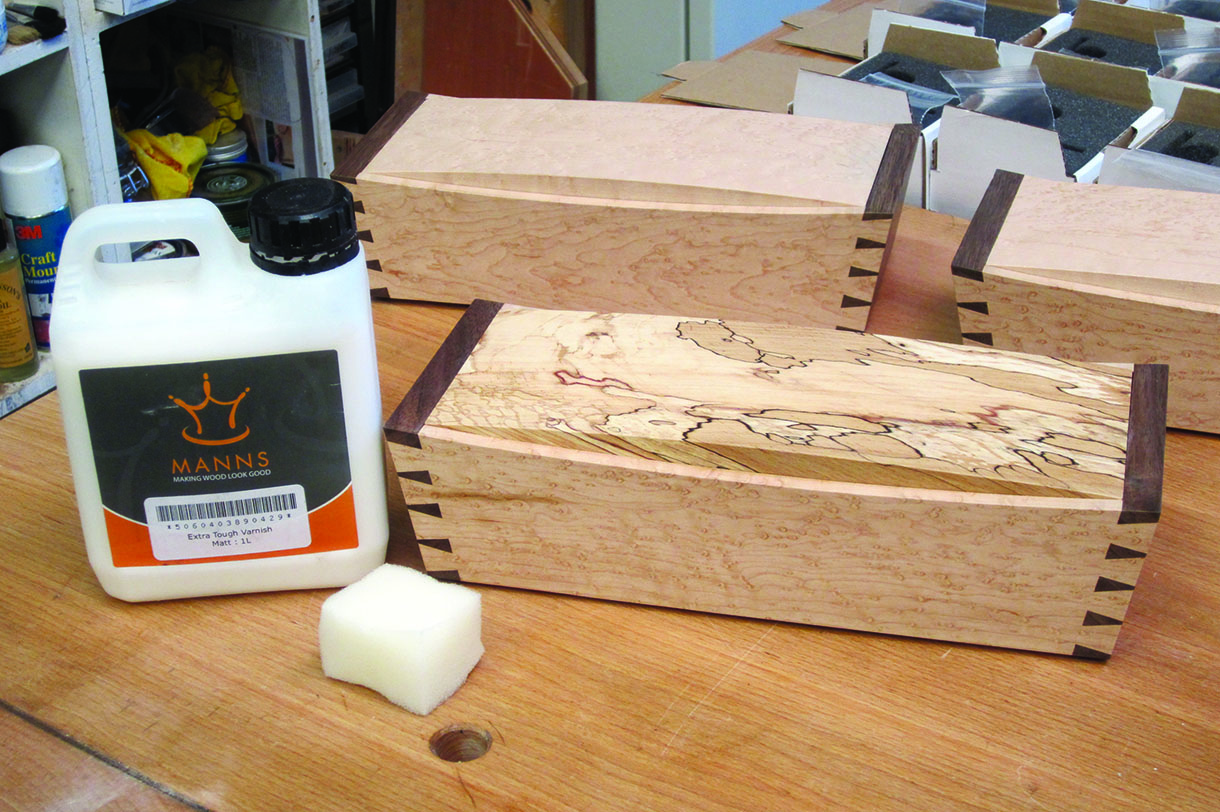
Finishing with a matte water-based varnish
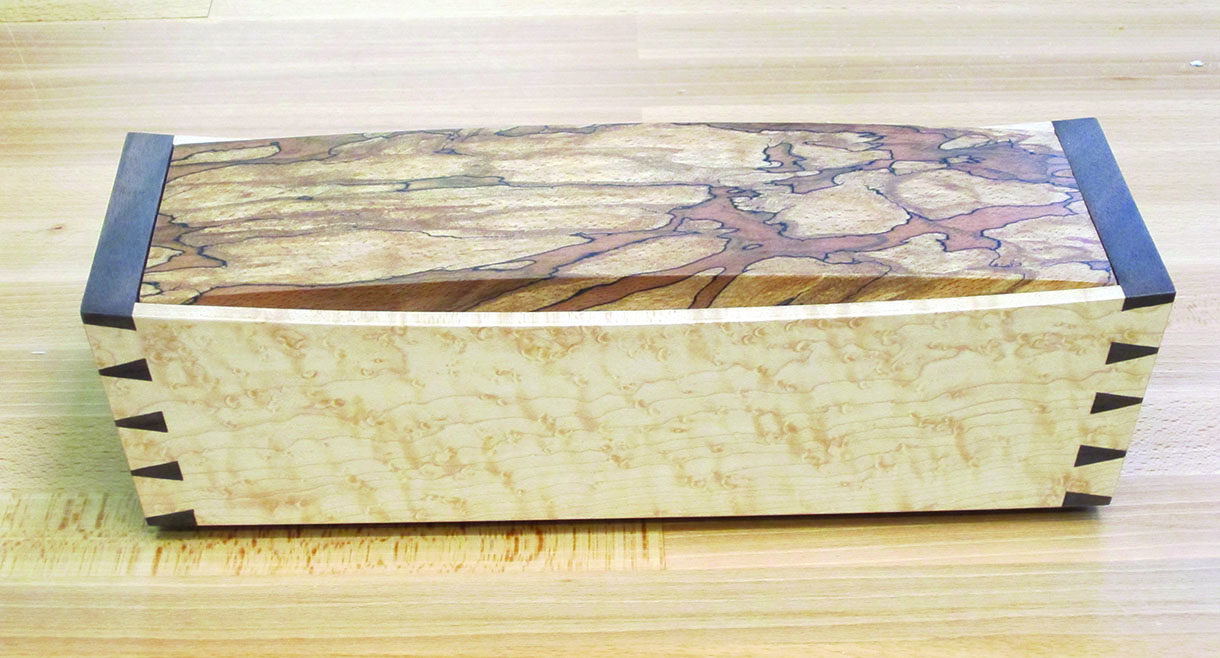
The finished box


