Tips for Carving Hedgehogs
Bob Jubb shares his tips and techniques for carving hedgehogs
We used to regularly get hedgehogs in our garden, but sadly in recent years I have seen very few. They are popular animals, particularly with children. Many years ago, I saw one wandering around the garden in daylight and photographed it with the idea of carving one. The first one was carved at actual size in oak (Quercus spp.) and since then I have carved a dozen or more in various woods. The hedgehog shown is carved in oak, with eyes inlaid with buffalo horn. The carved legs are vulnerable to breakage as the grain runs across the legs, so I have included an alternative design where the prickles hide the feet. I have also included a carving of three baby hedgehogs in a ball, scrabbling around each other.
Things you will need
• Usual carving tools
• 4mm V-tool
• 1.5mm V-tool
• Buffalo horn dowels
• Dremel cutter
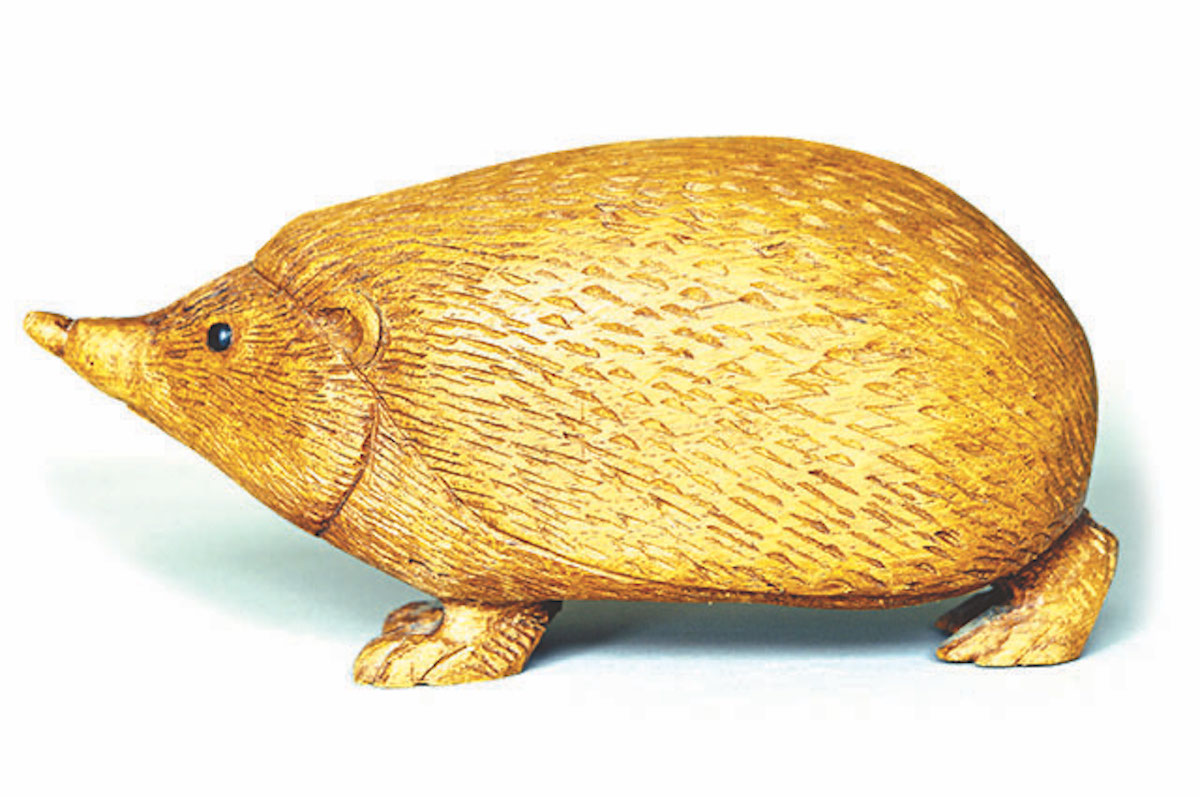
Hedgehog pattern 1
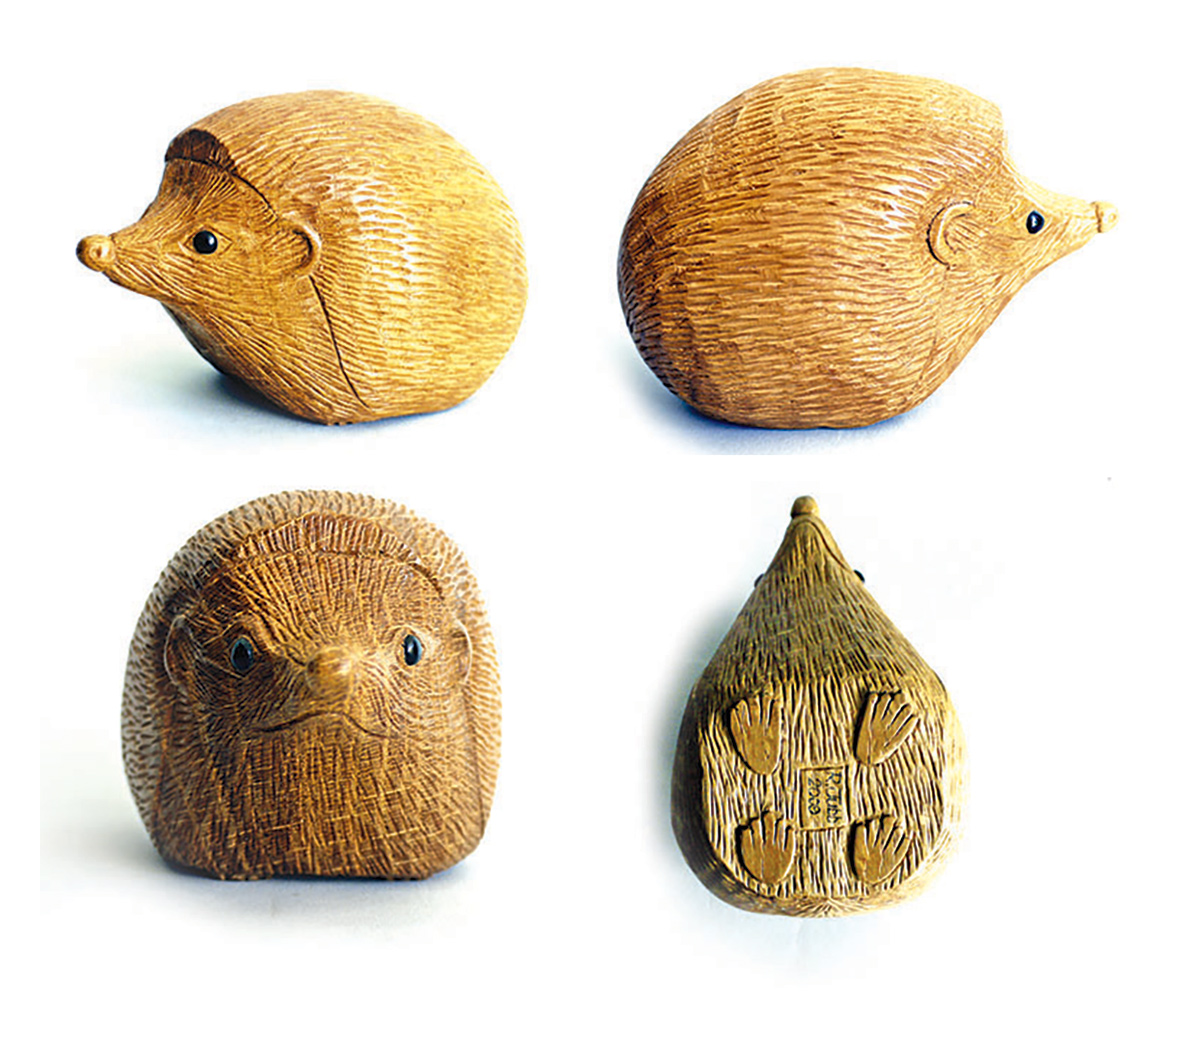
The prickles on the back of the hedgehog are carved fairly deeply with a 4mm V-tool to get the coarse prickle effect, while the hair on the face and underneath are carved with a 1.5mm V-tool with cuts close together and shallow to make it look like fine hair. Be careful when carving the legs as the grain is short across the legs, and they should be carved with hand pressure rather than with a mallet. The eyes are made from buffalo horn dowels, rounded off and tapered to fit the drilled eye holes. After gluing in and allowing to dry, cut off the remaining dowel and then shape it with a cutter in a Dremel or with a file to make it domed. Ebony (Diospyros spp.) or African blackwood (Dalbergia melanoxylon) could also be used for the eyes as they are also black.
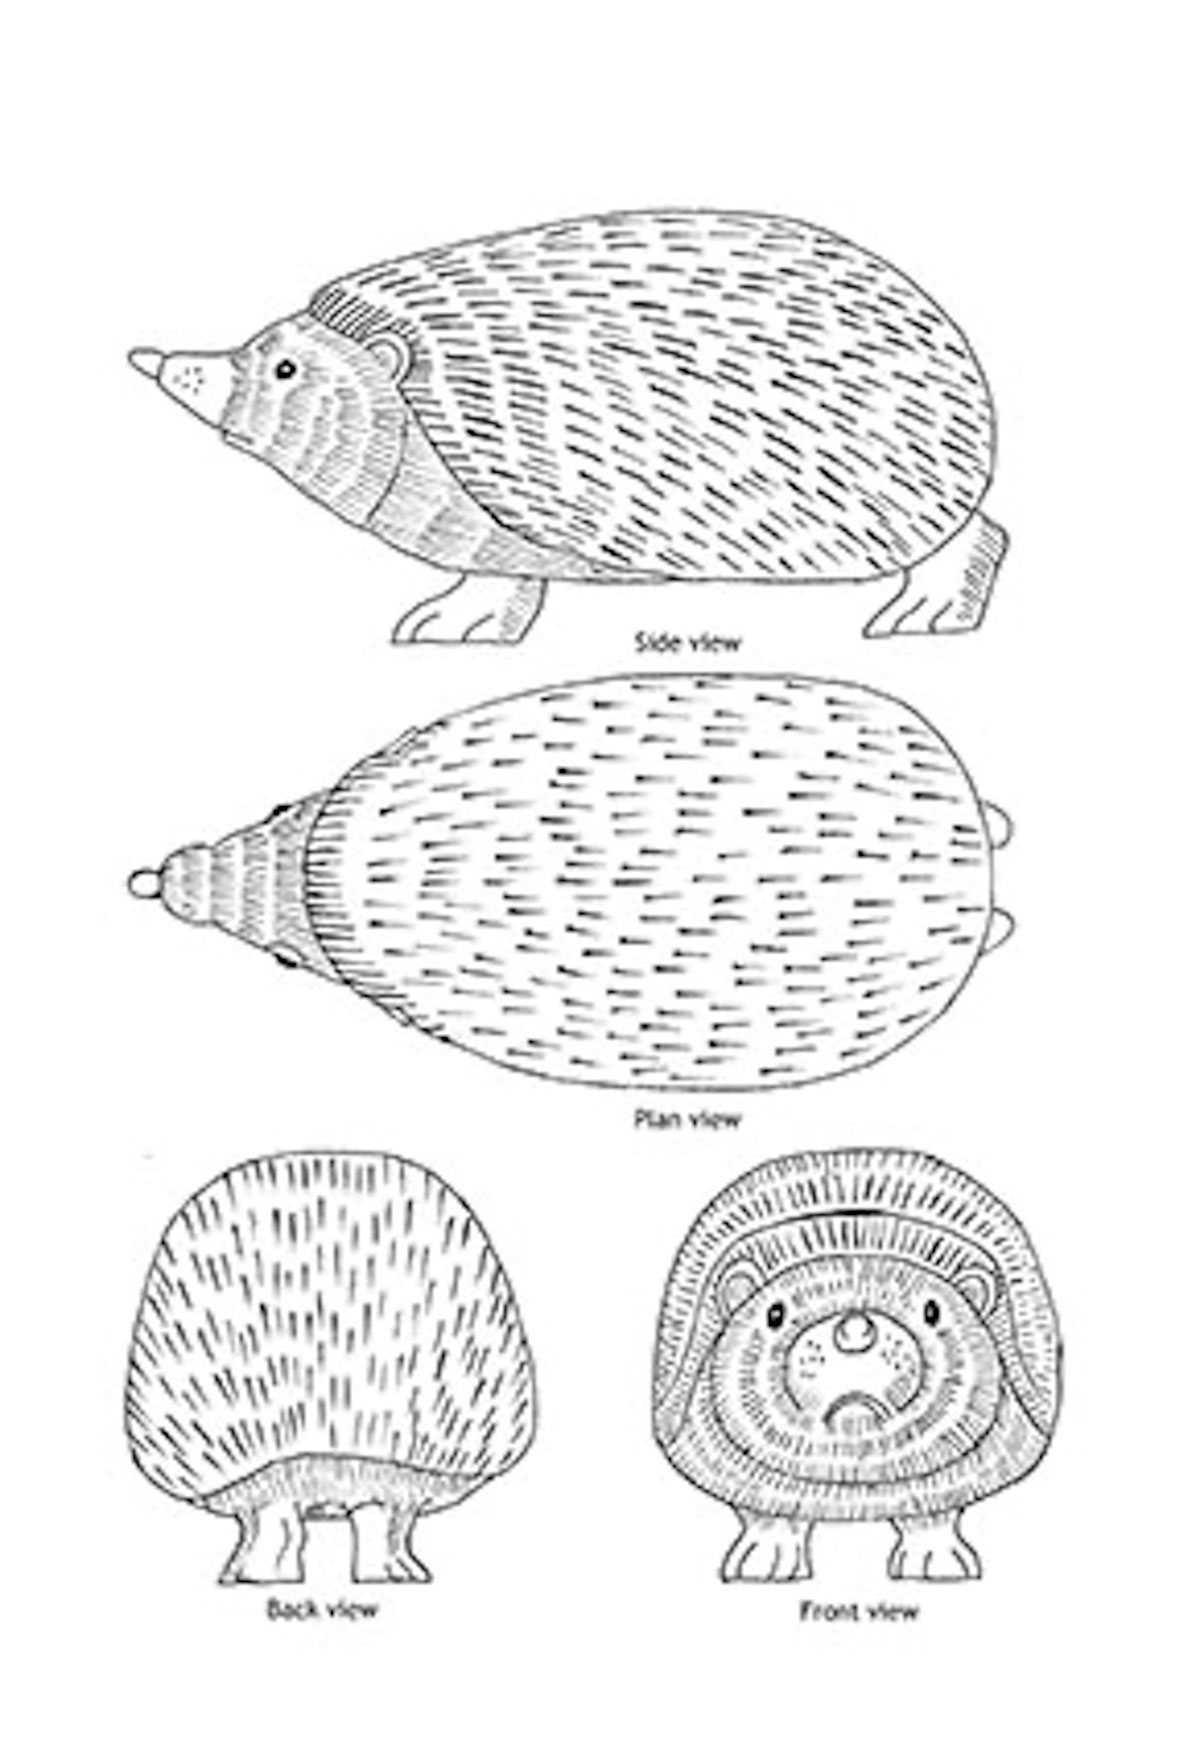
Hedgehog pattern 1
Views of pattern 1 hedgehog
Hedgehog pattern 2
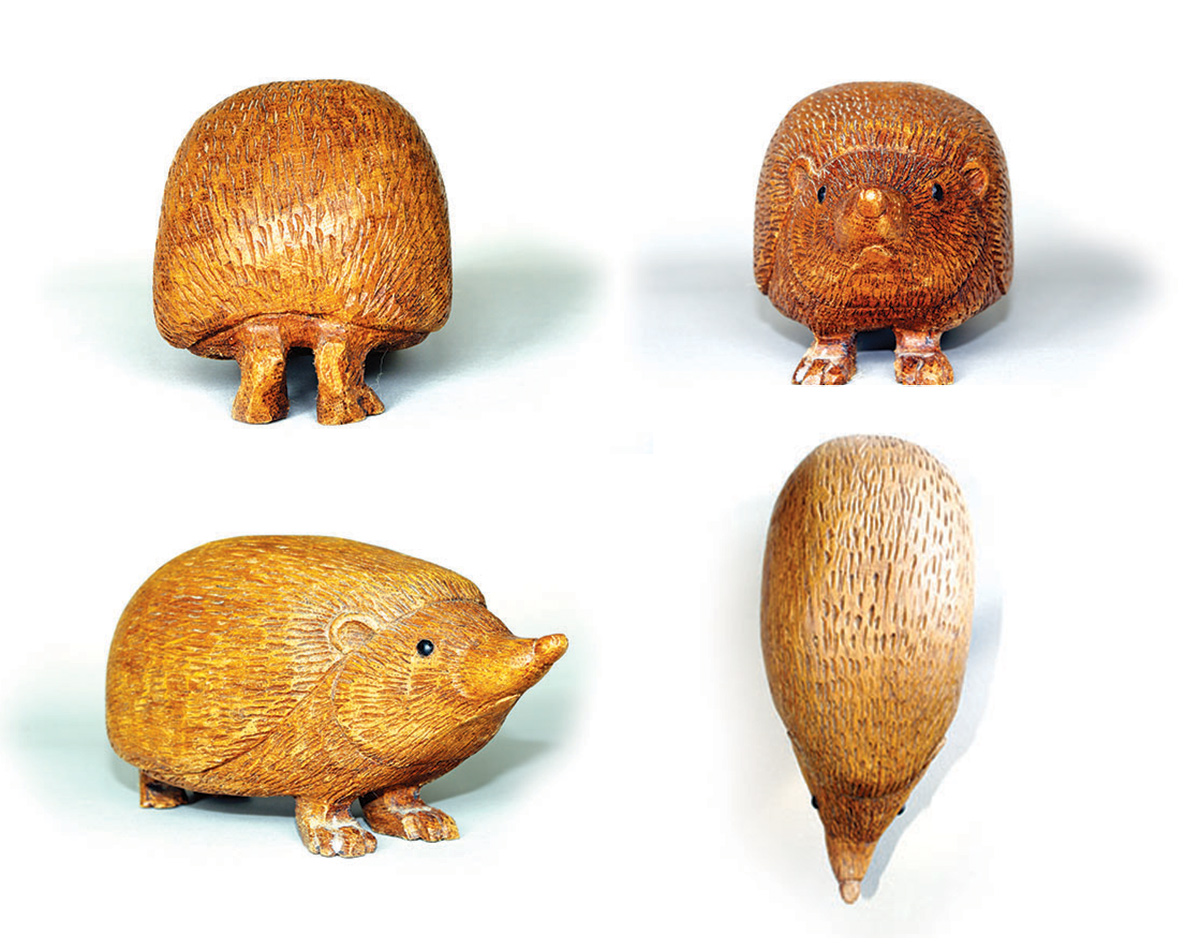
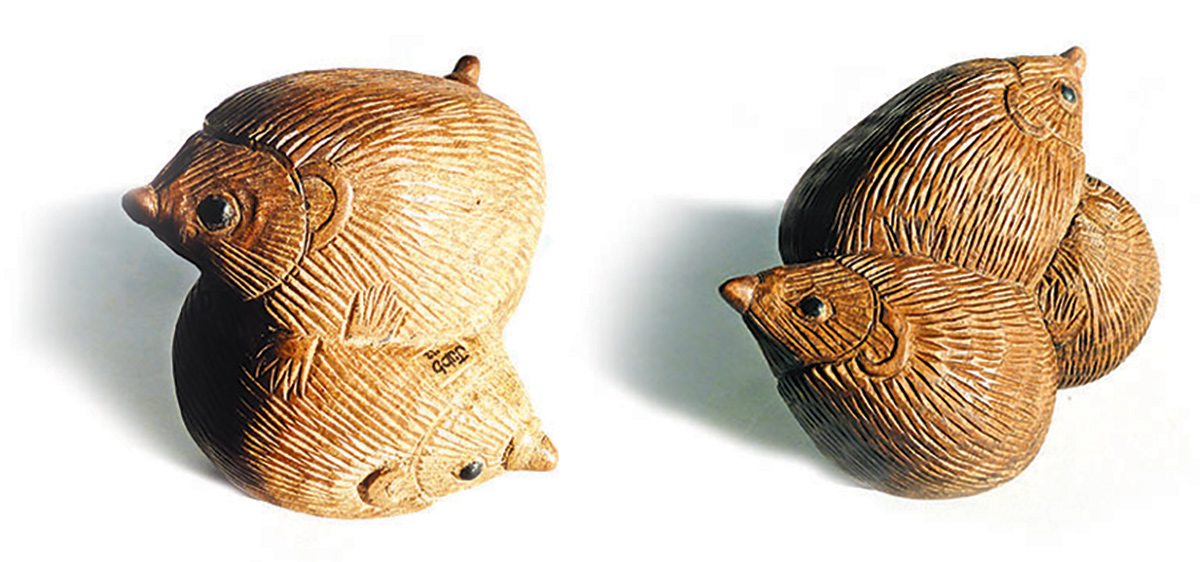
The second hedgehog carving has no feet visible from the side and is designed so that the feet do not break off. The prickles go right down to the ground and the feet are carved in shallow relief underneath. The hairs on the face and under the body are carved with a 1.5mm V-tool with cuts close together to resemble hair. The prickles on the back are carved with a 4mm V-tool and are cut more deeply and spaced further apart to give the impression of prickles. The eyes are inlaid with buffalo horn dowels.
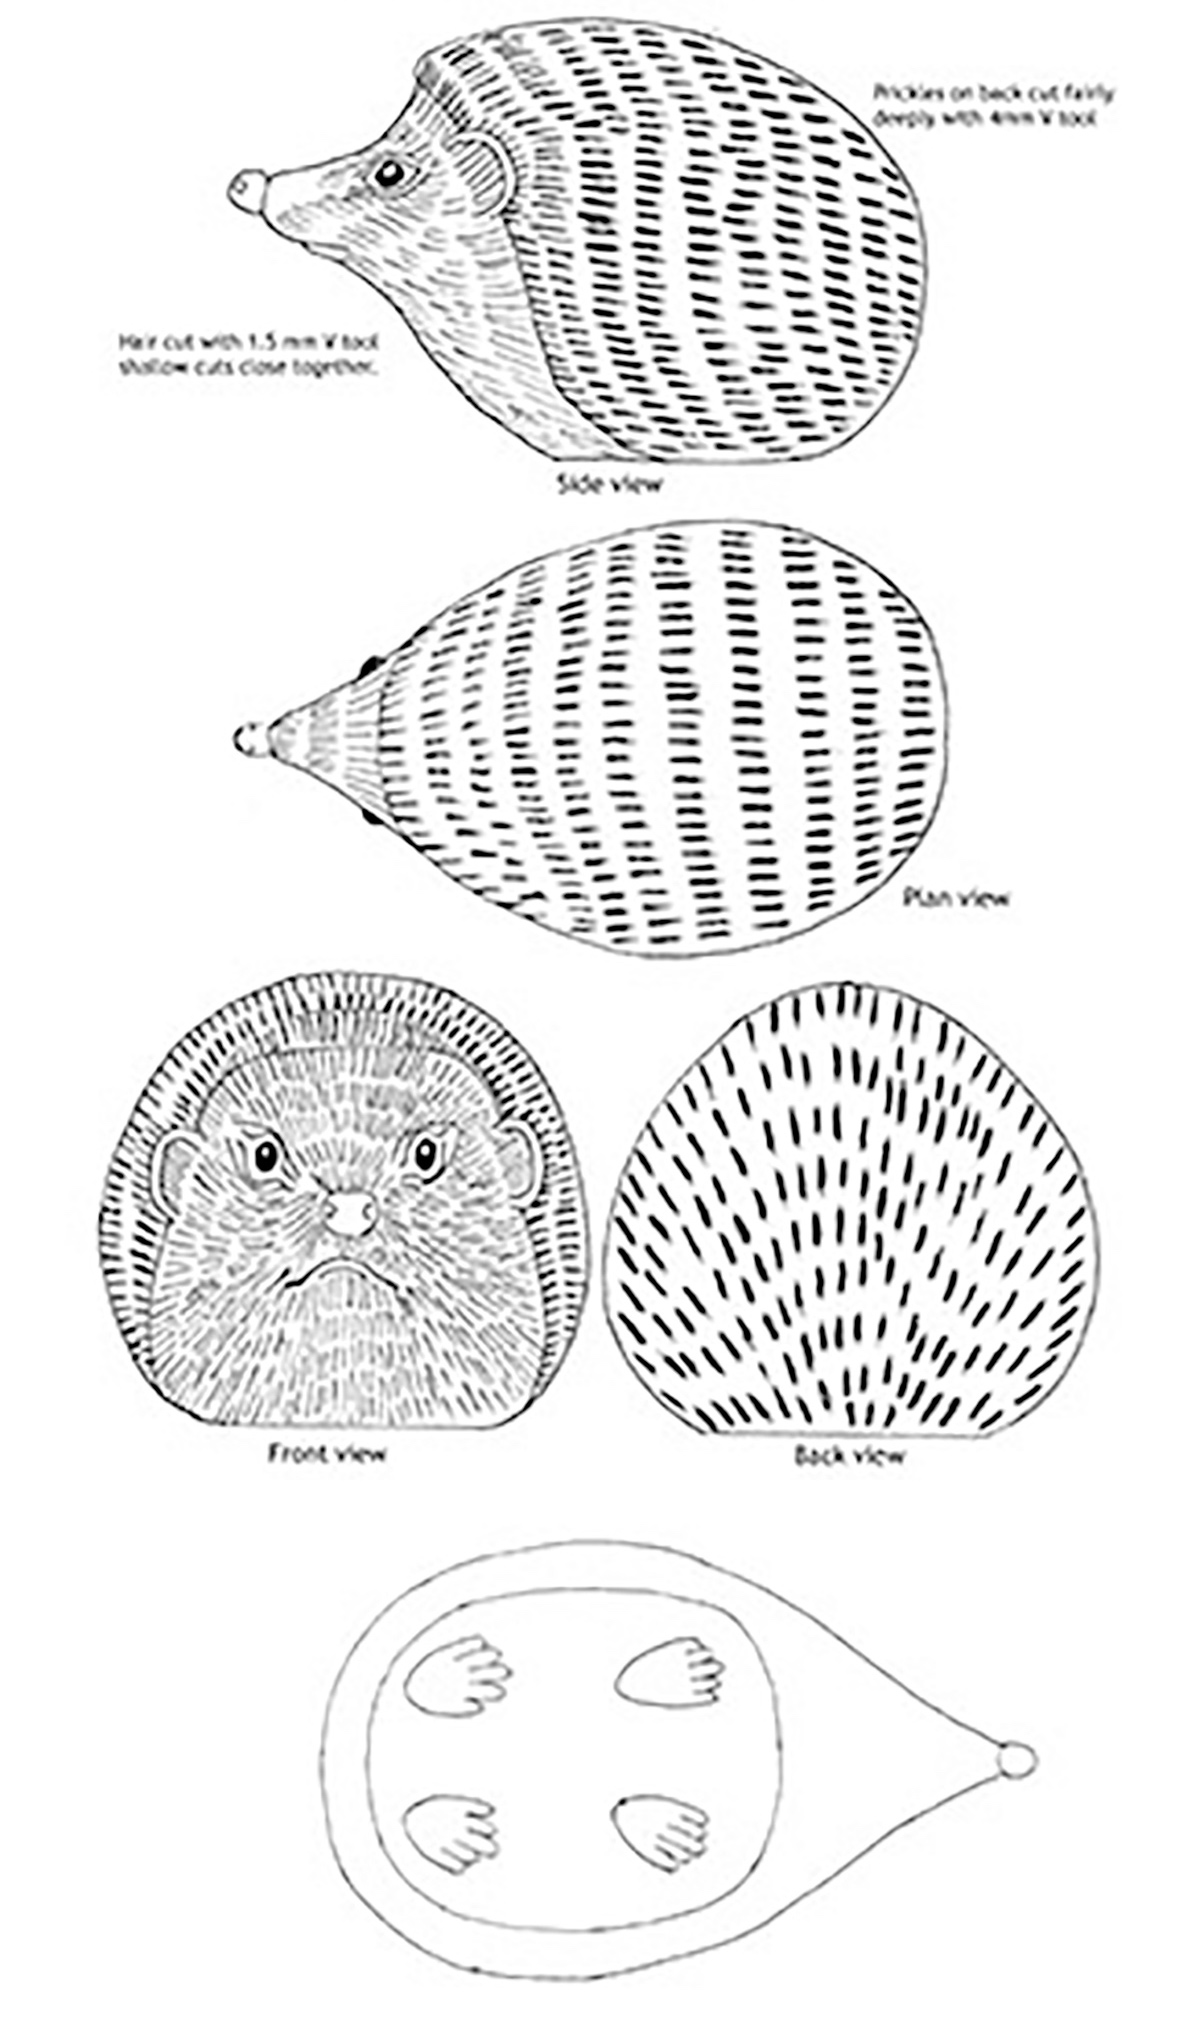
Hedgehog pattern 2
Views of hedgehog pattern 2
Hedgehog pattern 3
I enjoy designing and carving small groups of animals and birds, and I had a small block of walnut (Juglans regia) about 75mm cube that I thought would suit a project of this type. So I drew out a group of three hedgehogs scrabbling around each other, then set to and carved this trio. The nice thing about this design is that you can regularly turn it over and the group will look different each time. I drew out the outline of each hedgehog on the walnut with a white coloured pencil to make the line easy to see. I roughed out the three basic hedgehog shapes before carving in any detail. In a carving of this kind, the grain can be in any direction. When I was happy with the overall grouping, I drew the feet on the wood and marked them in. Where possible I placed the feet from one hedgehog on the hedgehog next to it, but in some places this was not possible. I then drew out the faces and ears and carved them in. I finished the carving all over before putting in the eyes, and finally carved the prickles and hair with a 1.5mm V-tool.
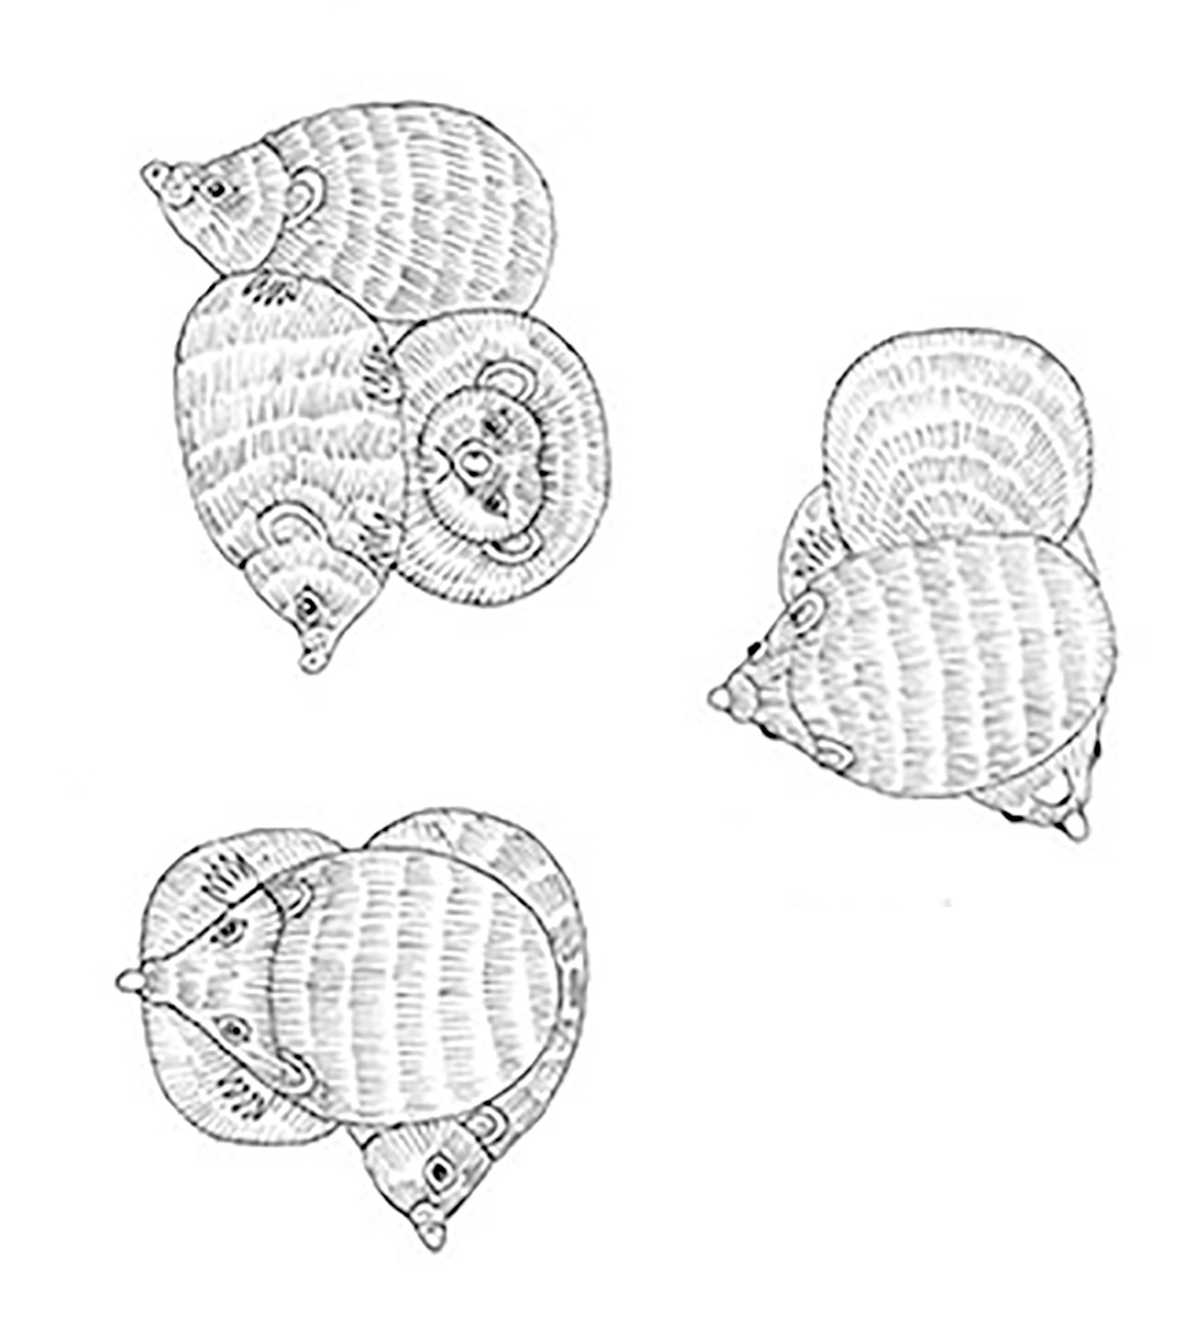
Hedgehog pattern 3
Views of hedgehog pattern 3


