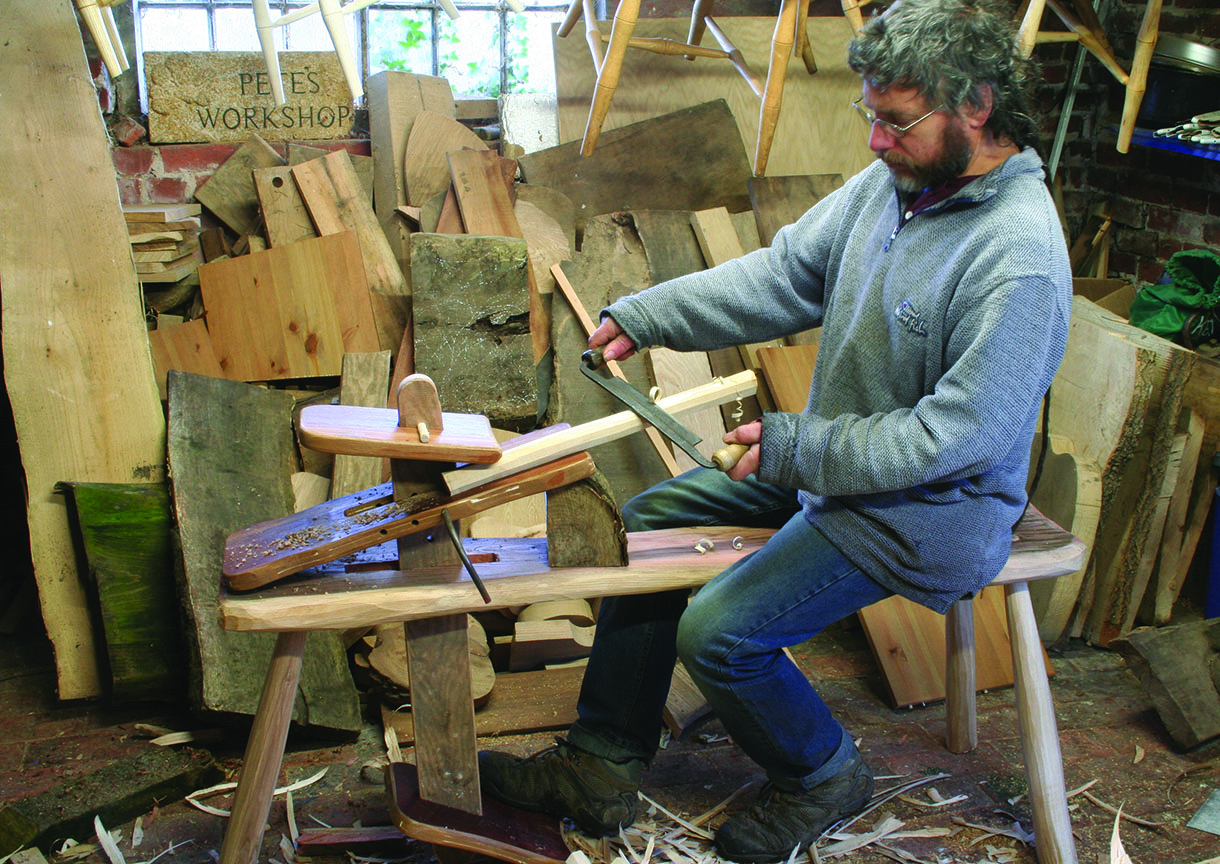
Do you like working with hand tools? Ever stared at a large piece of wood and thought, how am I going to hold this down in a comfortable working position? A Shave horse is probably your answer.
The shave horse has been around for donkey’s years, proving its worth time and time again as an inimitable piece of workshop kit. It’s essentially a giant vice, perfect for larger projects that require a bit more strength and a solid working position. Using a few tools, I’m going to show you how to make a continental/American ‘dumbhead’ shave horse. It’s a really good ‘quick release’ vice that leaves both hands free and allows you to sit while working. There are other designs, such as the bodger’s horse, but I like this style. The shave horse is equally useful both indoors and outdoors. It works efficiently, and is easily adjusted for different working angles – allowing you to work precisely and in comfort.
Tools used
To make this shave horse I used the following tools.
Bandsaw/chainsaw
Large auger
Sliding bevel
Chisel
10mm mild steel bar
Drawknife
Axe
Drill with assorted drill bits
Spokeshave
Cramps
Hacksaw
Router (if available)
Wood used
Ash is a superb wood for building the work horse with. It is commonly available, inexpensive, and enjoyable and easy to work with. Furthermore, with its density and durability, ash is a popular choice with furniture makers – this will ensure your workhorse is a rock-steady dependable that will perform time and time again.
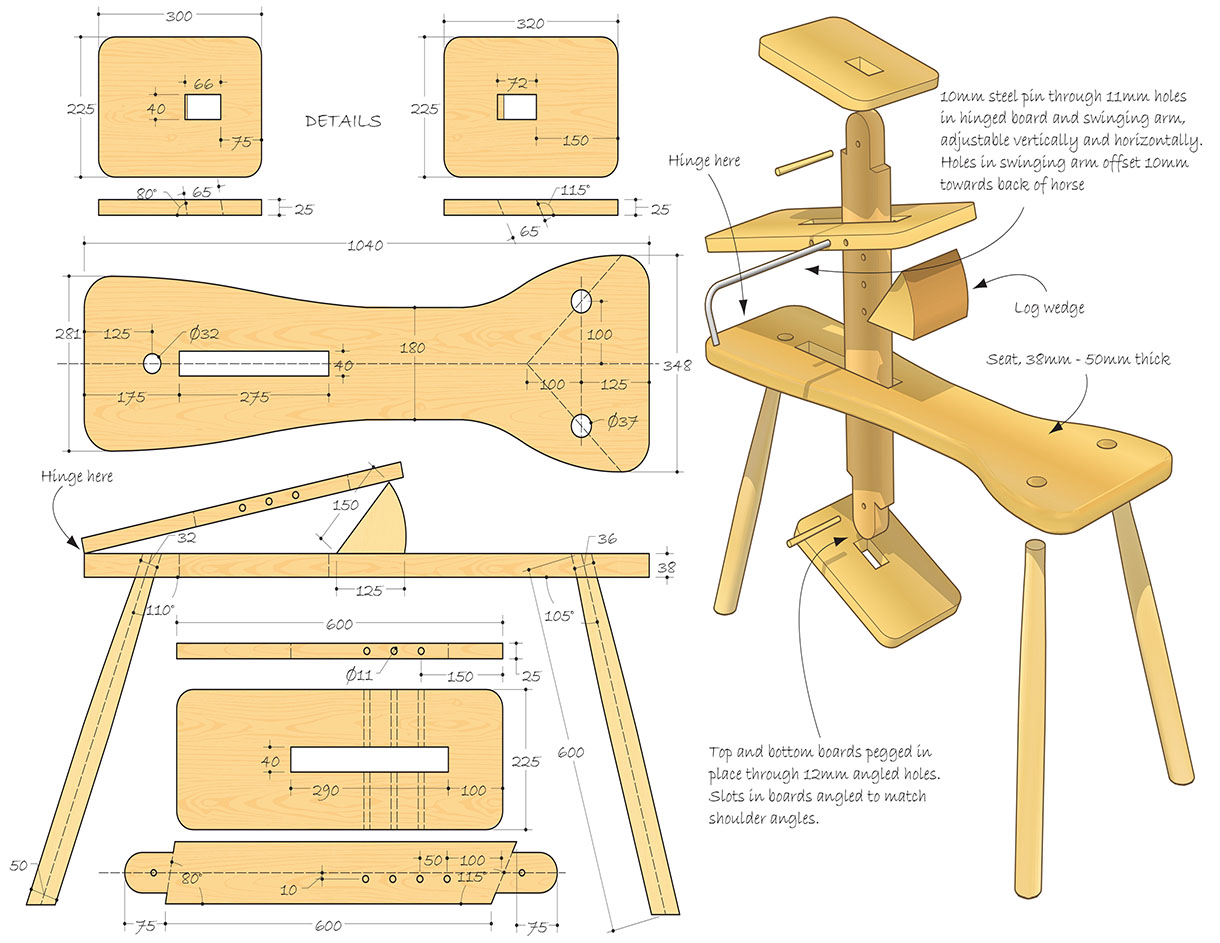
This exploded diagram shows you all the pieces, including their dimensions, that will make up your shave horse. Note how the pieces come together on the right side of the image
Constructing the shave horse
N.B. Make sure you regularly reference the exploded diagram for an understanding of measurements.
Making the main body
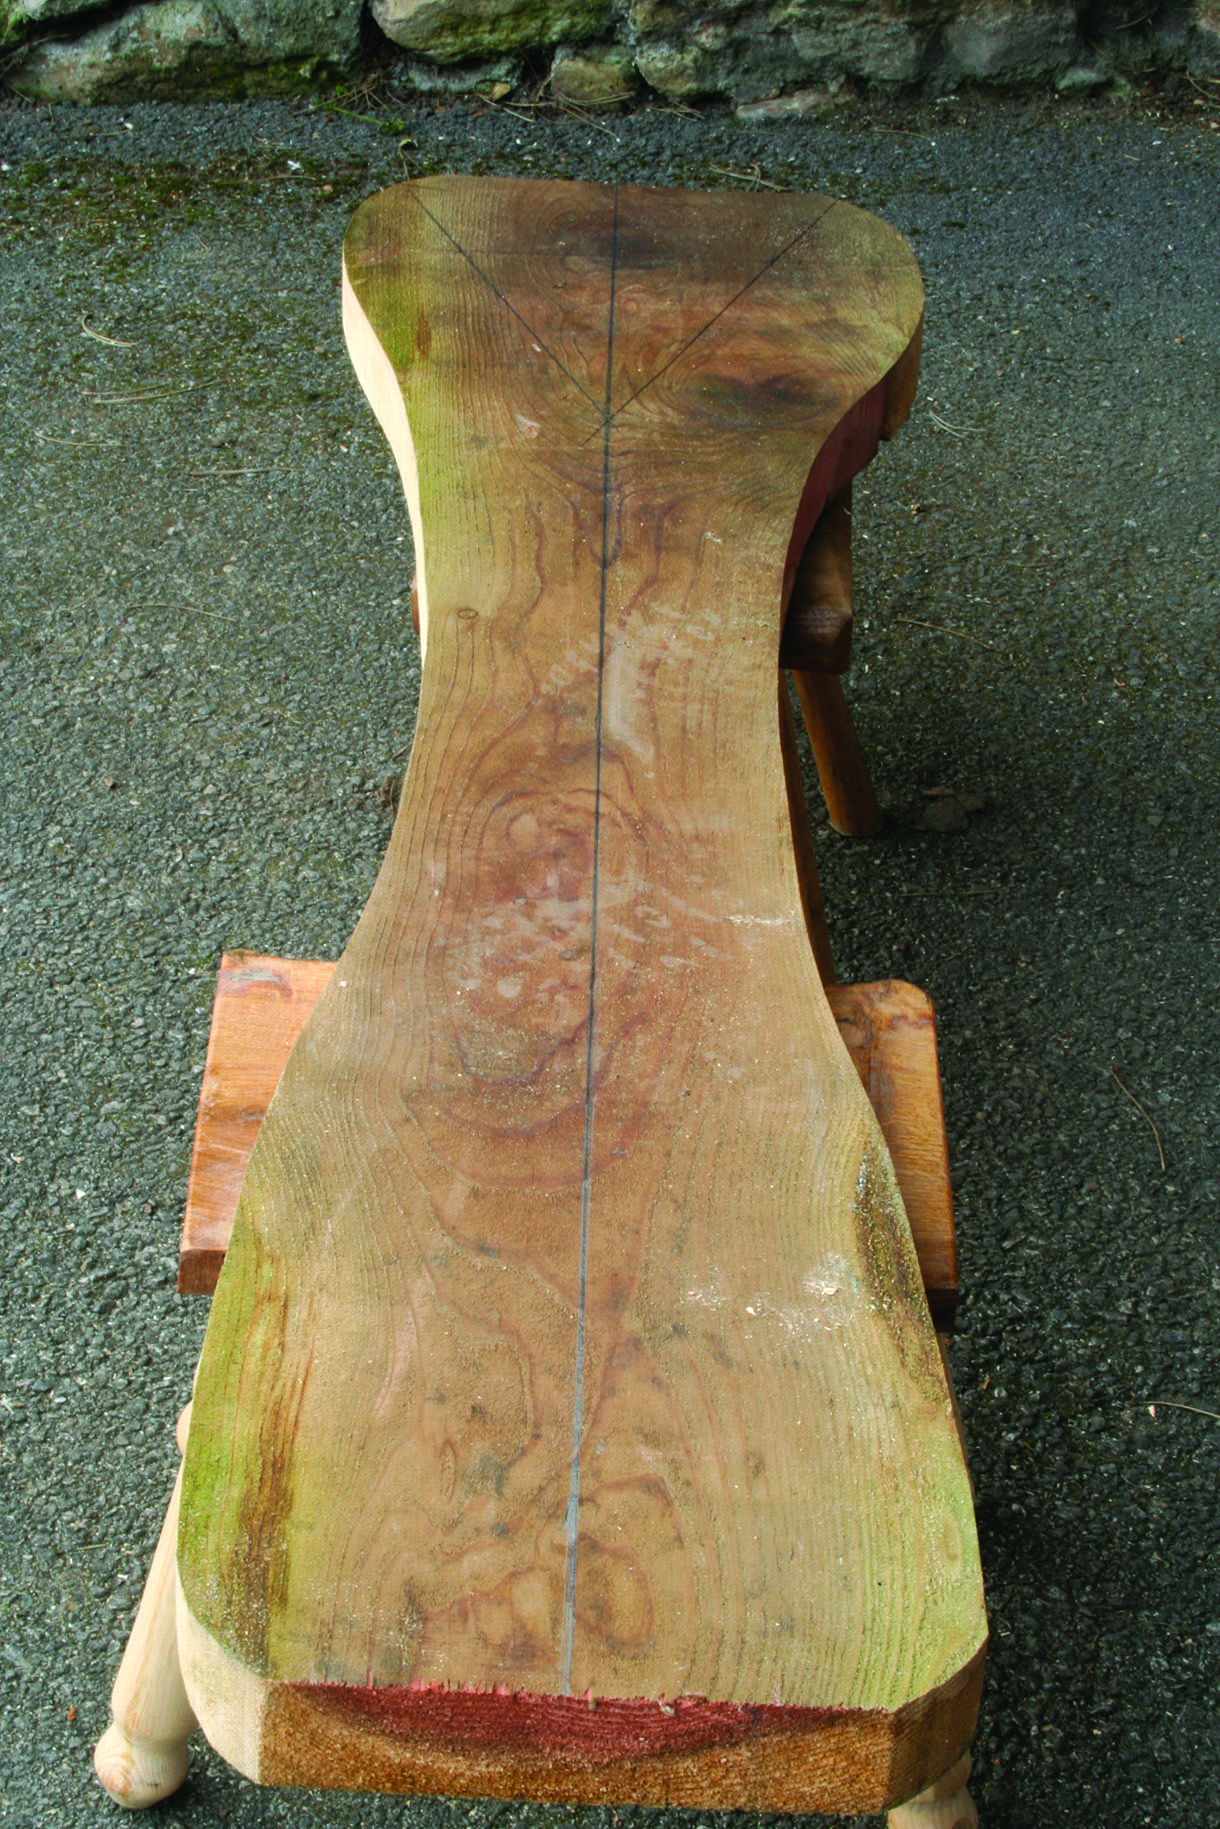
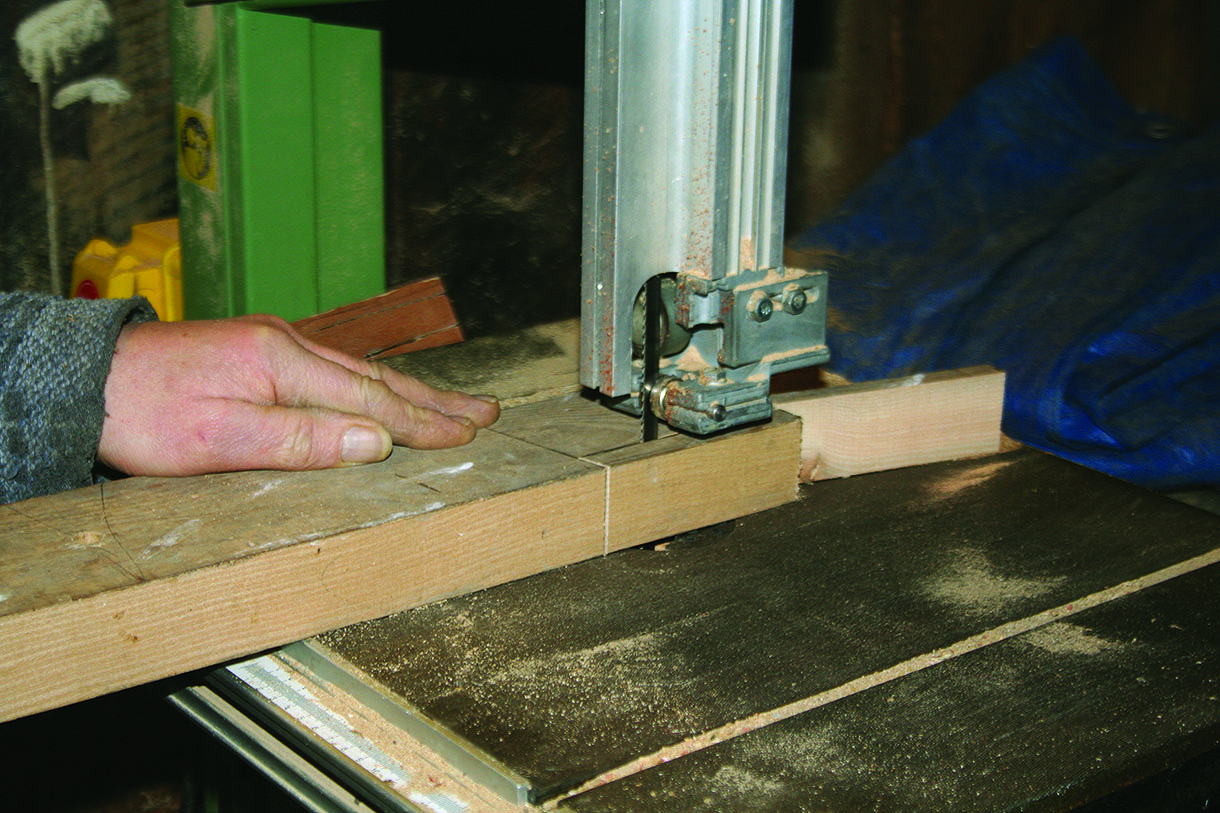
The first job is to cut out the main body. A bandsaw is the ideal tool, but a jigsaw or chainsaw will work just as well. A 200mm wide plank should be wide enough, though you may wish to use a wider board to give more width for the seating area. This will also allow for a wider splay on the back legs of the shave horse for increasing its stability. The middle section of the plank needs to be narrow, otherwise you won’t sit comfortably – use the exploded view as a guide to the general shape. Cut when you’re happy with the shape
Making the legs
These are best carved from logs of ash. Use an axe to make them roughly cylindric, and a drawknife to round them. For a more refined finish you can dust off your lathe and turn the legs instead. Ensure that the top end of the leg is the right width for a tight fit into the main body
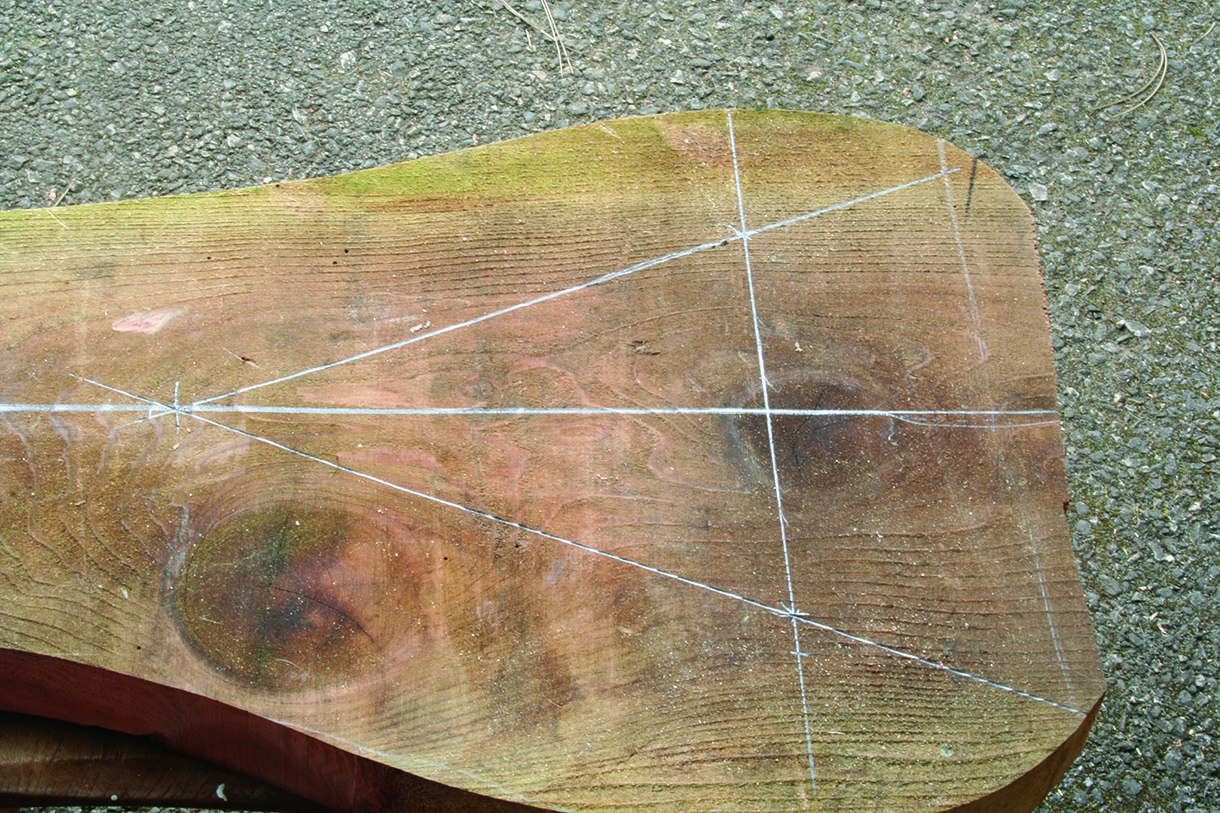
Installing the legs
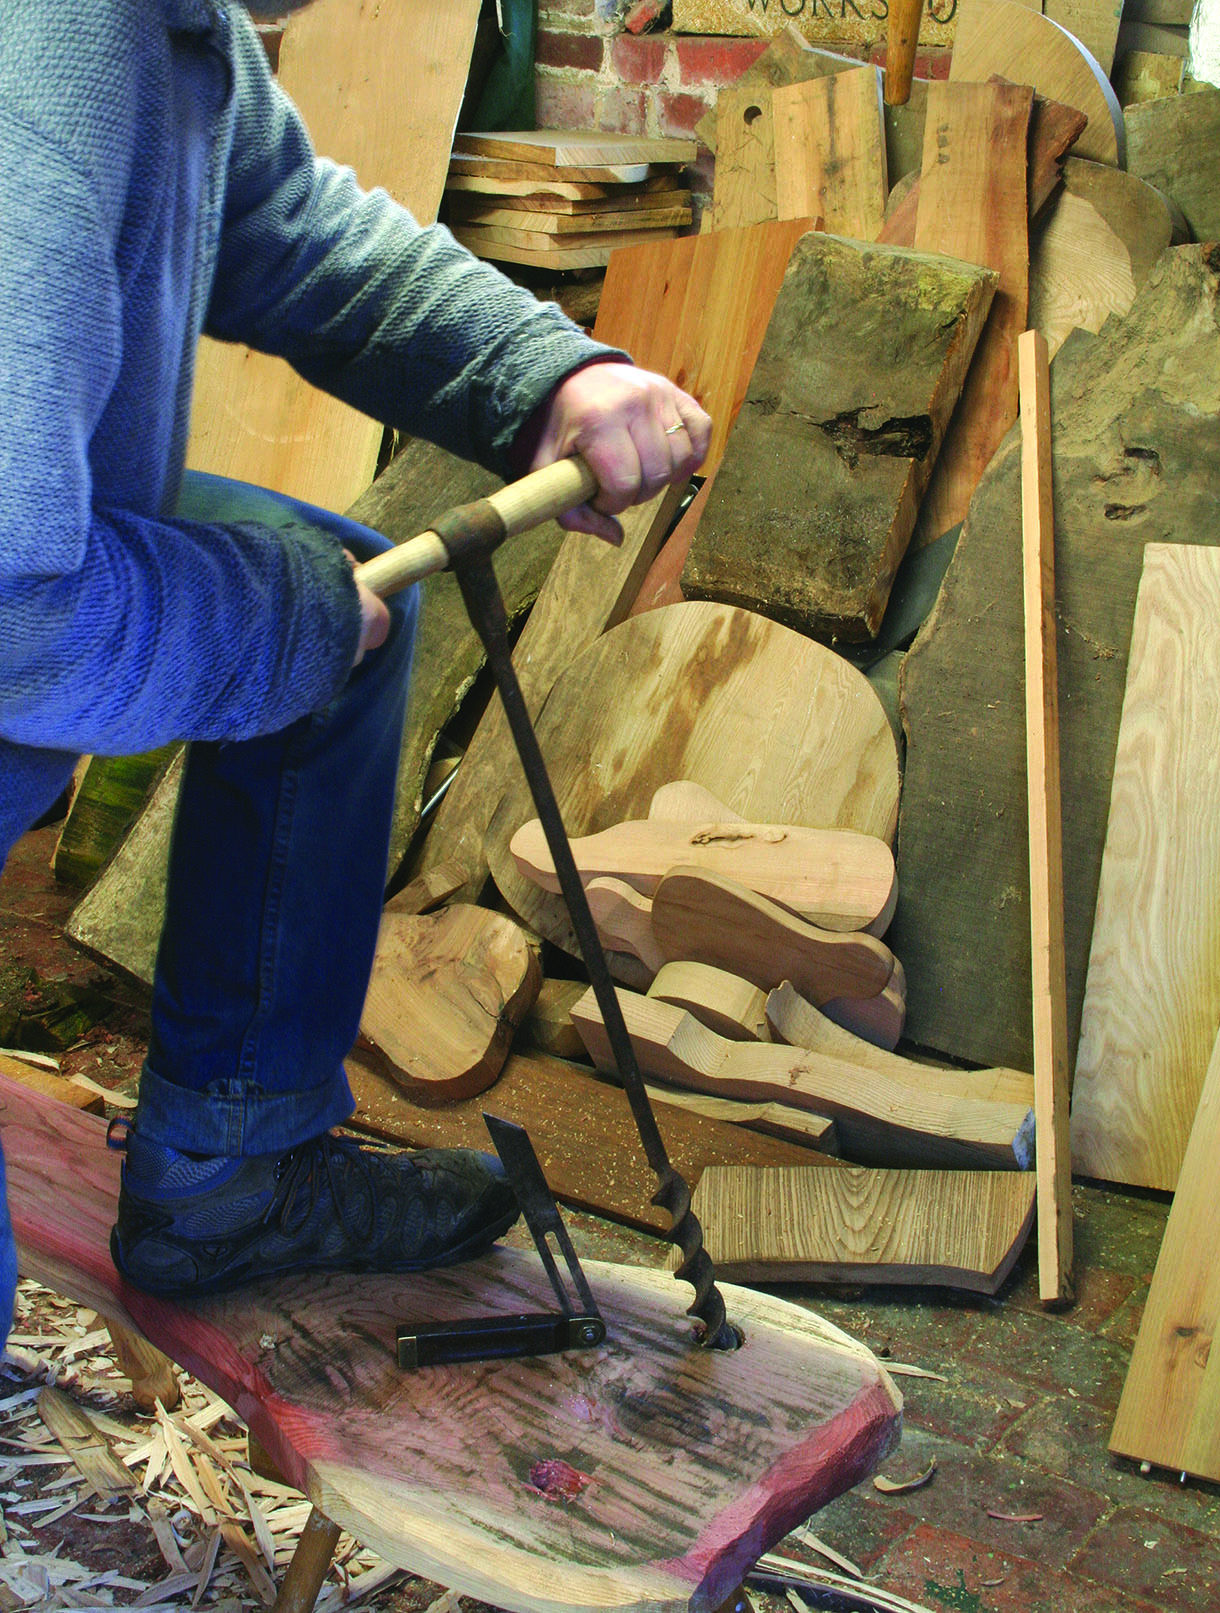
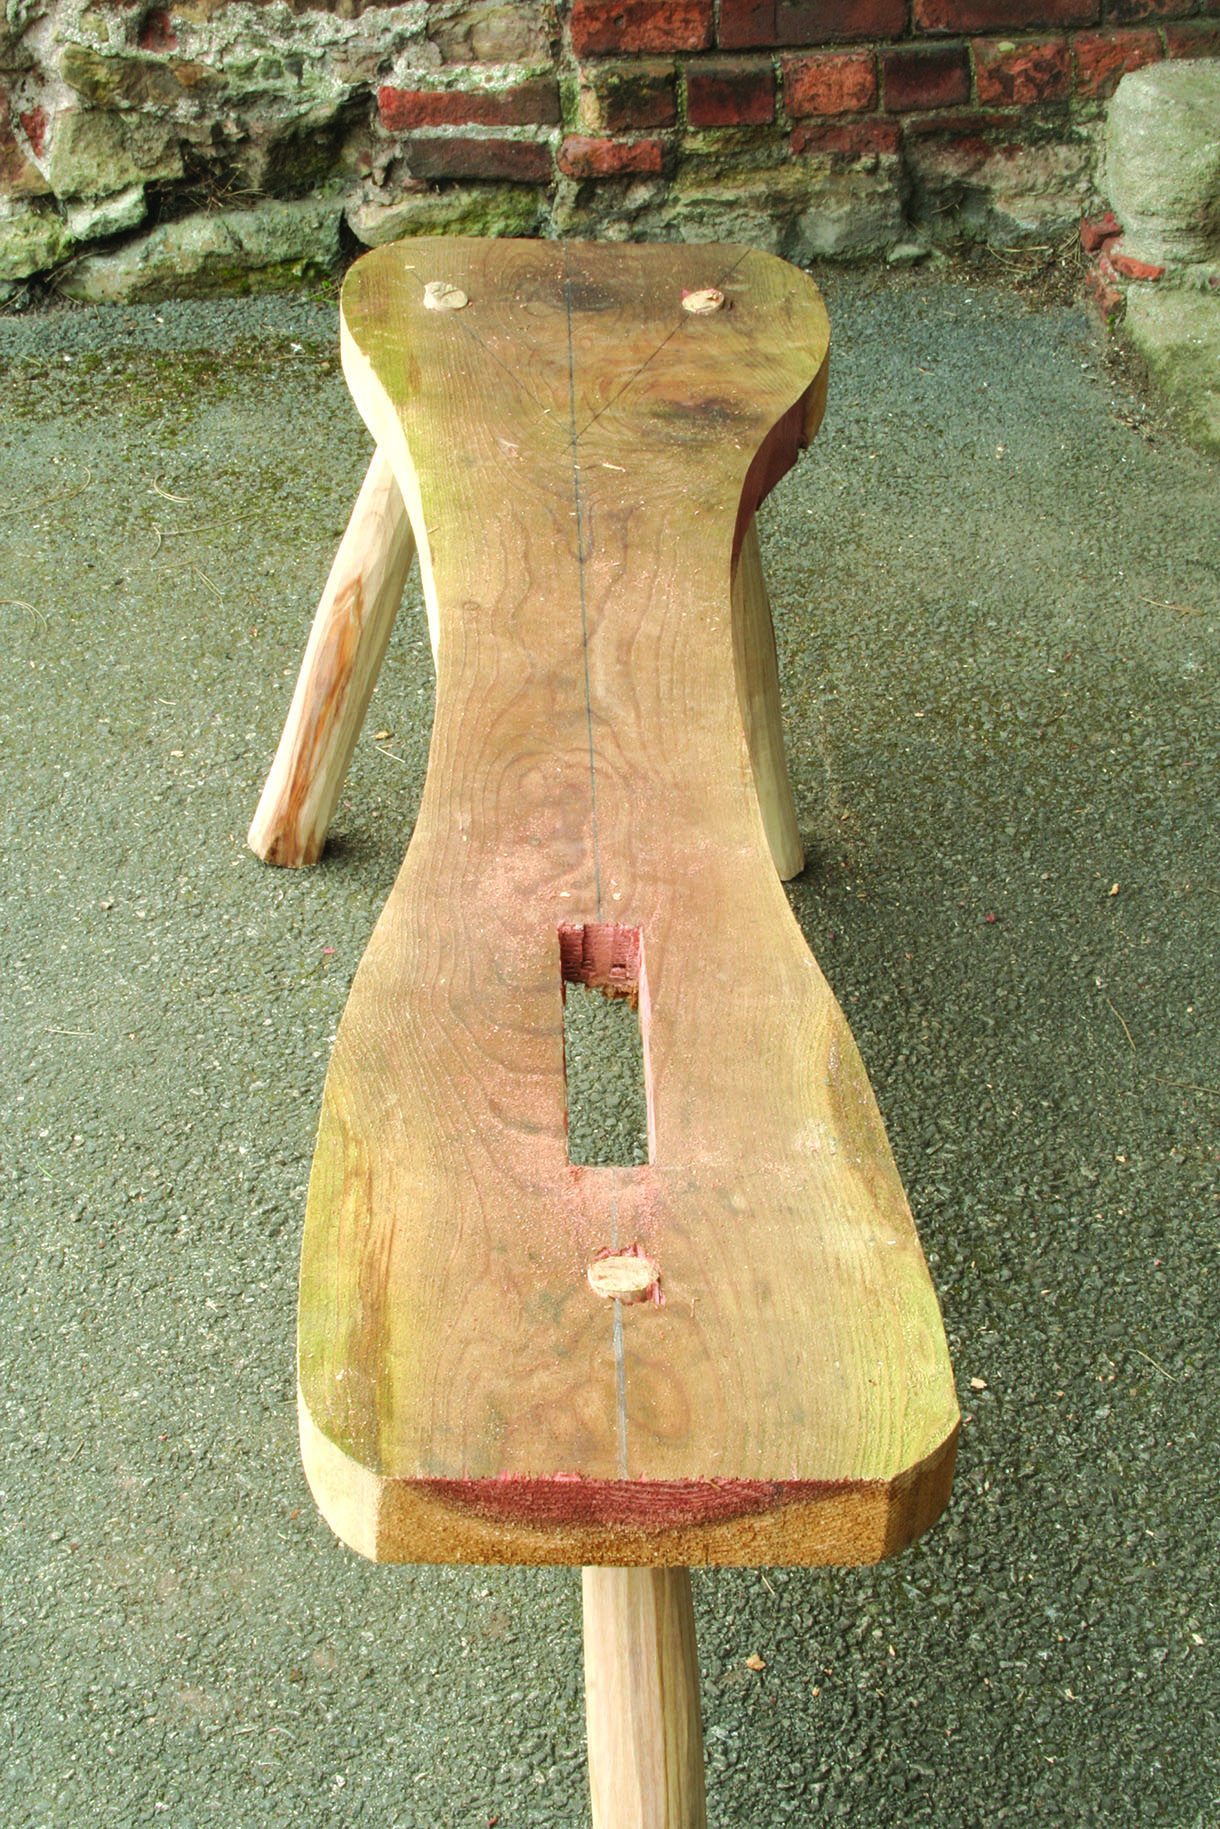
Once you’ve marked the outline of the main body, the next job is to mark a centreline as a reference for drilling the leg holes. We’ll also use this centreline as a sight line for the front legsFor the rear legs, use an angle finder, adjust your drilling tool to 15 degrees and drill right through the main body. You can change the splay of the legs by moving this angle forward or back – a wider stance will provide more stability, but will take up more room. If you have one, use a large auger with a 11/4in diameter drill. Alternatively, you can use an electric drill with a spade bit. Now drill the front leg hole with the same approach, but with an angle of 20 degrees, sighting along the centreline. Once the holes are drilled, hammer the legs into the main body from the underside, and saw off any excess leg protruding from the topNow you have a main body with legs
Swingarm construction
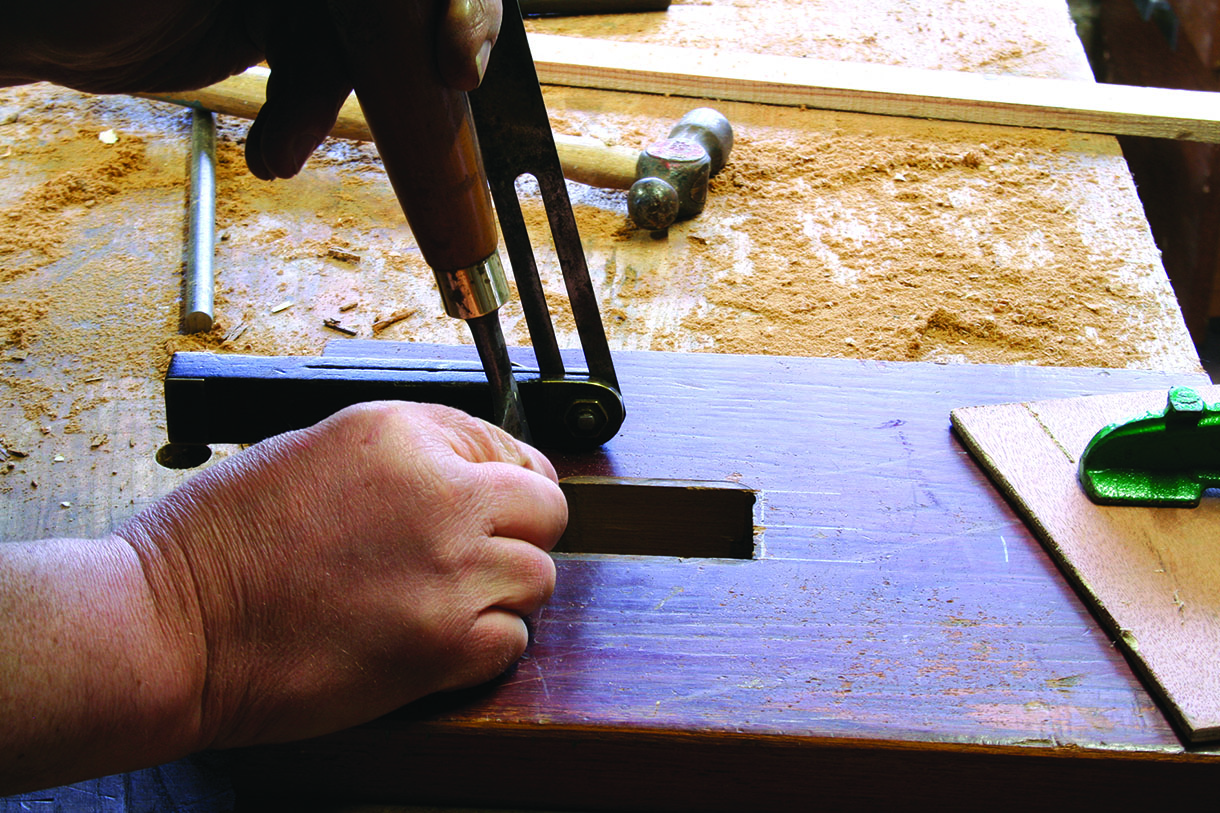
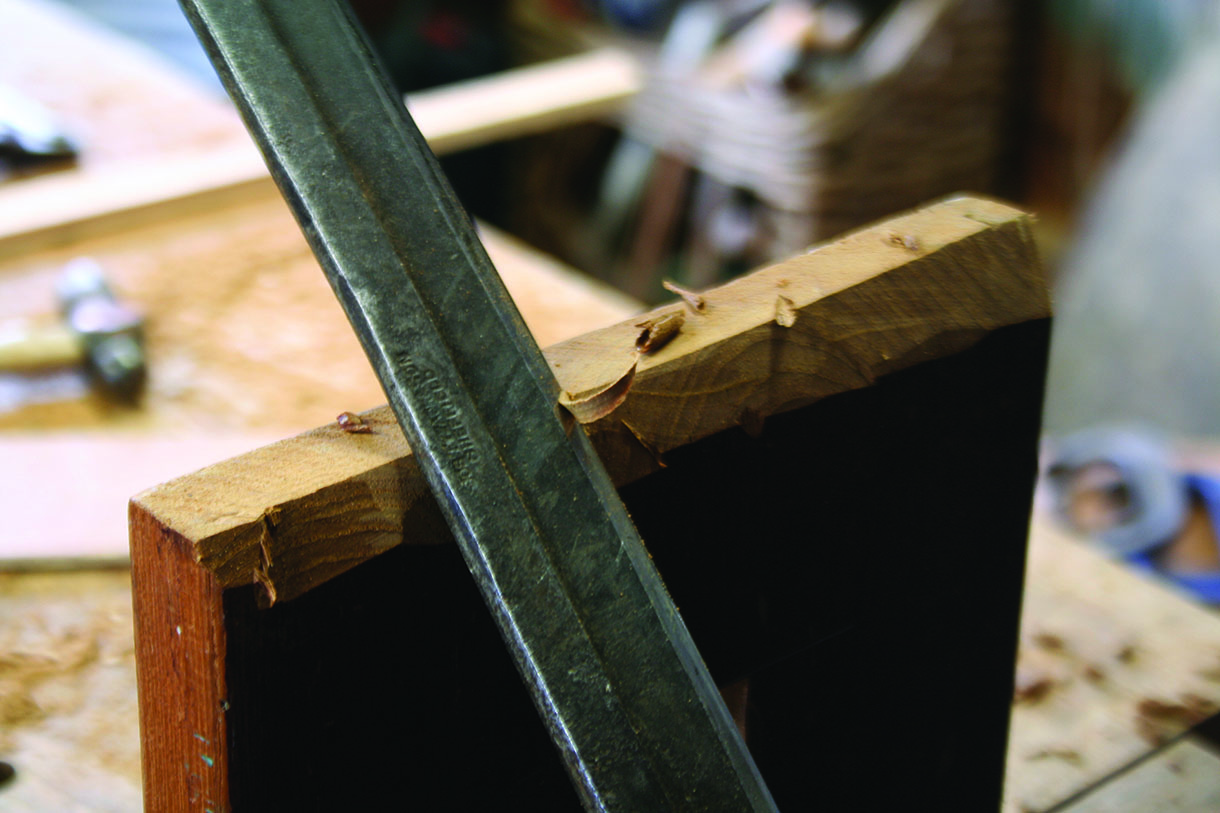
Using the centreline as a guide, mark out the slot for the swinging arm – this needs to be a snug fit, so that the arm can swing easily but not twist. I’ve used a chainsaw to cut this slot out, but you can drill a series of holes and clean it out with a chisel, or use a jigsaw or a router. The slot should match the thickness of your swingarm.
For the swinging arm, I used a length of leftover ash. Using the exploded diagram as a guide, cut to length, mark out the angles for the top and bottom tenons, and then cut. Having the tenons angled places the footrest and top section at the correct angles for gripping and for your foot to rest on. At this stage you could drill the pinholes in the swingarm, but it is advisable to wait until you’ve finished the rest of the shave horse – you can then choose the position of the holes to suit your work. It’s important that when you drill these holes, use a drill bit slightly larger than the pin, and bring the hole forward of the swingarm centreline, so the swinging arm automatically opens when you release the pressure from your foot
Making the three plates
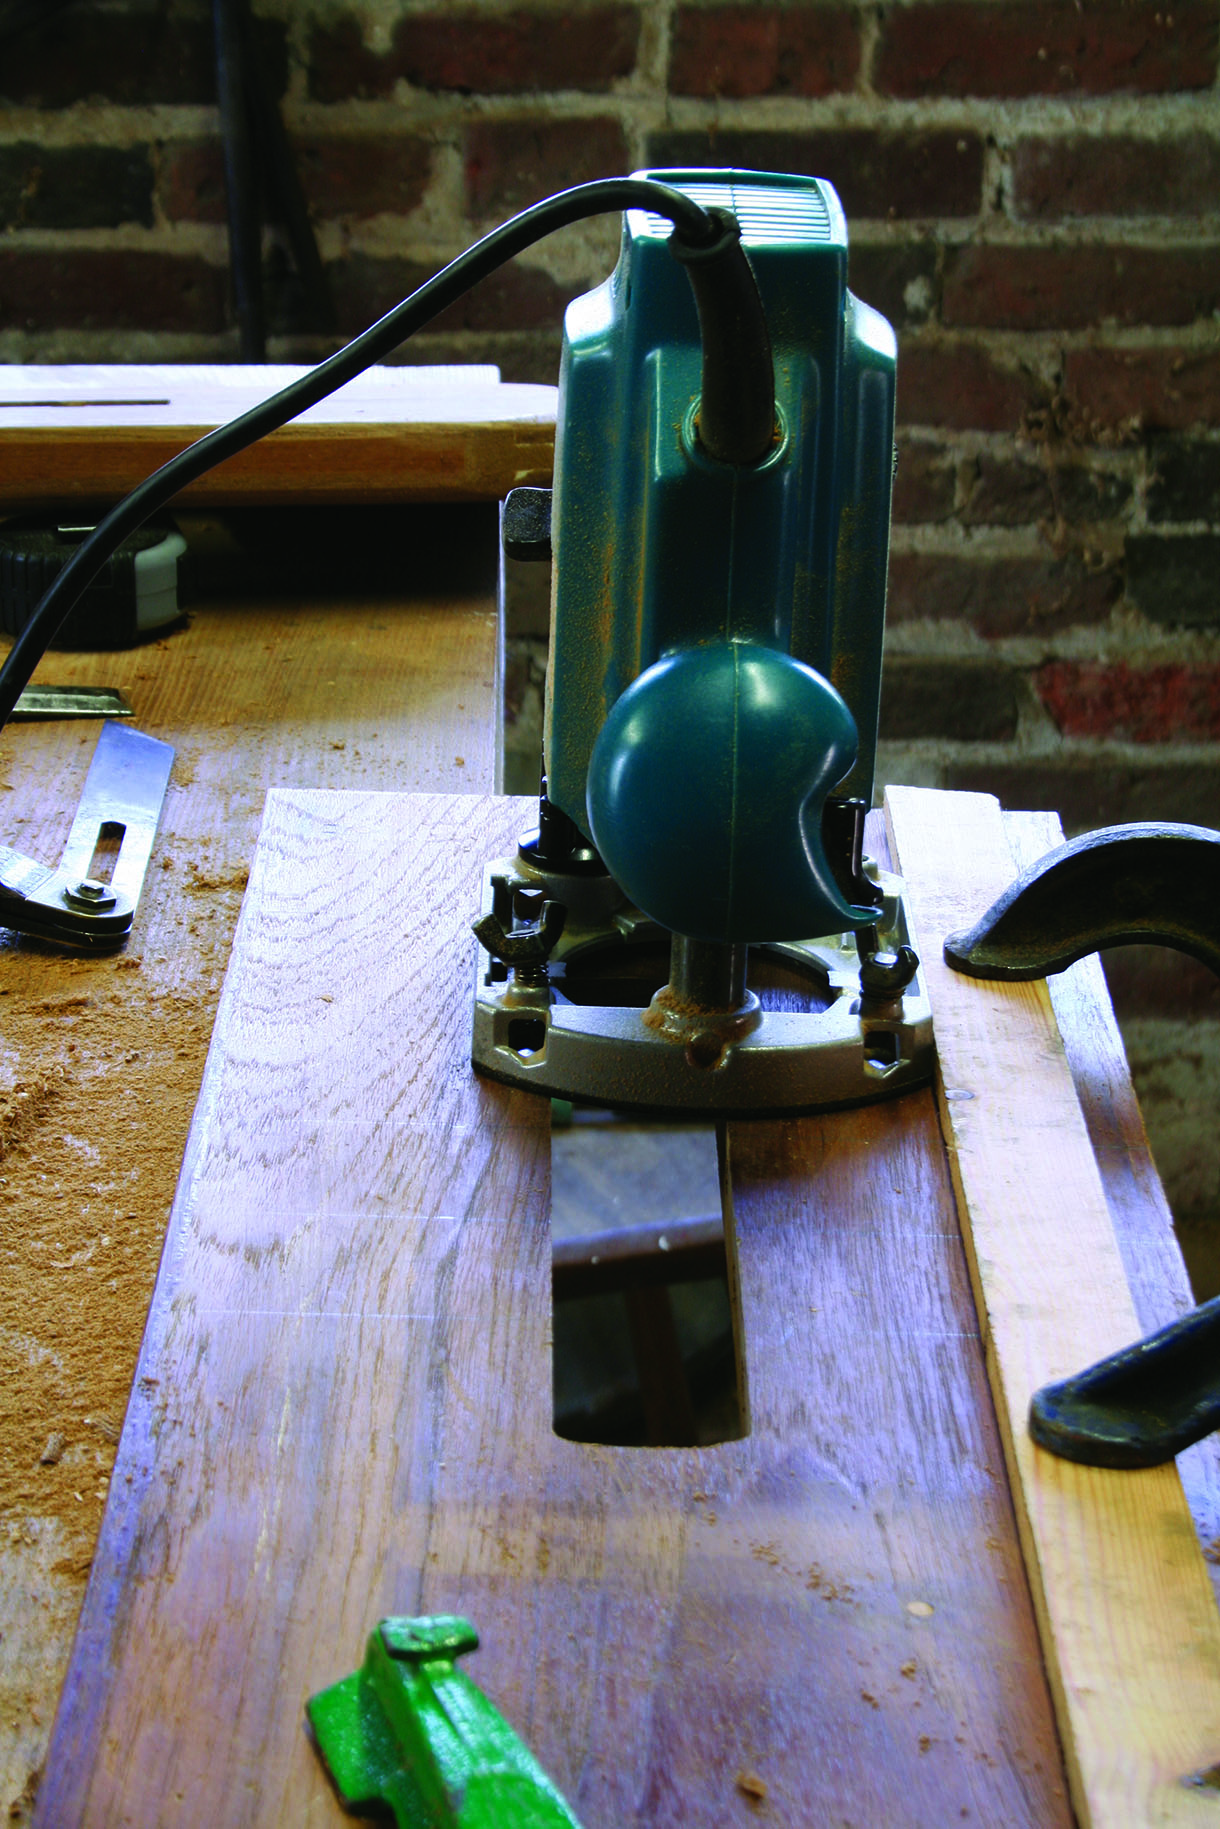
Next, we are going to make the three plates – the footplate, the hinge board, and the grip plate. I used a scrap workbench top for the next three parts as there is lots of drilling involved. Cut the three parts to size, and then cut the centre slots out of the hinge board, lower foot plate and upper grip plate.
A router and a clamped-on guide will give you excellent results. Alternatively, cut the slots using a drill and chisel or cut with a jigsaw. You want a snug fit, but not too tight as you may wish to dismantle your horse for easy transportUse a guide to cut the ends of the top and bottom mortises to the correct angle – 10 degrees for the grip plate and 25 degrees for the footrest
Putting the main assembly together
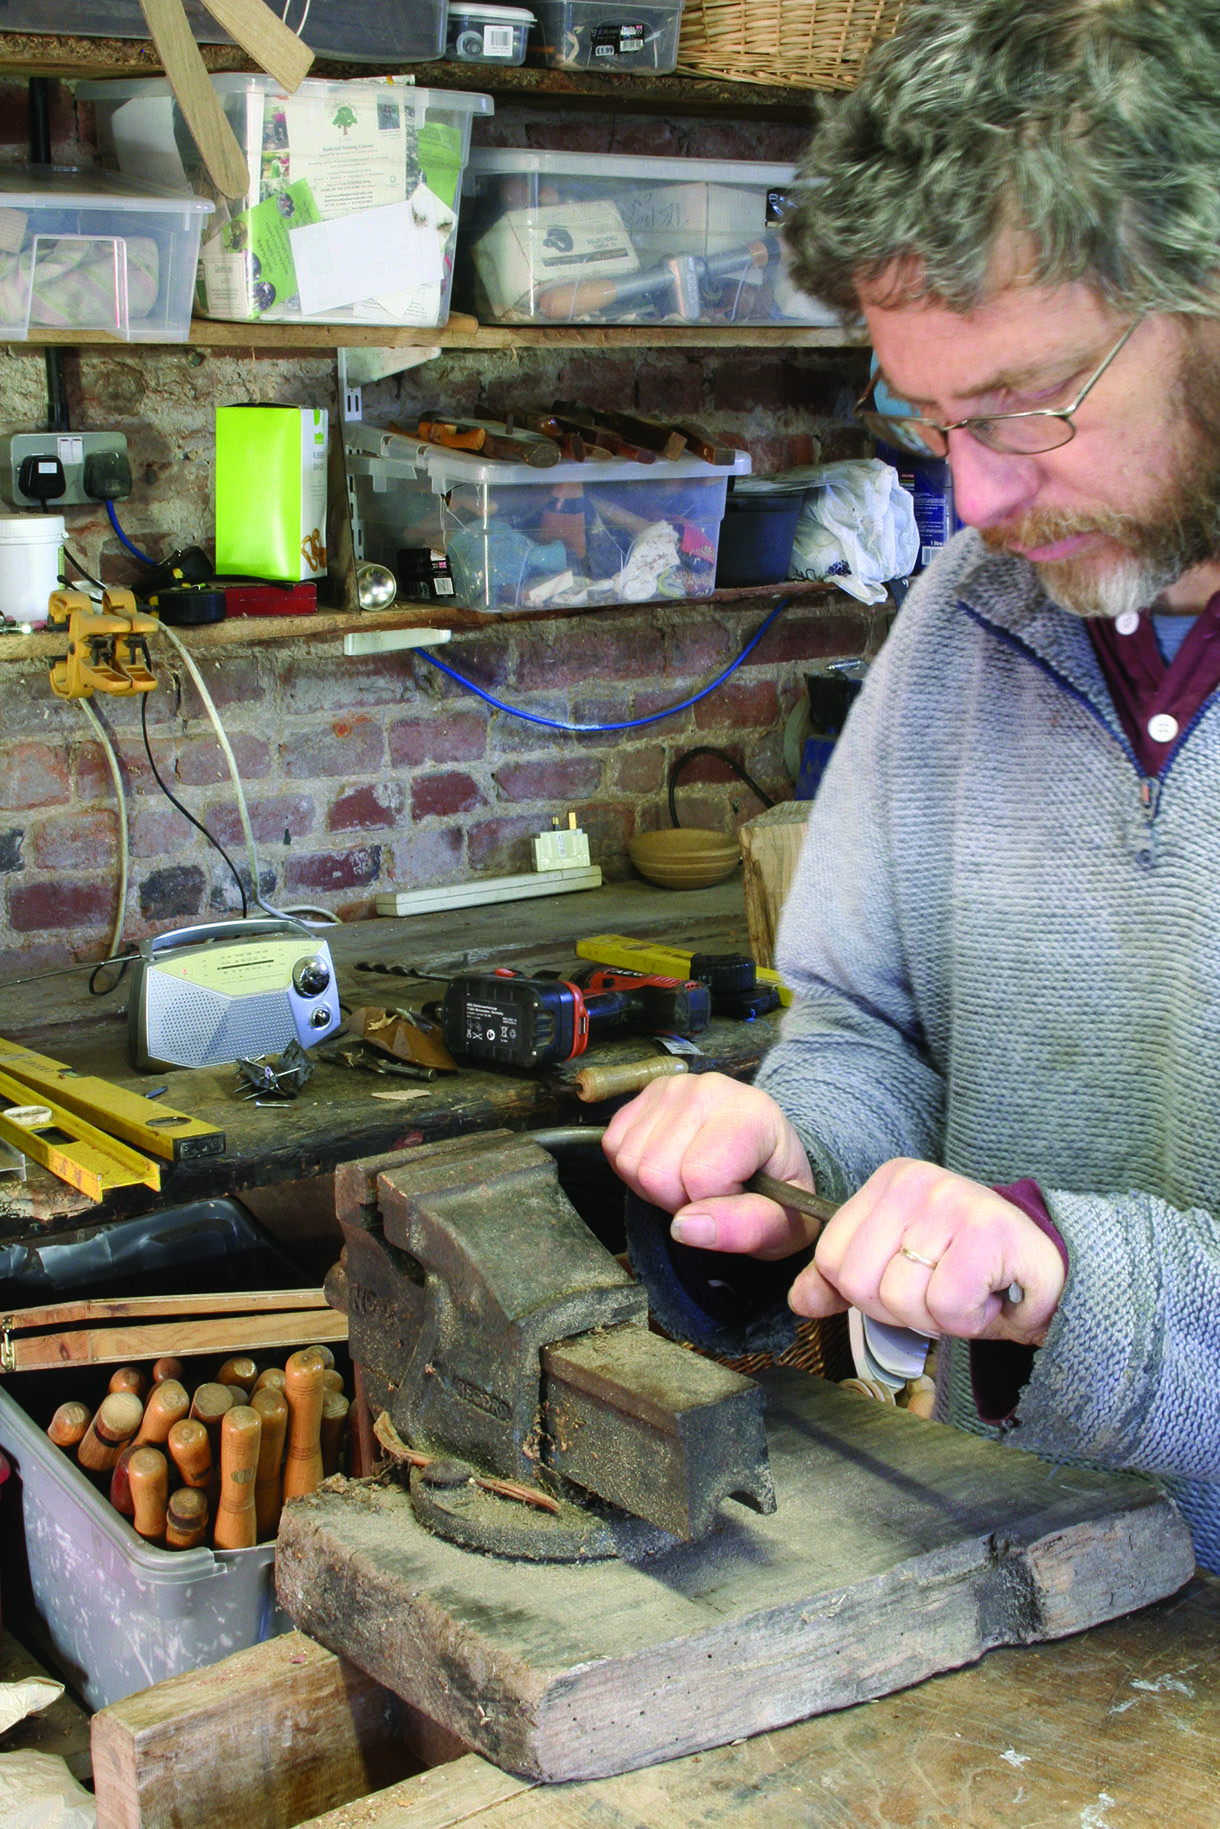
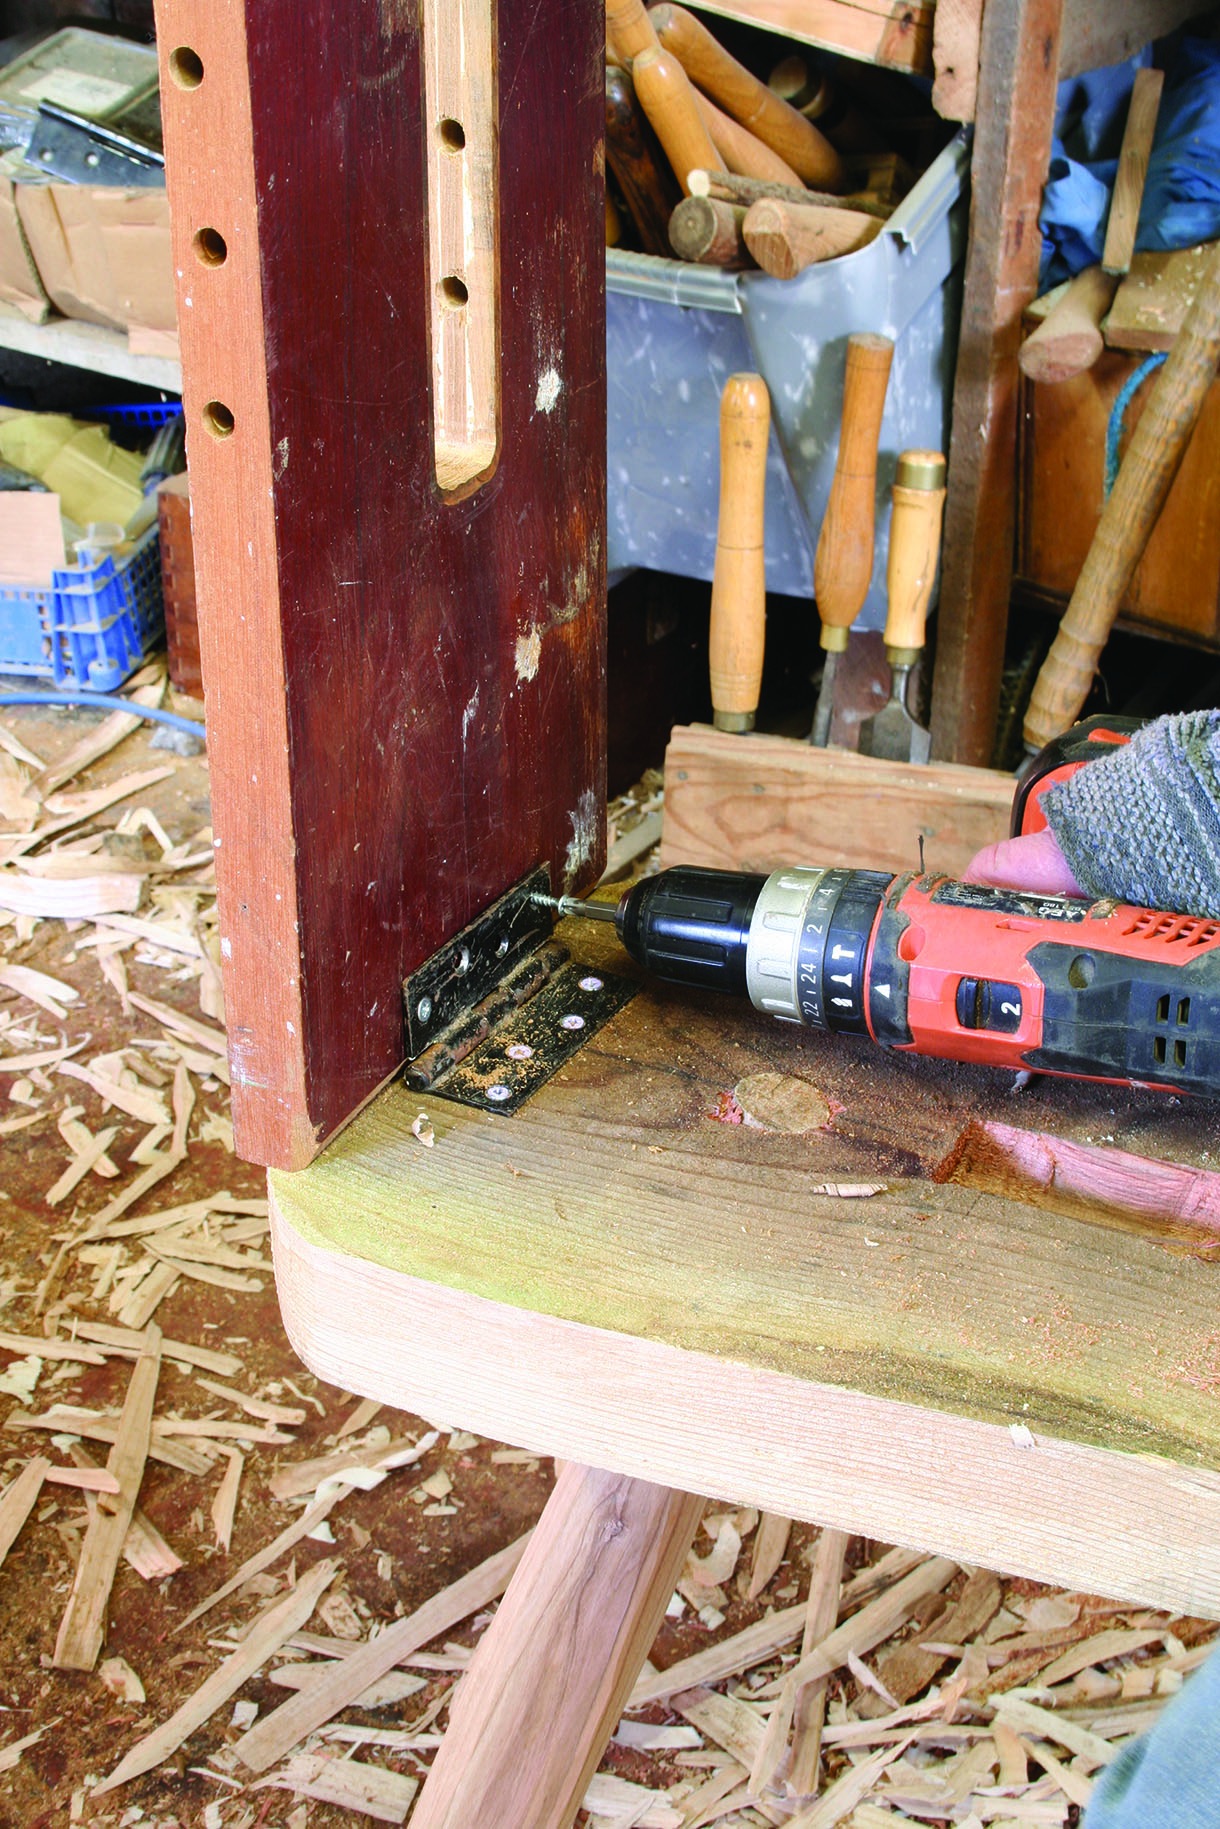
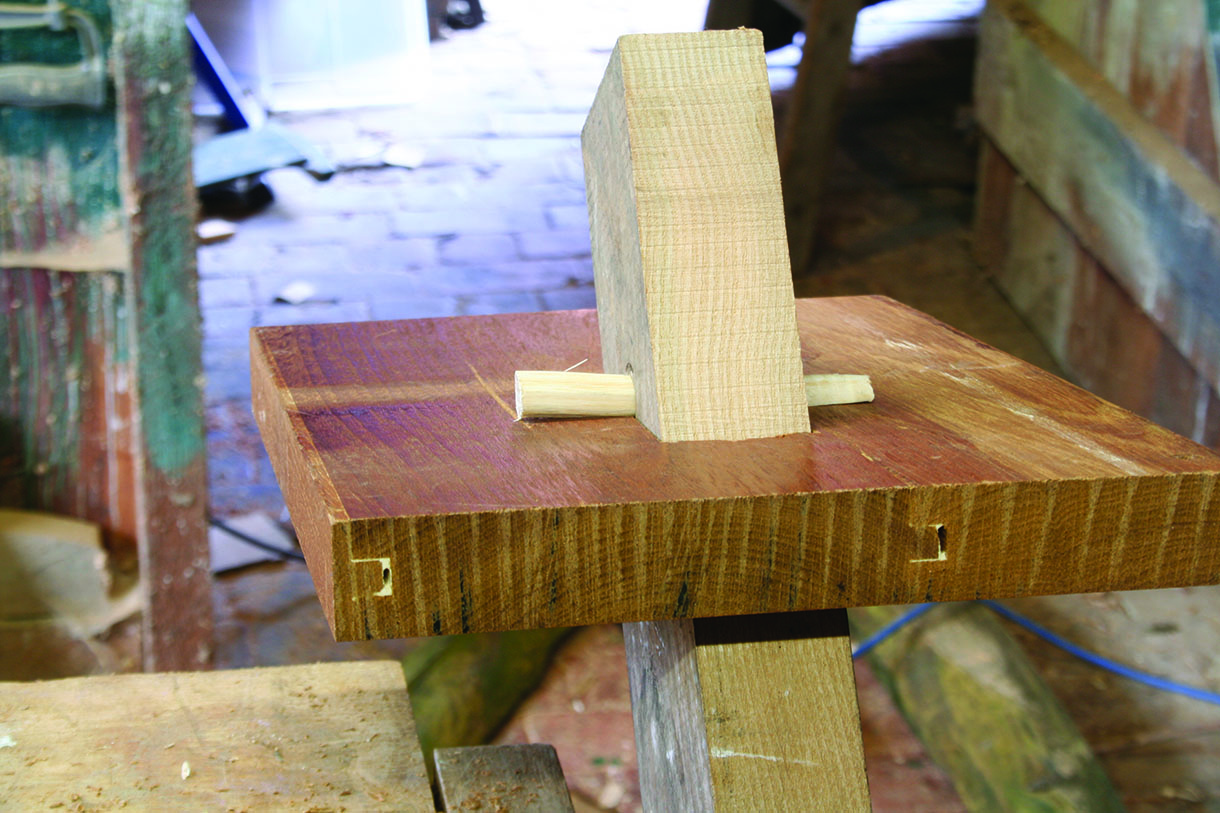
Now we need to drill the hole in the central work board for the swingarm pin. You could use a wooden pin for the pivot if the board is thicker (this is easier to work with than a steel bar), but as we’ve only 25mm to play with, I’ve used some leftover 10mm mild steel bar. Drill a series of holes along the central work board. This will allow you to move the head of the vice forward and backward, so you can grip your workpiece in different places. Note: I’m using a 11mm drill bit to give a loose fit. This makes it easy to change the position of the arm. You can use a straight scrap piece of wood as a guide to help drill an accurate hole. An extra pair of eyes will also help when drilling these holesThe pin is made from a scrap section of 10mm steel bar. Cold bend one end 90° to form a simple handle, then cut to length. Alternatively, you can fashion a pin from a piece of woodTo fix the central work board to the body of the horse, use a 100mm hinge. This is strong enough to keep the board stableNow we can peg the top and bottom boards in place on the swingarm. Drill a 12mm hole at a slight angle of 6 degrees through the swingarm. Make a corresponding size peg, and shave it to a taper. With the board in place, you can now knock the peg in. This fixes the head and footrest quite securely, whilst ensuring it is easy to take apart by simply removing the pegChamfer the underside of the top board as this will reduce bruising of your work
A further refinement would be to glue some leather here and on the central board which will also protect your work.
Finishing touches
Put an angle on the edge of the underside of the grip plate – this will reduce the chances of denting your work. For an extra flourish, you could glue some leather here, and on any other points of contact – perhaps most notably where you’ll be sitting.
Finally, cut a wedge from the log used for the legs. If the sides are different lengths, by turning it over you can change the height of the centre board (invaluable on my courses when you have different sized people who will be using the same shaving horse). The same effect can be achieved by sliding the log back and forth long the main bodyTo finish the shave horse, take it to pieces and round off all edges and contour the body. Don’t be afraid to change the measurements to suit your requirements. You can make the body narrower or shorten the legs – you may need to shorten the swinging arm as well. Add a cushion for comfort.
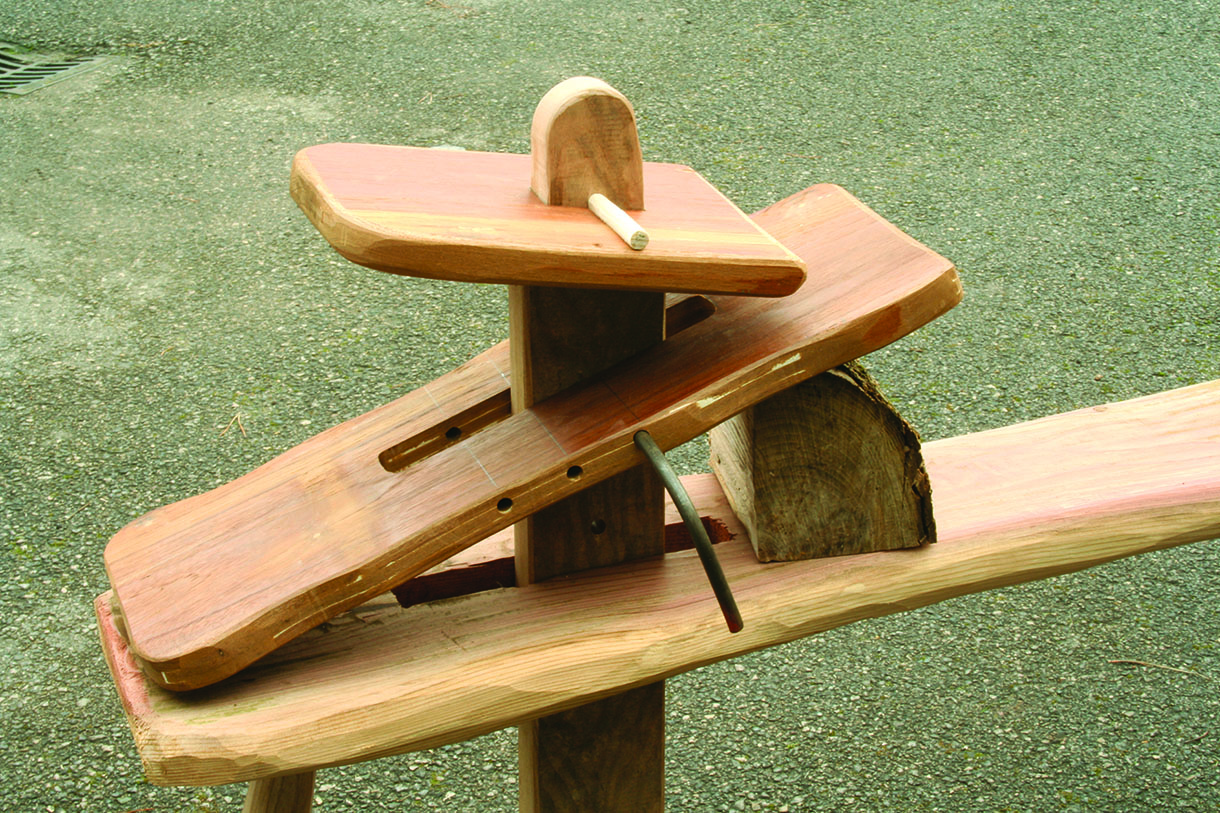
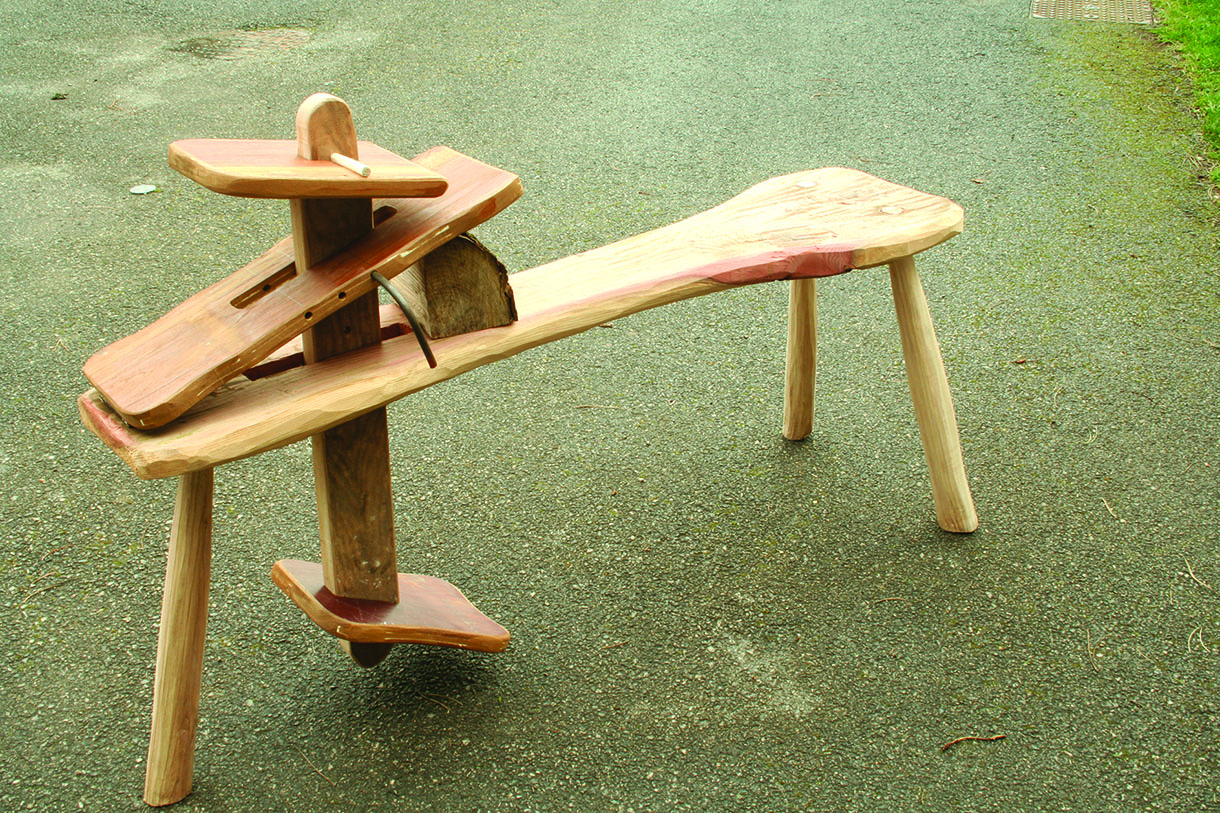
And there you have it. A trusty and dependable shaving horse that is easy to build using few tools. If you get stuck at any point, asking for a second opinion can help. Remember to reference the exploded diagram for dimensions and to see how the shave horse goes together.
Woodworkers Institute Newsletter
Sign up to receive weekly newsletters direct to your inbox, featuring a round-up of interesting and entertaining woodworking content from the Woodworkers Institute and the web, including the latest products and handy tips to help you get stuck into your next woodworking project.
Thank you. My son and I are going to build a shave horse so we can make traditional bows. This is the best. I have some excellent wood on site here in Virginia. I was going to try eastern red cedar for my legs. I’ll try to send photos when done. Thanks again. Bob
‘Left my shave horse in Illinois upon move to Oahu, Hawaii. Thank you for allowing me to enjoy, again, the production and use of an improved design for a shave horse!
To provide the best experiences, we use technologies like cookies to store and/or access device information. Consenting to these technologies will allow us to process data such as browsing behaviour or unique IDs on this site. Not consenting or withdrawing consent, may adversely affect certain features and functions.
Functional
Always active
The technical storage or access is strictly necessary for the legitimate purpose of enabling the use of a specific service explicitly requested by the subscriber or user, or for the sole purpose of carrying out the transmission of a communication over an electronic communications network.
Preferences
The technical storage or access is necessary for the legitimate purpose of storing preferences that are not requested by the subscriber or user.
Statistics
The technical storage or access that is used exclusively for statistical purposes.The technical storage or access that is used exclusively for anonymous statistical purposes. Without a subpoena, voluntary compliance on the part of your Internet Service Provider, or additional records from a third party, information stored or retrieved for this purpose alone cannot usually be used to identify you.
Marketing
The technical storage or access is required to create user profiles to send advertising, or to track the user on a website or across several websites for similar marketing purposes.


6 responses
I would like to get plans for a shave horse can you help me please
Regards Colin Bray
Thank you. My son and I are going to build a shave horse so we can make traditional bows. This is the best. I have some excellent wood on site here in Virginia. I was going to try eastern red cedar for my legs. I’ll try to send photos when done. Thanks again. Bob
‘Left my shave horse in Illinois upon move to Oahu, Hawaii. Thank you for allowing me to enjoy, again, the production and use of an improved design for a shave horse!
Aloha Philip,
Did you get the shave horse built. Wondering what species of wood you found to use. I’m also on ‘Oahu.
Thanks for the plan, good design, good post on how you did yours
What are the measurements in mm or what is it.,