Building Le Bureau de L’agent Console Desk
From commission to delivery, Richard Warmisham covers some of the techniques used in this tricky build.
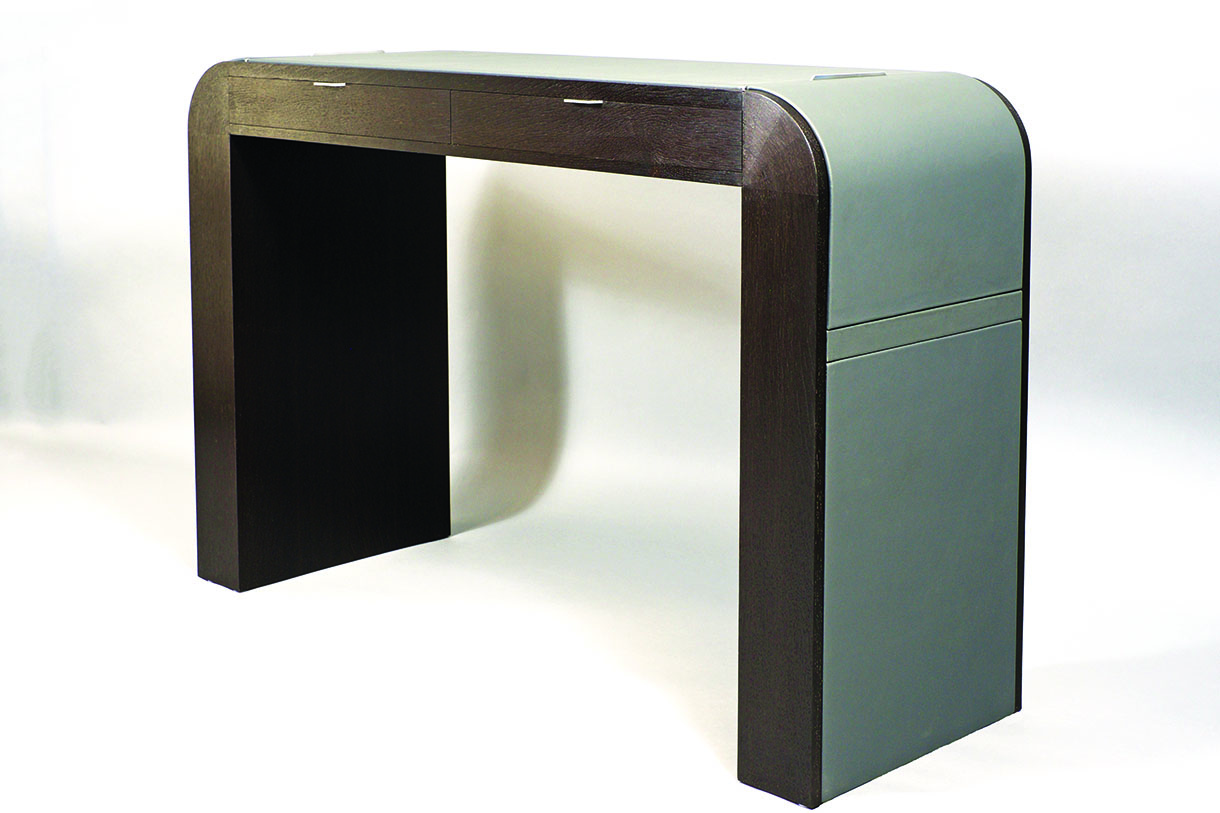
From commission to delivery, Richard Warmisham covers some of the techniques used in this tricky build
Le bureau de l’agent is the result of a very specific brief from our client. From our initial discussions, we were commissioned to design a slim, elegant console style desk. The desk would need to fulfil several functions. Space was required to store several laptops, an iPad, some peripherals and accessories, camera equipment as well as the usual pens, notebooks and paper. In addition, the client requested that the laptops needed to be stored out of sight. Size was a critical issue too and our design had to fit a specific space and should be no longer than 120cm. If that were not enough, also on our client’s wish list was a facility for built-in charging points for his numerous Apple devices.
As with all commissions, a brainstorming session ensued with much sketching and lots of questions to resolve. Made by 68° was recently joined by award-winning designer Costas Michalia and his input was immediate. It didn’t take us long to decide on materials or style. The design reflects our love of Art Deco, but with a nod to modernity. We wanted restrained and understated elegance while also being tactile and inviting user interaction. The addition of a leather desk surface pays homage to all good writing desks. We soon realised that the leather should be extended past the working area of the desk extending down the legs. Each storage area inclusive of the drawers was also lined in leather. This added a sumptuous texture and a much more forgiving surface for all the devices stored. We presented our thinking to the client and were swiftly given the go-ahead.
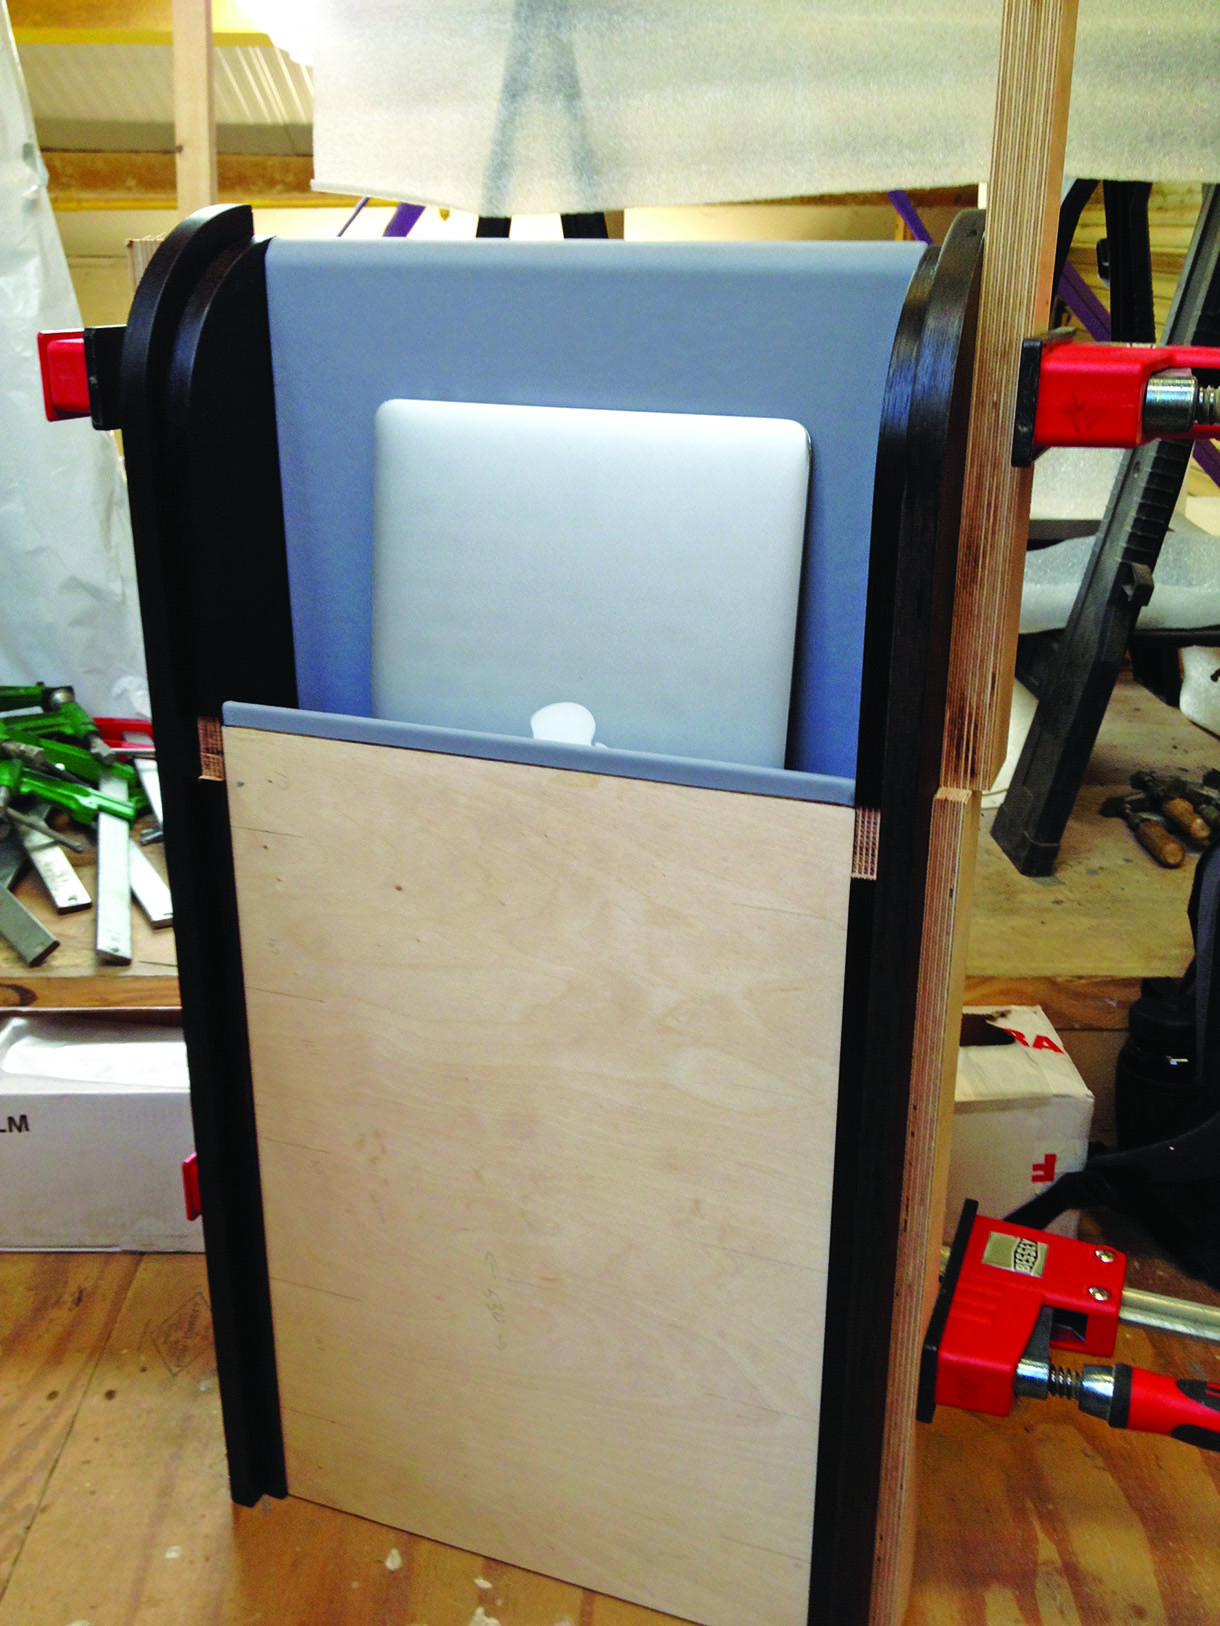
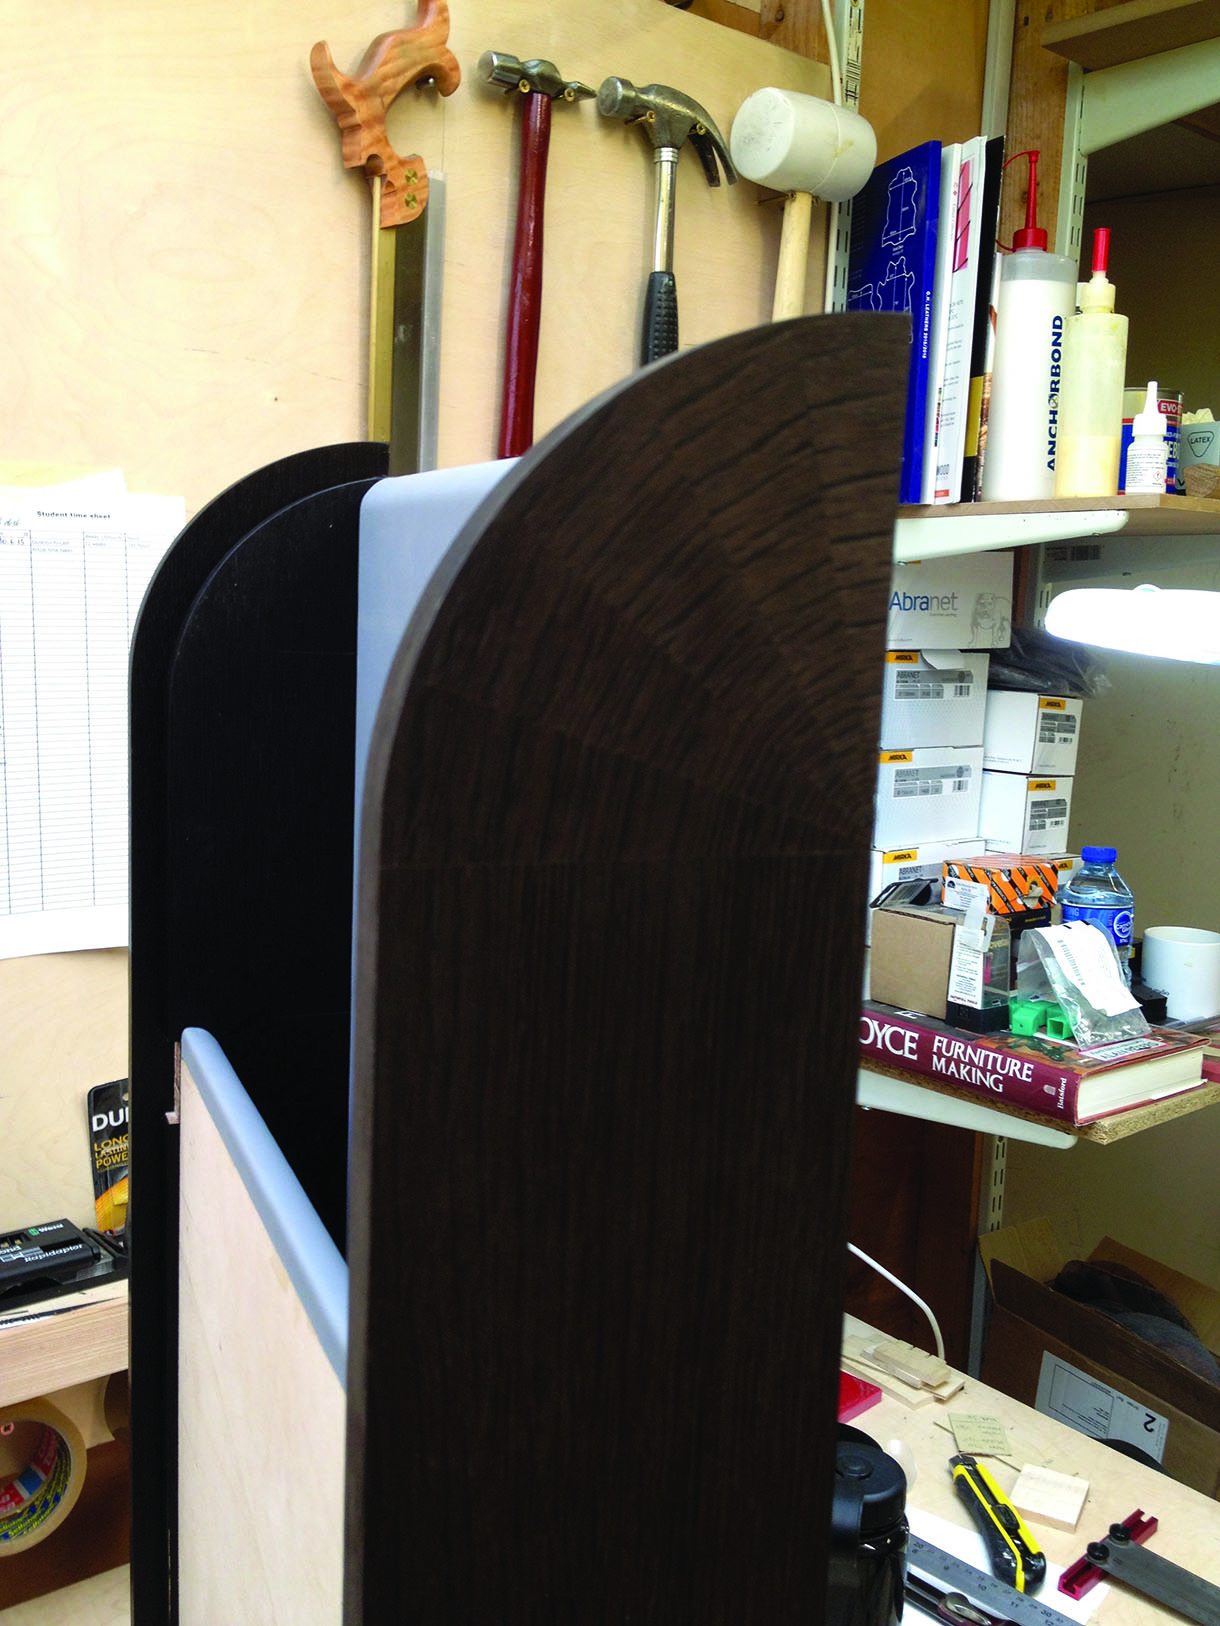
Leg assembly with Macbook Air
Material selection
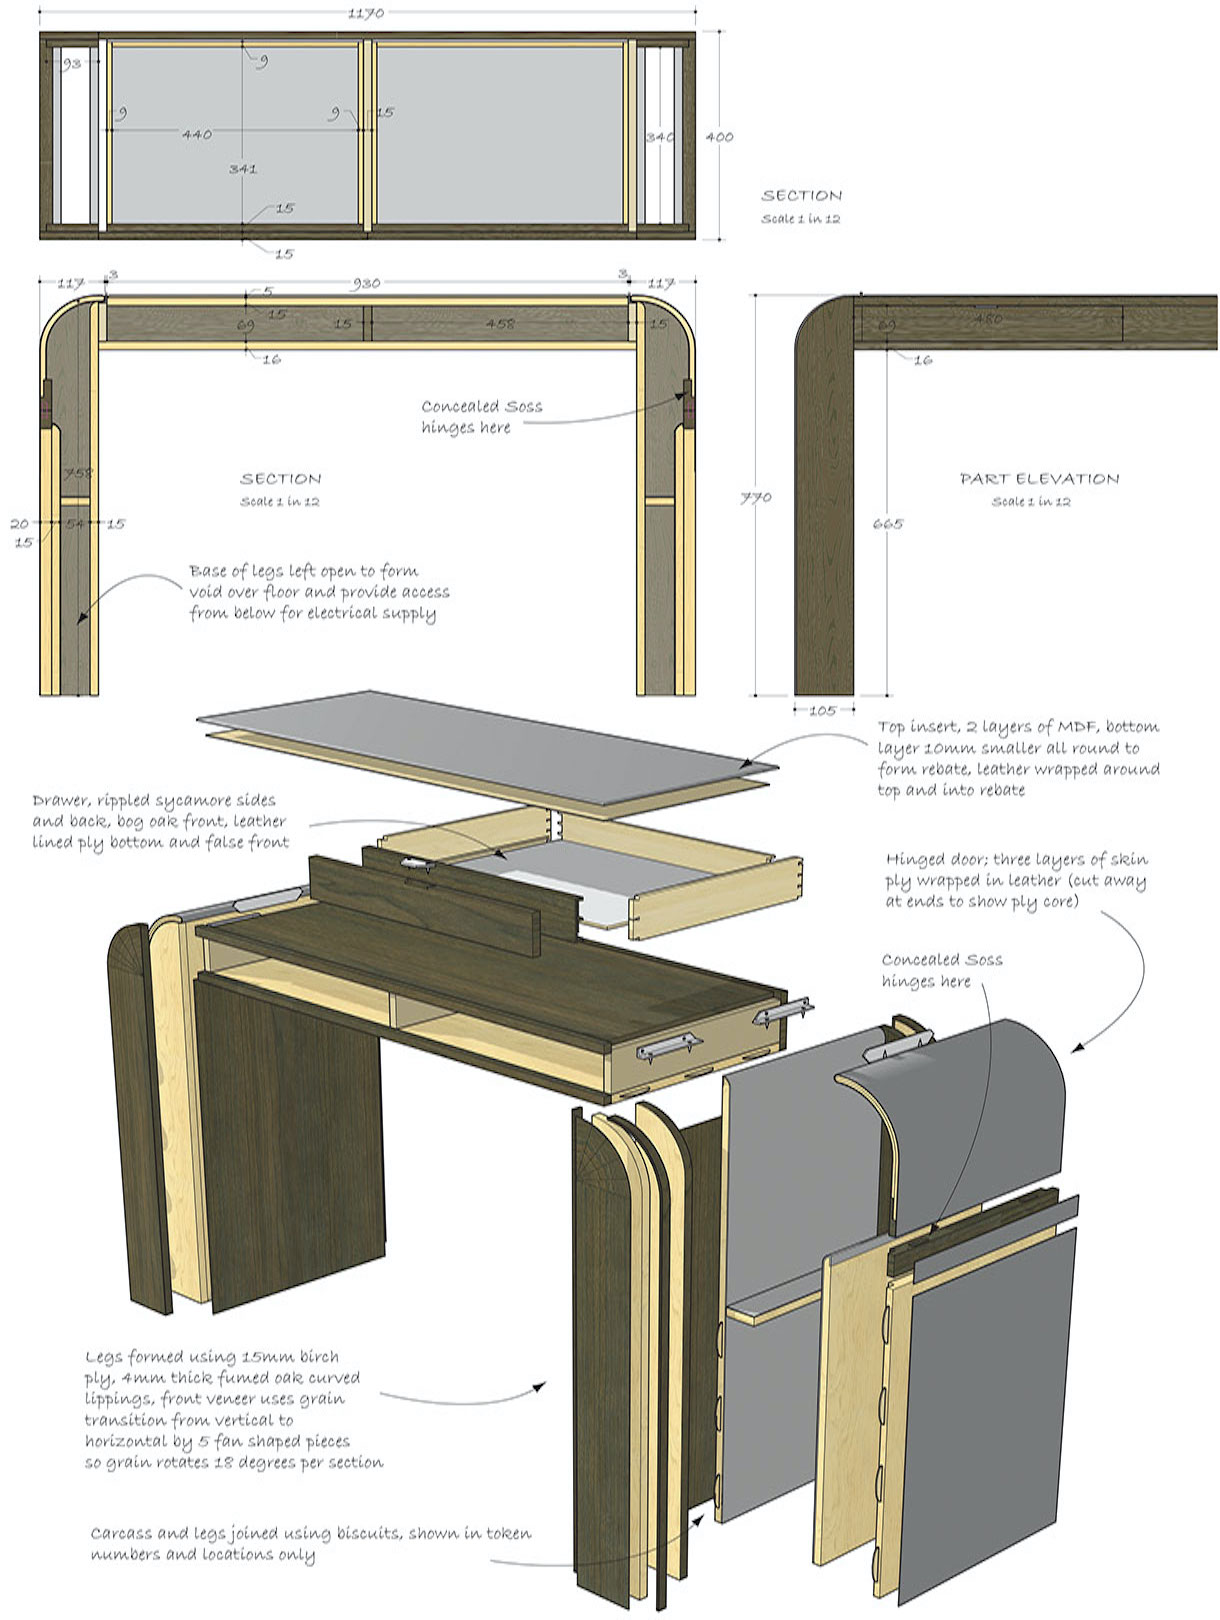
The materials chosen for the desk were fumed oak veneer, full grain leather, aluminium, bog oak and rippled sycamore. The carcass and legs were constructed from 15mm birch ply. When constructing the carcass I tapered the sides to allow for a slightly larger interior space towards the back. This was to ensure the piston fit drawers did not tighten up as the drawers were slid into position. Each drawer opening is designed to be approximately 0.5mm bigger in both height and width at the back.
The drawers were traditional in construction, featuring fine half-blind dovetails at the front, with solid bog oak fronts and false fronts. Rippled sycamore was used for the sides and back. The base is made from 6mm veneered MDF, the interior surface is leather lined.
One key area often overlooked by many designers and craftsmen is scale. Does the design, the shape of the piece fit in with its natural scale? We spend a huge amount of time debating the thickness, depth and curves. In fact we do this for every piece we make no matter the size or value. Every object, be it a chair, accessory or indeed an exquisite bespoke desk has a natural rhythm, a natural mass. Finding that rhythm and incorporating it into the design and functionality of the piece is the ultimate objective at Made By 68º.
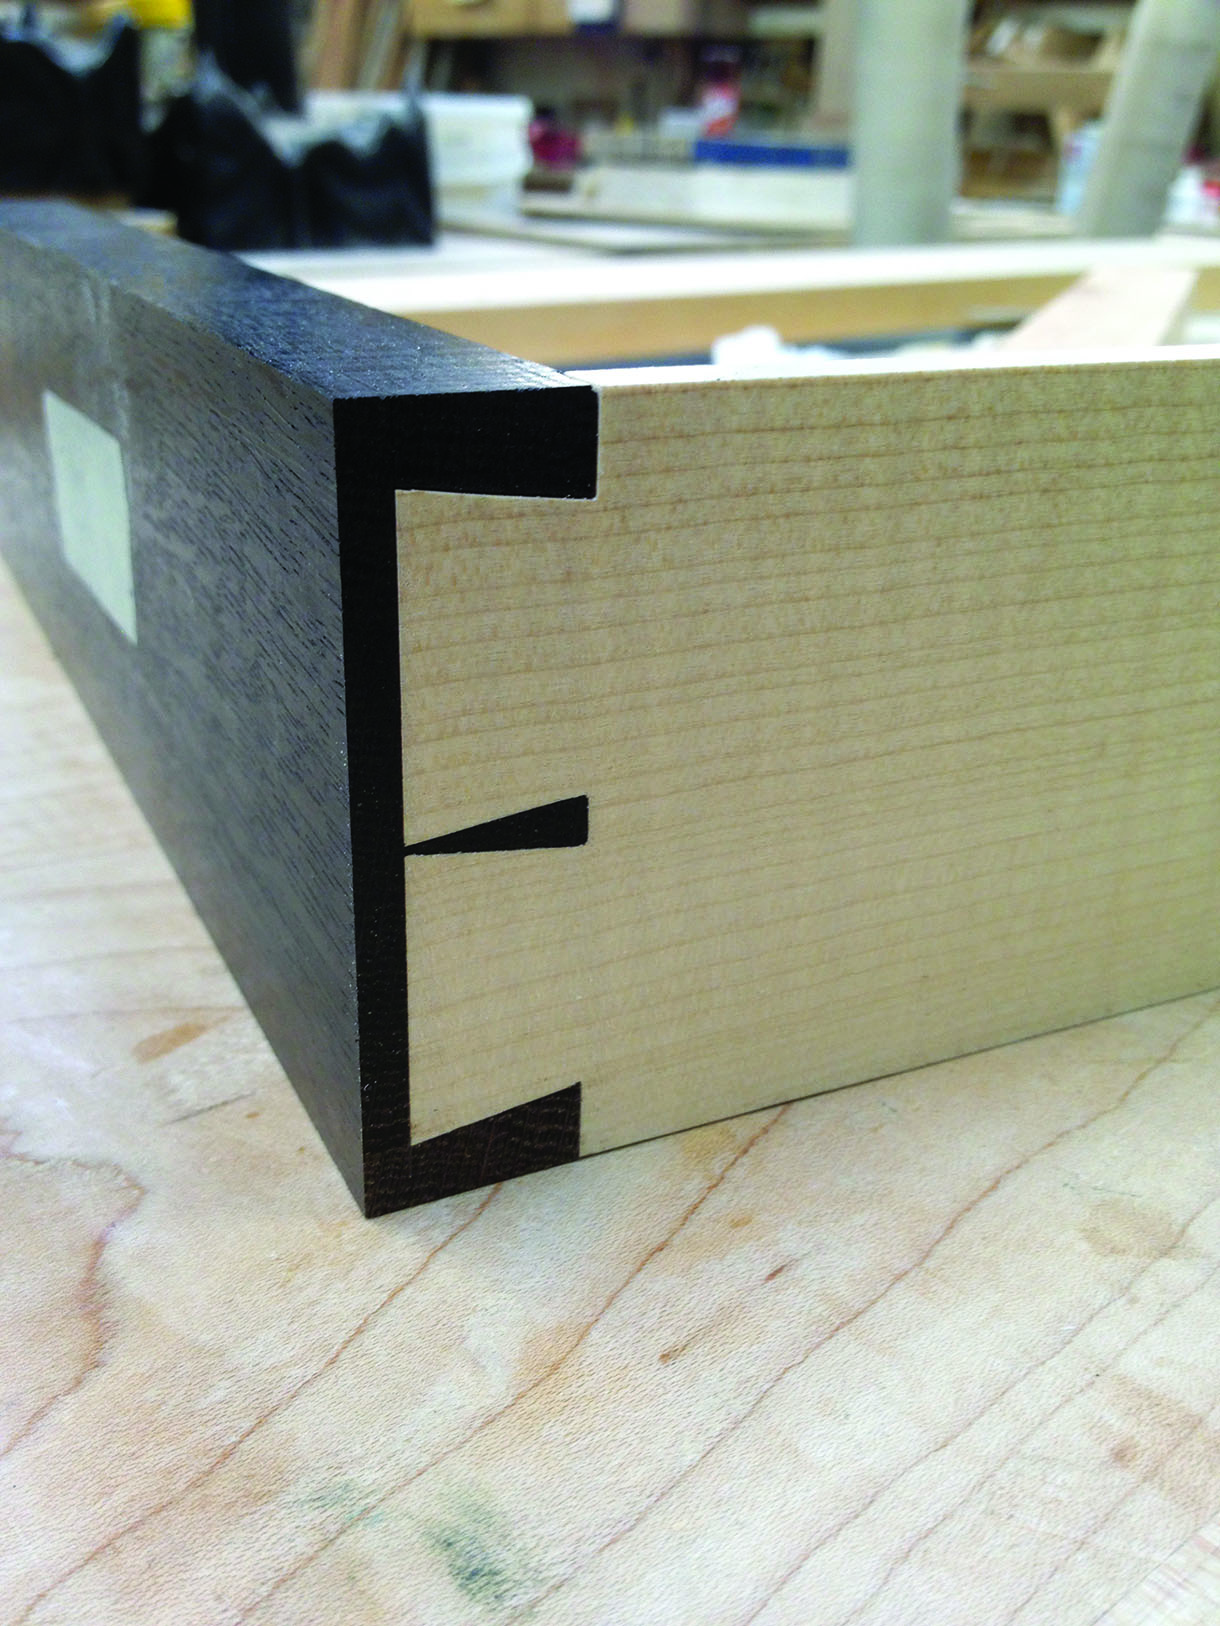
Half-blind dovetailed drawers
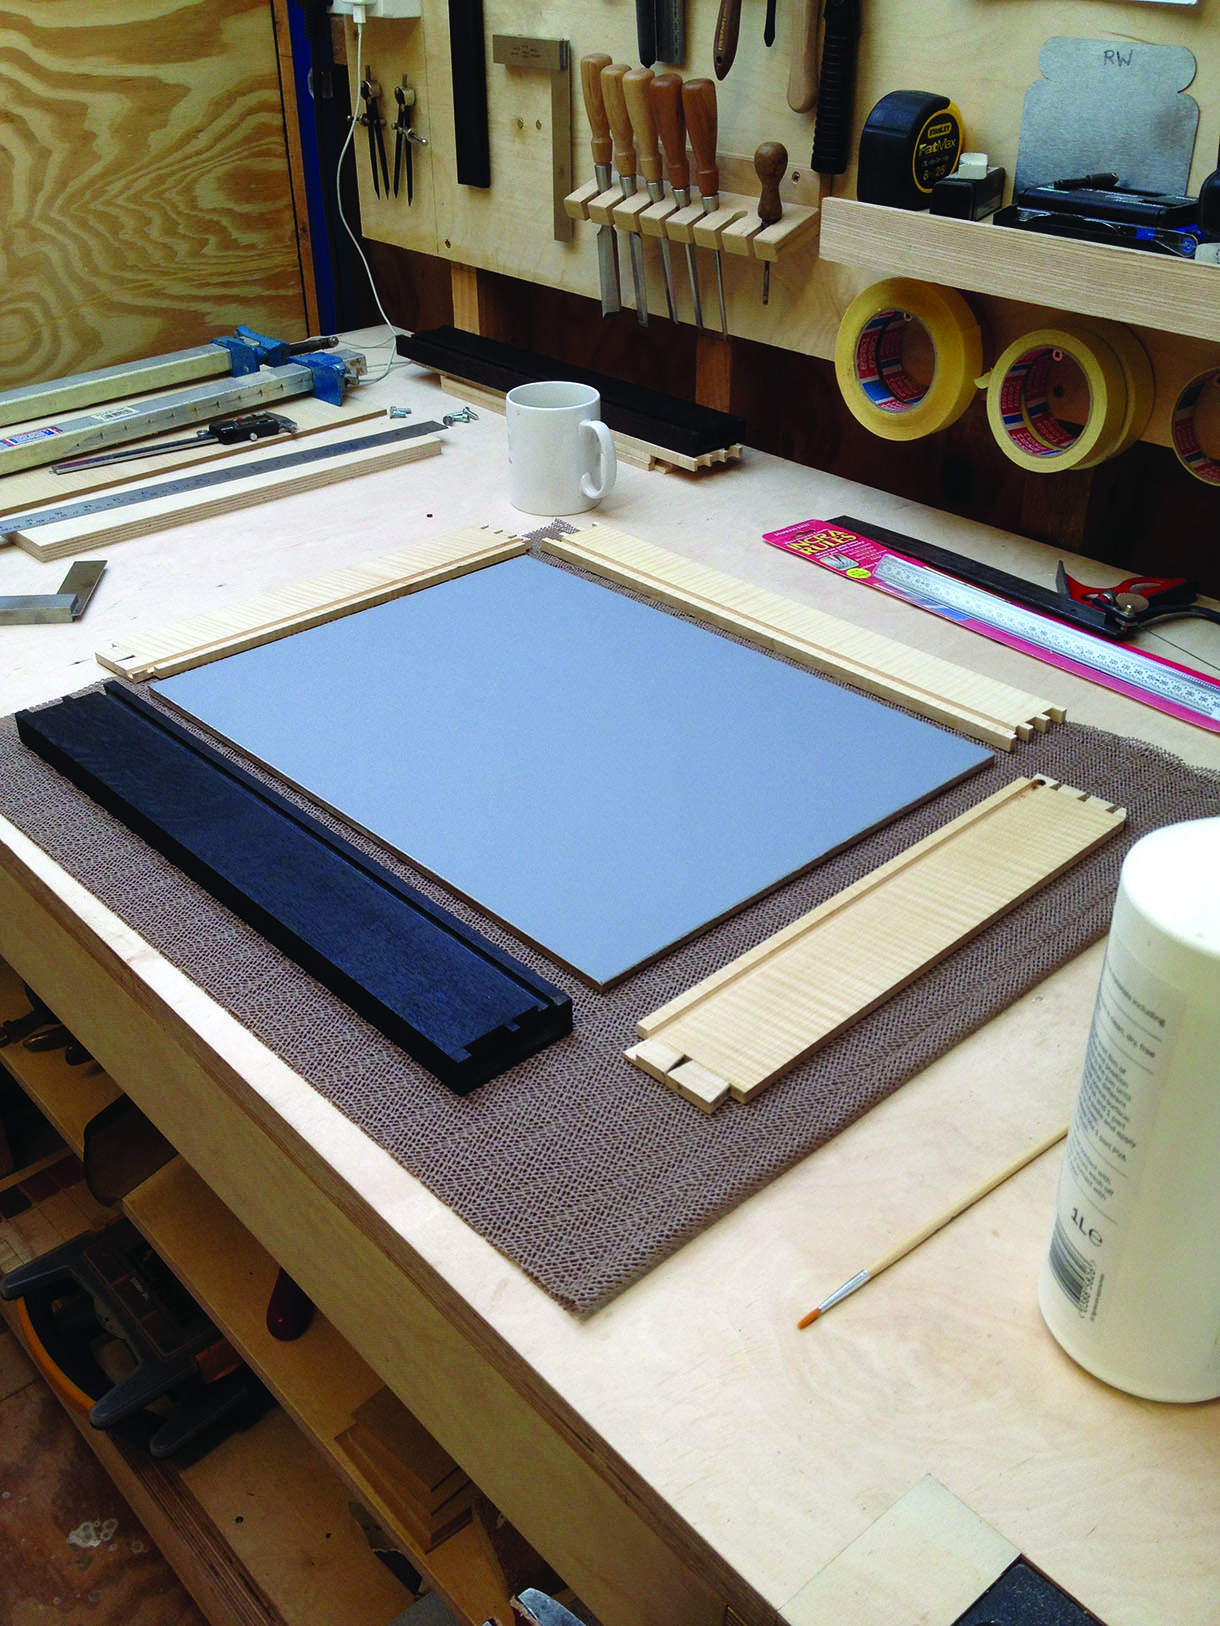
Drawer components laid out ready for assembly
Leather work
The leather work required special thinking. We had designed curved doors for the secret compartments and they needed to be clad both externally and internally with full grain leather. We didn’t want to stitch the hide so all junctions and edges had to be invisible. The process was rather like tailoring. We knew that the success of this piece would depend on the quality of the leatherwork. Special attention was given to the intersections between leather, wood and aluminium. The leather needed to flow naturally, the shadow detailing, joins and edges required precise craftsmanship.
The leatherwork on the desk is a true testament to the time, effort and quality Made By 68º aim for. Each angle, each fold, each layer is meticulously matched and then finished, creating an object one wants
to engage with and touch. We used a combination of contact adhesive and PVA. The contact adhesive provides immediate grab, which is useful for the tricky concealed folds. PVA was used forthe larger expanses, it is not only easy to apply with a roller, but also has plenty of open time and allows for repositioning.

Edges of leather are carefully wrapped and glued into rebates with contact adhesive
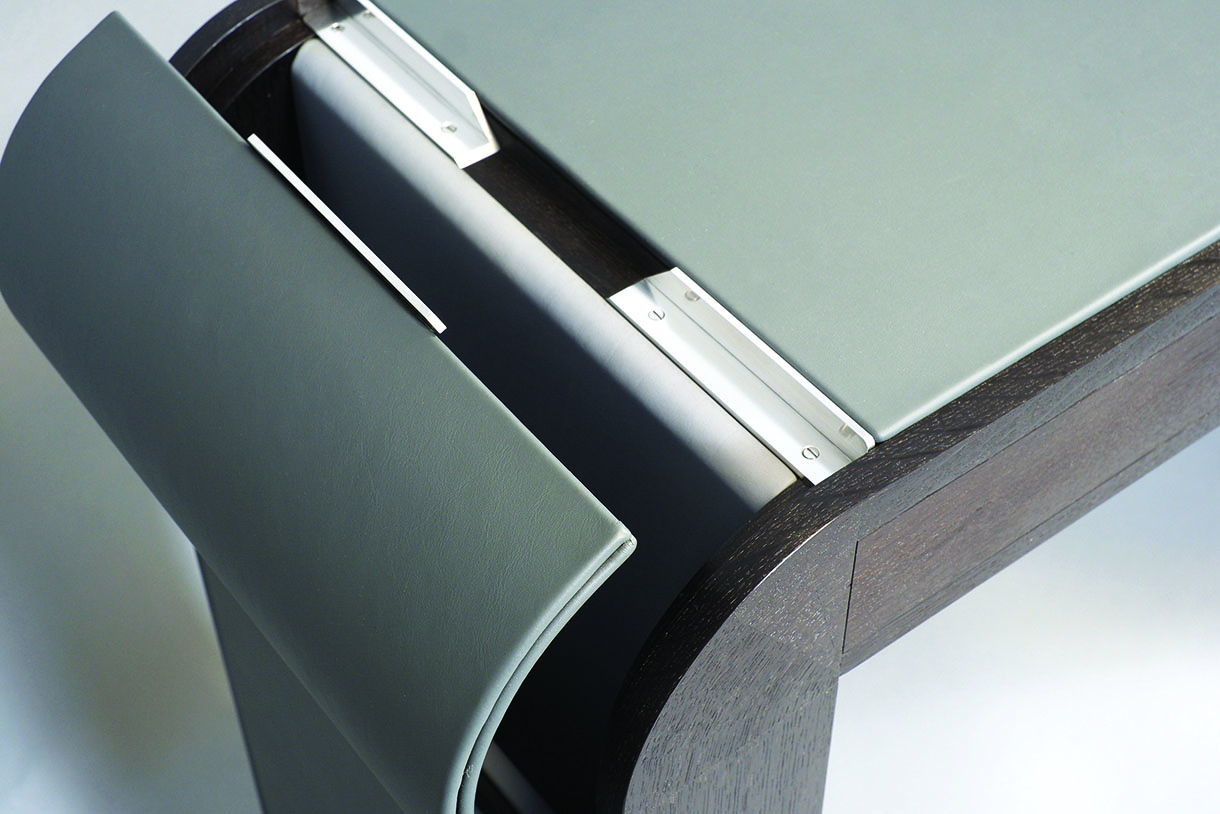
Detail shot showing leather and metalwork junctions
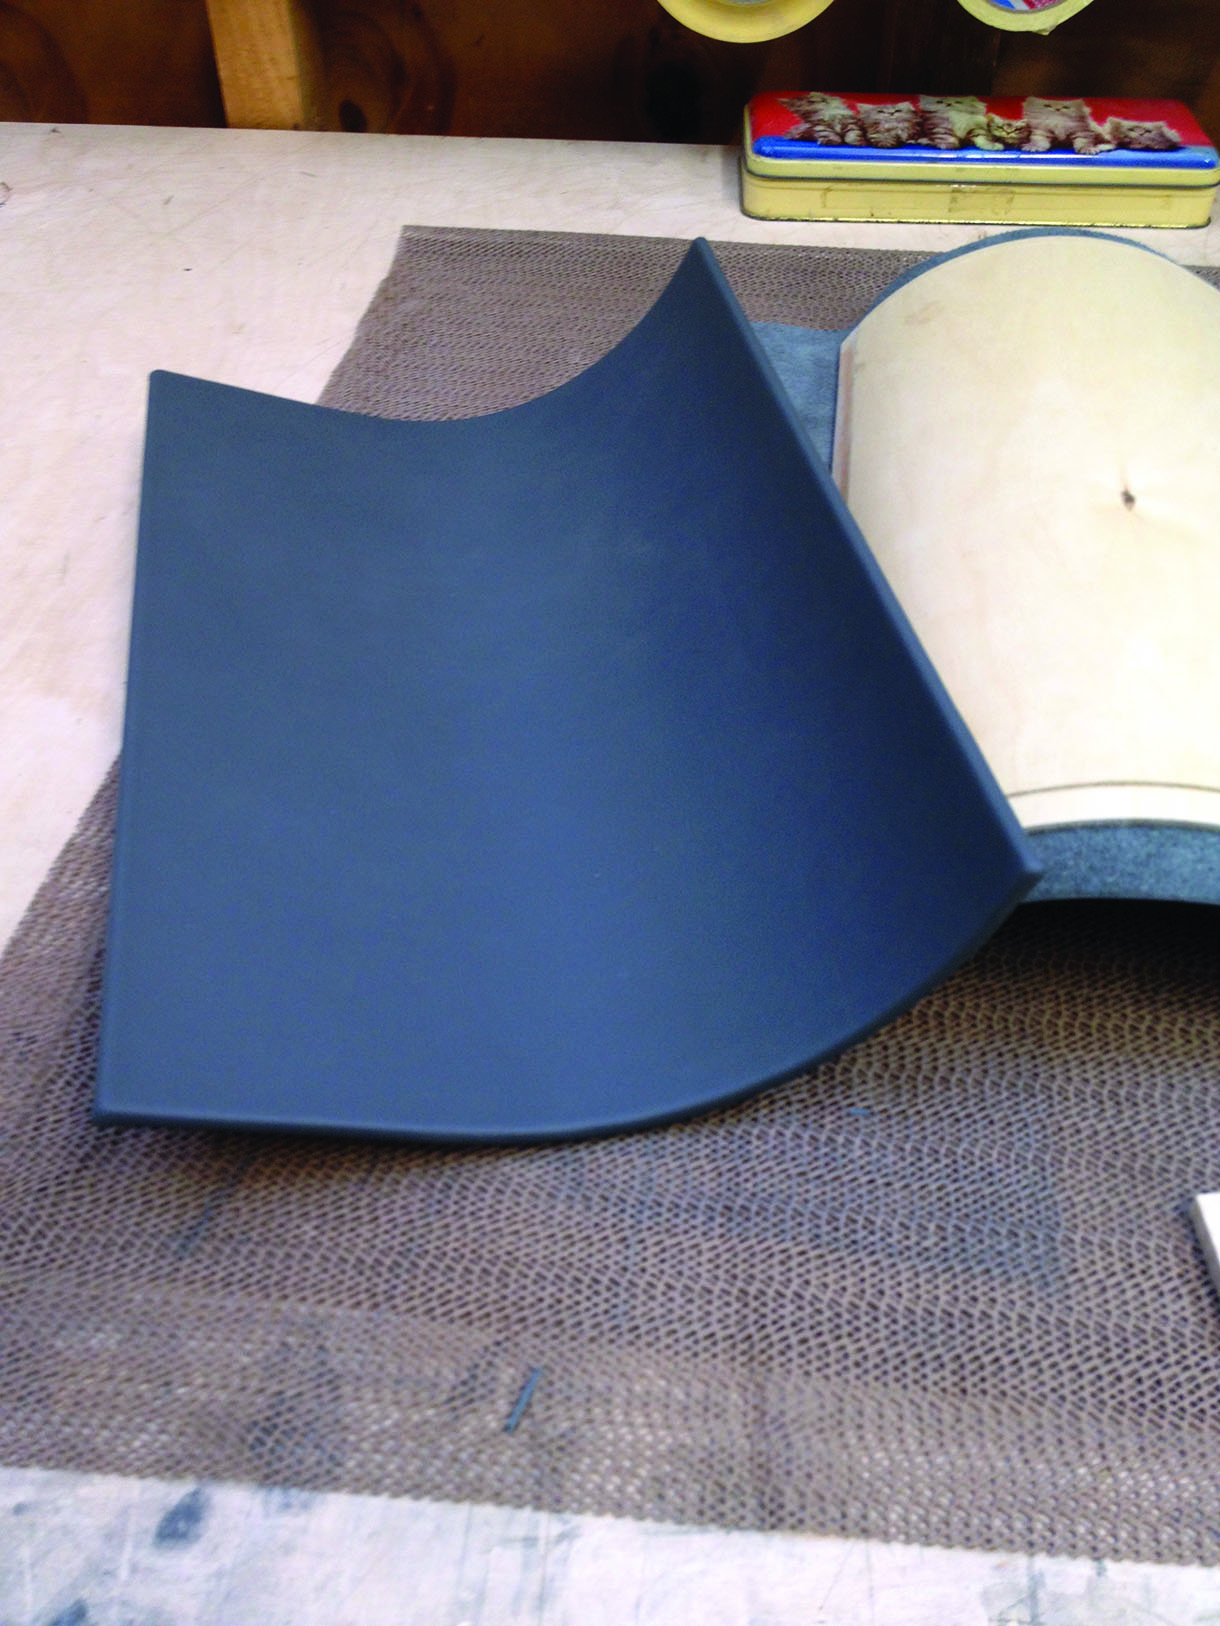
Leather cladding for the door panels
Metalwork
Aluminium was chosen for use as handles as it is not only easy to machine in the workshop, but it can also be polished to a very high grit. Pieces of L-section aluminium were utilised for the door handles and trim for the door shuts. Flat section was used for the two drawer handles. All the components were cut slightly oversize to width on the chopsaw to allow for sanding and polishing. The tablesaw was used to rip the aluminium section to size. Screw holes were drilled on the pillar drill and then countersunk. Using the sanding linisher I set the fence at 45° and took the corners off the door handles.
All the components were then progressively sanded on an adapted shooting board to ensure crisp and flat surfaces. I worked through the grits starting with 180, 240, 400, 500 and then moving on to wet and dry 1000–2500. At each change of grit the component was rotated 90° and sanded until the scratch marks from the previous grit disappeared. I then moved on to Abralon pads up to 4000 grit and finished using compound pastes to achieve a very high level of sheen. This process, although very time-consuming, was essential as all the metalwork is extremely visible.
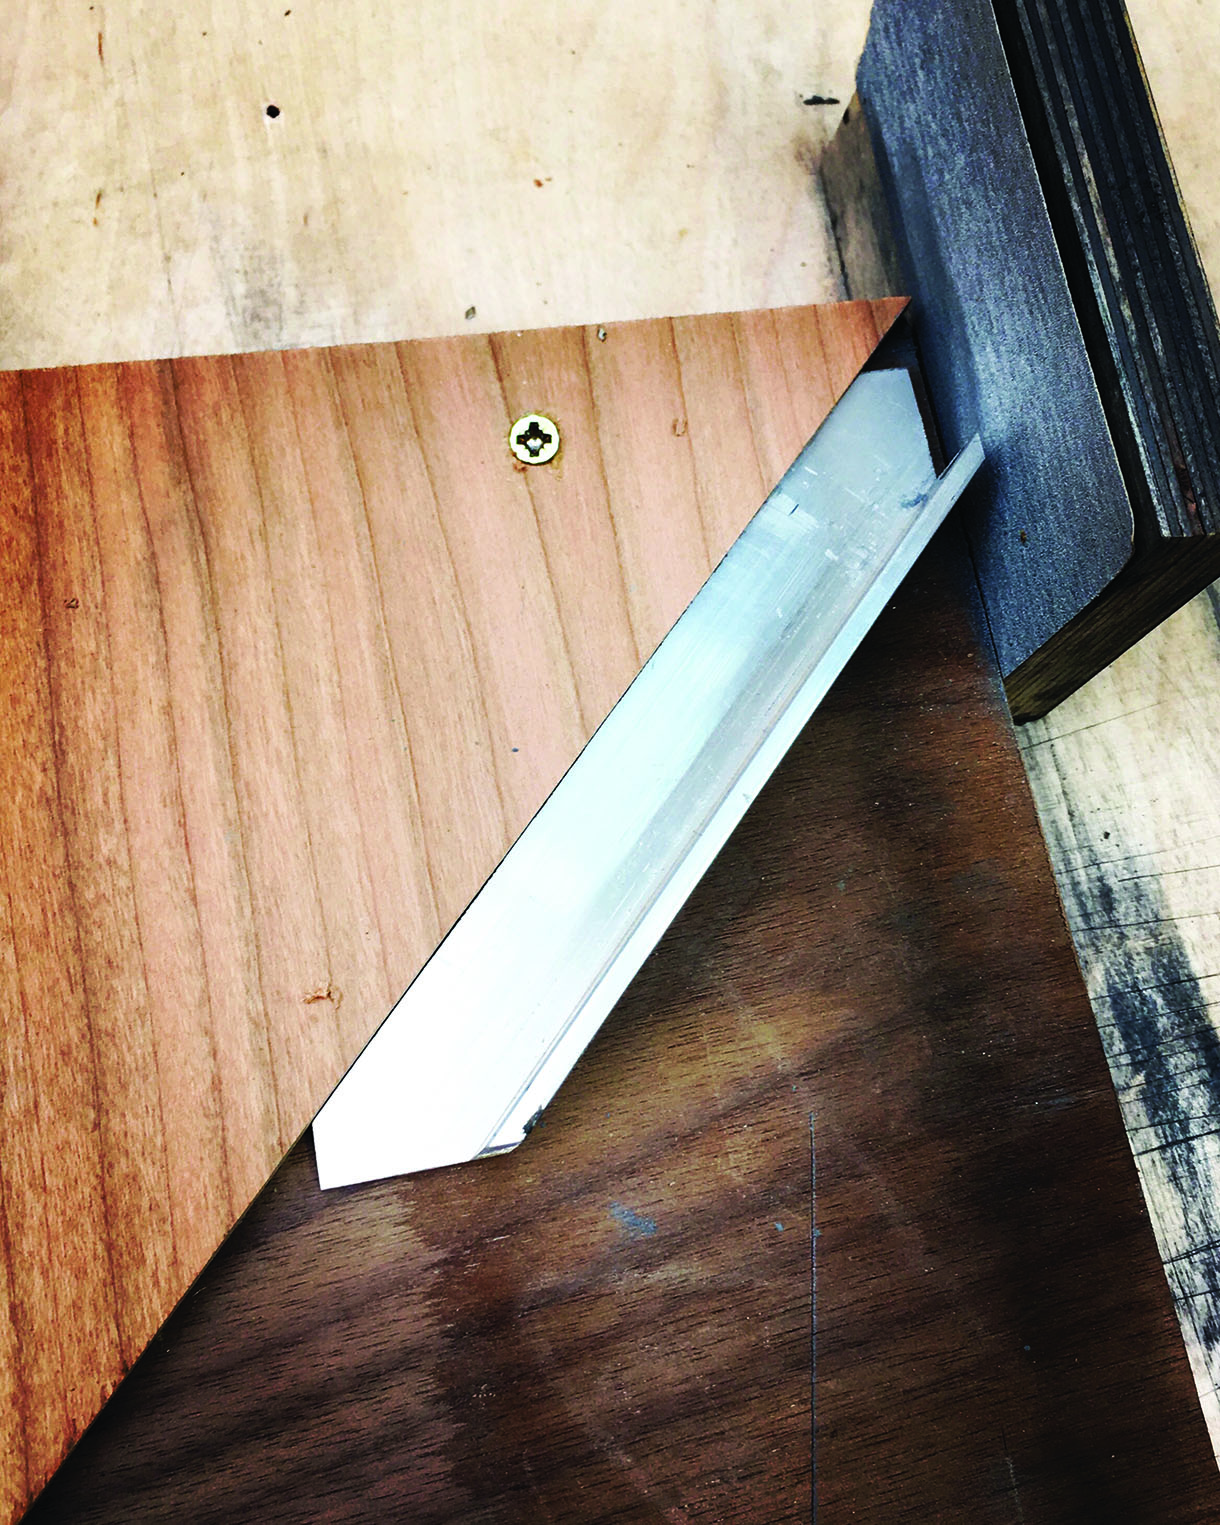
The metalwork shooting jig is used to produce crisp and flat polished surfaces

Before and after shot of door handle

Metalwork in place on the finished desk
Former making
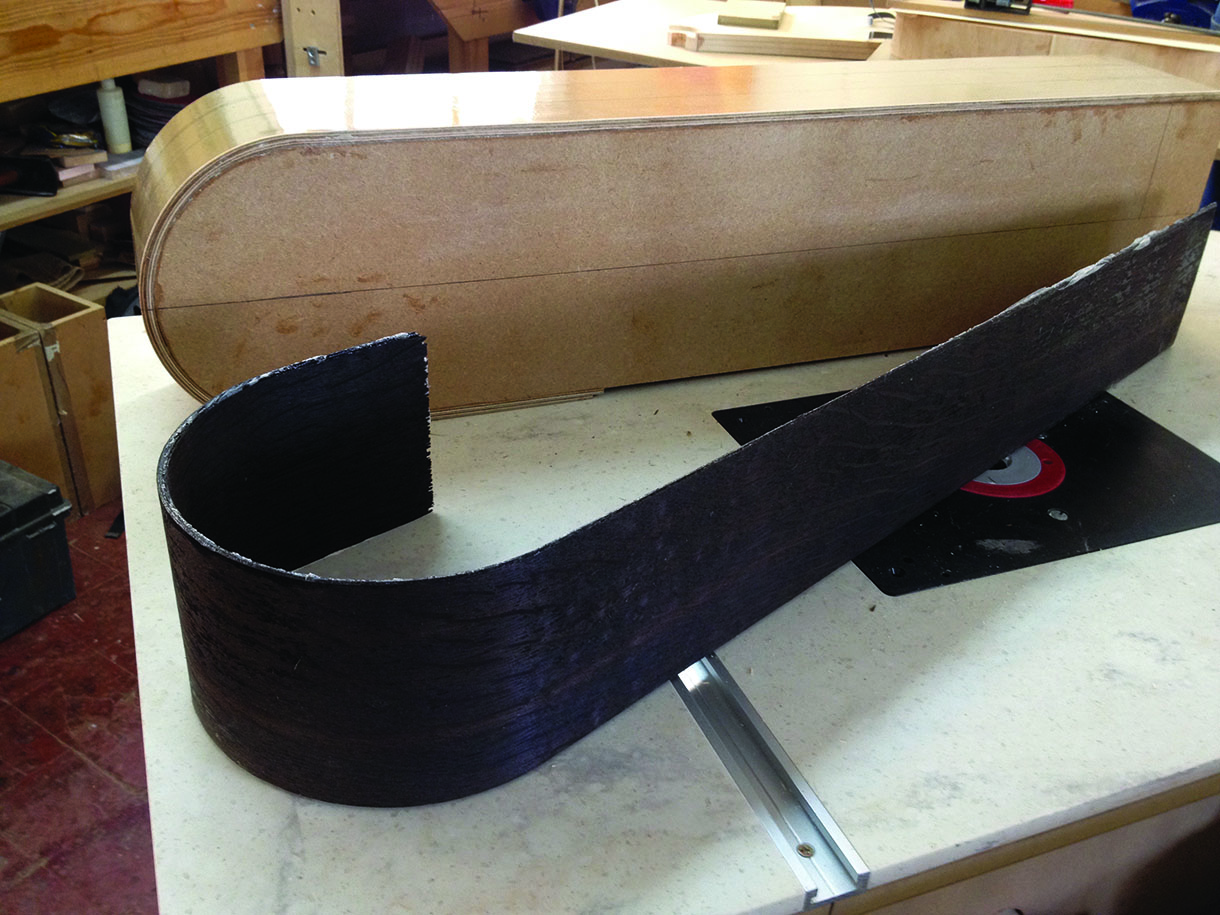
Two formers were required for this project. The first was for making the curved lippings for the legs. The second was needed to create the doors to the secret compartments. In each case I used a laser cutter to produce a full sized template in birch-ply. These master templates were then used to rout 18mm MDF components, which were glued together.
Curved lippings were required for all four legs. I calculated that they needed to be at least 4mm thick and approximately 17mm wide as they would be glued onto the 15mm birch ply. In order to minimise glue-ups, the former was made wide enough to produce one component that could be ripped down on the bandsaw. Seven layers of fumed oak veneer were glued up using epoxy resin and placed in the vacuum bag. 18mm MDF was used to create the door former and it was made large enough to allow for two components to be made per glue-up. The former was covered in brown packing tape and marked with a datum.
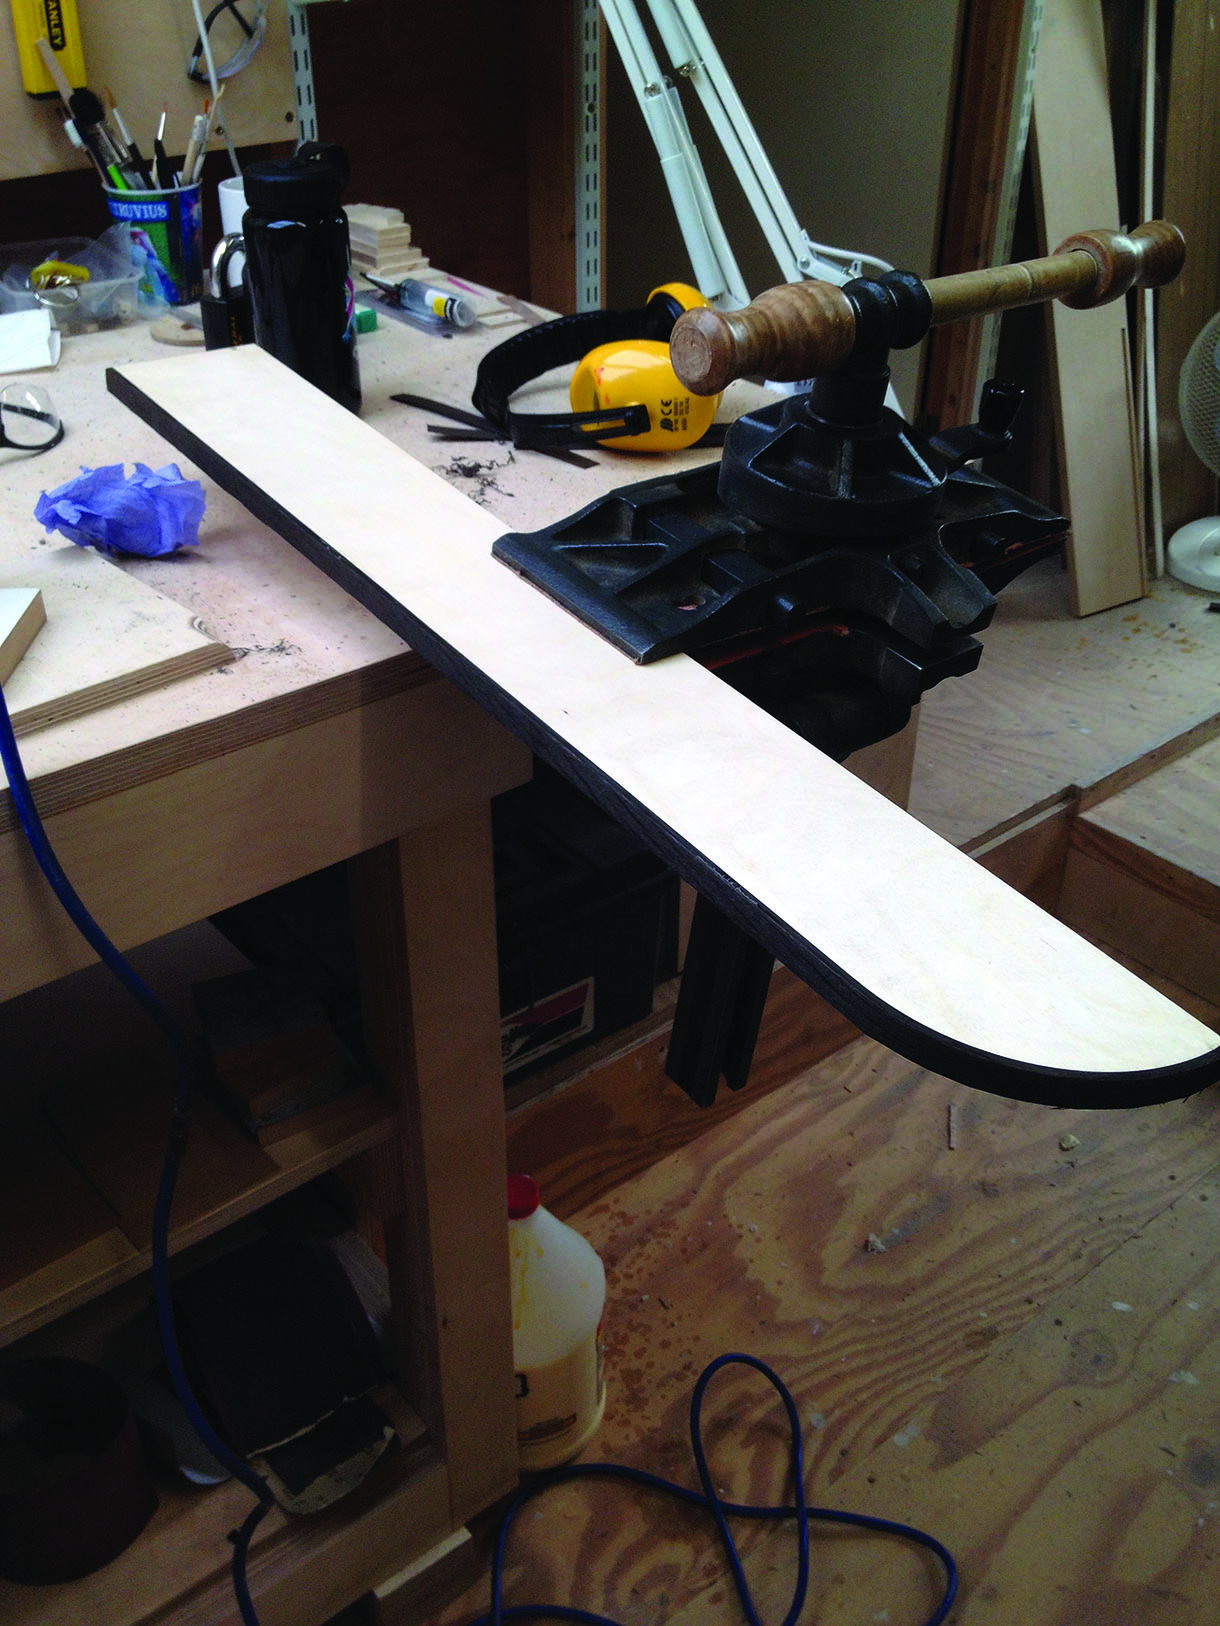
Leg panel is held in the pattern maker’s vice while the lipping is flushed off
Lipping is removed from its former
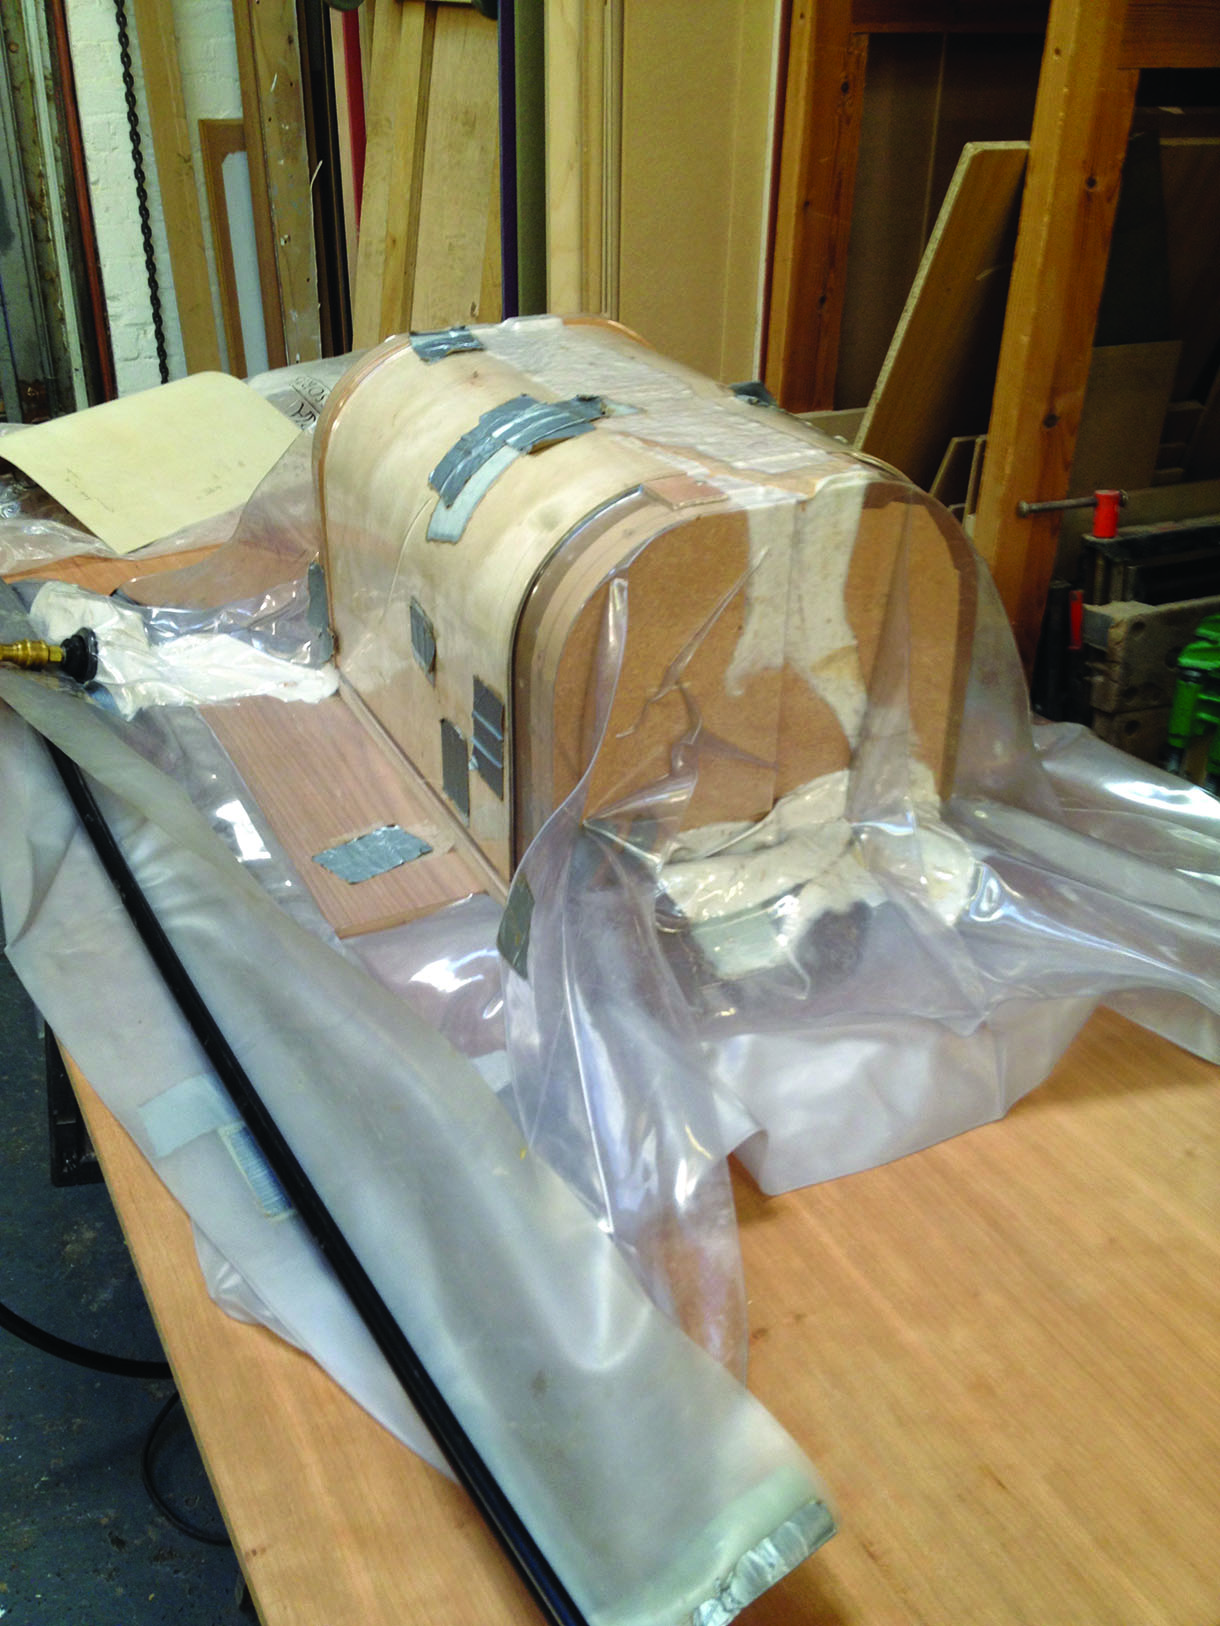
Door former in vacuum bag
Doors and hinges
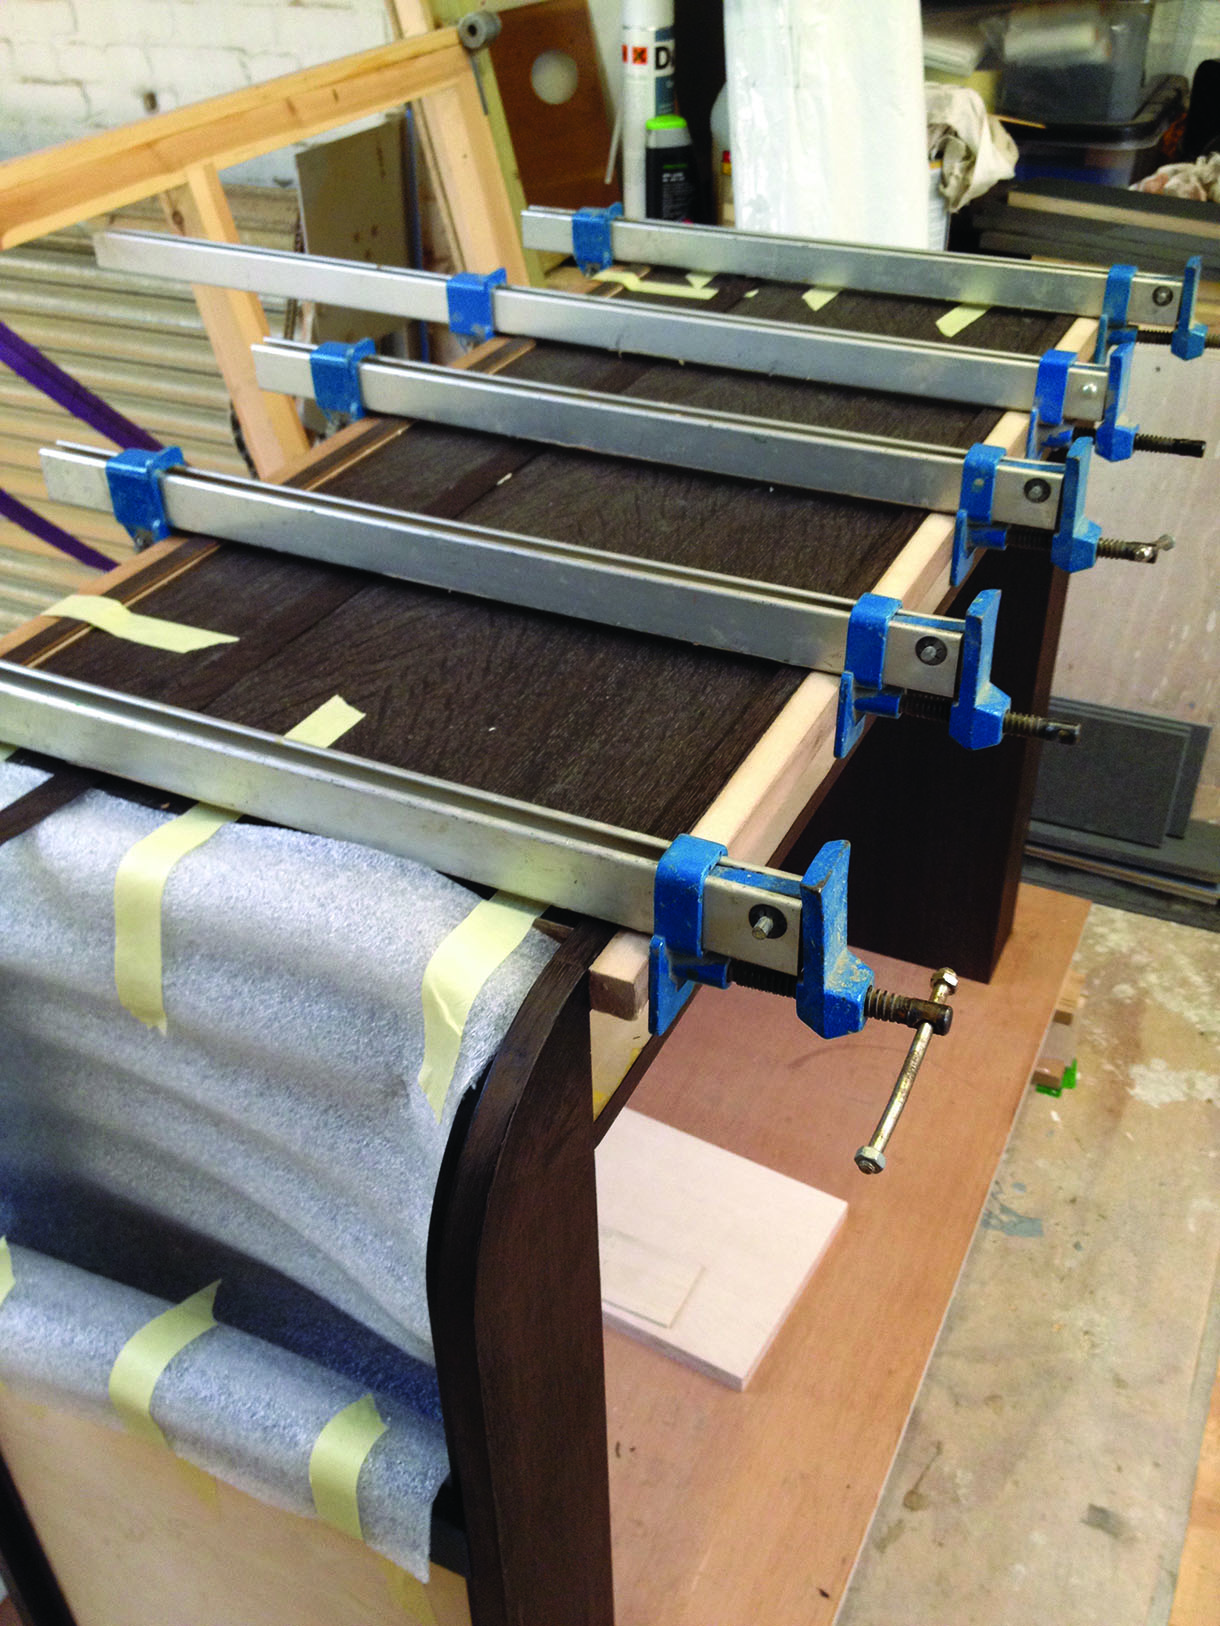
Each door is made from two components. This was to allow for the concealing of leather edges. Three layers of skin-ply are glued up using epoxy resin. Rebates were created to allow the leather to be wrapped around the edges. The skin-ply was screwed onto the former to prevent the layers sliding around. The former and doors were placed in a vacuum bag and ratchet straps were used to provide additional clamping pressure.
It was imperative that there was no visual clue to the presence of the hidden storage doors. Tiny Soss 101 concealed hinges were used to allow the doors to be opened 180°. A simple router jig was made using some scrap 6mm MDF. Using a template offset calculator (www.diywardrobes.co.uk/documents/templateoffset) I worked out what the offset should be and created two identical openings evenly spaced apart. This was then used to cut the hinge holes in both the doors and rails. Using a guide bush and a 9.5mm twin flute router bit, I achieved a very snug fit.

Interior curved door component being clad with leather
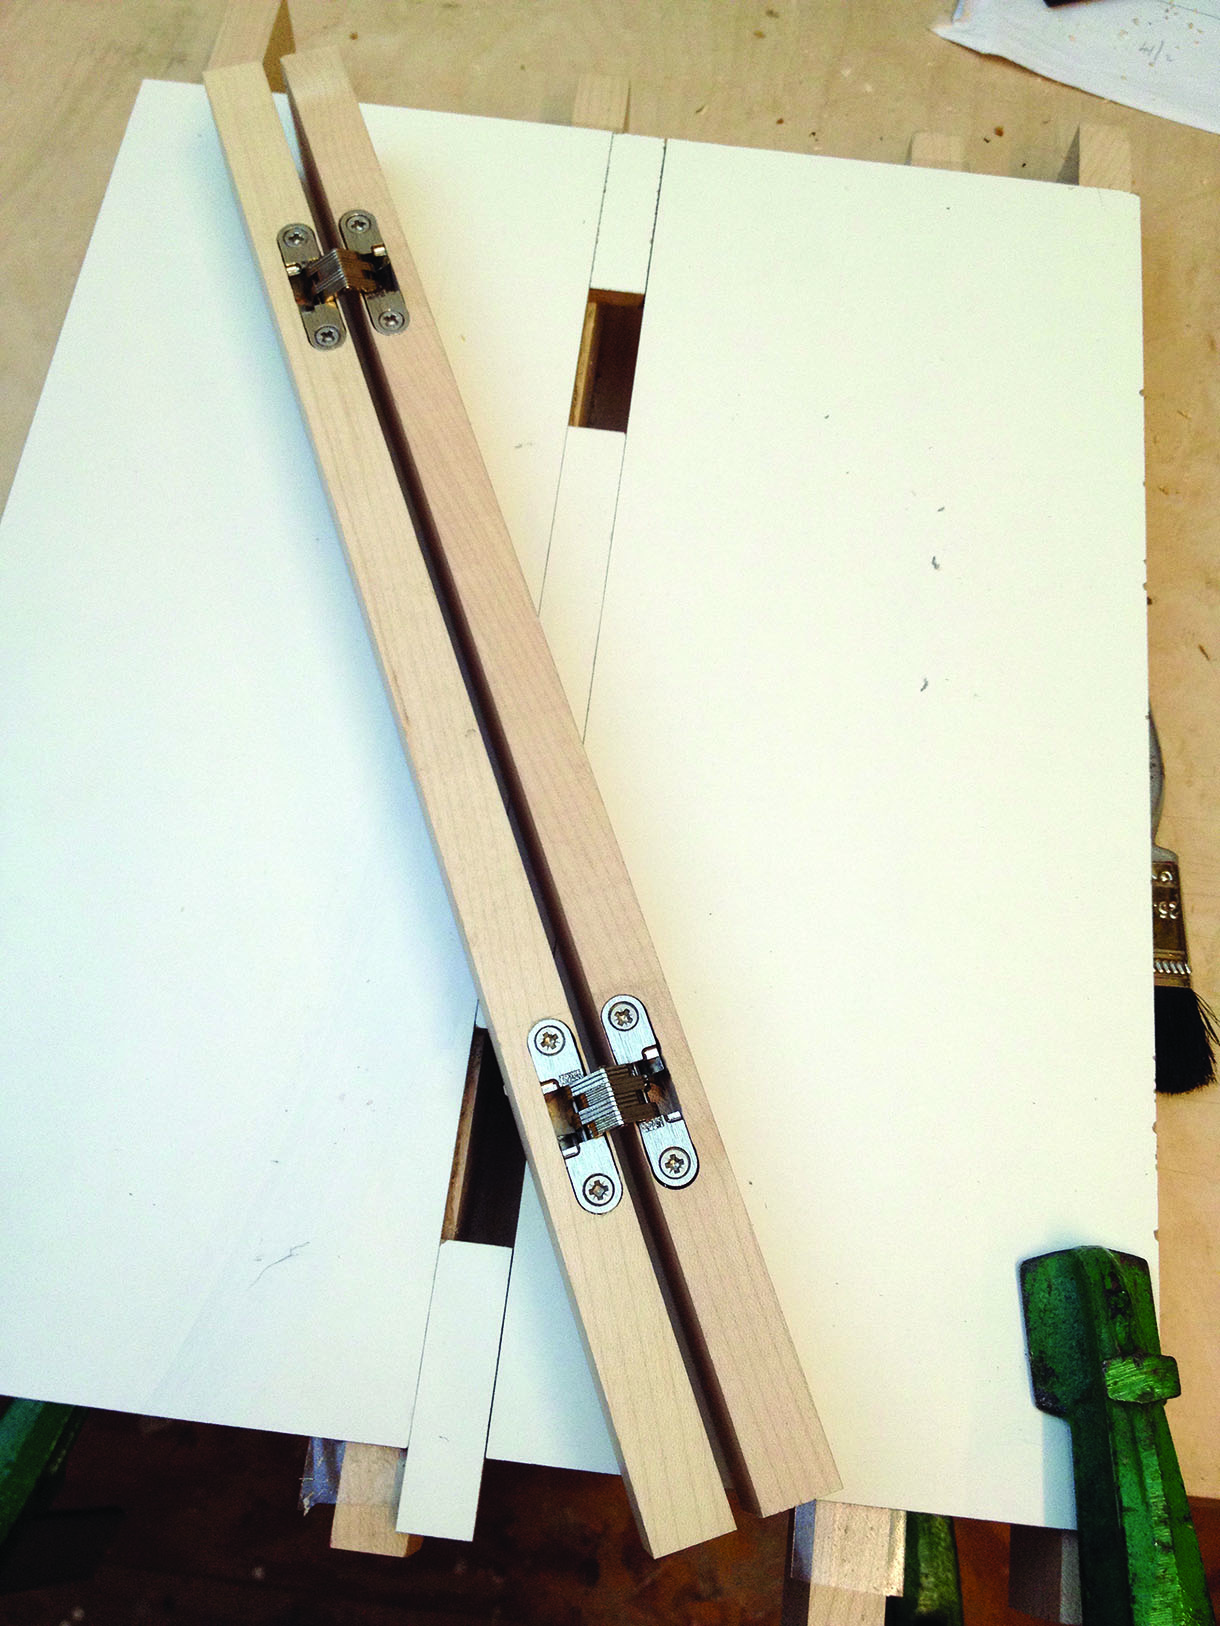
Test cutting hinges with the router jig
When things go wrong
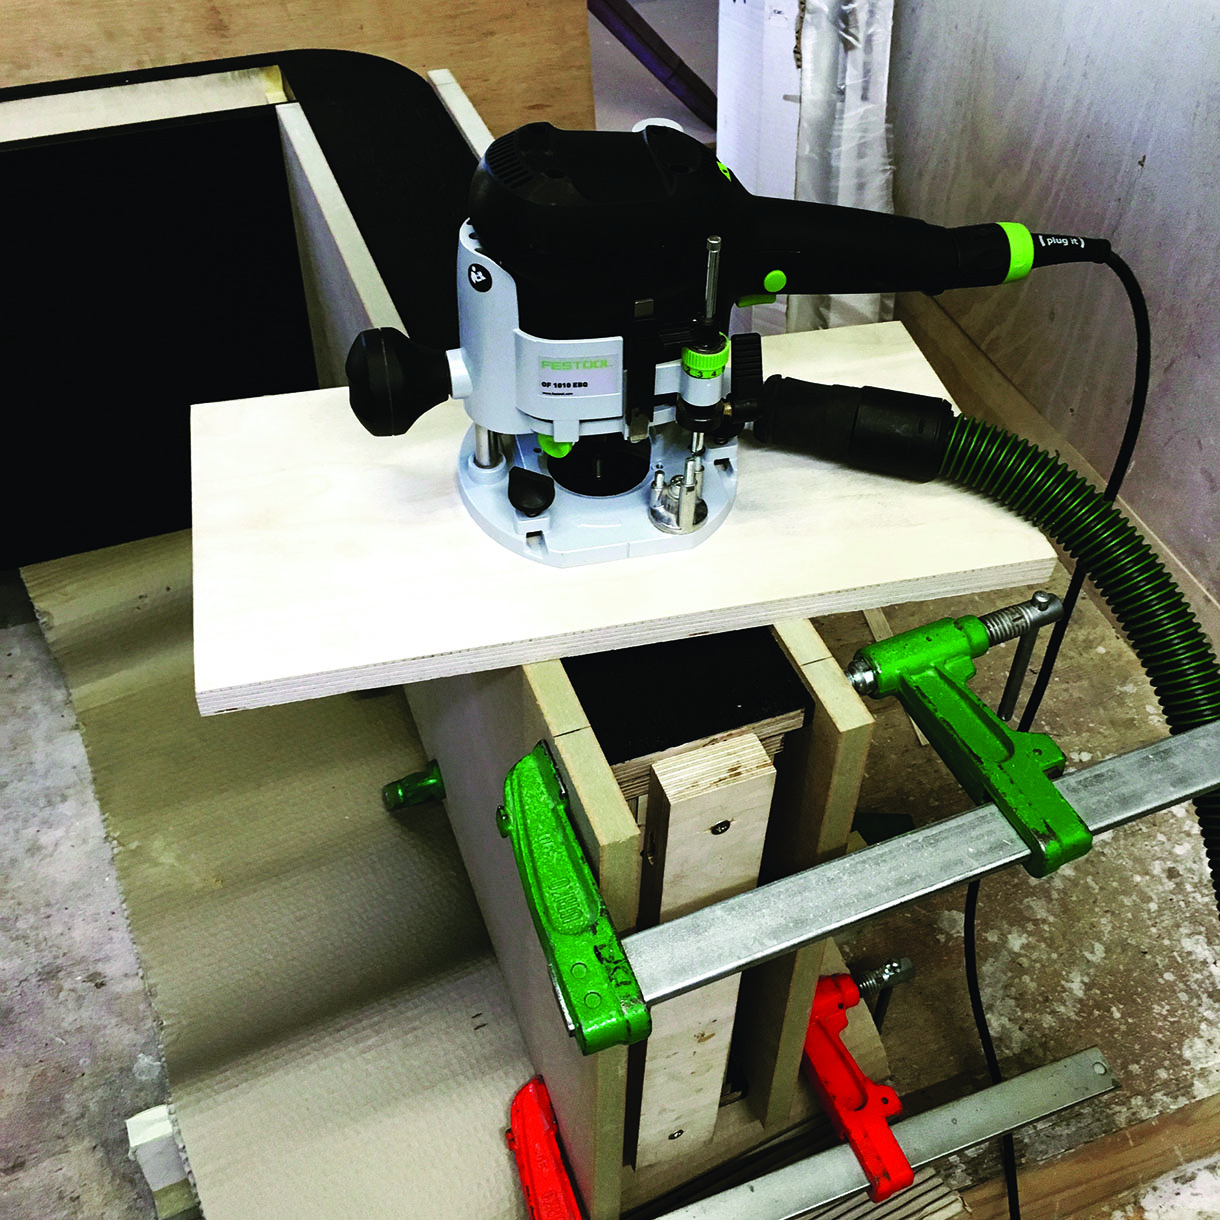
As a relatively new maker things don’t always go to plan. I had much veneering to do on this project and at times the fumed oak was a challenge. It is very open grained and can be fragile at the edges. Towards the end of the build I noticed I had a problem with glue seeping through on one of the front legs. I had been using Titebond Original and had applied it with a serrated scraper. I now know that too much glue had been applied, and under clamping pressure it had pushed through the surface leaving awful yellow streaks. It was impossible to remove with a scalpel so I decided drastic action was required. The only solution was to remove the veneer and apply a new leaf. Using 18mm ply, I made a large and stable base for the router. Two pieces of 18mm MDF were cut to size and clamped either side of the leg. The edges of the MDF were then levelled using a Vernier gauge to ensure a consistent distance was maintained over the entire leg. This was imperative as these edges functioned as a sledge for the router base to run along.
In order to get the depth of cut accurate, I made an identical but smaller setup of the leg on my bench. I used this to accurately set up the router to create the exact depth of cut, this would ensure the newly veneered surface would be flush with the fan arranged veneers at the top of the leg. Like all these things, setting up, making jigs and testing took far longer than the 10 minutes it took to remove the glue damaged veneer!
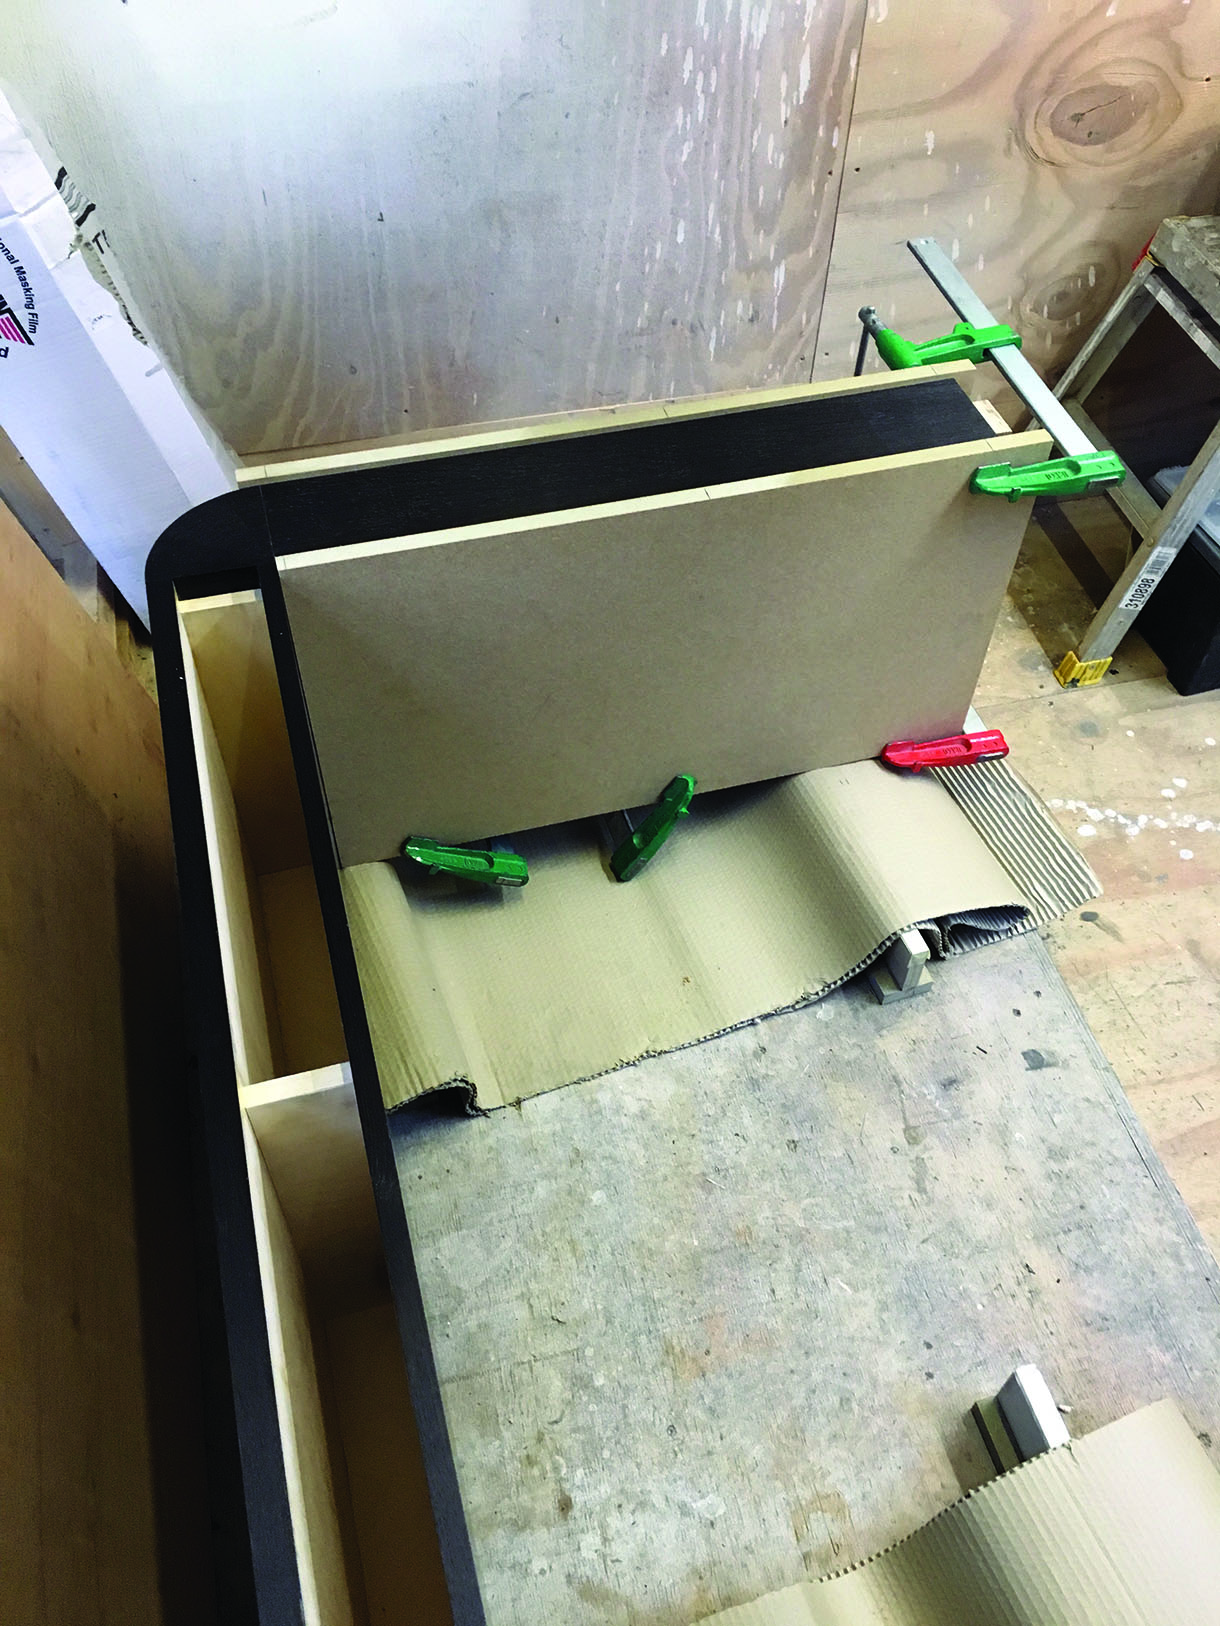
MDF panels clamped to leg
Preparing to remove the veneered surface on the front leg
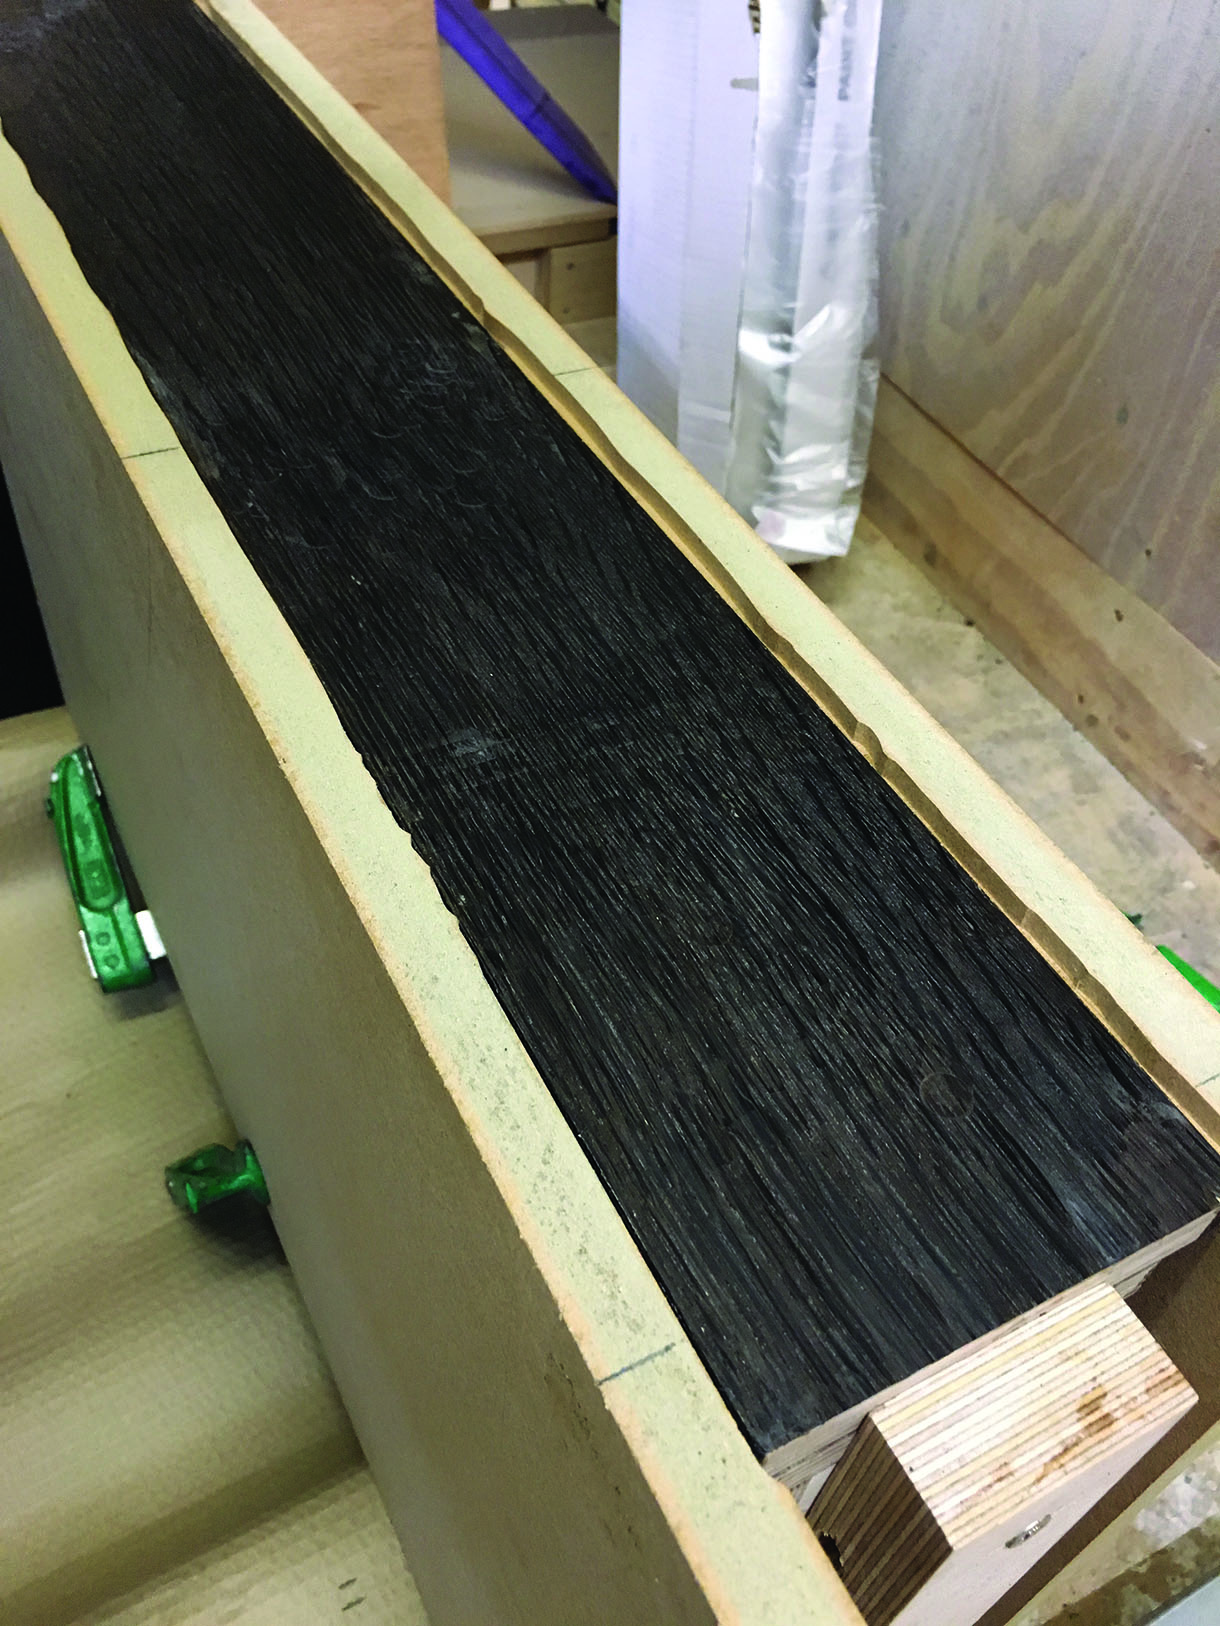
Removing the damaged veneer from the front leg
The integrated charging points
A key facet to the design and build of the desk was the need to store and charge several devices. Consideration was given not only to the cable route through the desk and how each device would charge, but also the air flow around each device as it charged.
The desk would be positioned on top of a floor socket allowing the main power cable to run up inside the leg and end at the base of the storage area. The laptop charger is stowed beneath the storage compartment to keep the heat source away from the electrical items. In addition USB charging cables are routed into the base of the storage area.
The other leg and storage pod incorporates a simple box so that the camera battery would be on charge when needed. The light grey leather within the storage pod also made identifying cables and devices much easier as the bright surfaces reflected the ambient light to illuminate the base of the compartment.
Wood used
Oak (Quercus robur) veneer
Bog oak
Sycamore (Acer pseudoplatanus)
Birch (Betula spp.) ply
Veneering
I wanted a smooth grain transition from the top of the legs to the drawer fronts and decided on a fan effect. I split the 90° into five pieces. Using a very sharp No.10 scalpel blade I carefully cut five 18° triangular pieces of fumed oak veneer and taped them together. They were then glued into position on the legs.
For the top of the desk, I needed to create a central recess for the leather pad to sit into. I routed 15mm wide rebates across both edges of the top surface. Into this I glued strips of 6mm MDF. This provided a space of 4mm for the leather pad to sit in. Next I veneered the front edge. And finally, once the legs were attached, two strips of book-matched veneers were applied across the top of the desk and down each leg
edge, this was done for aesthetics as well as covering the leg/carcass joint.
Veneering the top front edge of the carcass
Detail shot showing the fan arranged veneers


