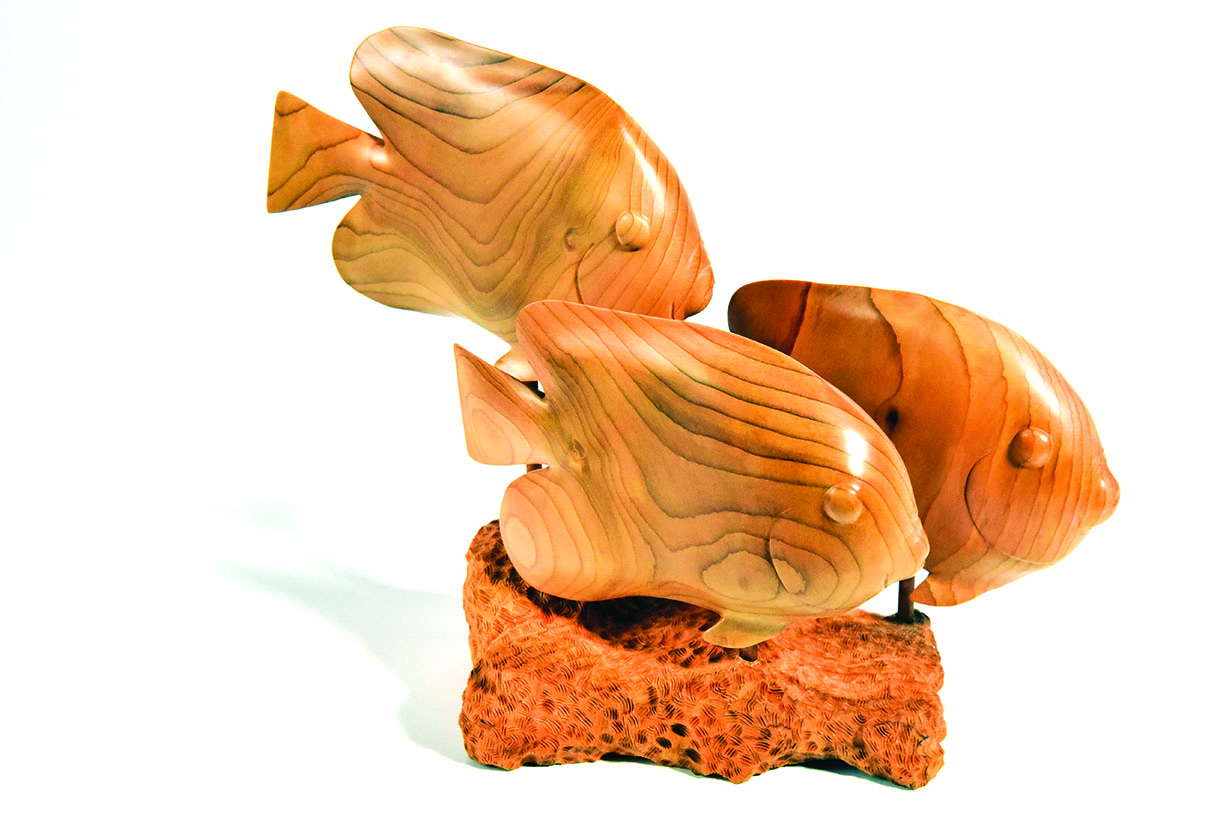
Angelfish Shoal on Coral:
Jean Grace continues to carve small creatures, but this time she goes for an aquatic theme
Jean Grace continues to carve small creatures, but this time she goes for an aquatic theme
As a member of the Sussex Woodcraft Society, I like to support their annual show. Last year the set competition was anything made from a supplied piece of cedar of Lebanon (Cedrus libani) at about 175 x 175 x 90mm. I pondered what to do with my block of wood for a while, not really sure how to make the best of its wonderful grain. Finally, I realised I didn’t need to make just one item from it and with a little research I found some fabulous angelfish with amazing markings on their bodies, some of which resembled the grain in my block of wood. Initially I didn’t know how many fish I would be able to get out of my wood, however, with a bit of help, and by turning one of them round, I found that I could get three fish and still have a piece left over. Now the idea was really coming into focus. I could have three fish shoaling on a piece of coral. Unfortunately, I wasn’t able to finish it in time for the competition, but, I persevered by learning new techniques and using different tools, and I finally finished another carving.
Things you will need
Tools:
• Bandsaw
• A selection of carving gouges
• Flexi shaft machine
• 19mm cylindrical structured carbide burr
• 6mm spherical structured carbide burr
• Mini angle grinder with carbide cutter
• Power sander
• Abrasives (micromesh P120-P800)
• Diamond nail file
• Cut resistant glove
• Optivisor
Material requirements:
• Block of cedar of lebanon 175 x 175 x 90mm
• 6mm dowels
• Sanding sealer
• Microcrystalline wax
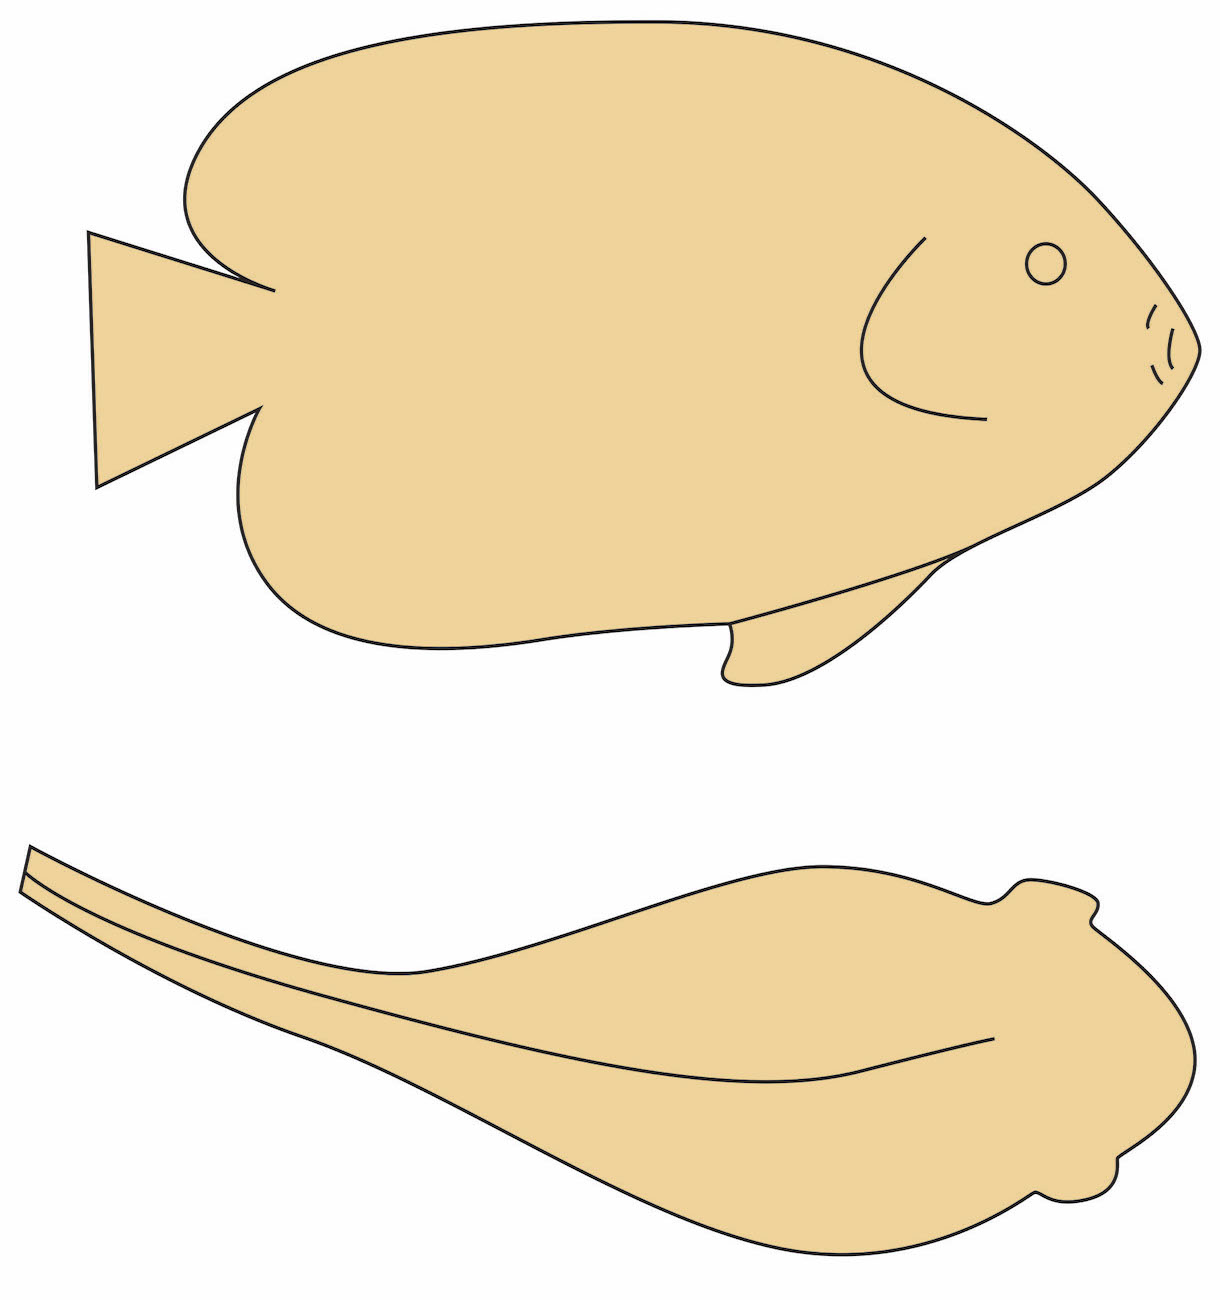
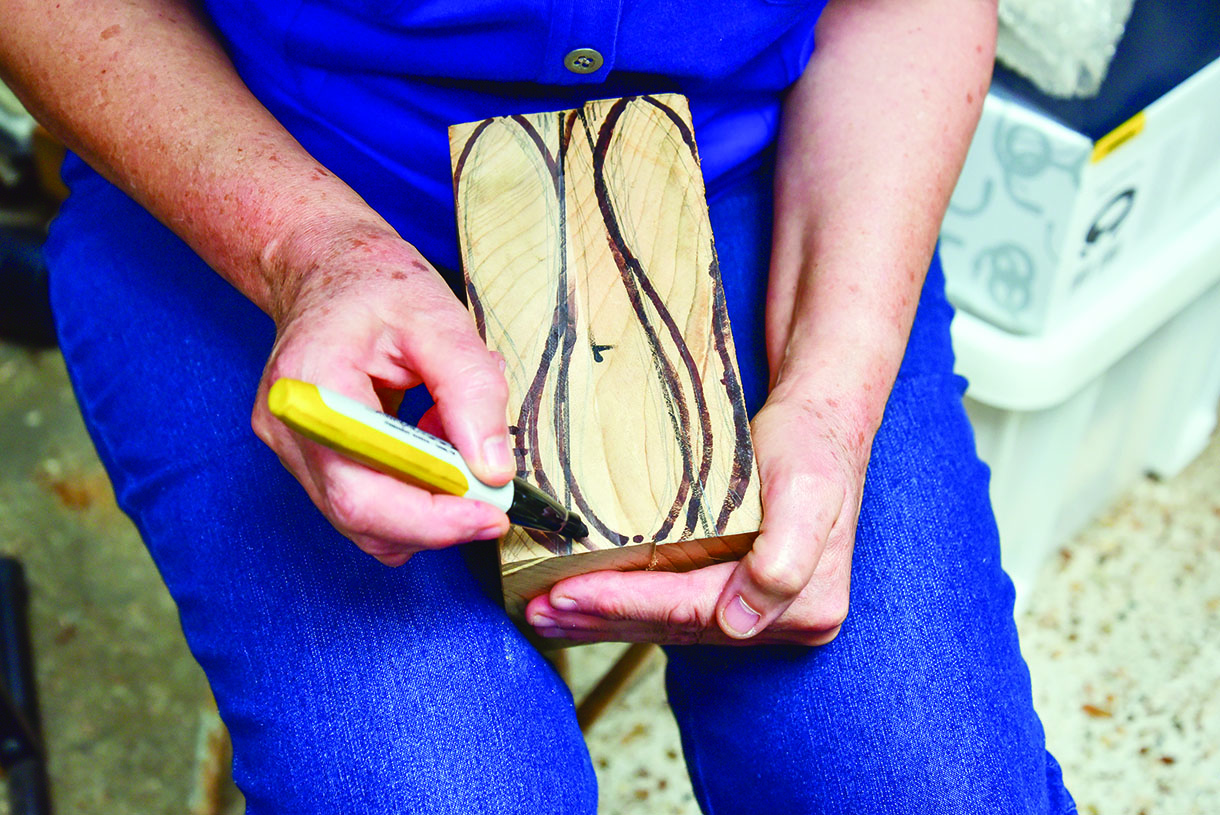
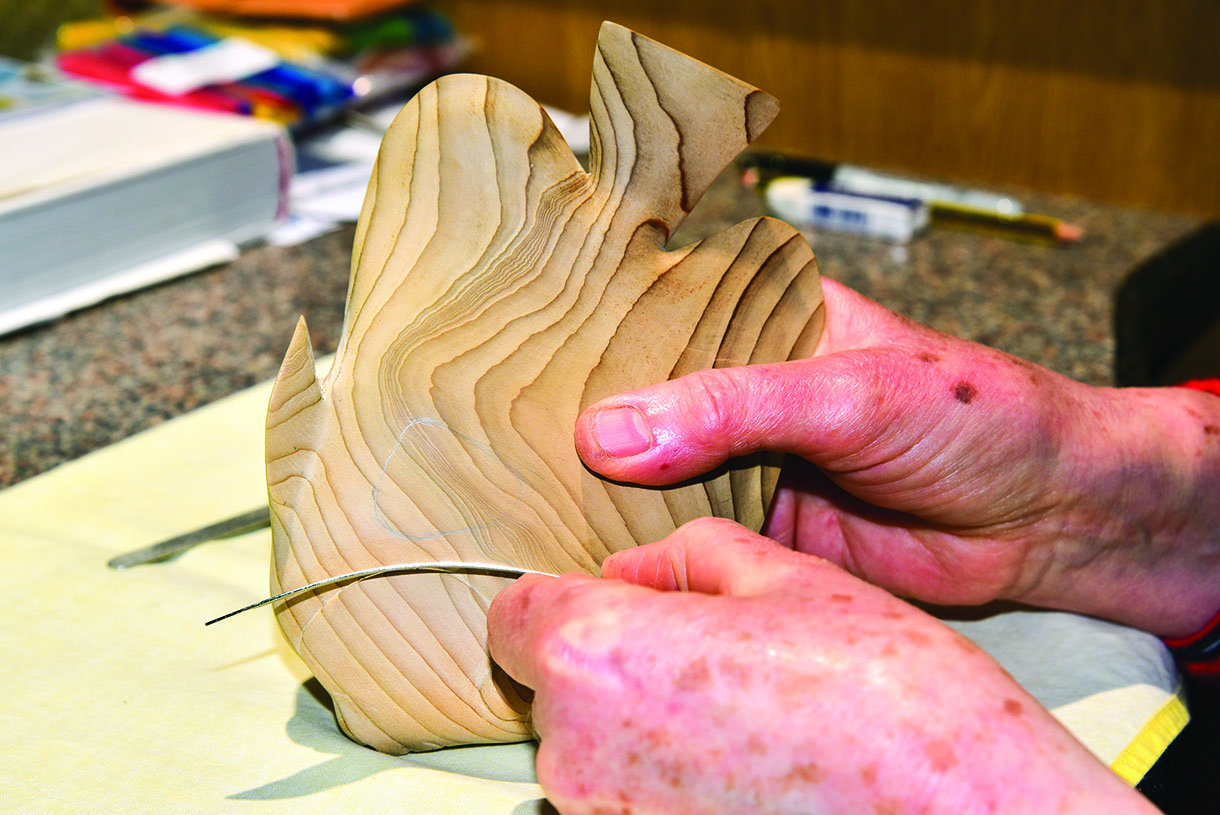
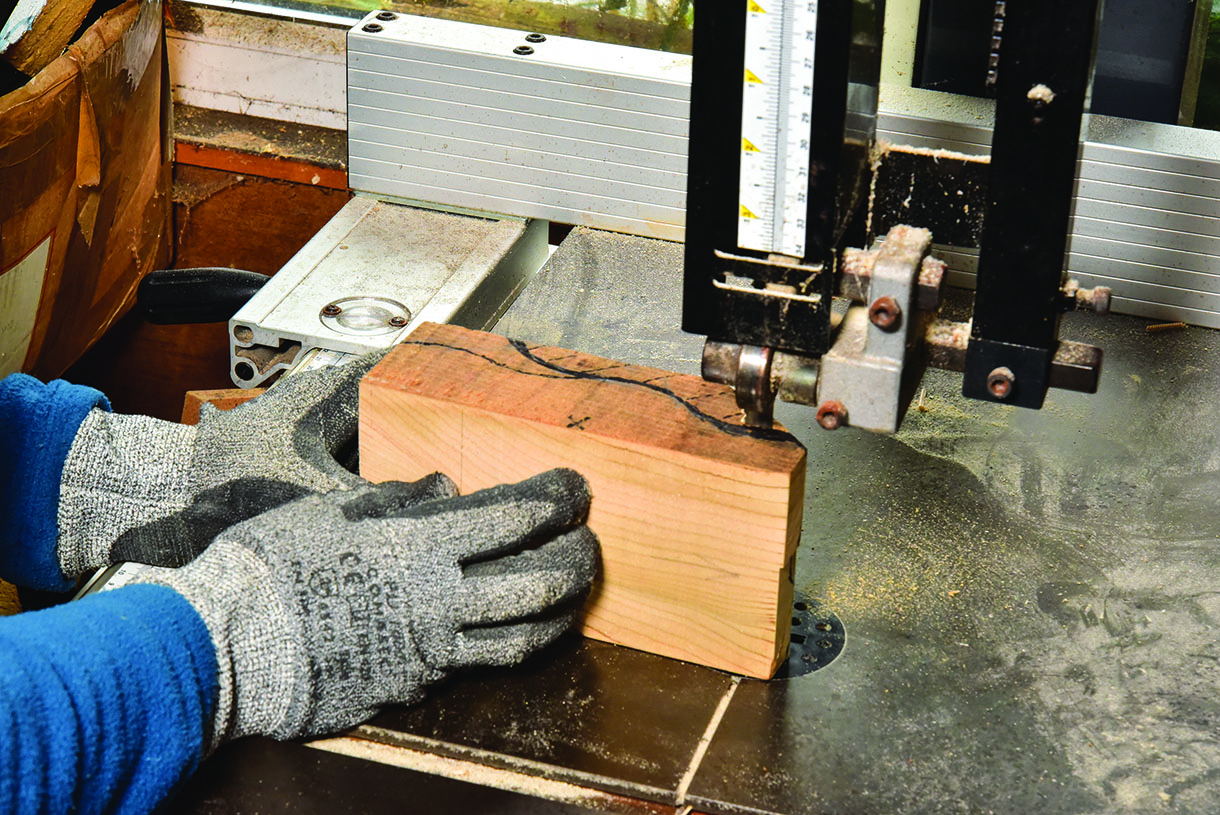
1. Draw a plan view of the fish on your block, allowing plenty of room for the tails so they can be turned vertically, as well as horizontally when you carve them. Start sketching with a pencil, moving on to a marker for your final line. Make sure you leave sufficient space between elements to allow for the saw cut
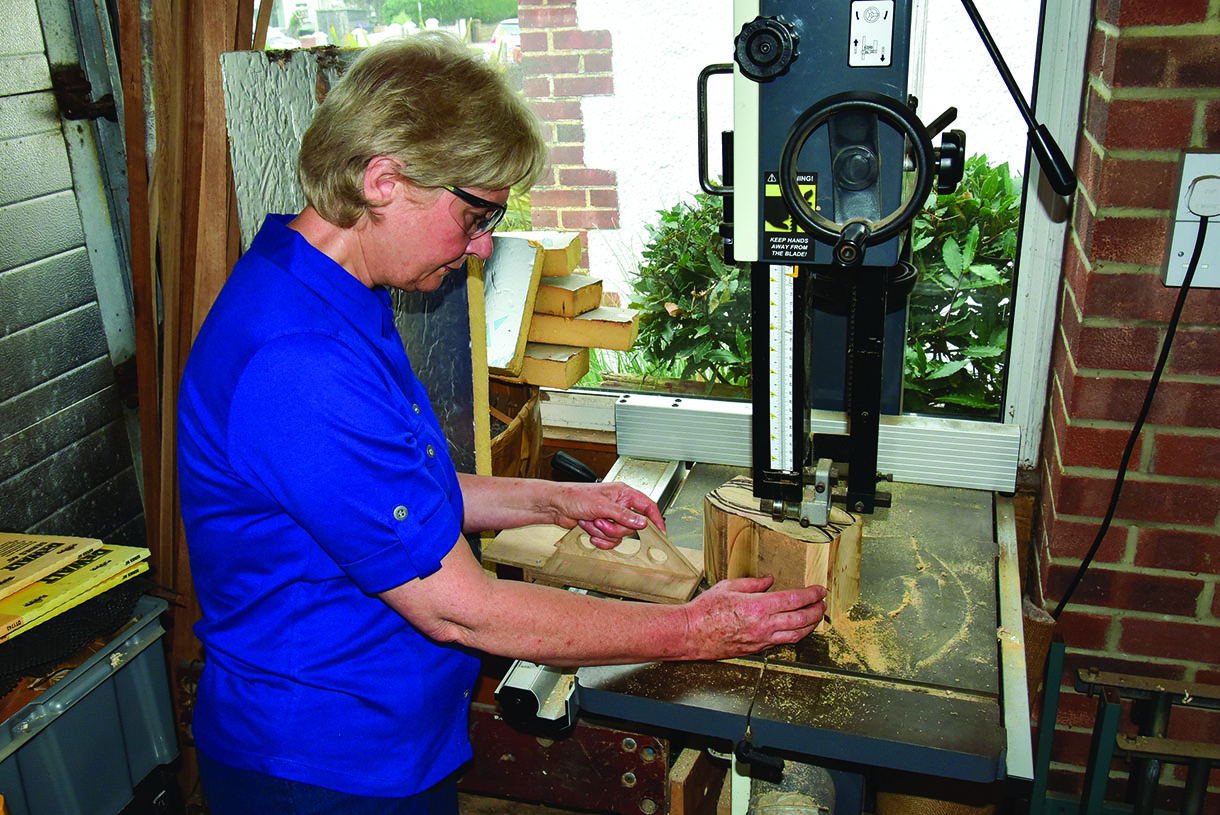
2. Cut carefully between the lines drawn allowing as much room as possible for each tail. Ideally the bottom of the block should be flat so it sits firmly on the bandsaw table. Control the direction of the cut with one hand and feed the wood towards the blade with a push stick. Then draw a side view for each fish and bandsaw out supporting the uneven block carefully
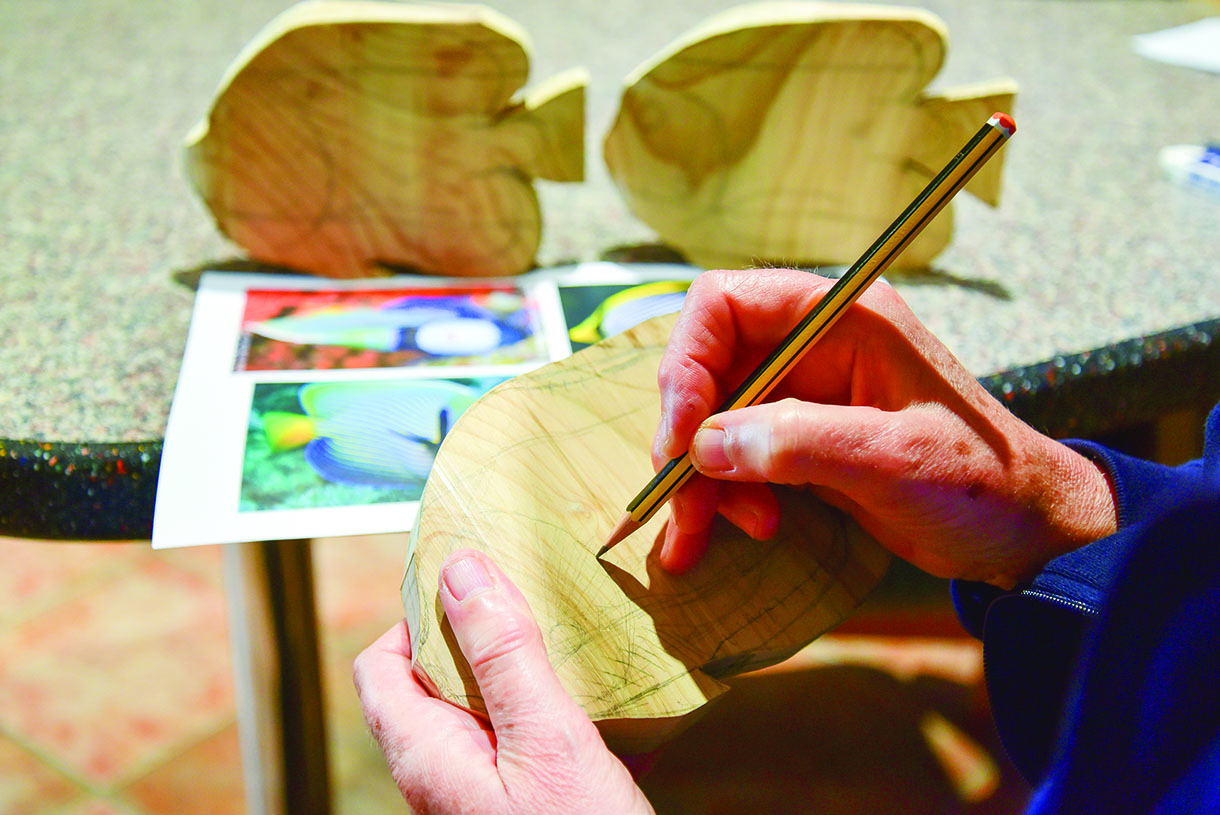
3. Do plenty of research, and print out views from all sides, then you can start drawing the key features on your fish so you know where you can remove wood from, and more importantly where to leave extra for fins jutting out, etc. In addition draw on a centreline, but make sure you give the fins some ‘movement’

4. Start roughing out the body shape, rounding the body and thinning substantially towards the edges of the fins. Stop and check your line regularly. Where you have canted a fin to one side illustrating movement, shape the other side accordingly. The tape was to remind me to leave plenty of wood for the front of their pelvic fins
Top tip
When roughing out, add a marker where you need to leave extra wood for a feature you intend to carve later, so you don’t get too carried away.
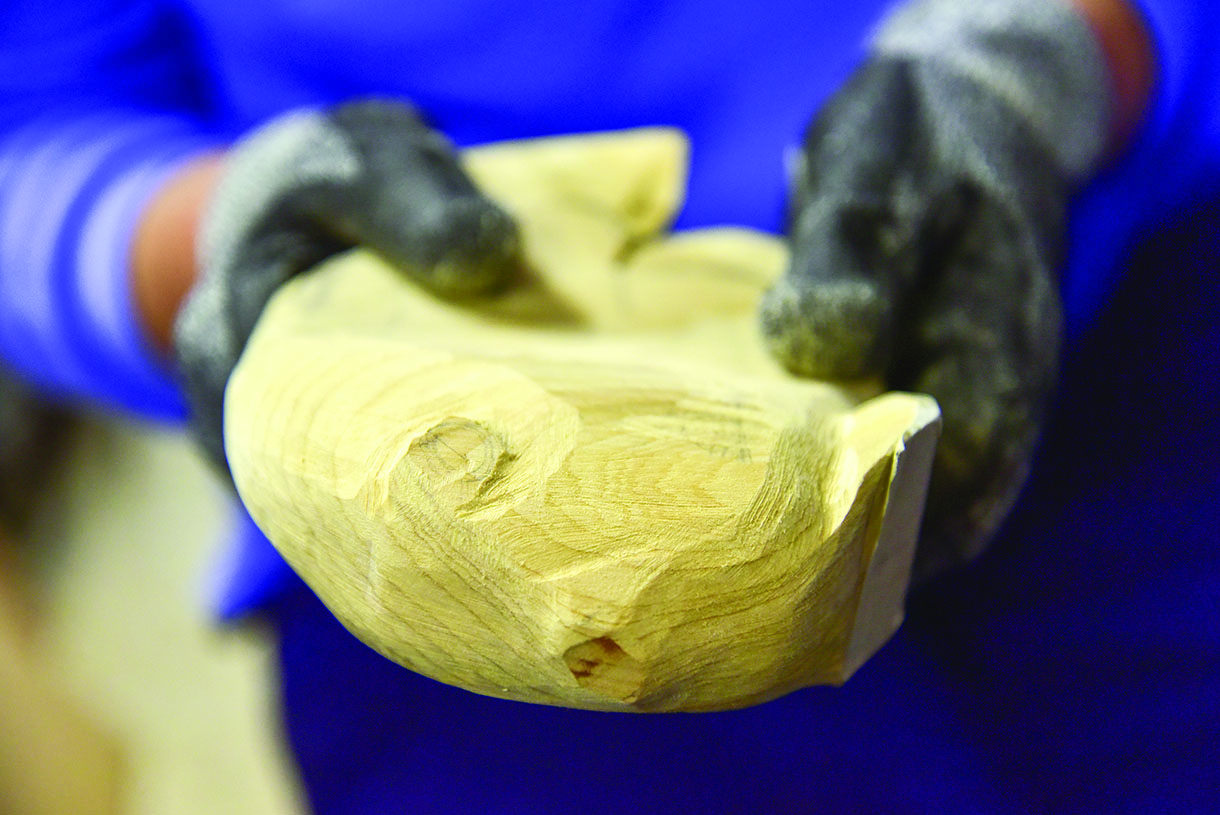
5. I used power tools to rough out the body and fin shape, however you could just as easily use a gouge or knife for most of the work
6. Examine your fish from all angles to make sure you have the movement the way you want, then remove more wood as necessary. Think about how the fish would swim through the water and turn so you can ensure your movement is realistic

7. Mark any areas that need further attention, then start carving the features. Undercut the gill plate with a hooked skew then move on to shape the eye, which on fish can be very bulbous. Work primarily on the front at this stage, leaving plenty of wood on the fins and tail at the rear
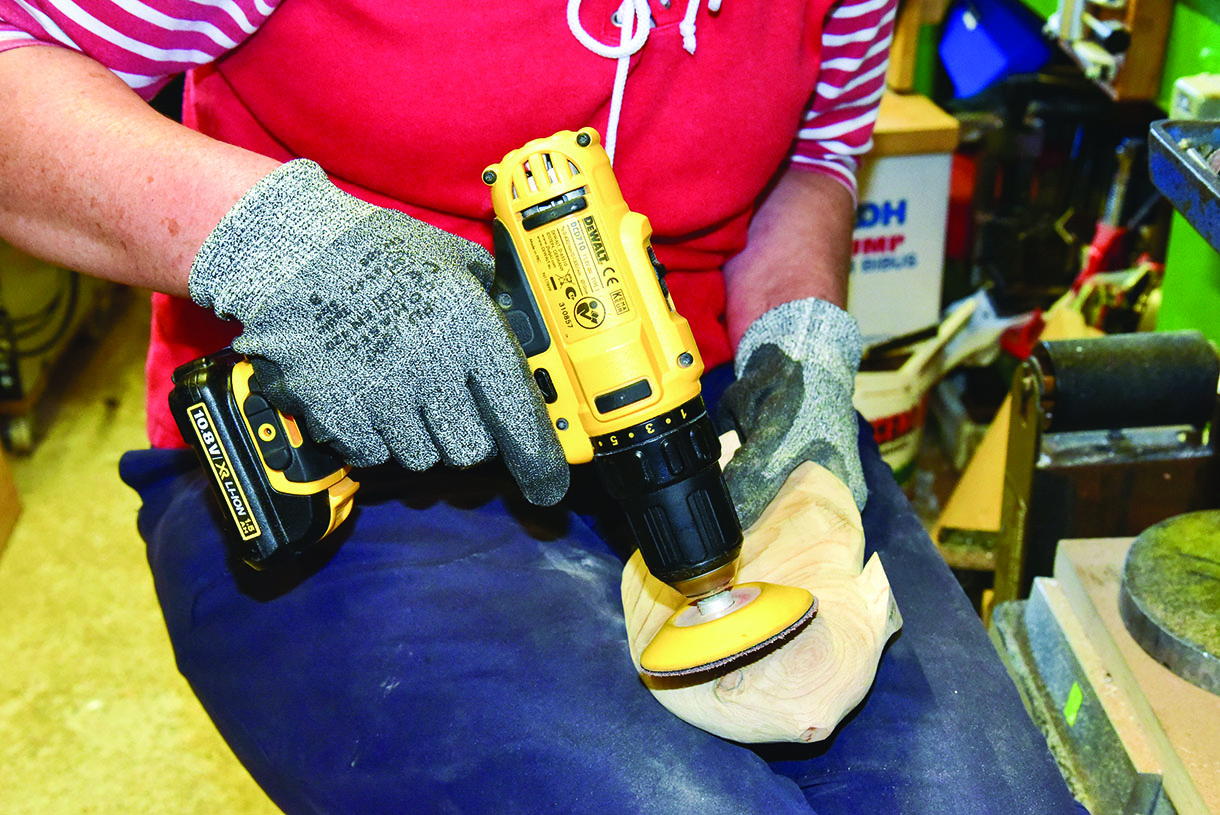
8. Once you are happy with the general shape you can start to refine it with a power sander. Here I am using a lightweight drill and an 80 grit, 75mm disc on a flexible backing pad. Watch out for features that can disappear quickly when using power tools
“Examine your fish from all angles to make sure you have the movement the way you want… ”
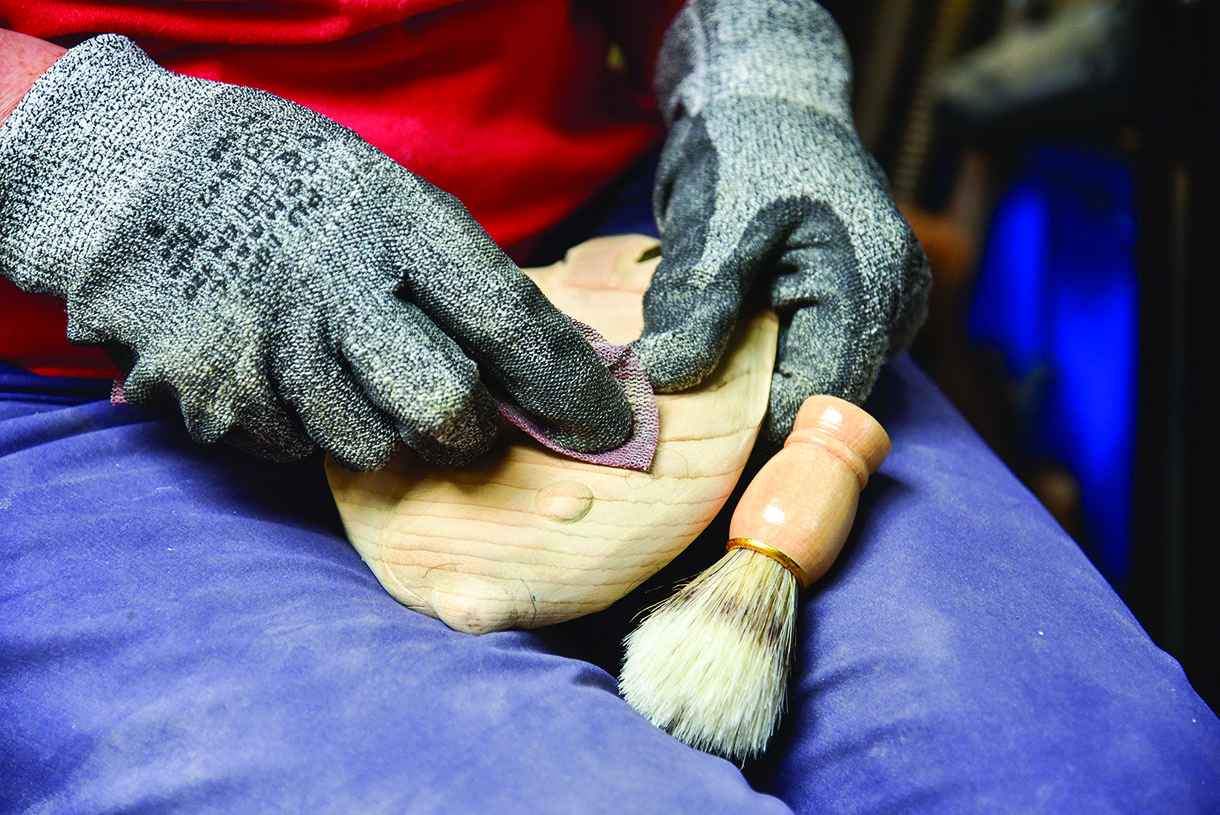
9. Having used 80 and then 120 grit discs, you should start sanding by hand with 120 grit, going with the grain to smooth out any remaining ridges or inconsistencies. The sawdust from this wood may collect on the carving so brush it off regularly so that you can clearly see your progress
Top tip
Carve the most robust features such as the eyes and gills before removing wood from fine features such as thin fragile fins.
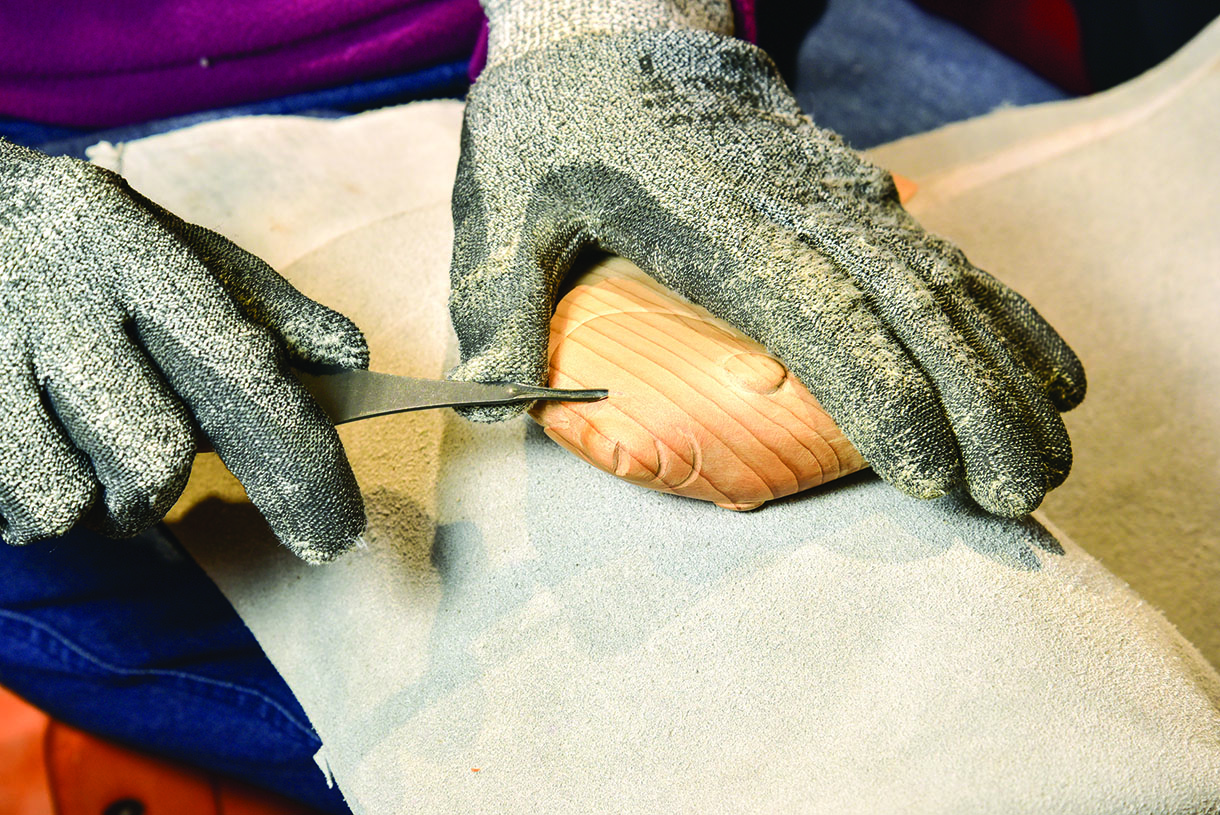
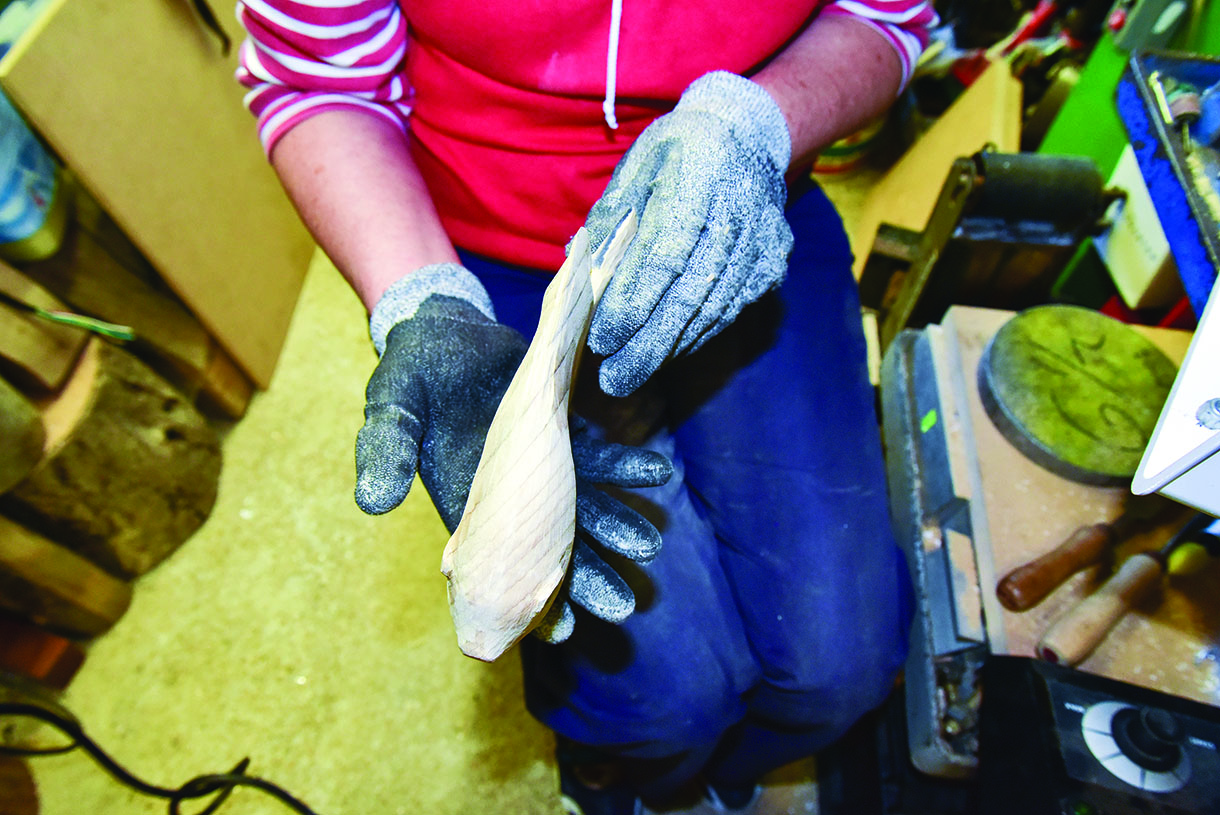
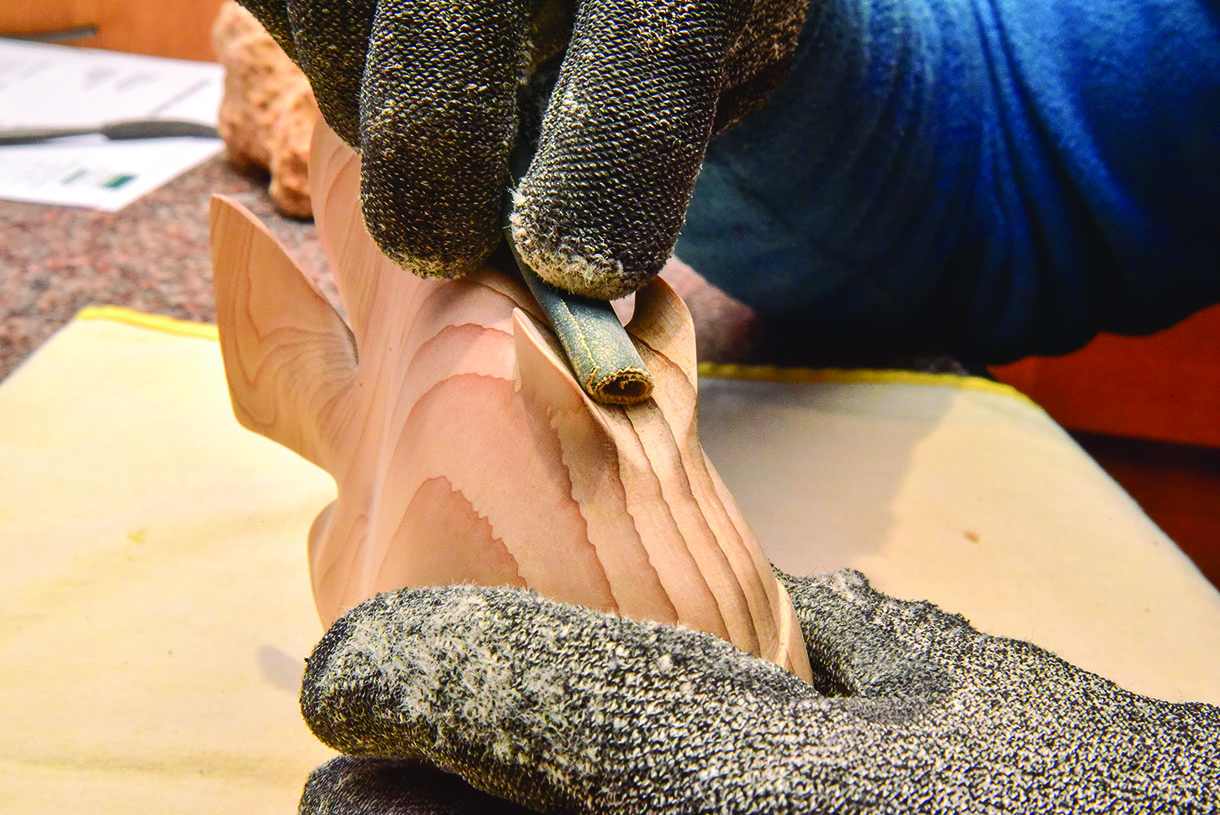
10. Carve fine features such as the grooves around the mouth with your smallest veiner or U-shaped gouge. Rotating the fish as you carve helps you produce a smooth groove

11. Use a very sharp carving knife with a flat portion on the blade to slice cleanly in to form the mouth. Here I was cutting against end grain

12. To ensure you don’t put pressure on the ever more fragile tail, use a book and cloth to raise the carving. Use a fine curved riffler file to refine the shape where the fins meet the body, and between the fins and the base of the tail
13. Continue sanding and improving the finish all over, however you need to ensure you keep certain features crisp. I would advise smoothing the edge of the gill plate with a bent diamond nail file. I had intended to carve pectoral fins, however I couldn’t get a result I was happy with on test pieces so abandoned the idea
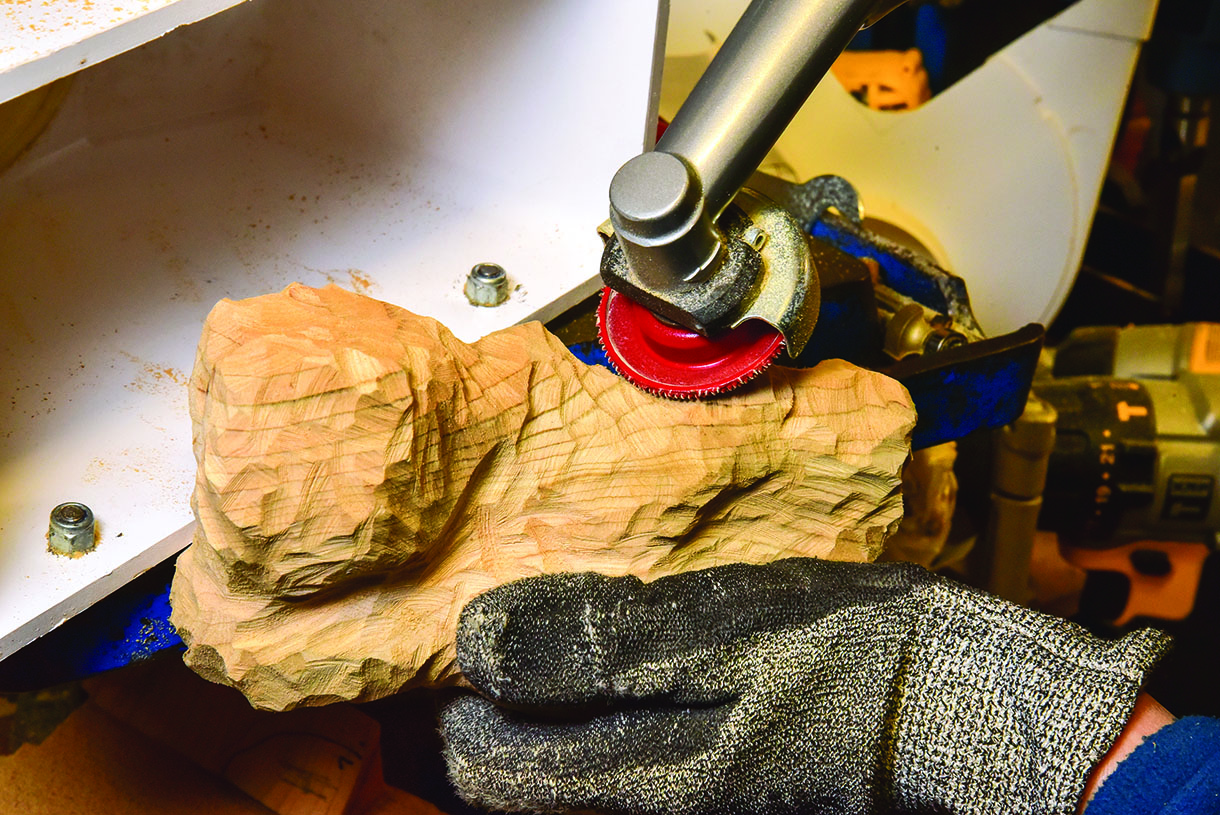
14. Having completed the rest of the fish, remove the wood between the pelvic fins that will become very fragile because of the grain orientation. Use a carbide cutter in a mini angle grinder, which gives a good degree of control
15. Make sure you leave sufficient wood to be able to remove all the small grooves left by the carbide cutter with rolls of abrasive. Work through the grits as before
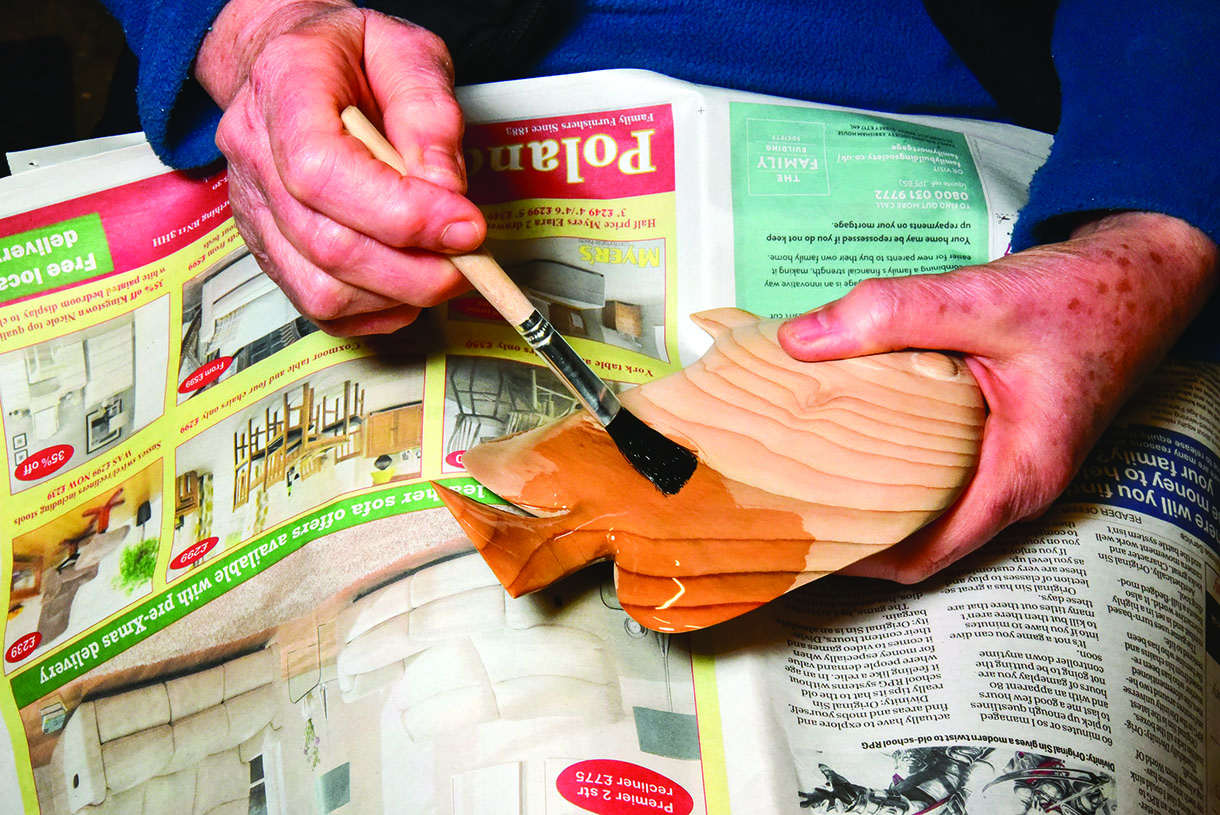
16. Seal your carving using sanding sealer as a base for your chosen finish. This may raise the grain slightly, so you will need to de-nib it with some fine abrasive. I used 600 grit for the final finish
Top tip
Brush sanding sealer on a small area, then wipe off the excess, and repeat to get an even coat all over. Otherwise it dries too quickly and unevenly.
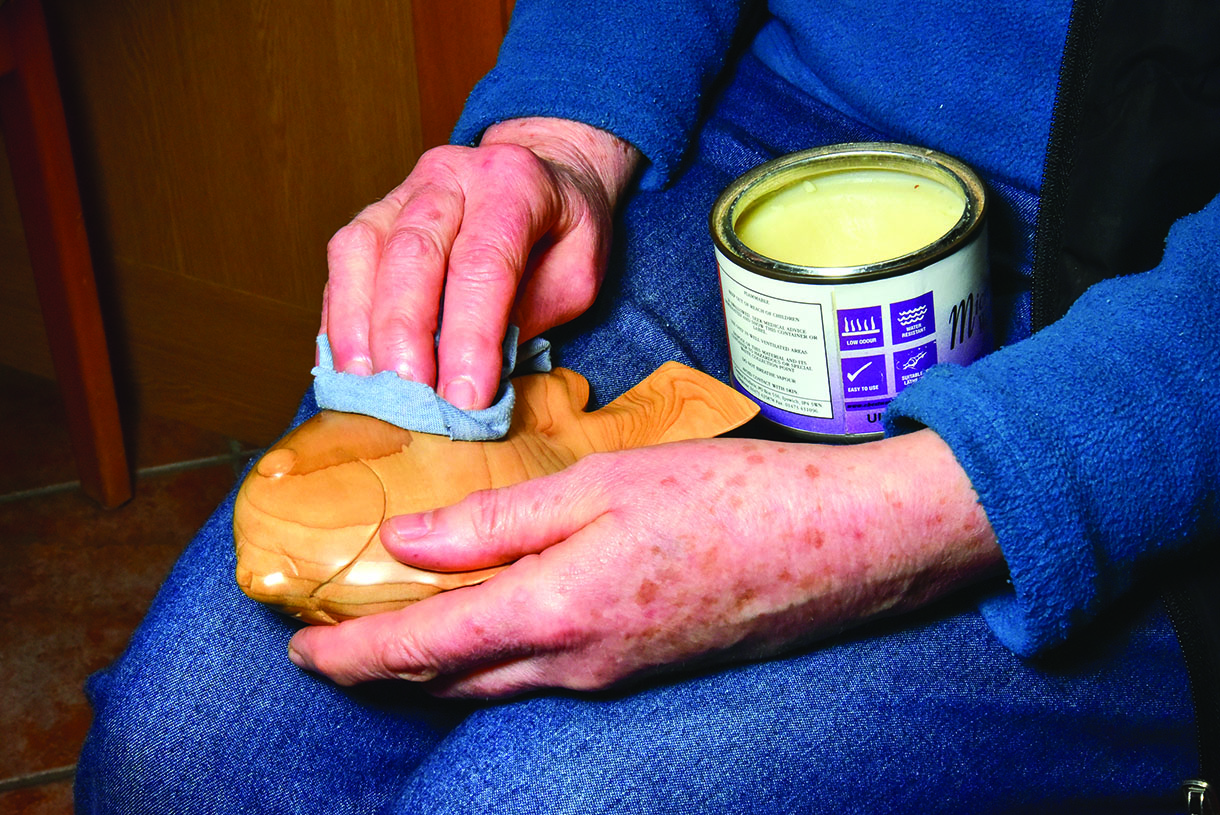
17. Apply your favourite finish. Mine is microcrystalline wax, which is applied with a soft cloth and buffed to the level of shine you choose
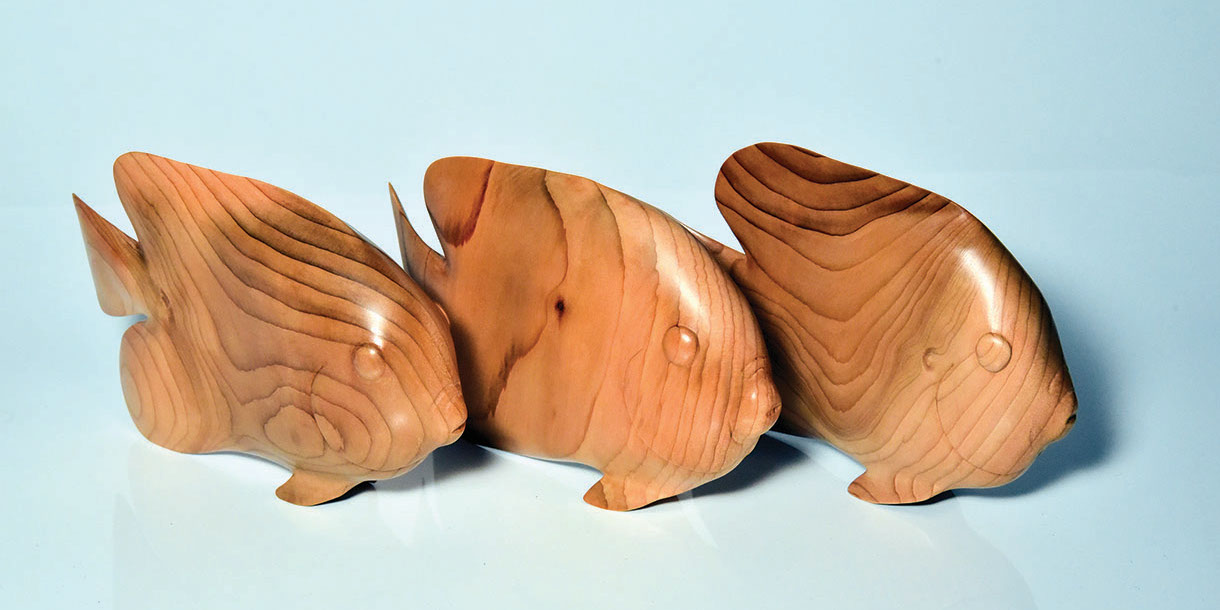
18. All three fish are now complete and looking for somewhere to swim. Now make the coral
Did you know?
• Angelfish are one of the most popular breeds of aquariam fish.
• Originating from South America, the angelfish are freshwater fish belonging the cichlid family and are carnivorous. However, angelfish are generally found in the Atlantic, Indian and Pacific oceans.
• The female angelfish prefer to lay their eggs in neat rows on a slate against a wall of the tank.
• Freshwater angelfish breed for life and females can lay up to 1,000 eggs at a time. When one fish dies, the other will not breed again.
• If the angelfish is well cared for by its owner, it can grow to be about 150mm tall once is reaches adulthood, which is approximately a year old.
19. Draw your coral on the remaining wood, remembering how uneven it is, and bandsaw
away as much of the waste as possible
20. Now, shape the block introducing further irregularities. Create high, medium and low points where you can mount the fish. Working close to my dust extraction hopper, most of the dust is captured at source
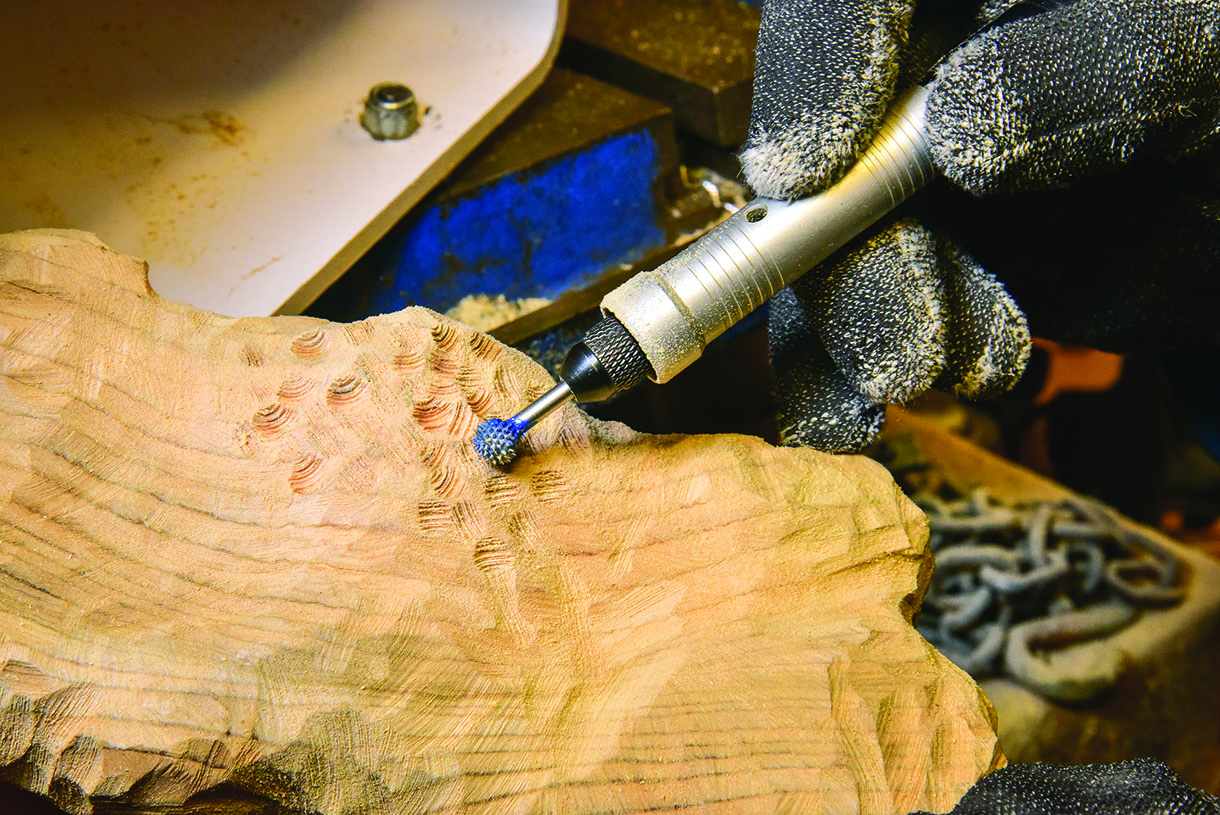
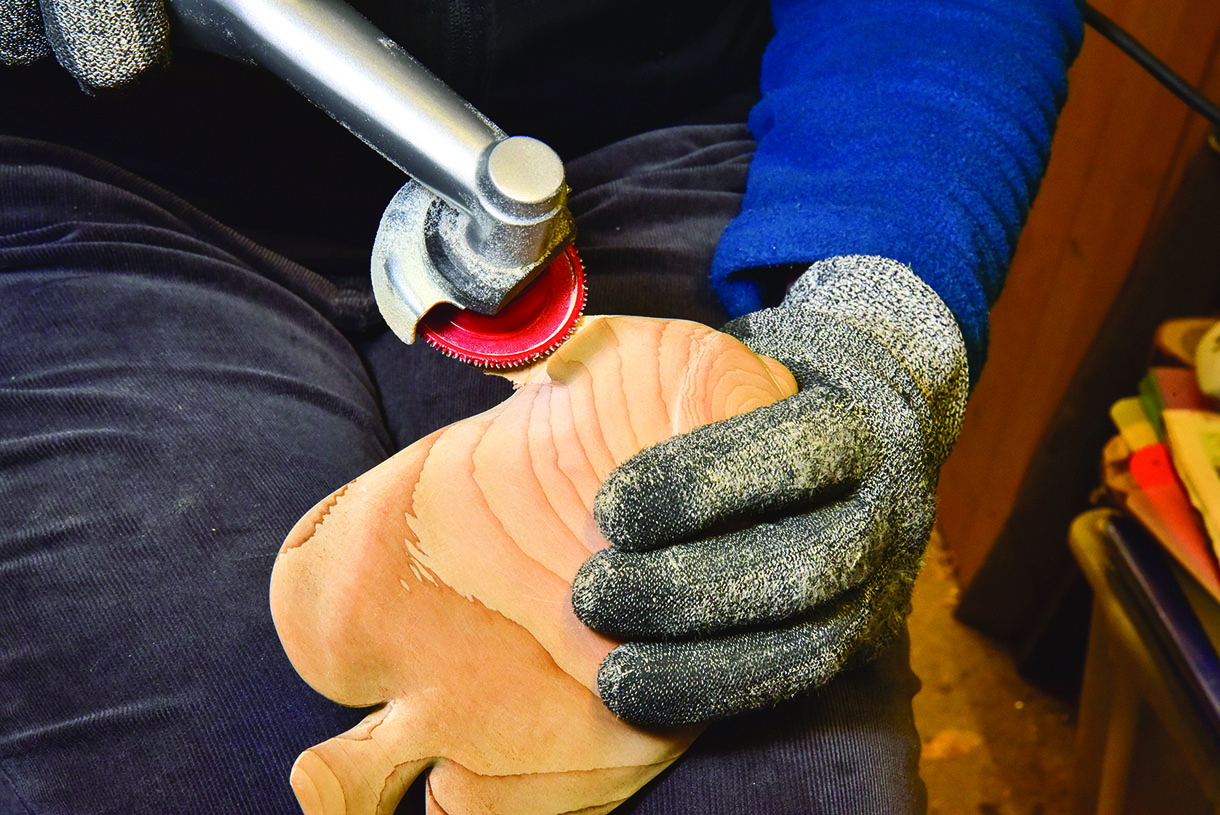
21. Check, using your fish, that you are happy with the shape before adding the final texturing with a carbide ball cutter. Constantly change the direction of the cutter to ensure the marks it leaves appear random. The cutter works best when used on its side. Seal the coral with sanding sealer using a small amount on a brush with a stippling action
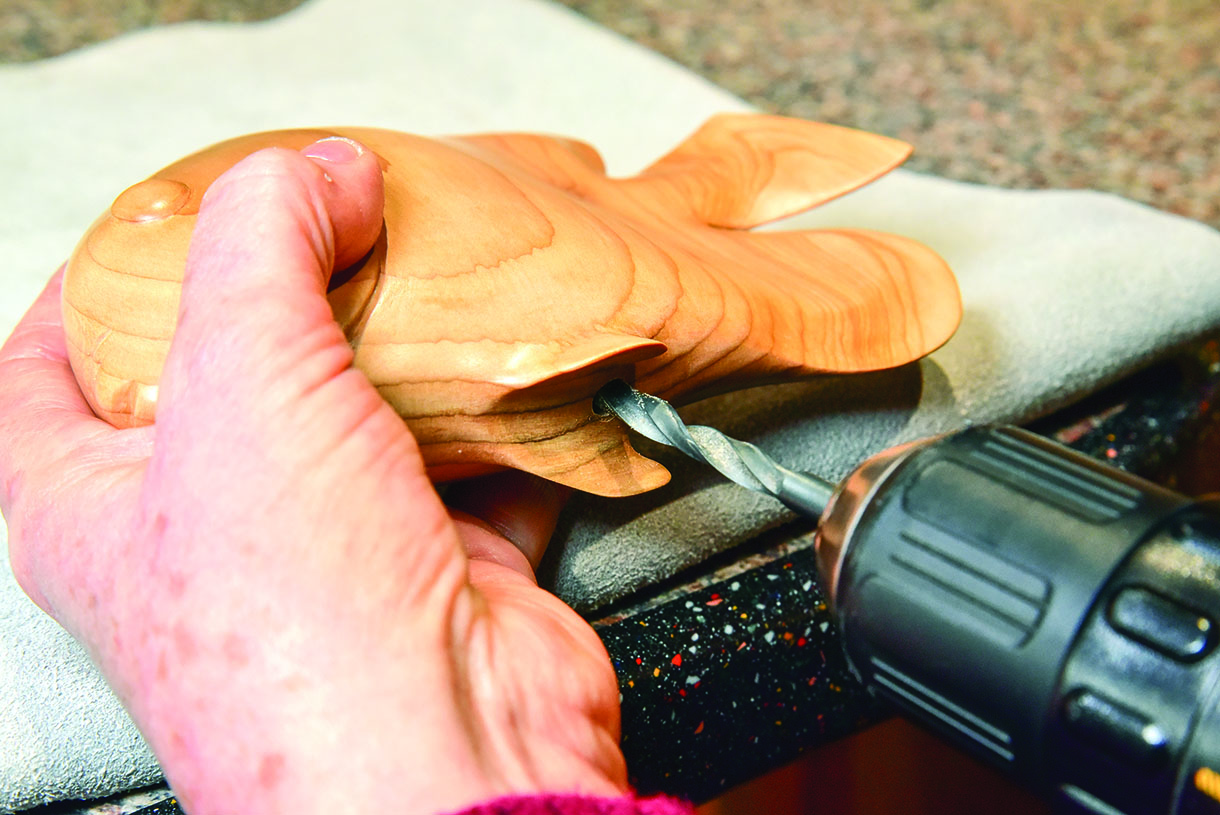
22. Drill each fish between the pelvic fins to accept a mounting dowel, keeping the drill as square as possible. Use a bradpoint bit to ensure the drill bit doesn’t slip and ruin your finish
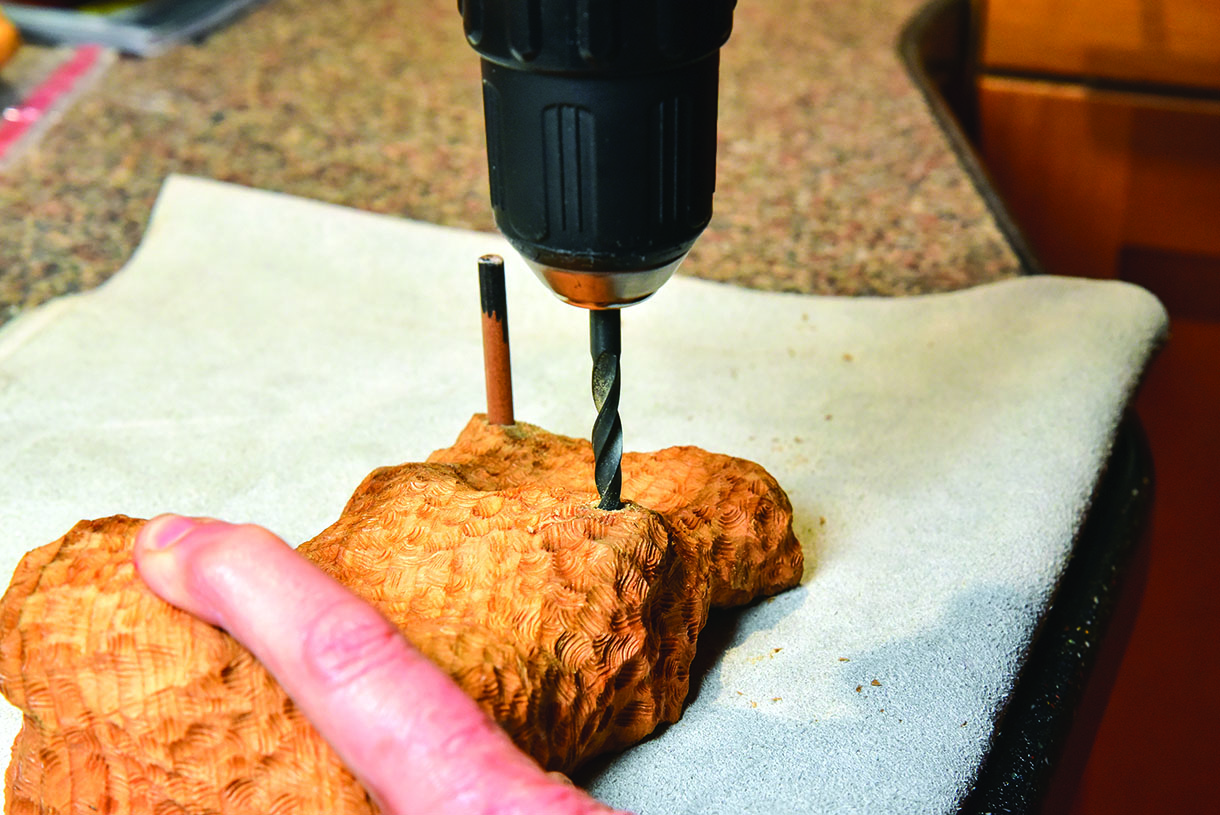
23. Determine where your fish will be mounted and drill the coral. Enlist some help to hold the fish up so you can choose their best placement. Test fit a scrap dowel to ensure a snug fit
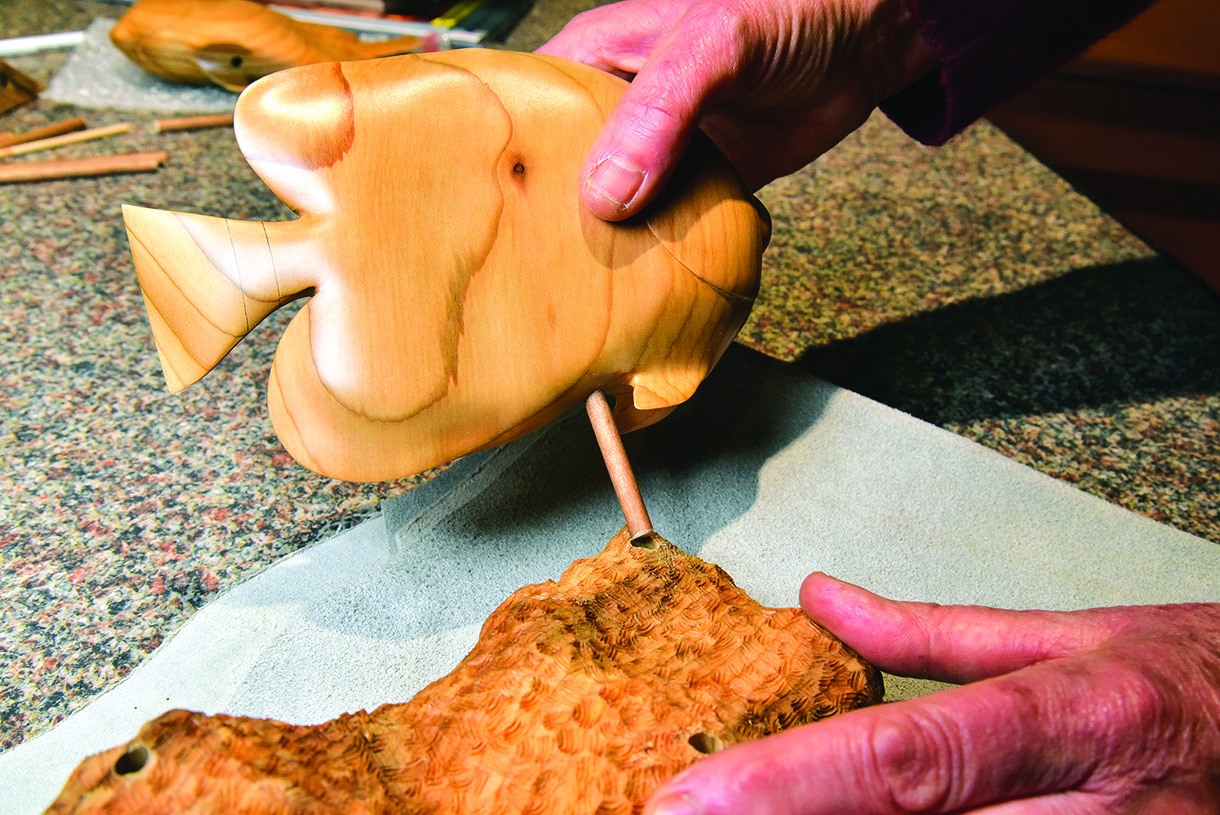
24. Decide how much each fish needs to be raised above the coral, and cut a suitable length of 6mm dowel. I had to dye the dowel with some brown stain to blend in with the other wood. Then install them in their final position and turn so they shoal together. Real fish don’t swim in straight lines, so further movement can be added by placing one at an angle


