Four-Position Orbital Sander Holder:
James Duxbury has a gripping idea for easy component sanding
James Duxbury has a gripping idea for easy component sanding
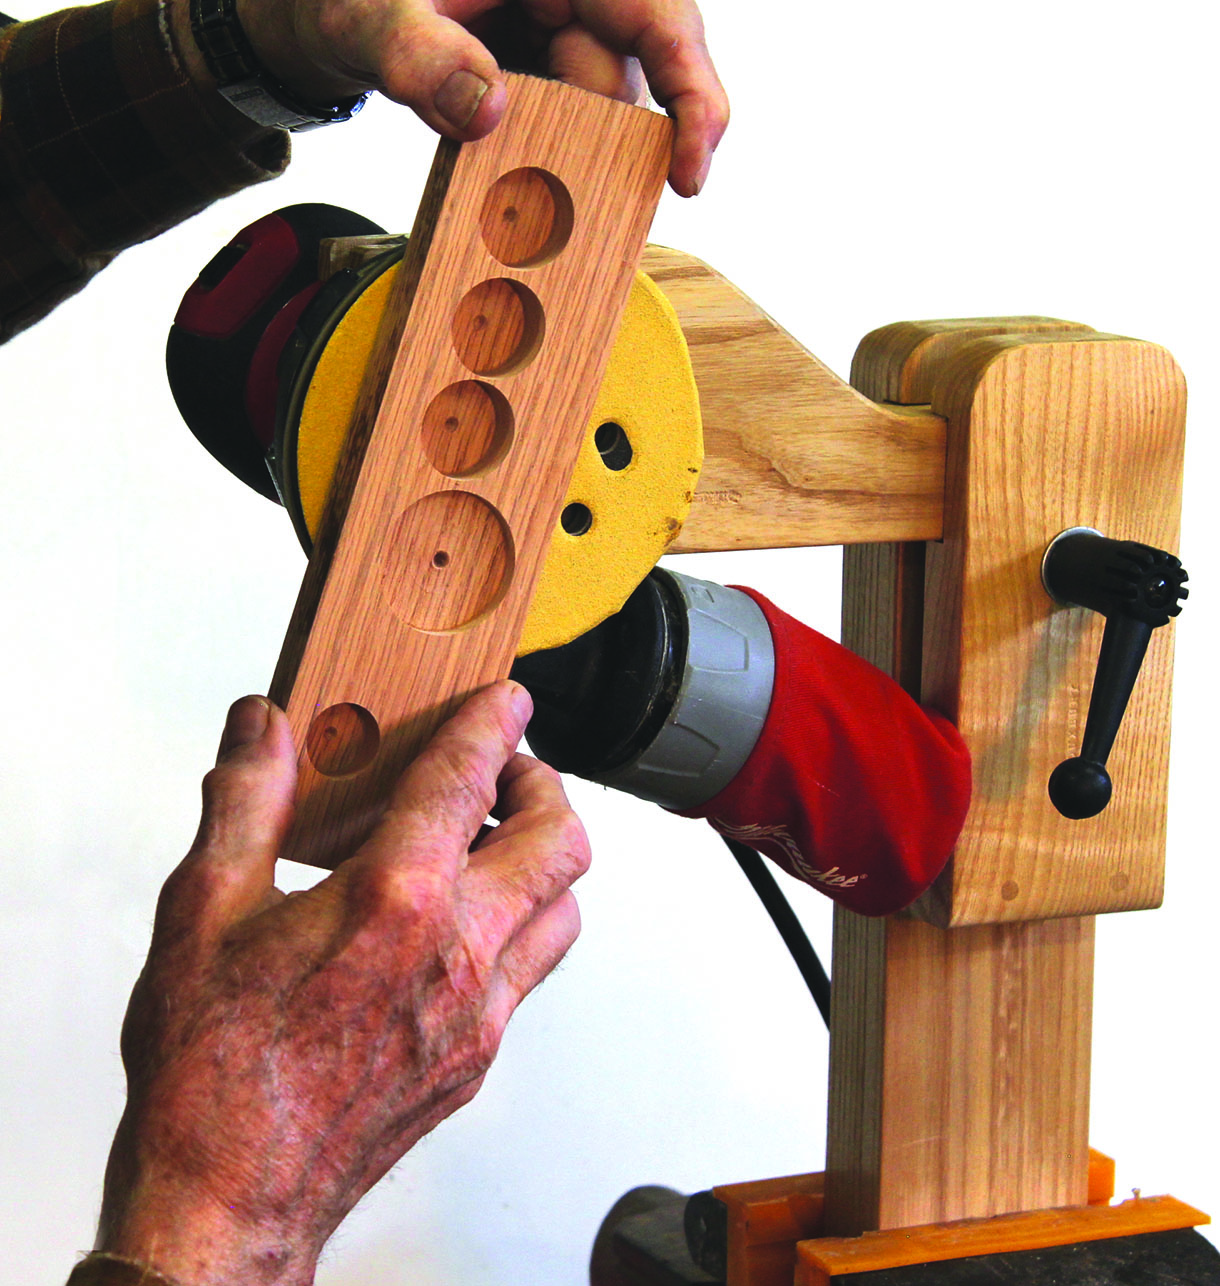
The sanding of small wooden objects can be very difficult and time consuming. Not fun at all. This is especially true if the pieces are of an irregular shape which is not able to be clamped and if there are multiple sides of many pieces to be done. Holding the piece in one hand and the sander in the other works for a short period of time, but for continual use the sander gets heavy to hold, it vibrates your hand until it is almost numb, you cannot see exactly where you are sanding so precision is lost, and bumping the sander into your fingertips enough times can lead to thin skin or even an open wound. So, I designed a holder that will support a random orbital sander.
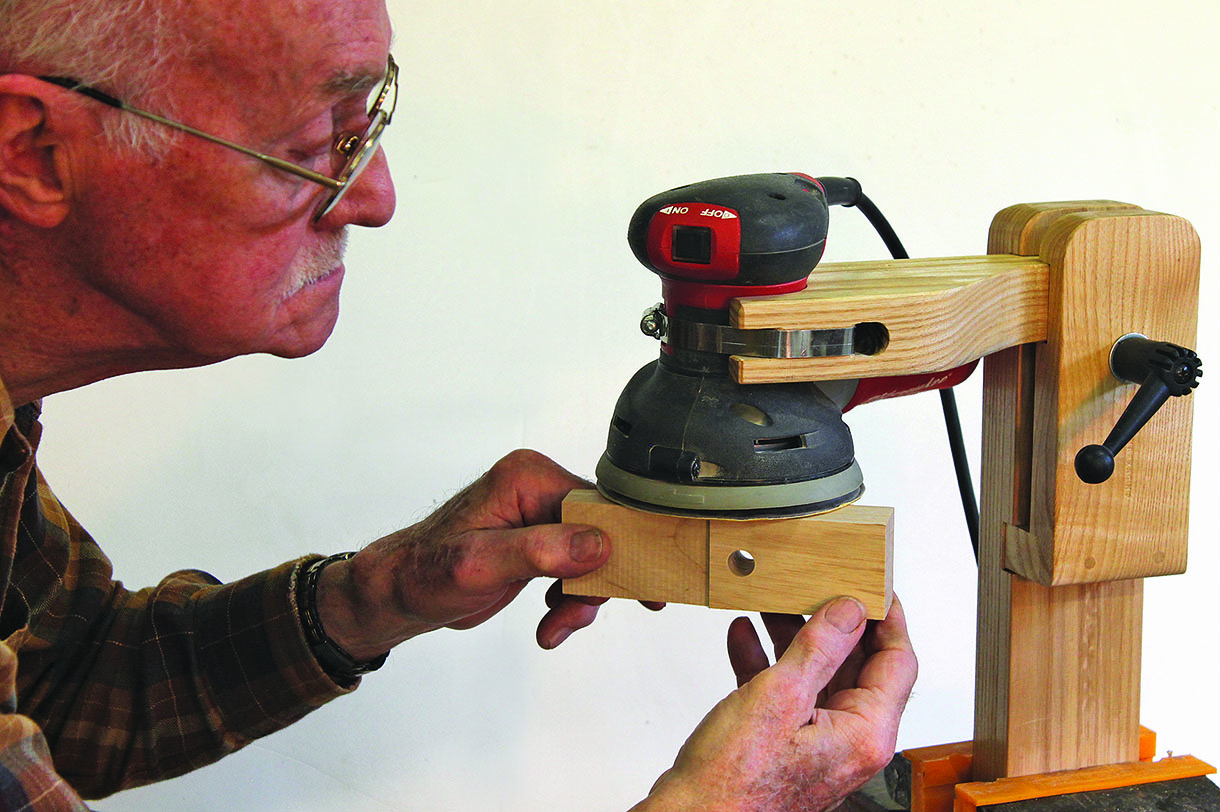
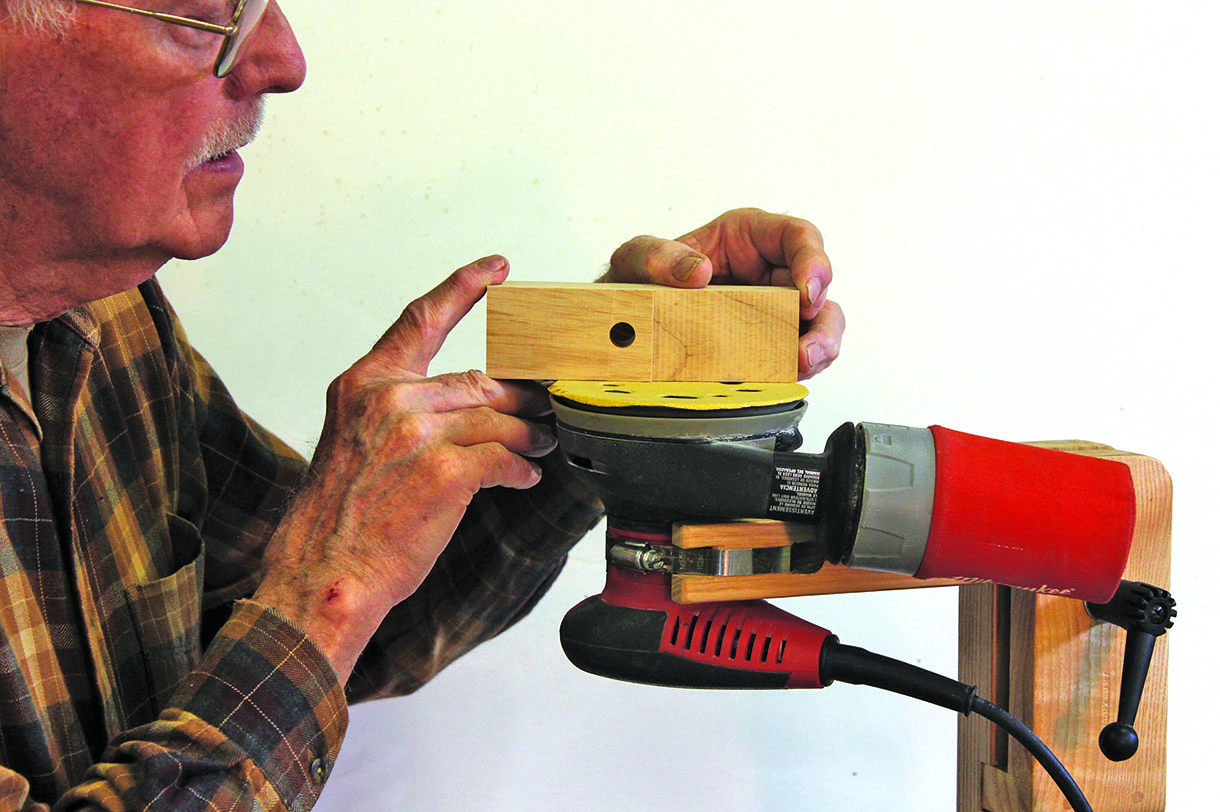
With the sander mounted securely, the piece being sanded can be held with both hands, right in front of your face so you can see exactly what is happening. Adding to this, sanding ease is the ability of the holder to be quickly and easily indexed to any of four positions putting the sanding surface upward, downward, left or right. It even makes changing the abrasive easier, allowing you to hold the paper in both hands.
Making the holder
For this holder I used a 127mm random orbital sander because it has a round motor housing that is easily clamped into a yoke.
I am sure there are many other suitable sanders, but with a little ingenuity almost any sander can be adapted to fit into a similar yoke design.
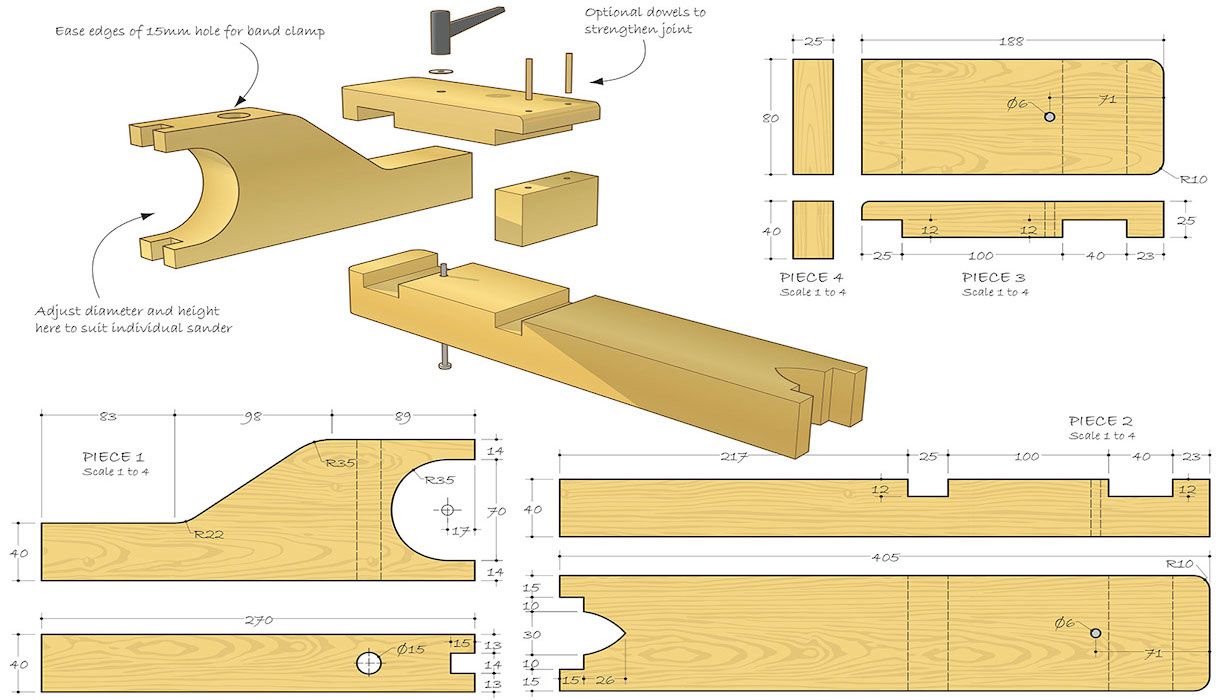
Besides the random orbital sander the materials are easy to find and not very expensive. Start with a piece of timber, ash in this case, but almost any hardwood is suitable, 38 x 140 x 922mm. An adjustable band clamp to fit your sander, a 6mm diameter carriage bolt 90mm long, with a washer and locking handle or wing nut completes the material required.
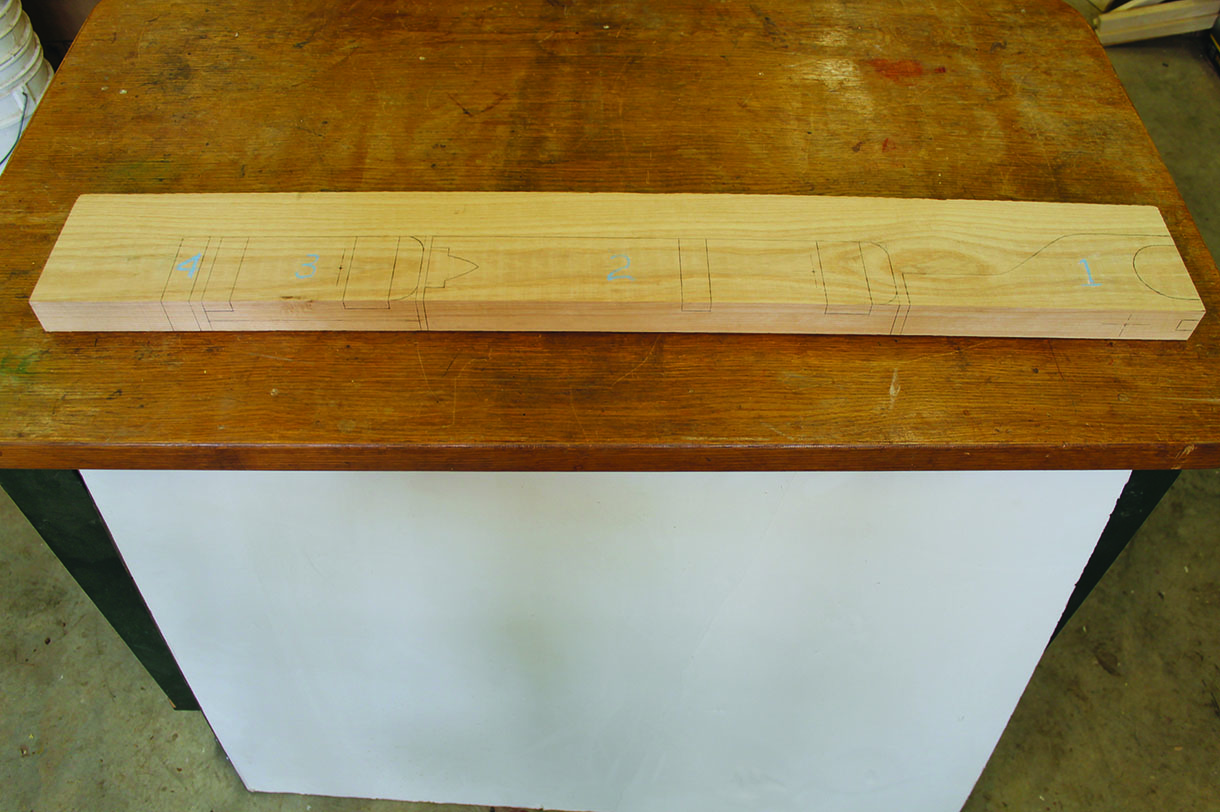
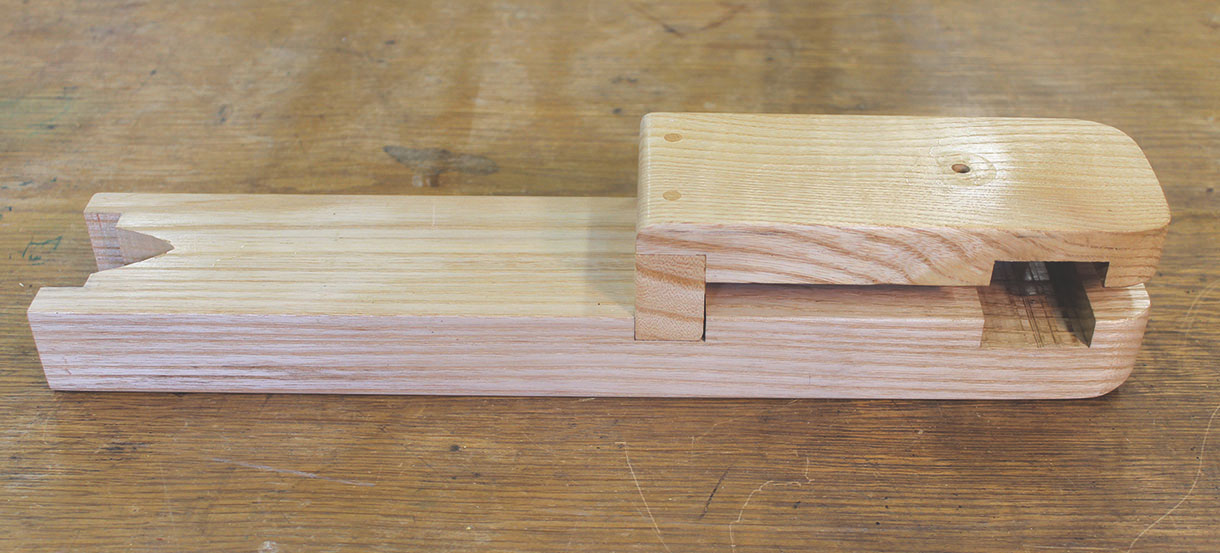
Mark out all four pieces on the timber. Number each piece with chalk, one to four. These pieces can easily be cut out on a bandsaw or even by hand.
Start with the yoke – pieces one and two, check the diameter of your sander. If it is different to the 70mm diameter of my sander, replace the 35mm radius dimension and redraw this arc. It is best to drill the 15mm hole first while the piece is at its largest and easiest to hold.
When that is done, take a small chisel and pare out a radius in both ends of the hole for the band clamp.
Next hold the piece on one side and bandsaw out the 15 x 16mm slots in the end and cut the rest of the yoke. Locate and drill the 6mm hole first. Now we cut out the two 12mm deep slots. This is done on a table saw by making a series of cuts. It could also be done with a dado blade, a router, the bandsaw or even be hand cut with a sharp chisel and mallet. The remainder of the piece is bandsawn out.
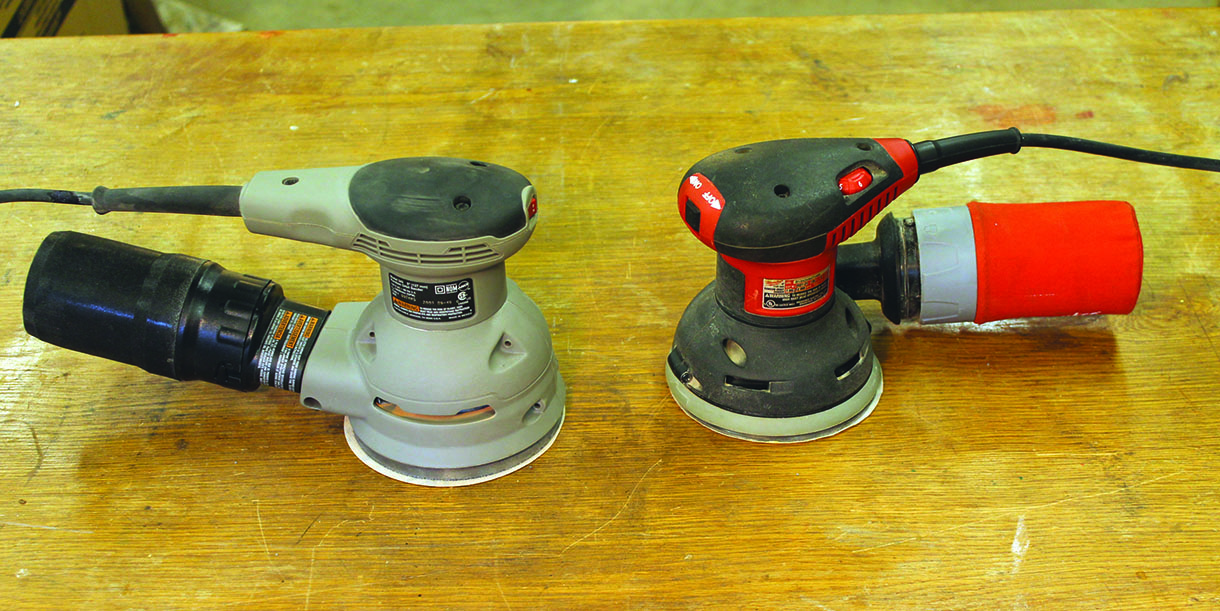
I had two sanders to choose from
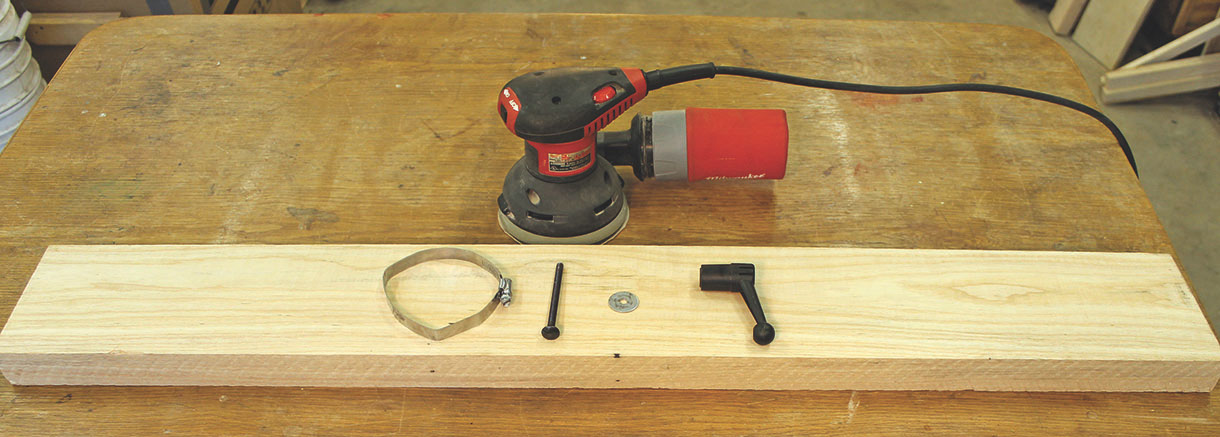
The materials needed were very simple
All the components were drawn out carefully
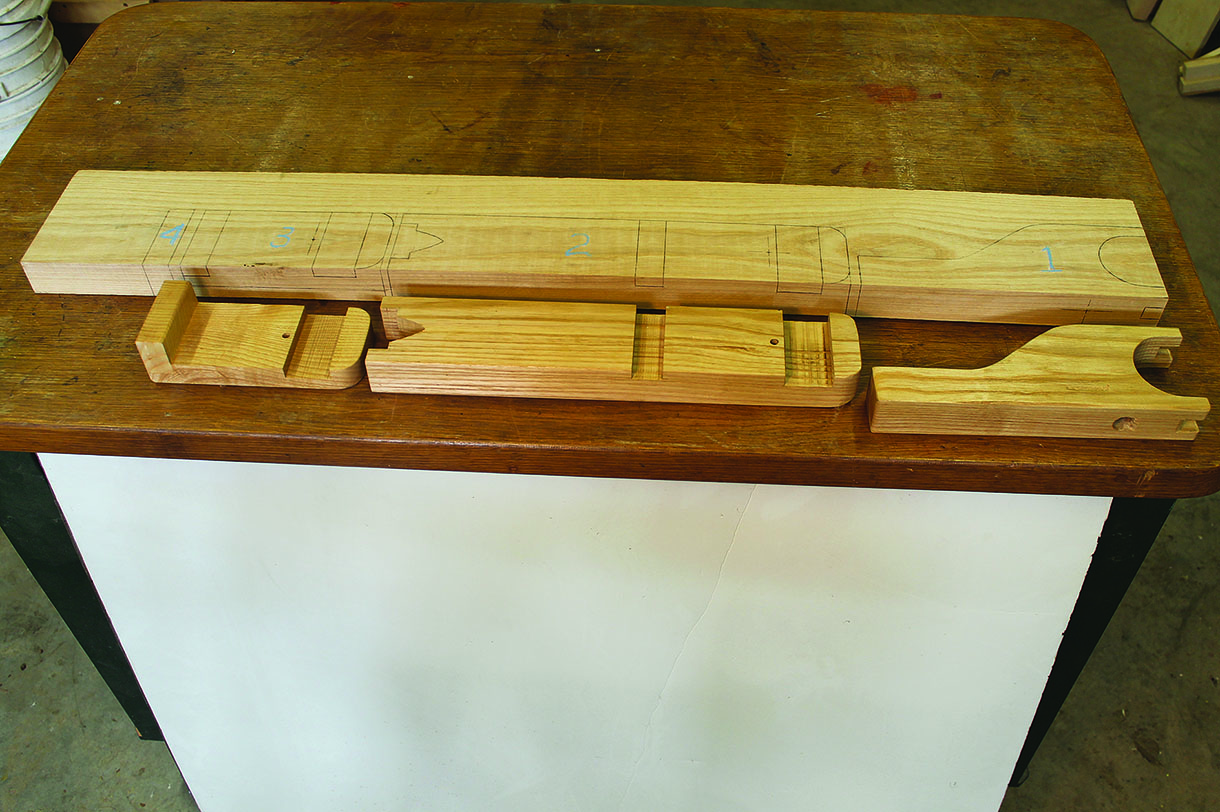
Then they were cut out and machining done
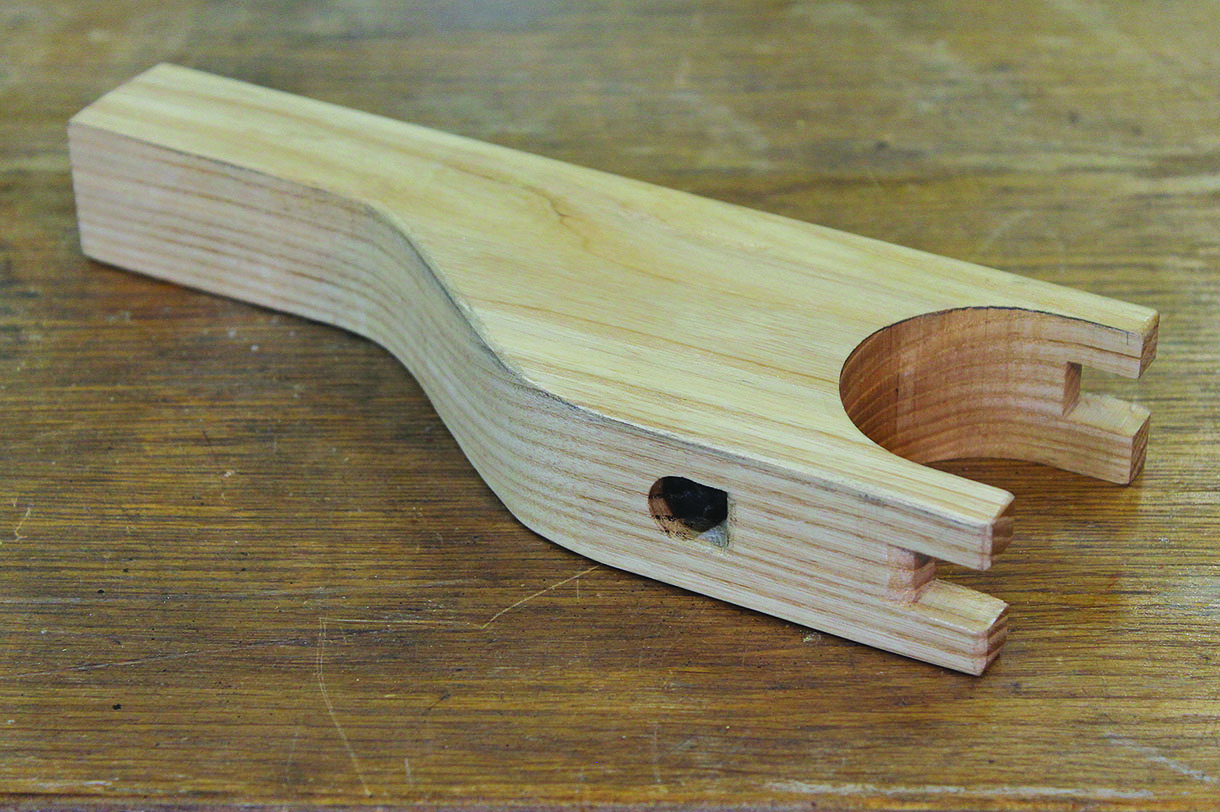
The yoke assembly was made to suit one of my sanders
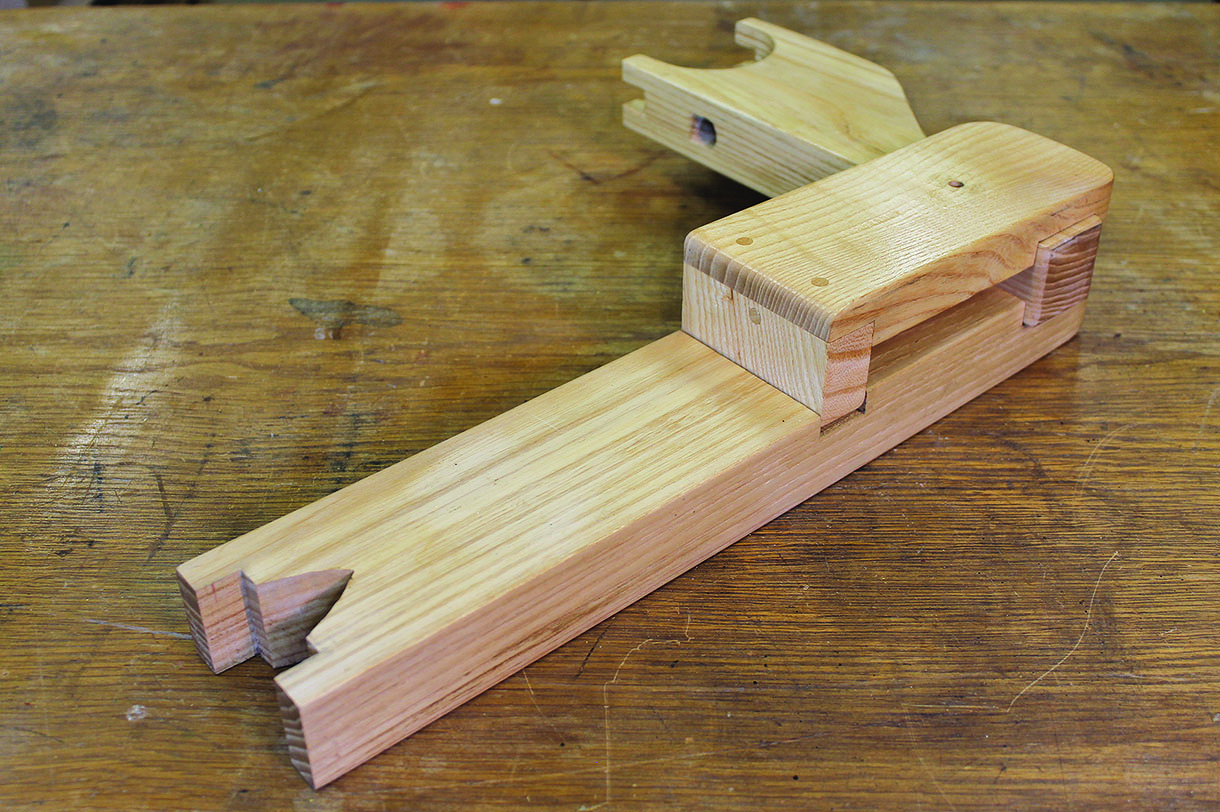
Pieces three and four are made together. Locate and drill the 6mm hole, then cut two 12mm deep slots, one 40mm wide and one 25mm to receive piece four. Cut out piece four and glue it into the slot. Two small dowels can be added if desired. Pieces two, three and four should fit together before piece one is easily slid into the assembly. Make all final adjustments, sand smooth and finish with a hard finish. When the finish is completely dry add the bolt and band clamp. Then install the yoke and clamp it in place with the locking handle threaded onto the bolt. All that is left now is to open the band clamp and mount the sander and the holder is complete.

The stand has the notch out at one end
Clamping keeps the holder at the correct position
The test fit looked as if it would work okay
Assembly time for the basic components
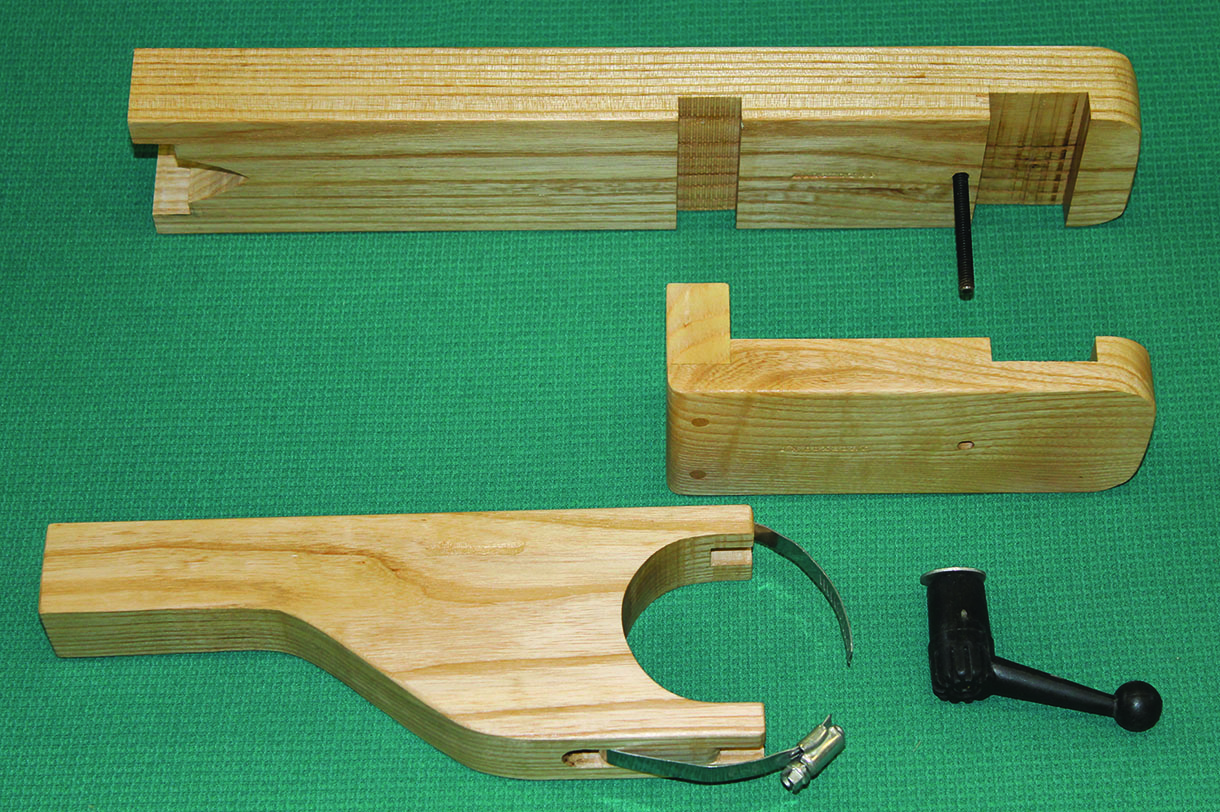
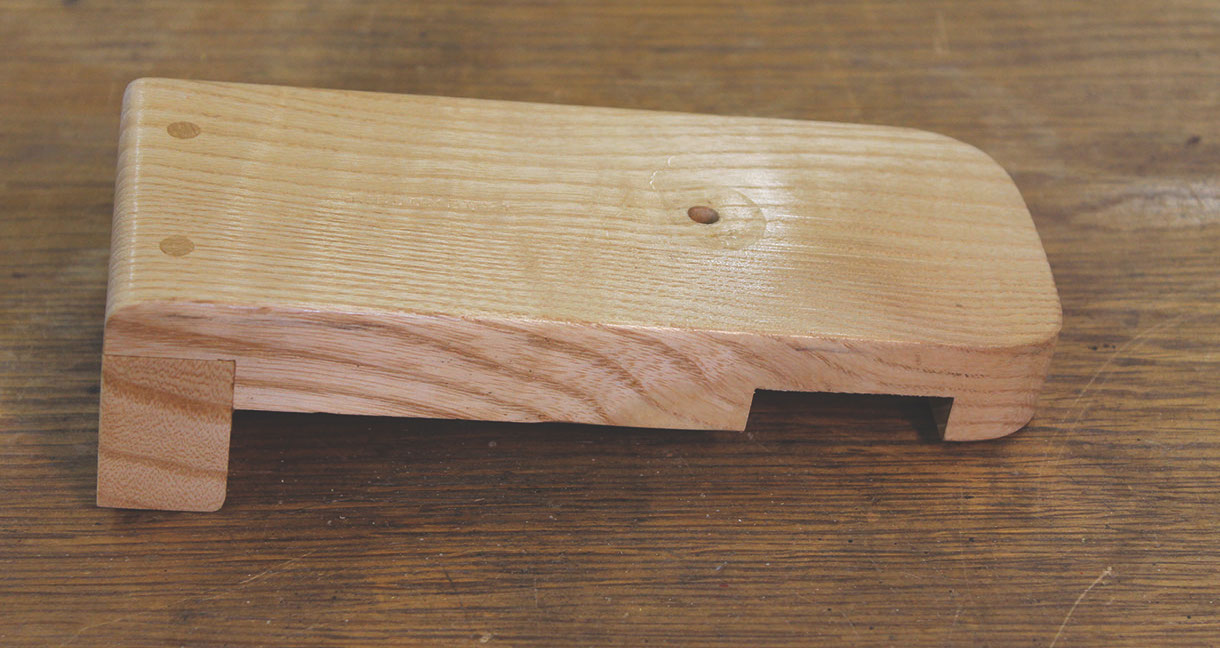
All the finished parts after shaping to take the hardware

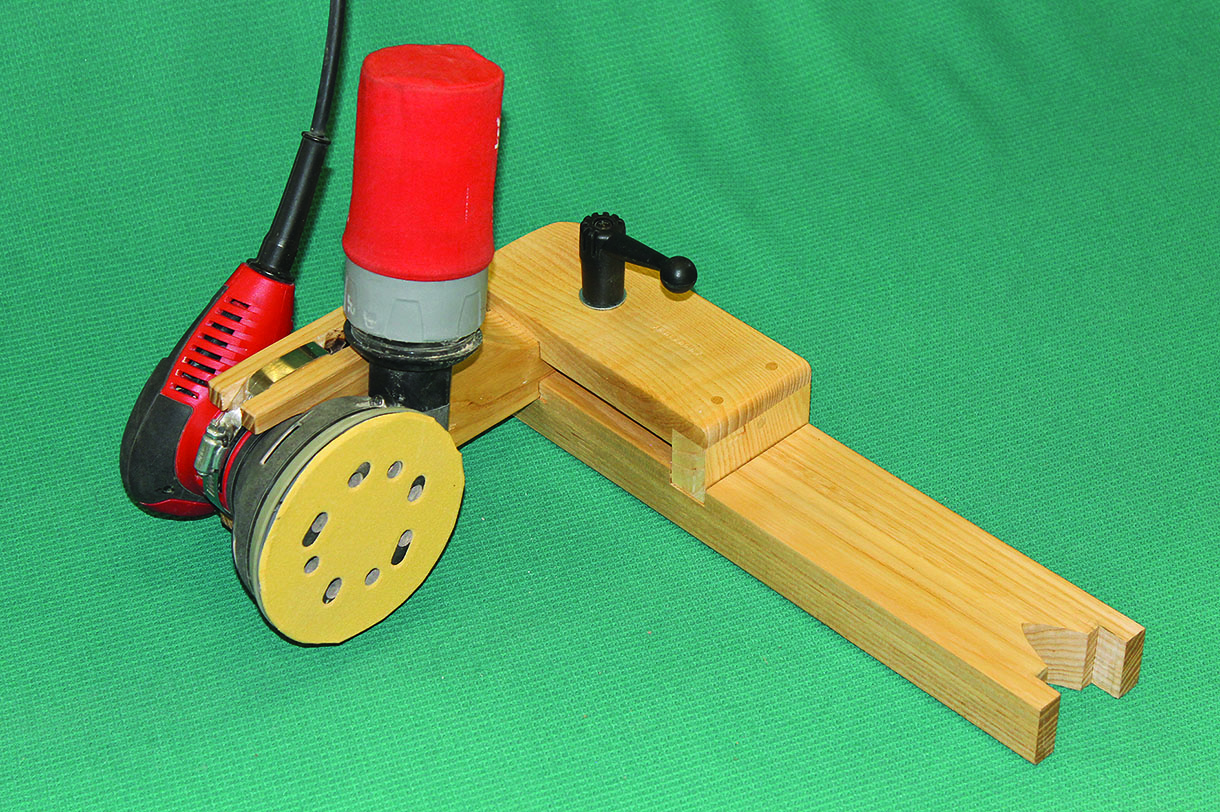
Everything fitted together and ready to use
Jubilee bands have plenty of uses, like holding my sander
Using a sander in the holder
Mount the holder in a vice. Note: with the vice open slip the lower notch in the bottom of piece two over the vice screw, or a guide rod, and tighten the jaws firmly for good clamping. Plug in the sander and try all of the four positions. For large sanding jobs the dust bag can be removed and the sander connected with a flexible hose to a shop dust collector system. A shop vacuum of some sort will also work well. This removes heat and dust, making it sand faster while extending the life of the abrasive paper. Last but not least try changing the sand paper. Use both hands. What a breeze. It has never been so easy.
The underneath sanding position
On top sanding made very easy


1 Comment
Would you please indicate where you obtained your crank handle?