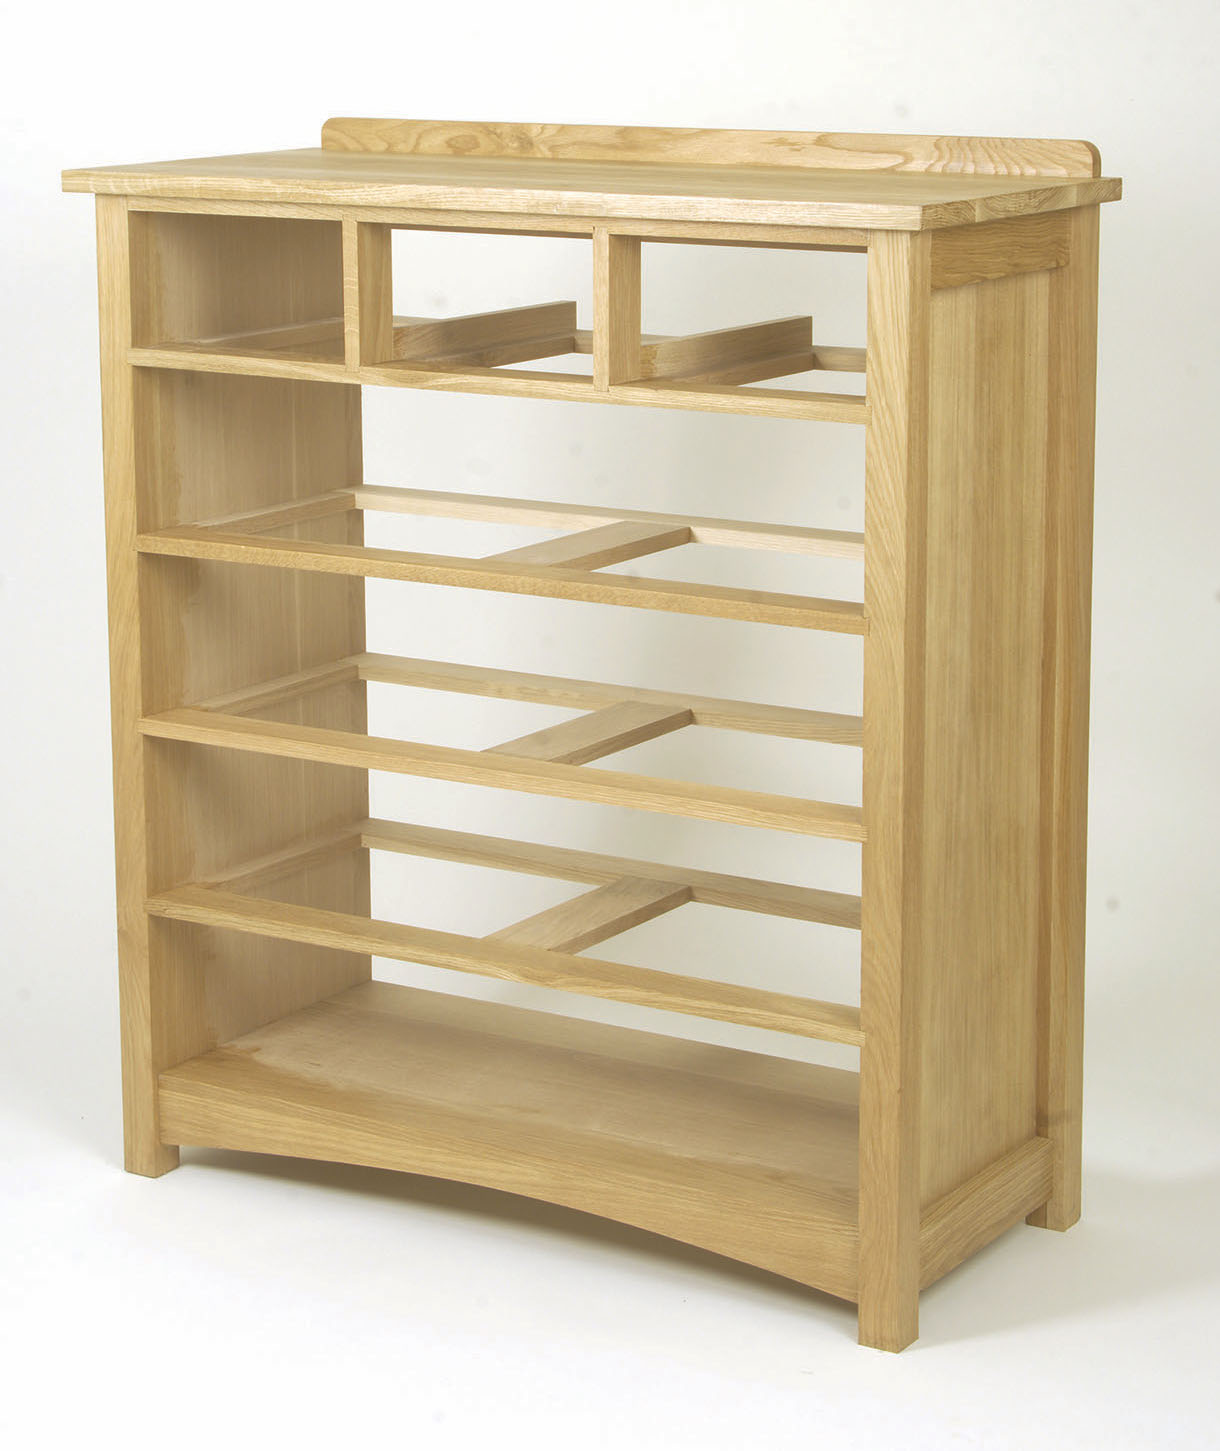
Seven-Drawer Mission Chest:
Anthony Bailey adds a chest to his Mission-style bedroom furniture
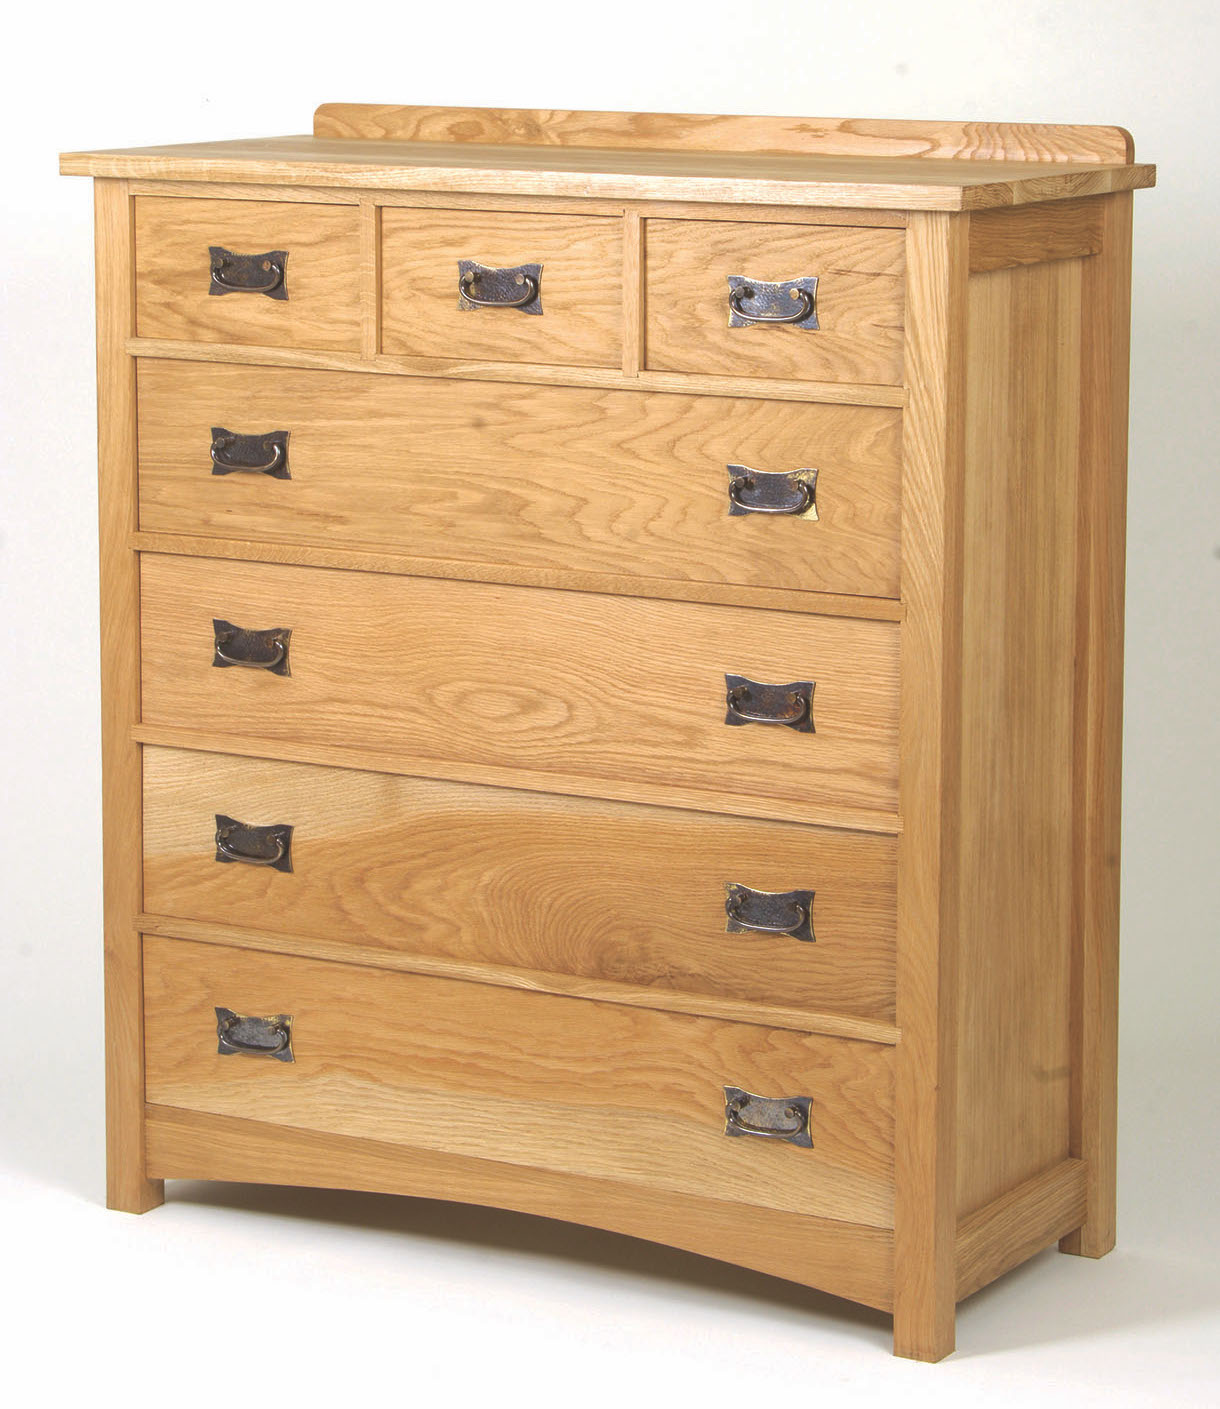
Anthony Bailey adds a chest to his Mission-style bedroom furniture
This is a substantial and imposing chest of drawers. Unlike a typical Georgian or Victorian chest, which would have drawers graduated in size, with the smallest at the top and the largest at the bottom,
this chest has equal-height drawers apart from the top row. The timber is American white oak (Quercus alba). It is finished with a sealer coat and waxed to keep the look as natural as possible.
Preparation
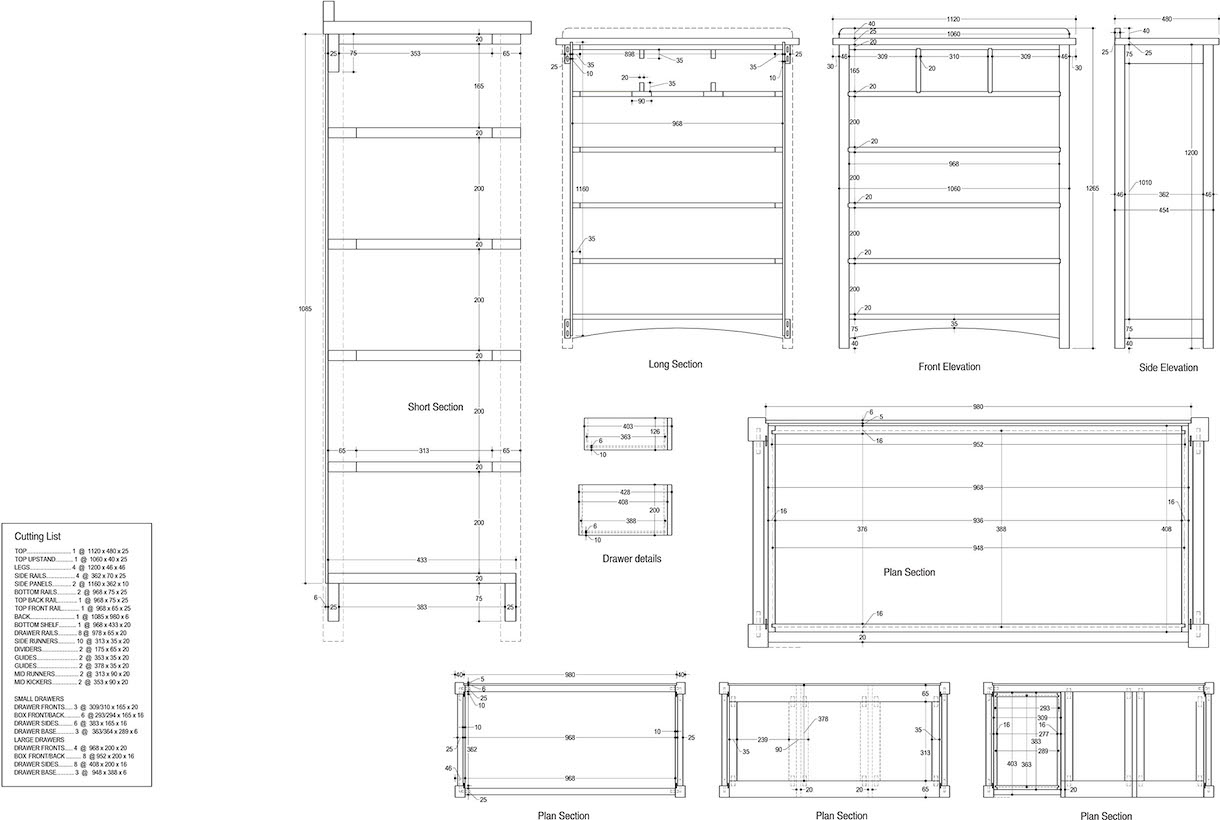
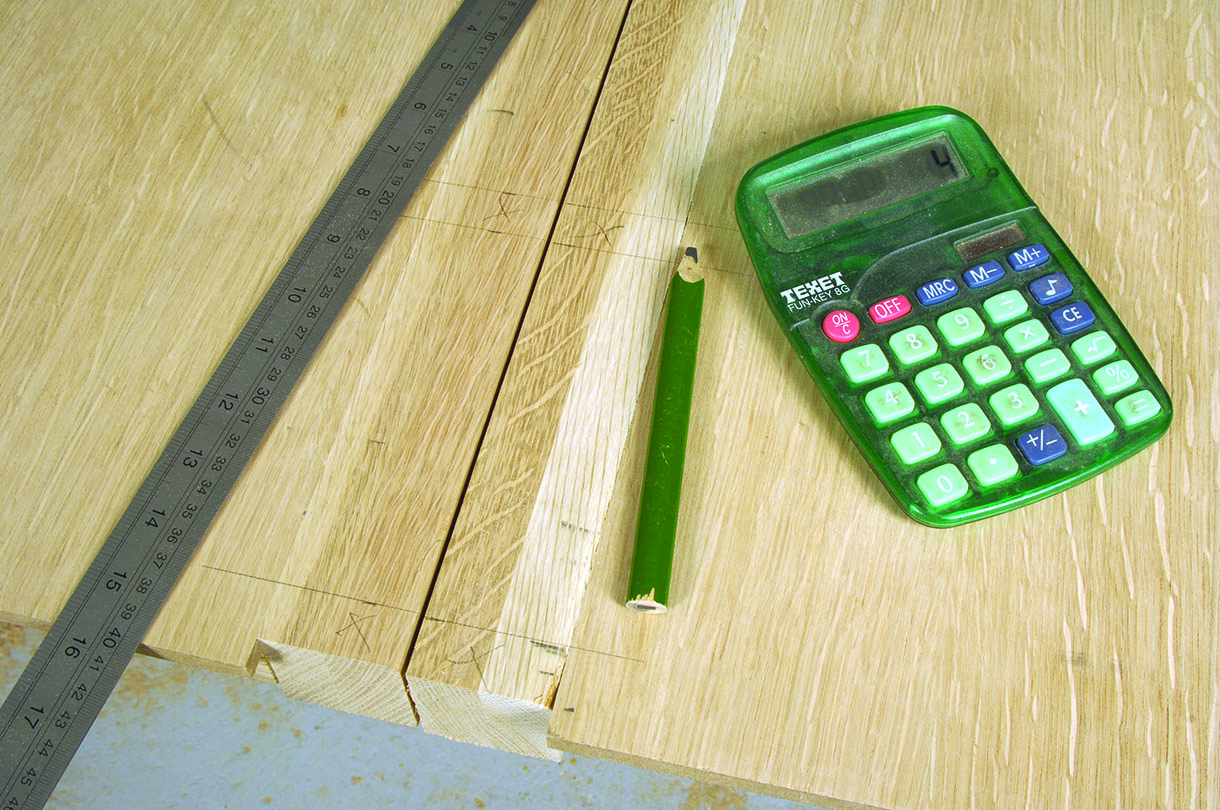
This project uses a very large amount of timber and there is wastage because even American oak suffers from splits, shakes and knots. Keep your best boards for matching colour and grain for the drawer fronts, and find good matching boards for the top. The back panel, end panels and drawer bottoms are all oak-veneered ply – not authentic but it looks fine and saves on cost and preparation time. Study the plans carefully and make up what is a substantial cutting list.
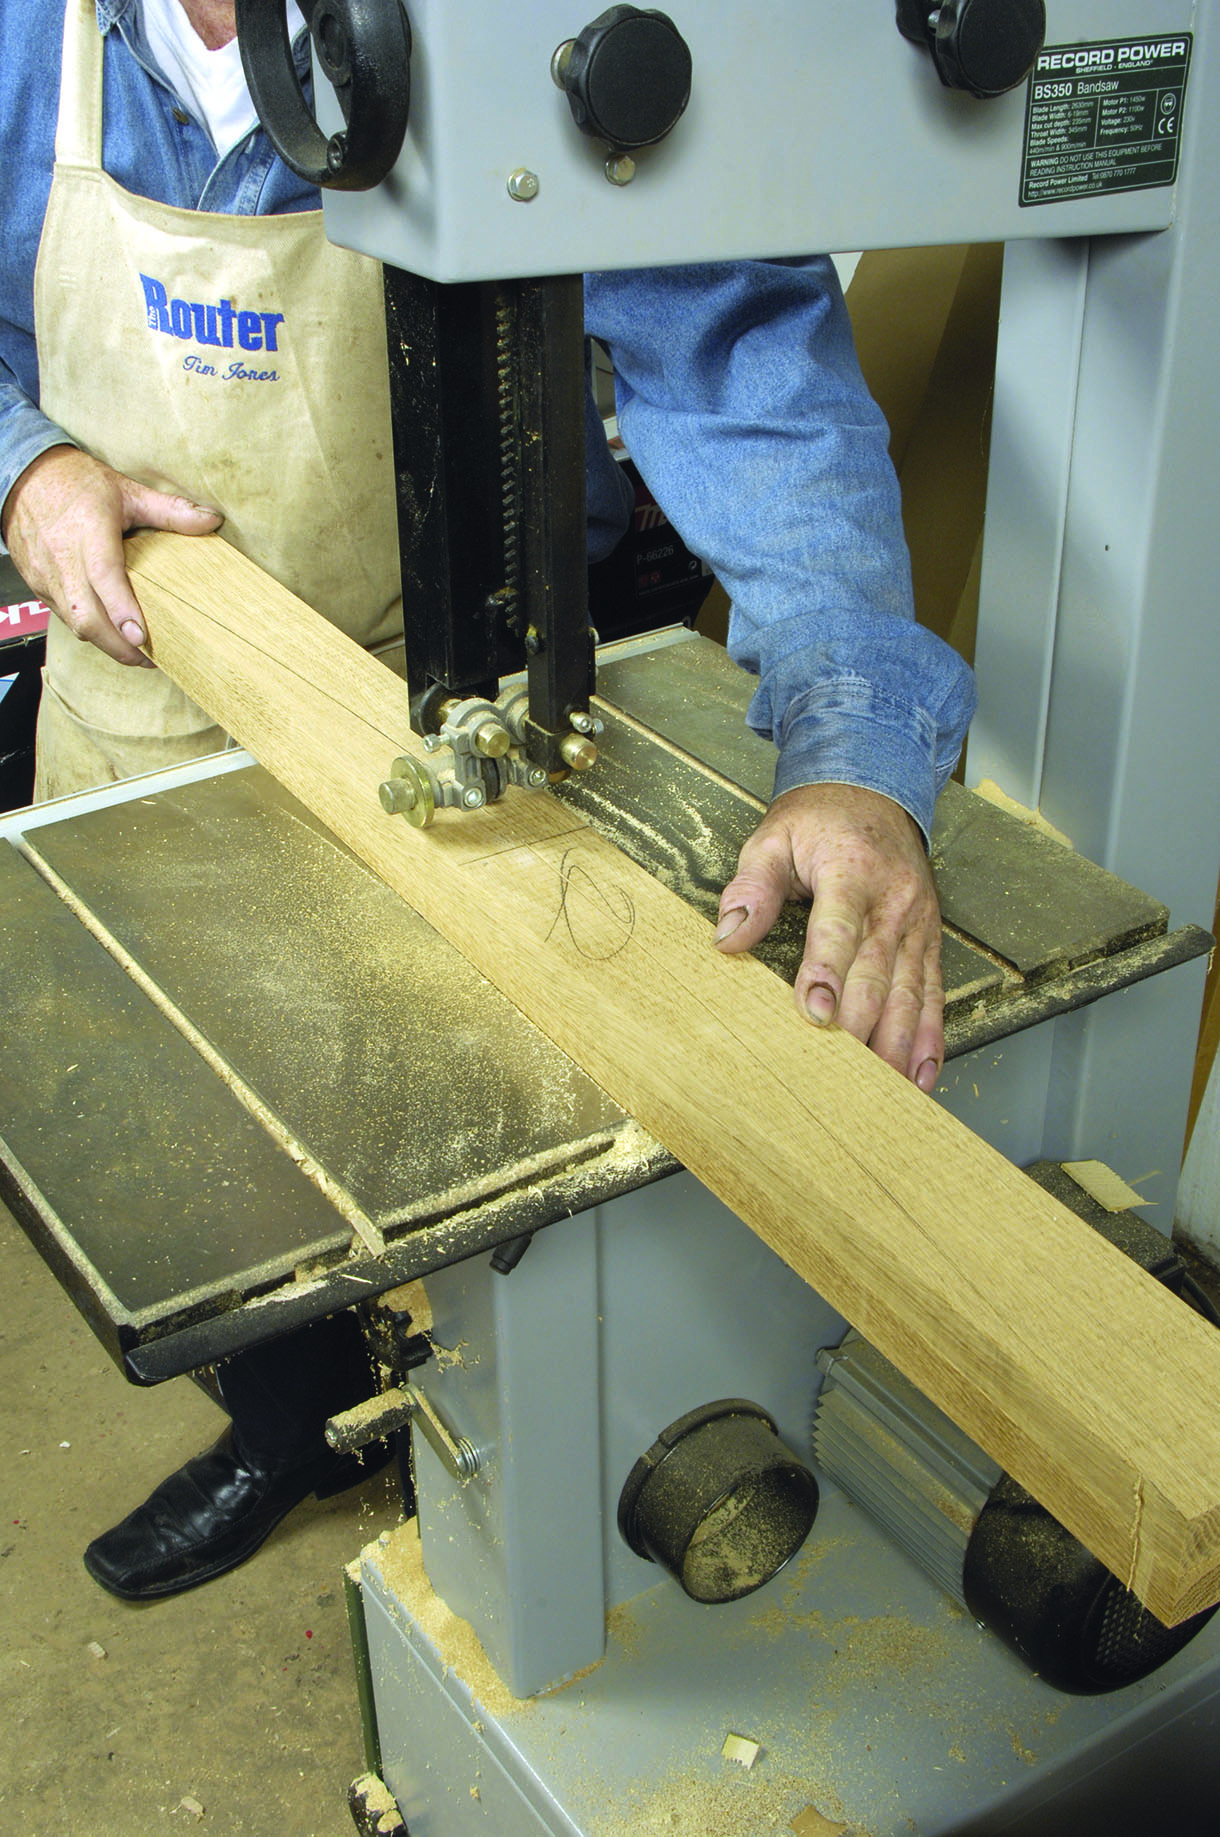
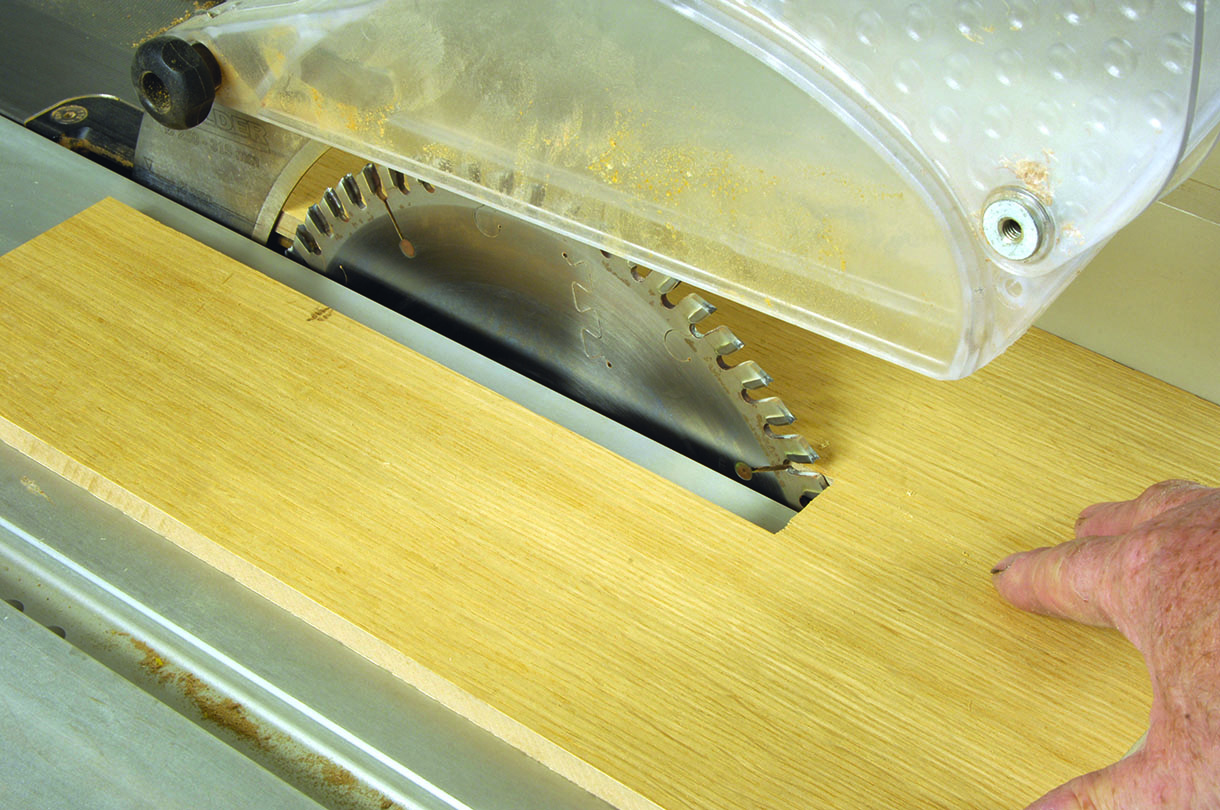
Cut out all major components first, especially if they need to be wide boards – with any luck narrows can be cut from the waste sections. Keep component lengths down to only what is required plus wastage or you will end up planing boards bowed from end-to-end down to less than acceptable thickness!
Overhand plane one face and one edge and check all boards for square. The top needs to be made from four boards, slightly overwidth, as does the bottom board in the carcass. All the other boards can then be
thicknessed to width.
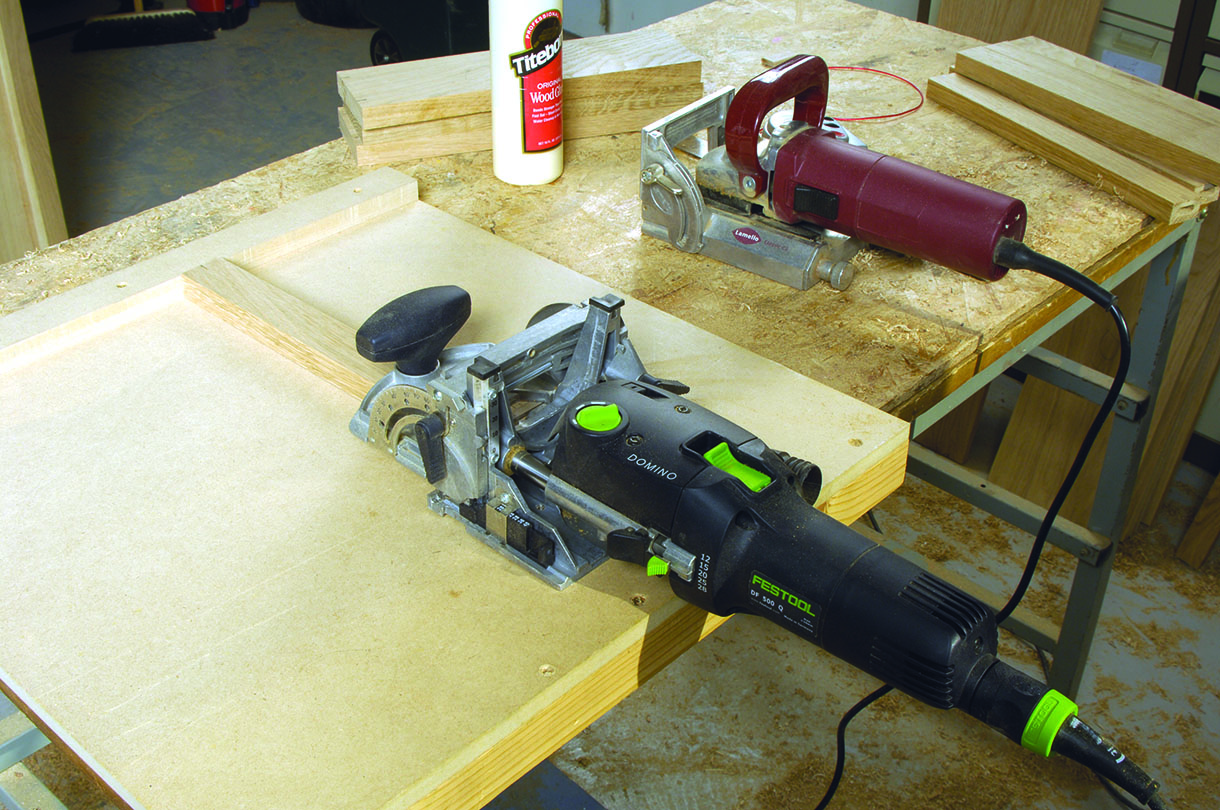
What you will need:
• Planer thicknesser
• Domino jointer
• Sander
• Bandsaw
• Tablesaw
• Router table
• Biscuiter
• Block
• Mallet
• Fine-tooth saw
• Plane
• Chisel
• Sash
• Deep-throat clamps
• F- and G-cramps
• 8 x 50mm Domino components
•’0′ and ’20’ biscuits
• PVA glue
• Cloth
• Protective pads
• Router cutters, including 19mm diameter dovetail
• 1⁄2in collet router + 30mm guidebush
• 6.4mm groover + arbor and 9.5mm straight bit
• Sub-table surface + high fence facing
• Screws
Carcass ends
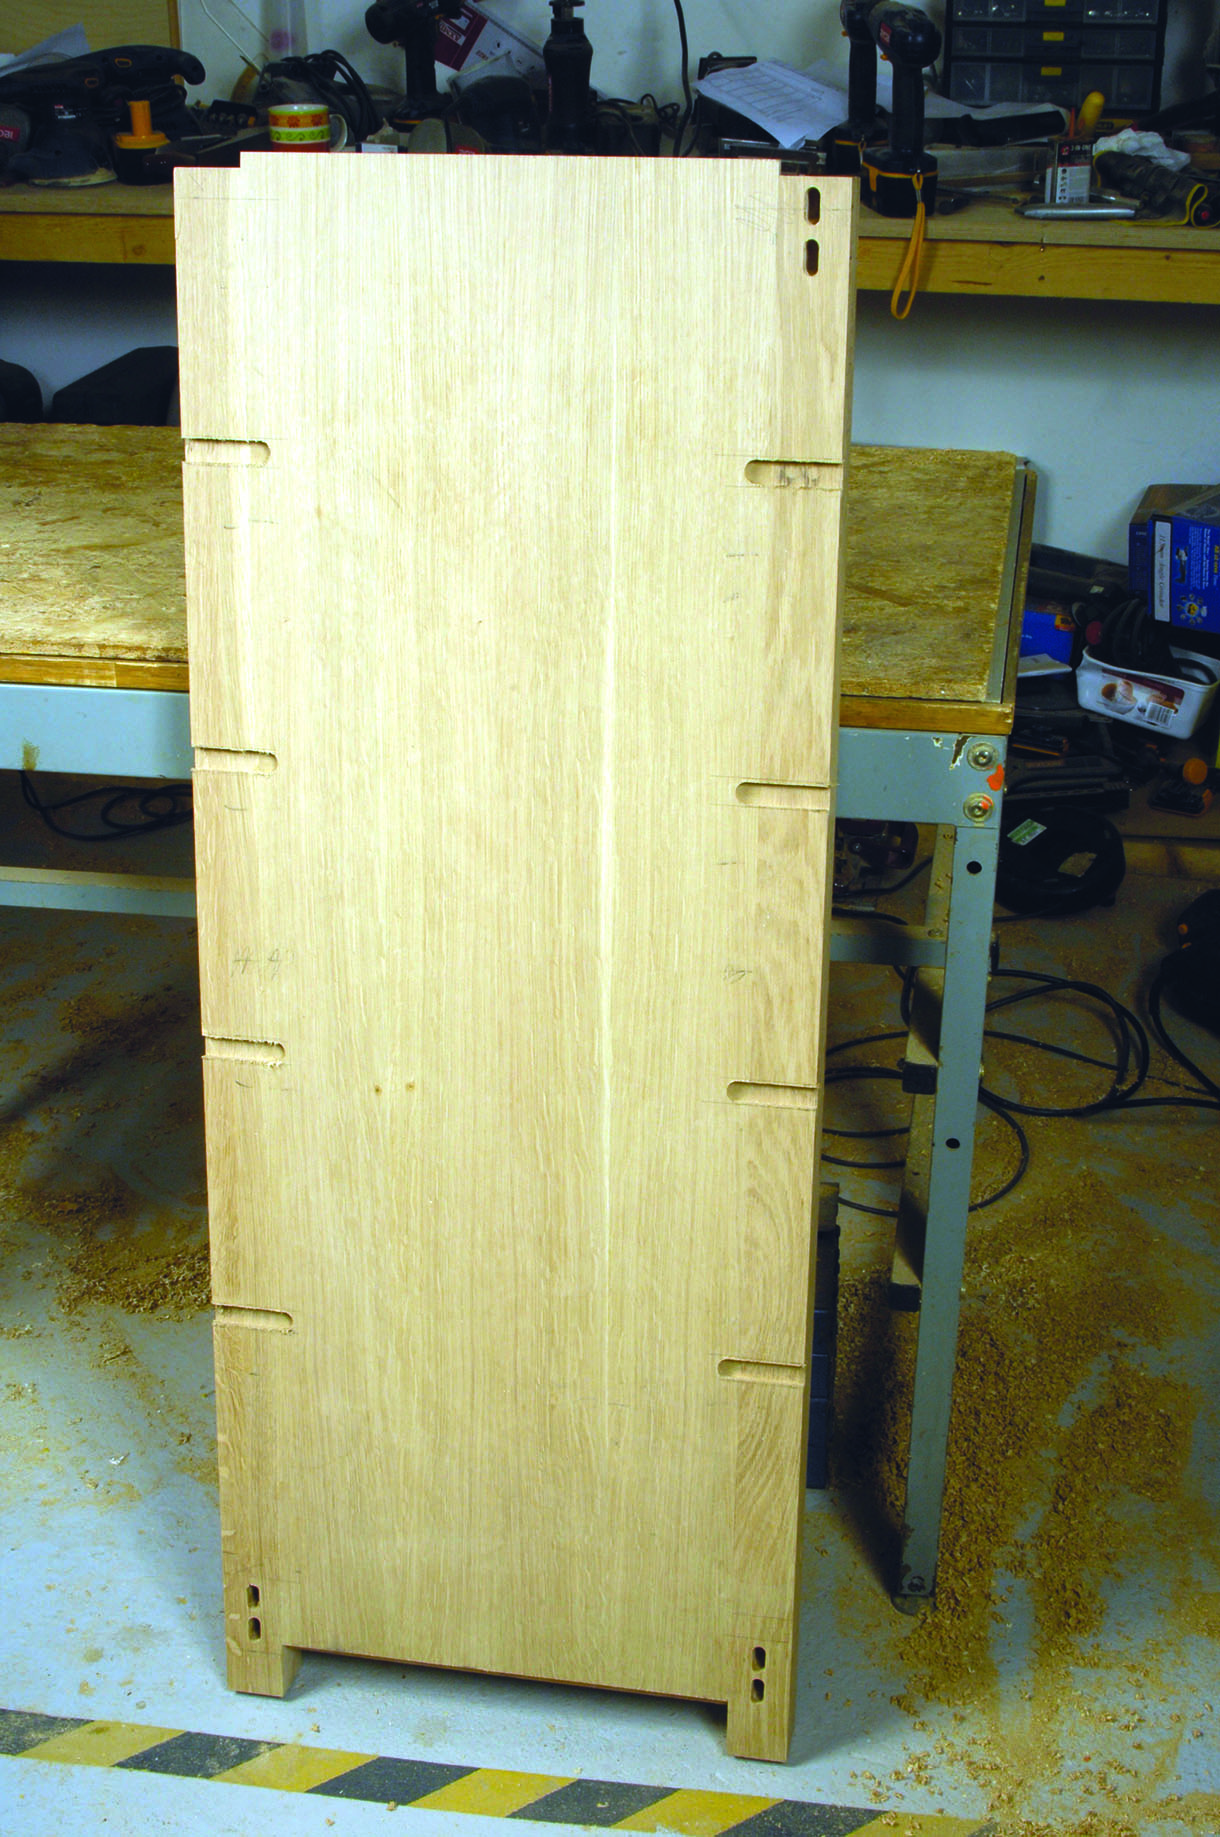
Assemble the ends first as these match and form sub-assemblies, thus breaking down the whole procedure for carcass assembly into bite-size pieces. I used Domino components, but you can mortise and tenon, in which case add tenon length to the top and bottom rails. Cut the stiles and rails to length. The 10mm oak-veneered MDF panels butt between both stiles but go up behind the top and bottom rails; note how the MDF extends 10mm above the top rails so it can slot into the top when that is fitted on.
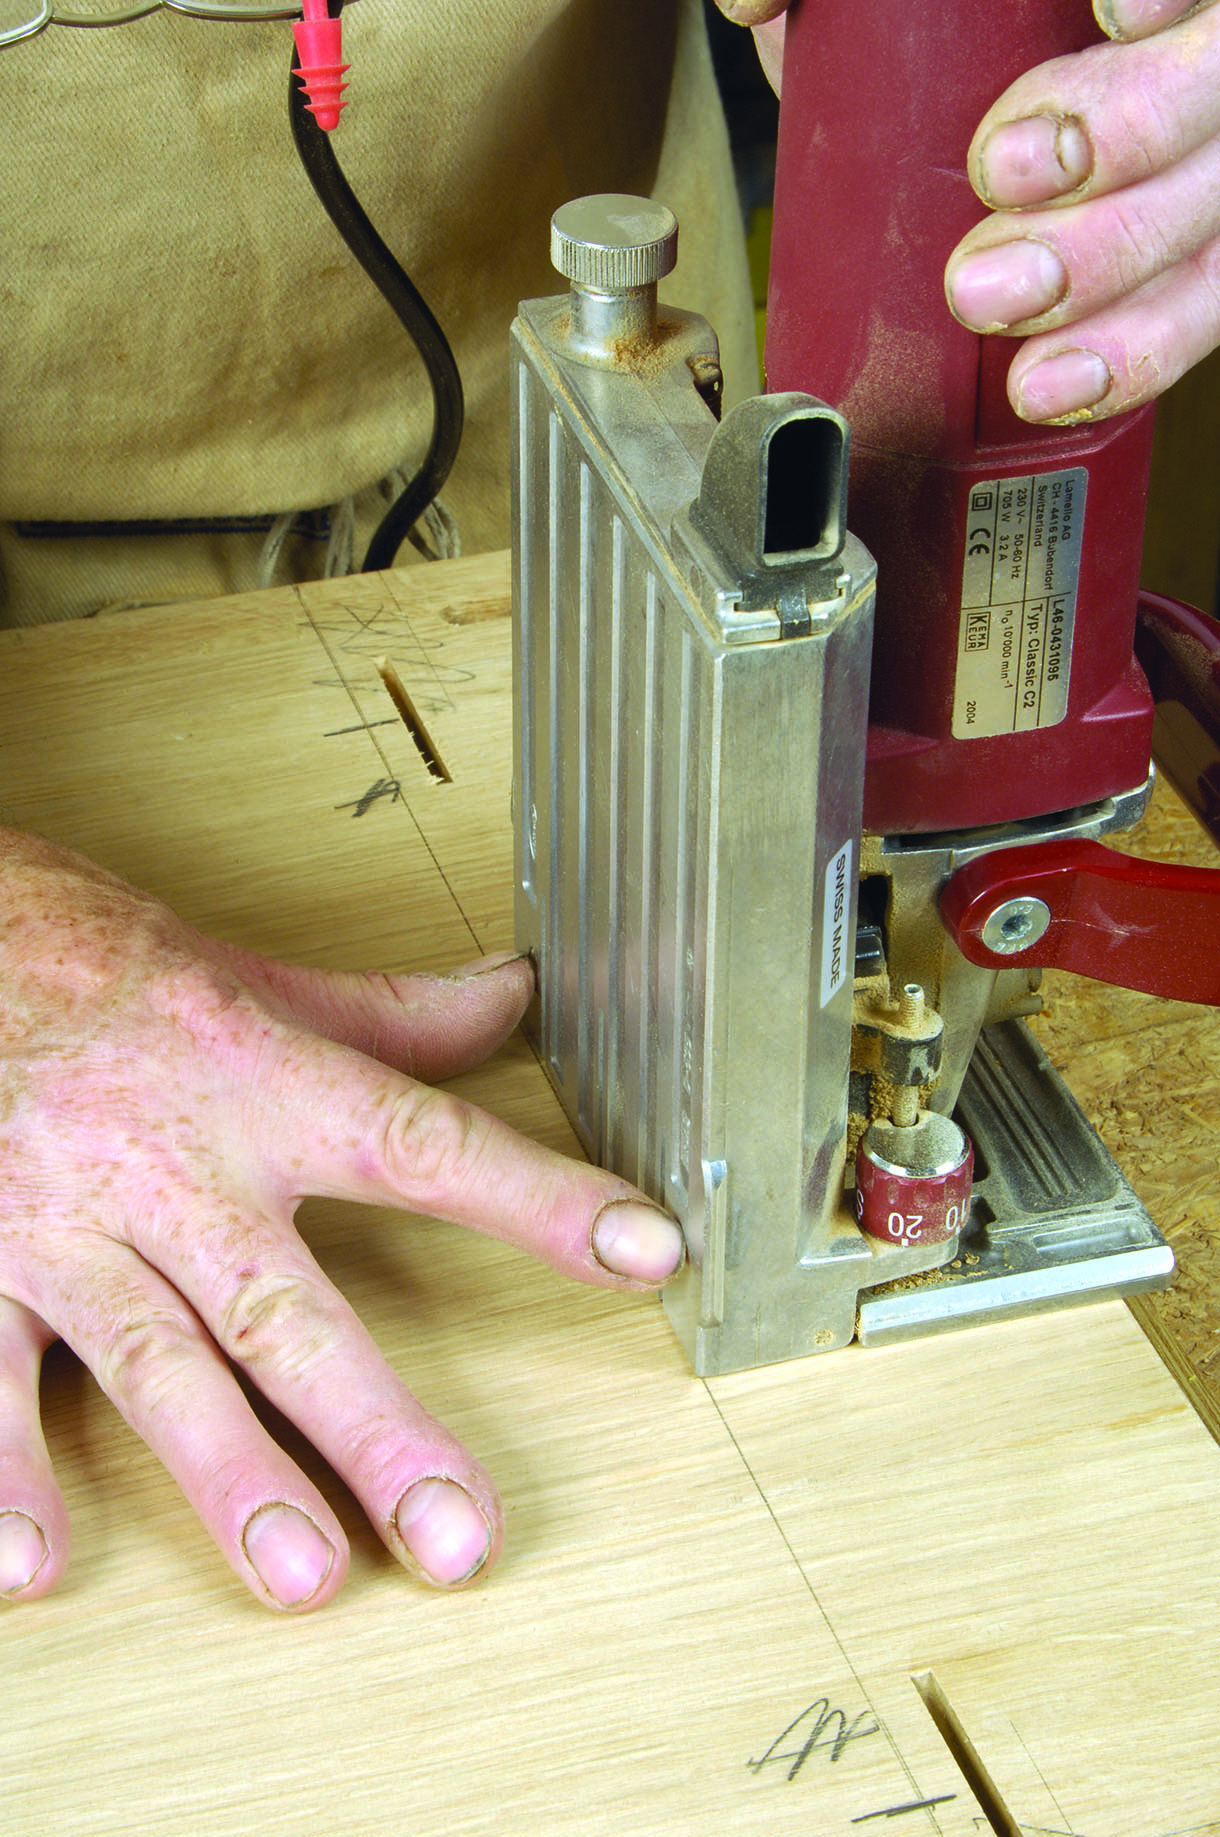
Firstly, joint the stiles and rails together using a Domino jointer and 8 x 50mm Dominos; the position of
the joints is important so the inside of the rails and MDF lie flush together.
1. Dry assemble and carefully measure the gap width as it is critical for a neat fit. Cut the MDF to the measured width and to length then biscuit slot into the stiles. Sand all awkward-to-get-at edges and faces, glue and assemble. Check for square and leave to dry after cleaning off any excess glue.
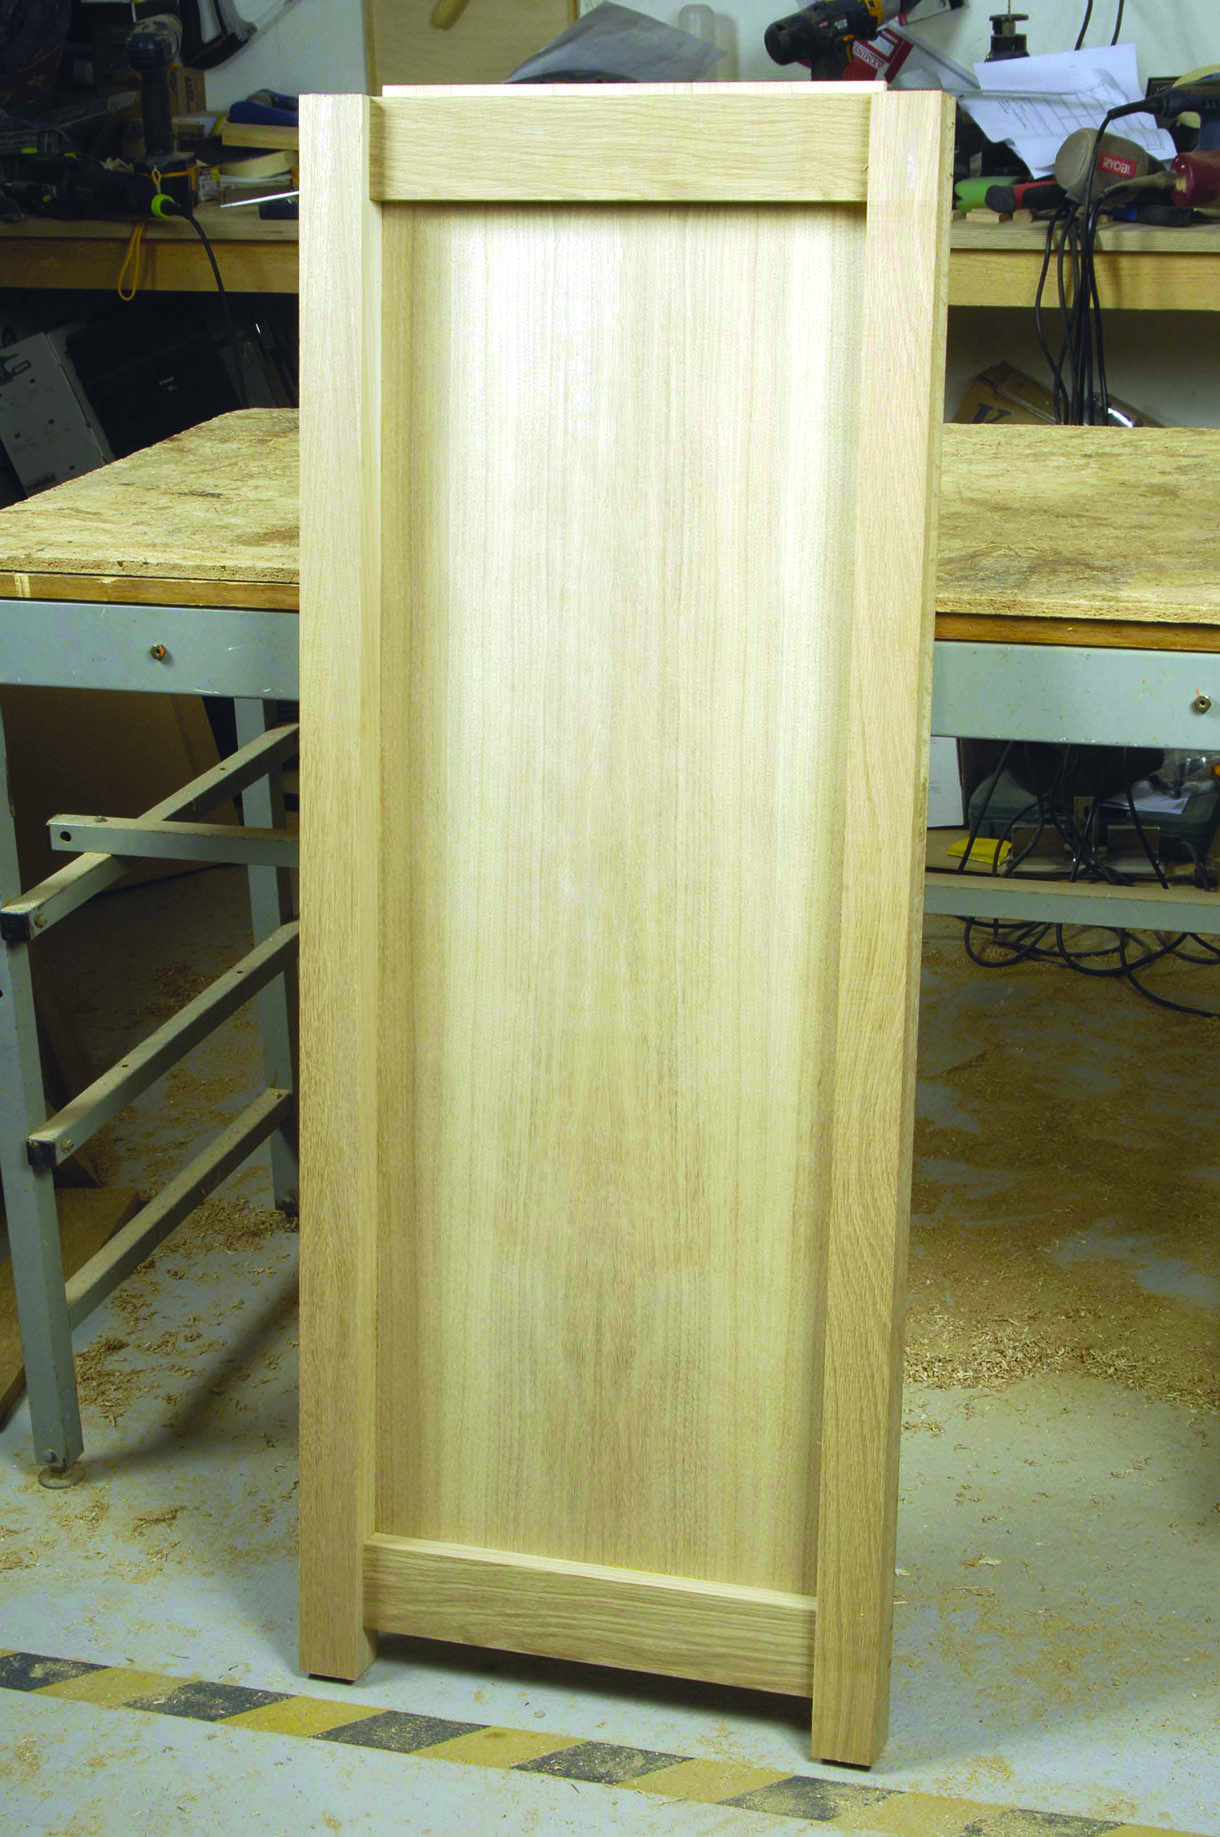
1. The assembled end panel; note the 10mm upstand
Rails, bottom board
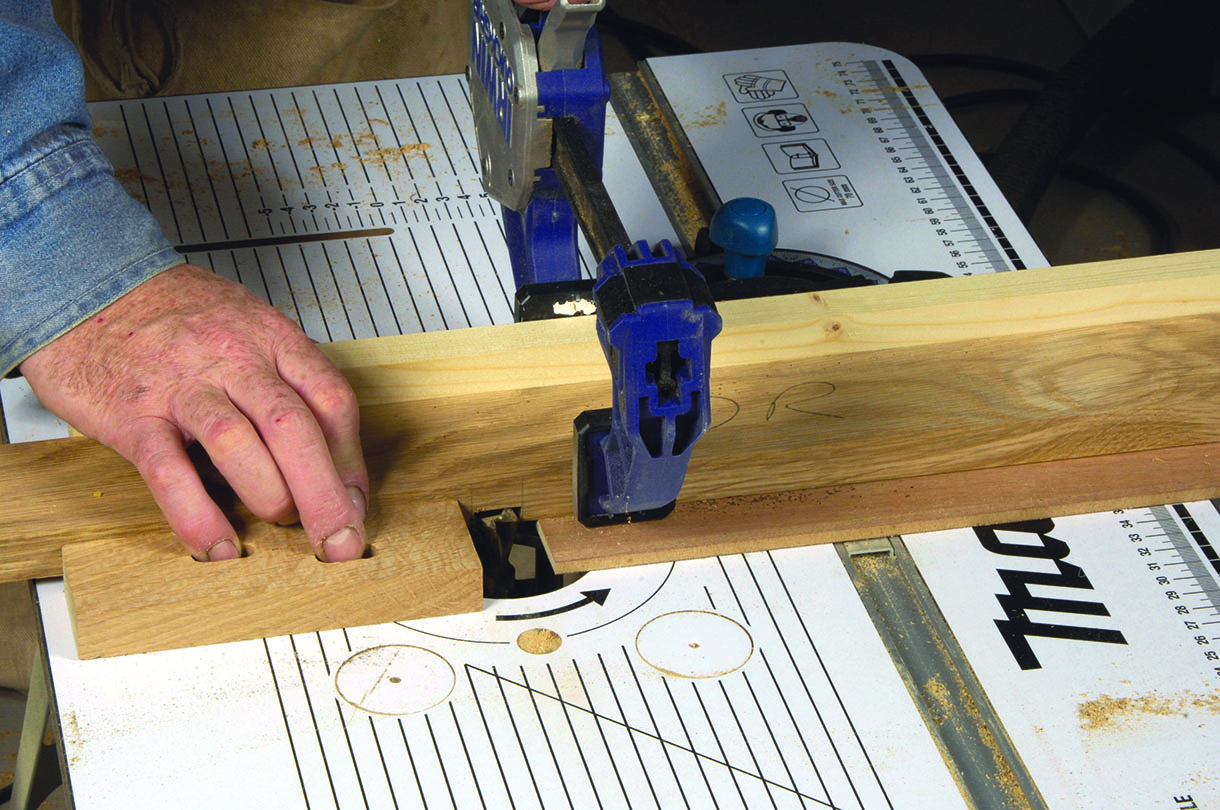
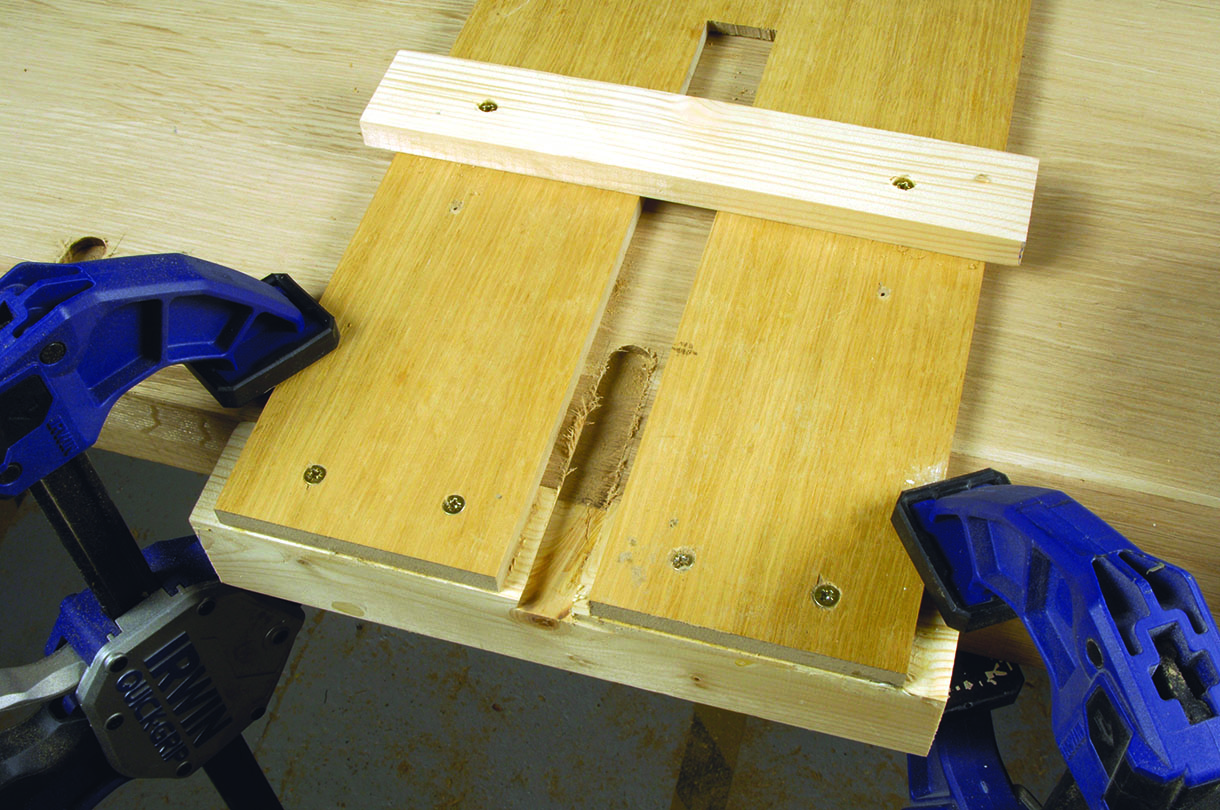
2–3. The front and back carcass rails are now cut to fit between the carcass ends and Domino-ed using two per joint. The bottom end rail curves are ‘pack cut’ on the bandsaw to a line and then belt sanded to get a smooth curve.
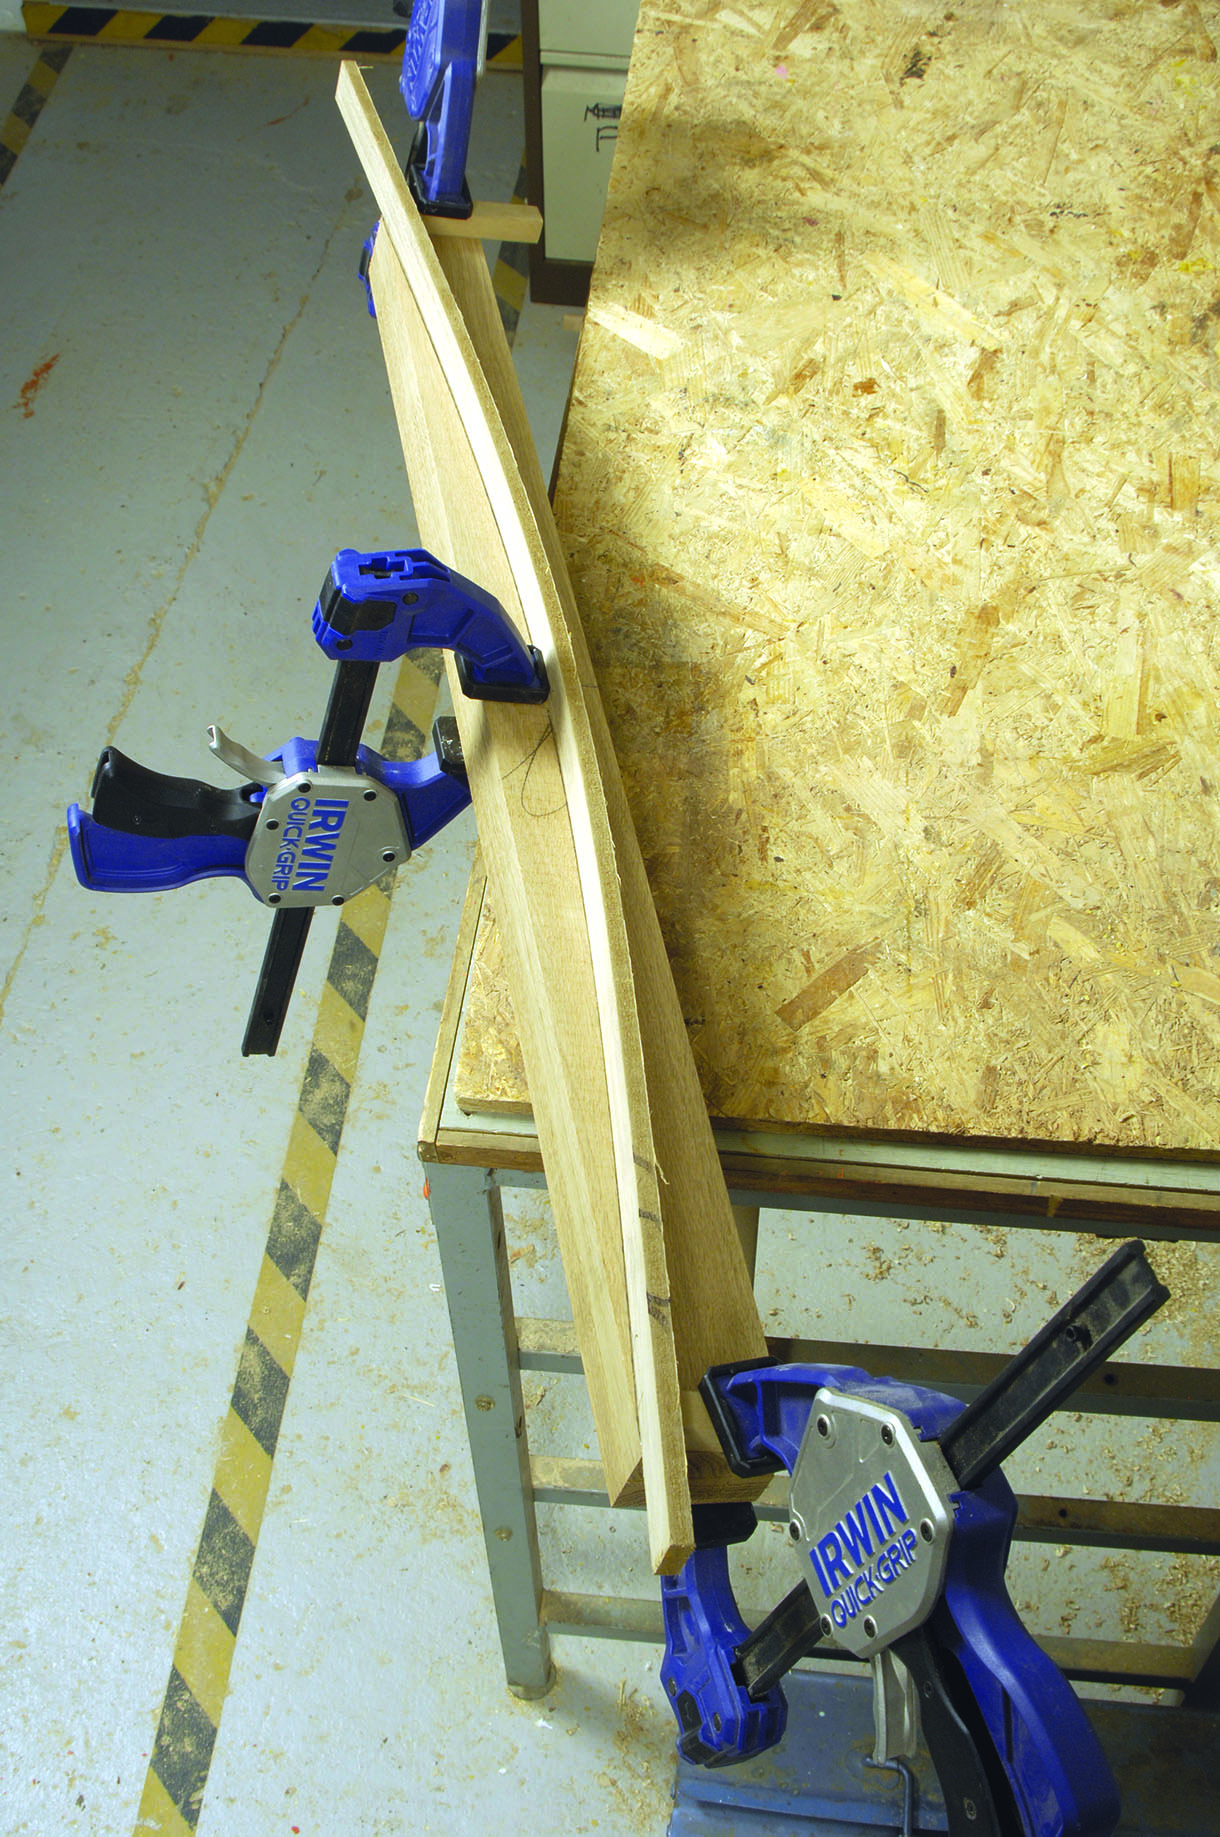
2. Using clamps and a strip of MDF to create a curve to mark against
3. Pack-cutting: both lower rails are held together with double-sided tape
Mistakes, I’ve made a few
Let’s face it, no one is perfect, least of all me! In this case I forgot the ply panels went between the end stiles, and Domino-ed the rail flush with the inside face of the stiles. Wrong!
A–C
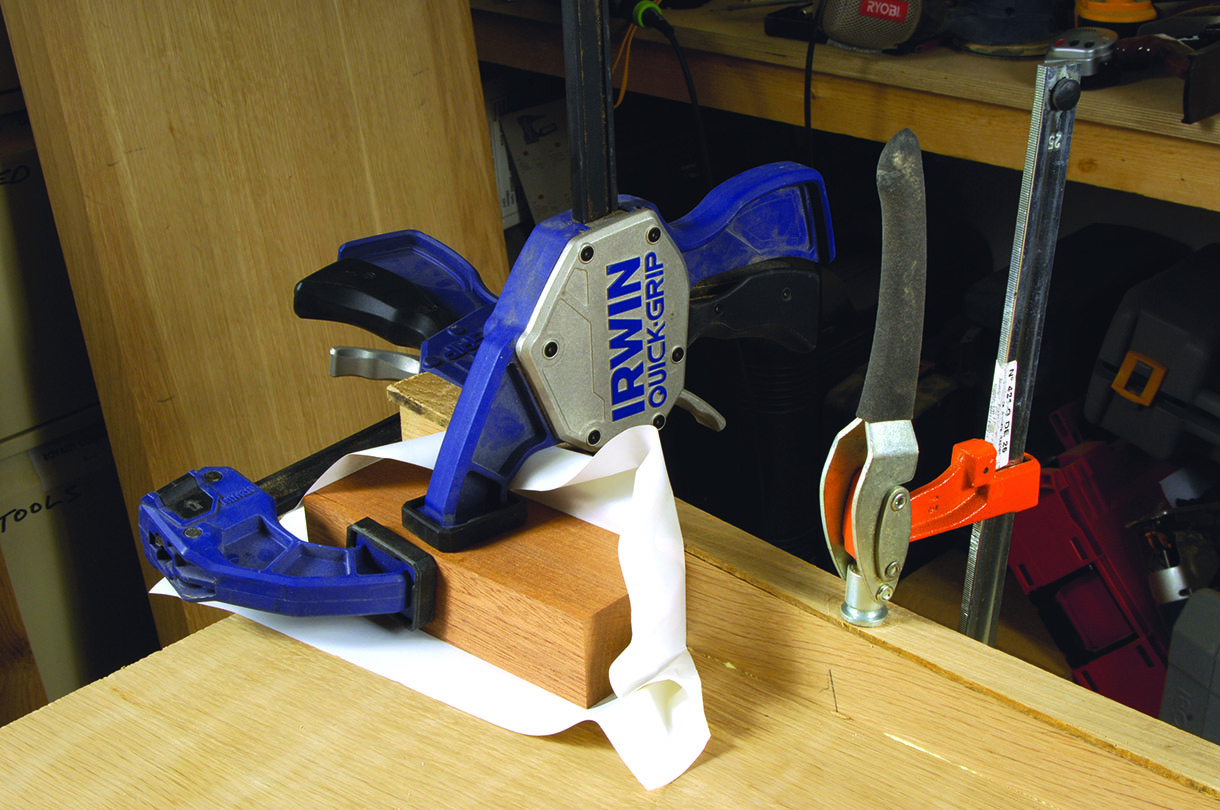
The answer, as with mis-slotted biscuit positions, is simply to glue and plug the wrong holes, in this case with Dominos, then saw off the projecting part with a fine-tooth saw and trim flat with a plane. Re-joint in the correct position and the old plugged holes will be completely hidden and this mistake kept a secret – just between you and me…
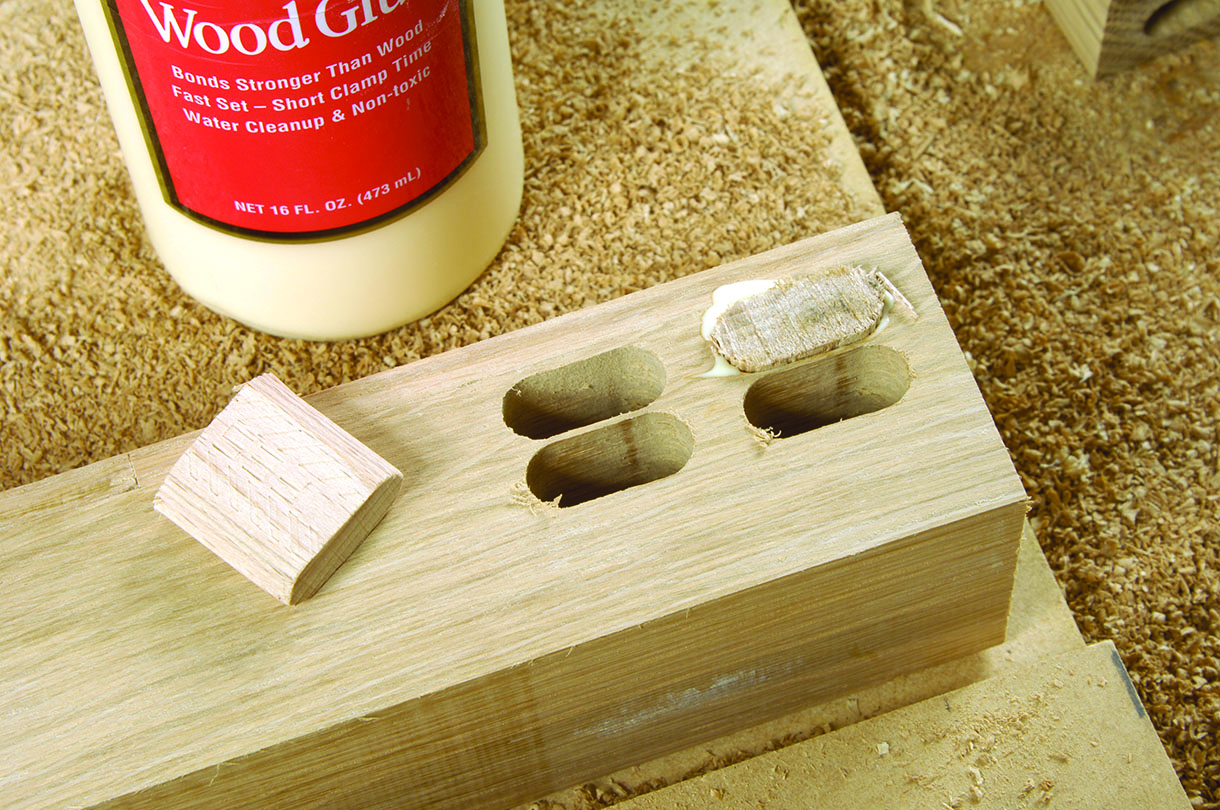
A. Fitting Dominos cut in half to make the repair
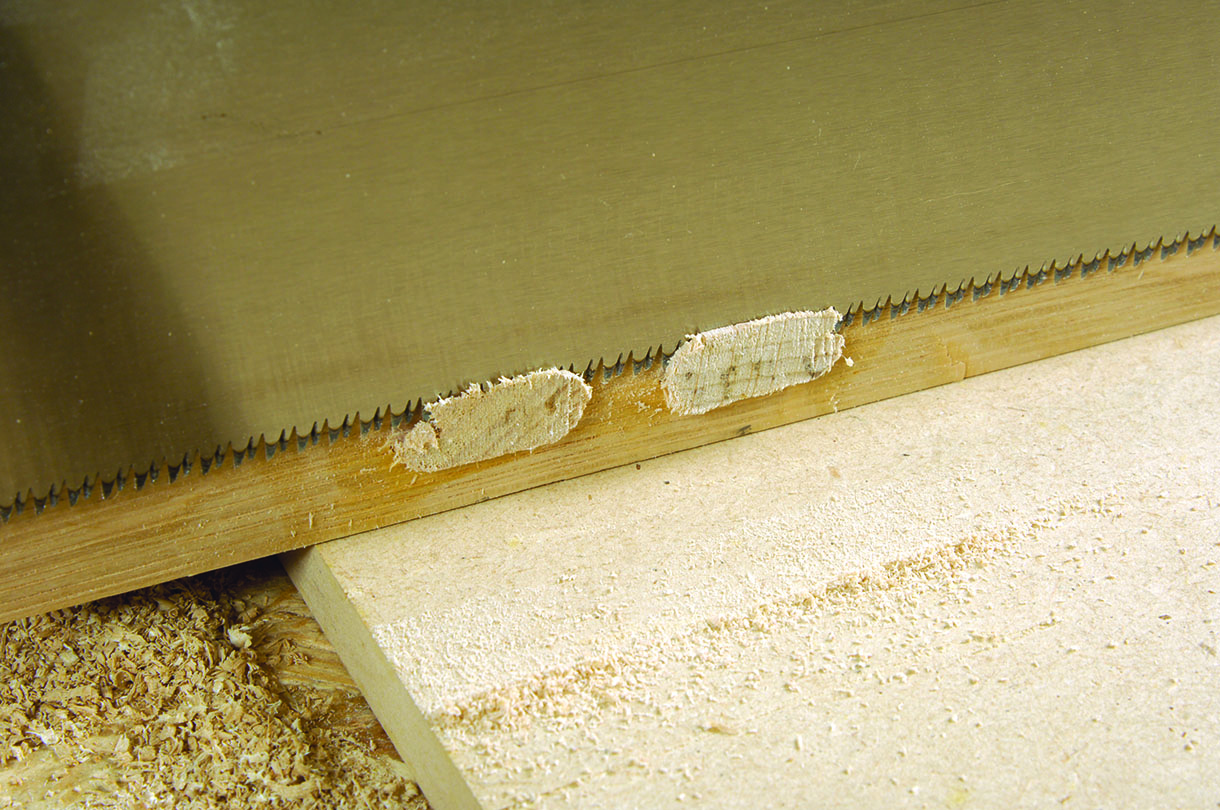
B. Cut the waste off flush before planing or belt sanding
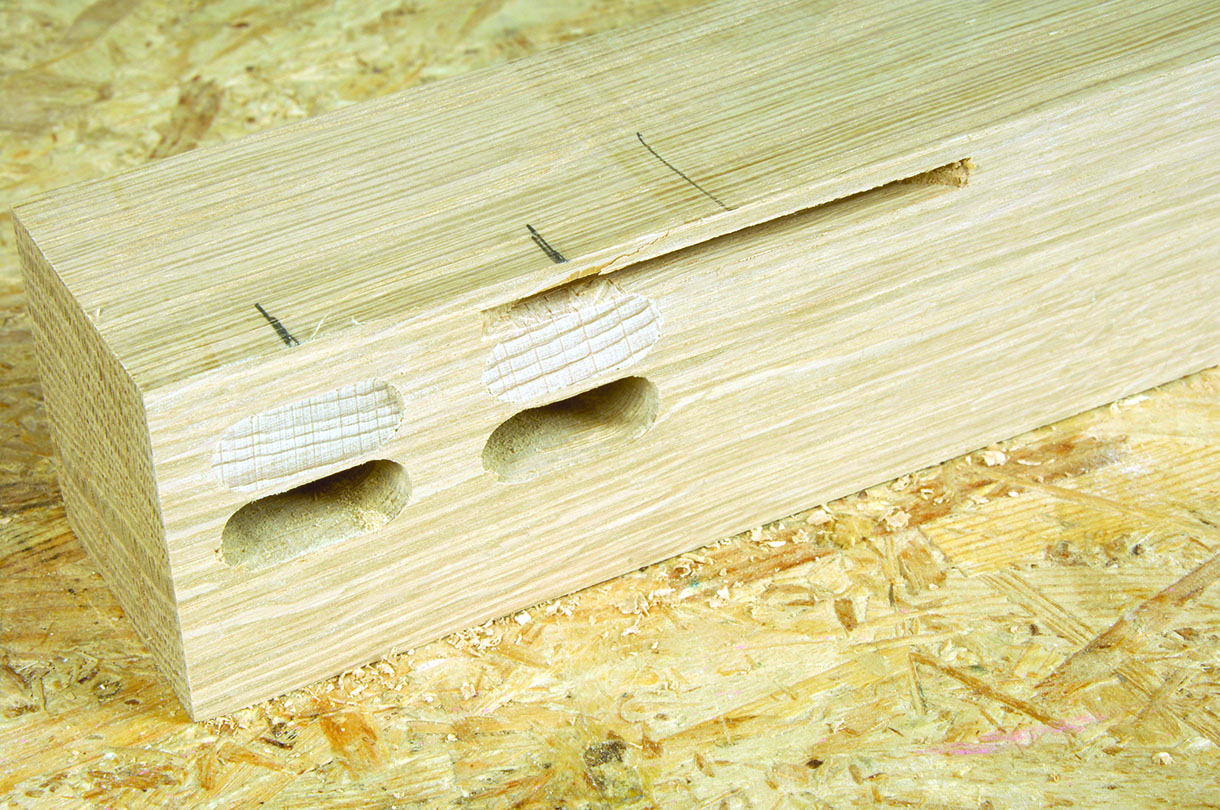
C. Almost invisible and strong repair
4–7. Dry assemble and cramp up in order to measure accurately the space between the ends for all the drawer rails. The size should be consistent throughout. Measure up for the carcass bottom board; this can now be cut exactly to size. Dry fit it in place, mark biscuit positions where it meets the carcass ends and onto the front and back rails; note the end slots must be ‘0’ biscuits to avoid showing through the end panels. Knock the assembly apart, then biscuit and glue the bottom board to the front and back rails only.
4. The carcass dry-assembled in order to measure up the drawer rails
5. A narrowed-down Domino is easier to extract when test assembling
6. Making the ‘0’ biscuit slots for the carcass bottom
7. The glued-up carcass bottom and rail; note the block used to keep it square
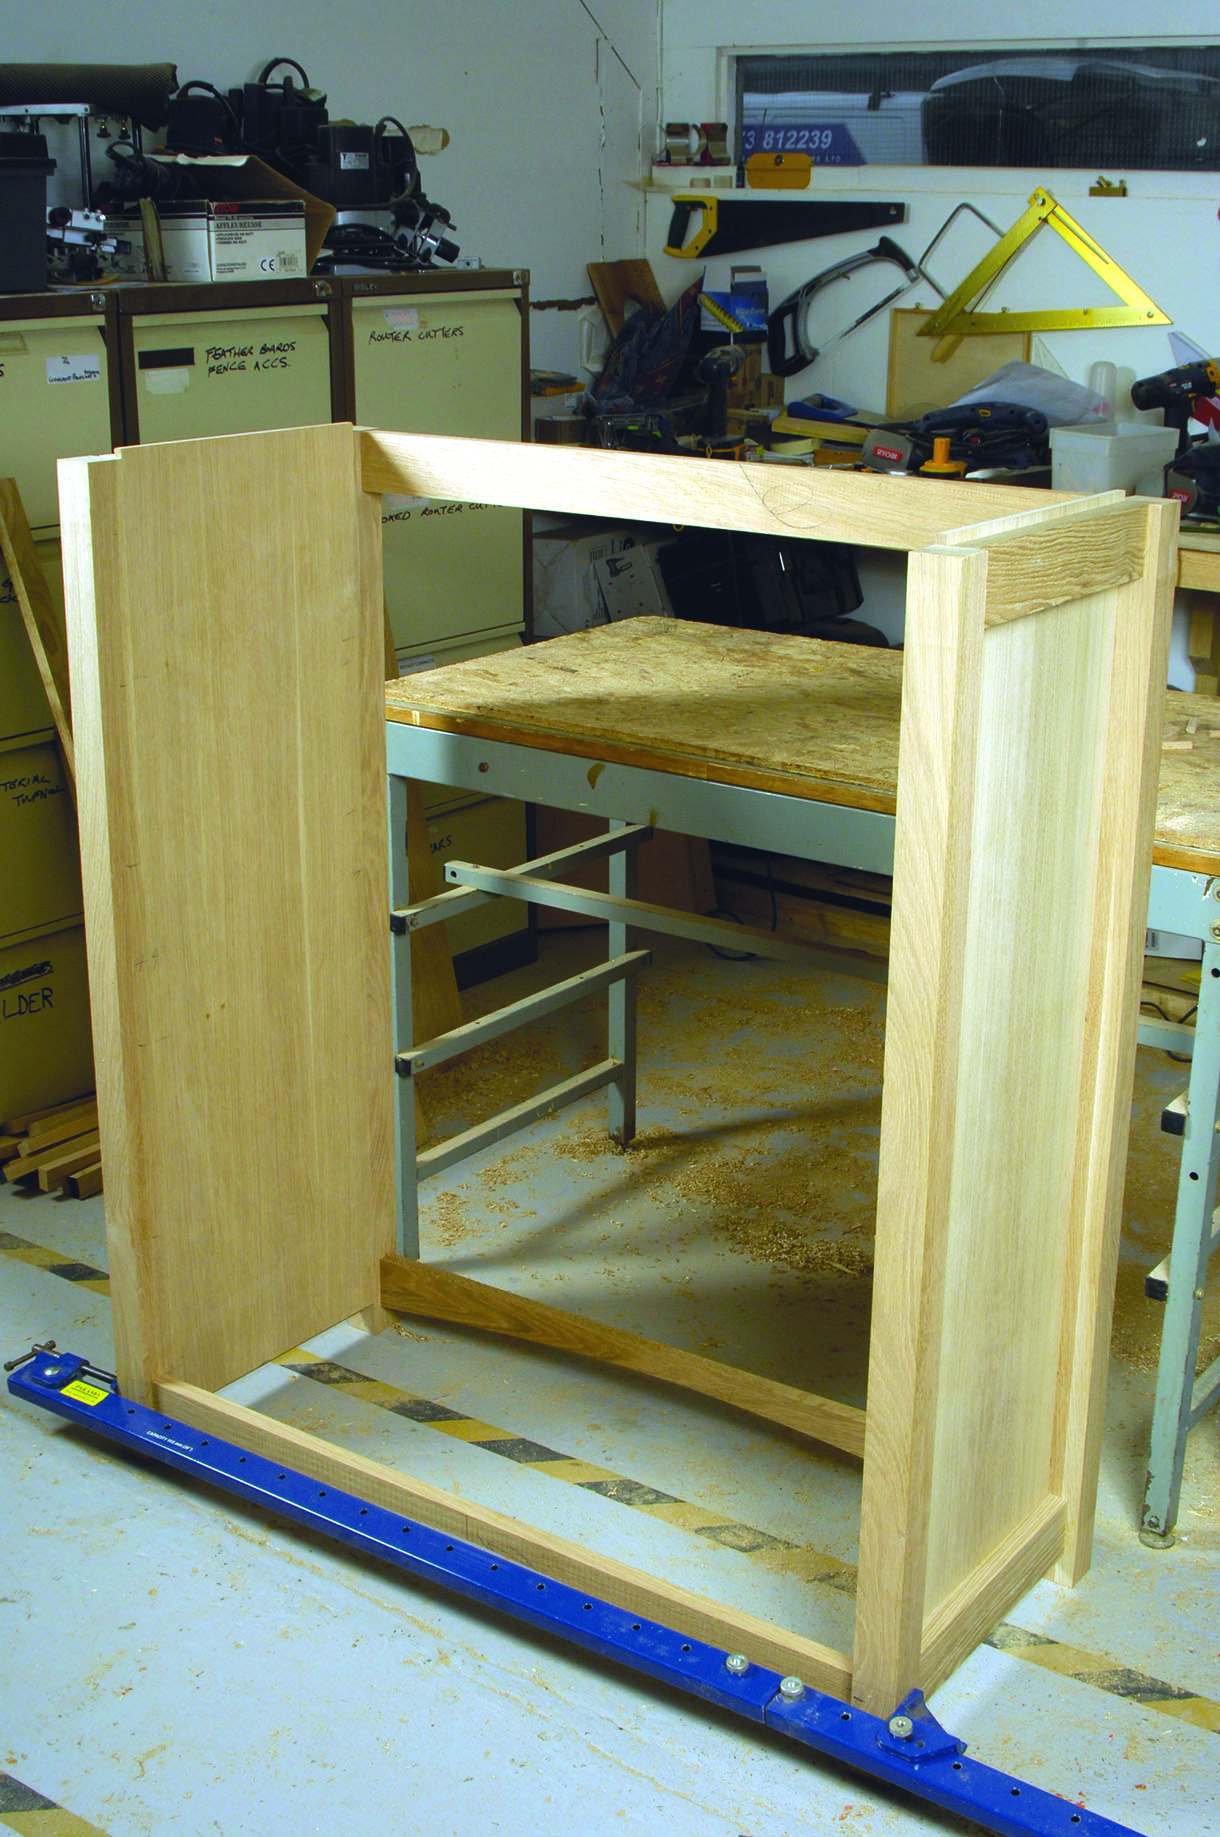
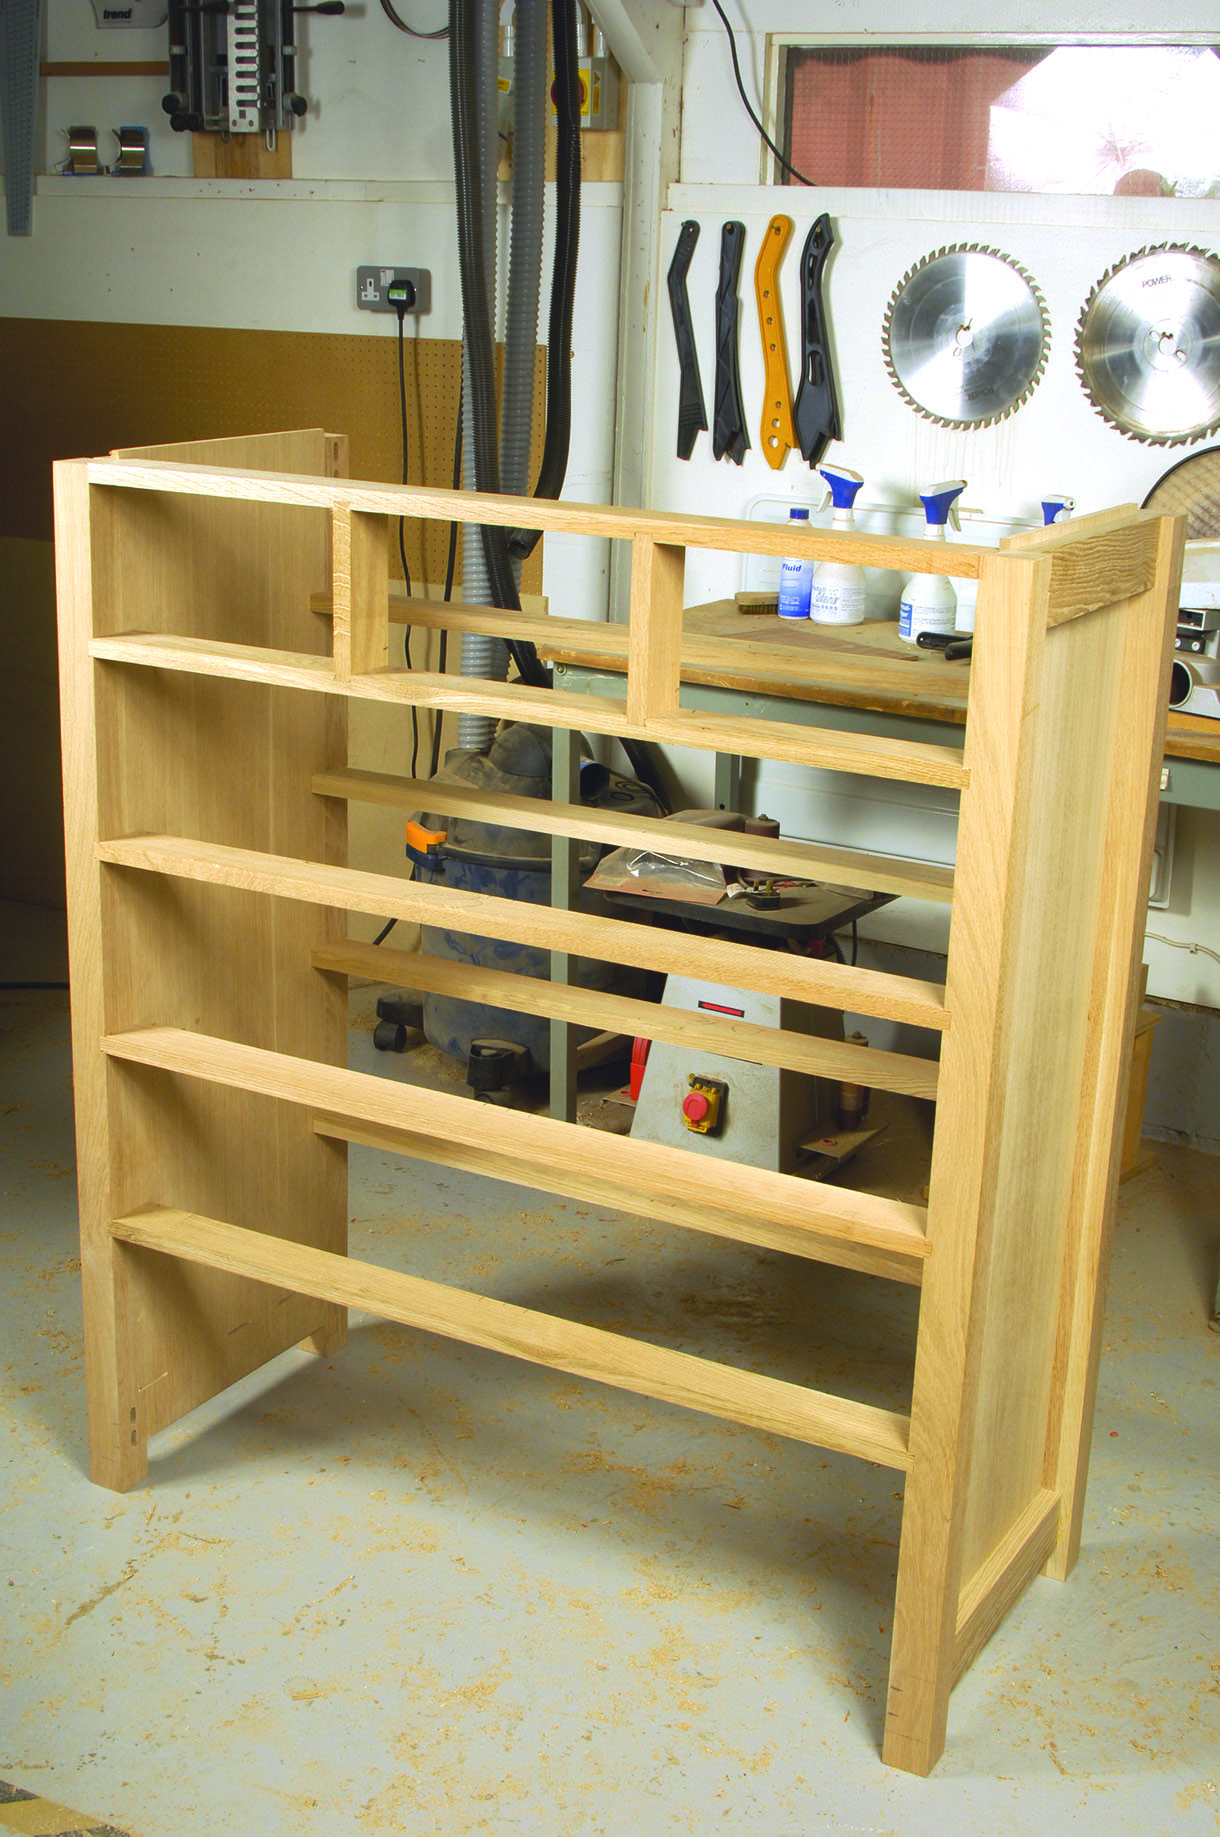
Dry assembly
8–9. Now dry assemble the carcass with rails in place, using a block and mallet. Get the rails flush on the front and the back ones knocked forward to give the correct gap for the back panel; note that you will need to cramp across the carcass middle to allow the dovetails to go in easily without damage as the carcass will almost certainly bow a little.

8. A trial assembly of a housing joint
9. The back panel allowance – shown on the finished piece
Drawer supports
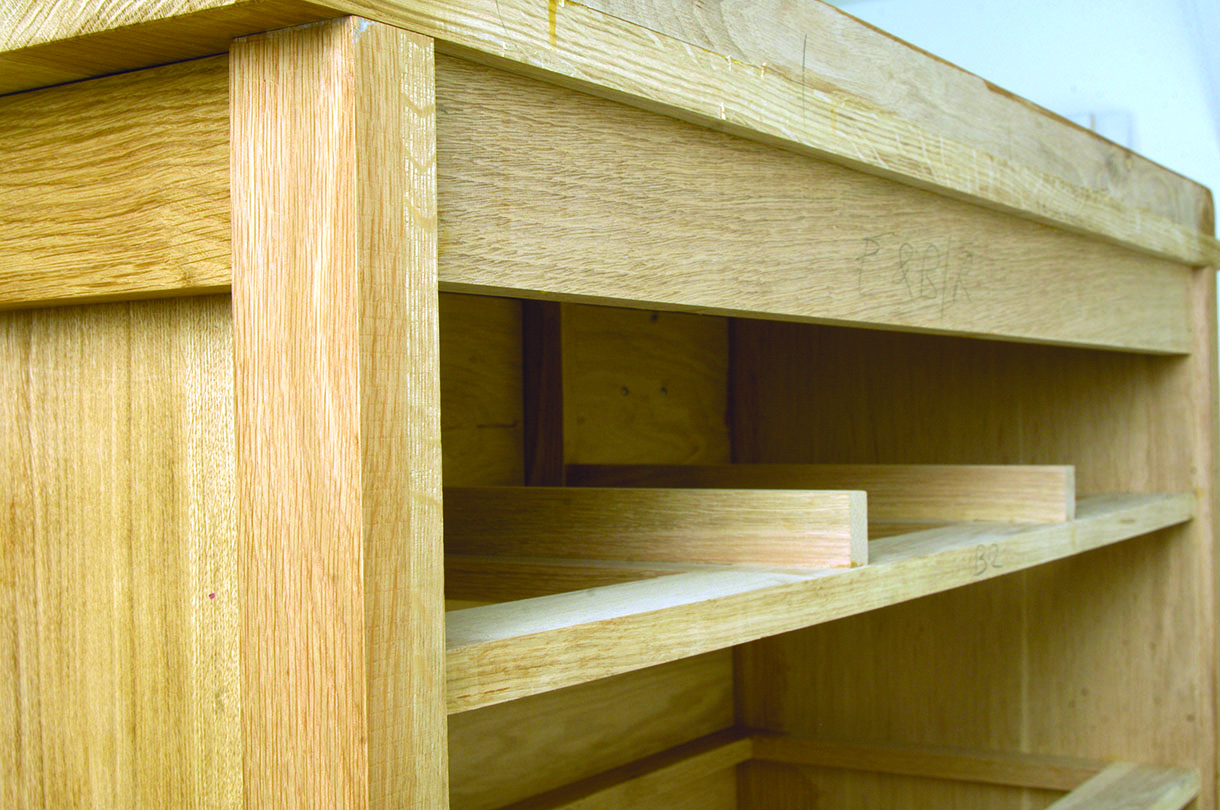
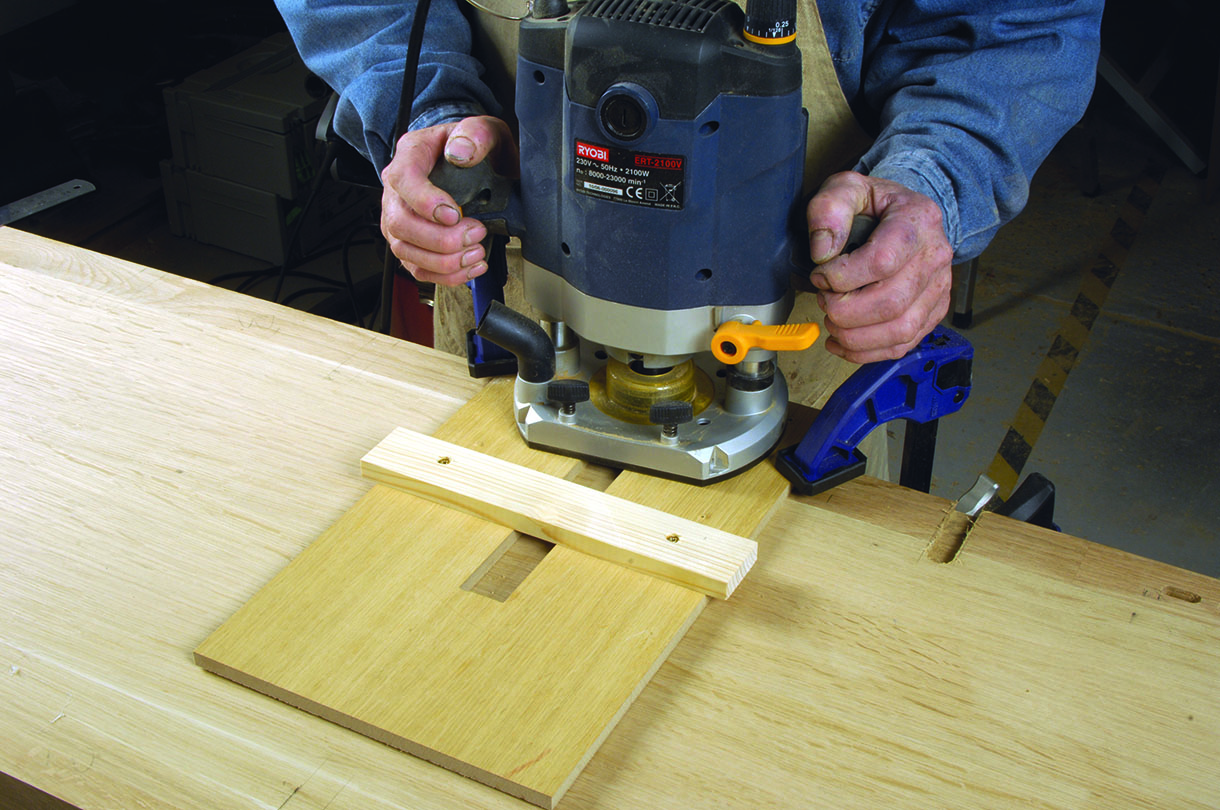
Measure the gap between the front and back drawer rails; this should be consistent. Cut the drawer supports to fit this measurement. There are two narrow outer supports and one wide middle one, except for the small top drawers where there are two wide supports with uprights to separate the drawers; note that these uprights can be biscuited and glued in the centre of the supports to make small sub-assemblies.
10–11. At the same time measure up for the two drawer stiles that go between the small drawers. These are housed exactly as the rails are; if you leave your router table set up these can be quickly machined.
10. Cutting a drawer stile housing
11. The stile in situ before sanding to remove fluff
12–13. Mark all drawer supports ready for Dominos, one slot for each narrow support and two for the wide ones, using 6mm-thick Dominos. Make a marking jig to ensure consistency, then it won’t matter where each component goes when it comes to final assembly.The narrow components will simply butt-glue against the carcass sides.All the carcass components, bar the top itself, have now been cut, jointed and where appropriate made into sub-assemblies. Everything can now be knocked apart and all internal or hard-to-access surfaces sanded prior to assembly. Machine the back panel rebate with a large straight cutter.
12. Checking that all the housings fit – carcass rails not present
13. Drawer supports are machined using a Domino ‘bench hook’
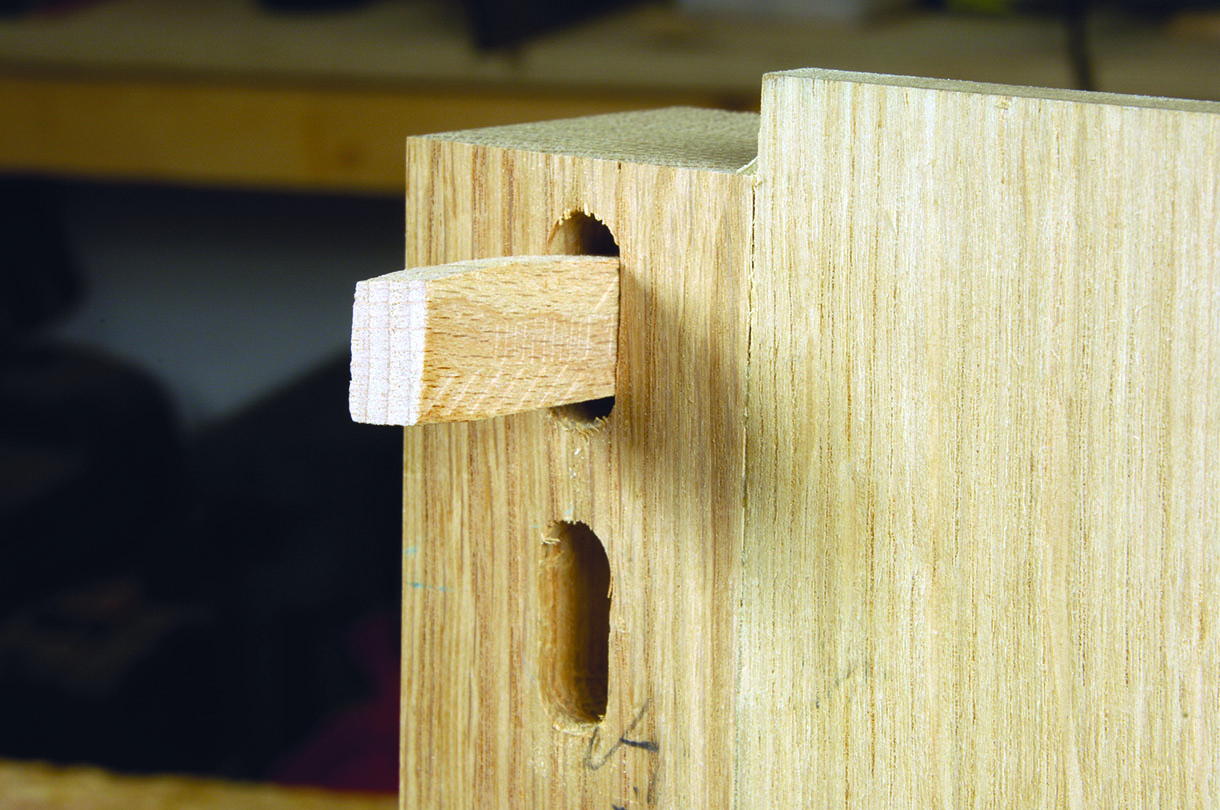
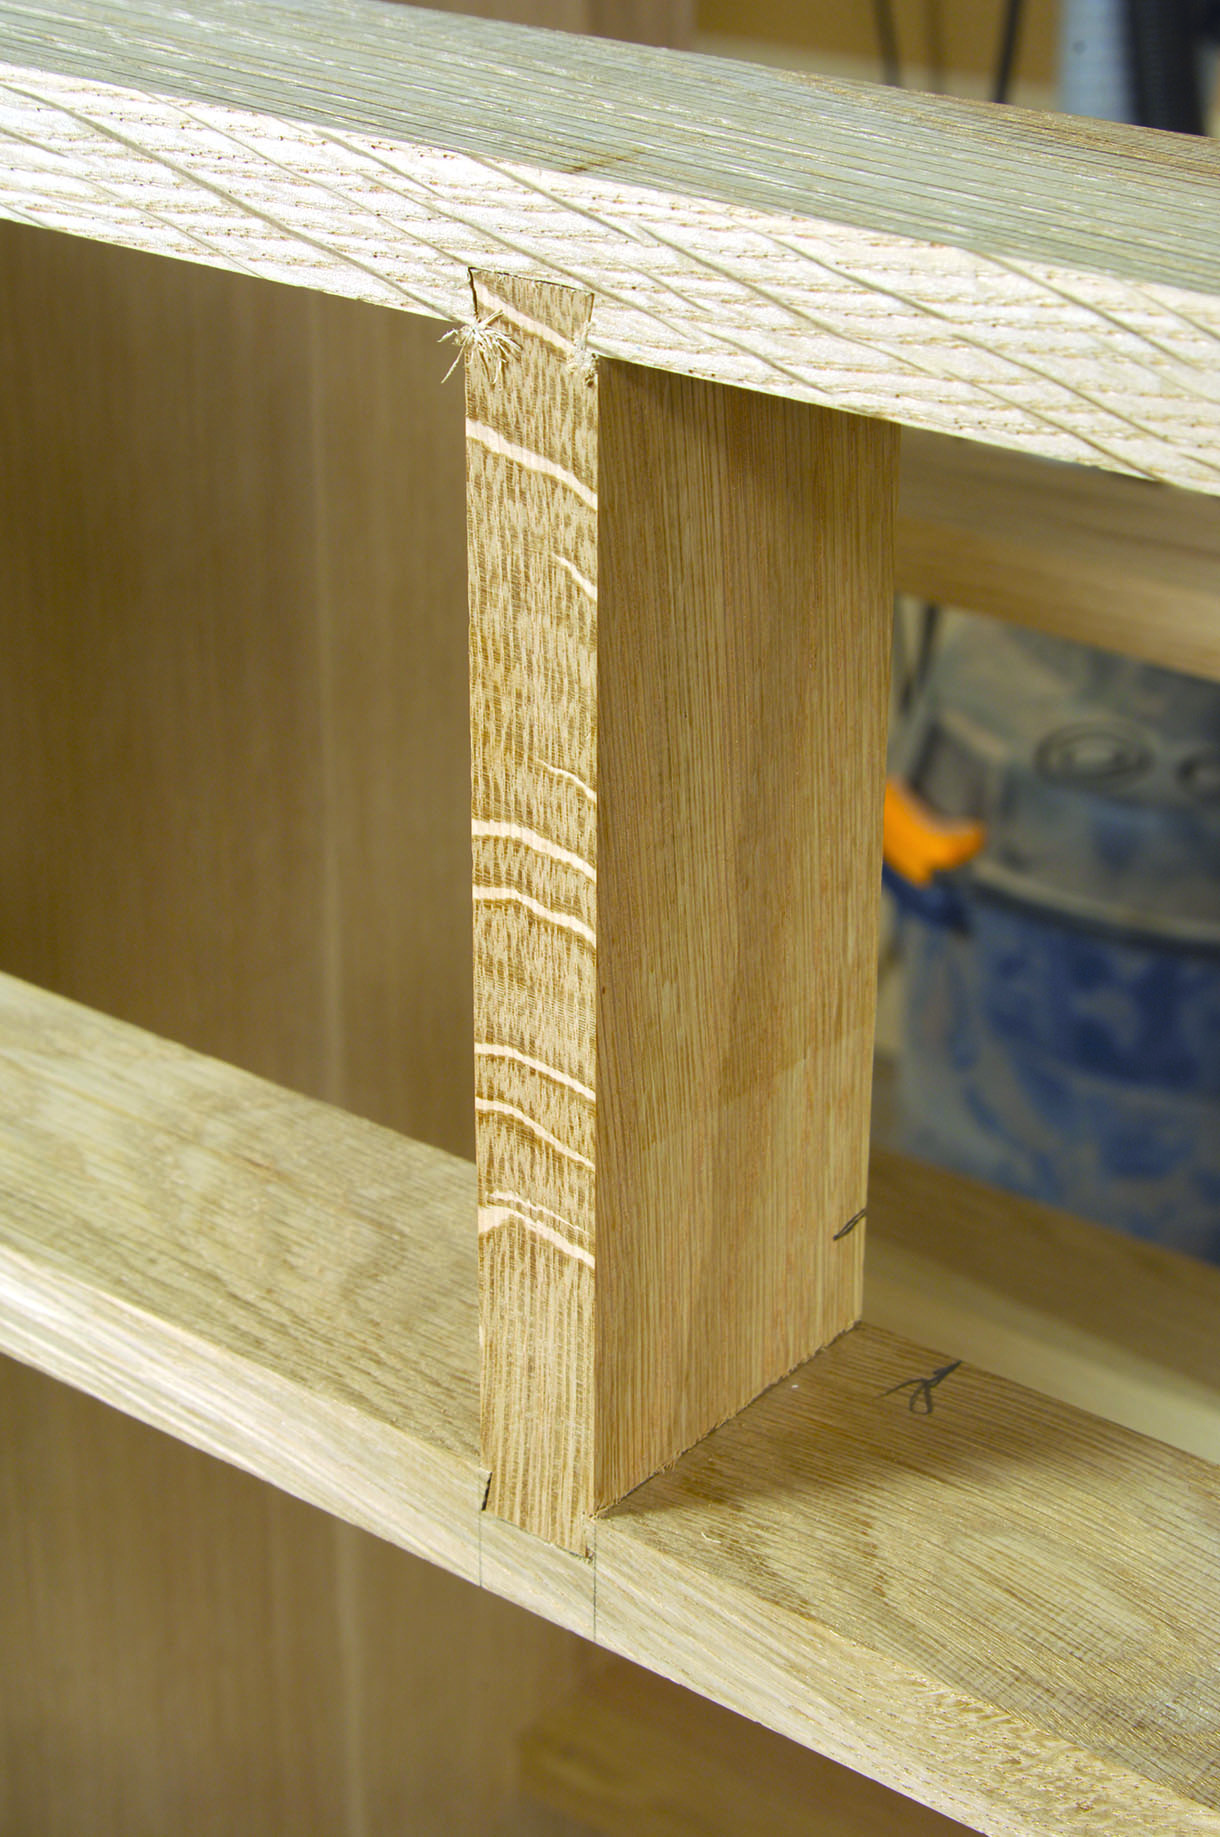
Dovetail housings
A. Place both end panels face down on the bench with the inside faces upwards. Mark up where the drawer rails will be, across both end panels; this will then allow you to accurately mark out for the housing joints.
A. For accurate housings, mark across both back panels
B. You need a large 19mm-diameter dovetail router cutter and a big 1⁄2in collet router with a 30mm or
similar guidebush. Make up a housing jig using the tablesaw to give a precise gap just large enough for the guidebush to slide through.
B. The tablesaw gives a precise template opening
C–E. As always, do a trial cut first to get the correct depth for the housing which will be about 7–9mm. The housing slot needs to be either the same as the rail width at the front but deeper at the back to account for the 10mm back panel or, as I did it, the same slot length but with the dovetails on the rail ends cut back by the thickness of the back panel. Machine all slots but note that the top front rail isn’t housed as it is too close to the end of the board; this is better biscuited to help hold it in place. Now machine the dovetails on the end of each rail. This is done vertically on the router table using a sub-table surface and a high fence facing to stop the components dropping into the cutter opening. Take your original measured drawer rail length and add the depth of the dovetail housing x 2 to give the finished rail length. Cut all rails exactly to this length bar the top front one, which is a biscuited butt-fit in between.
Do some test cuts, machine both rail faces and try fitting in a housing and adjust until it is a good tight fit.
Use a fine saw and chisel to round the ‘inner’ end, keeping the dovetail angle. Tap the rail home then, once satisfied with the fit, machine all rail ends in the same fashion.
C. The stop screwed to the template limits the cut length
D. The finished housing; sanding will remove the fluff
E. All the housings and Domino joints have been machined
Glue up
This is more than a little stressful so get everything ready first. You will need plenty of long sash cramps and several long deep-throat clamps to span the carcass width plus a number of shorter sash cramps. PVA glue will give the best working time as it won’t start setting too quickly.
First, glue and cramp the carcass rails and bottom shelf assembly in place. Next, glue and fit the front drawer rails then the drawer supports and finally the back drawer rails. Your longest cramps are used to
hold the carcass together crosswise, with the shorter ones pulling the drawer support frames together from front to back. You will almost certainly require help and plenty of pads to protect the wood from crushing.
Check the whole assembly is square and all joints closed properly, then carefully remove excess glue using
only a slightly damp cloth to avoid stain marks on the oak.
Making drawers
The drawers are simply tongue and grooved construction and will slide on the drawer supports in the carcass. Measure the openings to ensure you get the drawer box sizes correct. The front and back fit within the sides; add the tongue length x 2 to the length of the internal front and back measurement in each case. Machine all parts to width and thickness. The width, which will be the height of the drawer, should be a tight fit in the carcass; it will be trimmed later. The bases are oak-veneered ply to be cut to size later. Cut all solid parts to their respective lengths and mark them – sides or front and back – to avoid any confusion.
14. Set up the router table with a 6.4mm groover on an arbor and do test cuts for the groove until you have it exactly right. Machine all grooves including the drawer bottom grooves, leaving the groover at the same height. Now do the tongues; as the groover is not thick enough, use a piece of ply or MDF as a sliding sub-table on one pass to increase the effective cut width. The resultant tongue must be a nice tight fit in the grooves.

14. The drawer grooves that will hold the front, back and base
15–16. Assemble a couple of drawers, measure the size of drawer bottom required and cut out the ply to suit. Sand all drawer components, then glue, assemble and cramp. The drawer fronts need to be carefully sized and ‘gapped’ to fit in their respective positions in the carcass. Trim each drawer box to fit its particular position and fix on the drawer front when the handles are fitted in place. The handles must be aligned neatly from top to bottom on all drawers, apart of course, for the top middle one. Screw each front onto its respective drawer box from the inside.

15. Using a sliding sub-base to machine a wider rebate

16. An assembled drawer box ready to have its front planted on
The top
Loosen the two projecting tongues from the MDF end panels and house them into the top, using either the previous housing jig if it is long enough or making up another one if not. Bear in mind that a 9.5mm straight cutter will be used to make a 10mm or thereabouts slot, so either the slot in the jig needs to be slightly wider or the jig needs to be moved over between cuts. Make sure before you start that the MDF upstands are square to each other and mark their positions accurately onto the underside of the top, then clamp on the jig and machine the slots. Try fitting the top and adjust the widths of the slots a fraction if needed.
17. Now sand the top thoroughly and glue and fit to the top of the carcass using plenty of clamps to pull it down hard onto the carcass top. Lightly bevel the edges with a handplane.
17. The completed bare carcass awaiting back panel and drawers
Rubbing strips
Rubbing strips are glued onto the underside of the top. This avoids adding them to the general carcass assembly, but they are necessary to prevent the top drawers from simply hanging down at an angle when the drawers are pulled out.
18. Lastly, sand the entire carcass exterior, apply a clear sanding sealer and wax thoroughly.
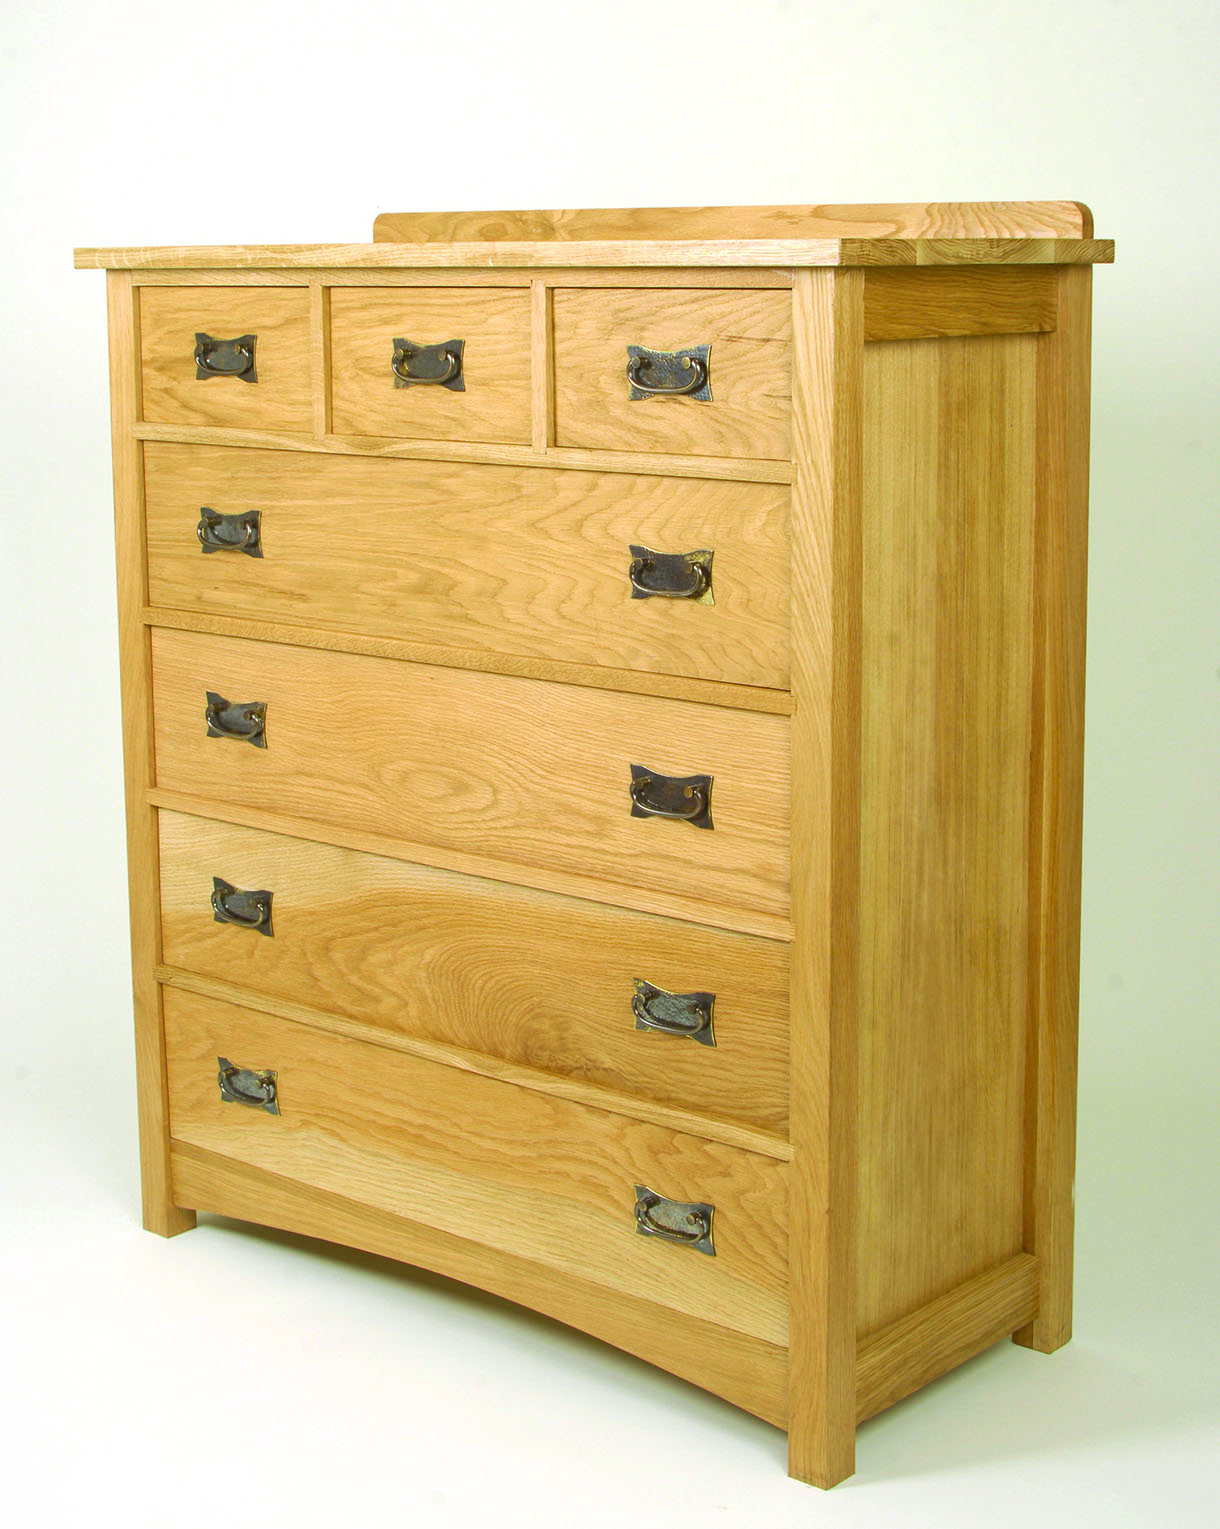
18. A simple but pleasing piece of functional furniture


1 Comment
are the plans and dimensions available for download or purchase? hard to see the dimensions as presented, but if the total is 1260mm tall, that is 4.1′ tall and a perfect size.