Try Turning a Wearable Ring:
Kurt Hertzog provides his top tips on using your lathe to make jewellery

Kurt Hertzog provides his top tips on using your lathe to make jewellery
Most woodturners have experimented with the variety of items that can be turned on a lathe. These range from pens to lamp posts, depending on the size of your lathe and your interests. While there are those who turn jewellery items such as earrings and bracelets, not many have ventured to rings. This month, let’s explore how to go about turning wearable rings. In the process, we will solve some of the material issues; sizing, design, workholding and more.
Your process flow might vary. You may be making rings of which size is not critical because the purchaser will test-fit their selection at time of purchase. Alternatively, you may be creating a ring to a specific size.
Depending on your location in the world, ring sizes can be defined by either letters, numbers or actual dimensional data. Even with an ISO standard defining size as the inner circumference in millimetres, there are still many different measurement systems. A quick Internet search will point you in the right direction for details of the sizing systems and the actual dimensions.
So, let’s have some fun making rings on the lathe. Whether you are making finger, toe, ear, nose or other rings, I’ll give you several methods of making them to accommodate multiple designs.
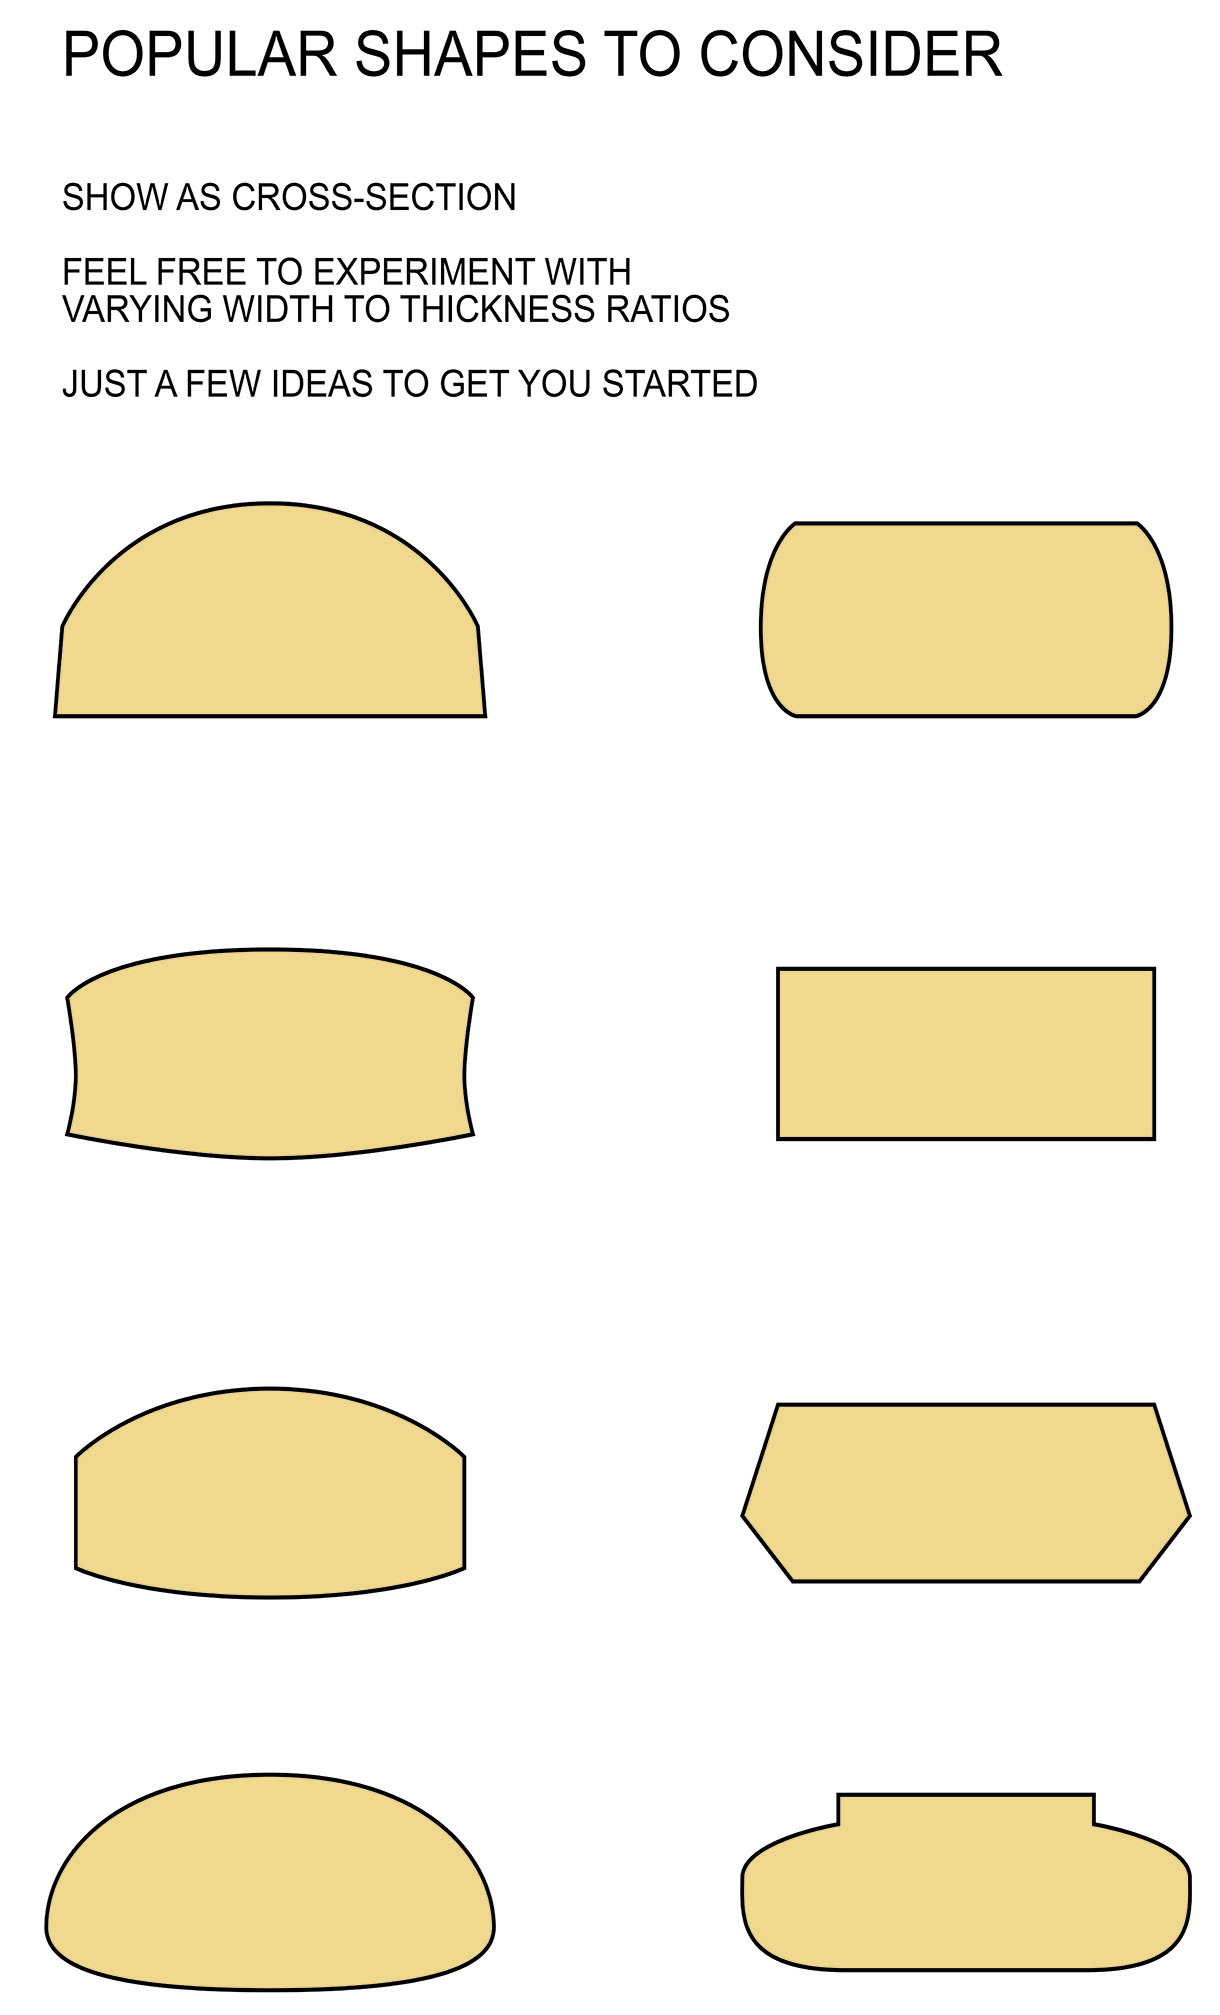
Measuring
The best way to create a properly-sized ring for someone is to measure a ring they regularly wear and one which they are happy with the fit of. You can also use the width and the wall thickness to help guide you to what is comfortable for them. If erring on the side of caution, a ring that is too big is a problem easily solved

Material selection
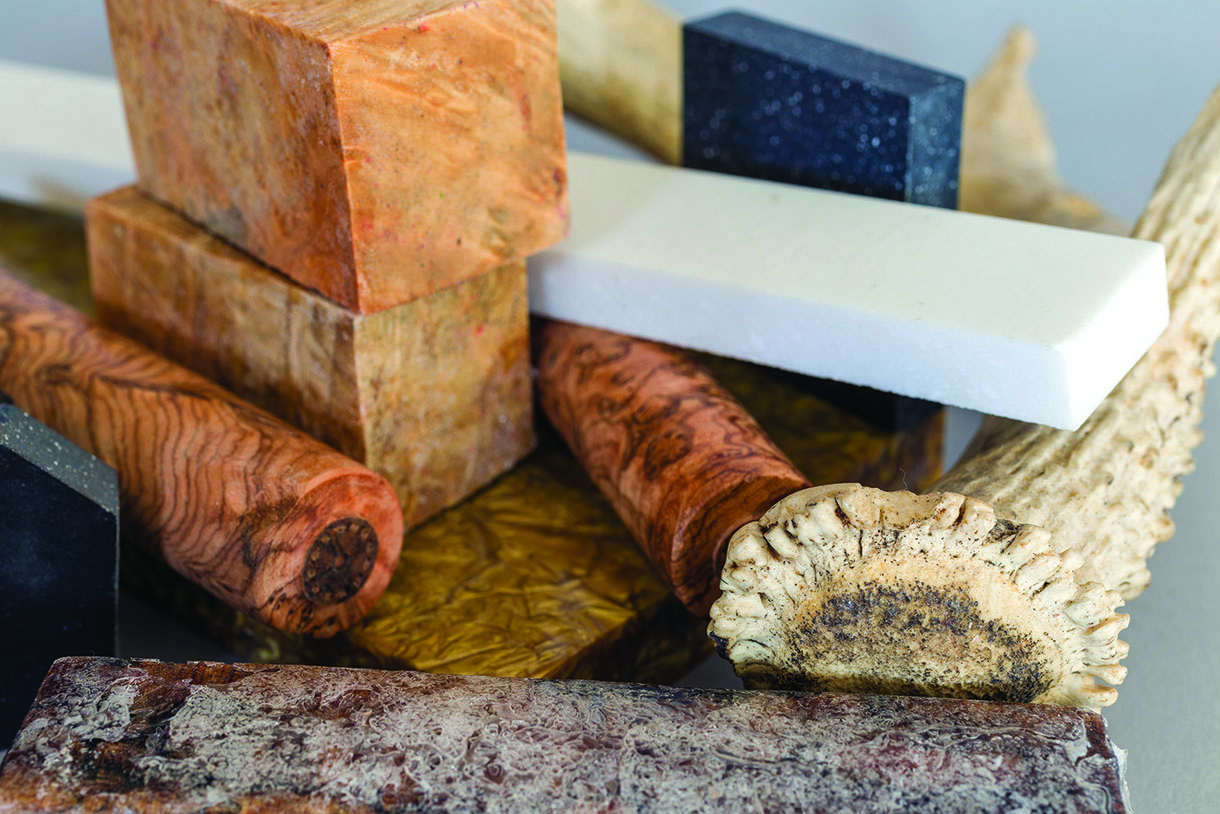
Rings are best made from materials that are dense and without the usual regular grain patterns. Solid surface materials, stabilised woods (particularly burls), plastics, bone and antler work very well as materials for rings that can be turned thin yet are durable.
Cutting the ring and drilling the hole
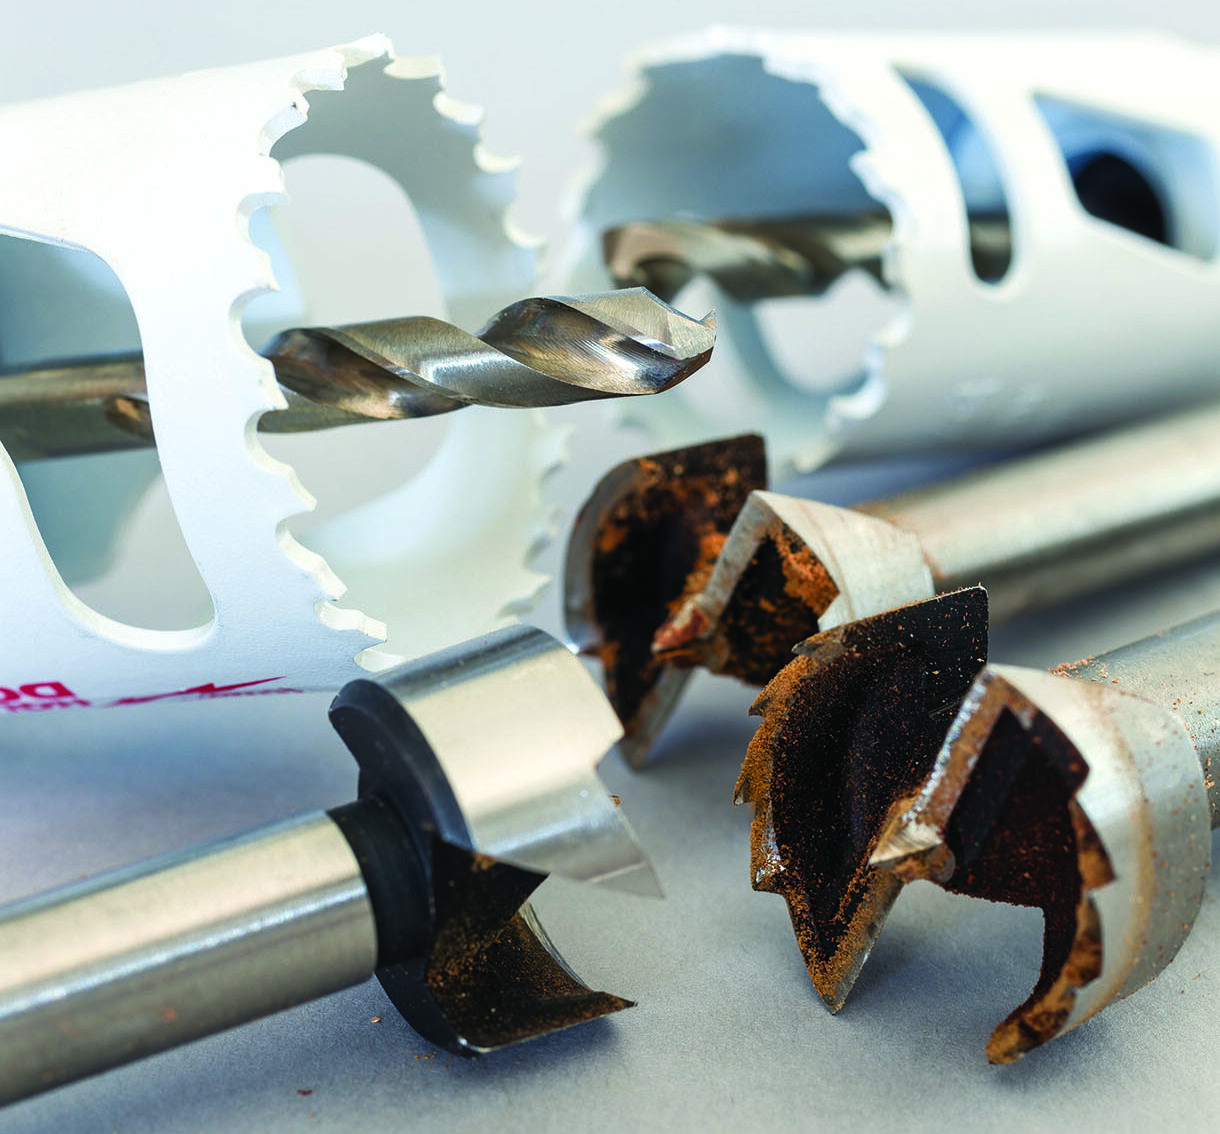
Hole saws and Forstner bits in the appropriate sizes are very helpful to speed the cutting process. The hole saw should be larger than the ring body and the Forstner bit slightly smaller than the desired ring size. Forstner
bits are more desirable than regular twist drills because they are less aggressive. Neither is critical as there are workarounds for both
For flat stock, use the hole saw to cut out blanks for the ring(s). Regardless of the material, hole saws are intended to run slowly, letting the teeth cut the material. Overheating will damage them. Use a sacrificial backing board for the best breakthrough result on the backside of the stock
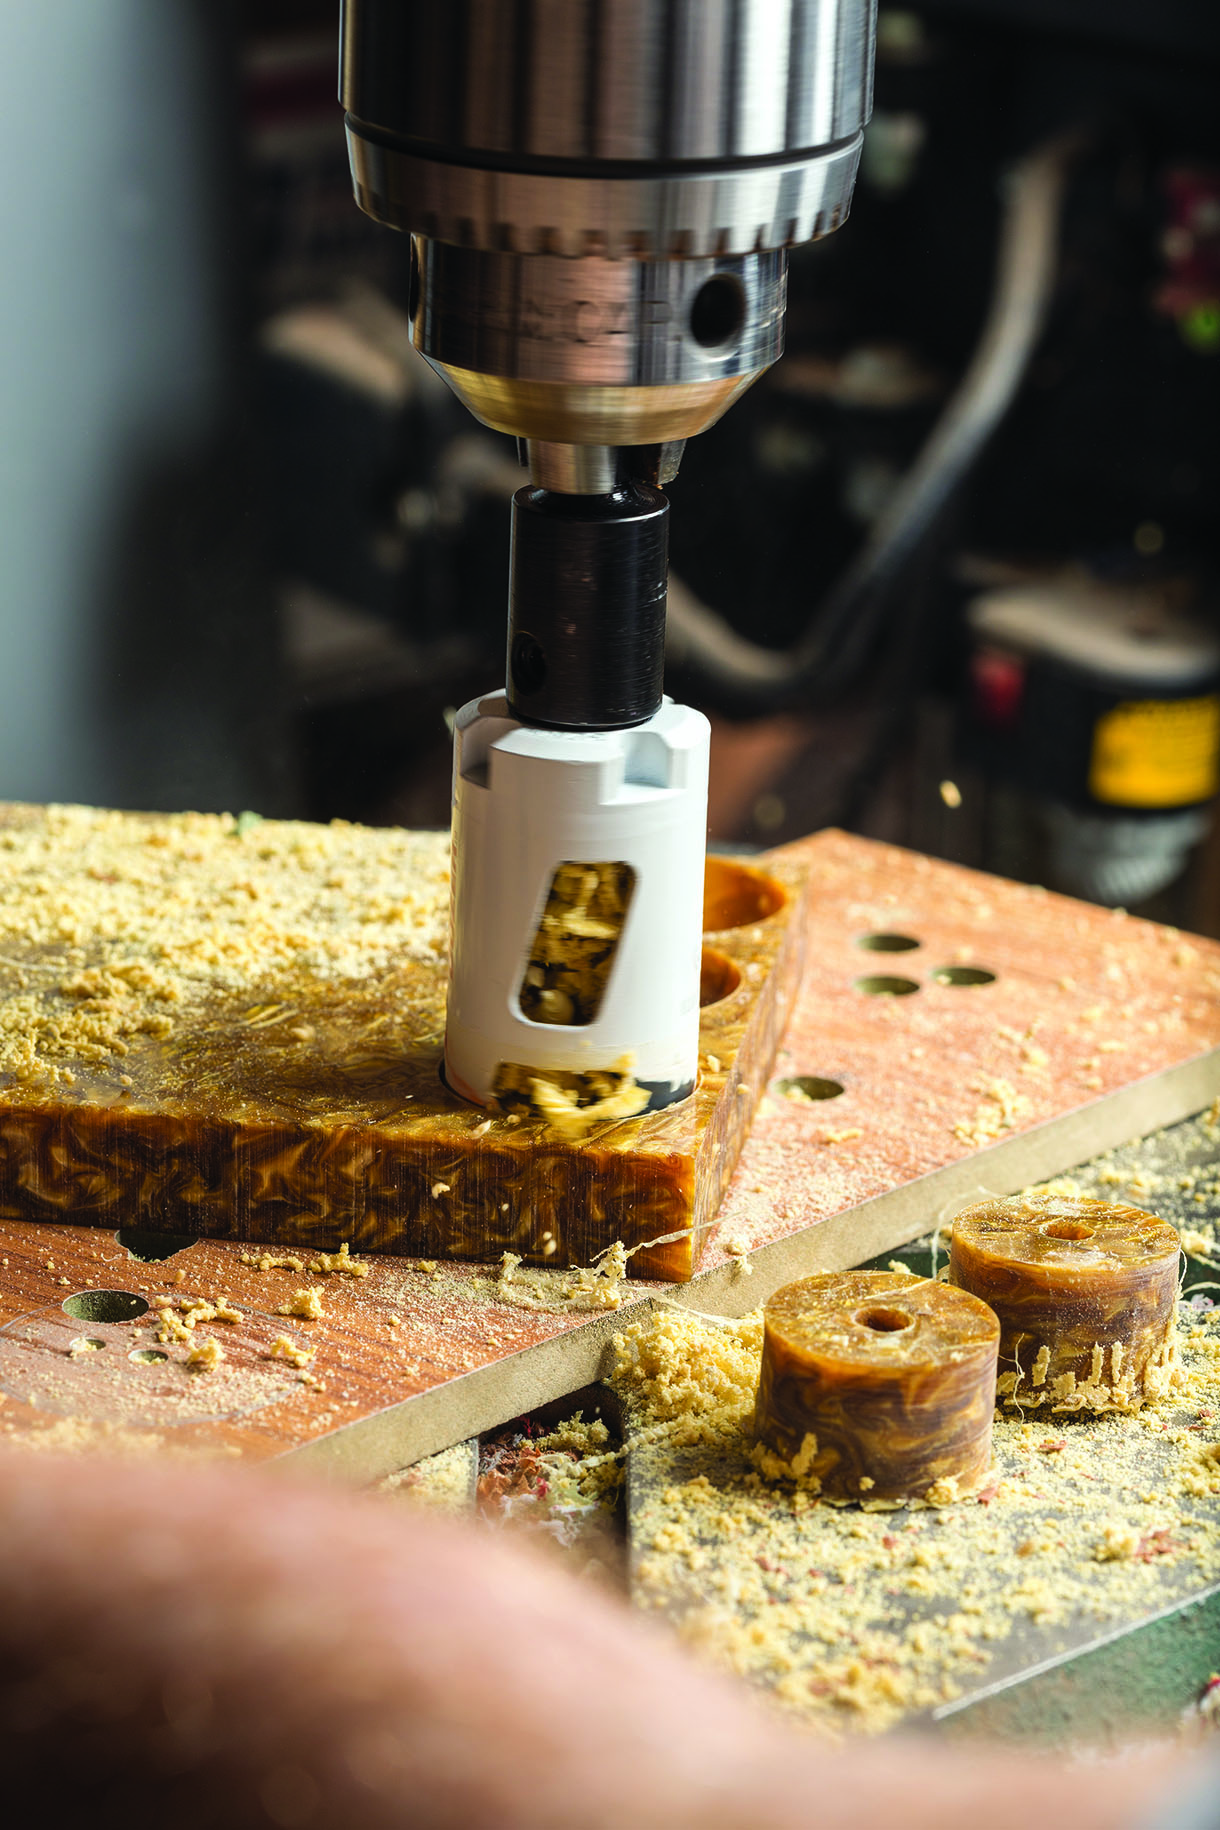
If you are going to drill into materials held in a chuck, ensure that your cutter will clear the body of the chuck. If not, insert a sacrificial material that will back up the material being drilled, to protect your chuck and cutter. Ease the drilling force as you come out of the material
Because my Forstner bit will pass inside my chuck body, I can stack a couple of the plastic ring blanks in the jaws at one time. A slow rpm will produce a better hole and increase the lifetime of your Forstner bit. For safety, always hold the drill chuck when retracting
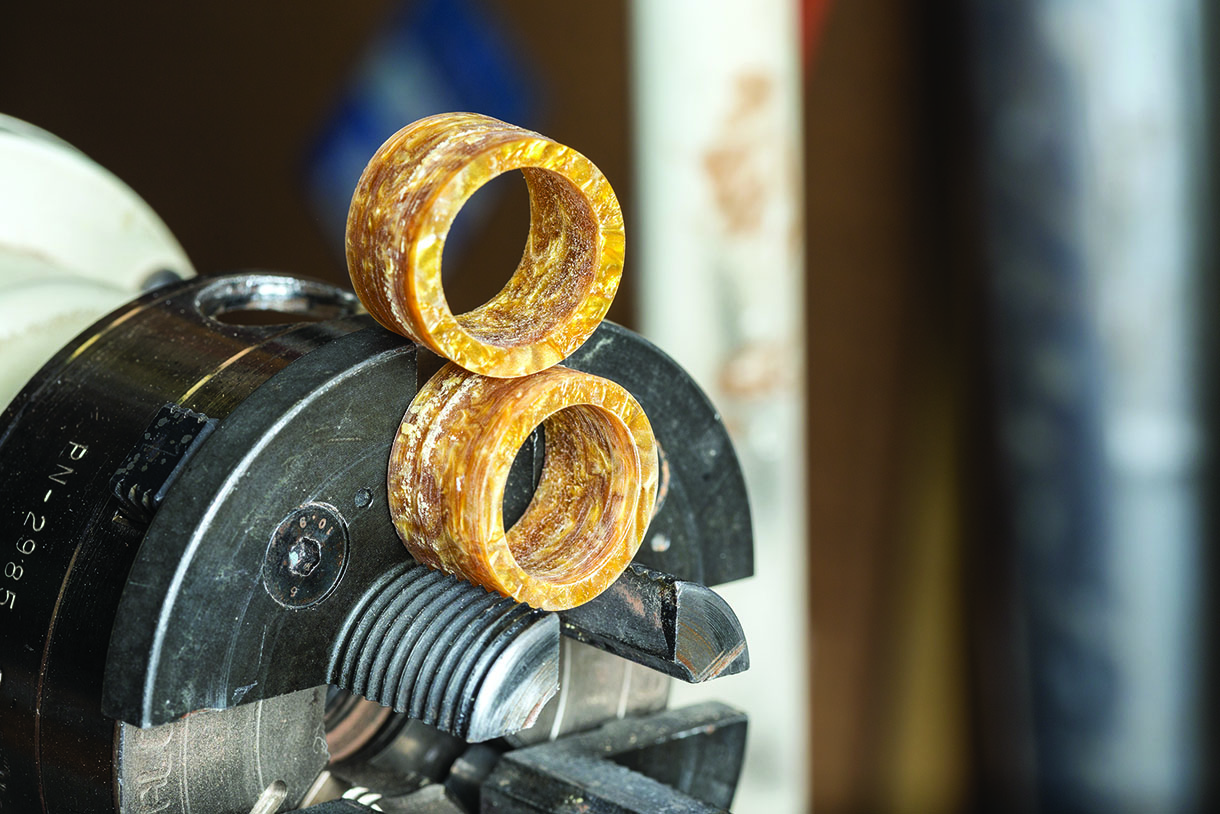
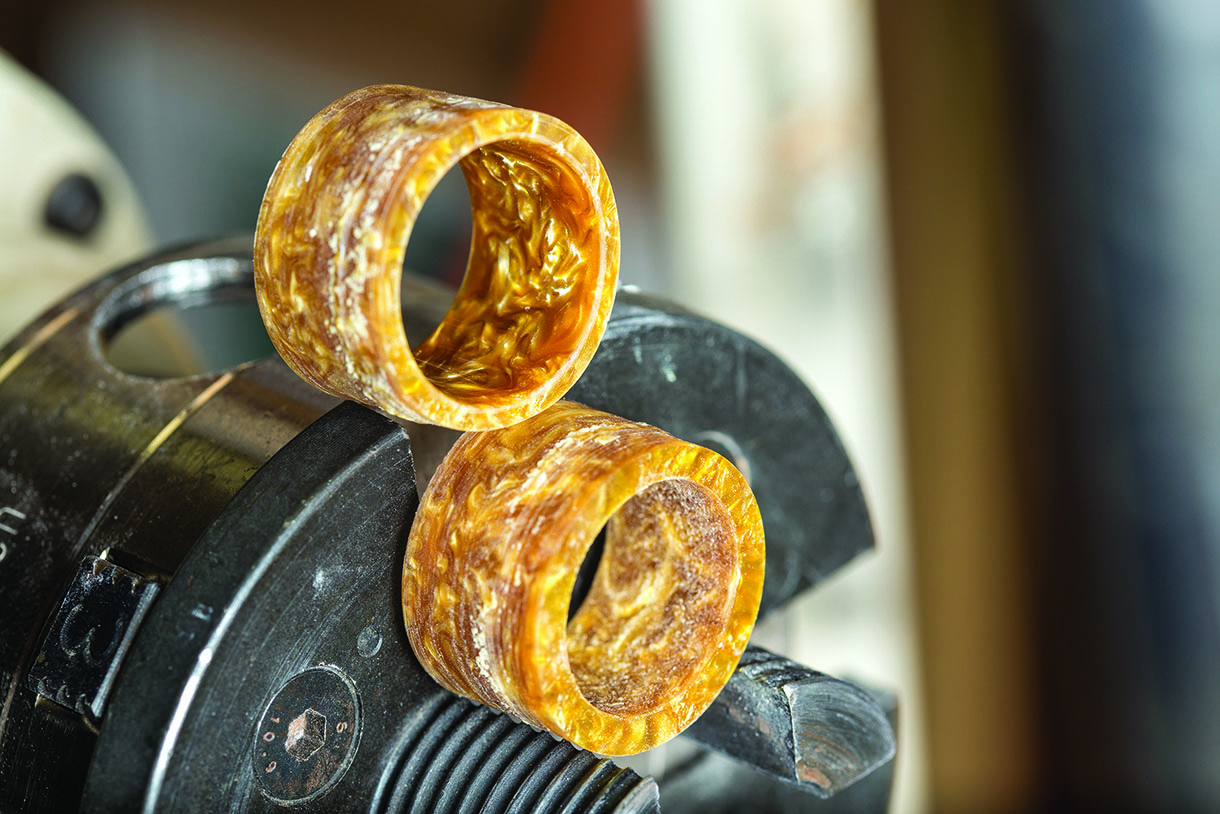
This picture shows a pair of ring blanks, slightly tighter than the end ring size desired and more than the desired wall thickness. The plastic material used was thick enough, so these will yield at least two rings per blank. Separation of the two rings from one roughed-out blank is easier near the end
If you don’t have a drill press, you can use a faceplate with a wooden face and some double-sided tape. Fasten your material to the tape and then proceed with your hole saw and Forstner bit. Take care as the double-sided tape can lose its grip if you ask too much of it
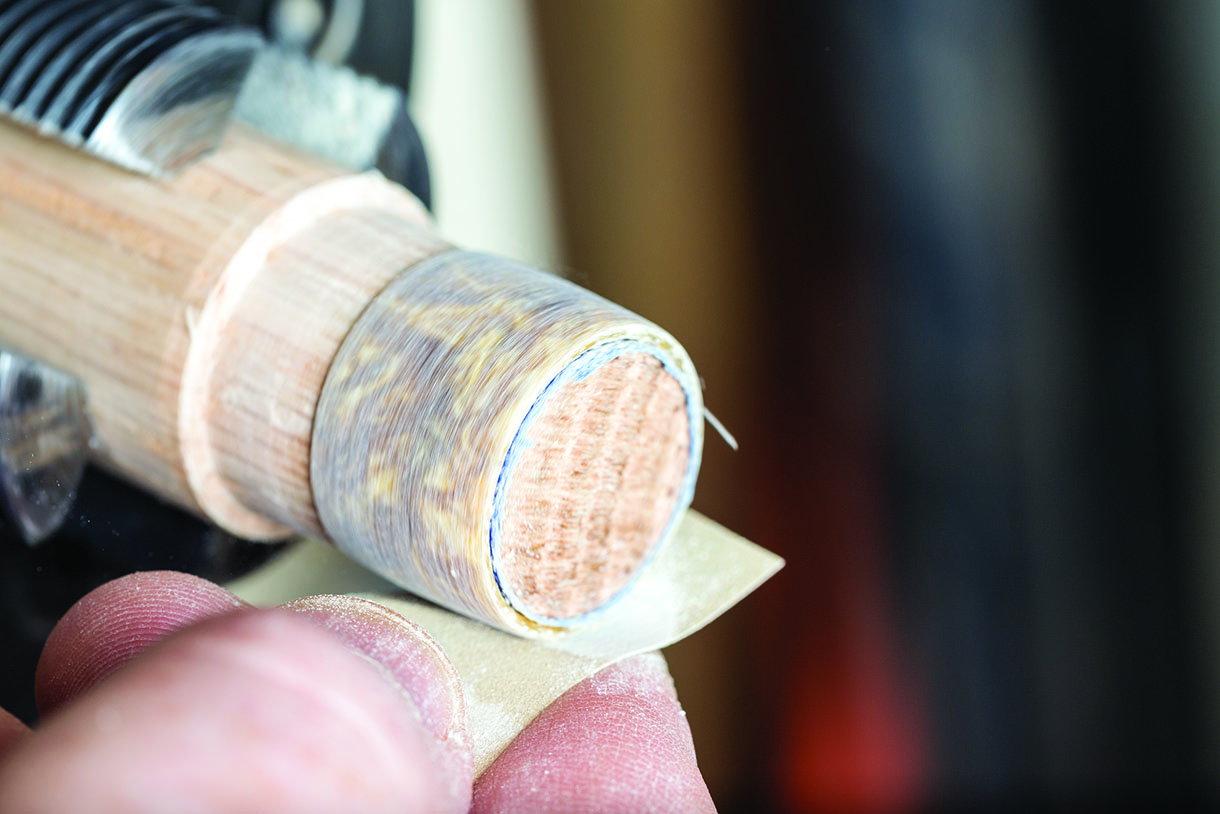
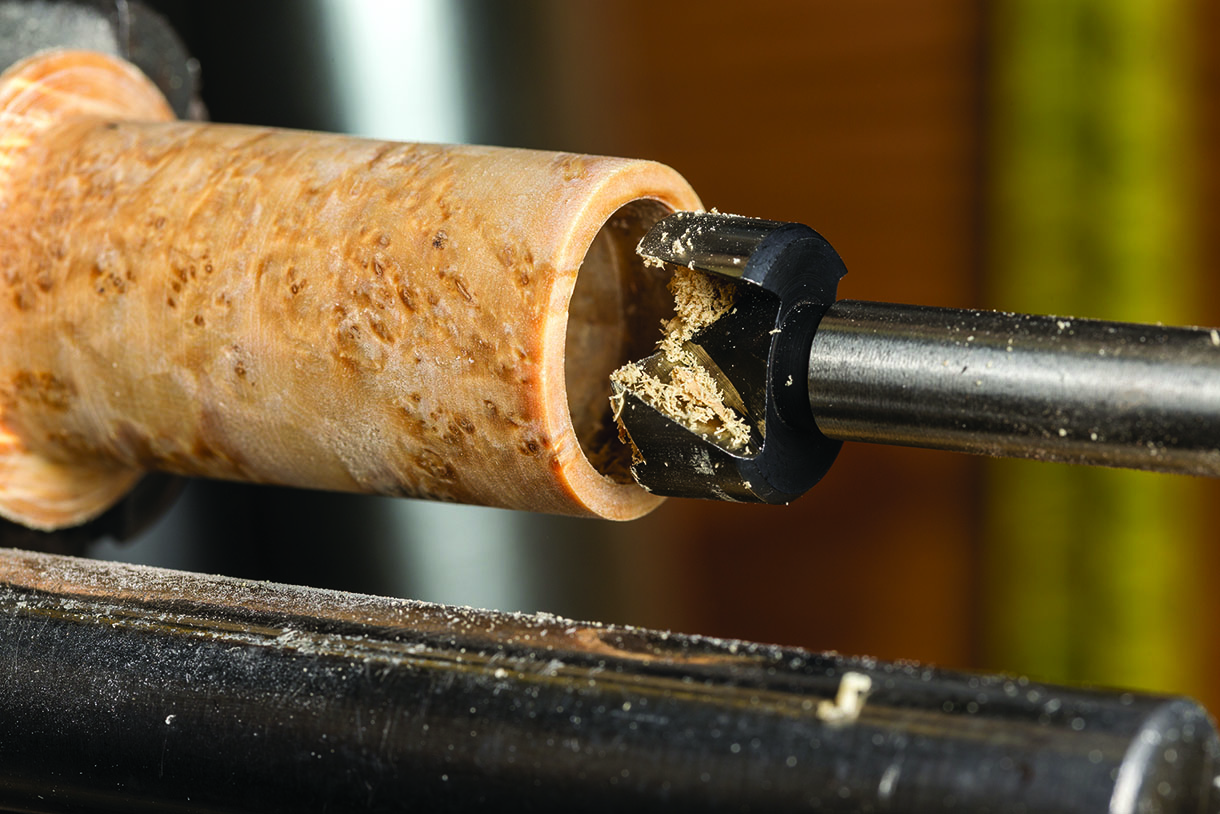
Finishing the inside
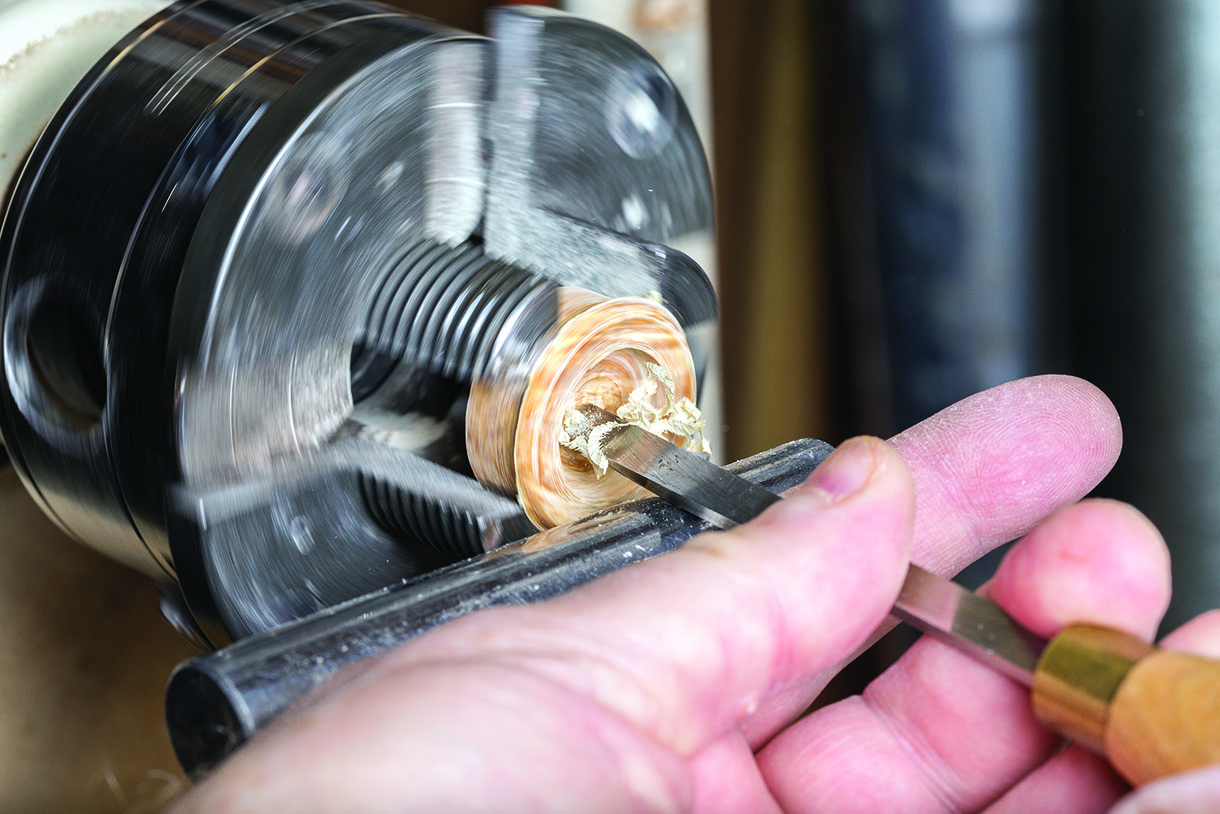
With the outside still rough finished, it is time to size and finish the inner surface to completion. If you don’t have a Forstner bit or one of the correct size, you can open up the hole the old fashioned way. This is most easily done using a small, round nose scraper
Take the inner surface to the desired finish. Rather than sticking my finger into situations like this, I wrap the abrasive around a dowel, marker or other round body. It is far safer and the inner surface flatness will be easier to maintain
Plastics will benefit from working through the abrasive grits and then working through the MicroMesh range (or other ultra-fine material). There are also plastic polishes available with fine abrasives. Get the inside to the end point now as you won’t come back to it
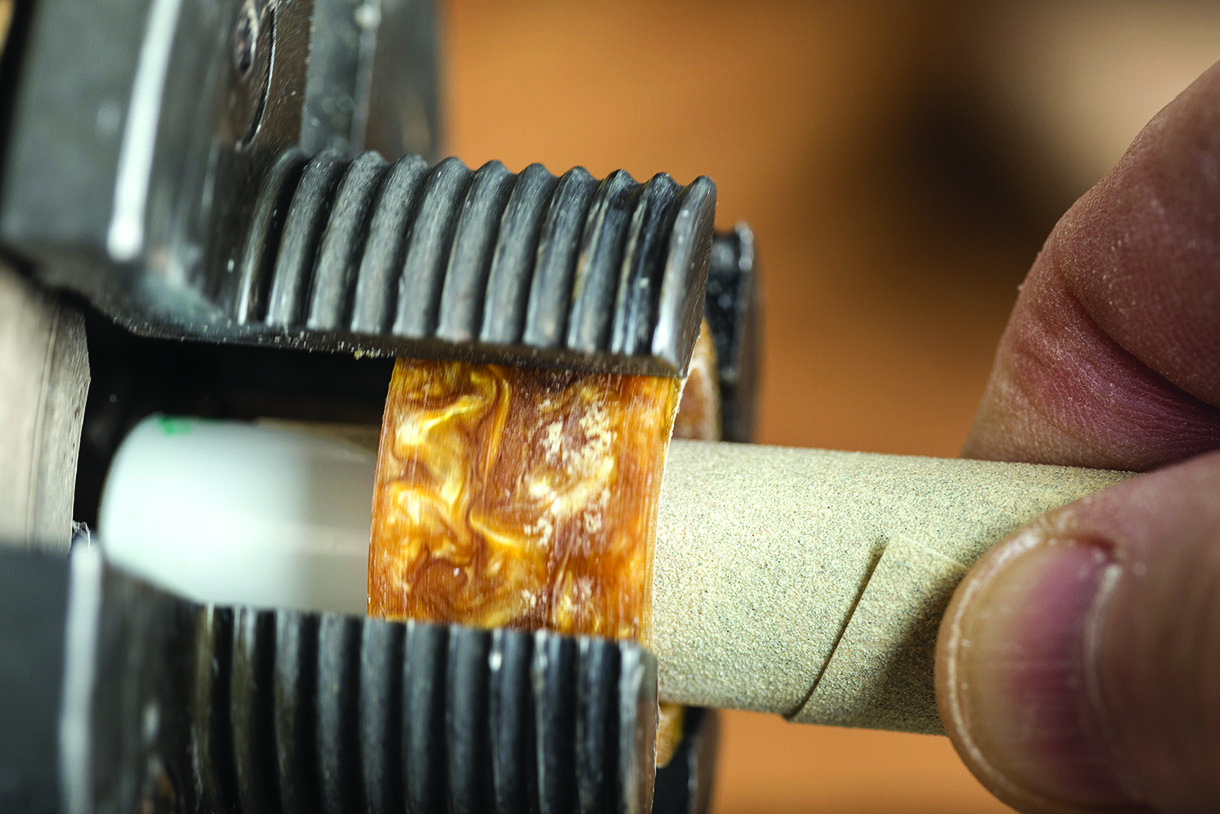
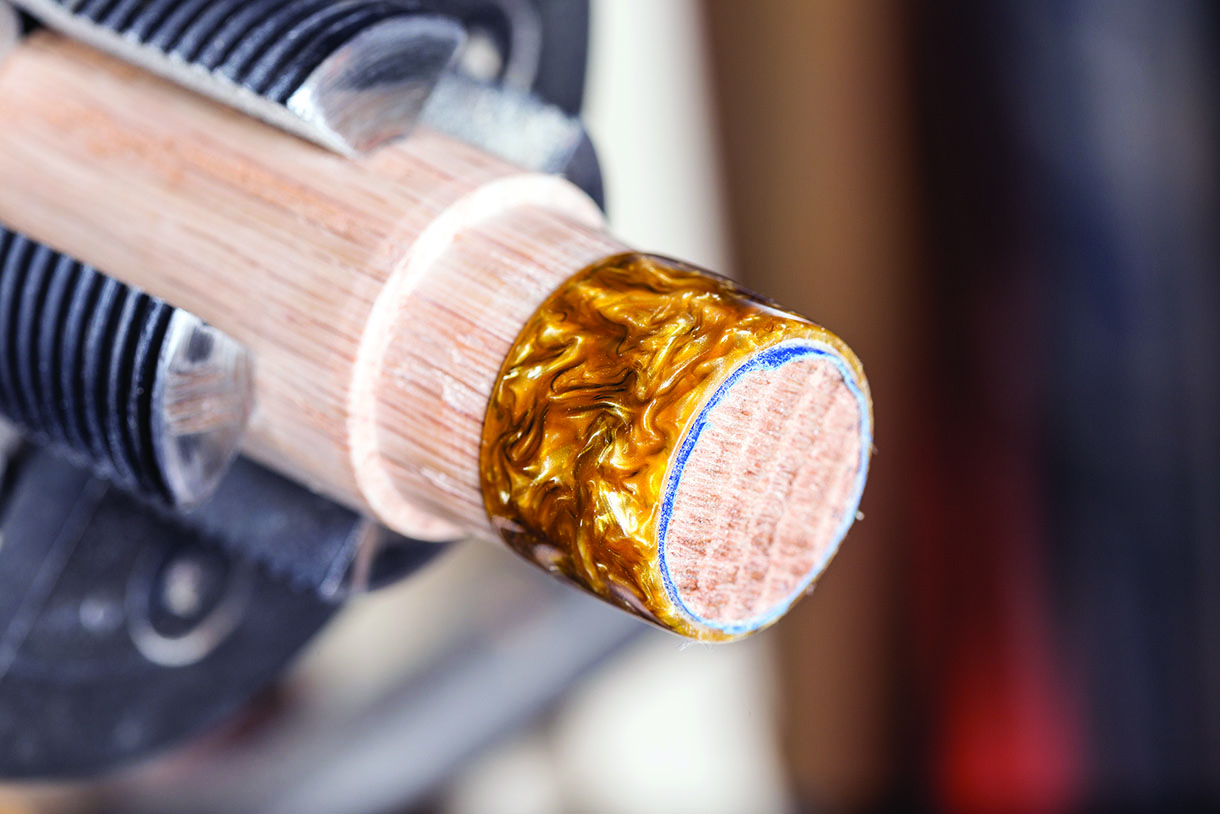
Turning and finishing the outside
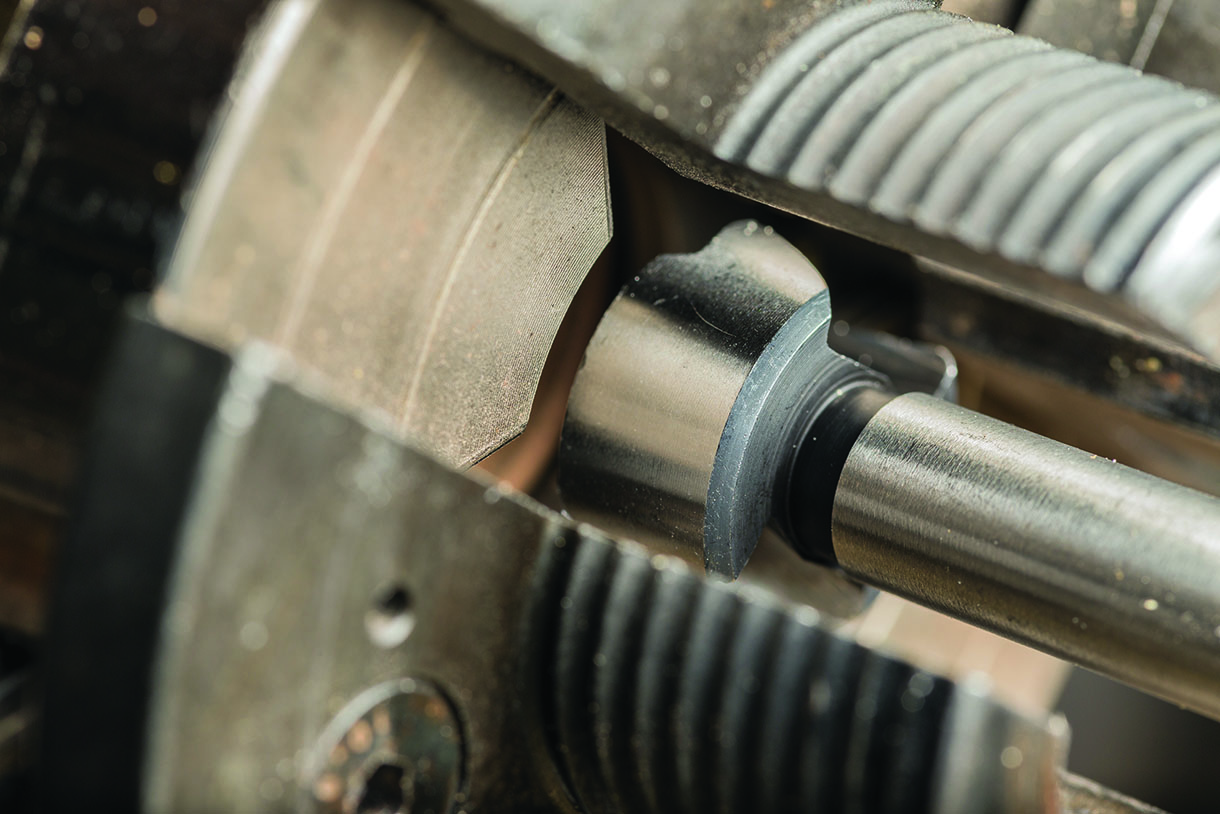
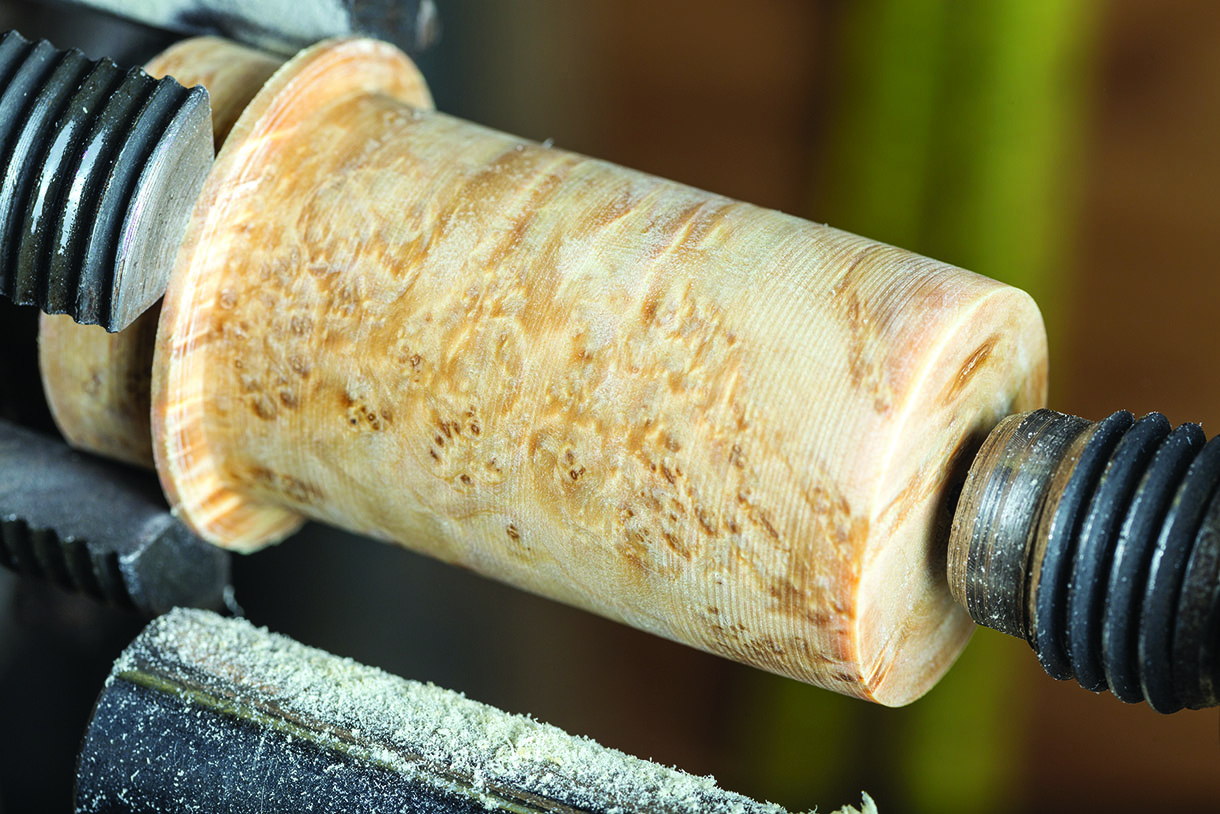
Use a scrap piece of dense, straight-grained wood to make a mandrel. It needs to be rounded and have parallel sides to fit into your chuck properly. If your chuck doesn’t have small jaws, turn something you can grip and then turn a mandrel
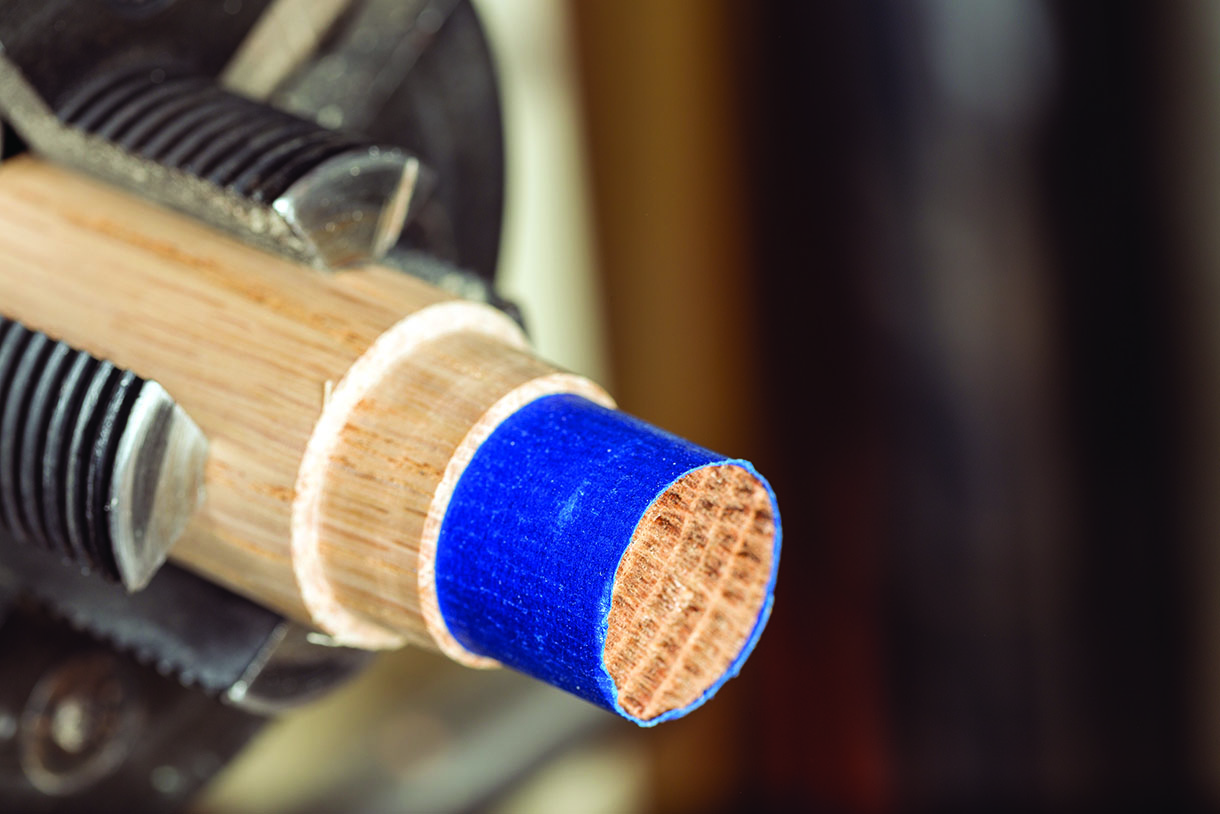
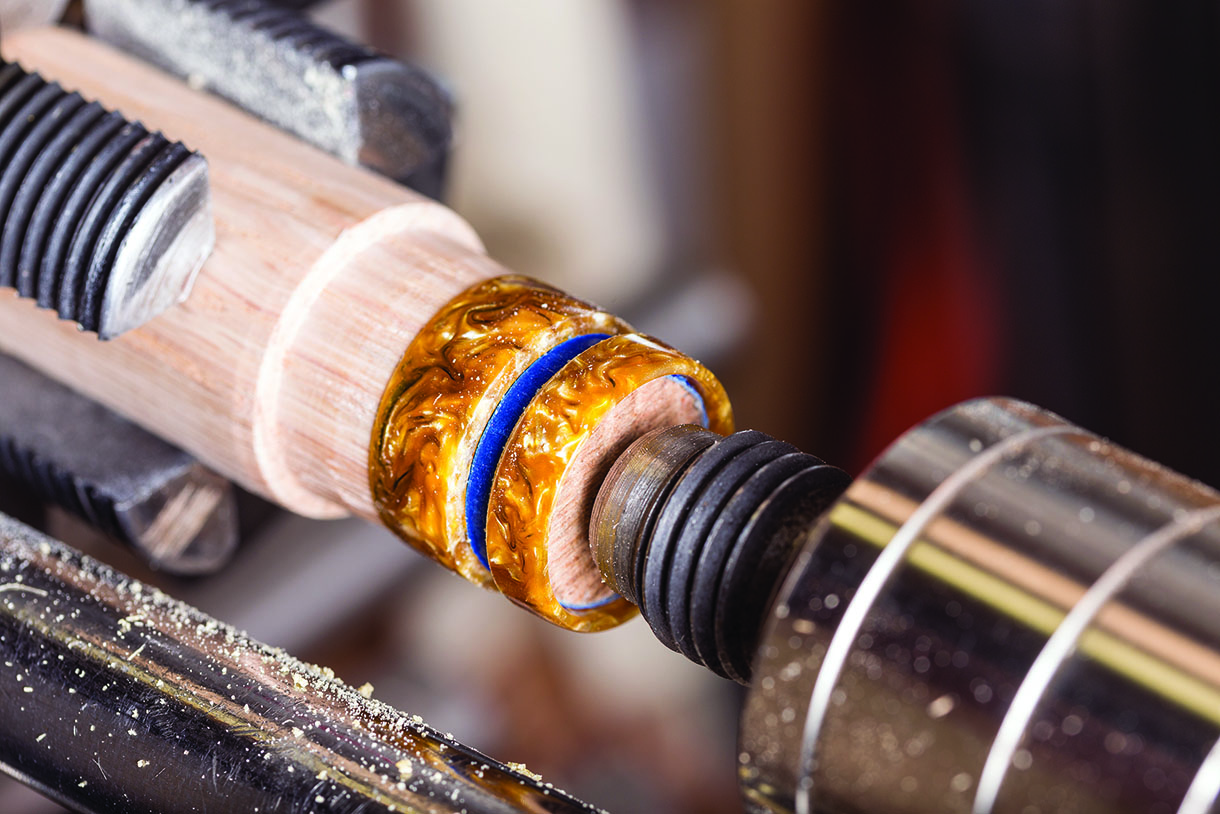
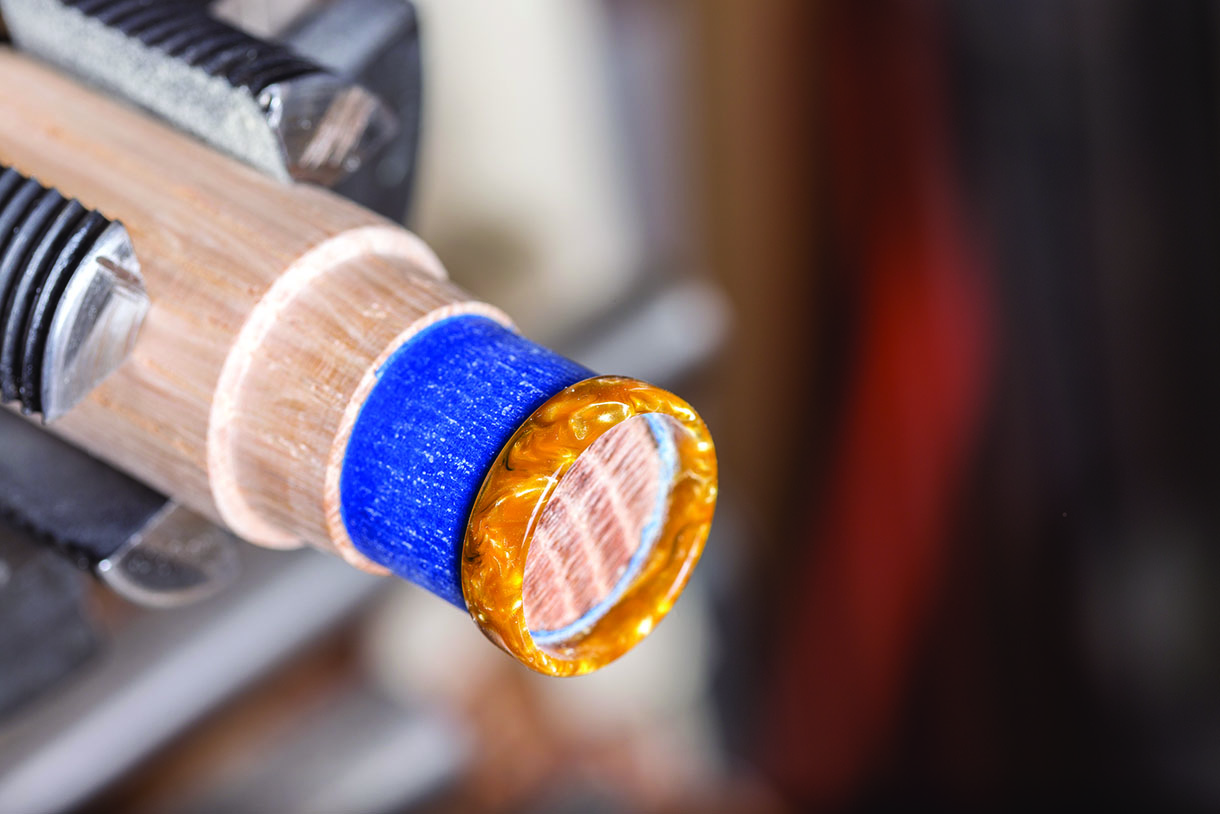
Fasten your mandrel into your chuck and turn until it runs true. Once true, turn a diameter slightly smaller than your ring inner diameter for a short length with a small shoulder. I use painters’ tape to control the final thickness, so I can adjust the ‘grip’ based on materials and variations in size
Be cautious when mounting wooden ring blanks. The grip needs to be firm enough to turn the blank without slippage, yet not split the wood. The shoulder can be used to position the blank as well as provide a guide for final thickness when turning down the outer diameter of the ring blank
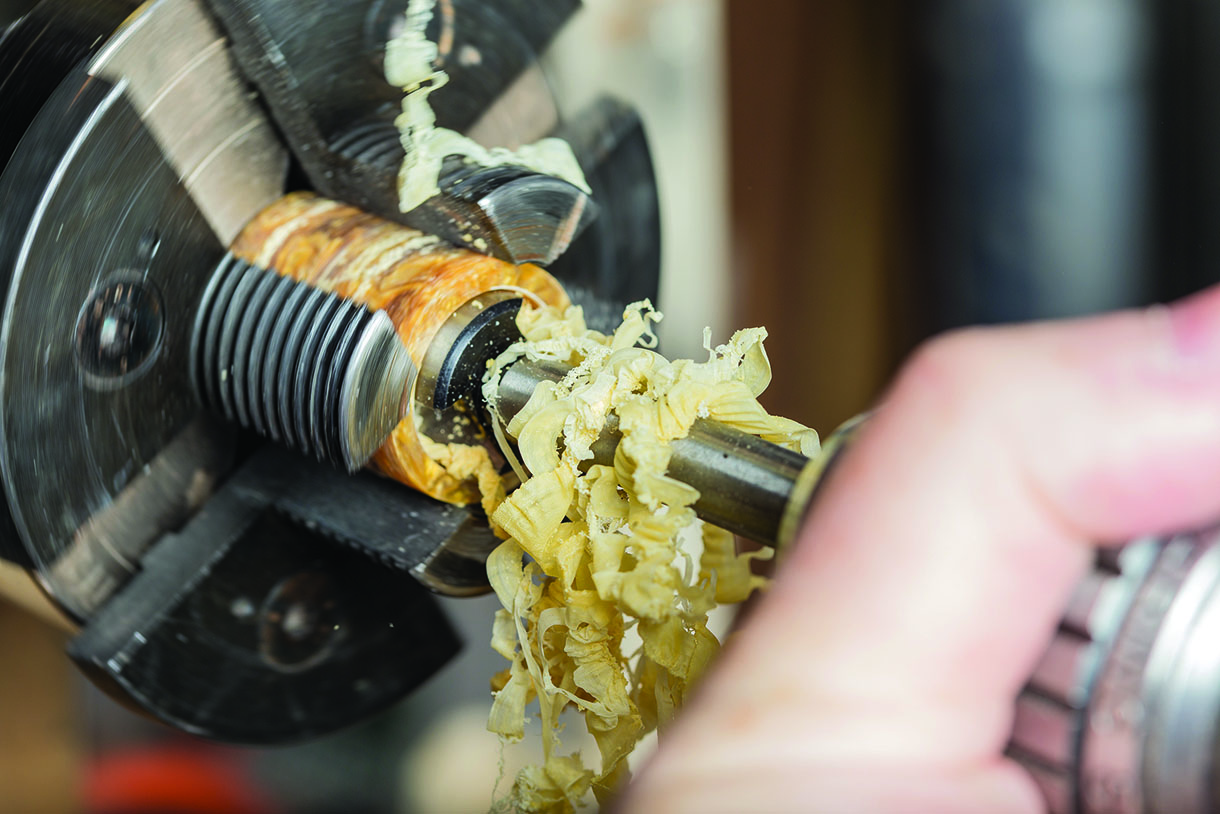
Plastics are far more forgiving when making rings. They have no grain orientation to cause fragility and they turn and polish nicely. I find a roughing gouge works well to thin walls to the desired dimension. You can use any cutting tool with which you are comfortable
Use a spindle gouge to create a special curvature or features in a ring. In this picture, a thicker, more rounded profile ring is made from Corian. The beauty of a wooden mandrel is that you can cut into it without danger and easily create another when it becomes unusable
Regardless of your material, turn to just larger than your finished dimension with any shaping needed and then use abrasives to get to the final finish. Nearly all abrasives will work much better when the lathe is run slowly and they are allowed to cut
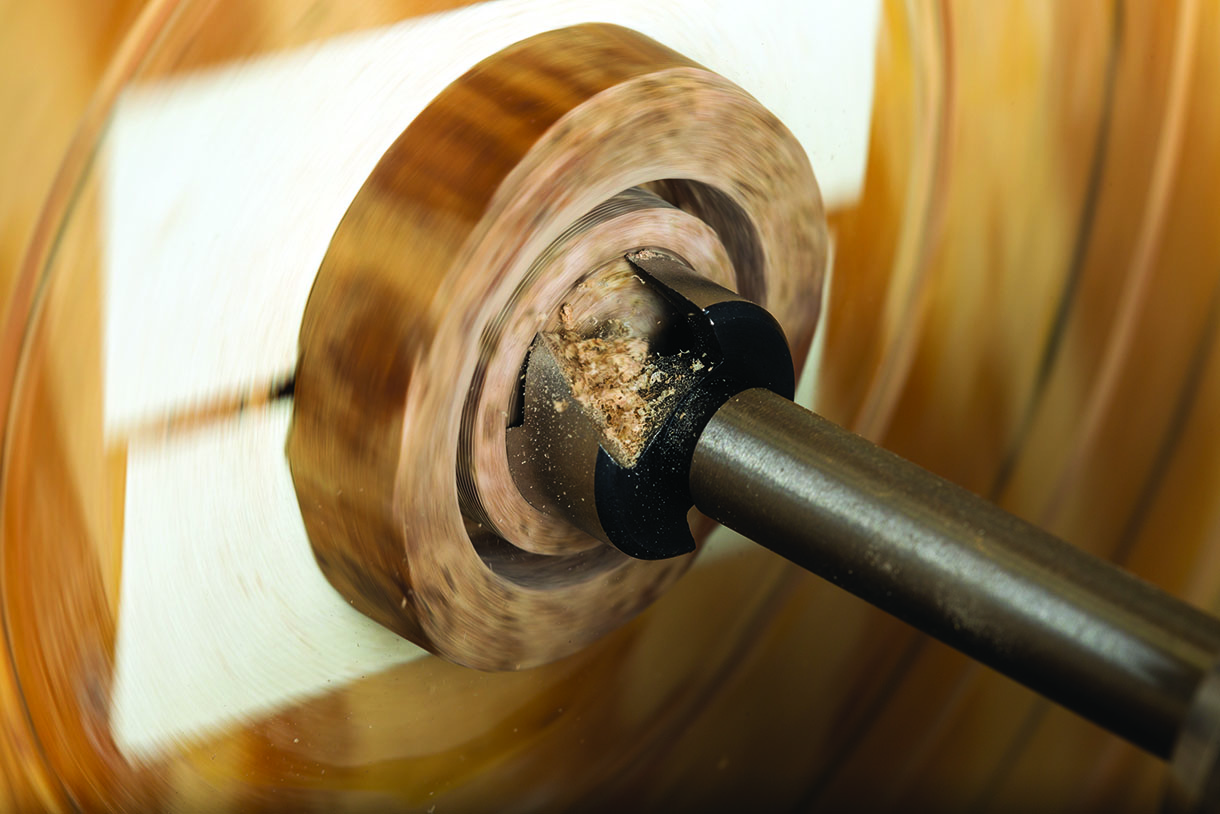
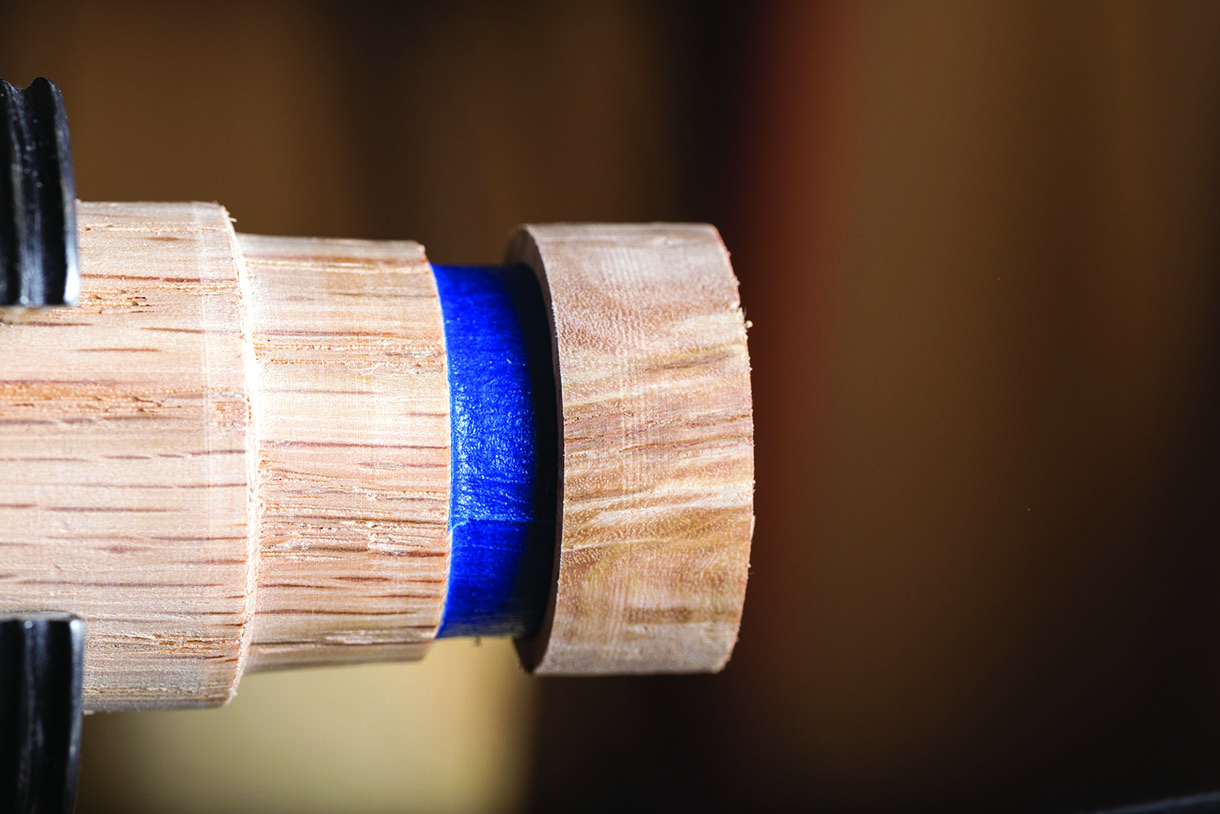
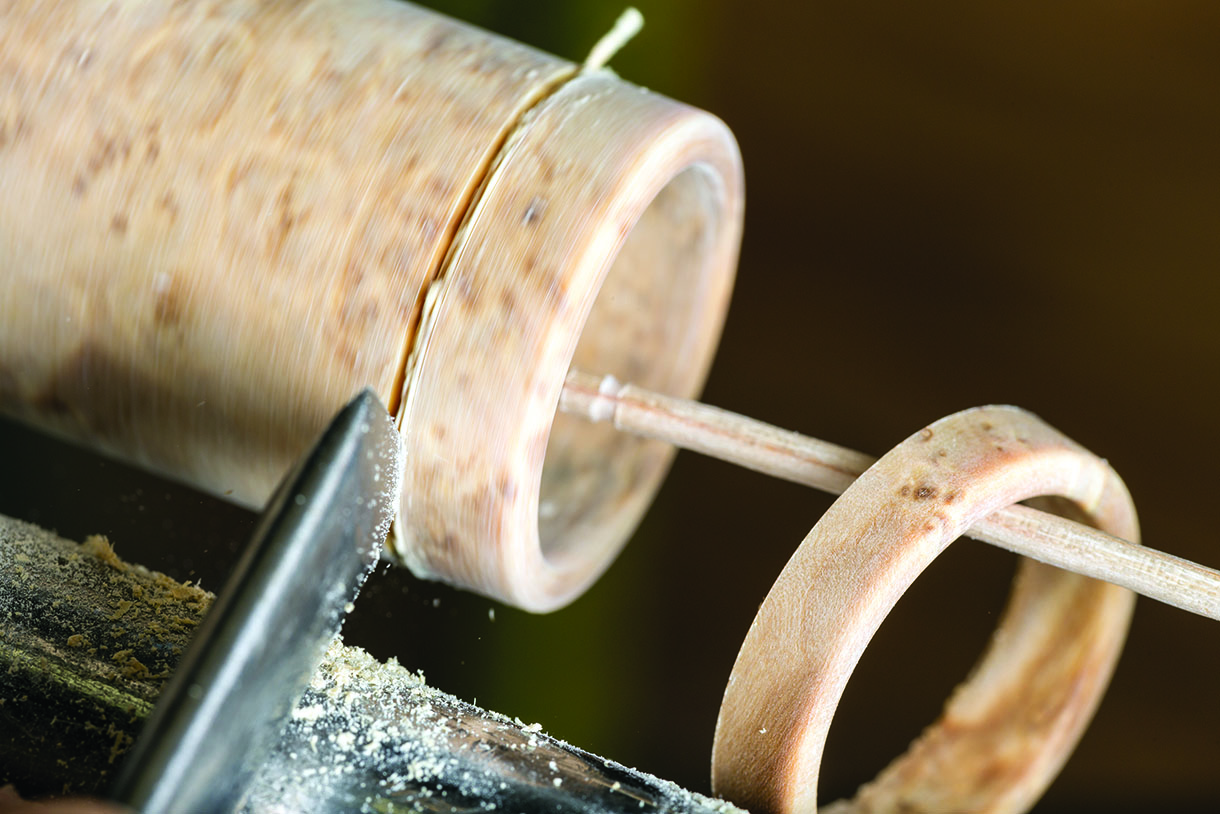
The inner and outer surfaces have now been taken to the final finish and the ring wall thickness is as desired. This blank was too thick for a comfortable width ring, so now is the time to deal with the ring width
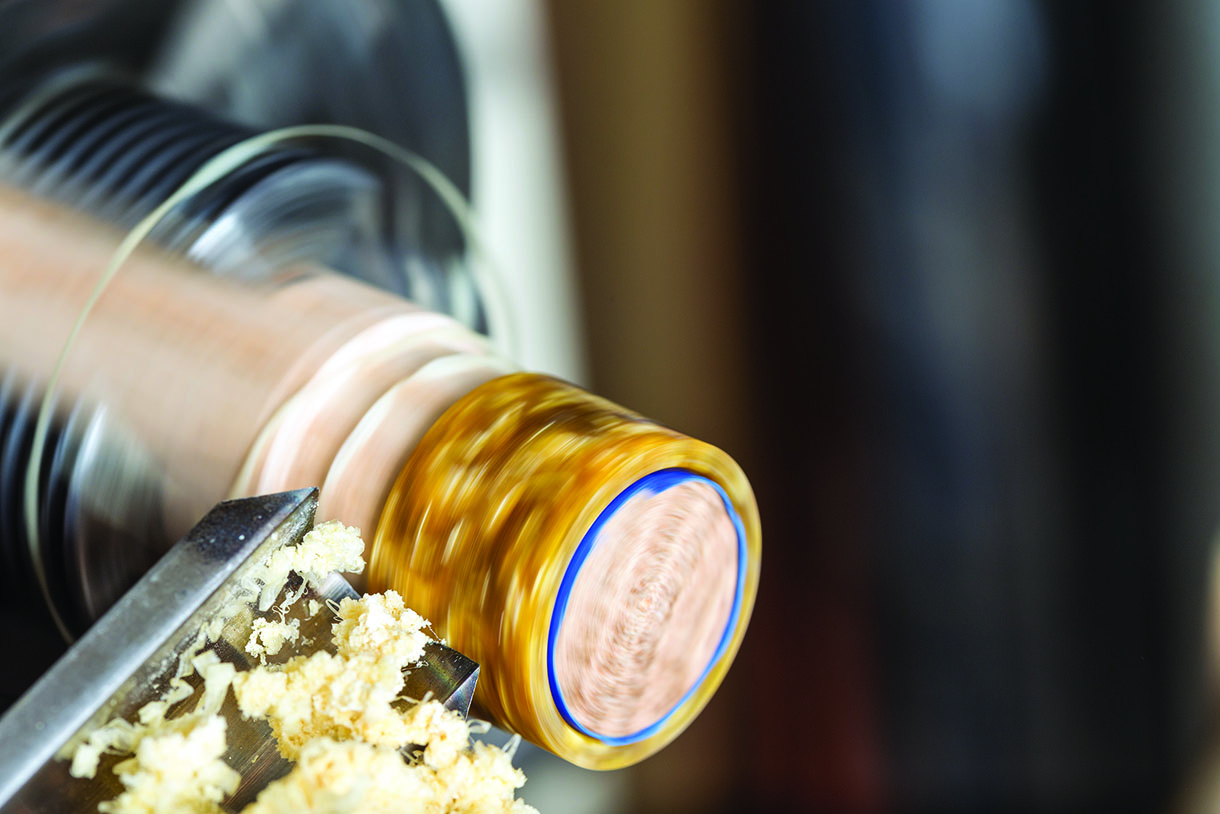
‘V’ cuts made with a skew chisel make short work of material in this wall thickness. The tail centre is brought up to keep the cut-off section of the ring from getting lost should it have come free. It also aids in supporting the end of the mandrel, although is not really required
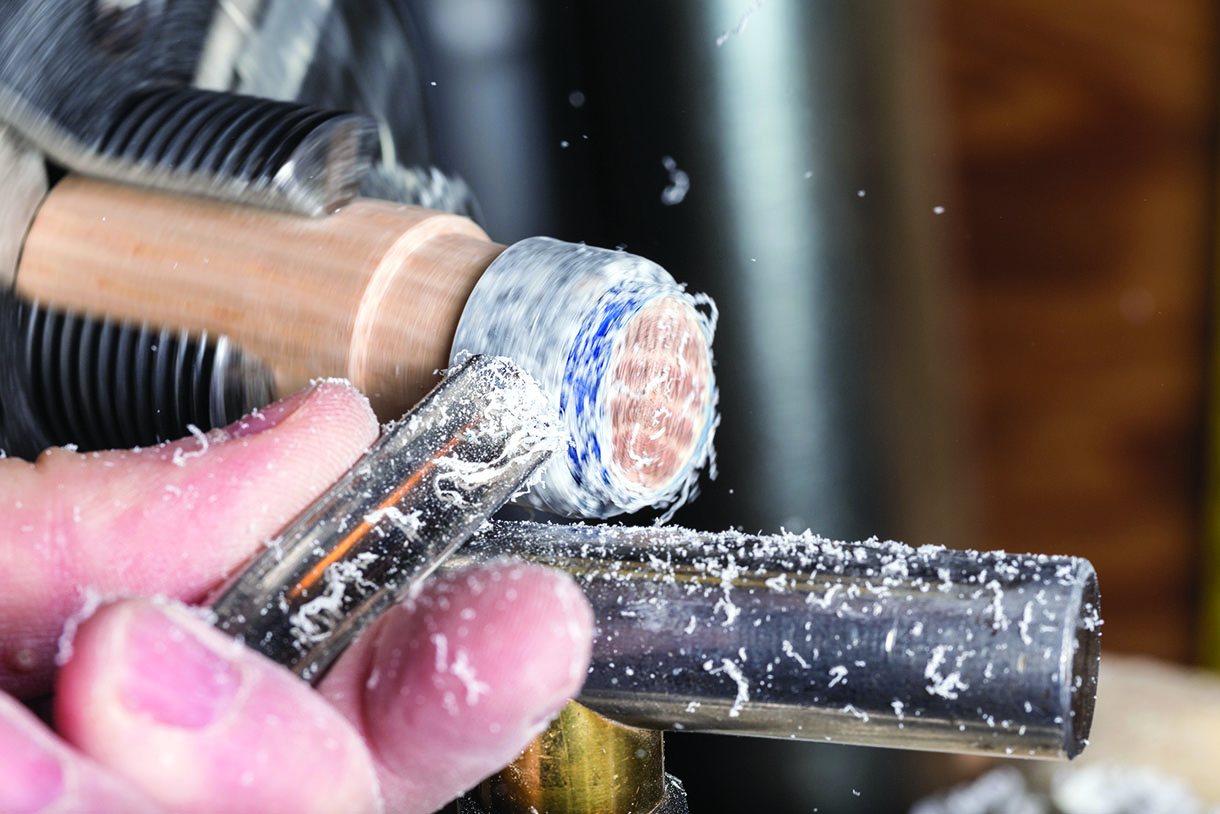
The rings can be positioned on the mandrel so that the cut ends can be sanded through the grits and taken to the desired finish. Sometimes a bit more tape is needed to allow the ring to overhang a bit, giving access to the inner edge
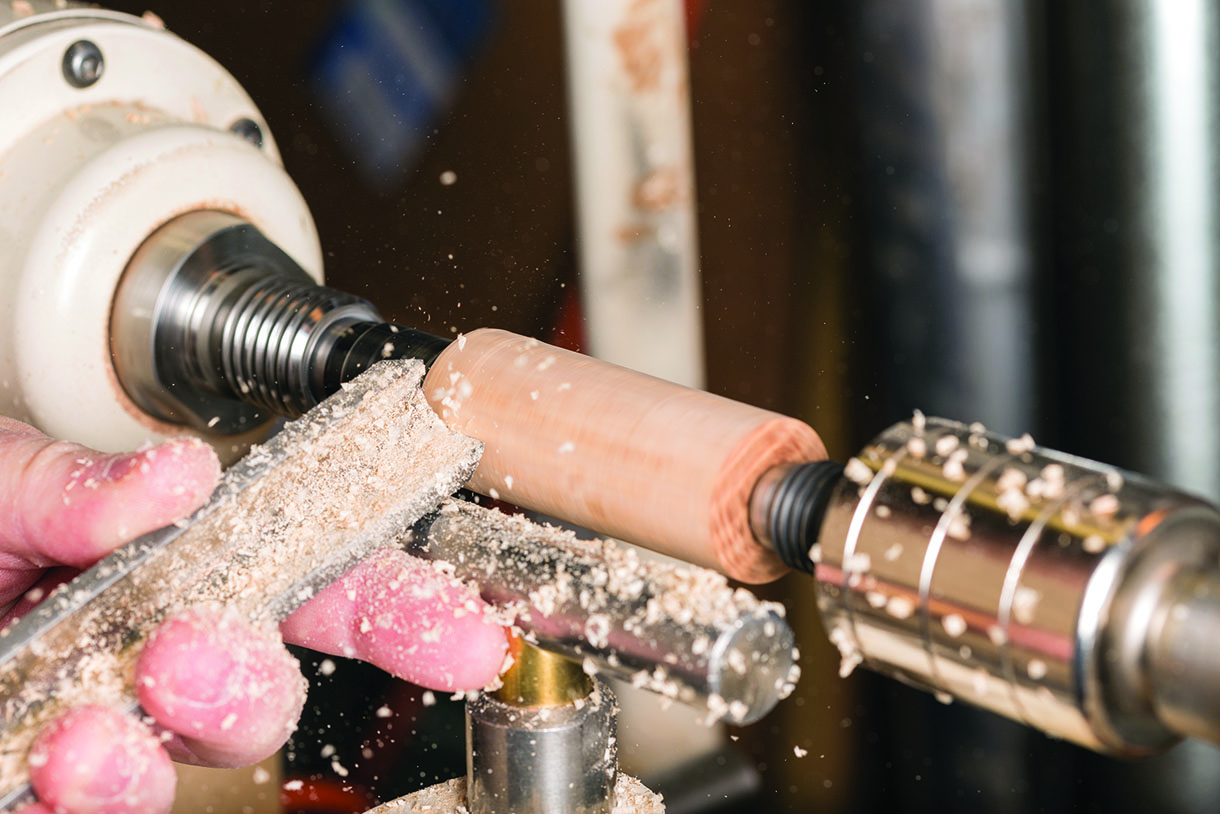
Alternative method of turning rings
Another method of making rings from square or round stock is to turn it round between centres. Put a tenon on a short length of the material and mount it in a chuck. Turn the outer diameter slightly proud of the desired finished diameter
Use the Forstner bit to cut the inner diameter slightly smaller than desired. Work in stages as you move towards the headstock. Drill a small depth, then repeat the process
Sand the inner diameter to finish and the outer diameter with the coarser grits. A tooth pick in a drill chuck in the tailstock helps capture the rings as you cut them off at the desired widths. ‘V’ cuts with a skew chisel work well. Sand the cut ends on the end of the mandrel as before
Finishing the rings
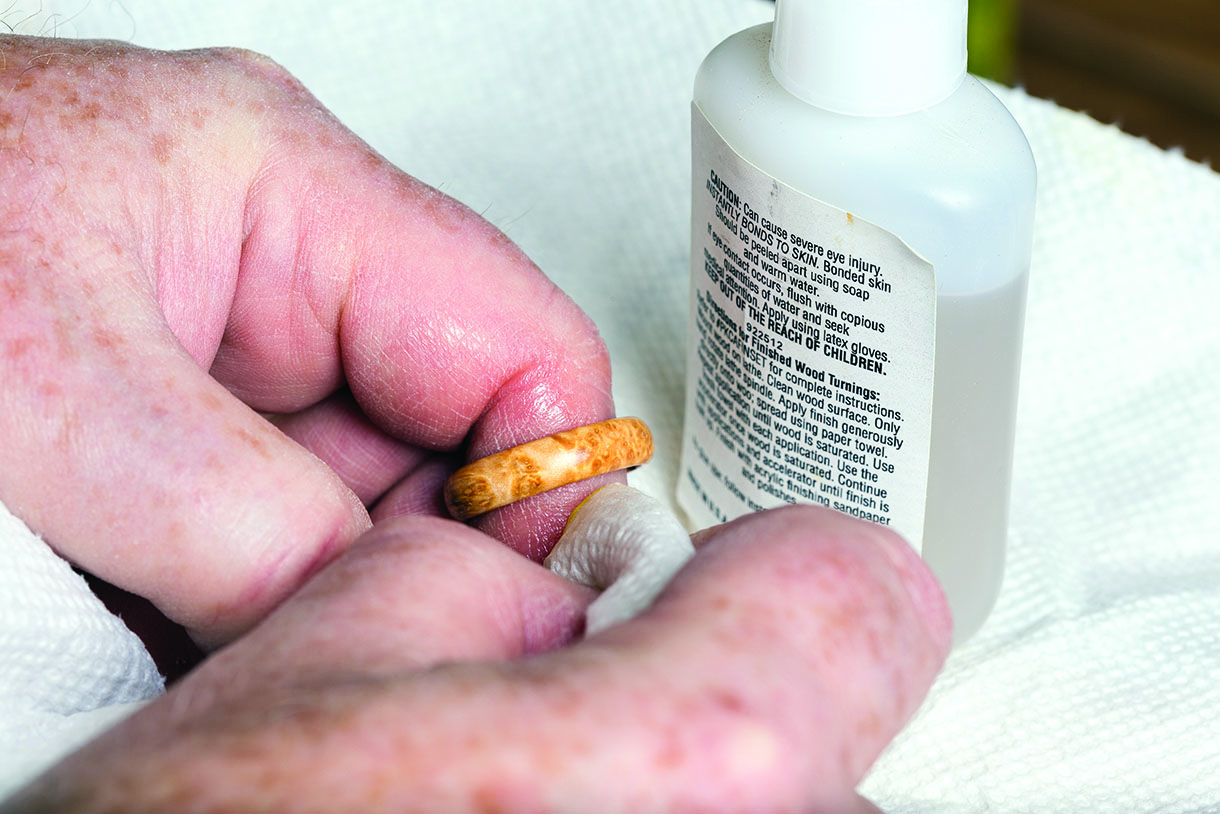
Plastics usually need no finish. For woods, use the finish of your choice to protect it and make the grain pop. I use a wiping oil for a matte finish and a cyanoacrylate adhesive for a gloss finish. If you are new to a cyanoacrylate finish, learn the procedure before you become very attached to your work!

Nearly any material you could use for a ring will benefit from a visit to the buffing wheel. Even raw woods and matte finish woods will show better using a jewellers rouge on a buffing wheel. Run the buff slowly enough
to let the rouge and the buff do the work
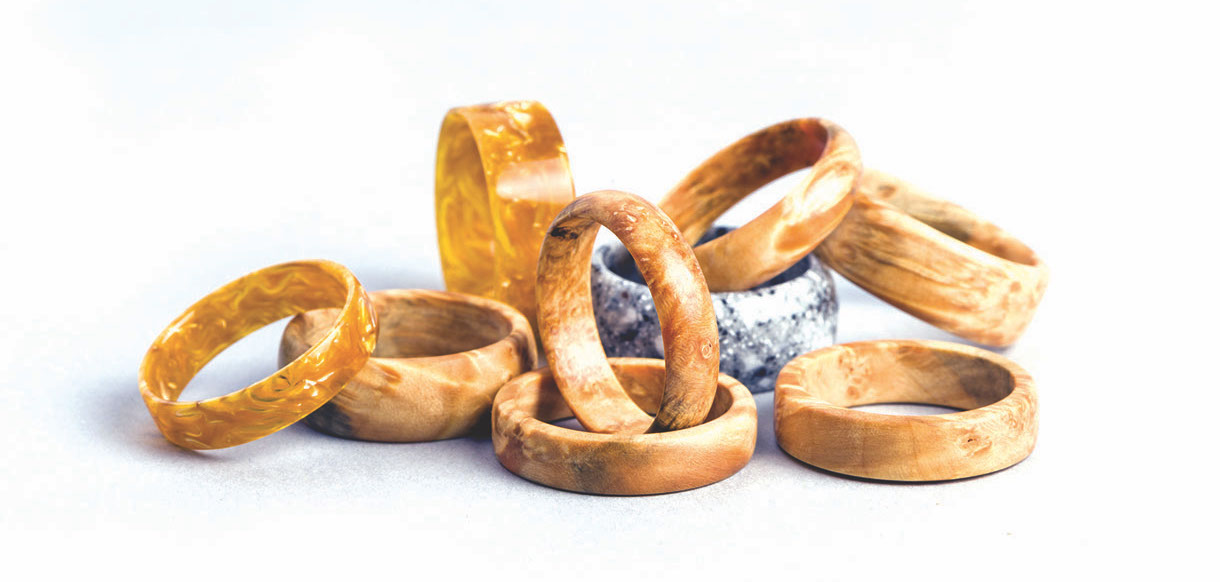
Here is an assortment of rings made as examples to get you started. Different materials, different wall thicknesses, different widths, different profiles, different glosses and different finishes. Easily done and lots of fun


