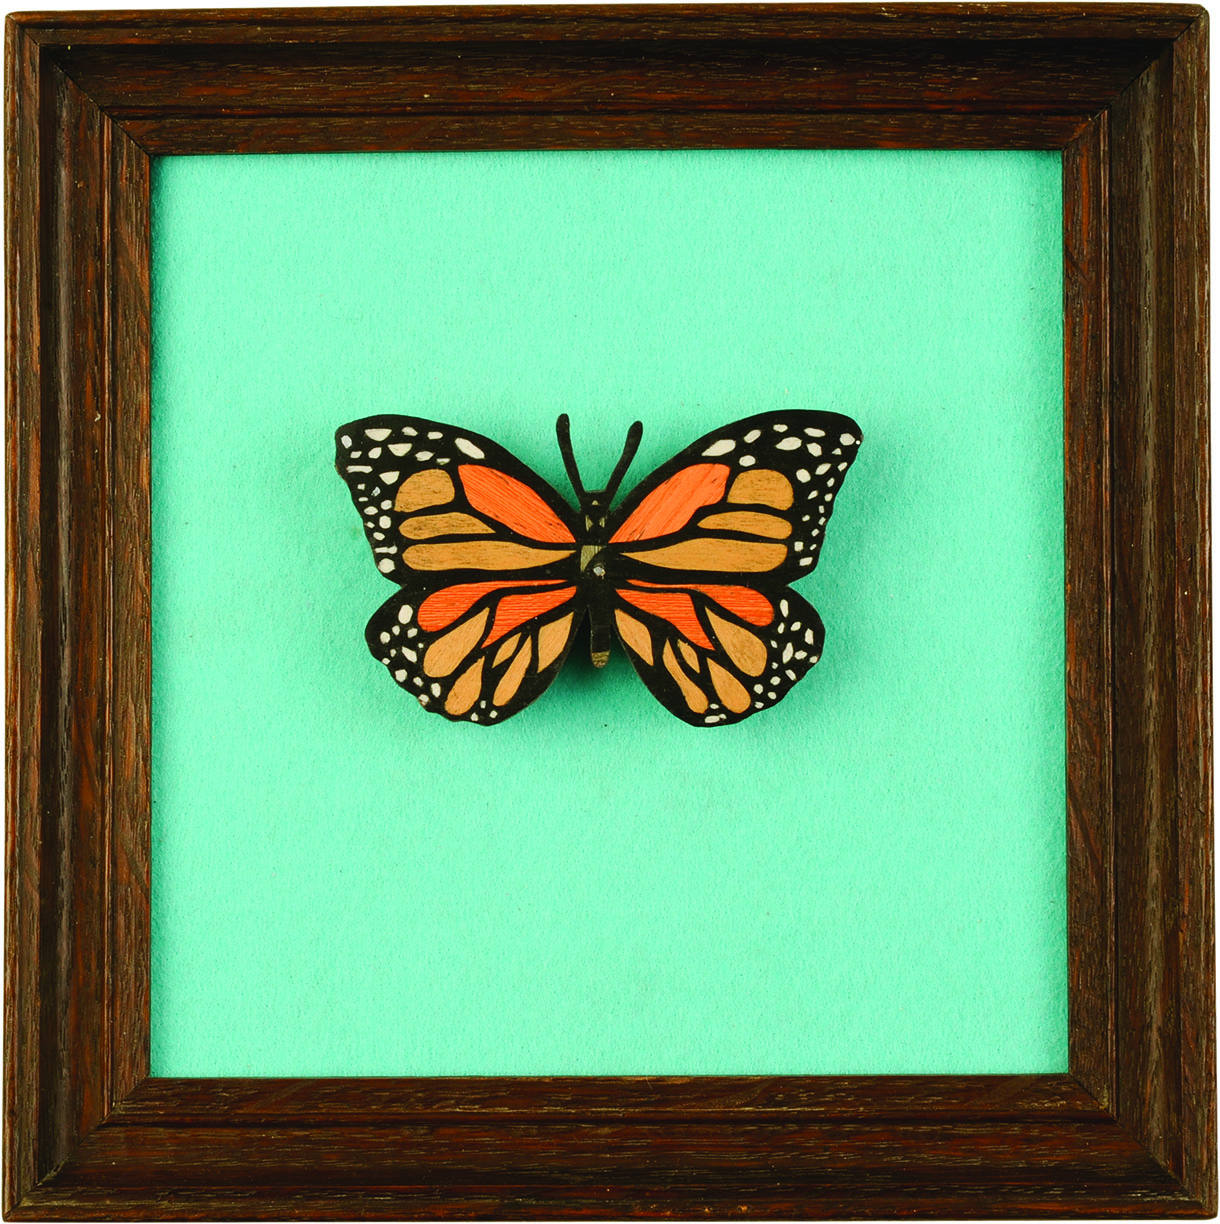
A Victorian Curiosity Pinned Butterfly:
That rare species, the Amber Bailey, pins down the perfect marquetry project
That rare species, the Amber Bailey, pins down the perfect marquetry project
I have always found ‘Victorian curiosity’ to be a gruesome but intriguing subject. I cannot say I will ever understand the killing of delicate creatures such as butterflies to preserve their beauty. However, I do recognise that the butterfly has the perfect detail and colouring to be captured in marquetry, making this the perfect wall-hanging statement piece. With almost 20,000 different species of butterfly around the world, why not have a go at creating a collection?
What you will need
• Several photocopies of the paper template/design
• Selection of veneers
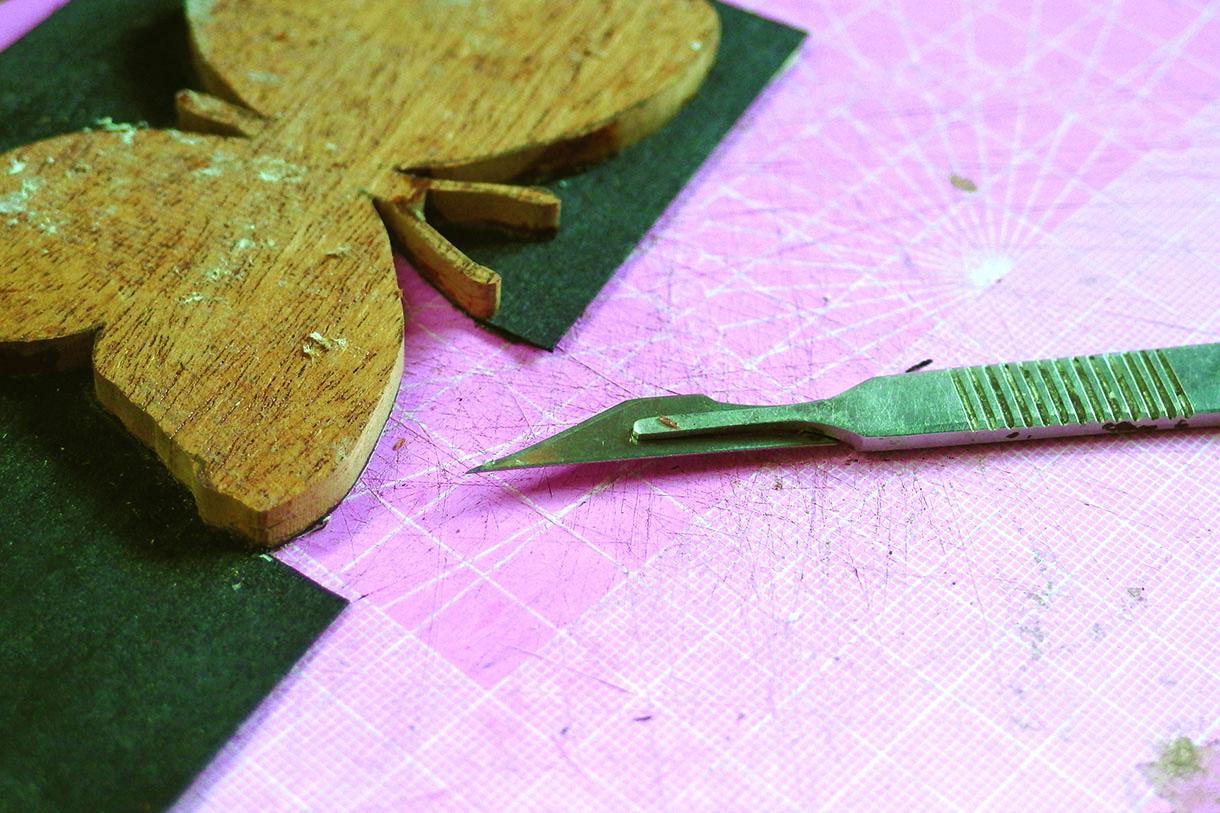
• Scalpel and 10A blade
• Cutting mat
• Old frame
• Fretsaw
• Fish glue
• Groundwork approximately 5 x 600 x 100mm
• Sandpaper and sanding block
• Baize fabric
• Carbon paper and Biro pen
• Osmo oil and cotton cloth
• Wax (clear or coloured,
depending on frame)
• Miniature drill
• Single wooden dowel
• Veneer pins and hammer
Suppliers
• To purchase any of the supplies, visit www.axminster.co.uk or any well stocked DIY store
• For veneers, visit www.originalmarquetry.co.uk or your nearest veneer stockist
Health and safety
This project involves using a scalpel to cut the veneers. To avoid the blade slipping and causing any nasty accidents, ensure to cut at an angle, away from your fingers. When using a fretsaw, keep your hands as far away from the blade as possible, preferably holding the work at the sides or behind the blade.
Preparing the background
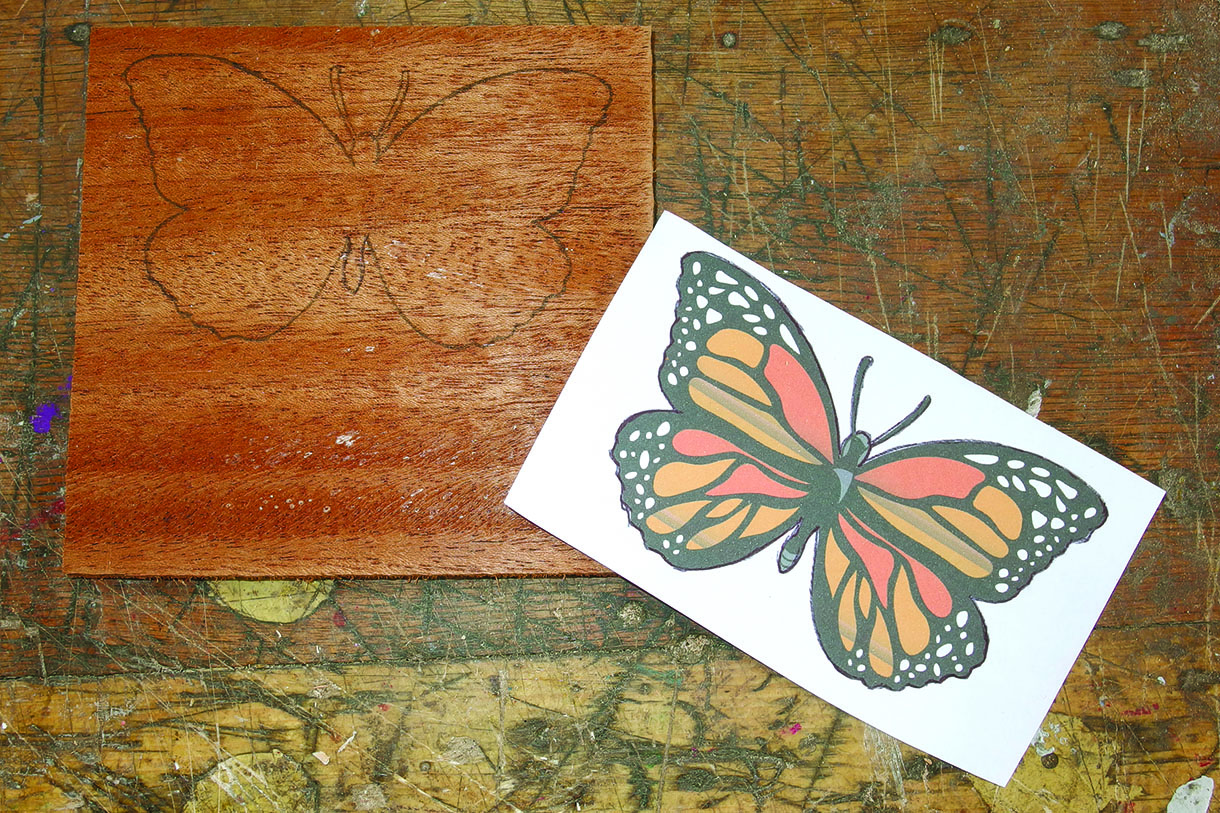
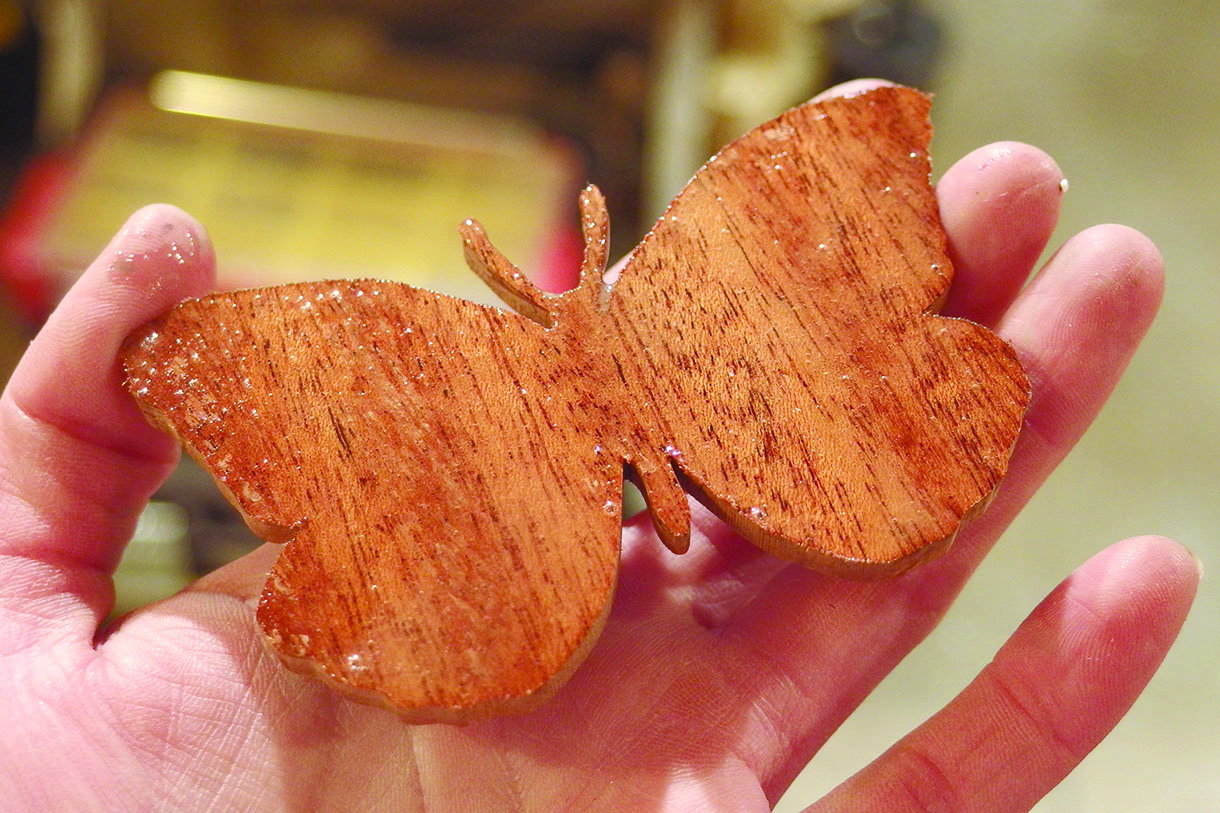
1. Using carbon paper, transfer the outside line of the marquetry design to your chosen groundwork. Drawing with a Biro will give a much more solid and consistent line than a pencil, which is likely to wear down with use. Choose your groundwork for being reliably solid, despite needing to be thin. I decided to make my own plywood using sheets of veneer glued together. Plywood is ideal for counteracting the natural bend of the wood when adhesive is applied
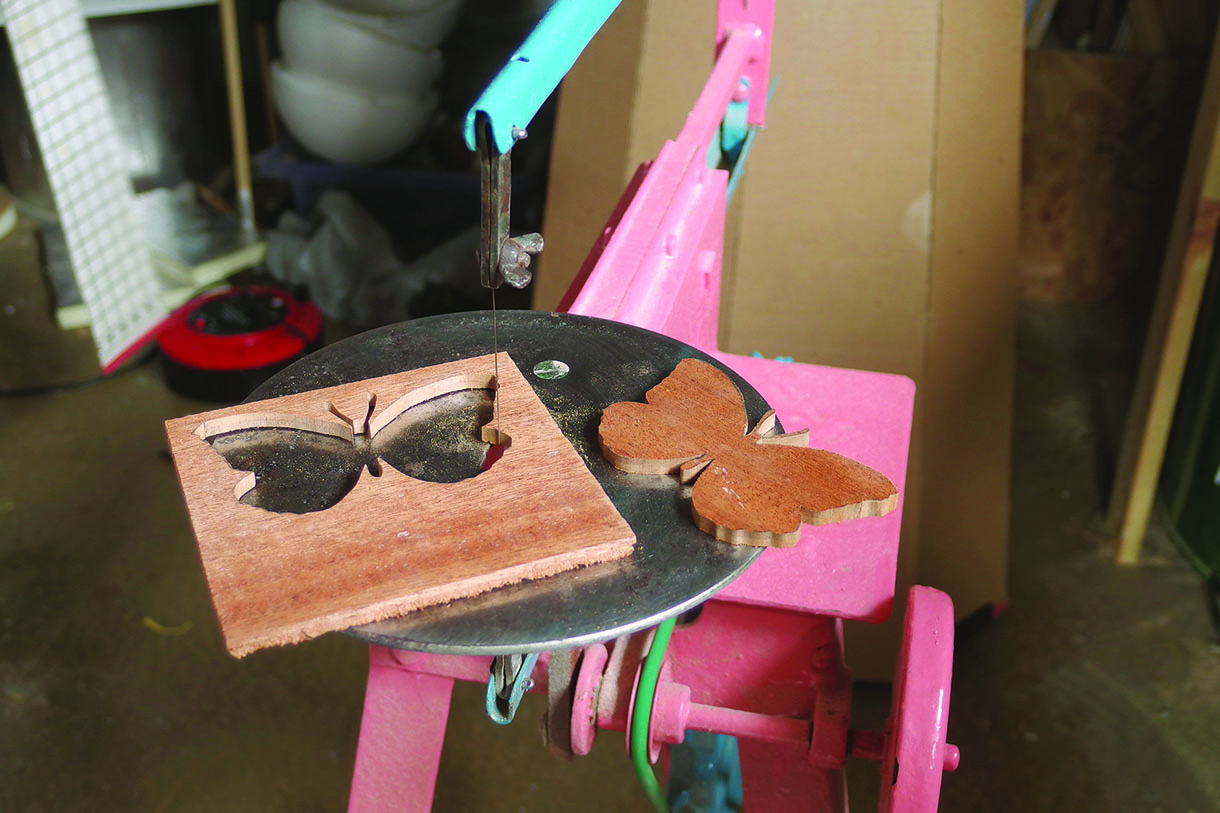
2. With a fretsaw of your preference, the groundwork needs to be cut following the carbon-produced line. Once cut, clean up the edges with a sheet of abrasive paper. Using a fixed arm saw, such as a treadle, or an electric fretsaw will ensure a straight 90° cut, rather than risking the creation of an unintentional angle if you had chosen to work freehand
Cutting the marquetry
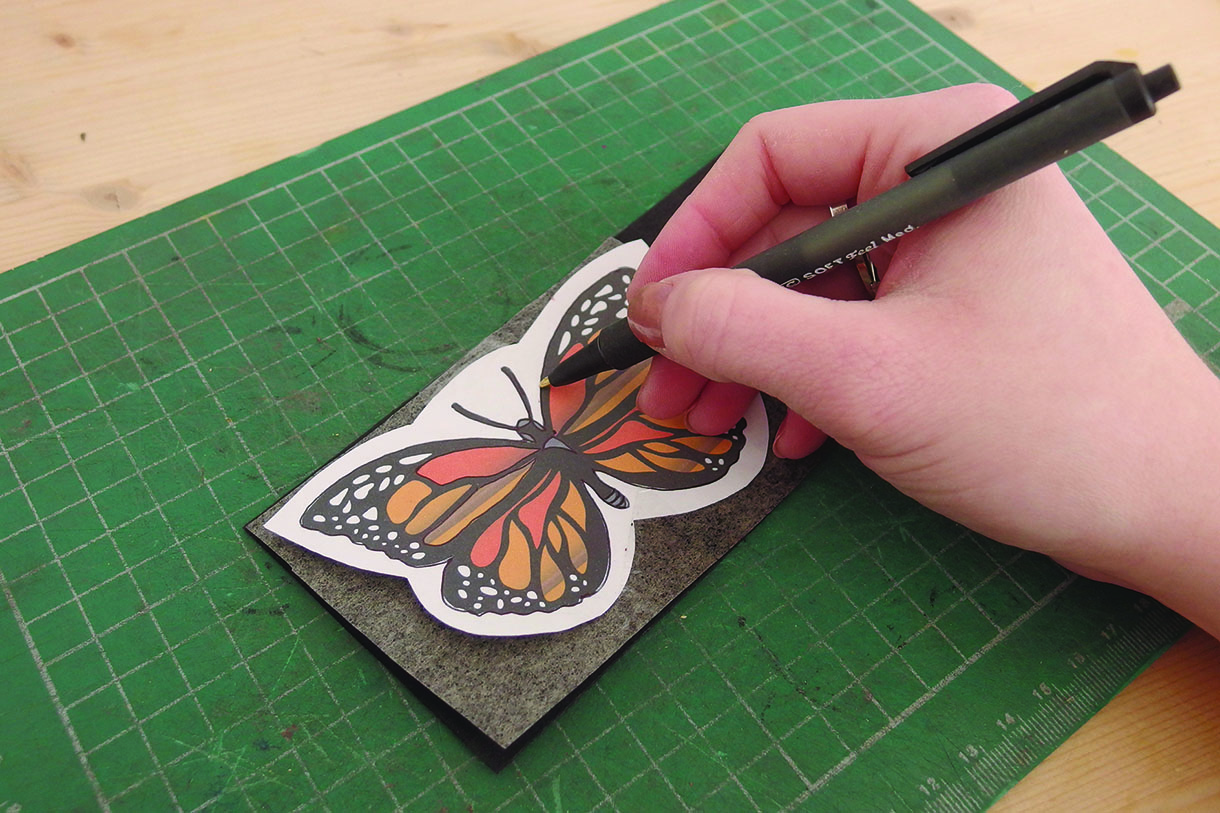
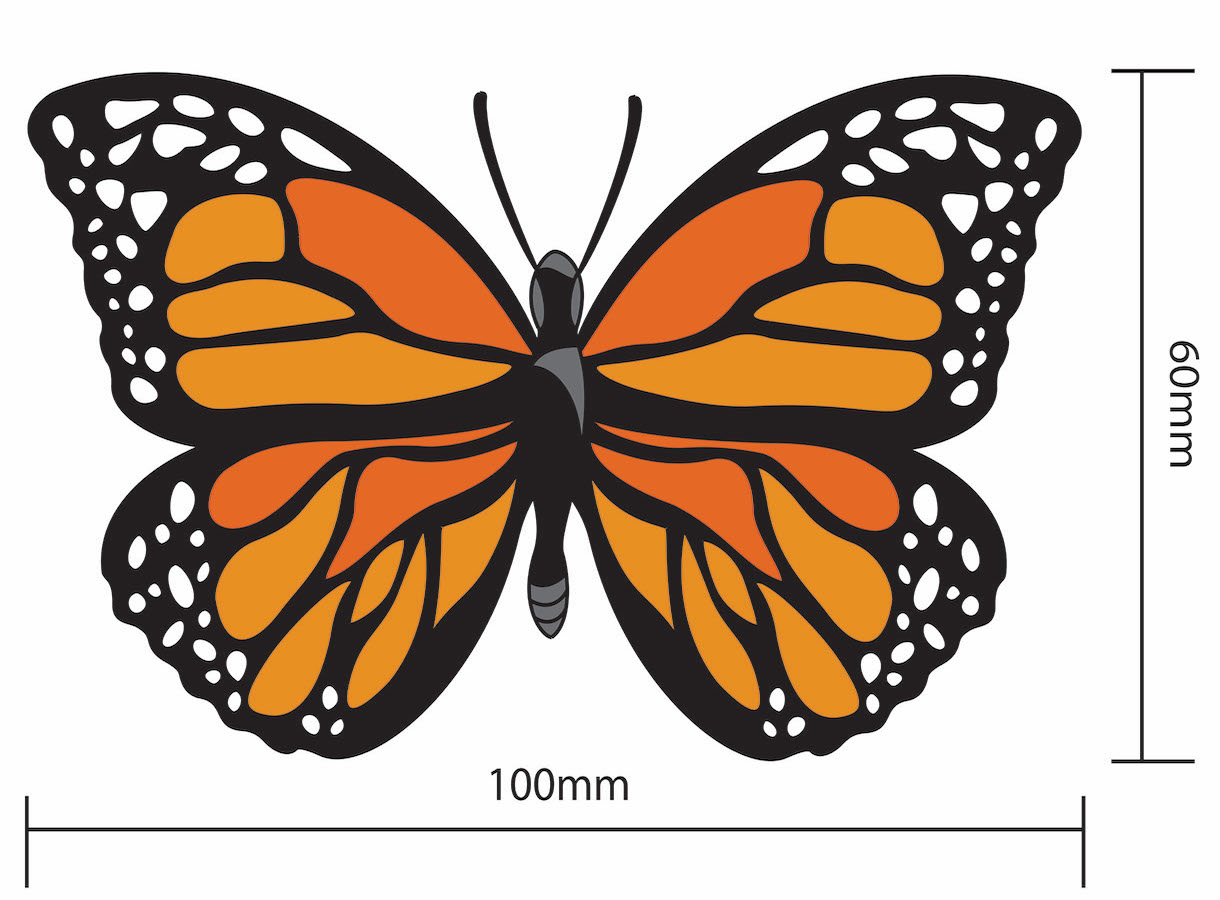
3. Working with the same carbon paper technique previously used, mark out all the detail onto your background veneer then begin to cut out will a scalpel
4. Secure both the carbon paper and template with tape to avoid the design slipping out of position. It is advisable to work a section at a time, filling in the detail as you go to avoid pieces breaking off as the marquetry begins to become more fragile
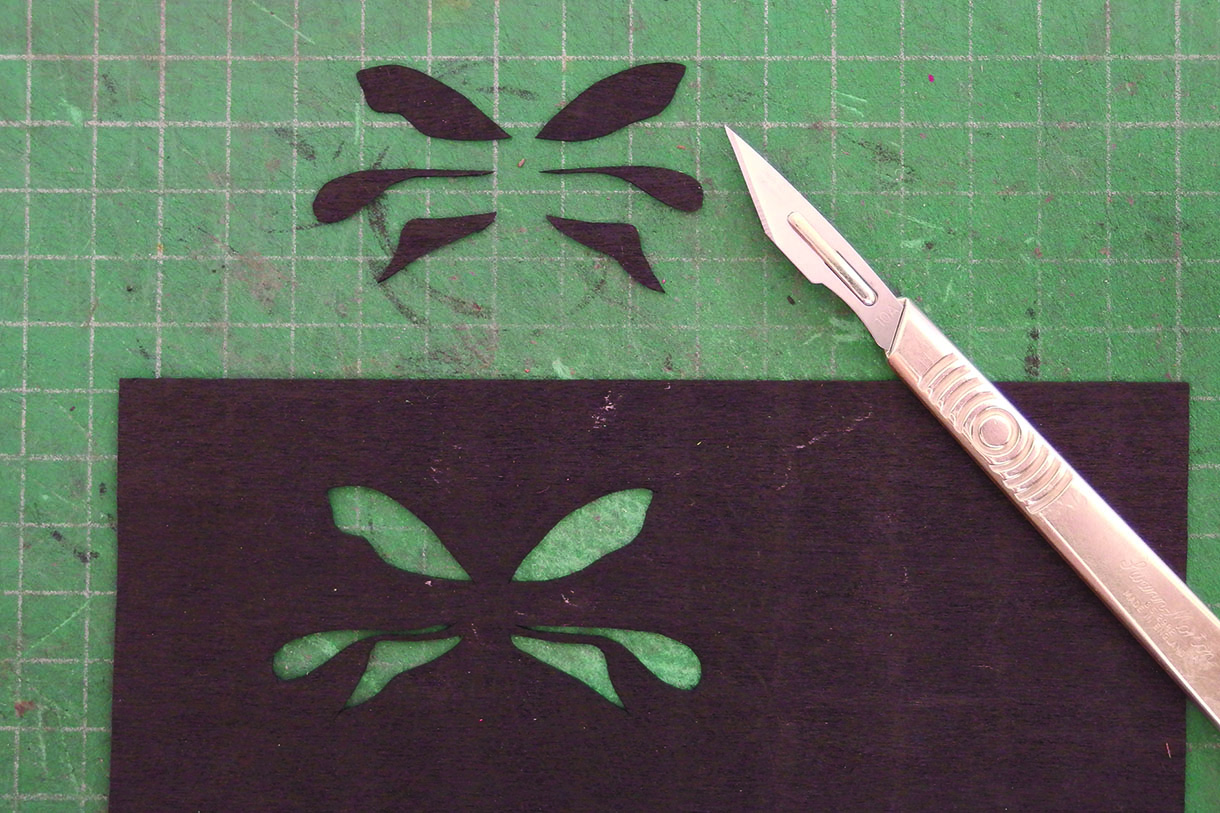
5. To apply the inner detail of the butterfly, tape the chosen veneers over the appropriate areas on the background before flipping over the marquetry to the other side
6. Now, cut out the detail using the background as a template. This will create a much tighter fit when inserted the correct way up. Work from the centre outwards until all the detail has been in filled. The actual background is not cut to the correct shape until after gluing up. Consider the grain direction for every section of detail
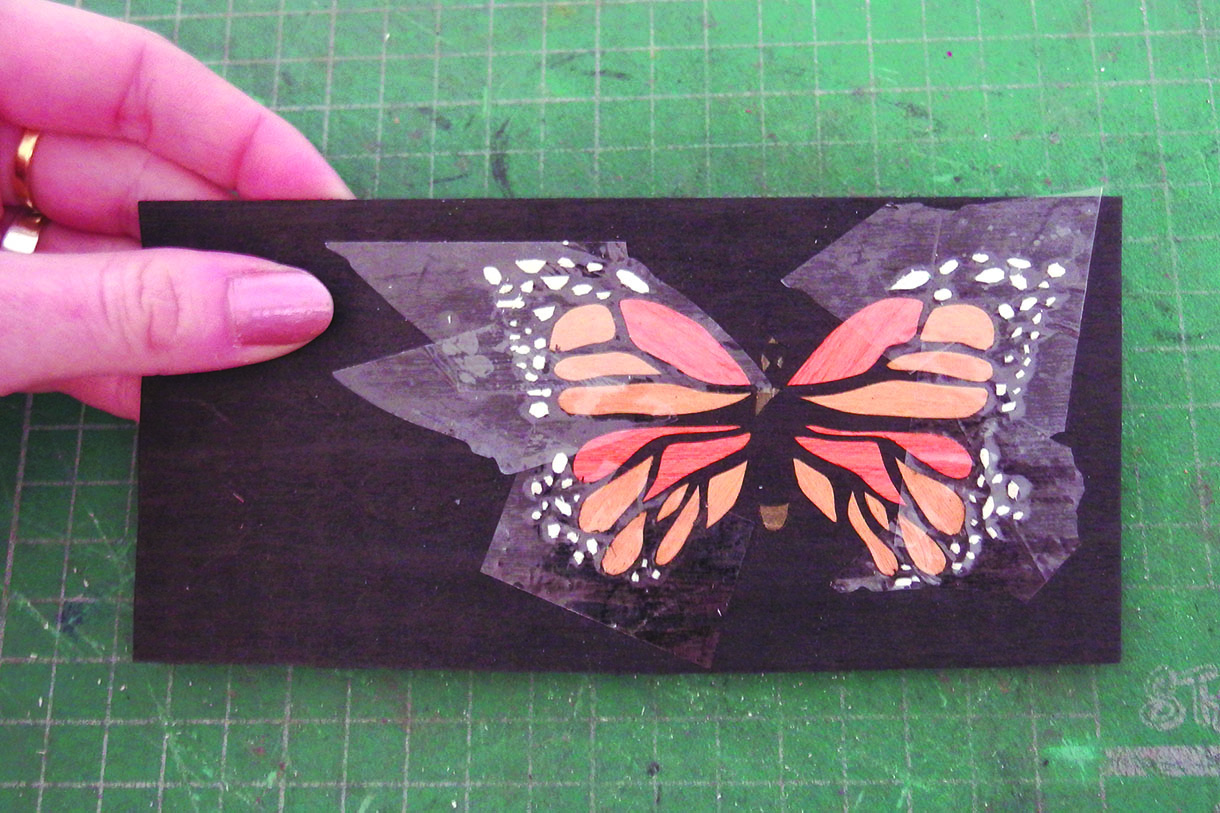
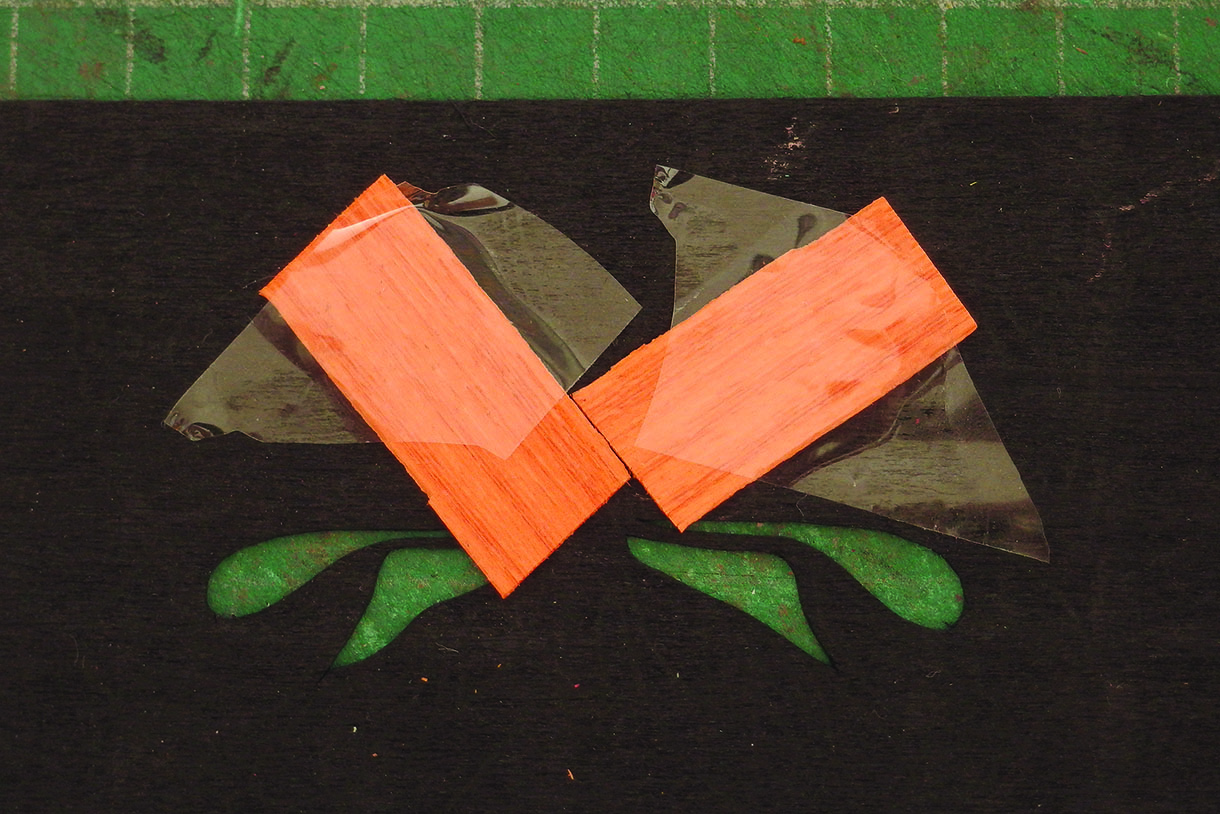
7. Once cut out, secure the detail with tape. The marquetry should be taped up so that ultimately you are left with a single sheet of veneer that can be glued up in one go
Gluing up
8. Apply an even layer of fish glue or similar product to the top of the groundwork and press this into position on the back of the marquetry. It is a good idea to have a clear line drawn on the veneer to make sure it is centred properly. Temporarily tape into place to stop any movement then clamp the marquetry up for a minimum of 12 hours. Apply adhesive to the groundwork rather than the marquetry, to avoid the tiny pieces of veneer getting caught on the brush
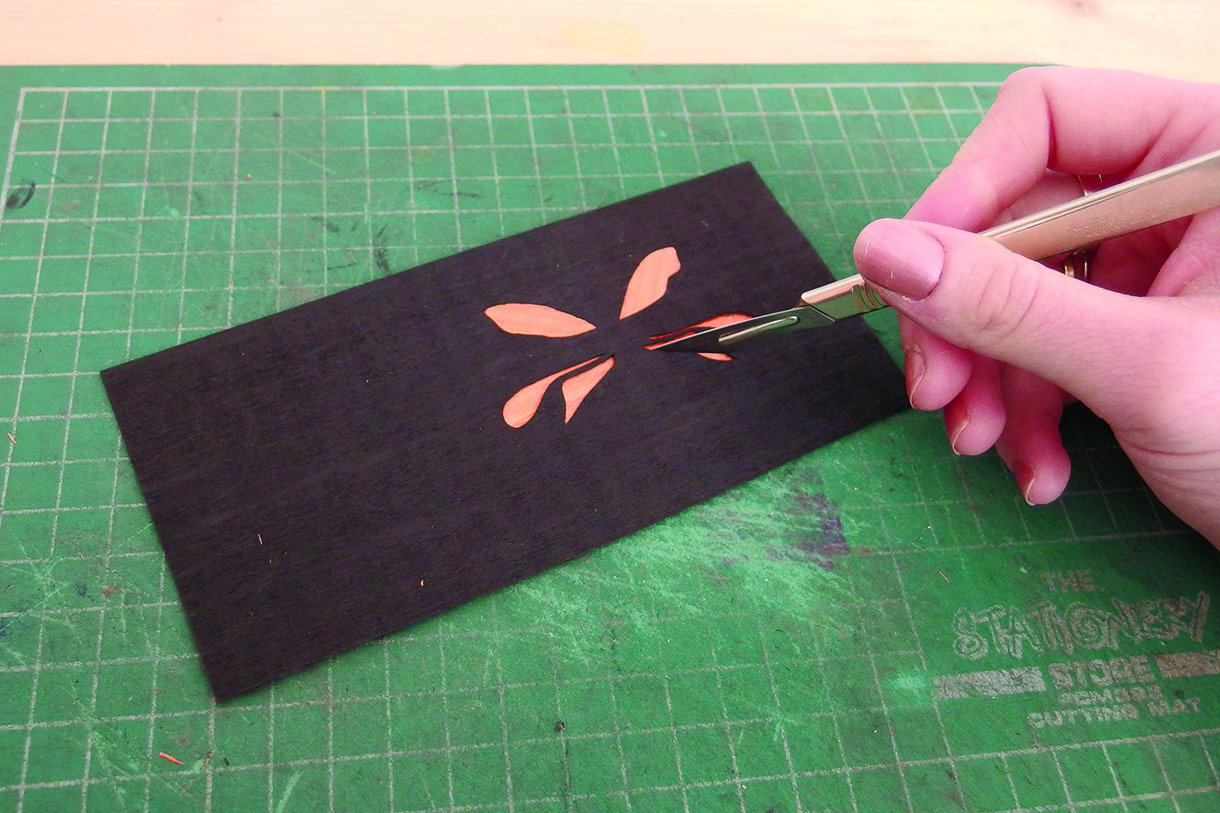
9. Once dry, the waste veneer and any excess glue can be cut away with a scalpel to leave a neat edge. A size 10A blade is ideal for working with veneers; anything larger is likely to snap or tear the grain fibres
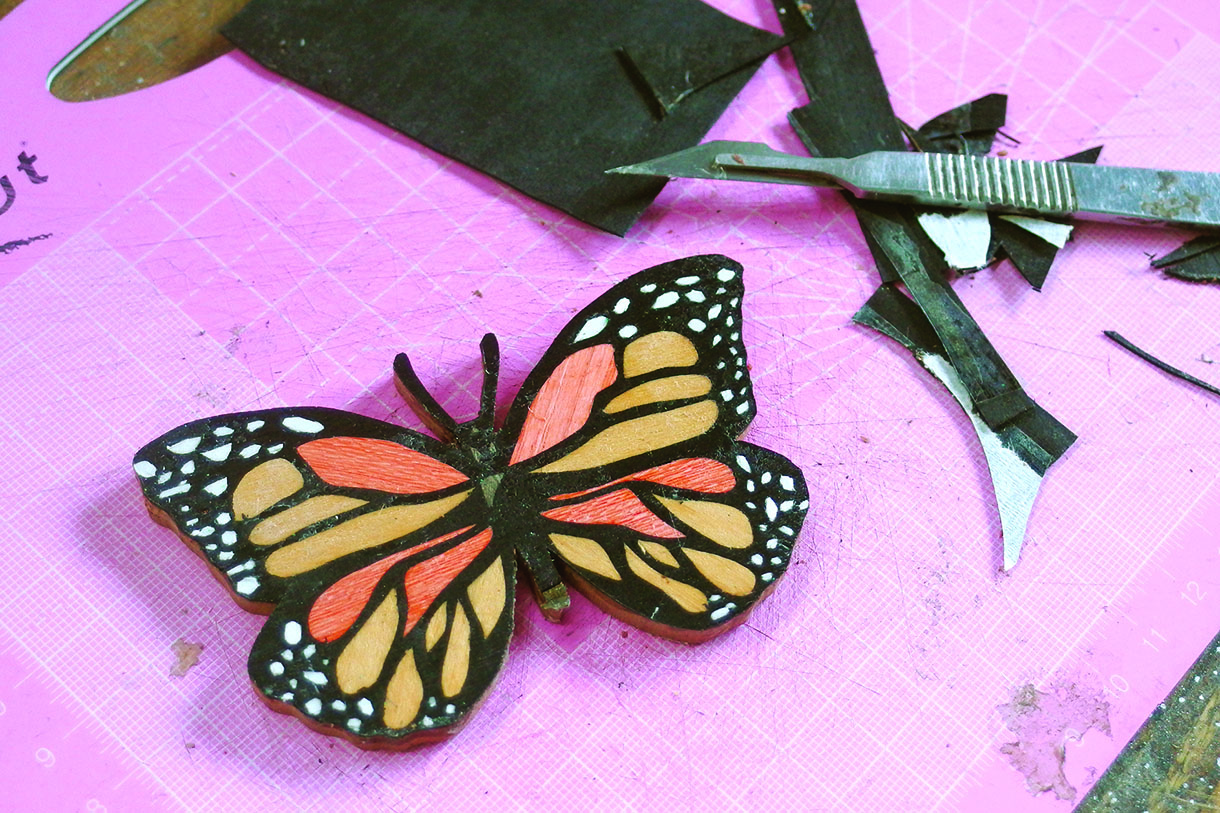
10. It is extremely important to make sure the marquetry is centred, otherwise there is a danger that some of the design will be lost when the waste veneer is removed
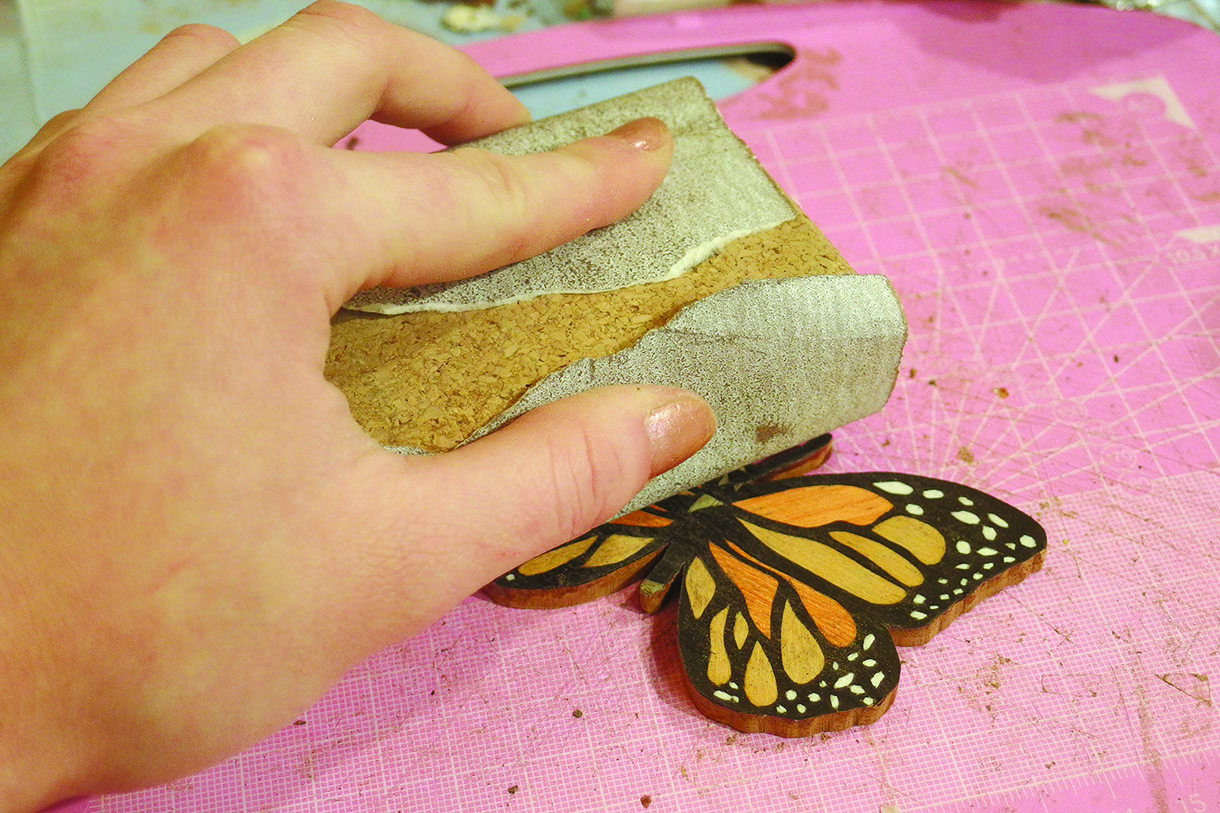
11. Gently scrape and smooth the edges and marquetry surface with a cabinet scraper and various grades of abrasive paper, ending with fine grit to ensure a silky finish and a level surface all over. Always work with the majority of the grain to stop the fibres tearing. In this instance, follow the same direction as the background
Finishing
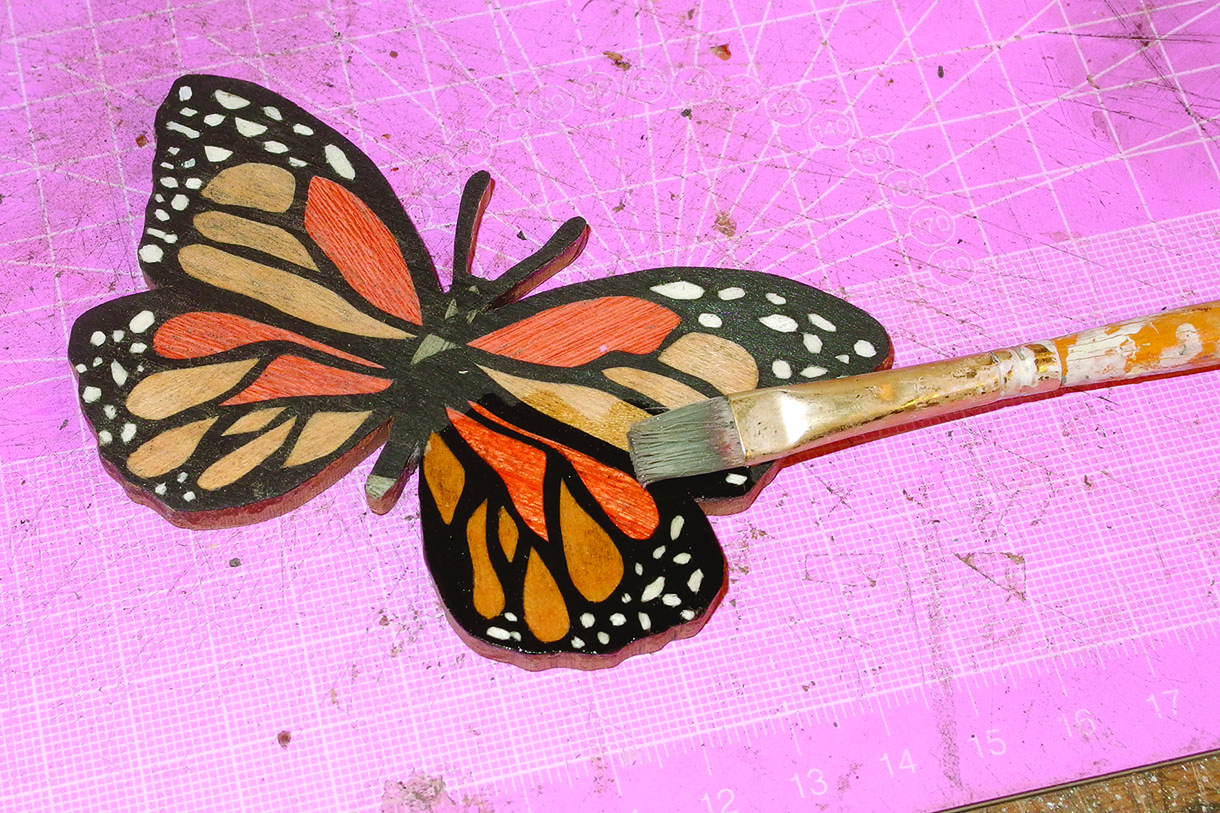
12. Now get ready for the finish. Using a small, soft brush, apply Osmo oil onto the top and sides of the marquetry. Buff into the surface using a piece of clean cotton cloth. Leave to dry for several hours before repeating the process and achieving a good depth of colour. Once satisfied, leave overnight before buffing up with a layer of clear wax. The first layer will act as a sealant for the grain and further layers can be added to build up the finish. I would recommend a minimum of three applications. Do not forget about the sides of the marquetry as these edges will be visible when the frame is hung up on the wall
Cutting the surround
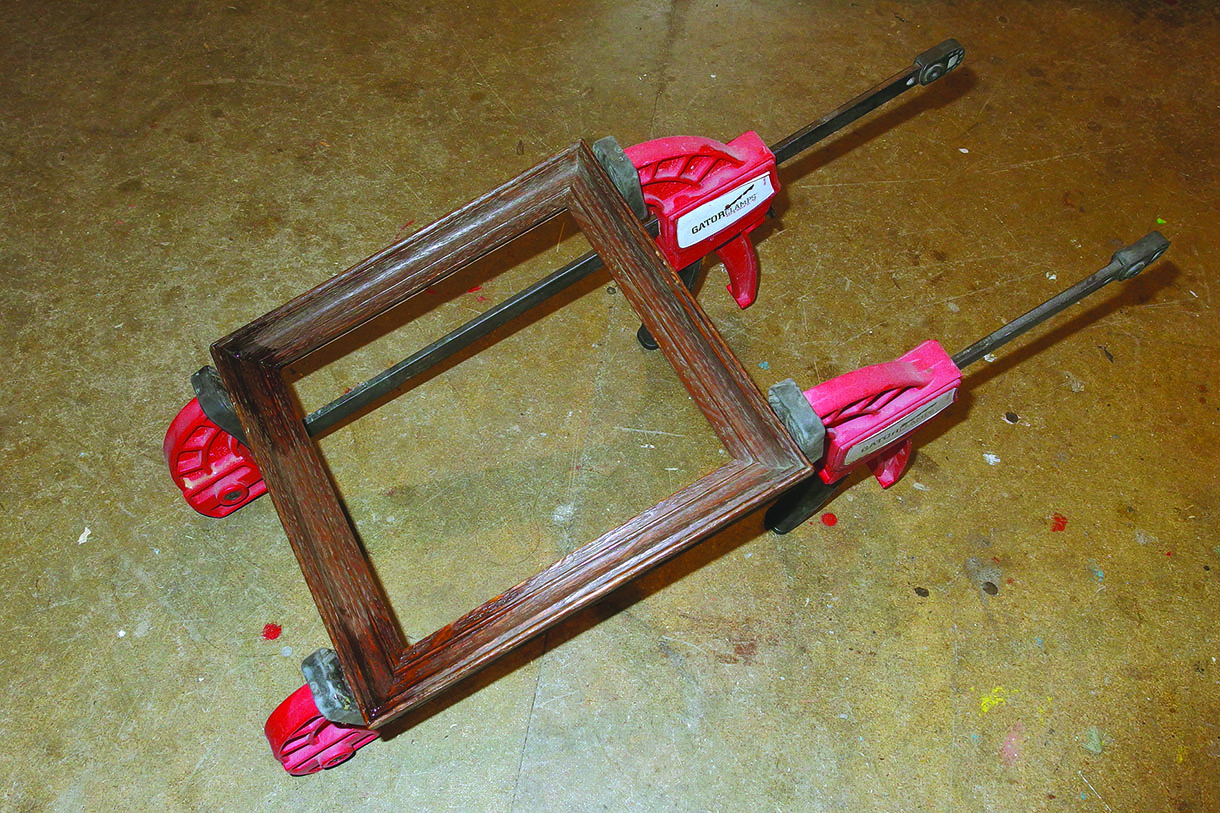
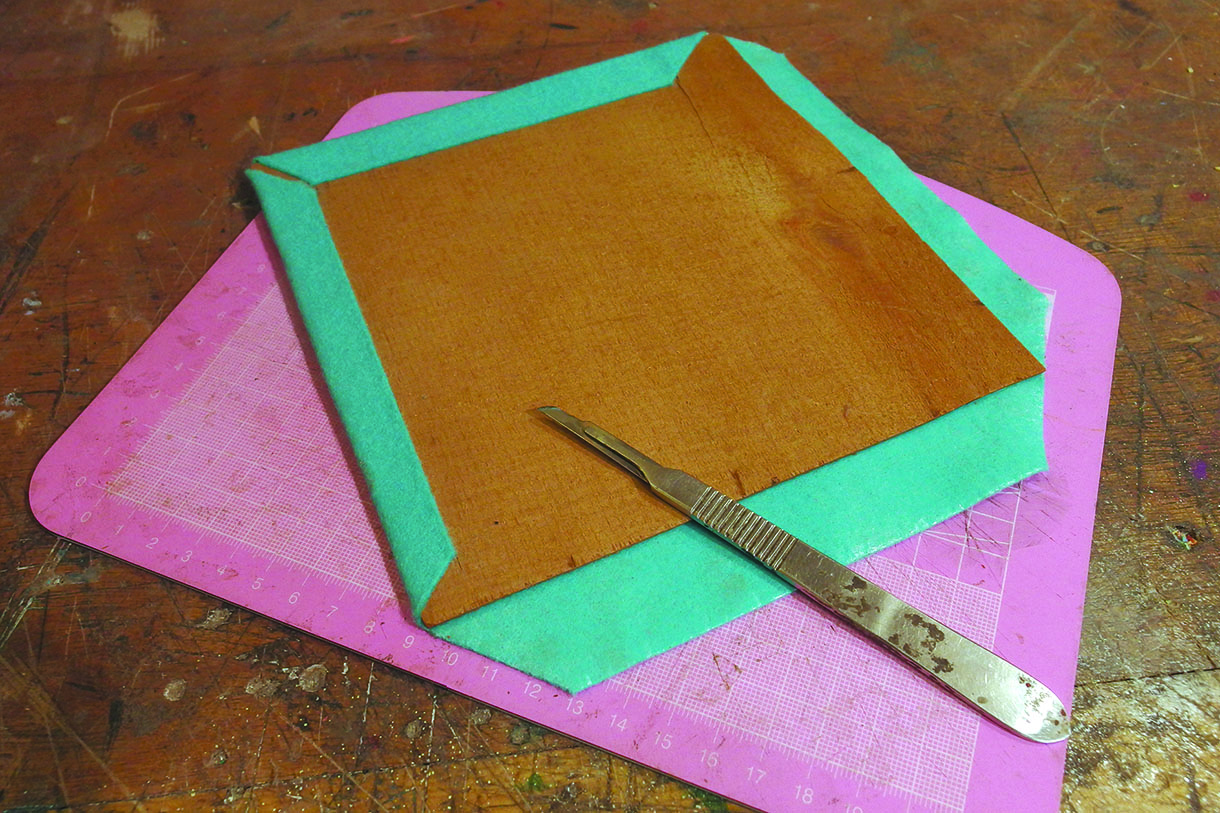
13. With your chosen frame, remove the glass to re-glue and clamp any loose joints. If the frame is looking a bit worn then waxing in an appropriate colour will rejuvenate the appearance of the wood
14. Wrap the backboard in a baize or felt-type fabric that will complement the colours of your butterfly. Sticky-back felt is available in a wide variety of colours. The advantage of using a self-adhesive product means you do not need to worry about glue soaking through to the other side of the material
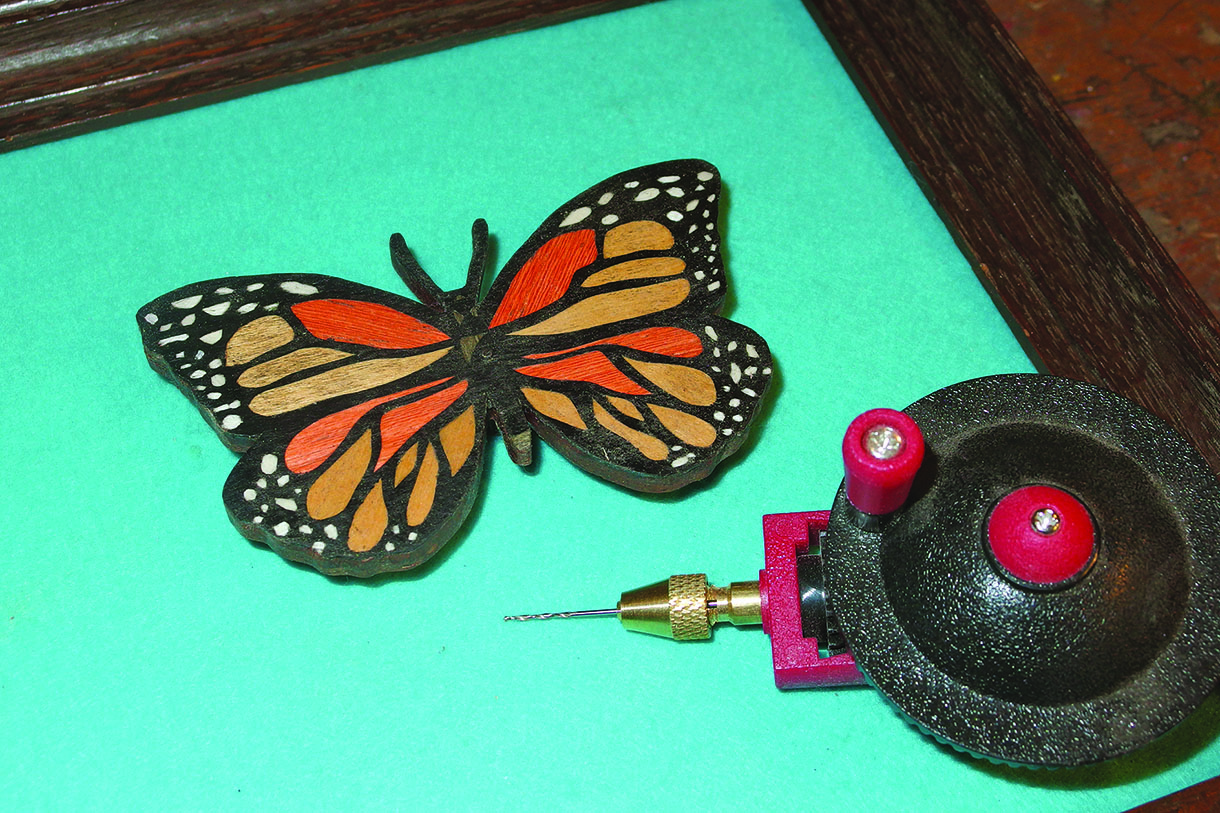
15. To affix the butterfly so it appears to be floating away from the background, cut off a piece of dowel and nail into the centre of the frame from the back. A very short length nail is required, so a veneer pin is ideal. A dot of glue may be required for extra security. Colour up the piece of dowel to match the frame.Using a tiny drill bit and a hand drill, carefully bore a hole in the centre of the butterfly for a veneer pin to be hammered onto the front of the dowel. The head of the veneer pin is now visible, as in a genuine butterfly collection. For a more subtle look, cover the pin head with paint


