Egg and Rosebud – part two:
In part two of his project David Springett finishes his egg and rosebud
In part two of his project David Springett finishes his egg and rosebud
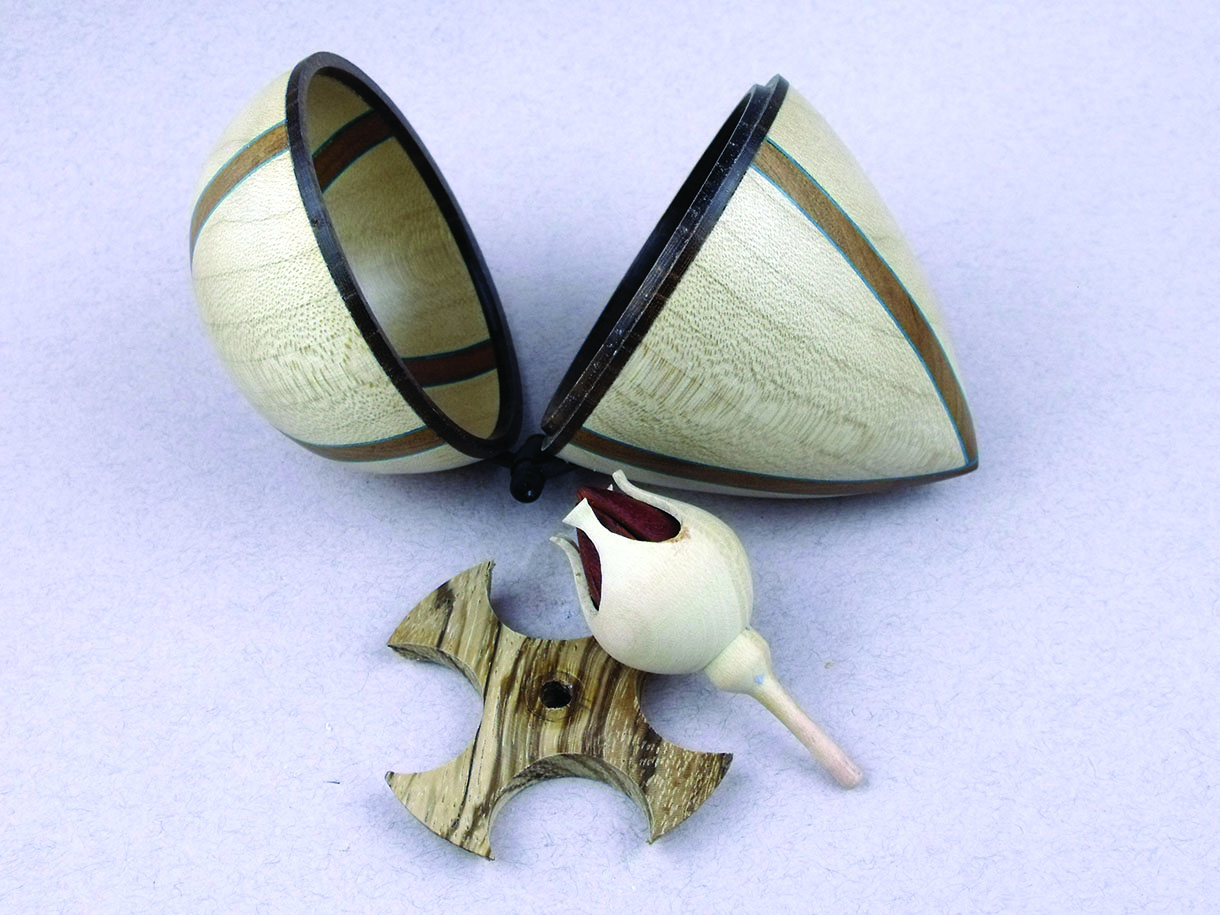
Having turned the two half egg shells in part one those halves now need to be connected with a wooden hinge. Contained within the egg will be a small, turned wooden rosebud, which is supported on a thin zebrano (Microberlinia brazzavillensis) disc.
Here, I describe how the hinge, rosebud and supporting disc are made.
Information and plans
Equipment used
• Epoxy glue
• Small 3 or 4 jaw chuck
• 1.5mm drill and a small piece of metal rod (or pin) of the same diameter
• 22mm saw-tooth drill – or Forstner bit
• Selection of round dental burrs, including one at 2.5mm diameter
• Dremel-type drill
• Junior hacksaw
• Jacobs drill chuck
• Small gouge and skew chisel
• Shelf toolrest (optional)
• Specially ground HSS tool for the rosebud
For the rosebud
• Sycamore – 60 x 35 x 35mm
• Padauk (or other coloured hardwood) 60 x 35 x 35mm – for the petals
• Small piece of dark hardwood – I used rosewood – for the hinge
• For the bud support inside the egg, a piece of zebrano – 75 x 75 x 6mm
Making the hinge

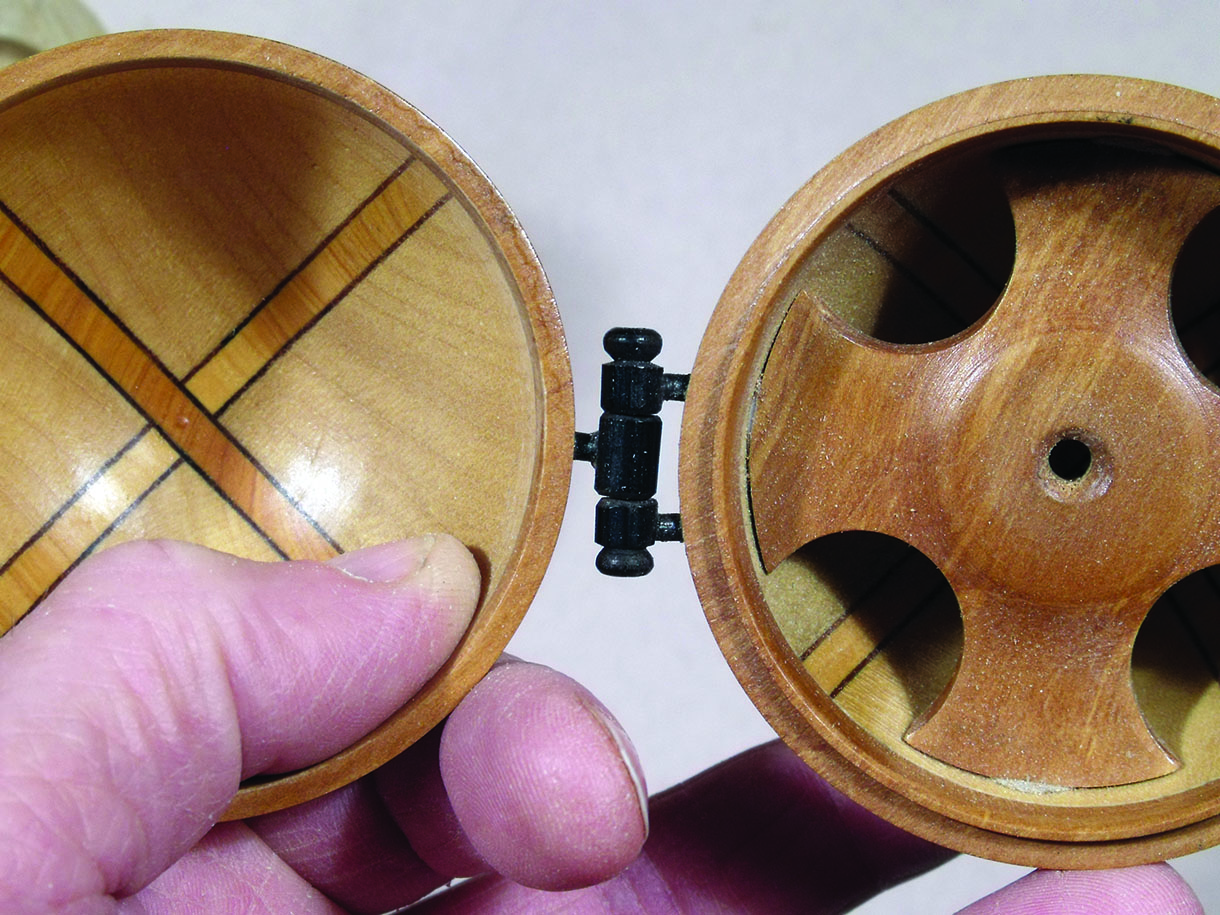
1. Fit a Jacobs drill chuck into the headstock. Hold a 9 x 9 x 30mm piece of dark hardwood in the chuck. Support the tailstock end lightly with a revolving centre. Turn a 22mm length to 6mm diameter. From this cut three pieces to 6mm long. Hold each piece in the drill chuck and drill through using a 1.5mm drill bit (or the size to suit the pin or panel pin available). Next, turn three dark hardwood pieces, each 9mm long by 2.5mm diameter. Mark the centre of each of the 6mm diameter pieces and, with the hinge pin through their middle, drill at that centre mark using a 2.5mm drill. Hold these hinge pieces in a pair of pliers while they are being drilled. Wax the hinge pin (to prevent the glue from bonding the hinge pin) and slide it in place. Epoxy glue the three fine dowels in place

2. The hinge parts can be seen here, ready to be assembled
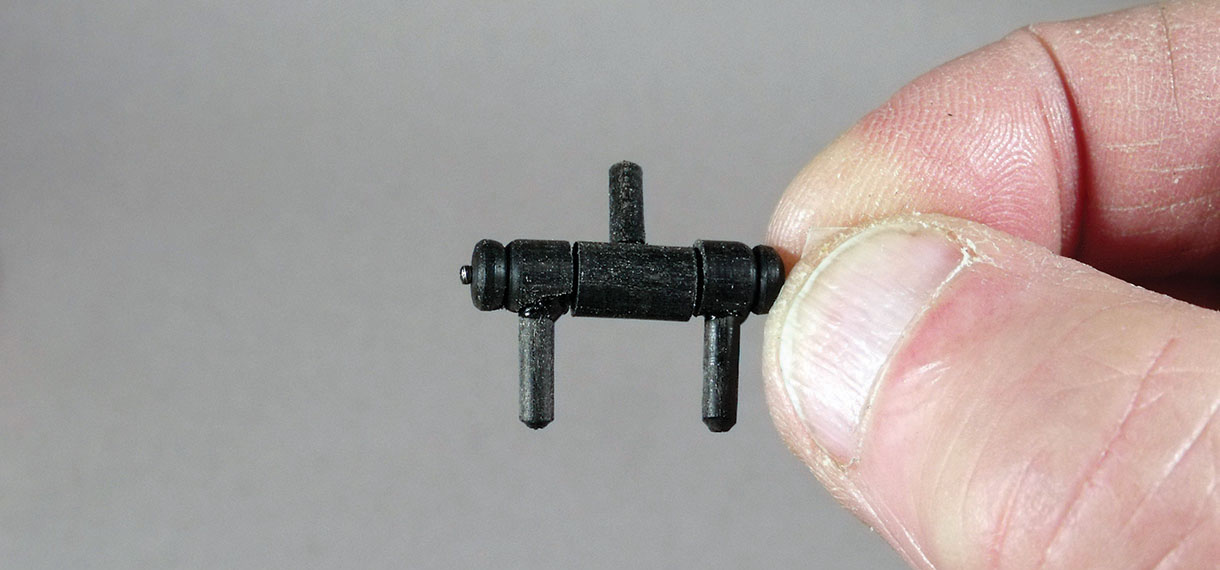
3. Immediately after gluing the parts in position, make sure the hinge can move freely and that the glue has not locked any of the parts in place
Fitting the hinge
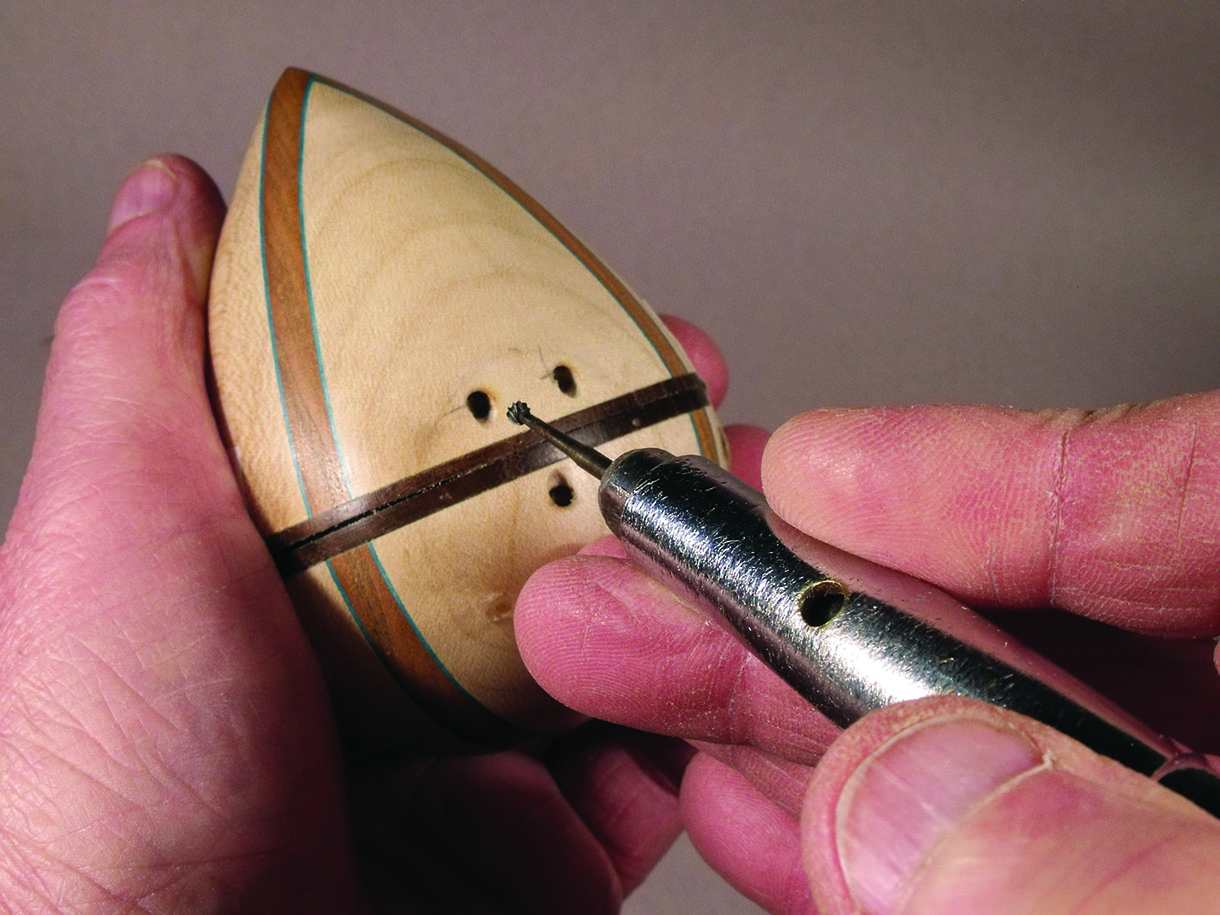
4. Using your judgement, mark the position for the upper dowel. Remember that the hole needs to be drilled at an angle. Using a 2.5mm round dental burr, drill a hole into the eggshell fractionally closer to the joint line than the marked position. If you are unsure about drilling with a dental burr, practise the method on scrap wood first
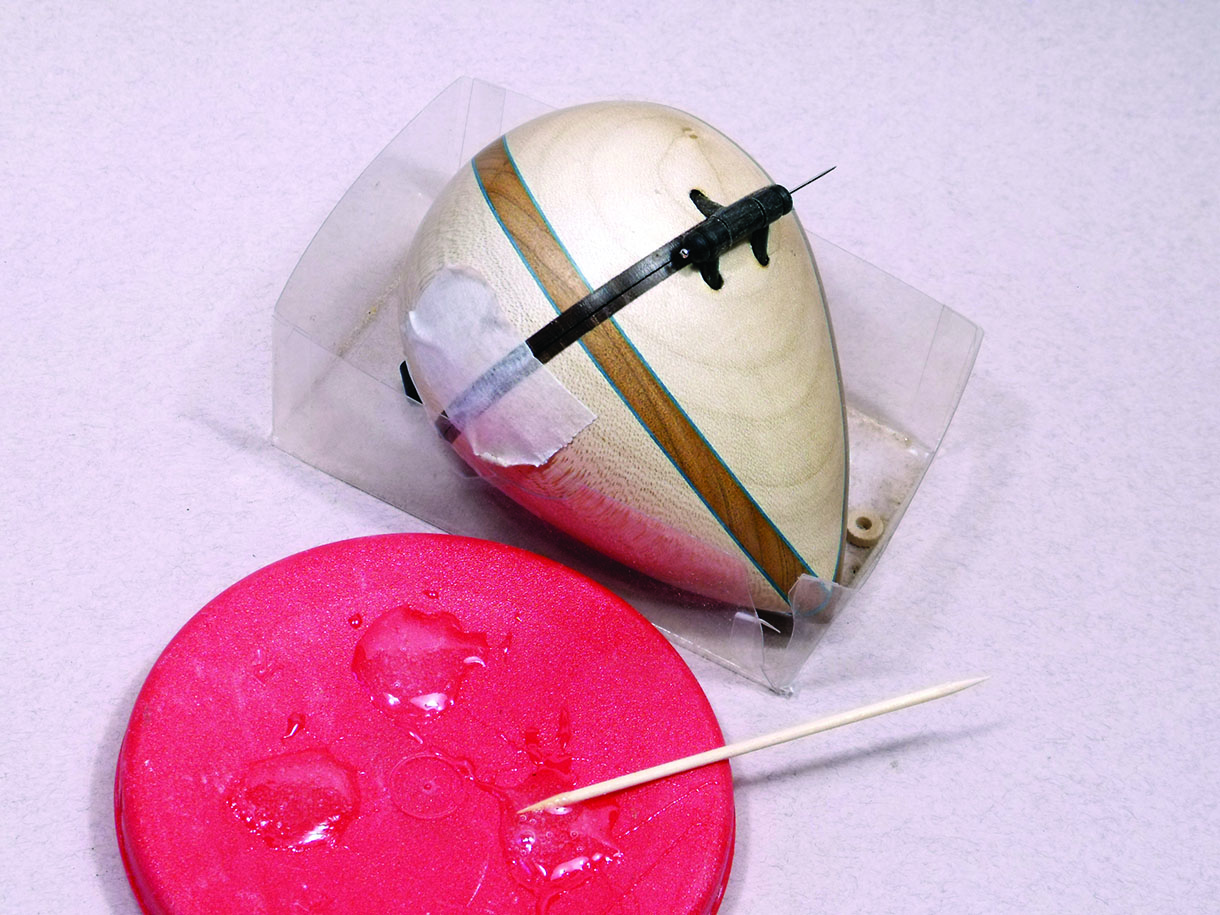
5. When satisfied with the hinge movement, masking tape the egg closed and glue the dowels into their respective holes using epoxy resin glue
6. The hinge glued in place
The rose
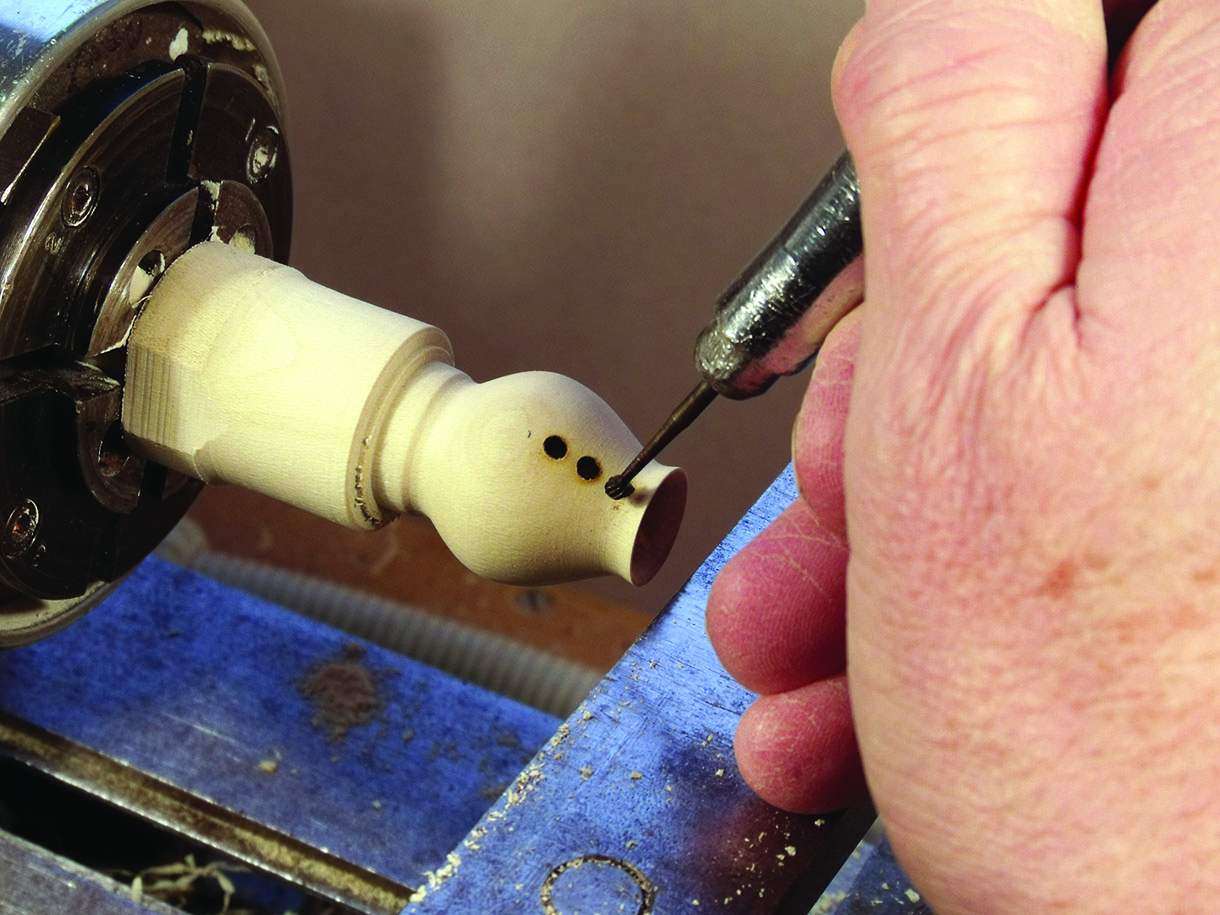
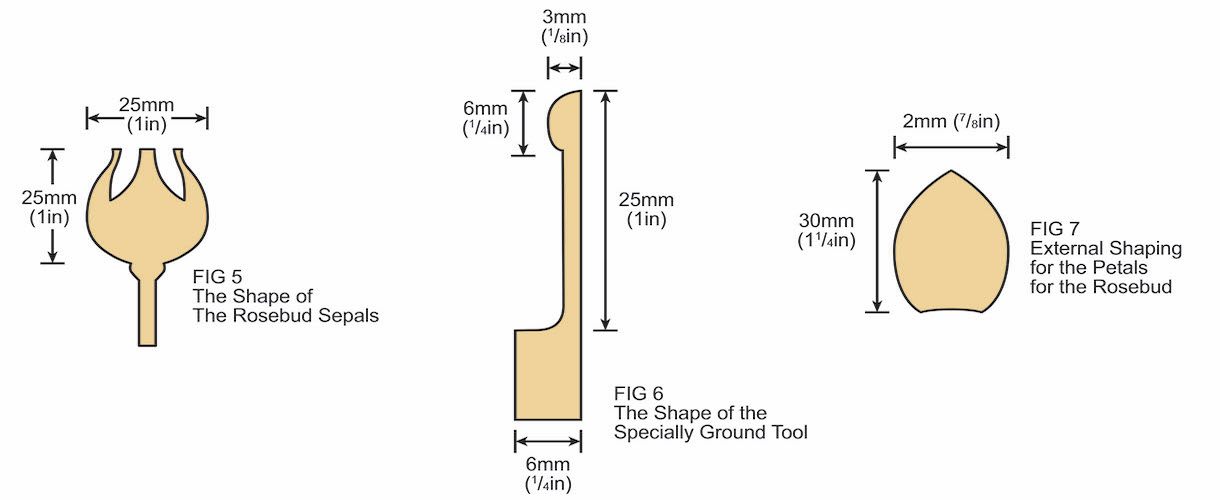
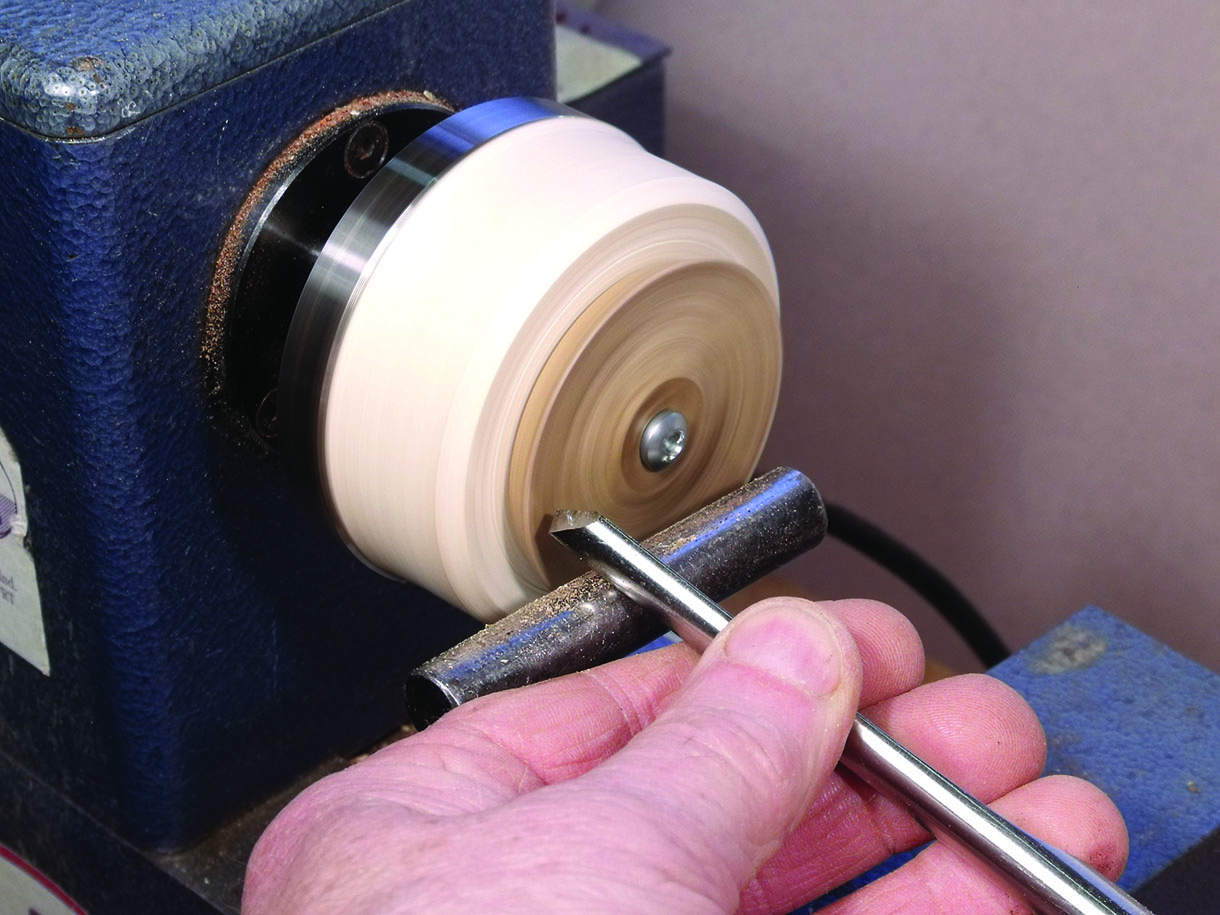
7. Set a 60 x 30 x 30mm piece of sycamore between centres. Turn fully round and as close to full diameter as possible. At the tailstock end turn a 9mm tenon, 9mm long. Remove the piece from the lathe. Remove the driving dog and replace with a drill chuck. Hold the tenon in the chuck and make sure that it runs true and on centre. Support the exposed end with a revolving centre. Face off that end. Using a 9mm drill bit, drill to a depth of 22mm. Fit the revolving centre into the drilled hole for support while turning the profile. Turn the outer profile down to the start of the stalk about 25mm long. Cleaning up the outer surface for it will be easier to do this now. On the bud surface mark, in pencil, the areas which will eventually be cut away. At one of those marked openings drill several holes. These will help judge wall thickness when turning the hollow inside
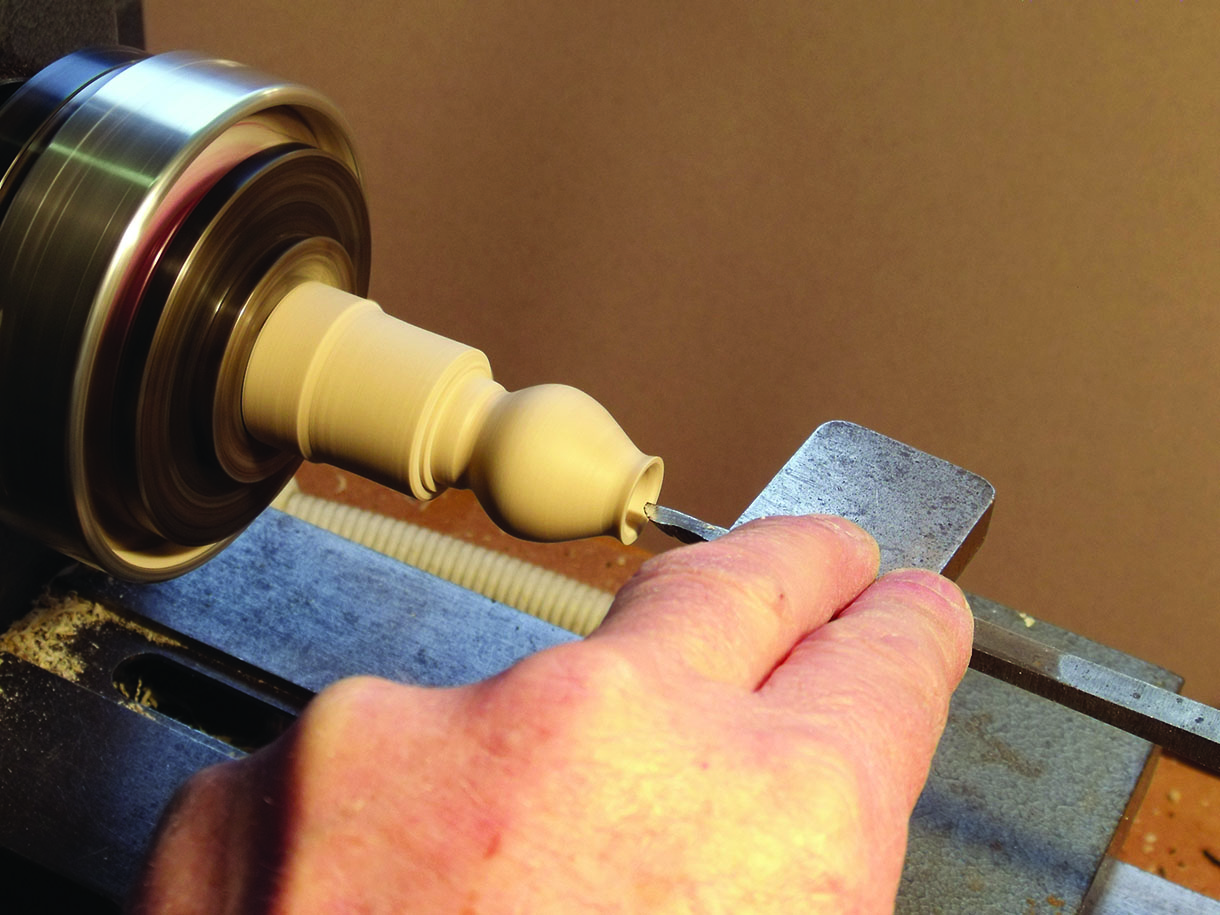
8. Withdraw the tailstock and bring the toolrest across the face of the work. I like to use a shelf toolrest to support the hollowing tool. Using the specially ground tool, made from 6mm wide HSS, slowly and carefully excavate the interior of the bud, bringing the wall thickness to about 1mm. The holes drilled earlier will help judge wall thickness. When satisfied with the bud turn the stem beneath to 2.5mm diameter and 25mm long. Part off close to the chuck
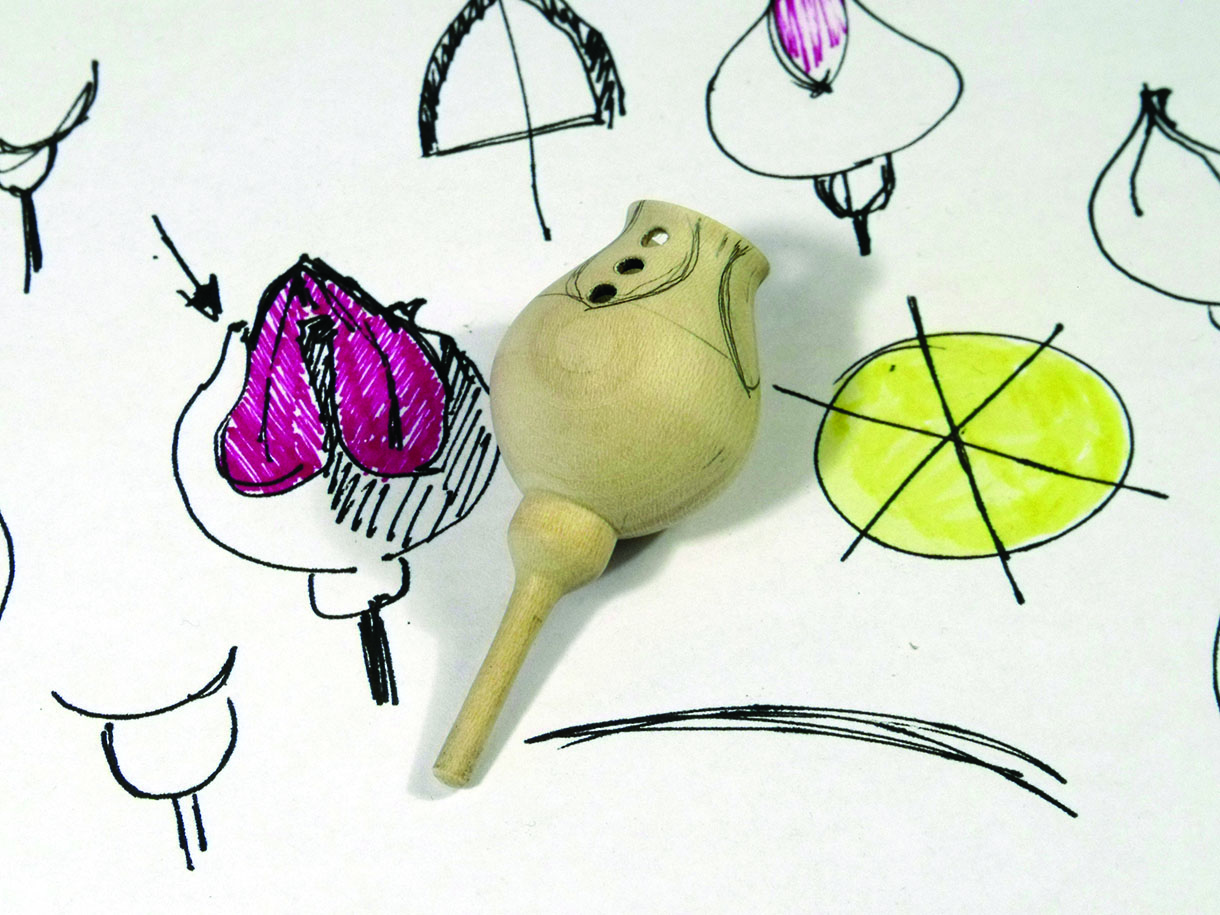
9. Here is the part finished bud, with holes drilled to help judge wall thickness, set on preparatory sketches
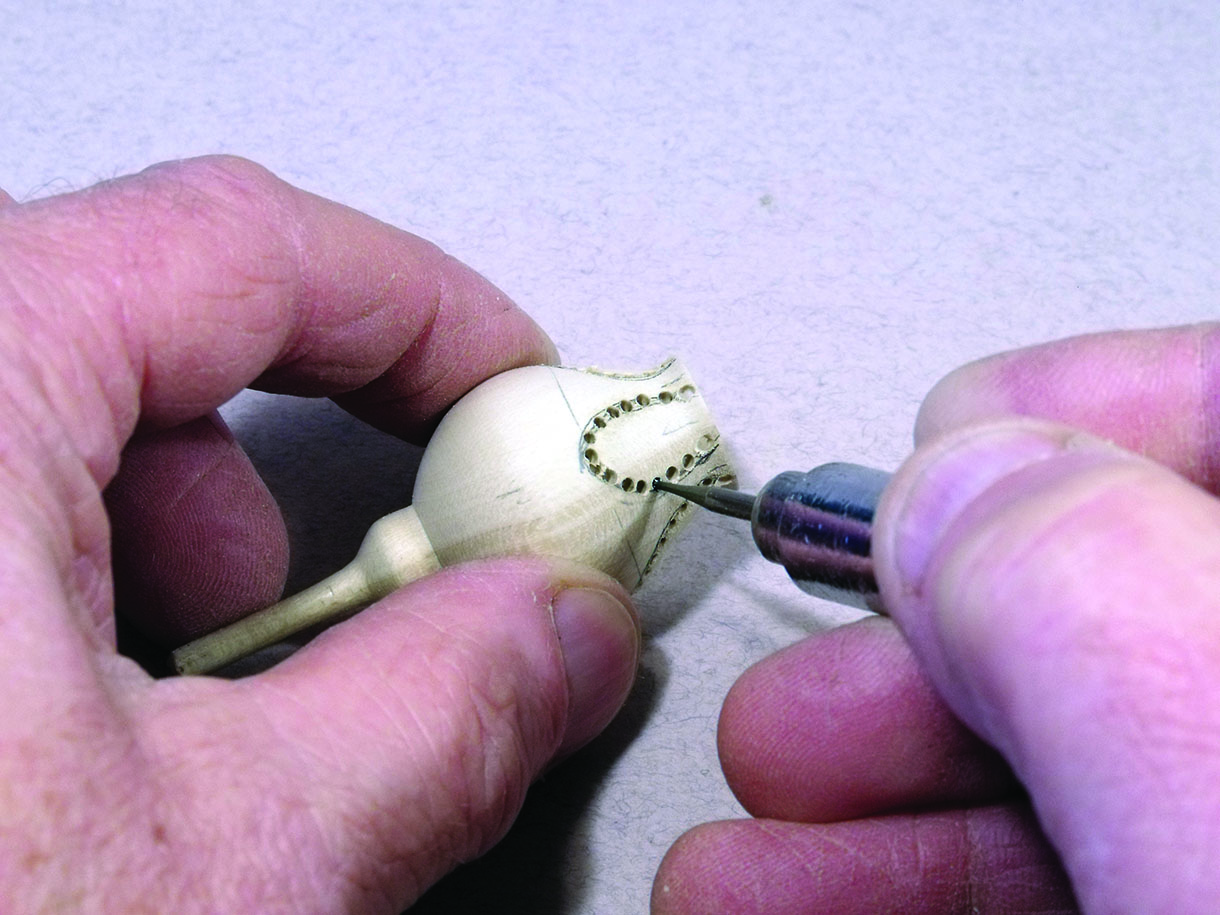
10. Cutting the sepals on the bud. Here a fine dental burr is used to chain drill inside the marked shape. Use that same burr to gently break through that chain of holes. Clean up the edges with fine files and glass paper
Turning the petals
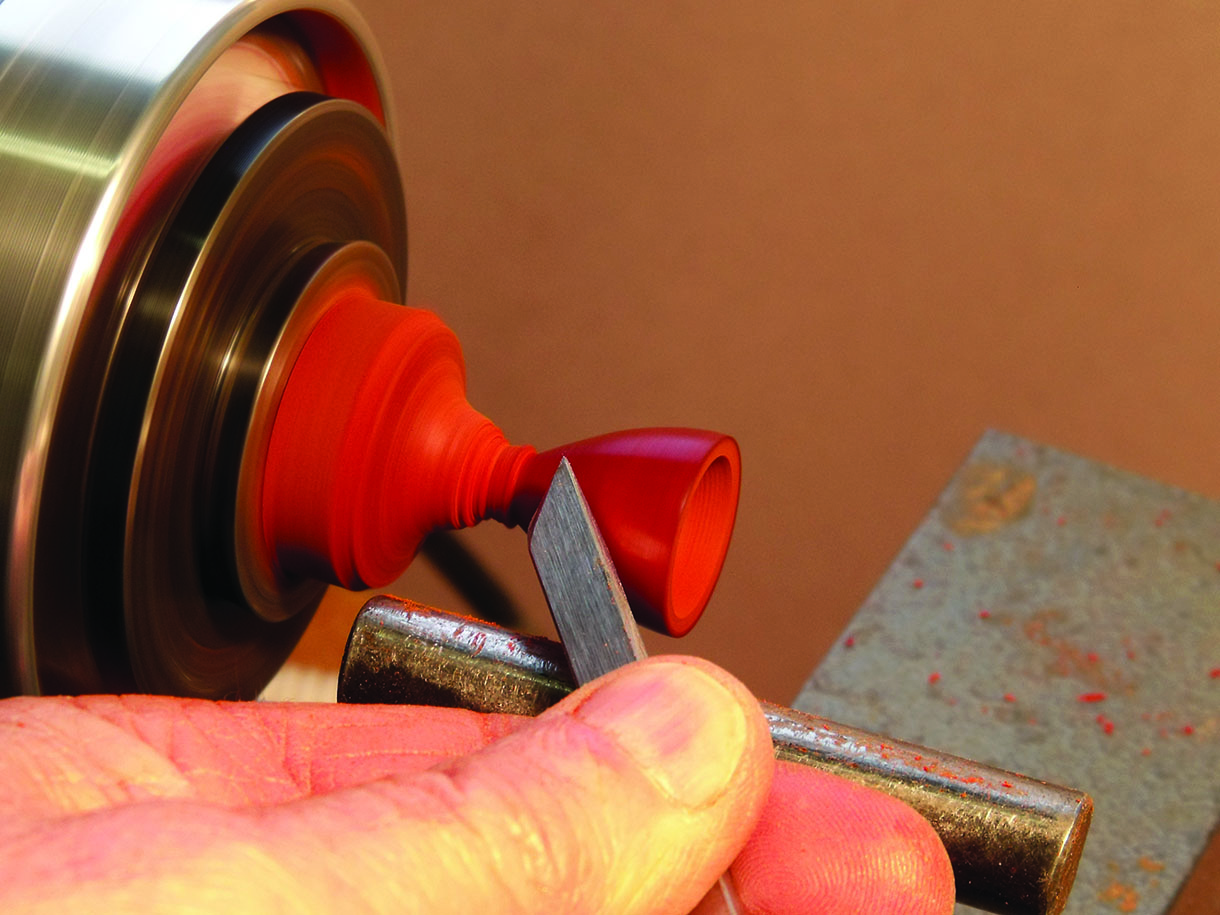
11. Place the piece of padauk, 60 x 35 x 35mm between centres and turn down to 25mm round. At the tailstock end turn a 9mm long tenon, 9mm diameter. Remove from the lathe, exchanging the driving dog with a chuck. Hold the turned tenon in the chuck and support the tailstock end with a revolving centre. Face off that end square and true. Withdraw the tailstock. Drill into the end using a 9mm drill to a depth of 22mm. Turn the outer profile, leaving a good thickness attached at the headstock end. Carefully turn the inner shape so that a wall thickness of about 1mm is achieved

12. Once satisfied, polish inside and out carefully parting off to a point
Cutting the petals
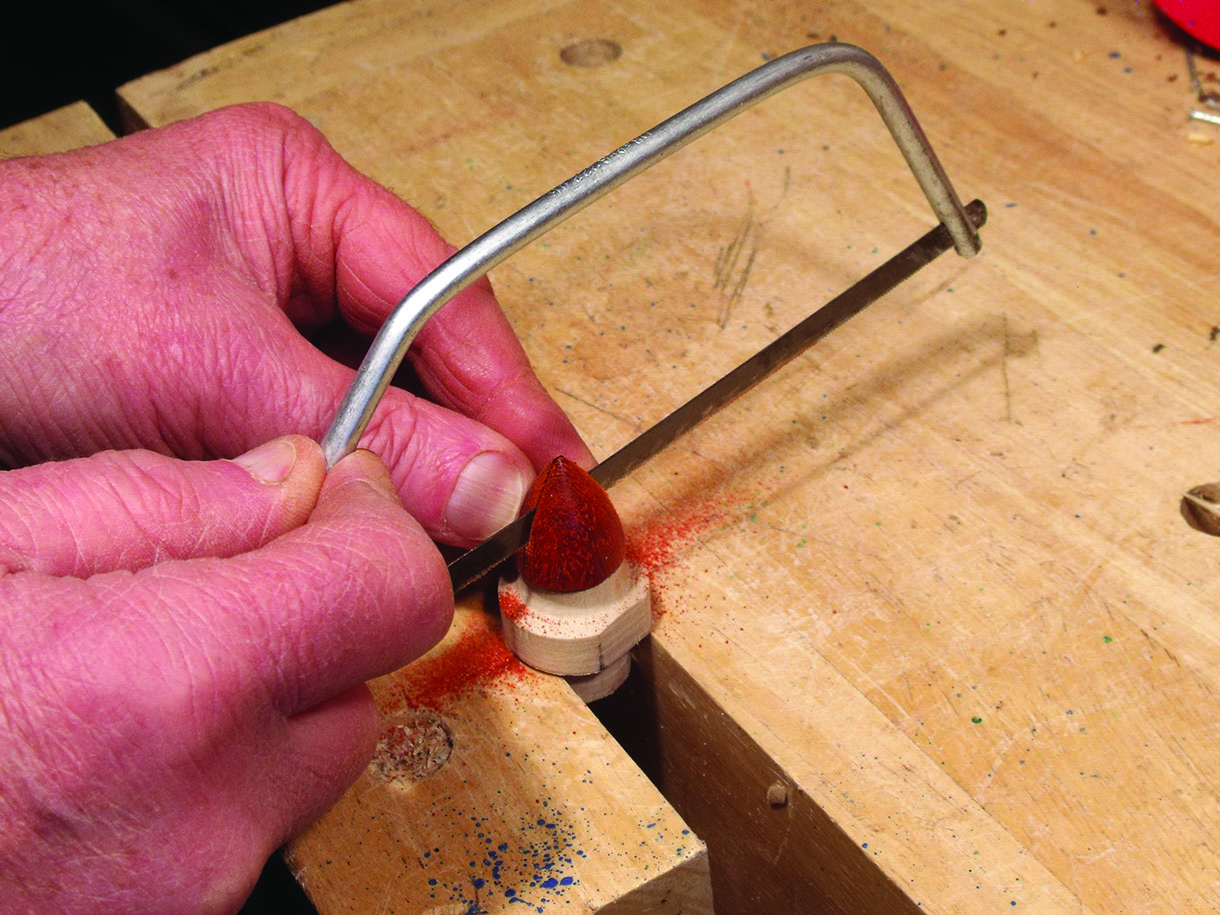
13. Turn a softwood plug to fit inside the petal blank and grip it in a vice. Fit the petal blank over the softwood plug. Using a junior hacksaw saw down stopping before cutting all the way through
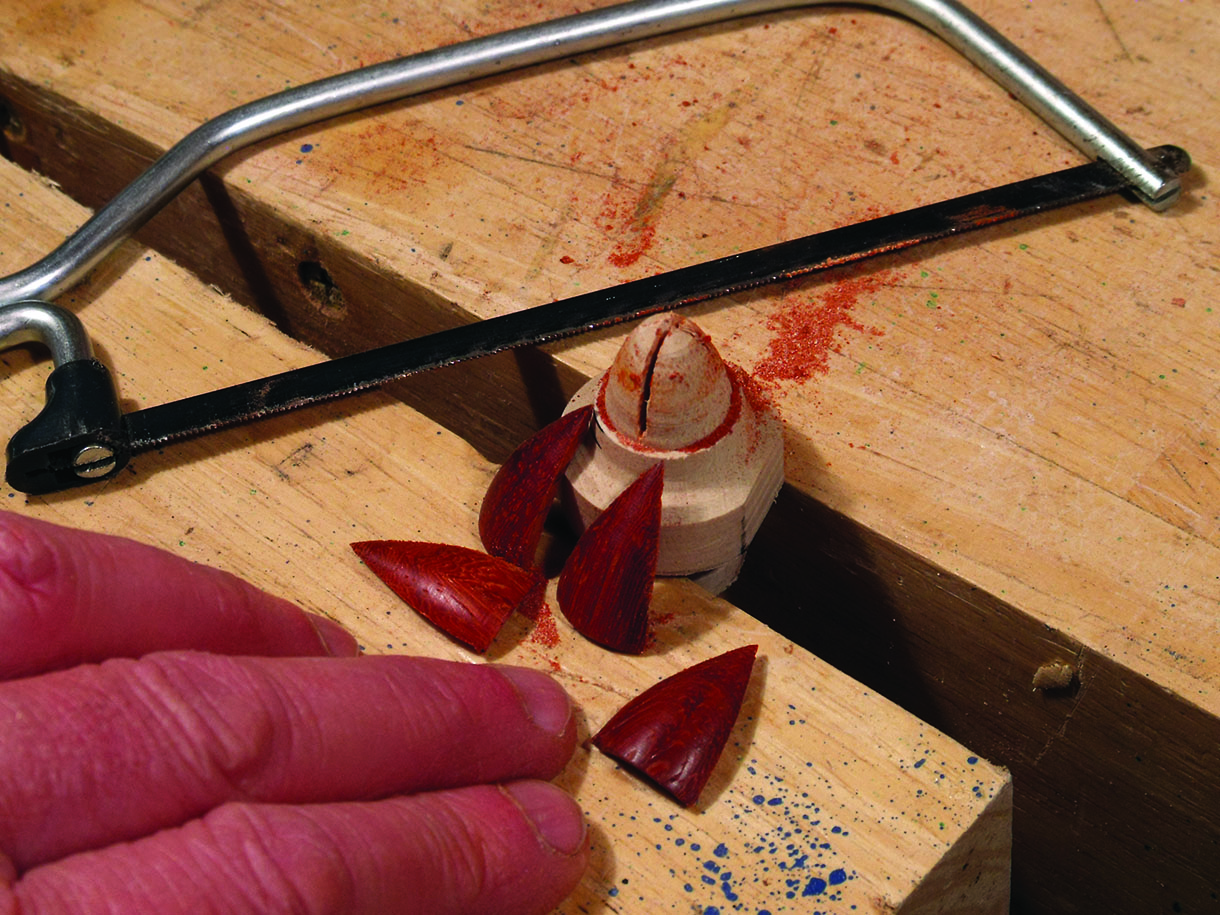
14. Make a cut at 90° to the first, this time cutting through. The four petal pieces can now be separated
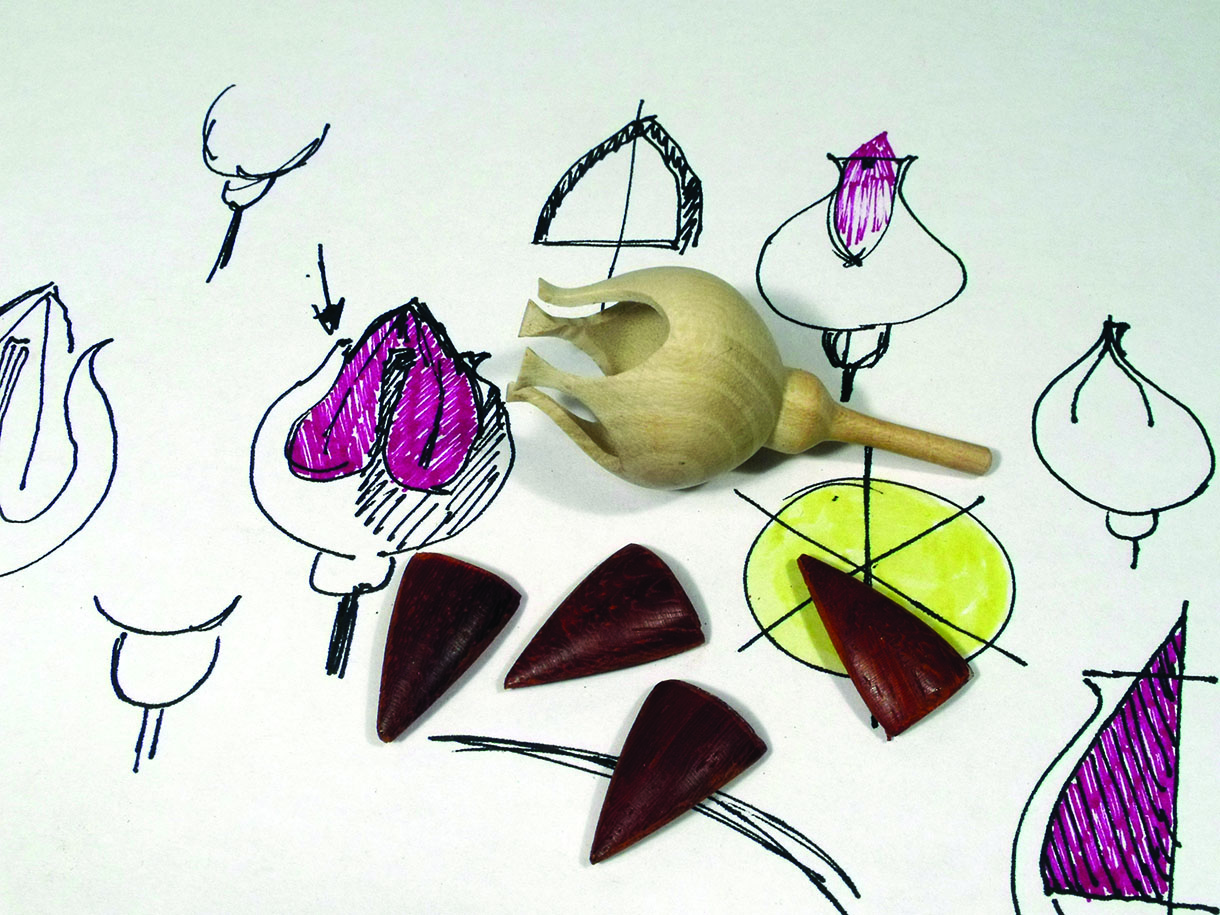
15. Clean off each petal, rounding over the edges. Here are the four cut petals, and the part finished bud is shown
Fitting the petals inside the bud
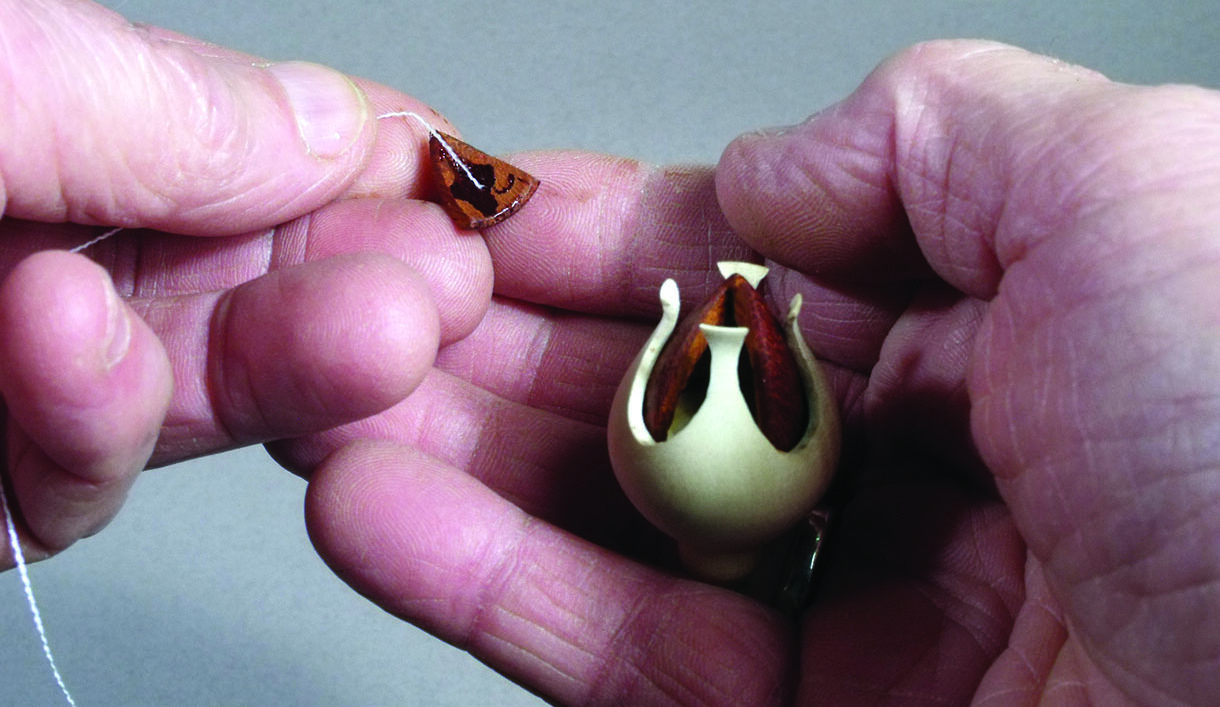
16. Take one petal. Lay it inside against one sepal and check for fit. Remove the petal. Dab a small amount of glue on the lower edge of the petal. Refit the petal in the bud positioning as before. Make sure that the petal tip appears to be on centre when viewed from above and that the petal falls equally in the centre of the hollow between the sepals. Hold until the glue sets. Fit petal two in the same way, pushing the edges together. On petal three, glue a piece of cotton thread on the inside about one third down. Drop it in place gluing as before. Once dry, trim off the thread

17. Glue a cotton thread on petal four. Test it for fit and make adjustments to the petal if necessary. Once satisfied, glue in place using the thread to pull the petal in position. When dry trim off the thread
Making the rosebud support
18. Cut a 56mm diameter disc from 6mm wood. I have used zebrano. On a faceplate fit a 75mm diameter, 15mm thick softwood disc. Now screw the zebrano disc centrally upon the softwood faceplate. Turn the outer edge of the zebrano disc at a slight angle so that it can drop into the lower egg shell and sit well against the sloping sides. Undo the screw and flip it over, fixing it centrally to the softwood faceplate. Turn a slight hollow towards the centre
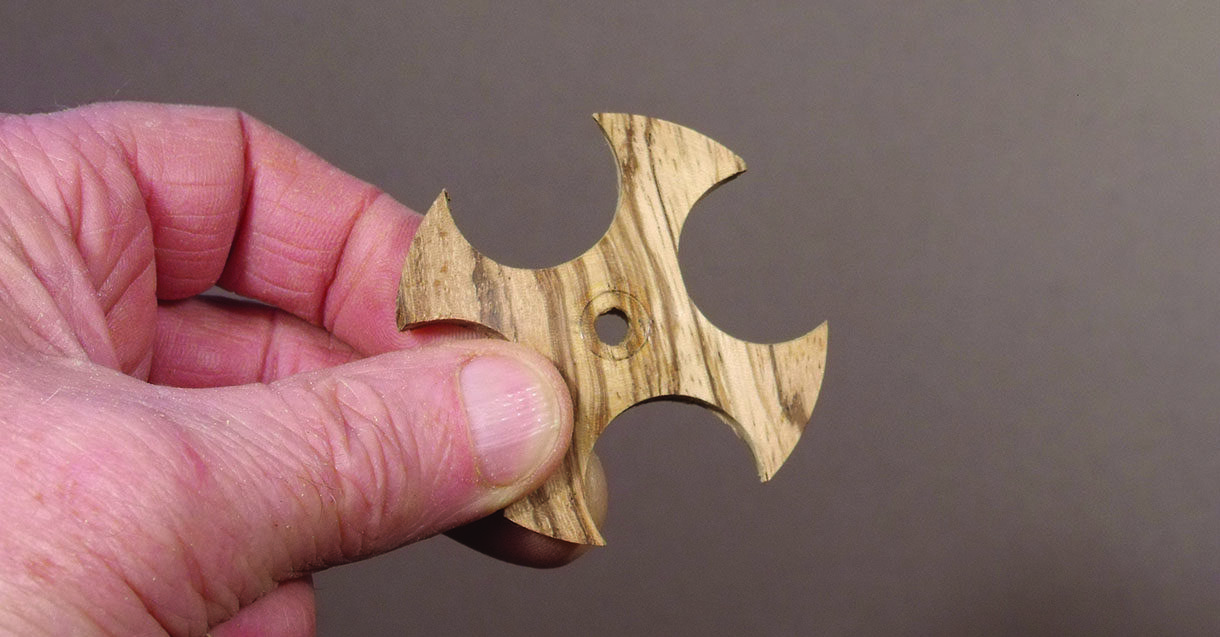
19. Mark a circular line 3mm from the edge. Divide that circle into four. Remove the faceplate from the lathe, with zebrano disc attached, and take it to the pillar drill. Fit a 25mm drill in the machine and at each of the four marked positions drill through
20. Remove the zebrano piece from the softwood faceplate and try it in place. Fit the rosebud into the drilled hole. When satisfied with the position of the zebrano piece secure it in place with a touch of glue. Close the top of the egg with the rosebud in place. Job done
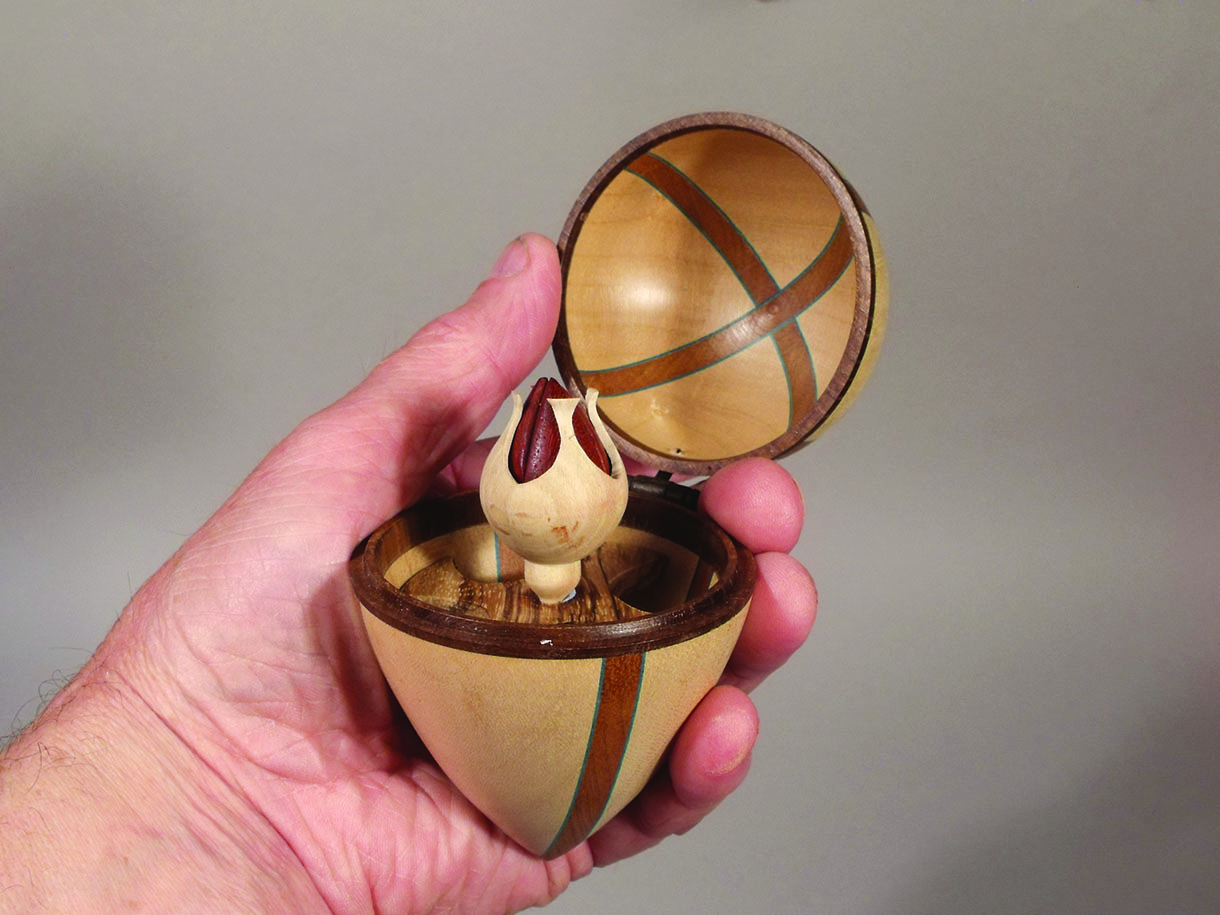
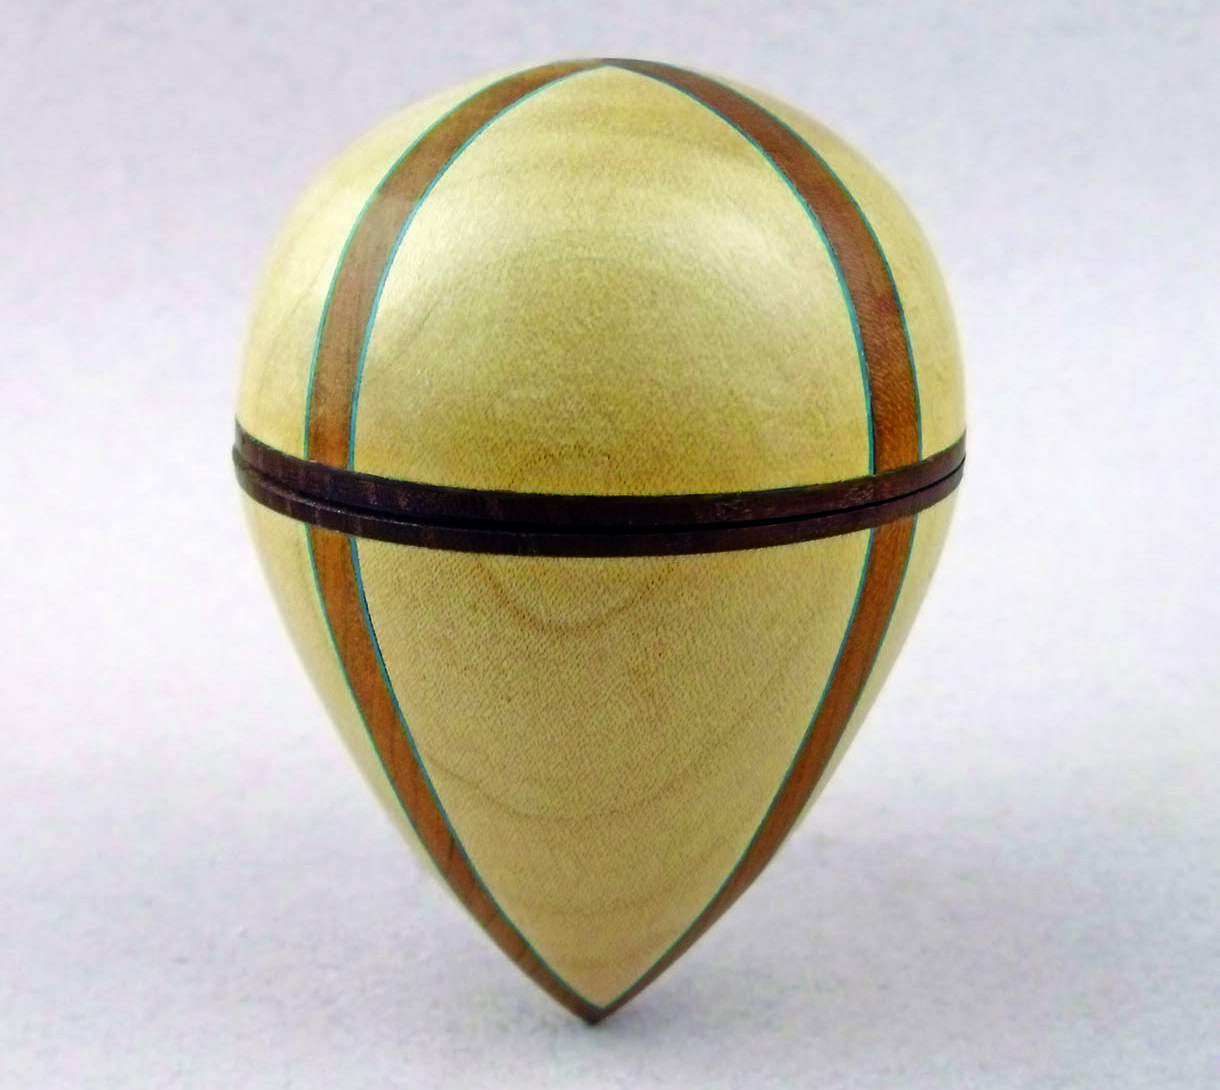
21. Your final egg and rose should look something like this
Top tips
1. Masking tape the two halves of the egg together aligns the halves accurately
2. Hold the hinge, with the centre dowel facing up and the outer dowels facing down, against the egg in one of the sycamore quadrants
3. When drilling into a curve surface, such as this egg, a normal drill can easily slip. A rotating dental burr can be held, lightly, at the marked position. This will create an indent into which that rotating burr may be pushed to drill a hole. This initial indent prevents the burr from slipping and damaging the surrounding area. Fit the hinge dowel in place then mark the positions for the two lower dowels. Drill as before. With the hinge set in place open and close the egg. Adjust where necessary
4. Turning the rosebud requires judgement and careful planning. Look at a few rosebuds to see how they are formed. A sketch of the finished shape needs to be made but does not have to be rigidly followed. It will act as a guide


