Three Turned Toys:
Colwin Way makes three fun projects, accompanied by his son.
Colwin Way makes three fun projects, accompanied by his son
For most of us woodturning is an escape from the day job, a time to relax and unwind and unleash those creative juices. I’m one of the lucky few who can also call my hobby a career. I love turning so much that I carry on when I get home, either making for shop orders, commissions or indeed for articles such as this one.
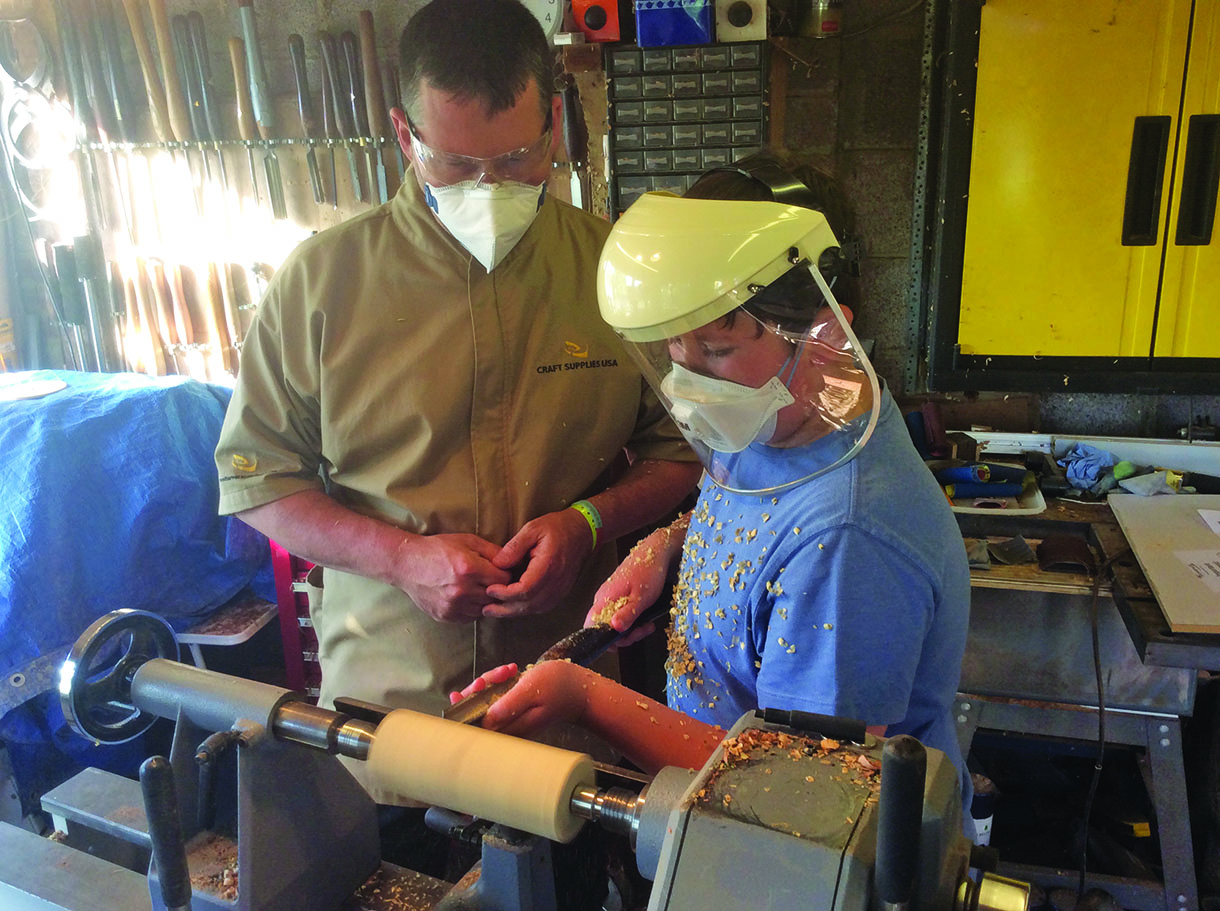
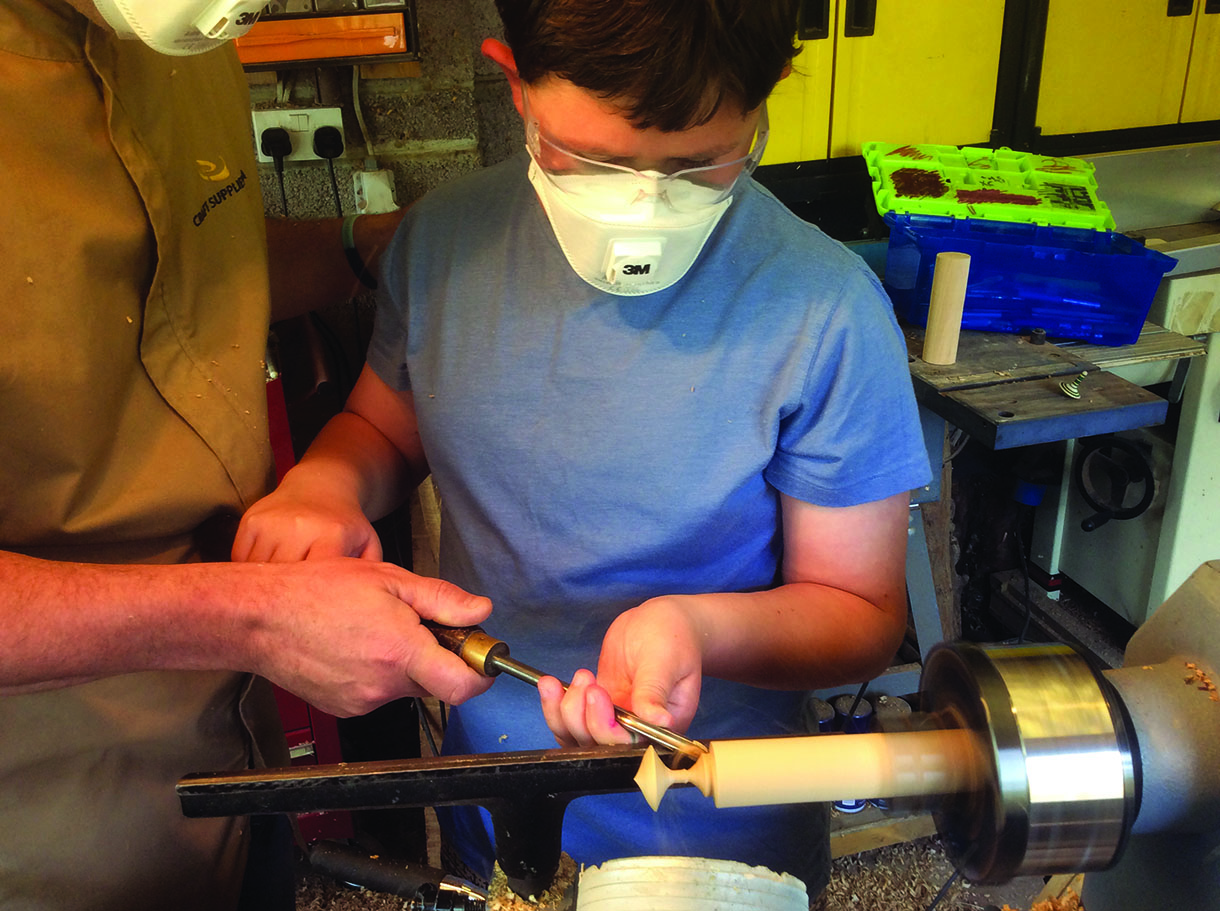
This does mean that sometimes I’m guilty of getting the balance wrong and neglecting those important to me! However, again I’m very lucky I have a very supportive wife behind the camera and that both my sons share a creative interest and started turning at the early age of six. As this article is all about turning wooden toys I thought it might be wise to bring in one of them, a true professional in the toy game, my 12-year-old son Charlie, which meant in turn we all got to spend a day in the workshop together.
The following pretty much tells the story, but if you have as much fun in the workshop as I’ve had creating these toys with the spinning top master Charlie, then you’re in for a real treat. The only problem now is I’ve opened up a can of worms as I find Charlie booking the workshop and myself for certain nights, in preparation of the next batch of spinning tops, and he is already talking Christmas presents for
his school friends!
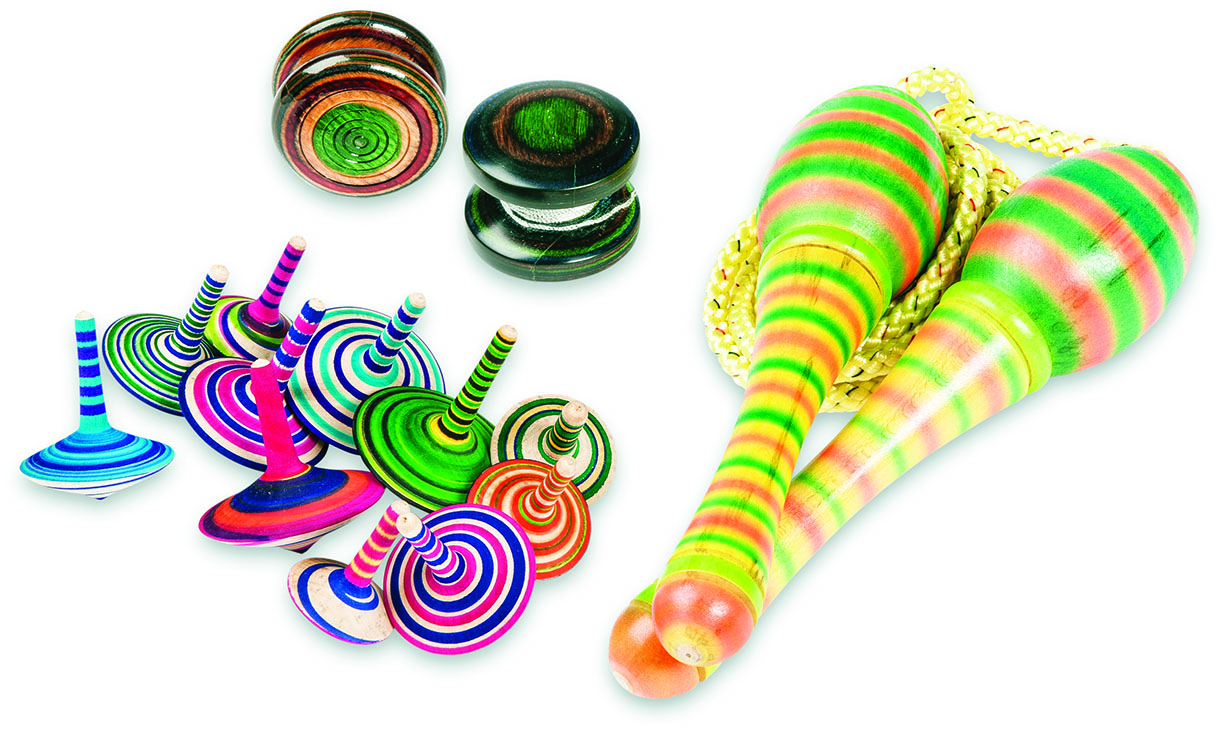
We’re going to look at three simple toy classics; spinning tops, skipping rope and yo-yos and they have all been made from lime (Tilia vulgaris), which I find an ideal timber for colouring and texturing as it has a tight grain with few knots or features. OK, so let’s start the fun with a batch of spinning tops.
EQUIPMENT AND MATERIALS USED
• 10mm spindle gouge
• 3mm parting tool
• 25mm skew chisel
• 19mm roughing gouge
• Coloured felt-tip pens
• Airbrush and paints (optional)
• 10mm drill bit
• 25mm drill bit – sawtooth or Forstner
• String for yo-yo
• 10mm coloured rope
Drawings and how to resize them
To enlarge or reduce the size of drawings right click on the image to download it and then go HERE to watch a video on how to use paper with a grid to do exactly that.
Children and workshop safety
Before we start turning I want to talk about workshop safety and children. A few things need to be considered when teaching youngsters on the lathe and I strongly believe that we need to set the example. The obvious safety consideration is eye protection and dust mask, but I run through the lathe controls every time we start turning and remind my sons where the chuck is and that we are going to take our time. The height of the lathe is a consideration and it may be that your child will have to stand on a platform to reach centre height. Above all though, ensure you are always with them, to watch and give words of encouragement and guidance, and never leave them on their own to turn. A child’s attention span maybe a lot shorter than yours, so a short burst of fun will be better, rather than keeping them turning after they’ve become bored. Check the child has nothing on them that could catch on the work including clothing and long hair, which can be tied back. Remember children are unaware of the dangers and completely fearless, so you have to be their eyes and ears.
Spinning top
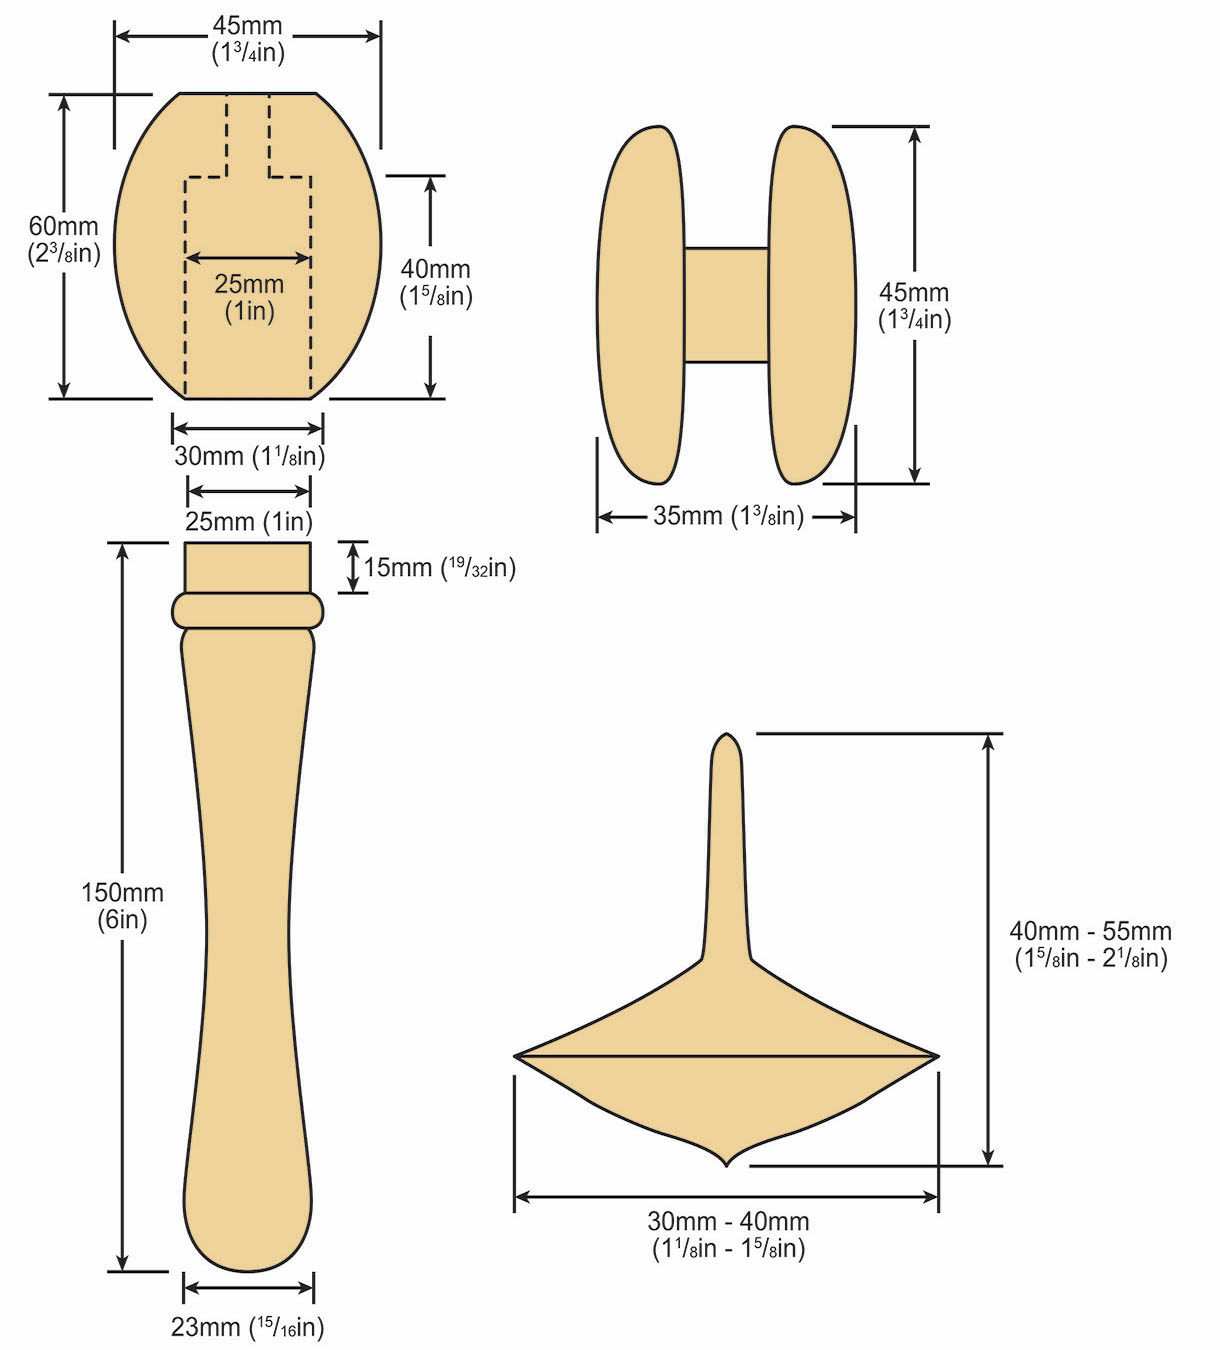
The blank sizes range from 30–40mm diameter x 150–200mm long, which means we can get several tops out of each blank.
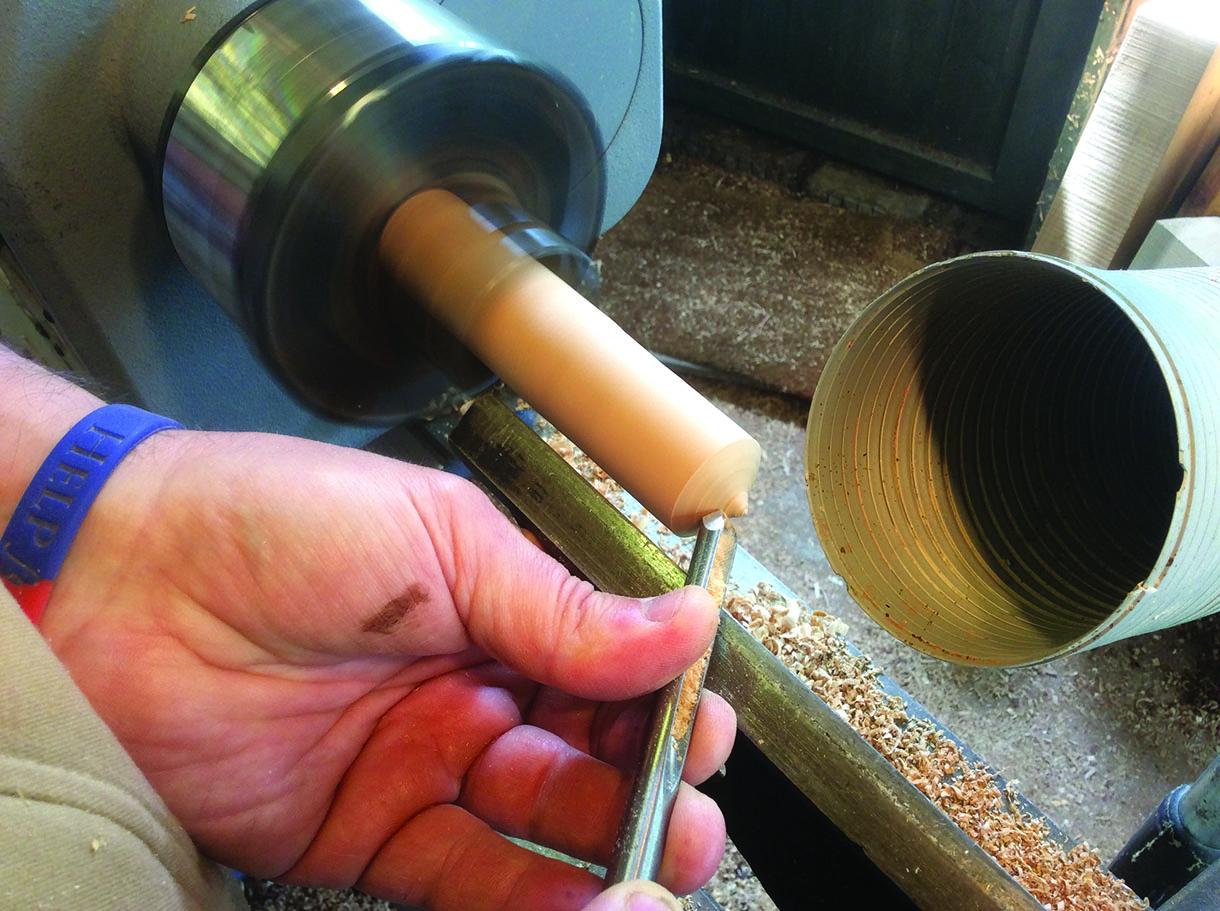
1. When all the blanks have been turned down to round we can start turning tops. Hold the blank in a four jaw chuck and a set of dovetail jaws. It’s important not to make your blank too long or they will vibrate badly when starting to shape. Start shaping the bottom of the spinning top, making sure they are turned to a sharp point to keep the bearing surface as small as possible and keeping the centre of gravity low to give a stable spin

2. Now start shaping the tops, again remembering to keep the centre of balance low. Use a 6mm bowl gouge, but a 10mm spindle gouge is as good, if not better for this procedure. Remember to point the flute of the gouge in the direction of travel and take small cuts while the blank is at its longest
3. Make the last few cuts to the top of the spinner
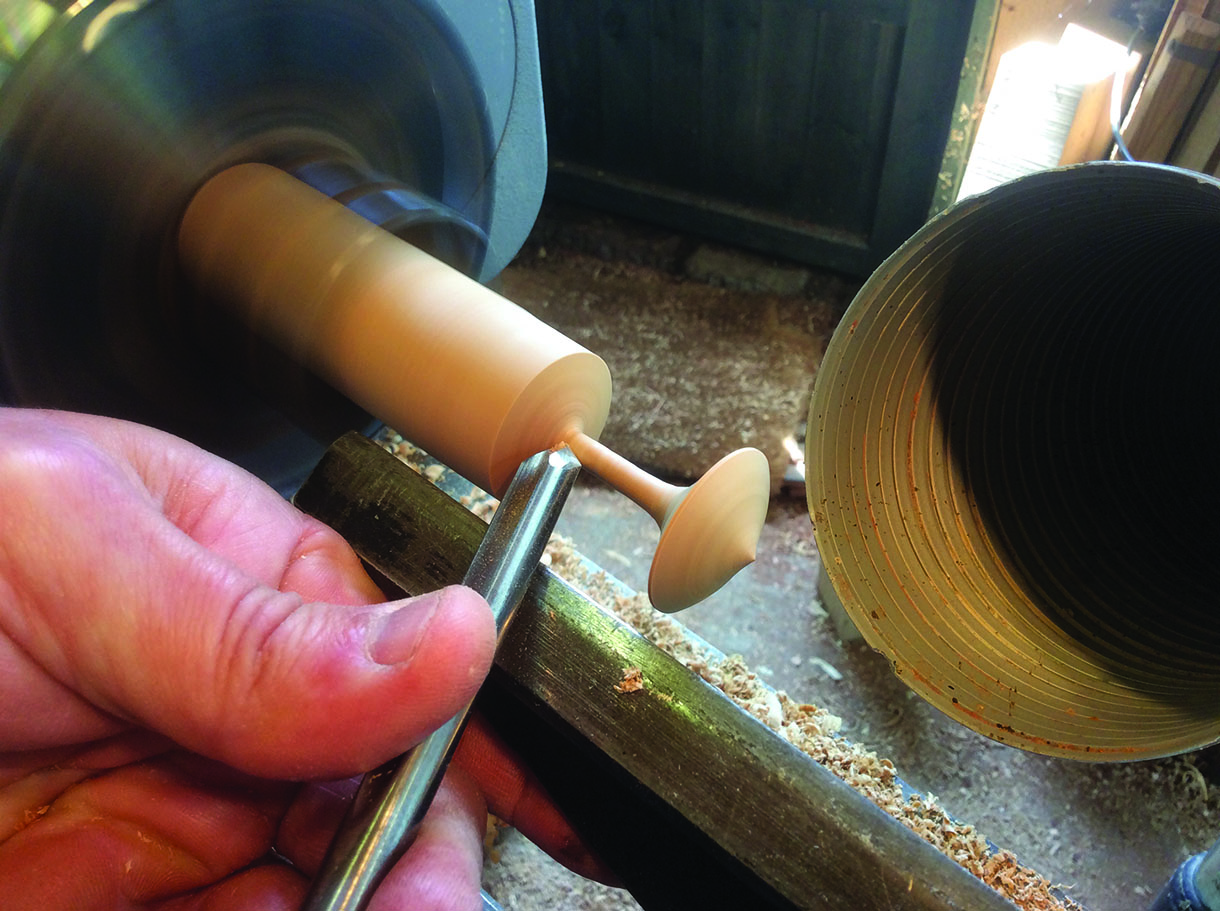
4. Smooth down the spinner and lightly sand, ready for decoration
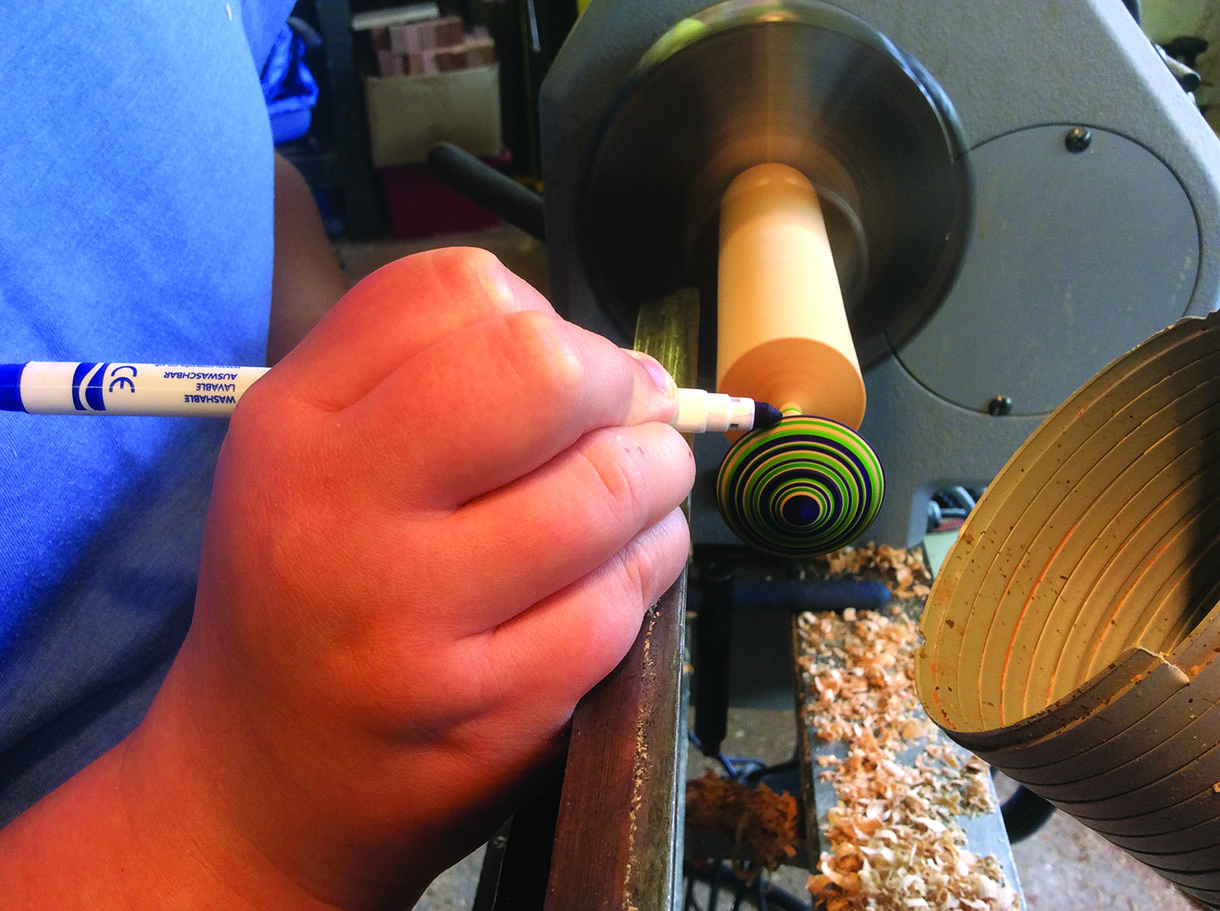
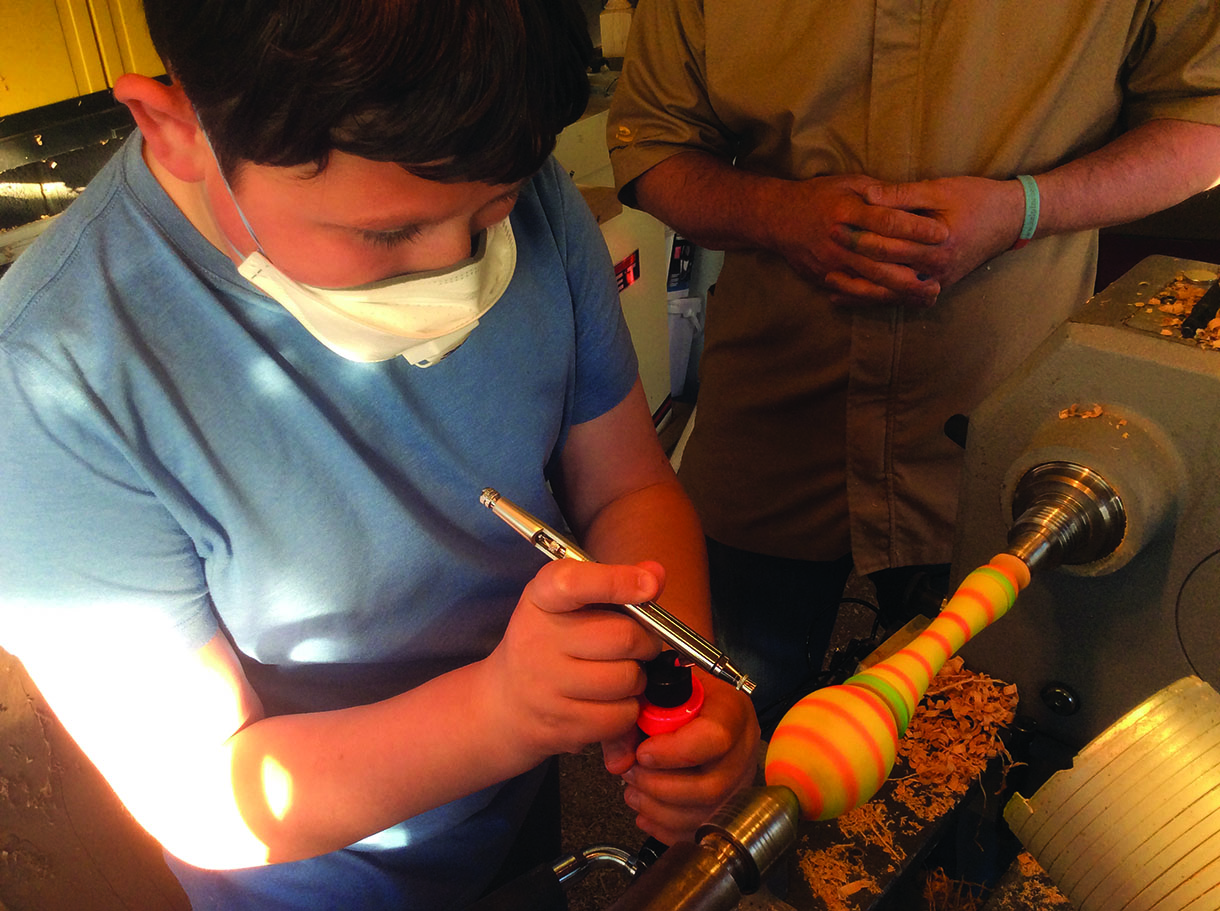
5. And now the fun begins and we can decorate the small top toy. With our projects, I let Charlie create the bright colour scheme and patterns himself, using with felt-tip pens from his own pencil case. Be sure to slow down the lathe speed when decorating the tops to 350rpm, to give strong bold lines and to protect the felt-tips
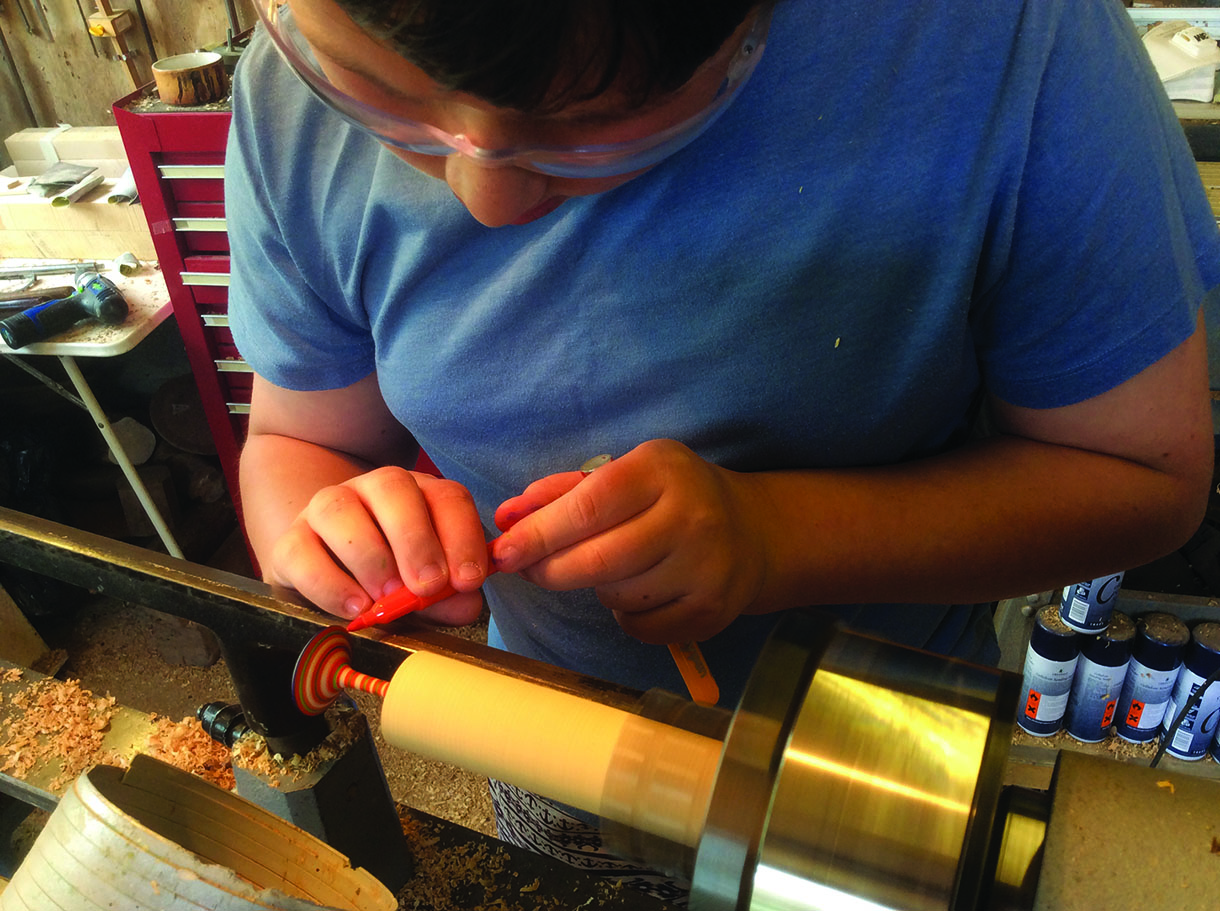
6. Continue to colour around the top until you are happy with the toy’s design
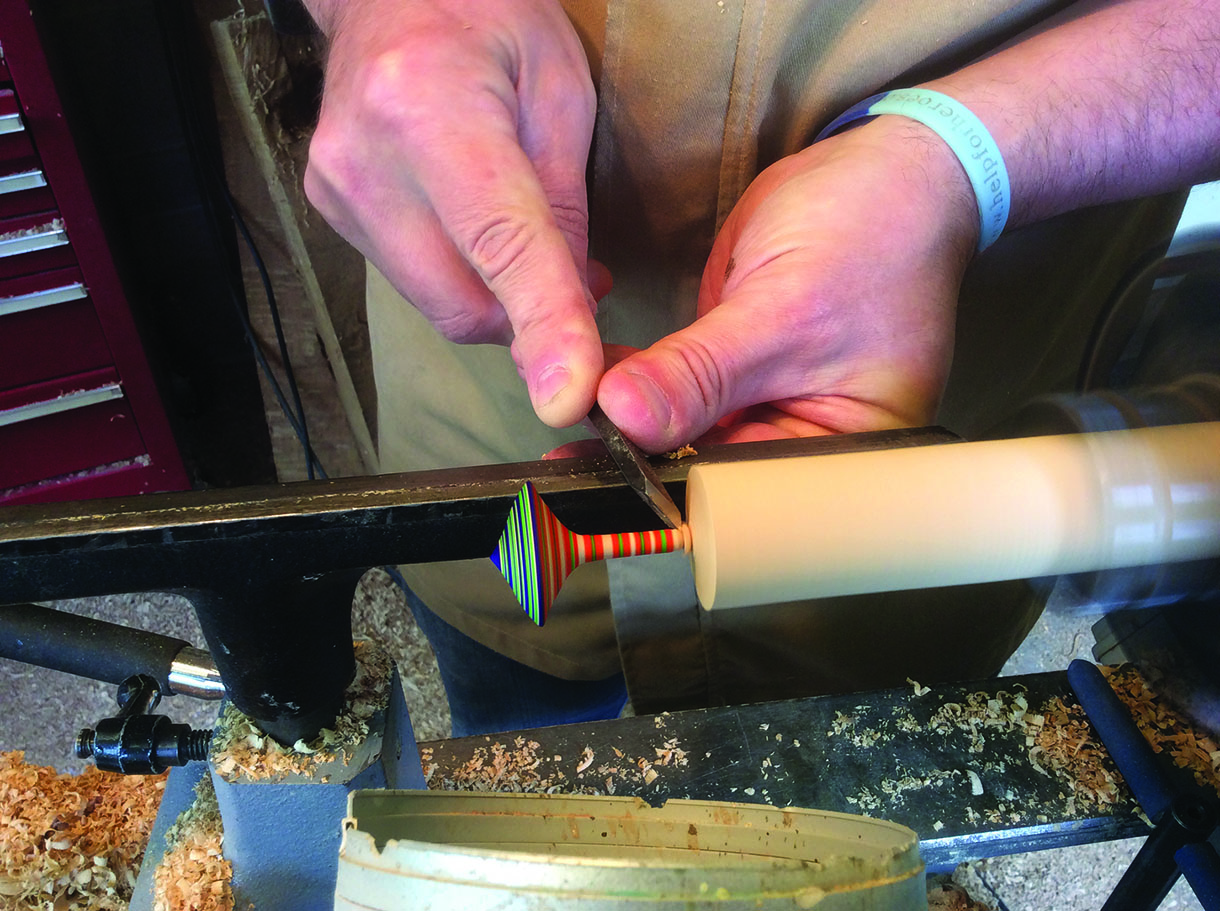
7. Finally, part off to toy with a 10mm skew chisel, and now it’s onto the next one!
Skipping rope
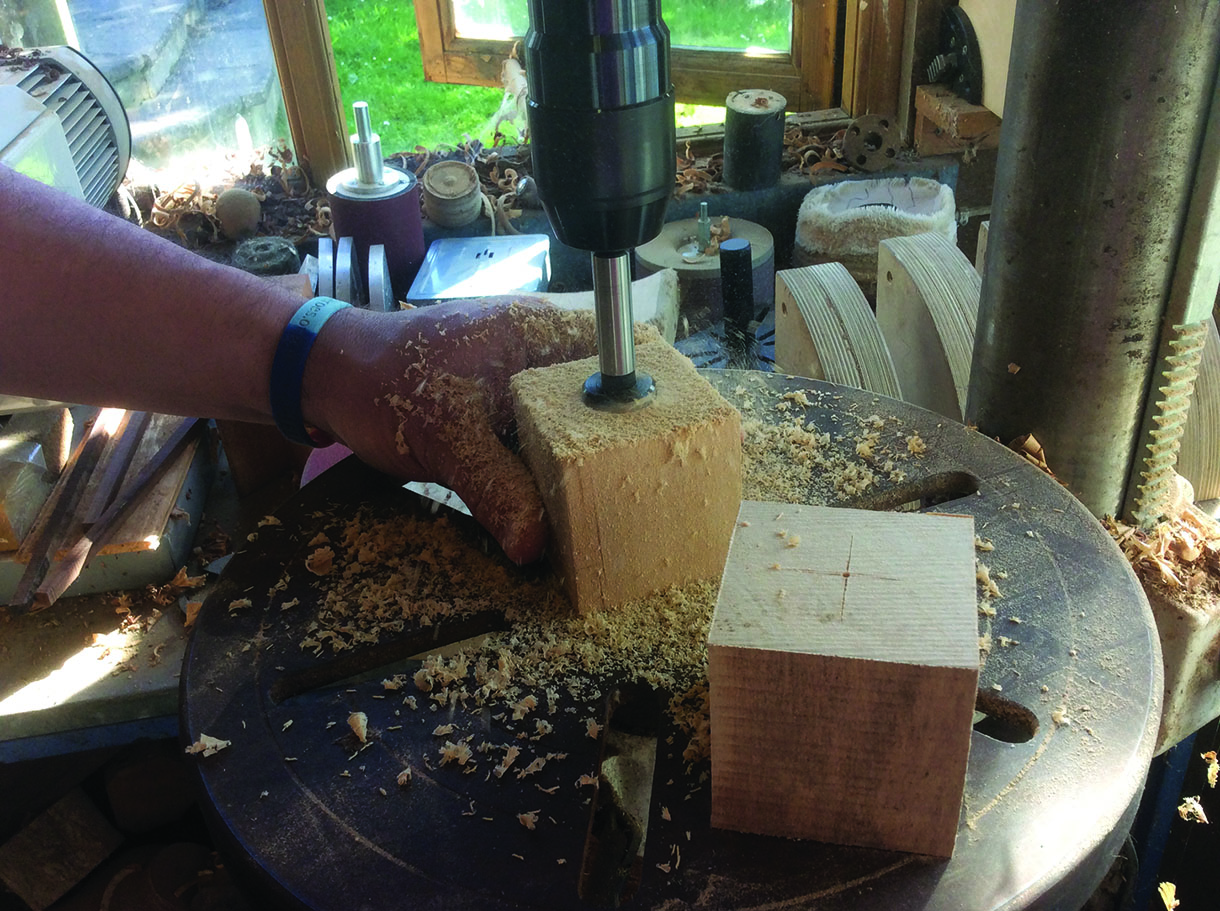
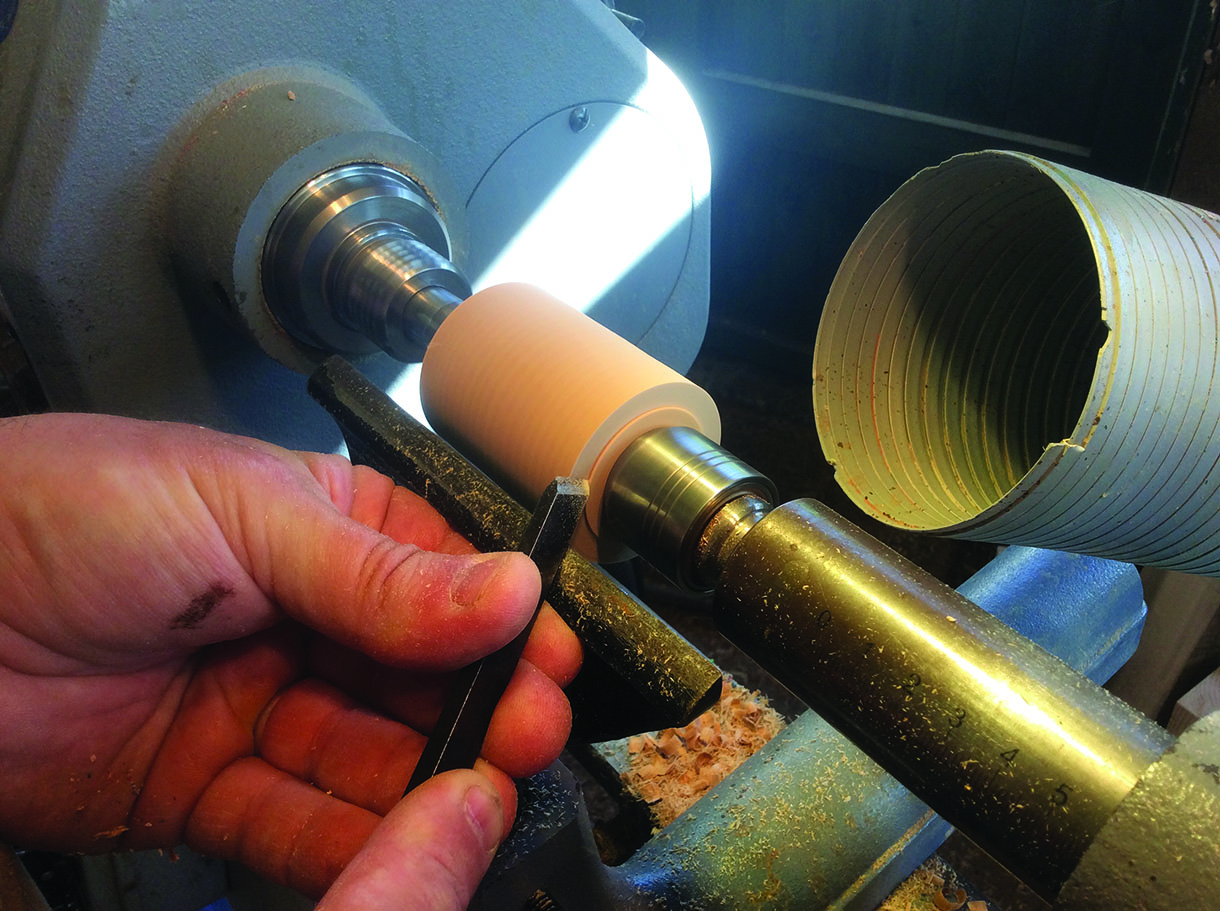
1. Again, the timber choice here is lime and to begin prepare four blanks, two for the handles and two for the tops. Start by drilling out the tops with two holes. First the main 25mm hole to a depth of 40mm, which will house the knot of the rope and the tenon from the handle, and a second all the way through with a 10mm hole for the rope to pass through
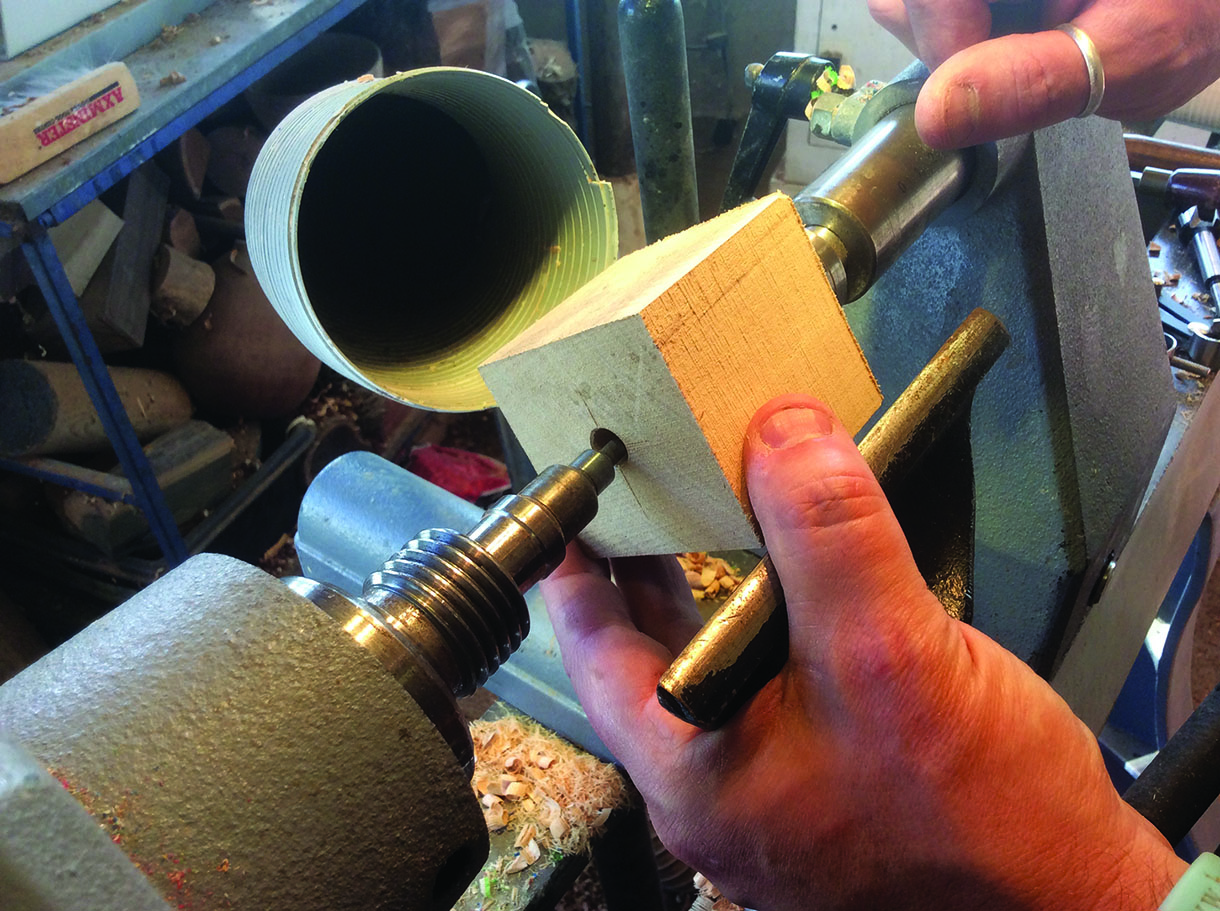
2. Prepare the handles by roughing them down and cut two tenons to fit the large 25mm diameter holes you’ve just drilled on the tops at a depth of 15mm. Set the callipers by measuring the drill bit used to drill the 25mm hole, and then cut with the parting tool
3. Back to the skipping rope tops. To hold these tops use a friction light pull drive passing into the 10mm hole and the tailstock centre into the 25mm hole the other end. Any friction drive will do and will mean you can cut right down to the centre without worry of hitting any prongs
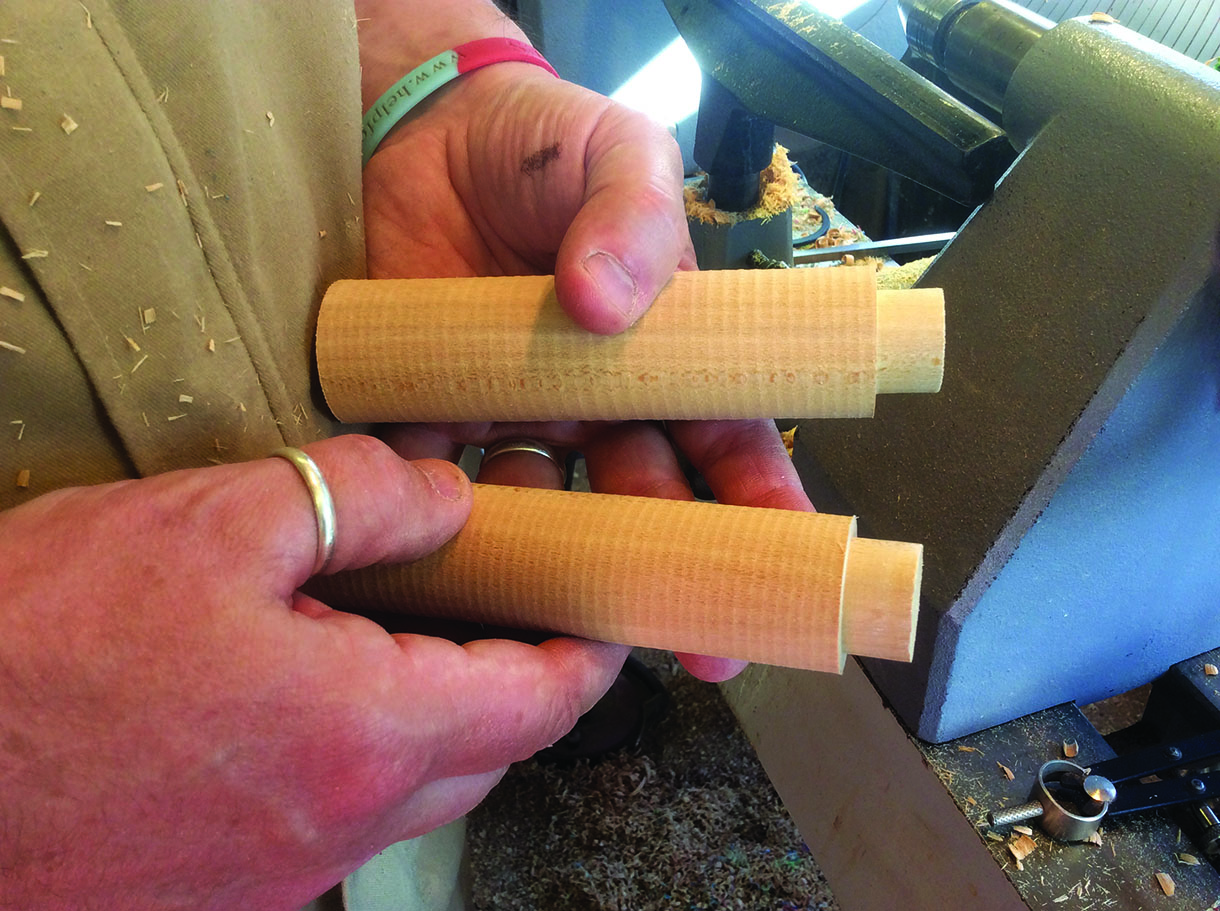
4. Now mount the tops securely to rough down the blank to a cylinder and true up both ends. This is a good opportunity to make the tops the same diameter
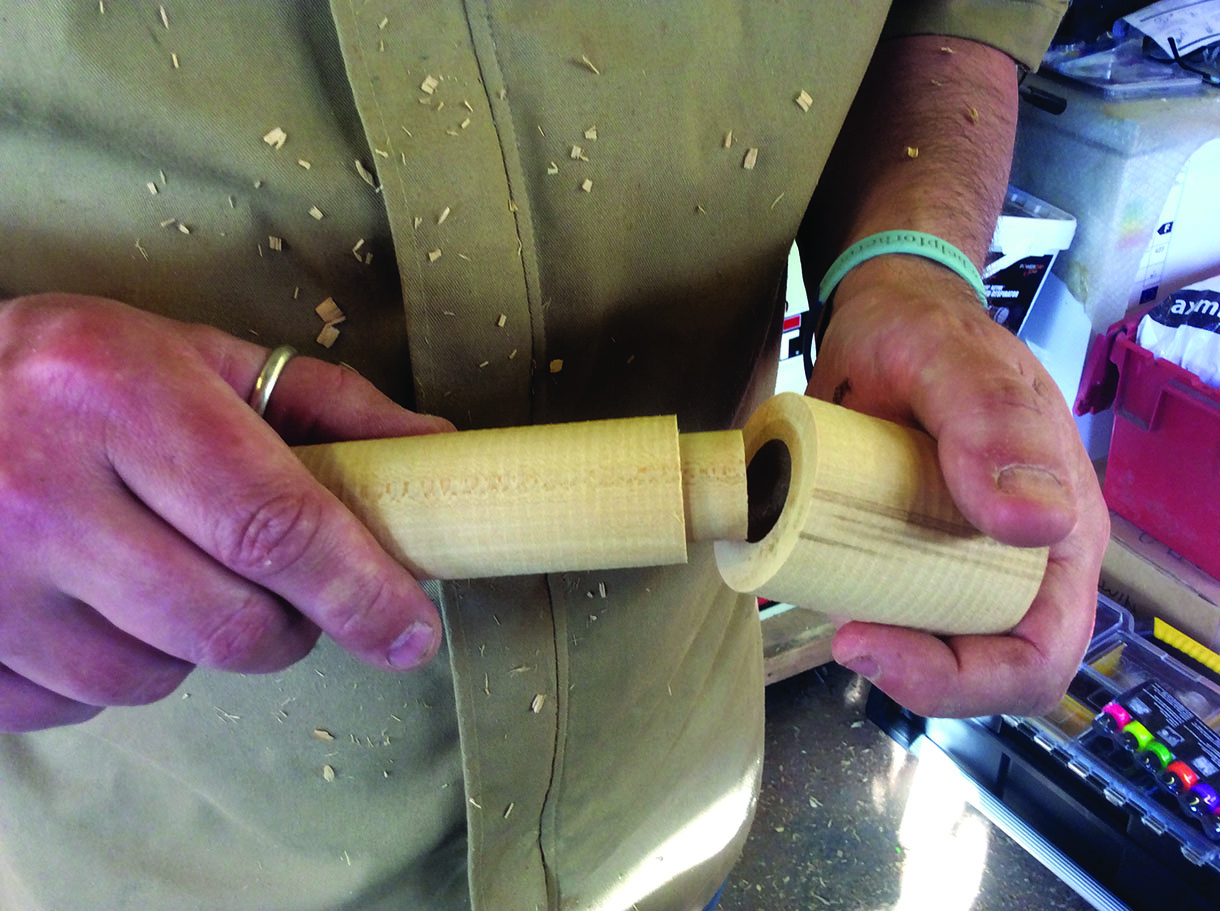
5. Fit the top and the handle together in preparation for turning. Make sure the fit is a firm one, but also remember that you want to get the piece apart once turned so you can fit the rope
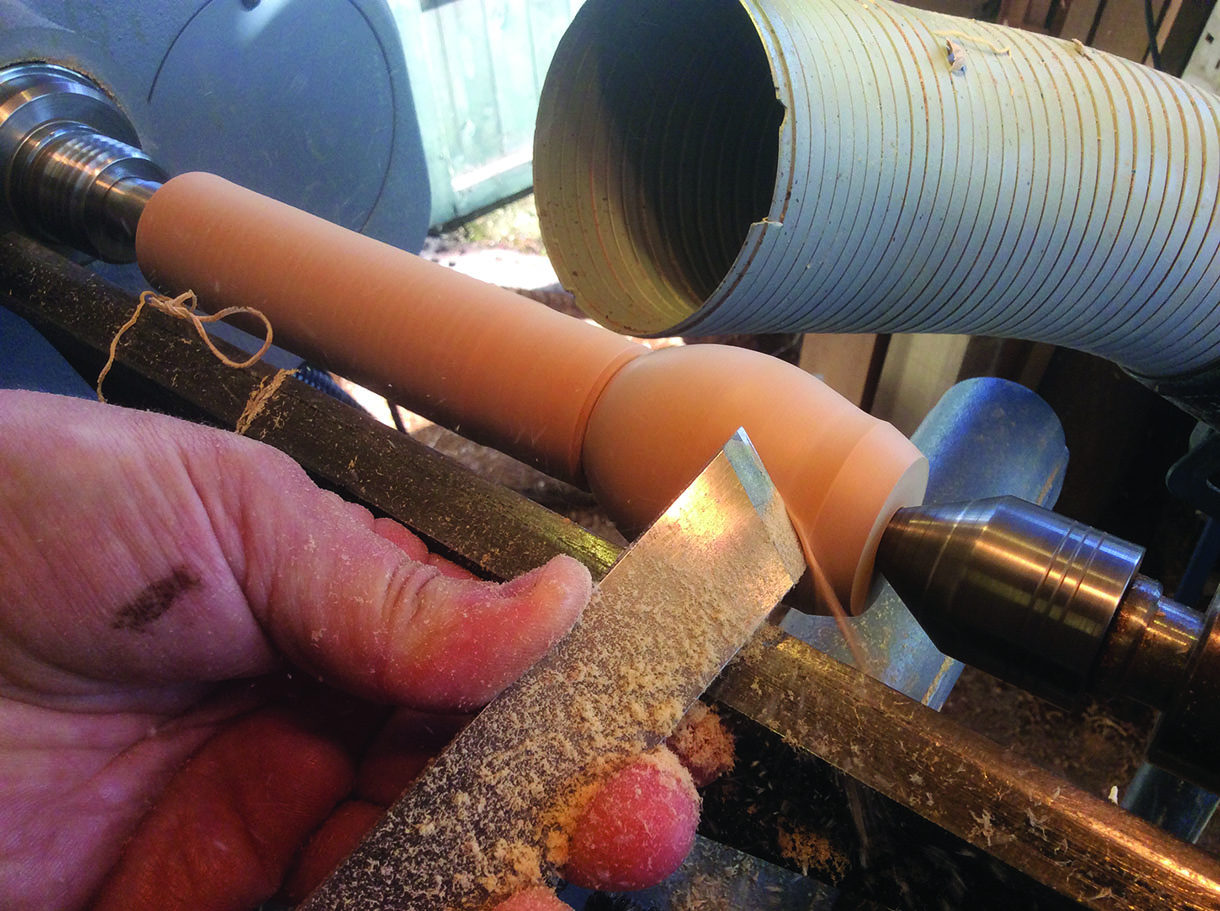
6. OK, so now to start turning the skipping rope handles. Mount them to the lathe using a pro drive sprung centre to drive and a single pointed revolving tailstock centre the other end. Alternatively, you could use a four prong drive and tailstock centre. Here I’m using the skew to shape the egg shape top
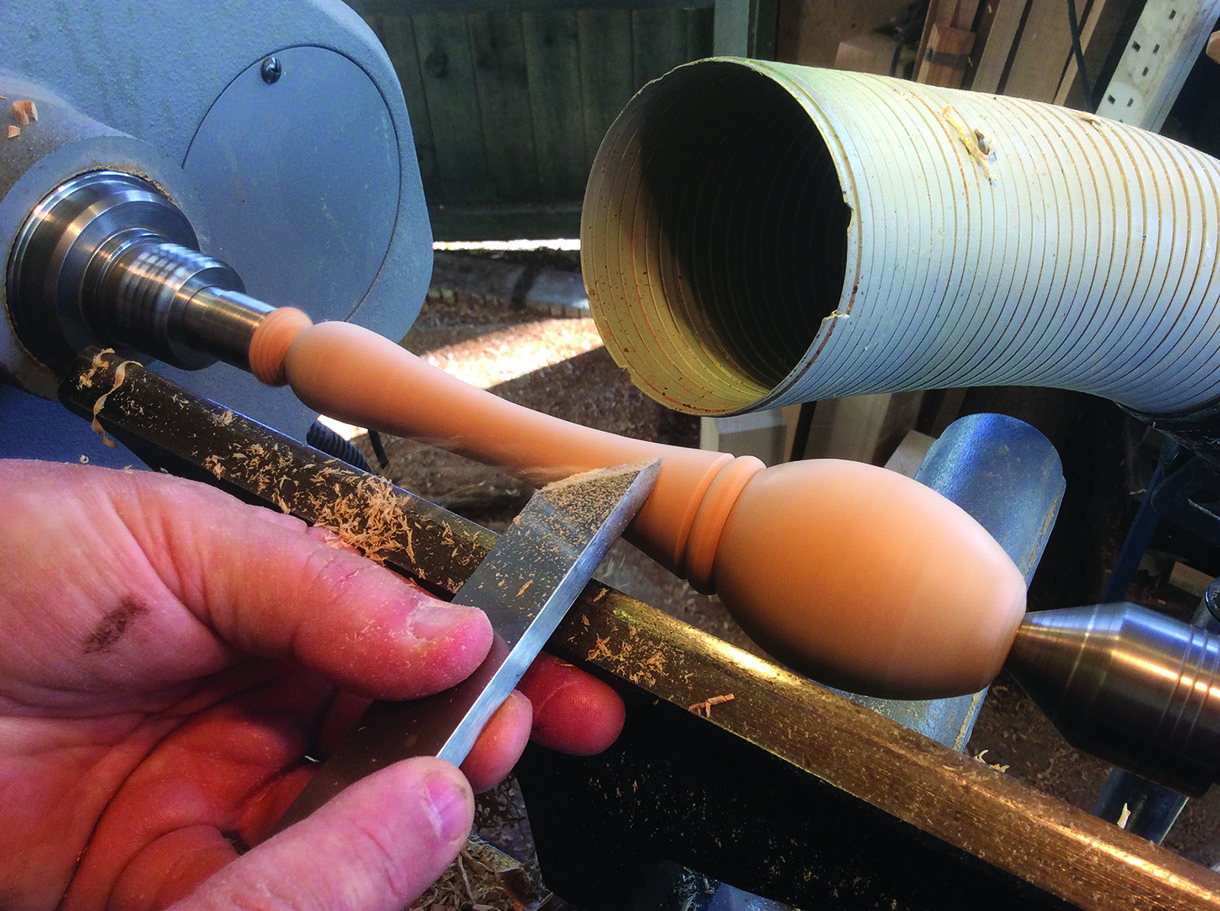
7. Use the skew to shape the main handle, making sure it fits comfortably in the hand. Remember that the hand holding this handle will be much smaller than yours, so make the handle small enough for this
Handy hint
Using the skew on this lime is a real joy and great practice and some key things to remember is to cut with the bottom half of the tool, always have the bevel rubbing and present the cutting edge at 45° (roughly)
8. And now it’s back to the fun bit. We started with an airbrush, spraying all over with a day-glo yellow then green and orange stripes. The airbrush is a great tool for this project and again is always popular, but a little bit of practice would be wise to understand how sensitive they can be. Why not do some doodles on some paper first by writing your name and playing with colours
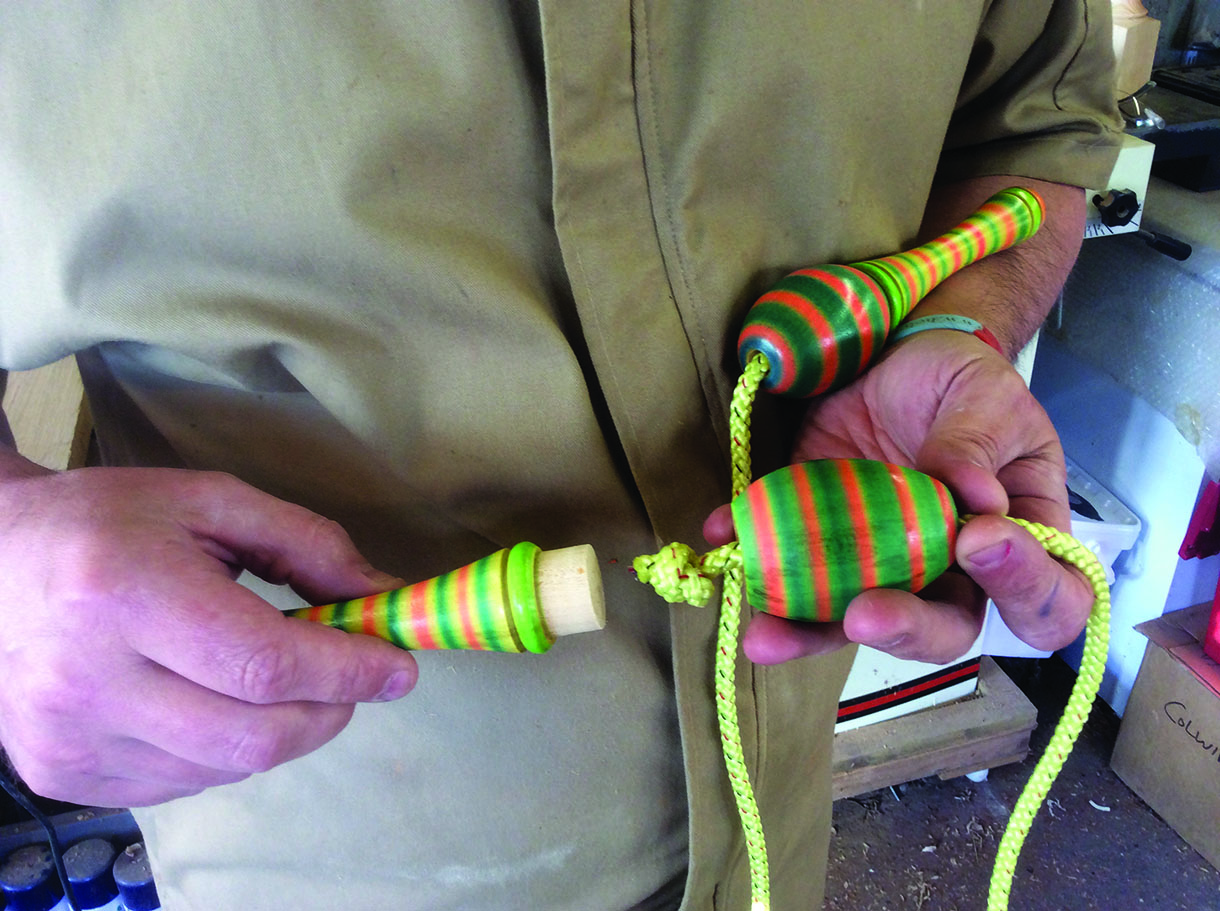
9. Here are the skipping rope handles finished. You can see the way the rope threads through the top and how the knots at the ends of the rope are hidden within it. We sourced the rope from a local hardware store and it was the source for the colour scheme Charlie chose for the handles
Yo-yo
For the yo-yo I wanted to use a material which wouldn’t need any decoration afterward, so I chose a few pieces of diamond wood. Diamond wood is a resin bonded coloured maple (Acer saccharum). However, plain timber can also be extremely colourful and dense so the choice is yours.
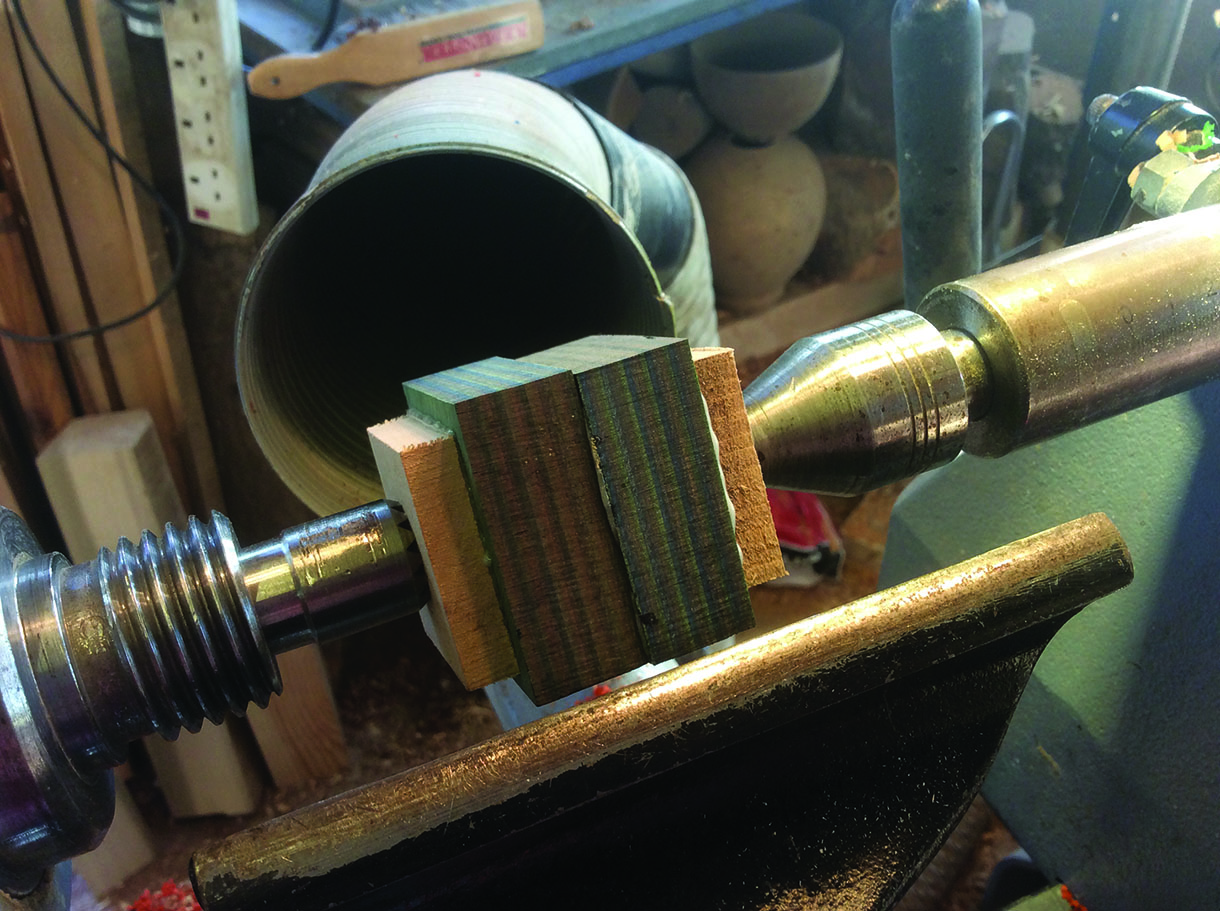
1. Because the colour wood was only 20mm thick I’ve joined two pieces together with epoxy resin and added two pieces of scrap wood for the lathes centres to drive with, these pieces will be turned off at the end of the shaping
2. Next, turn down the block to a cylinder, ready for shaping
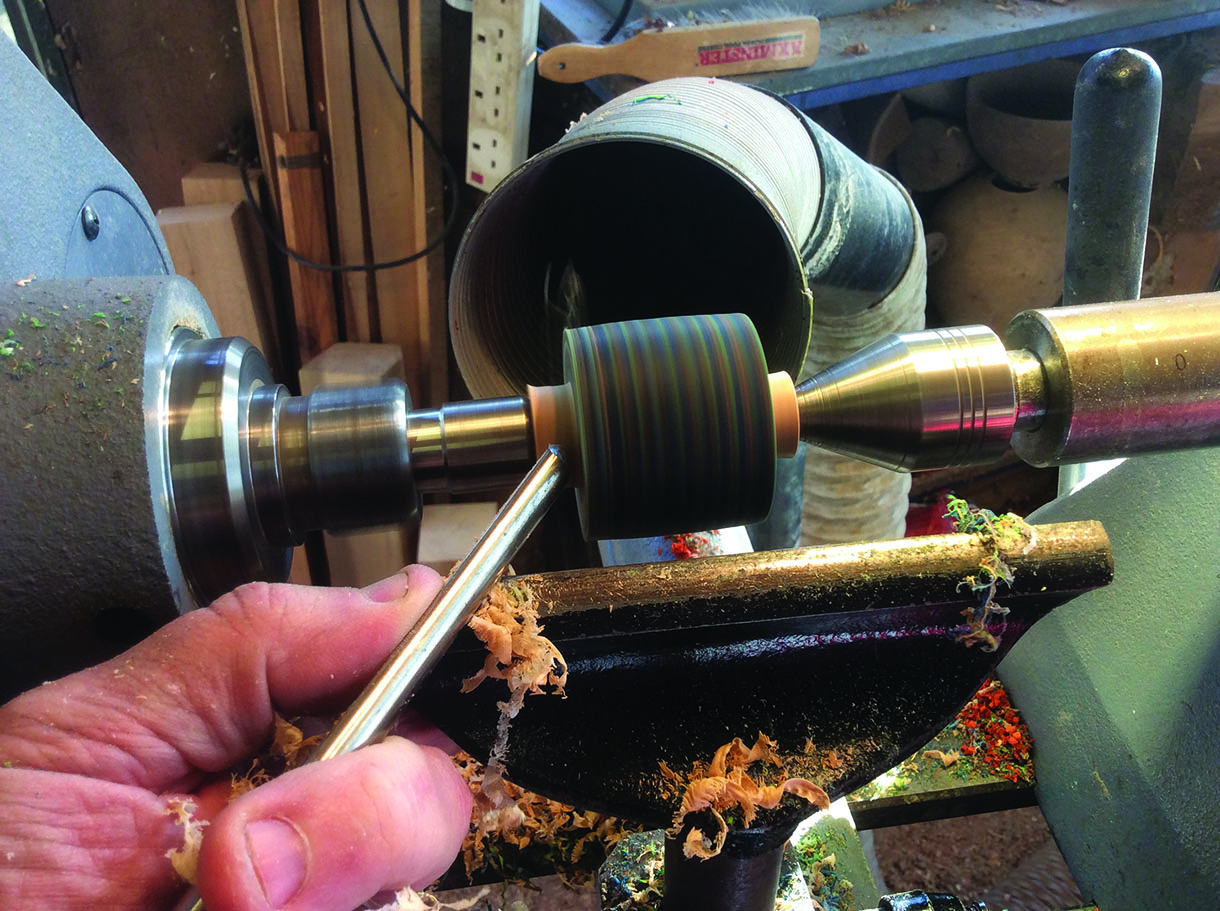
3. Now turned down to a cylinder, turn away the scrap wood before the basic shaping
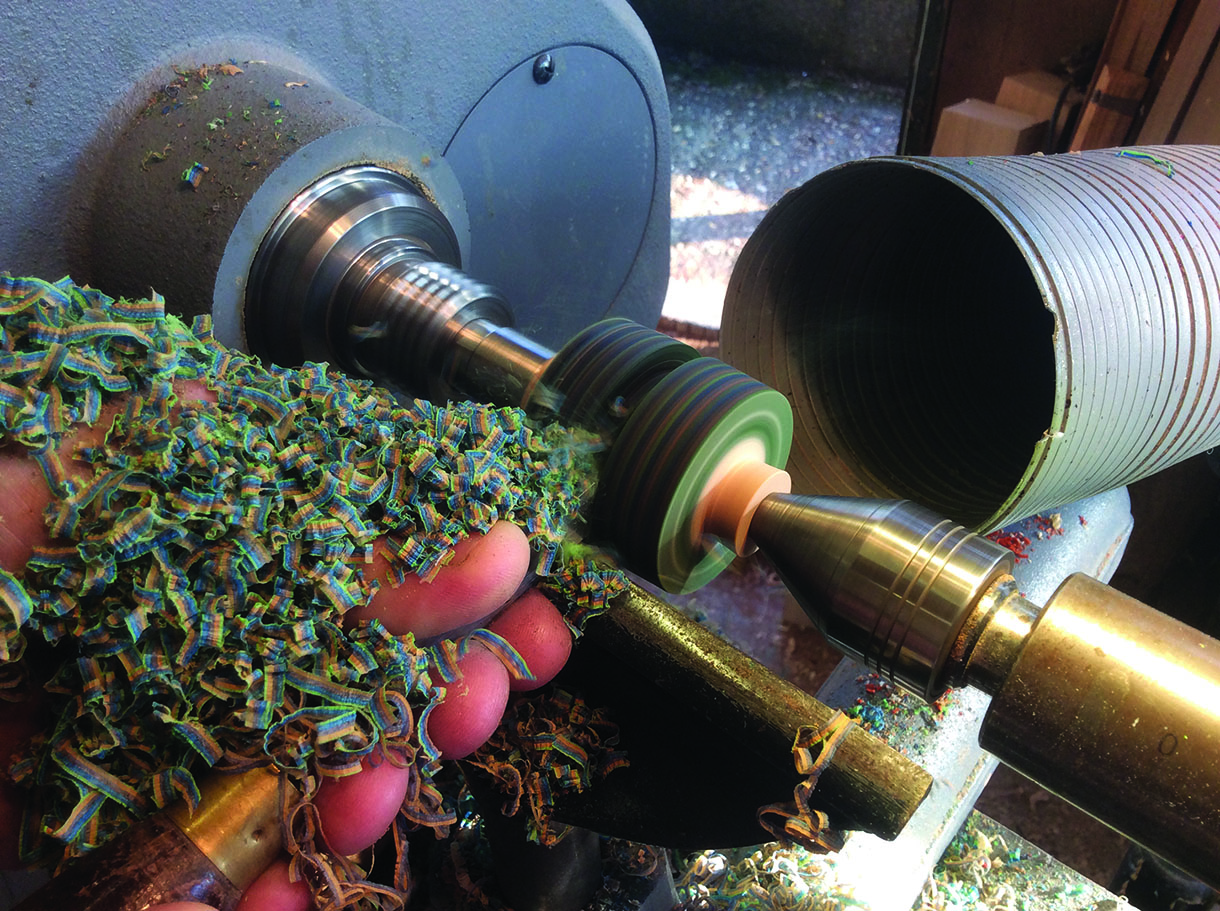
4. Use a 3mm parting tool to cut the slot for the string to sit, leaving 15mm diameter of solid timber in the middle
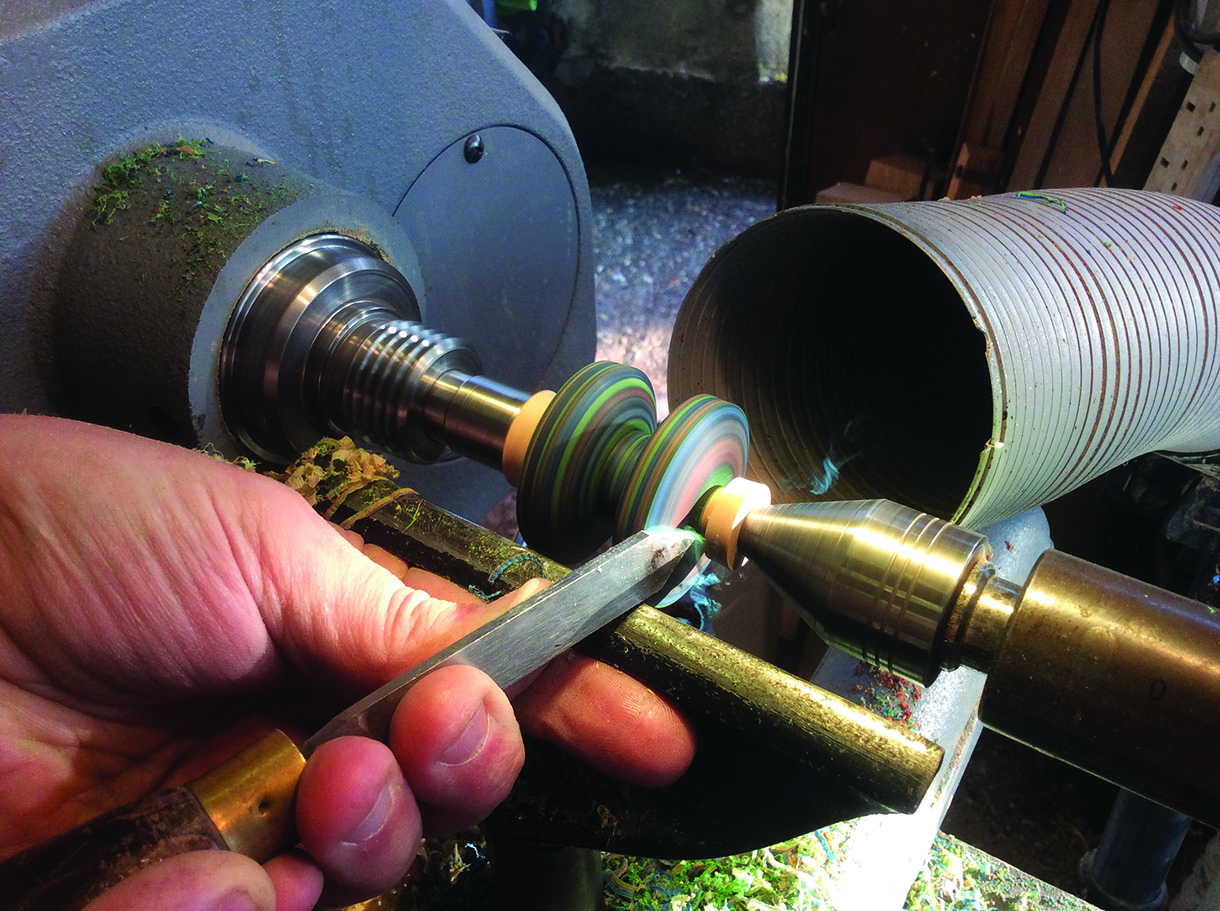
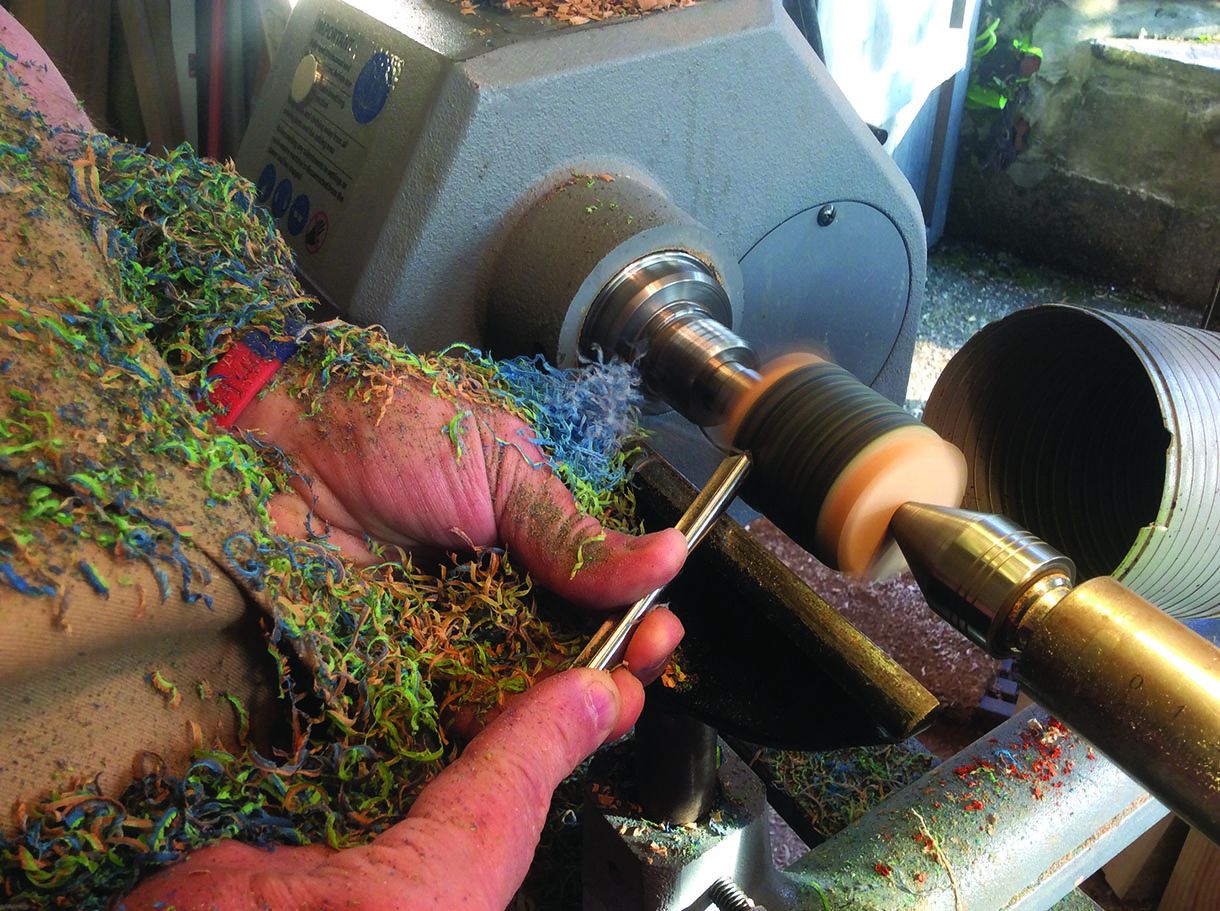
5. Use a parting tool to do most of the shaping before sanding to a high shine
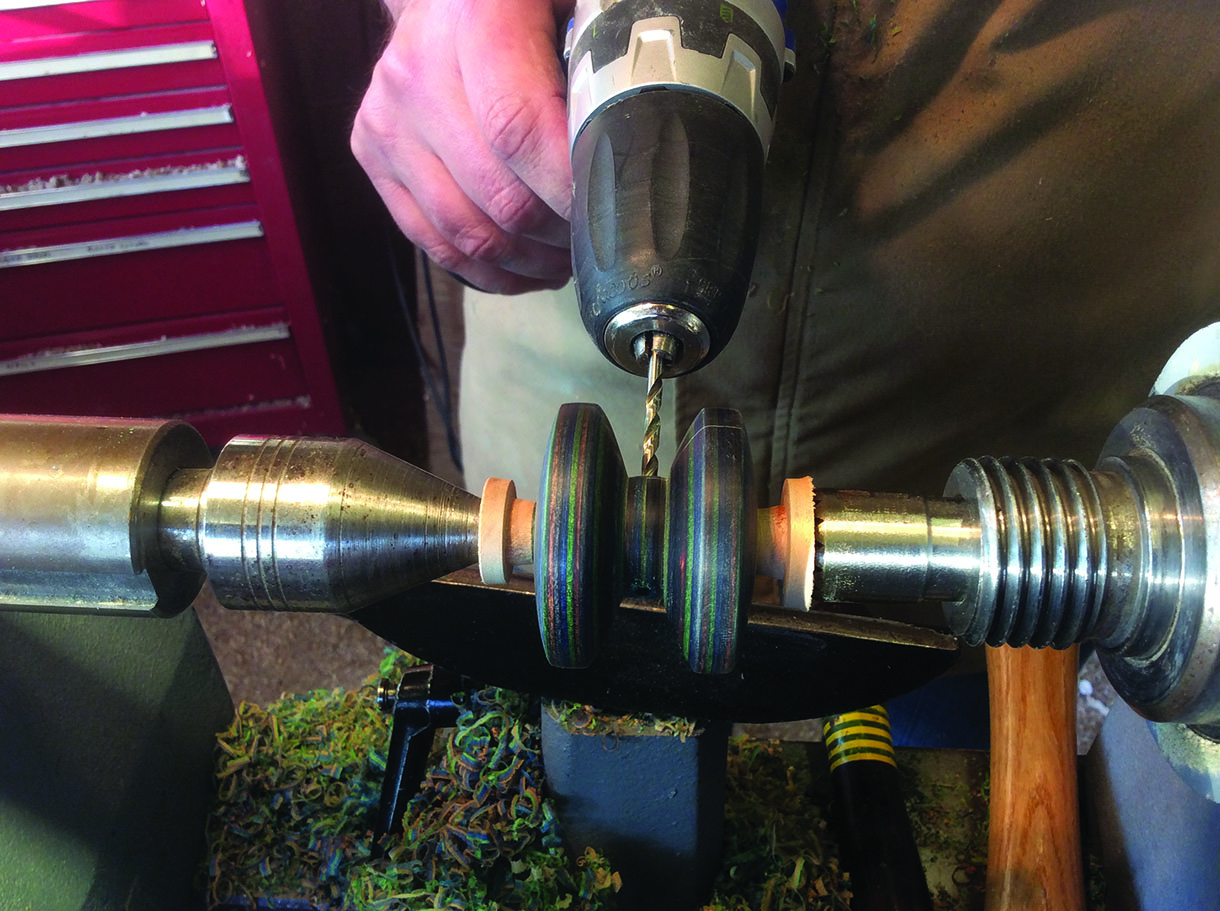
6. To stop the string from slipping when at the bottom of the swing, drill a hole through the centre spindle to thread the string through
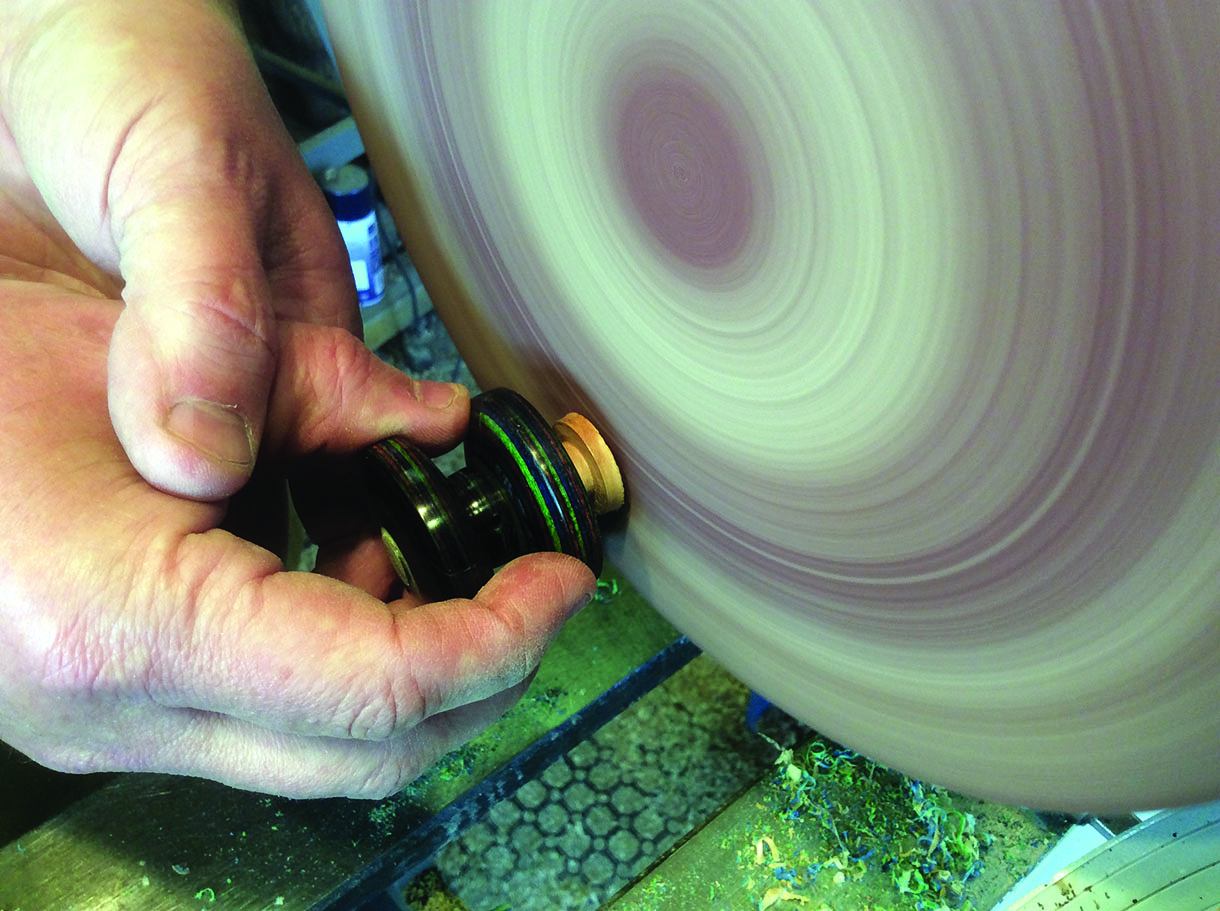
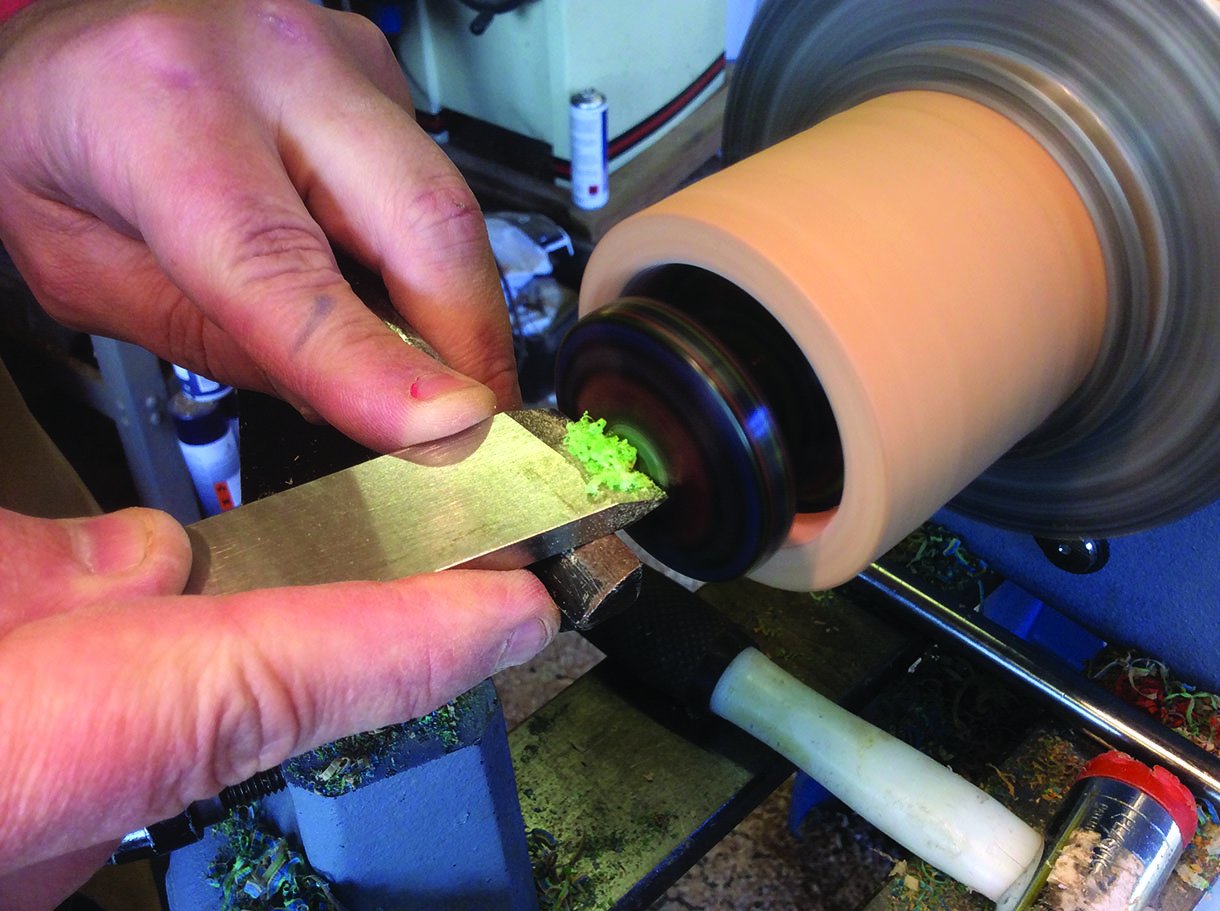
7. When you’ve finished sanding and have drilled your centre hole, you can polish. Use friction polish to get down into the centre spindle, but then buff with a buffing wheel and Carnauba wax after the yo-yo’s been finished. Sand off the waste blocks and to do this use a plywood sanding disc on a faceplate
8. To clean up either end after the sanding disc use a jam chuck and gently remove any marks before sanding and polishing, which you need to repeat on both sides
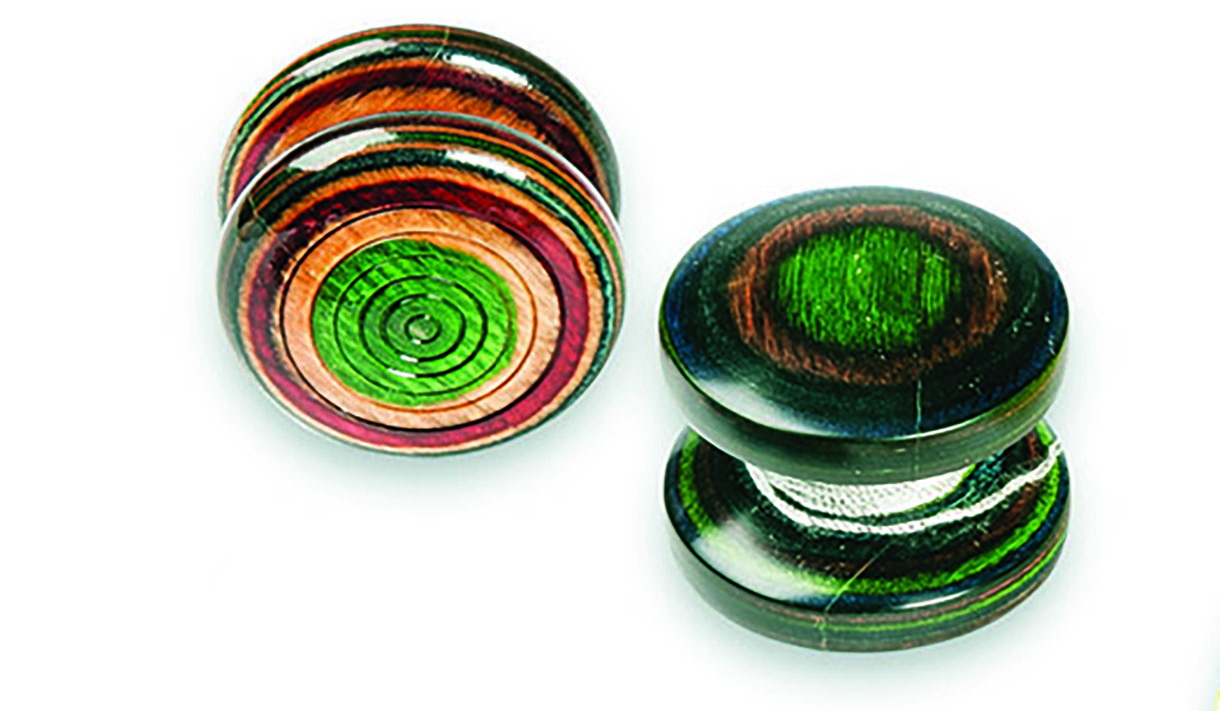
9. That’s the yo-yo finished and now it’s just left to wind the string up and start playing


