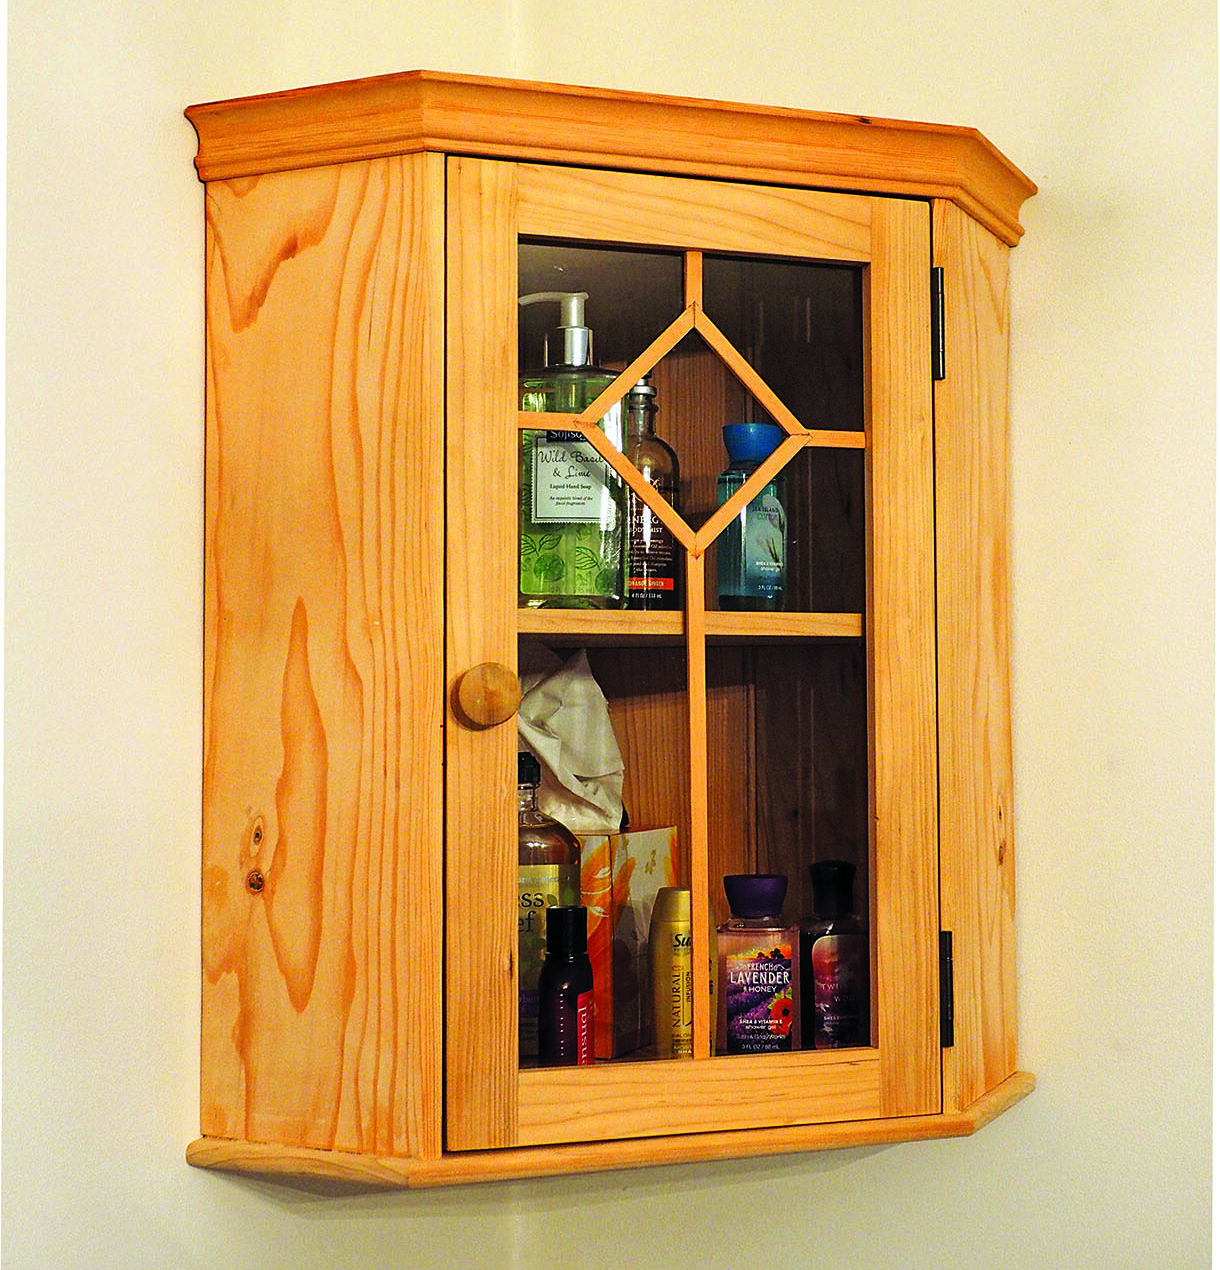
Bathroom Corner Cabinet:
Michael T Collins talks us through making this spacious corner cabinet.
Michael T Collins talks us through making this spacious corner cabinet
Things you will need
Tools:
• 13mm mortise chisel
• 19mm bevel-edge chisel
• Rip and tenon saw
• Brace and 10mm twist bit
• Jack, smoothing, block, router and combination plane with tongue and groove cutters
• 13mm round plane
• Mortise and cutting gauge
• Marking knife
• Homemade mitre box
For as long as I can remember there has been an old wooden cabinet in the corner of our bathroom in the family home. Readers of my previous articles may have been able to catch a glimpse of the cabinet, when we looked at making bridle joints. In this article however, I’d like to revisit that cabinet and re-create it by upcycling an old 2400 x 38 x 255mm scaffolding plank.
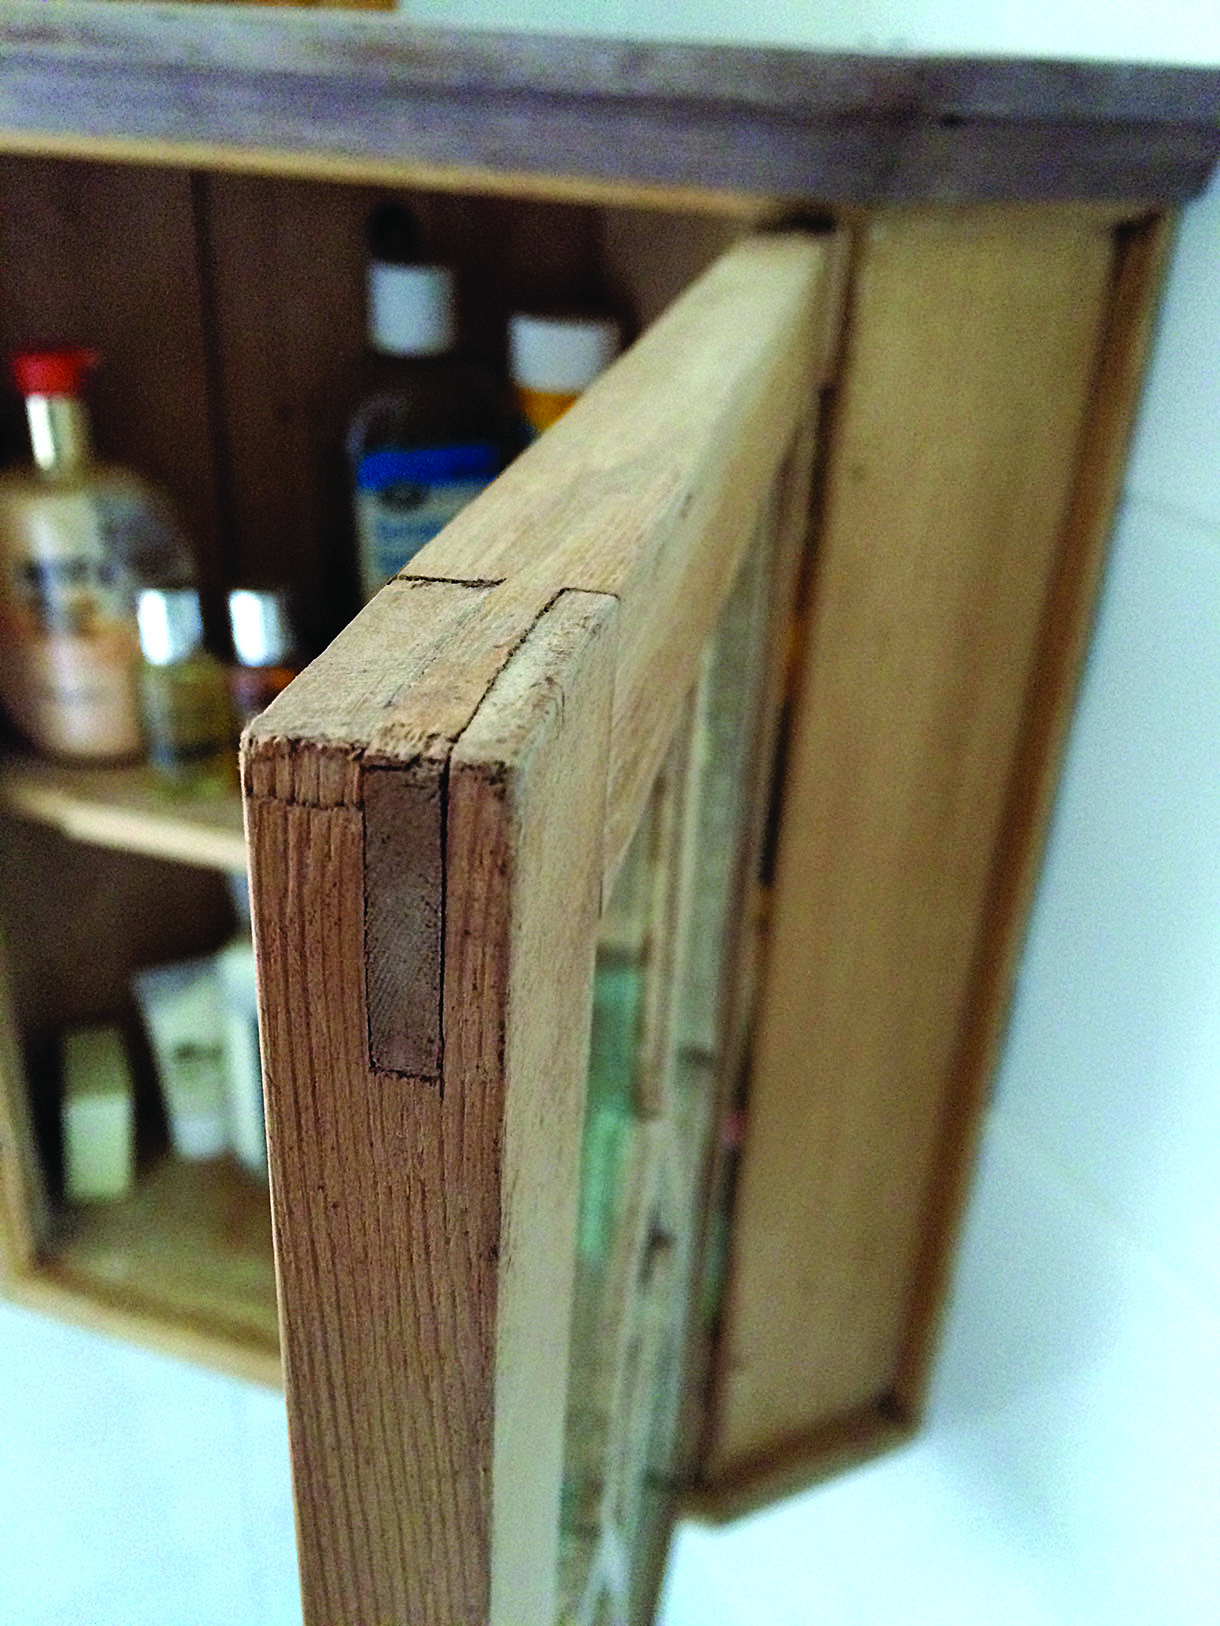
Bridle joint on an old medicine cabinet
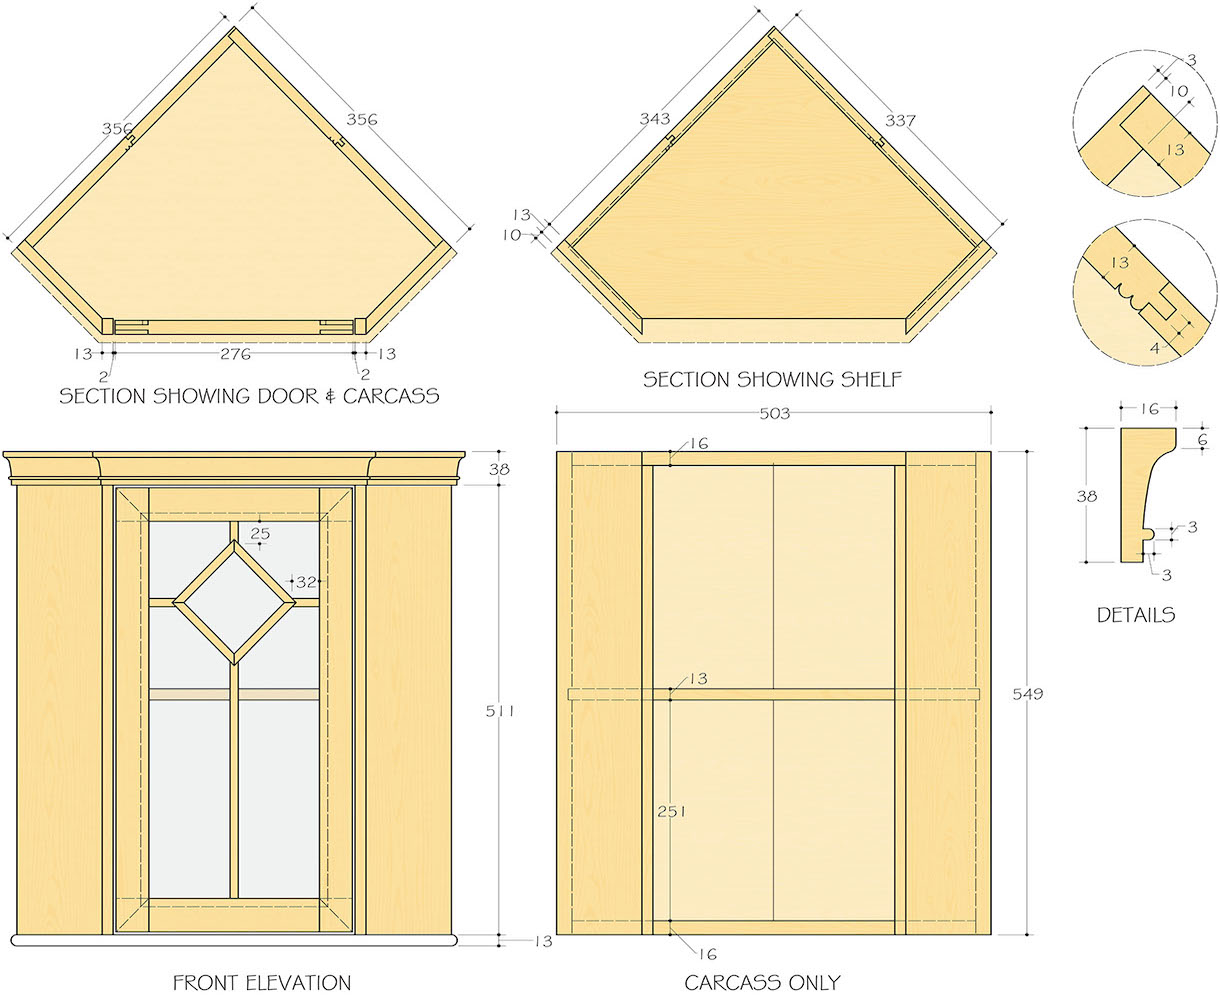
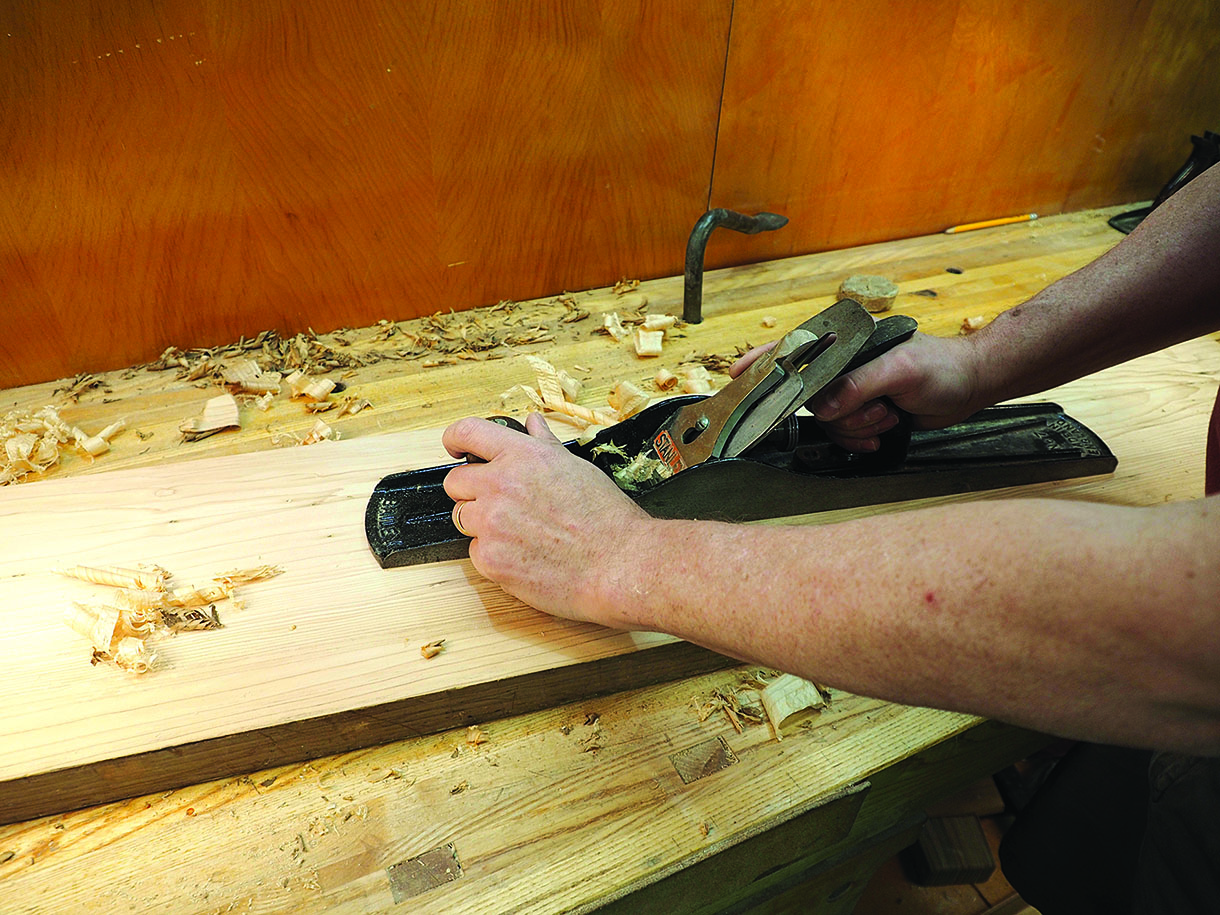
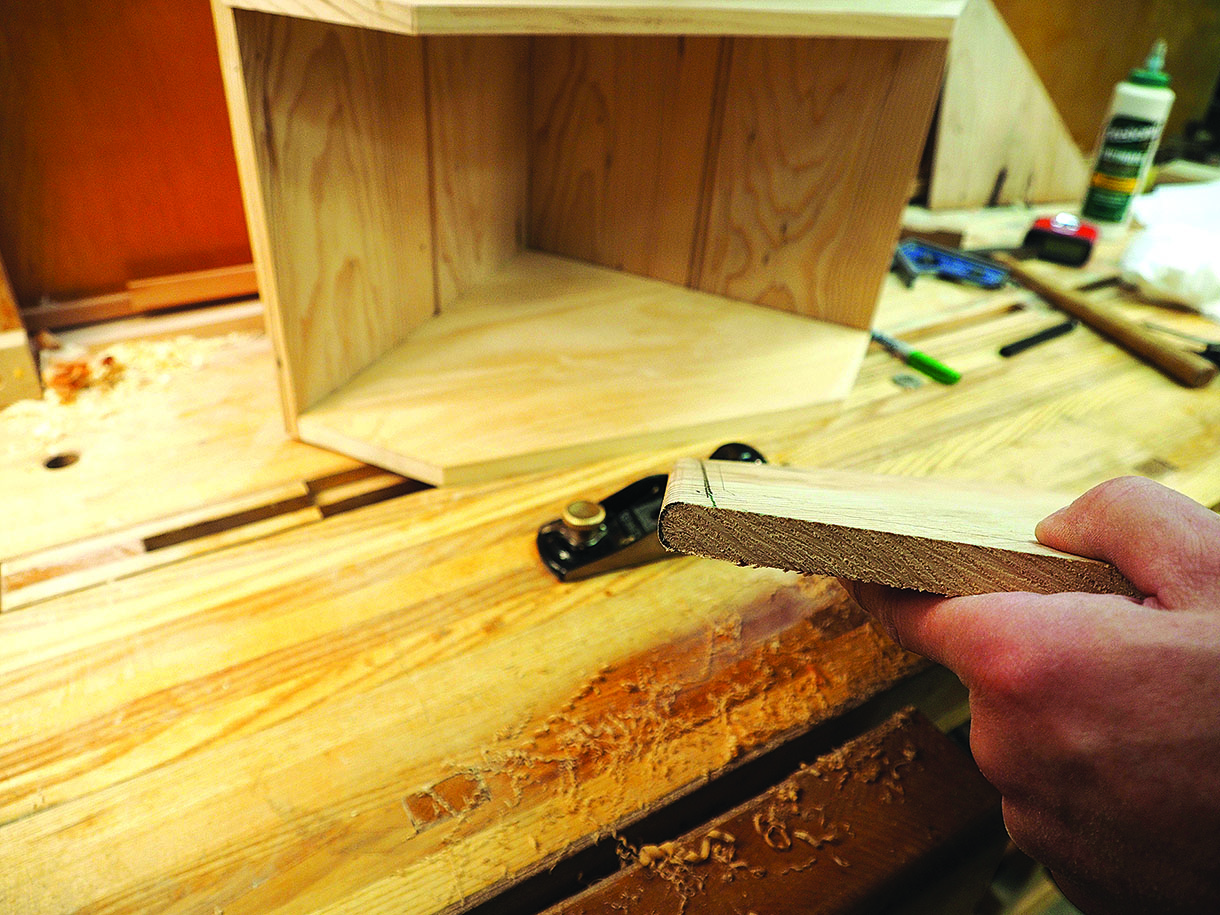
1. Cut the plank in half and prepare one for the panel and shelf to 13mm thick, the inner bottom and top are 20mm thick as is the door frame. All these sizes can be adapted for your needs. The parts for the door should be prepared 1–2mm longer for final planing to size. Plane one face flat and mark this as face side. Then, gauge the 13mm thickness from this face
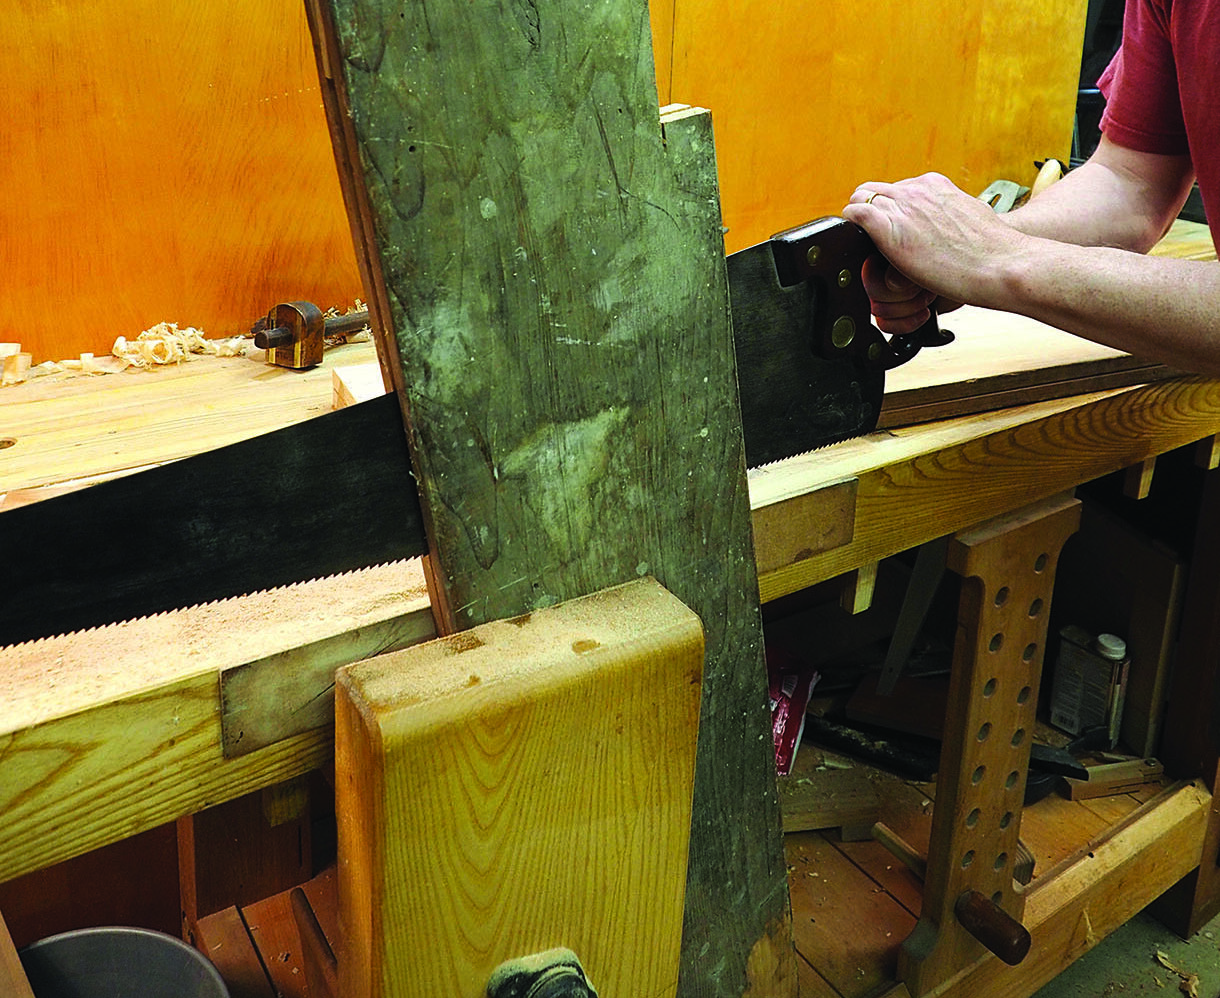
2. Now rip to thickness, with a good sharp rip saw – be prepared for a great upper body workout! Plane the two sawn surfaces and gauge the last piece and plane to thickness. Repeat the process for the other half of the plank, but this time gauge it to 20mm for the door frame, inner top and bottom
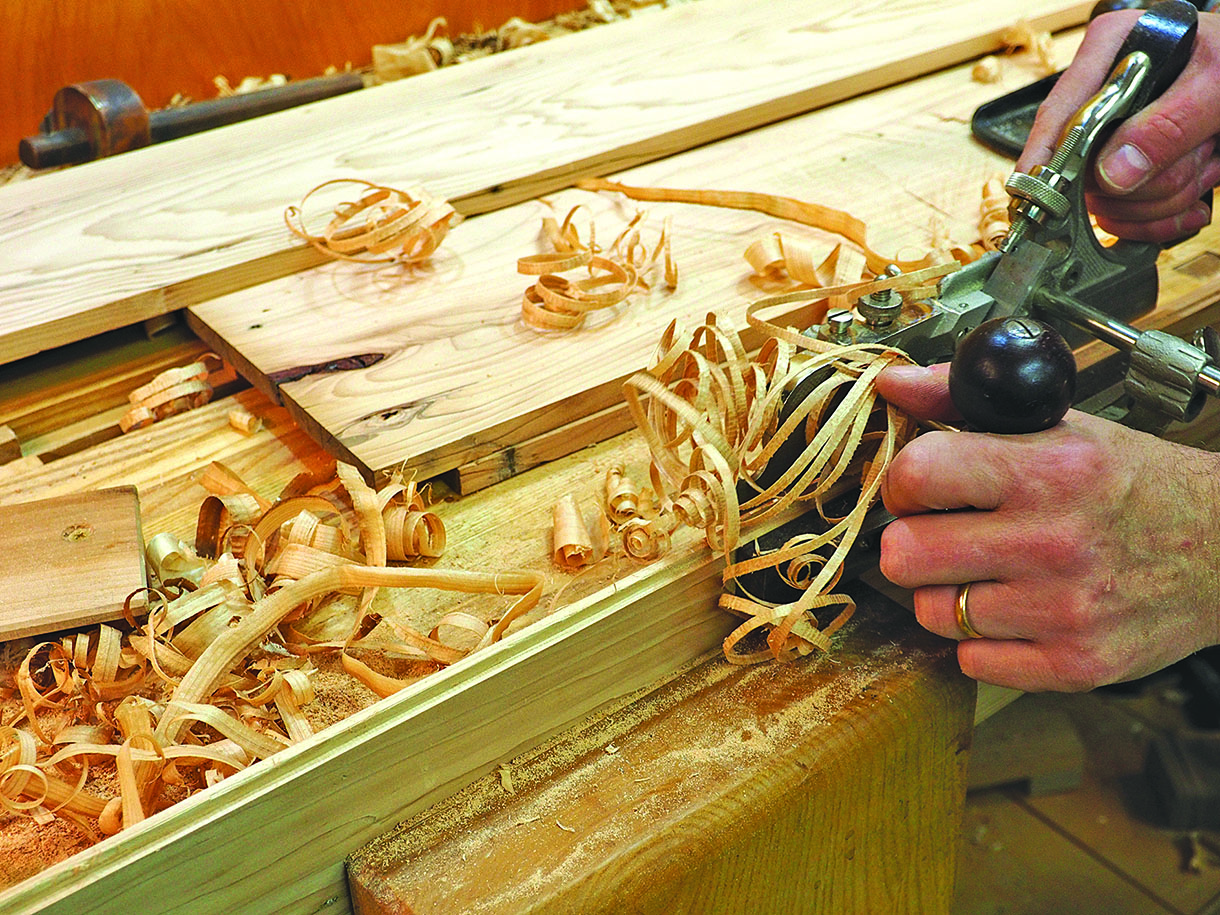
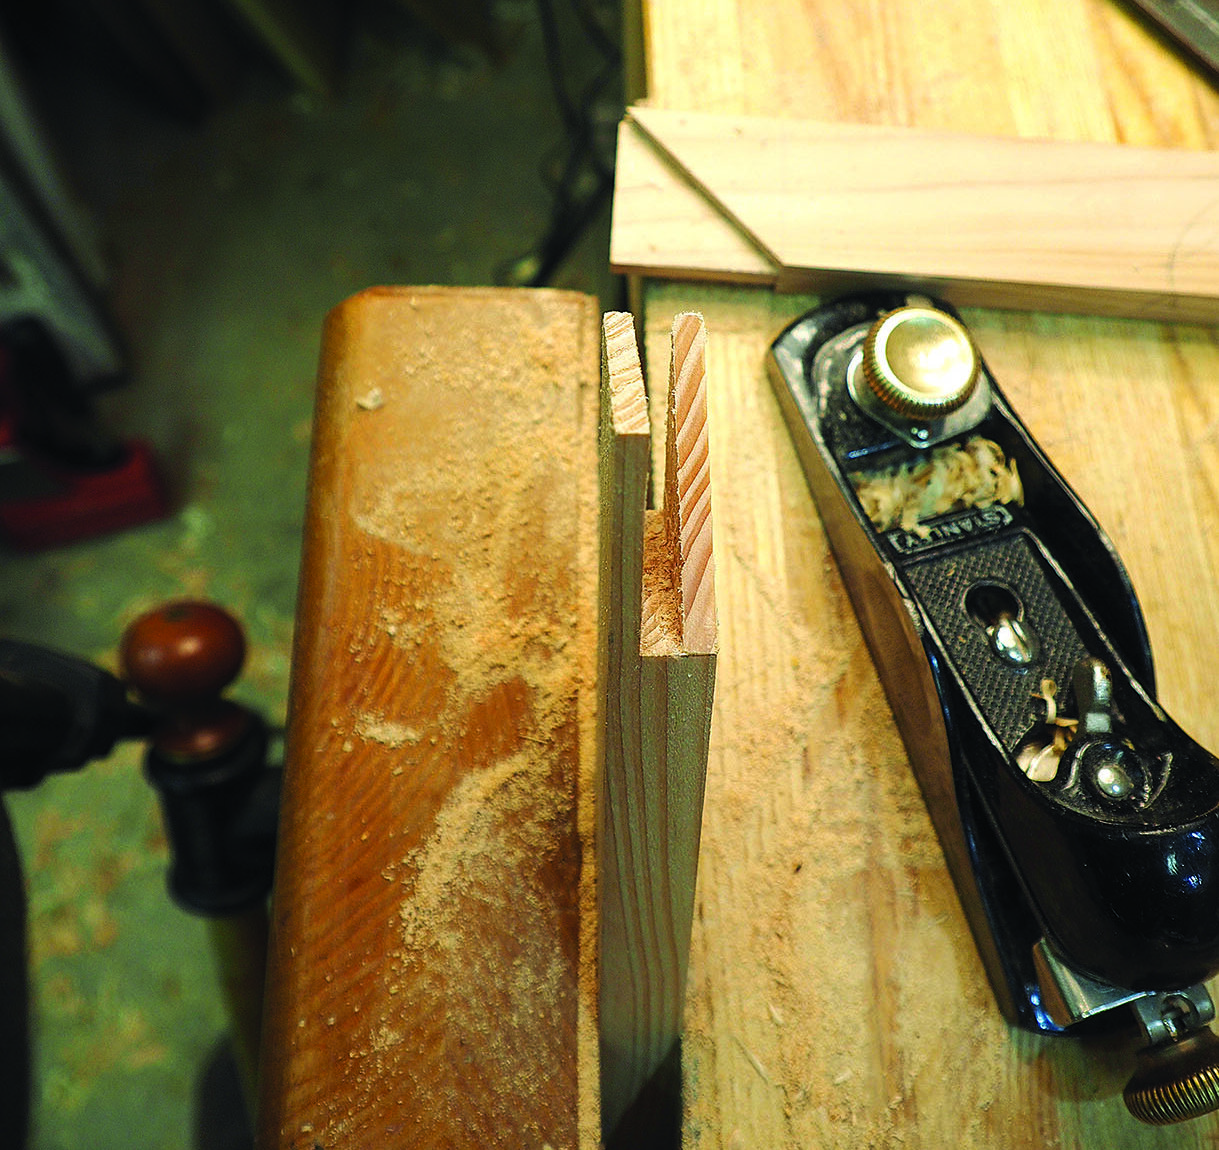
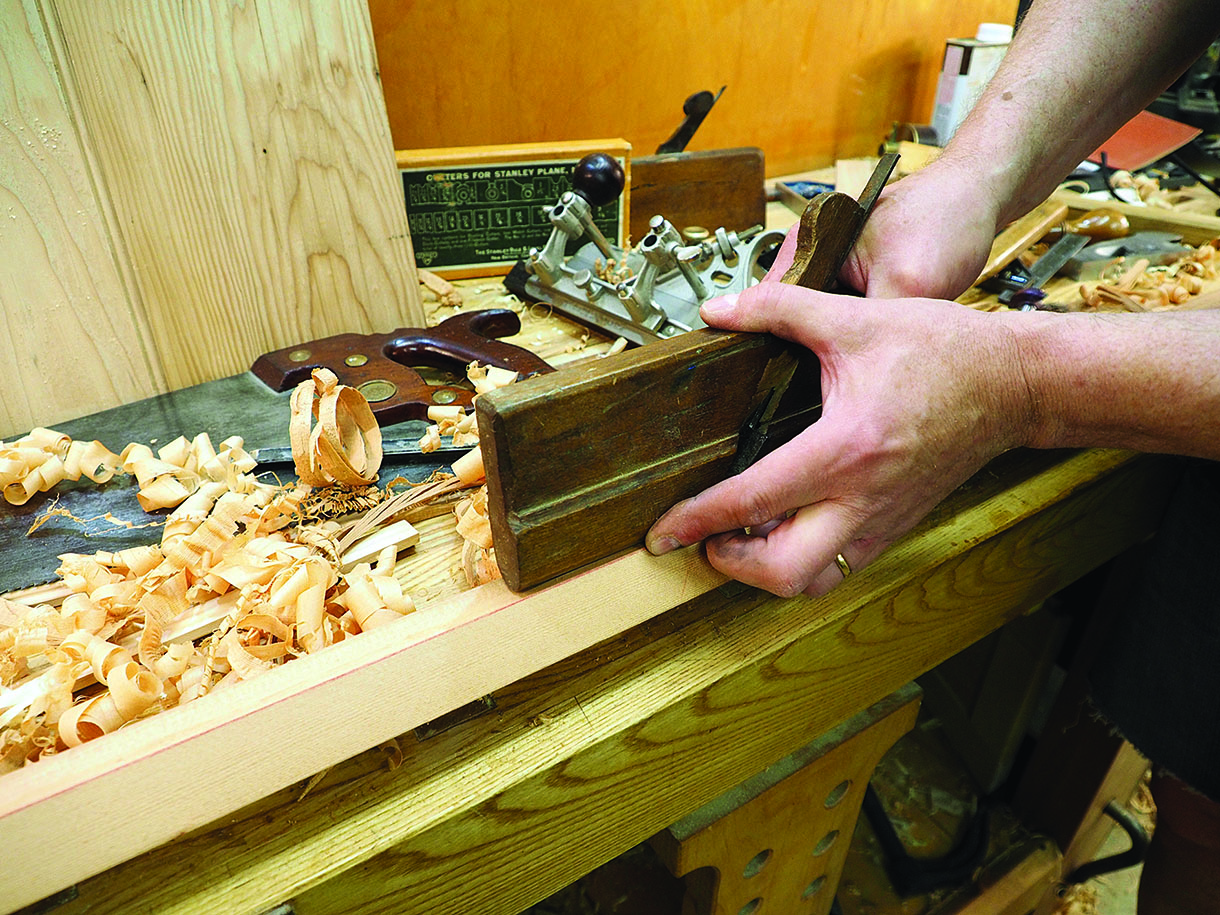
3. Select the boards for the side panels and keeping them full length, joint them using a combination plane with a tongue and groove cutter. Always plane with the plane’s fence on the face side. There are a number of reasons for using this joint; it holds the panels tight together, needs no glue and, if spread slightly, it allows for seasonal movement
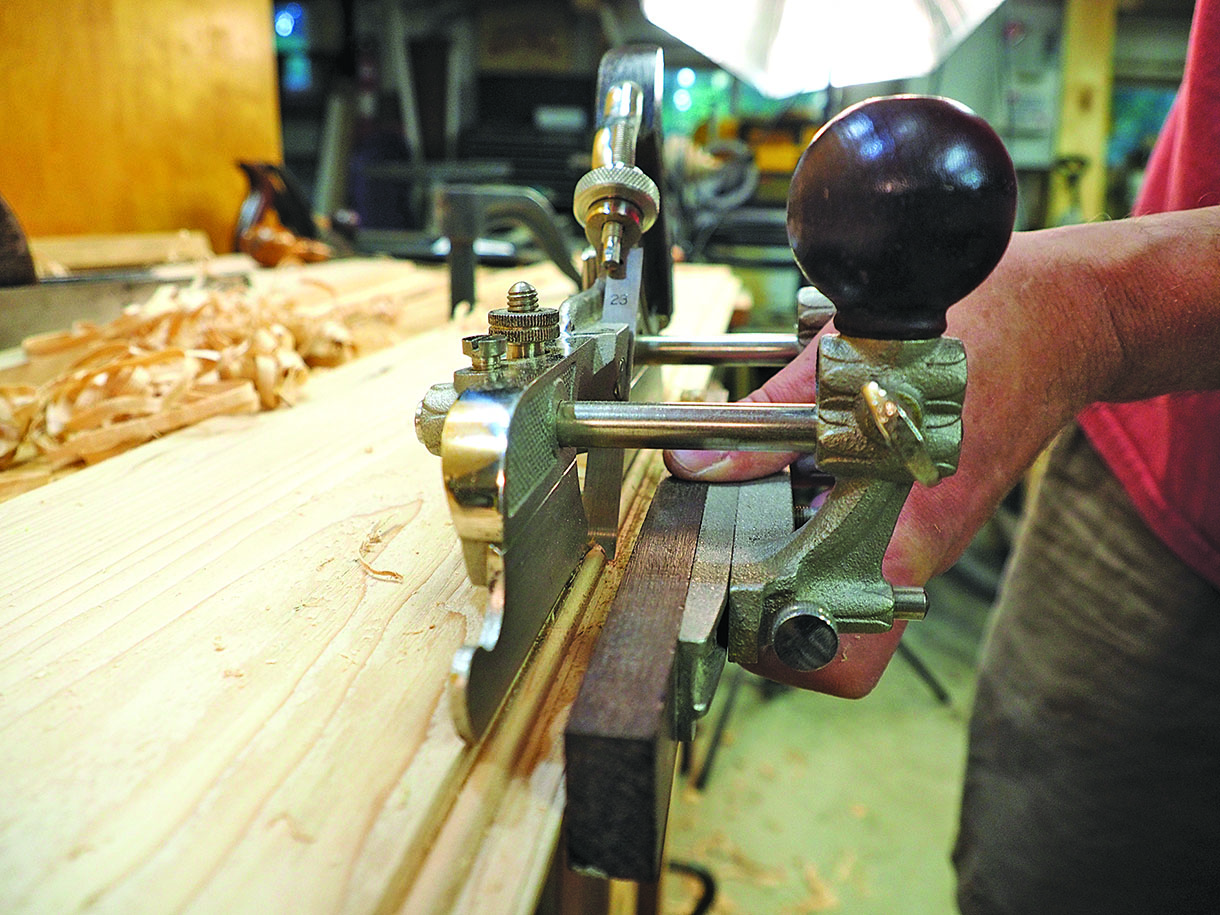
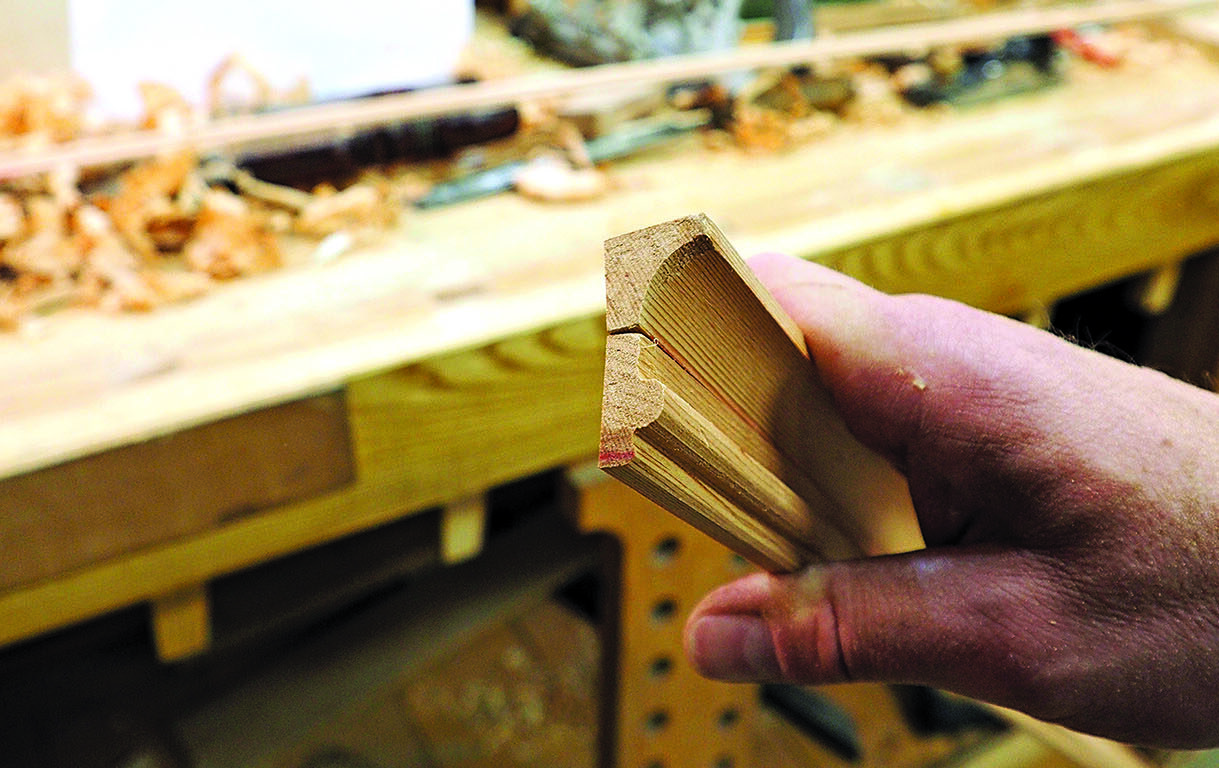
4. You may choose to add a small bead to the tongue piece surface for visual appeal
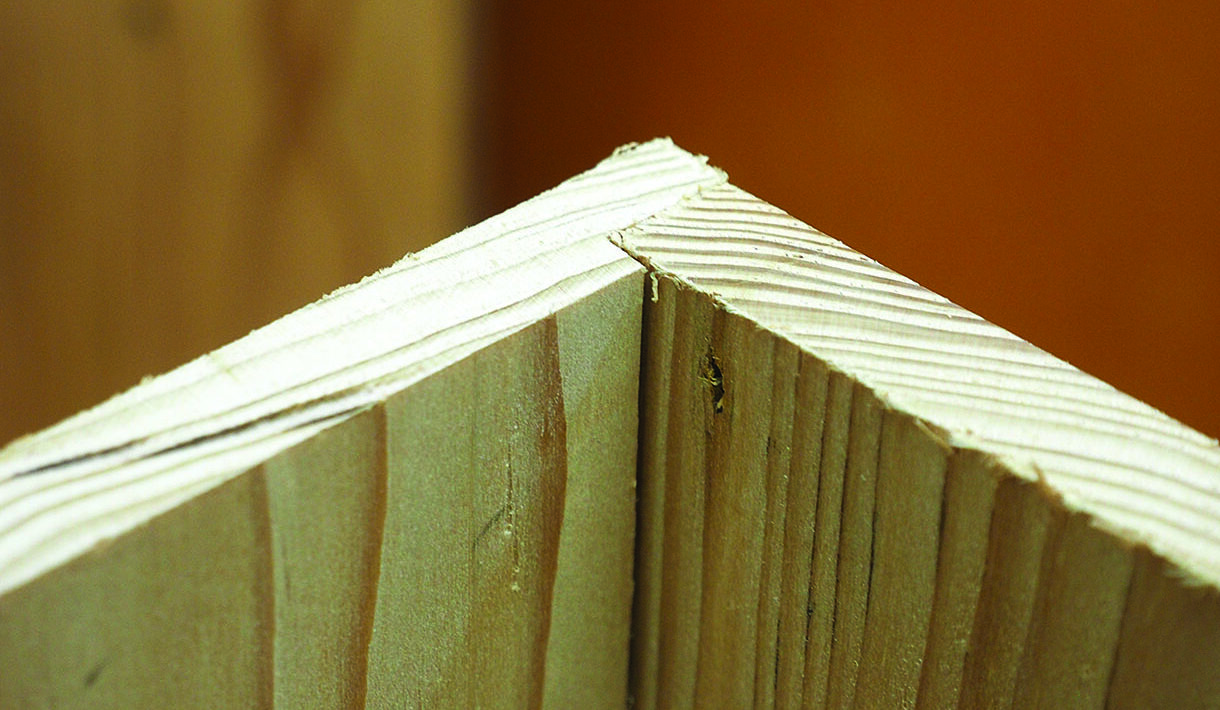
5. Using the combination plane, cut a rebate 13 x 10mm on the inside back edge of one of the pieces – this will allow the sides to be glued together at 90°
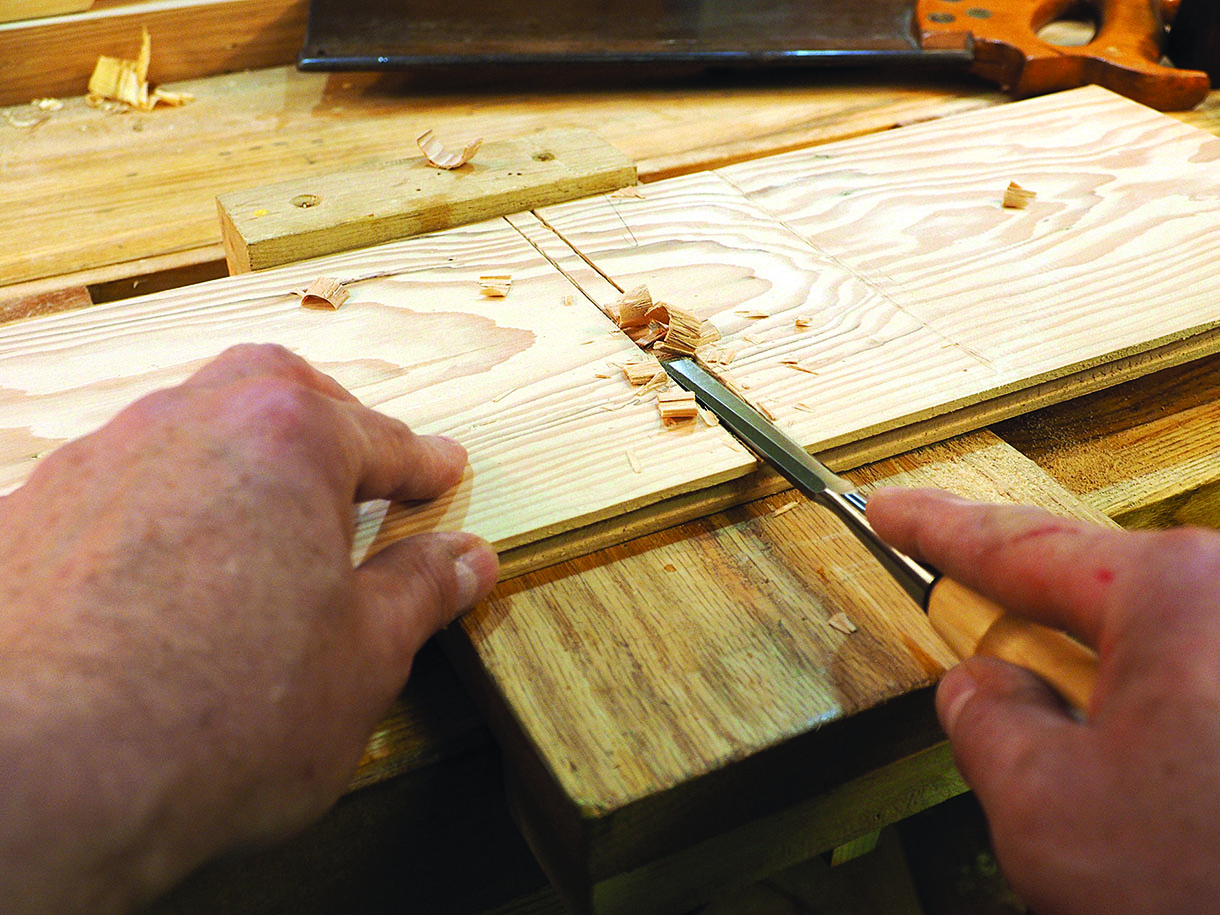
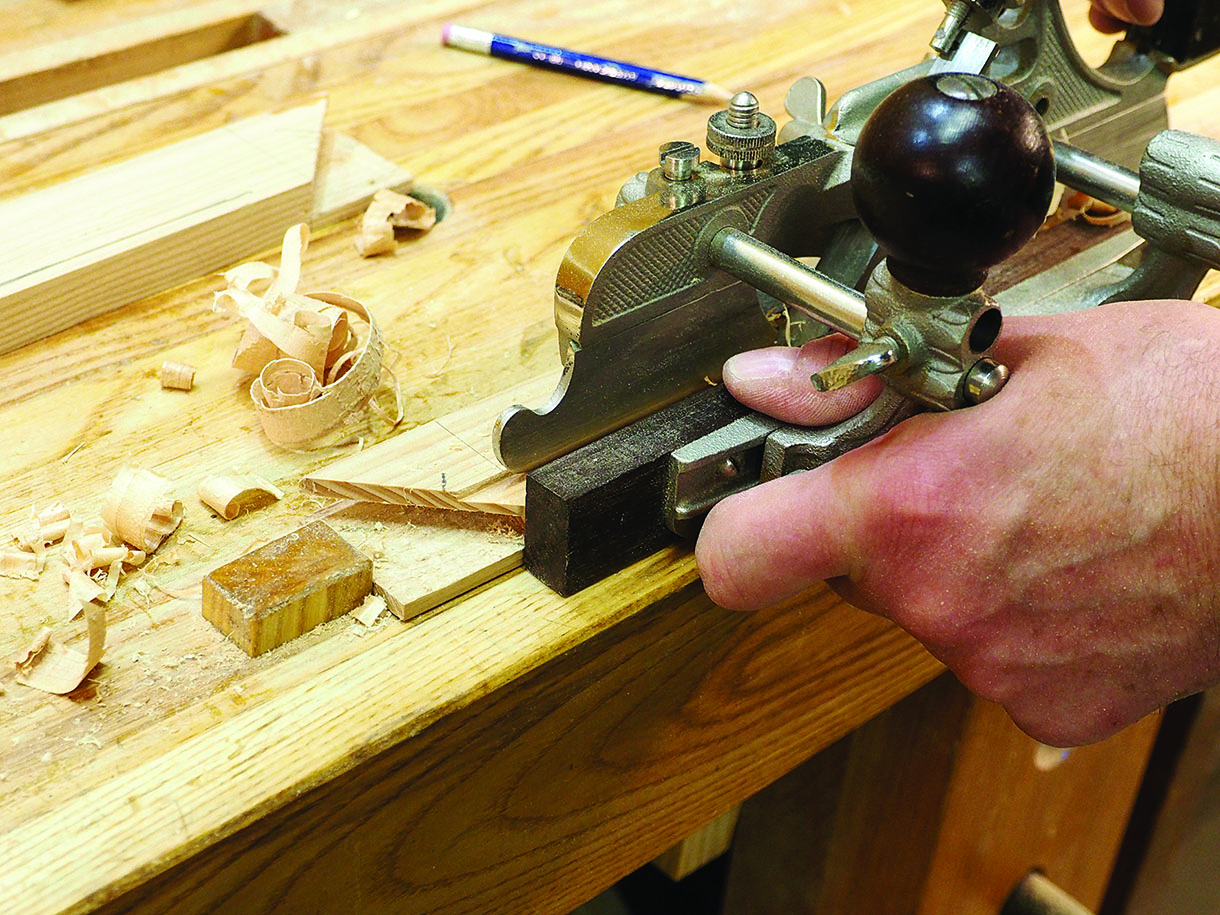
6. The shelf is set slightly above the middle of the side panels. Use the width of the shelf to mark the dado and saw down 3mm and remove the bulk of the waste with a chisel. Clean up the housing with a router plane
Inner top and bottom
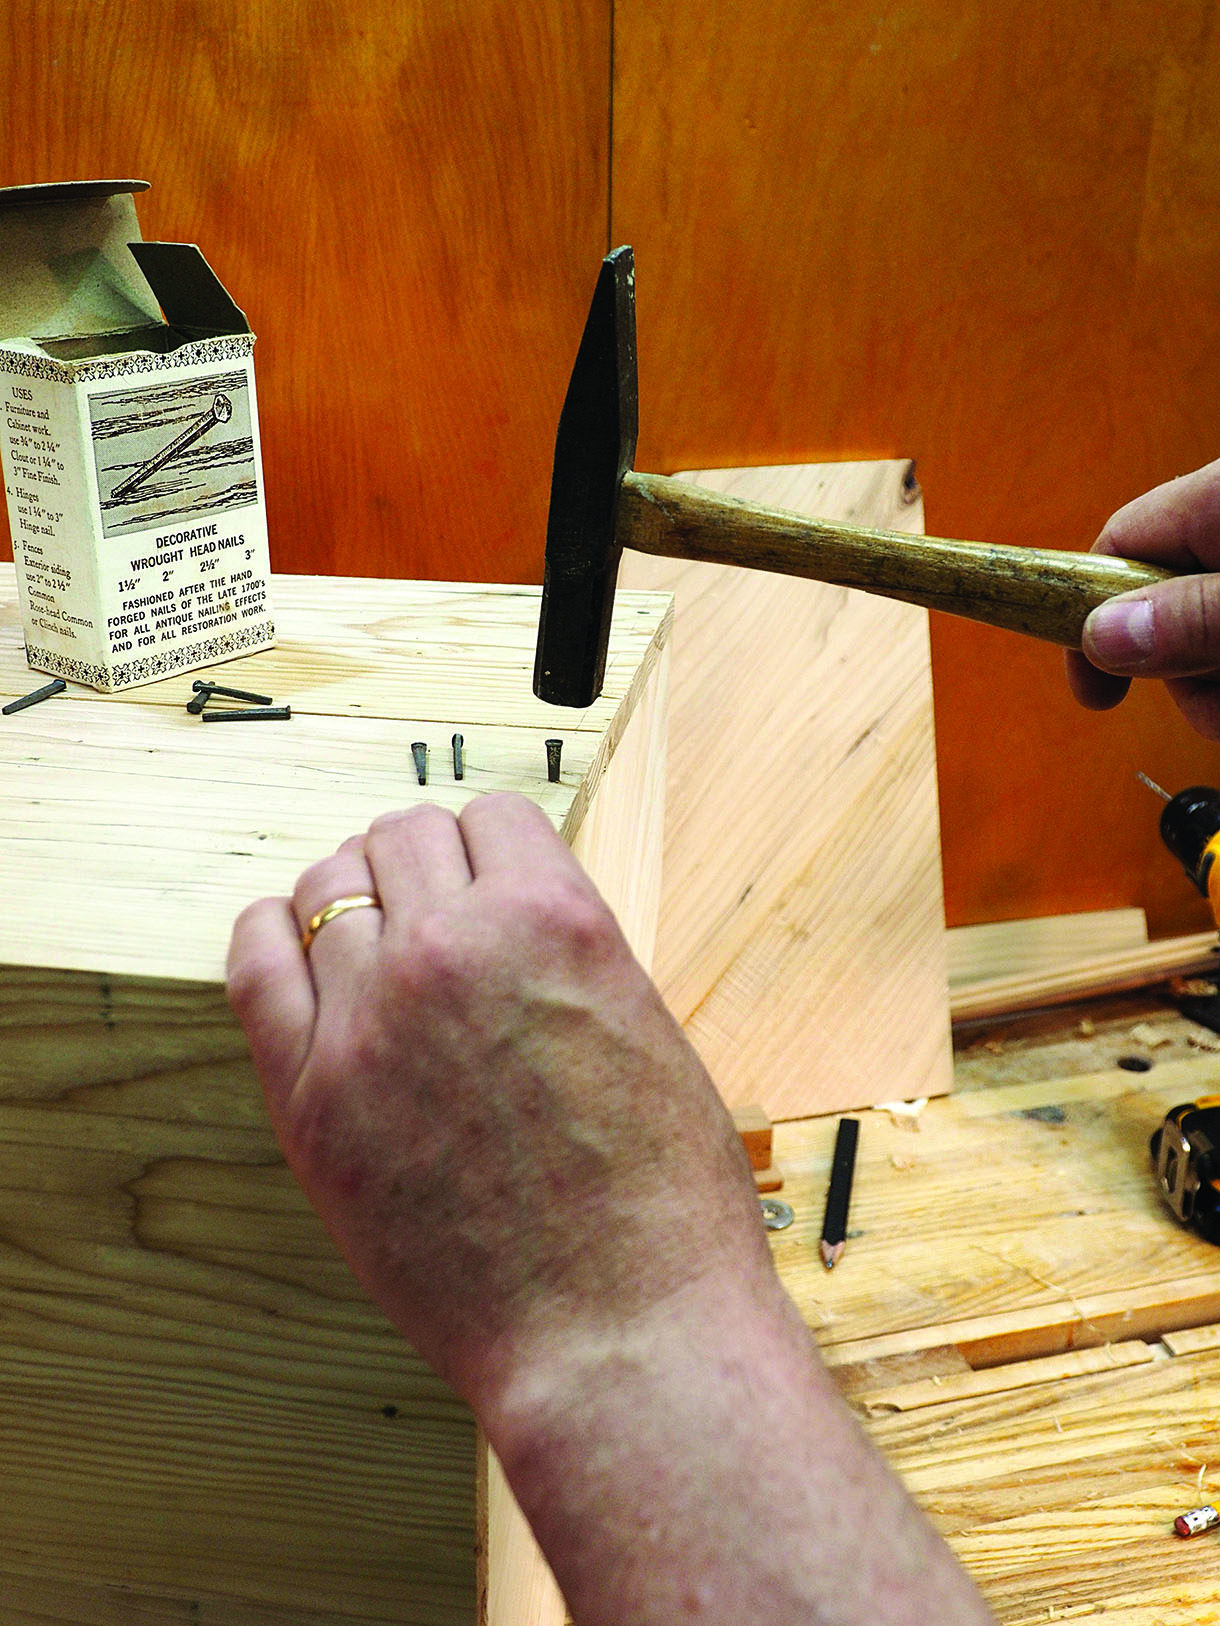
7. The inner top and bottom pieces are 20mm and made by using a rubbed glue joint and cut to size. These boards will be butt fitted, glued and nailed inside the side panels. I opted to use cut nails to add a degree of oldness to the finished cabinet. Cut nails are tapered in one direction and parallel in the other – the important thing to remember is that they are driven home with the parallel sides running with the grain. Drill pilot holes and drive the nails home
8. The interior shelf is made from 13mm board and is loose fitted in the 3mm dado on the side and front panels
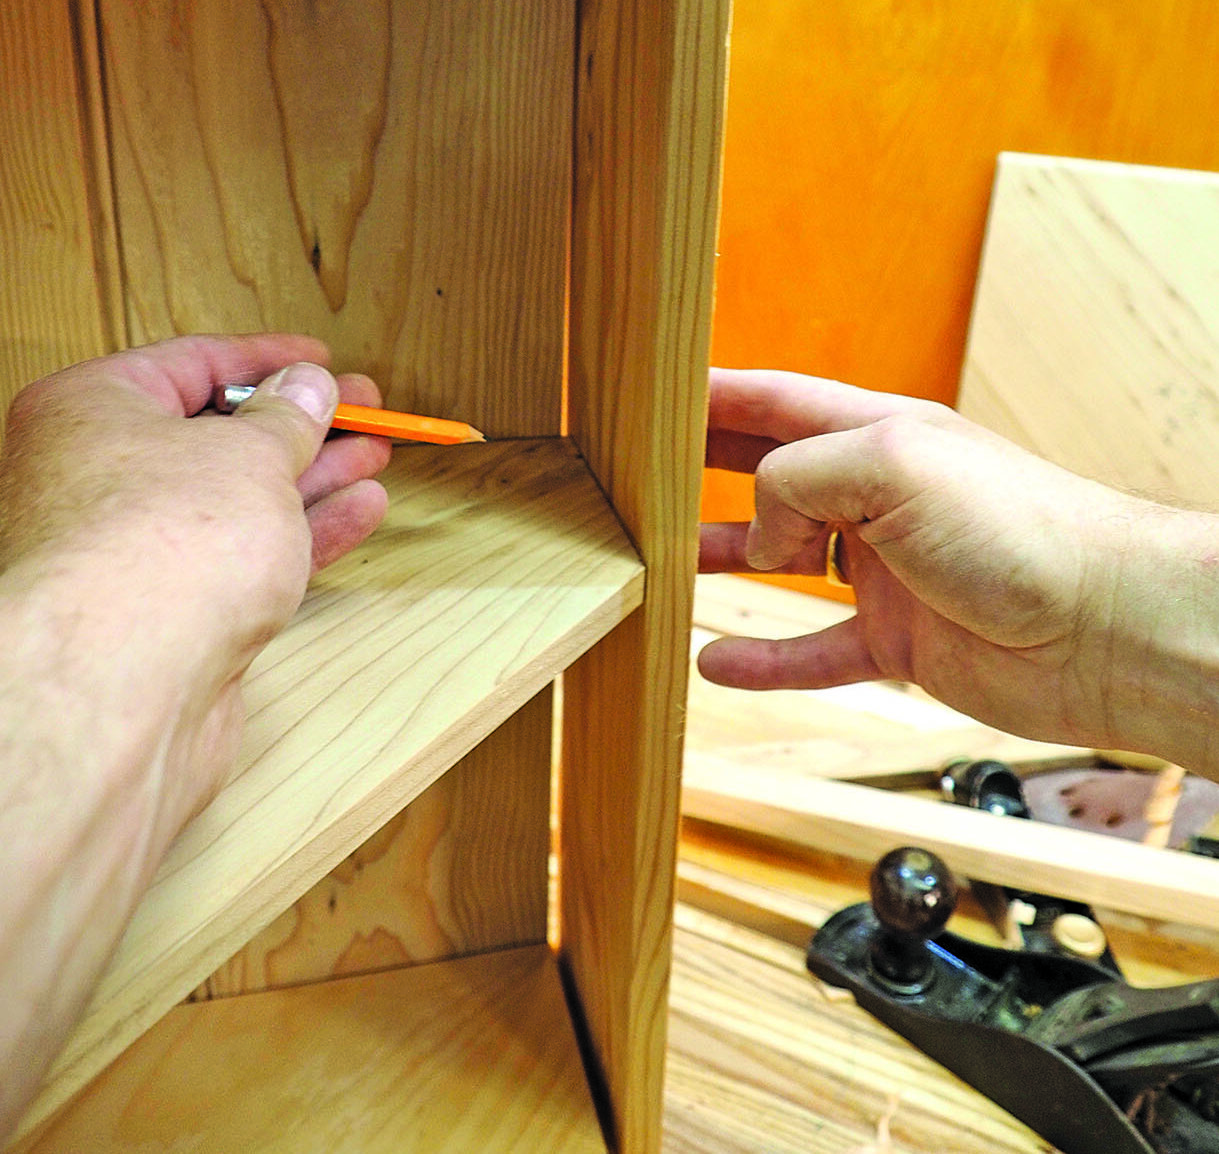
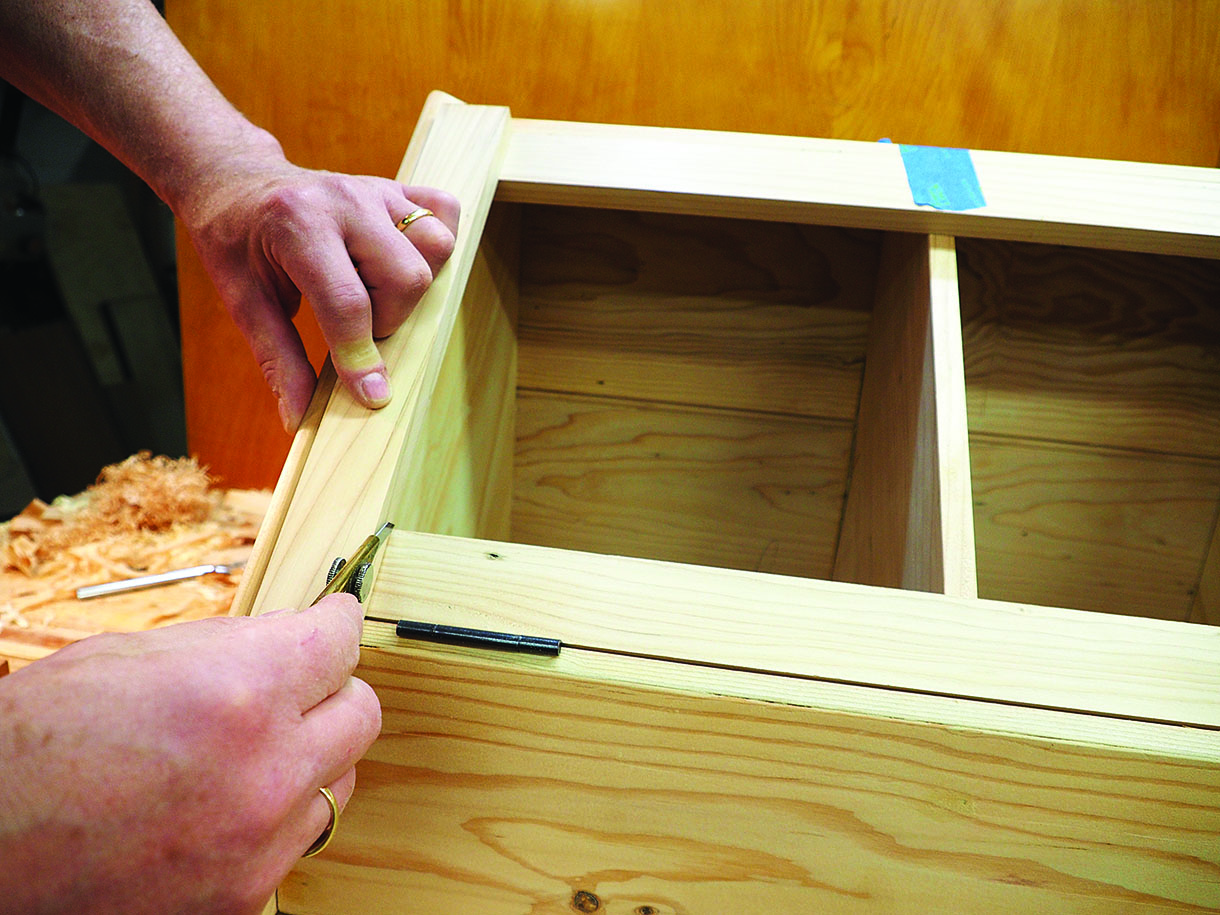
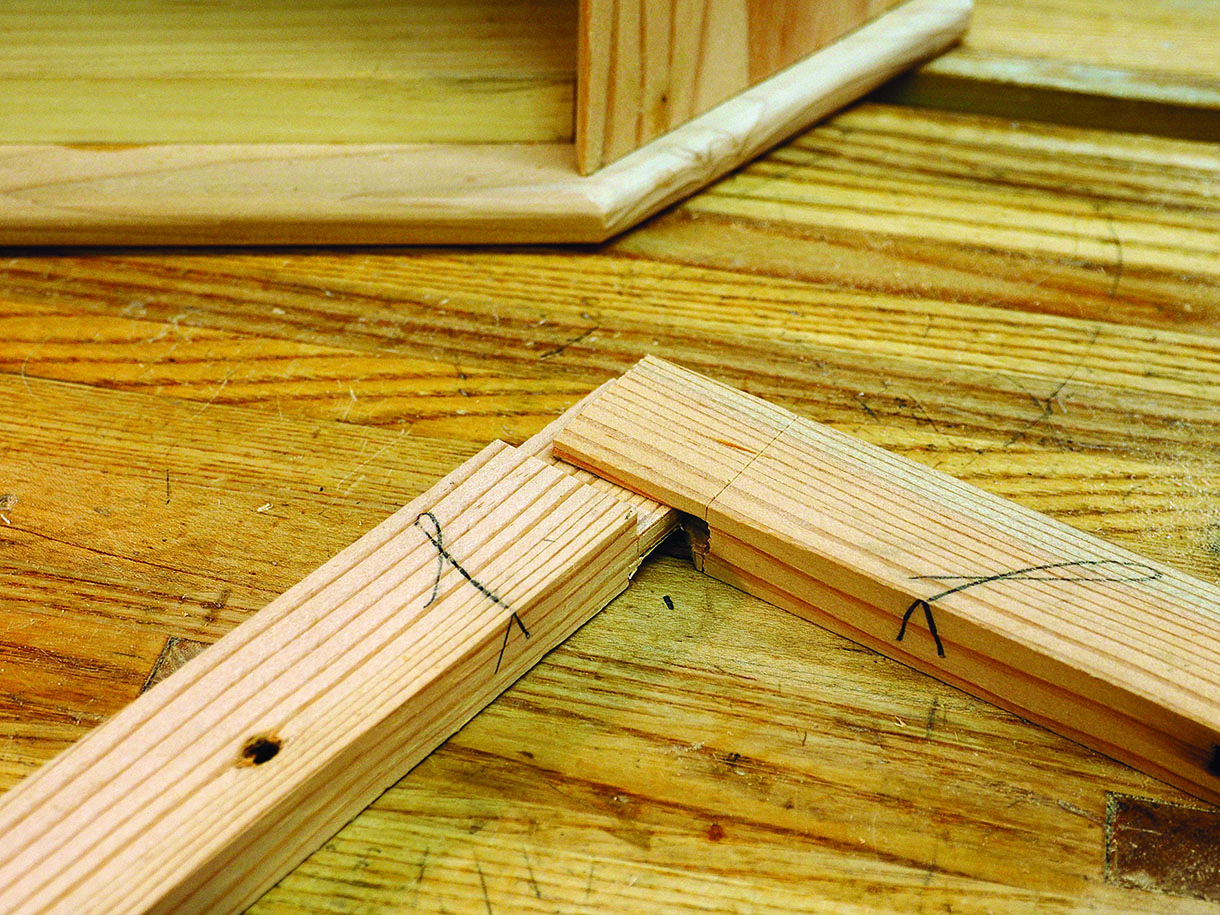
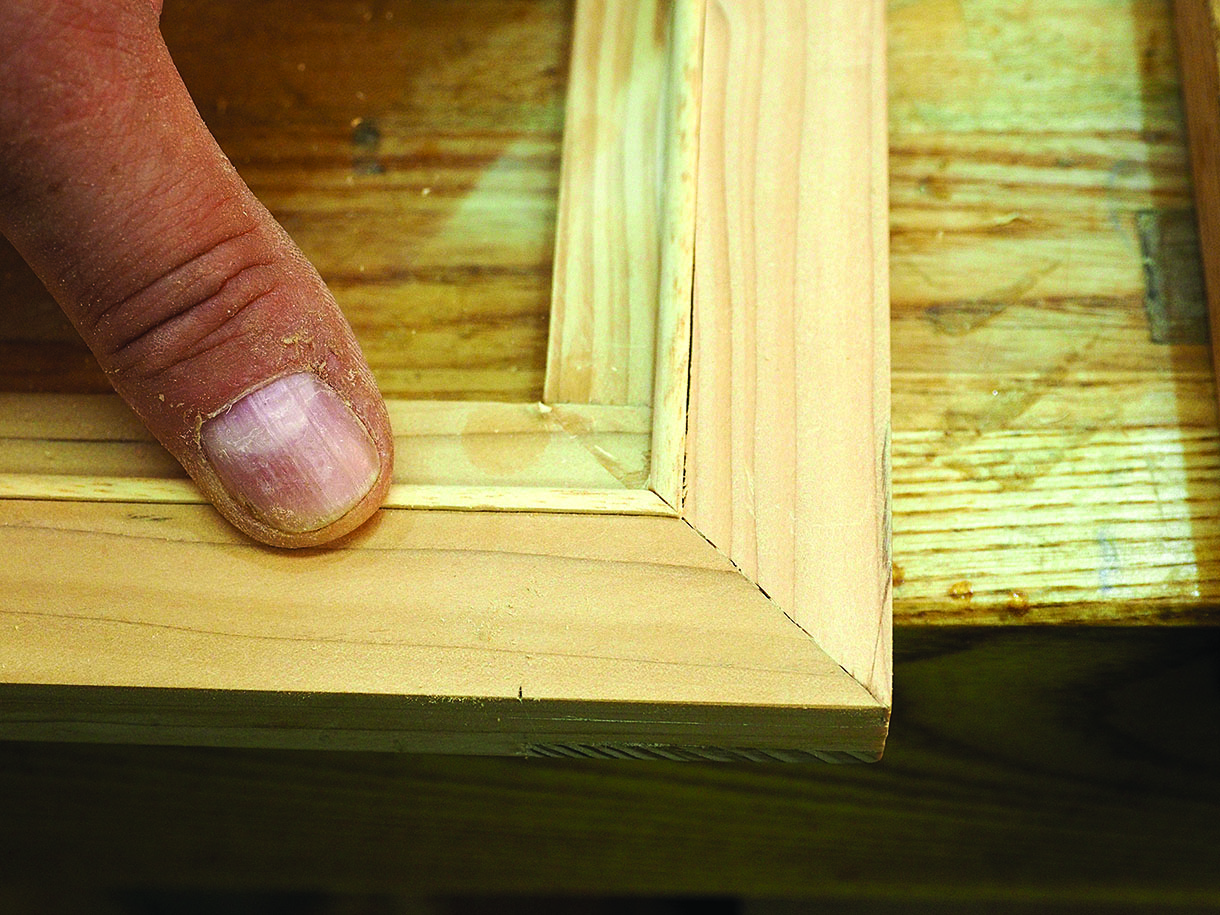
9. The face frame is made from 20mm stock and the sides are mitred together with the thin face frame – this gives a very clean joint that is almost imperceptible. Glue all the parts together and check for squareness. There is no need for nails as all these joints are long grain to long grain
10. The outer top and bottom are slightly different. The bottom extends by 10mm on the visible edges, while the top is flush with all sides, this allows the crown moulding to be attached. Place the carcass on the outer bottom board with the back corners flush, trace around the base using a washer that gives 10mm overlap – alternatively scribe with a compass. Cut out and then plane a bullnose profile on the visible edges
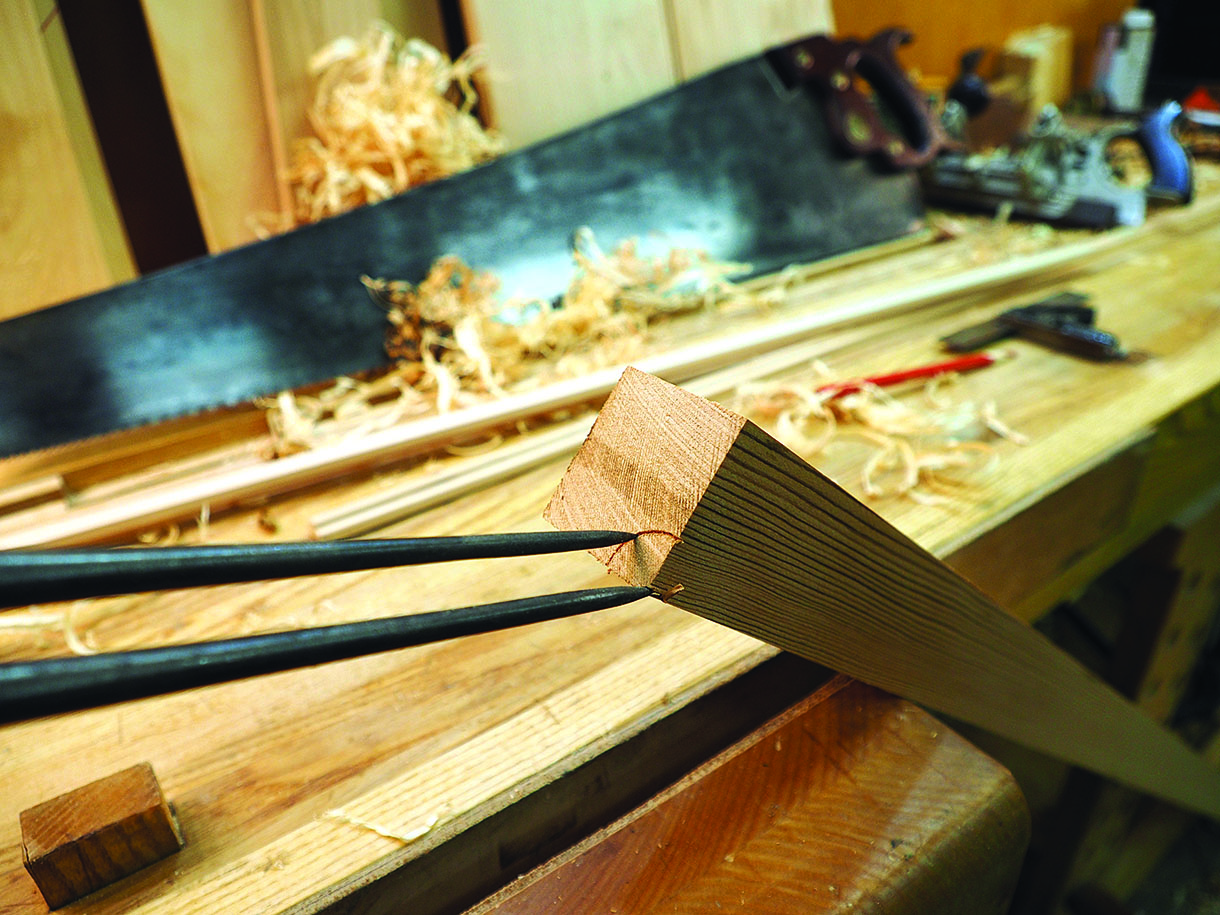
11. The measurements of the door are taken directly from the opening in the face frame. It’s a good idea to place the hinges in the frame so that the true length of the rails can be found. Using a bridle joint means that the rails and the stiles are the exact length of the width and height of the opening. The rails and the stiles are 38 x 19mm
12. The secret of this joint is in the precise layout – take time to practice on a mock-up. Layout the bridle joint as per image 13. Be sure to check that the rails and stiles are exactly the same width and thickness and ends are square
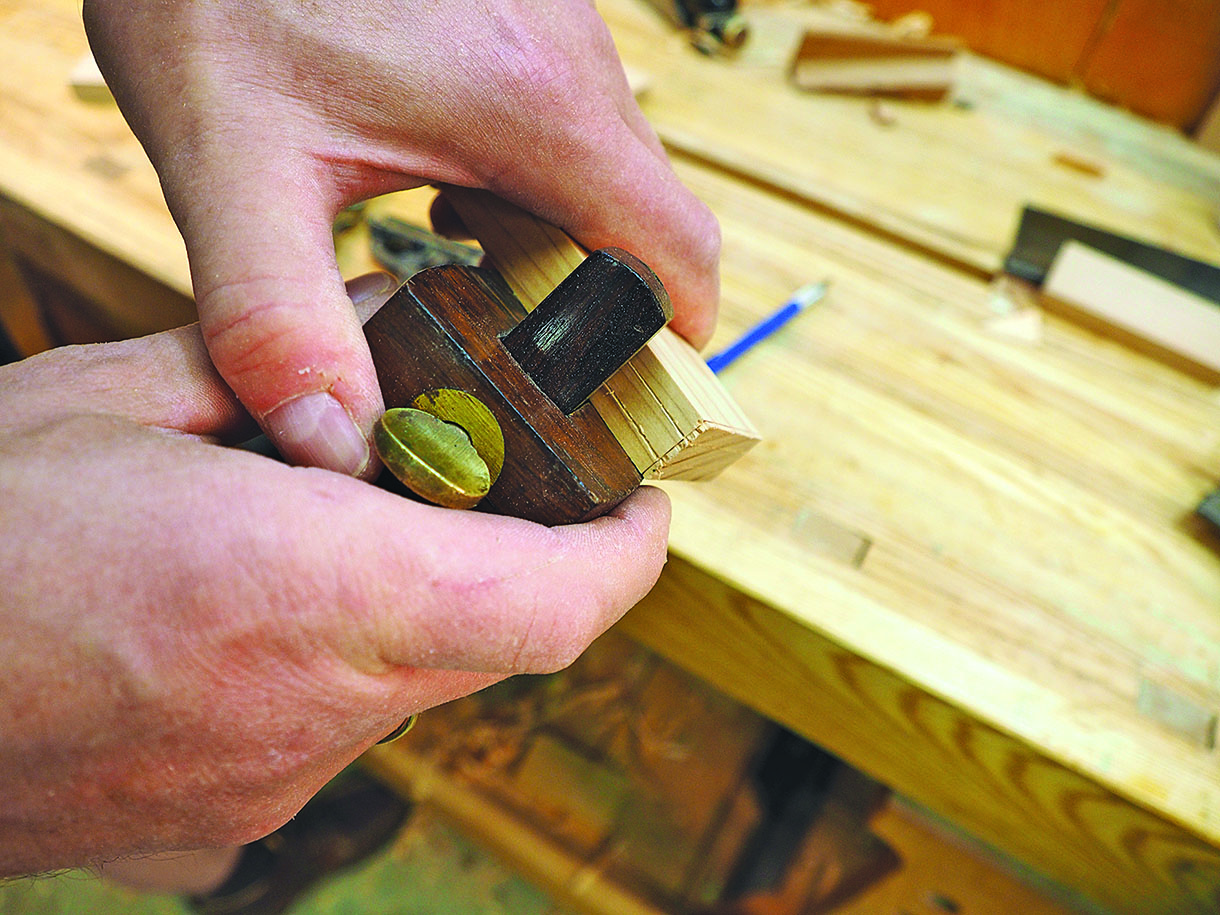
13. Mark the face side and edges on all pieces. The mortise location on the stile, is simply the width of the rail, plus 1mm for waste. Use the rail, pencil and try square to mark the location of the mortise. Set the mortise gauge using the width of your chisel – in my case 6mm. The tenon location is marked using the width of the stile. Gang the rails together and using the stile, try square and a pencil, scribe the location on all sides, and don’t forget to add 1mm for waste
Bridle joint with a difference…
This door has a rebate to hold a glass pane, however planing a rebate in a traditional bridle joint would need some ‘complex’ joinery or a stopped rebate so that it’s not seen on the ends. From the inside this modified bridle joint looks like a mitred joint, but from the outside looks like a traditional joint.
14. Adjust the mortise gauge so the tenon is in the centre of the rail. Scribe the tenon from the face side
Making the mortise
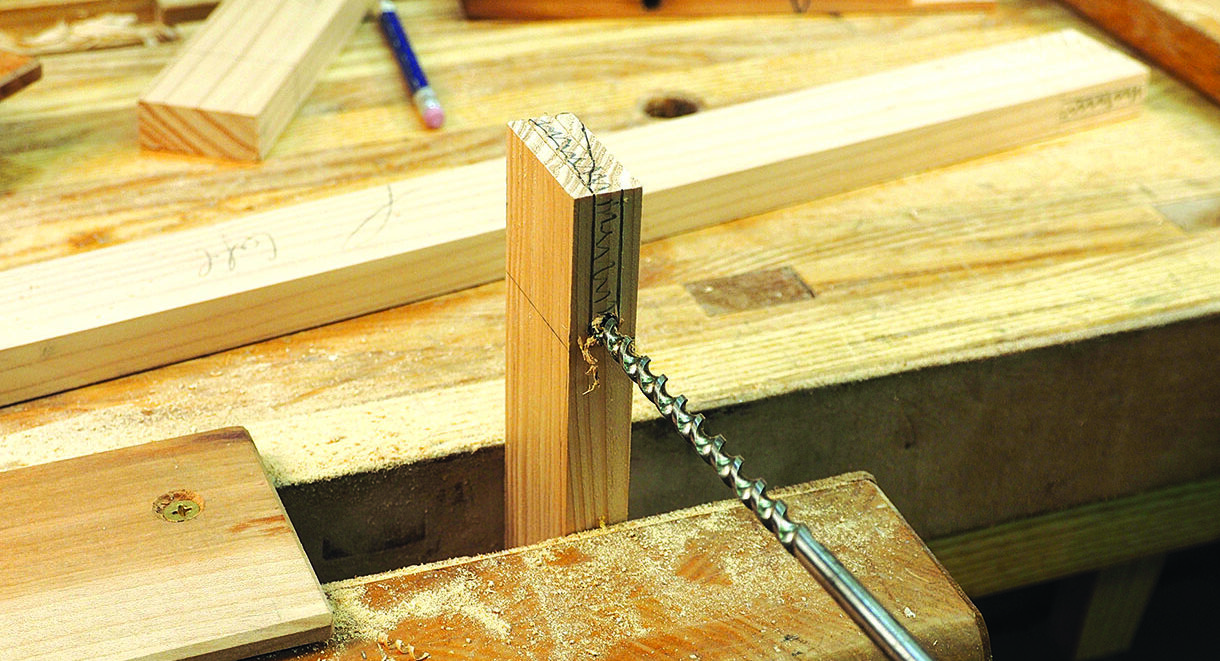
15. With the same mortise gauge setting you used to mark the tenon, mark the mortise on both ends. Drill a hole with a 10mm spiral bit at the base of the mortise with the stiles secured vertically in the vice and the mortise location facing towards you. Make sure you position the bit so it will bore a hole that touches the three marked lines and perpendicular to the edge. Drill through the bottom of the mortise until you can see the spur of the bit showing on the other side; turn the wood over and complete the hole
16. Once the hole is drilled, saw the rest of the mortise in the same way that you sawed the tenon, remembering to saw on the waste side
Rails
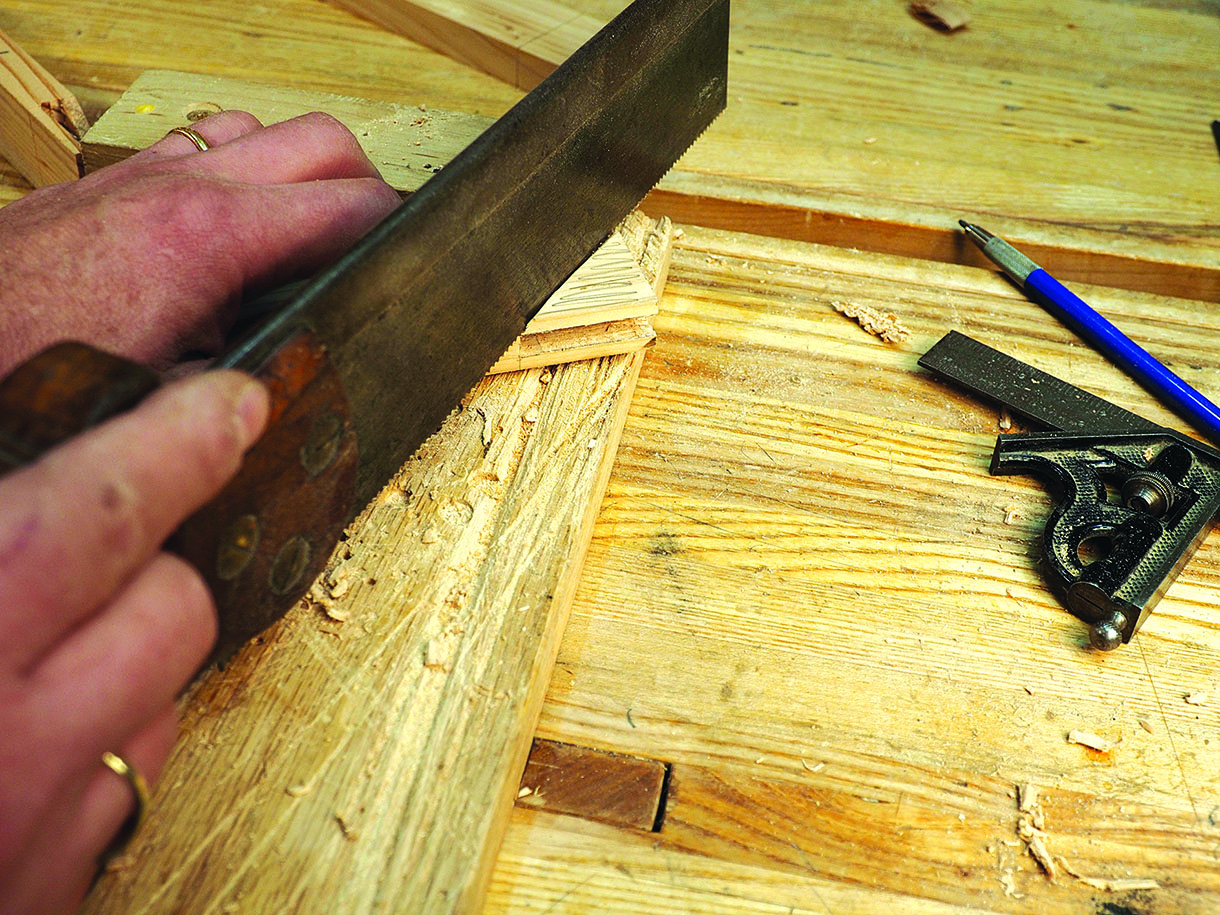
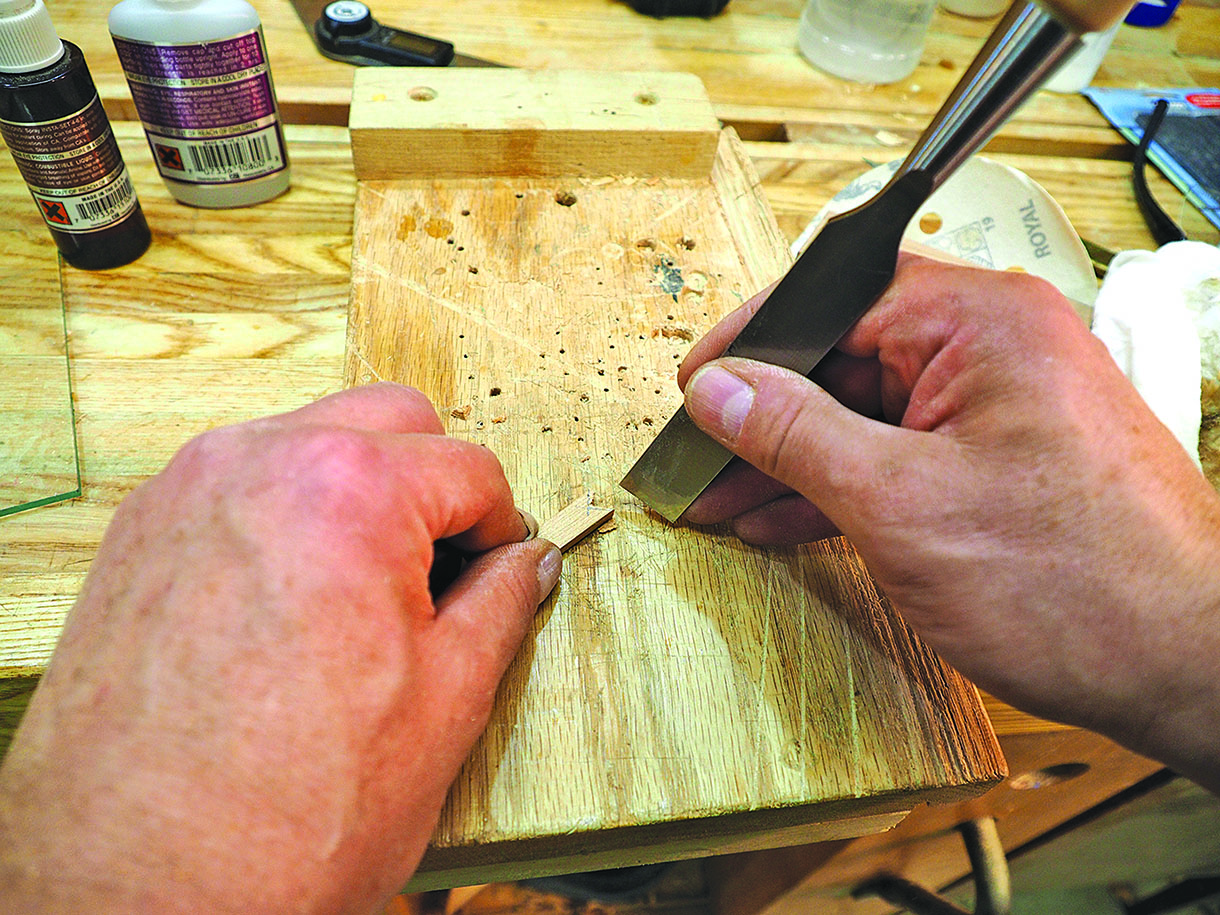
17. On the waste side of the shoulder line, cut a V groove using a chisel. This groove will give you a place for the saw to cut, allowing you to produce a very clean shoulder. Using a bench hook and a tenon saw, cut down to the tenon marks
18. Rip down on the waste side to the ends of the scribe marks using a dovetail saw. Turn the wood over and saw at 45° using the kerf as your guide. Saw vertically down to the shoulder. On the inside, use a marking knife to score the diagonal and then saw using the same method and repeat for the other cheeks. Use your mortise chisel to clean up joint. Mark the diagonal and saw to the waste side – the sloping edge can be cleaned up with a block plane
19. Once the bridle joints are done, plane the 10 x 10mm rebate on the inside. Ease all edges, glue and clamp the parts together, check for squareness. Plane off the 1mm waste
20. Once the glue is dry, position the hinges and test fit. It’s a good idea to chamfer the inside long edge opposite the hinges so the door clears the face frame when closing
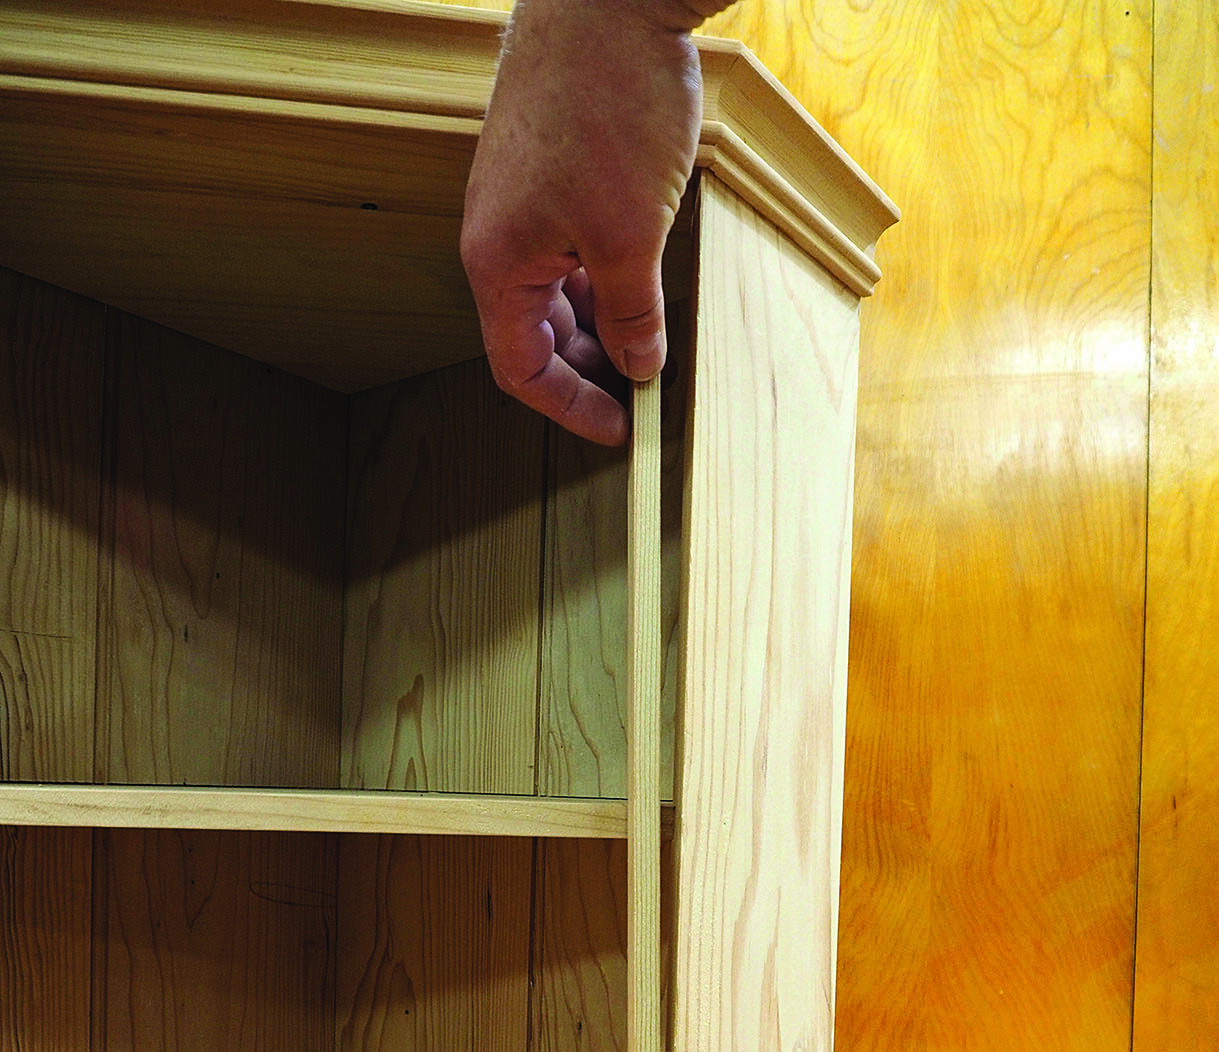
Crown moulding
21. The top edge has a handmade cove and bead moulding. Create the moulding by making two distinct profiles and gluing them together. Use the tongue cuter to create the 3mm profile and with a handmade scratch stock, round over the tongue creating a bead. A block plane would work also
The cove
22. Pick a piece of wood and scribe a quarter circle on the end
23. Remove most of the waste with a chisel or spokeshave, then with a rounding plane, use your fingers as the fence to create the cove
24. Glue the two profiles together to create a more complex one
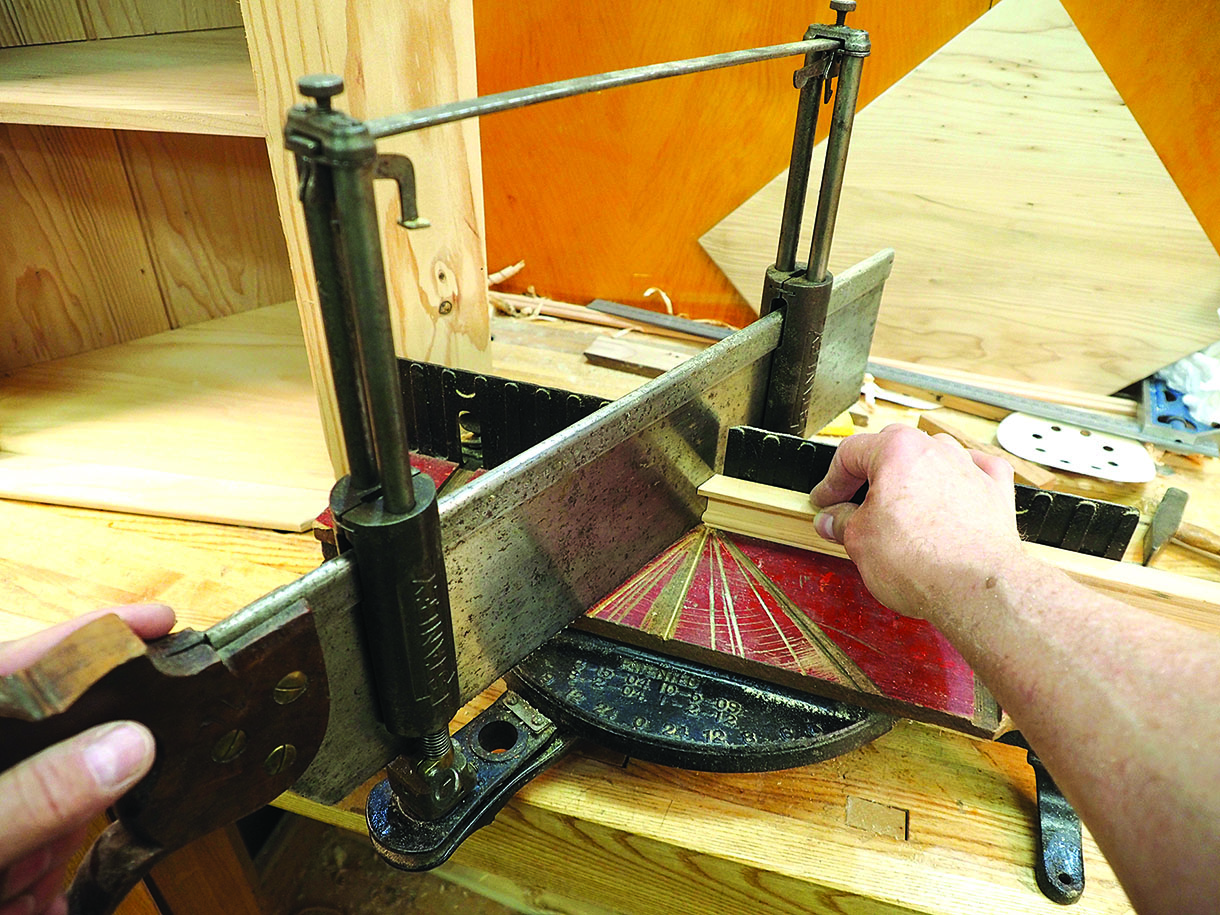
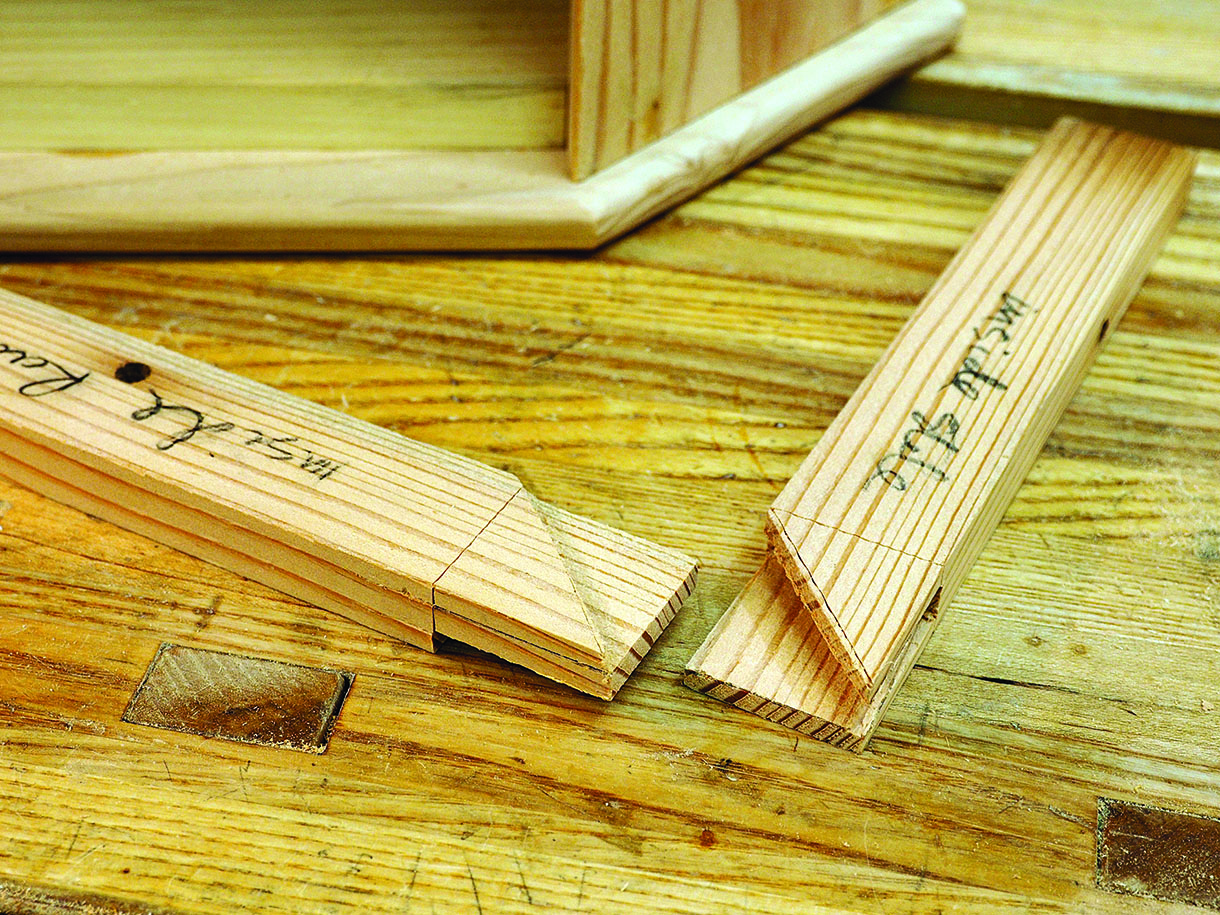
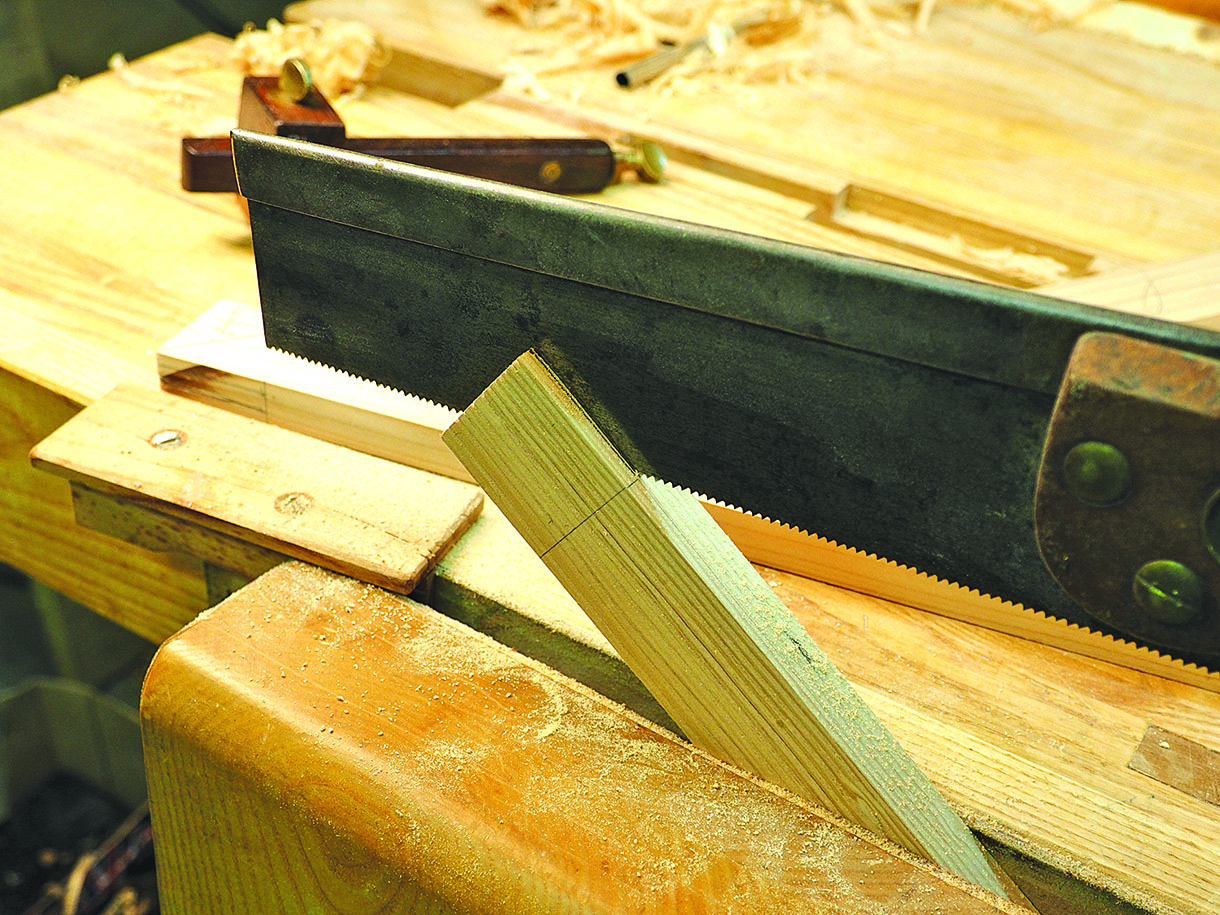
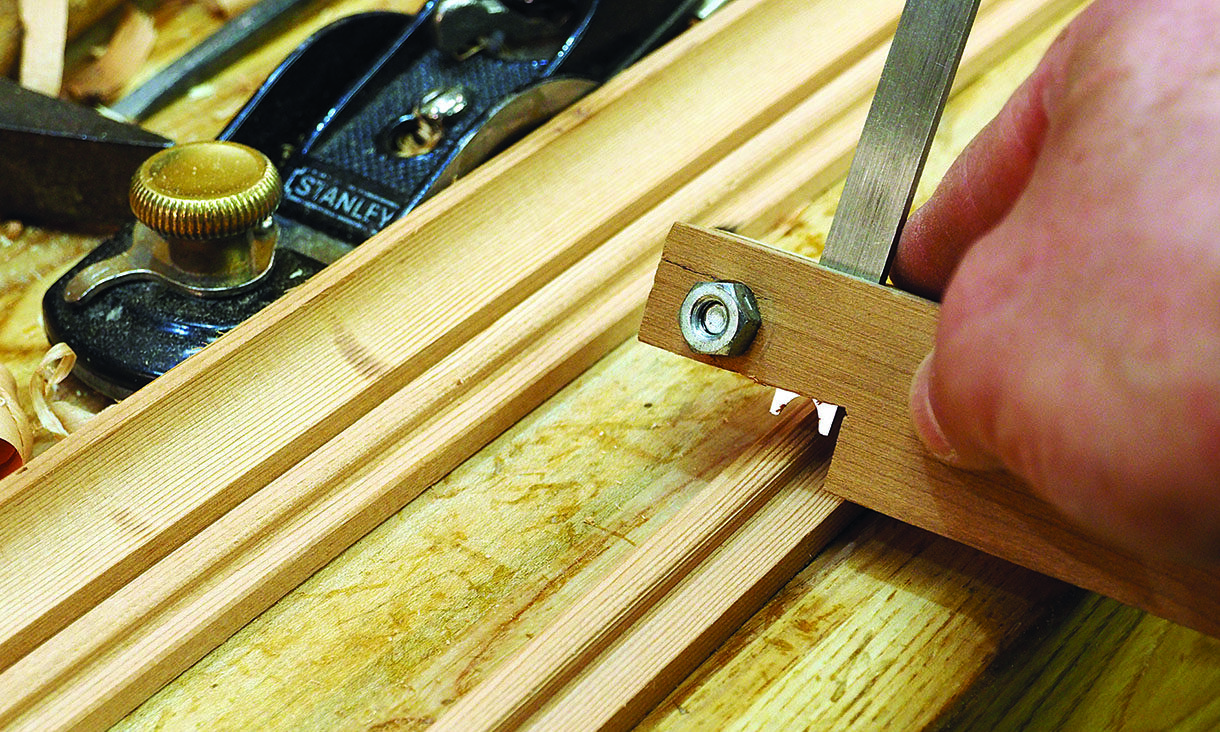
25. Once glued, mitre the moulding at 22½°. I’ve used a mitre saw, but a homemade mitre box will work. Clean up with a block plane
Finishing
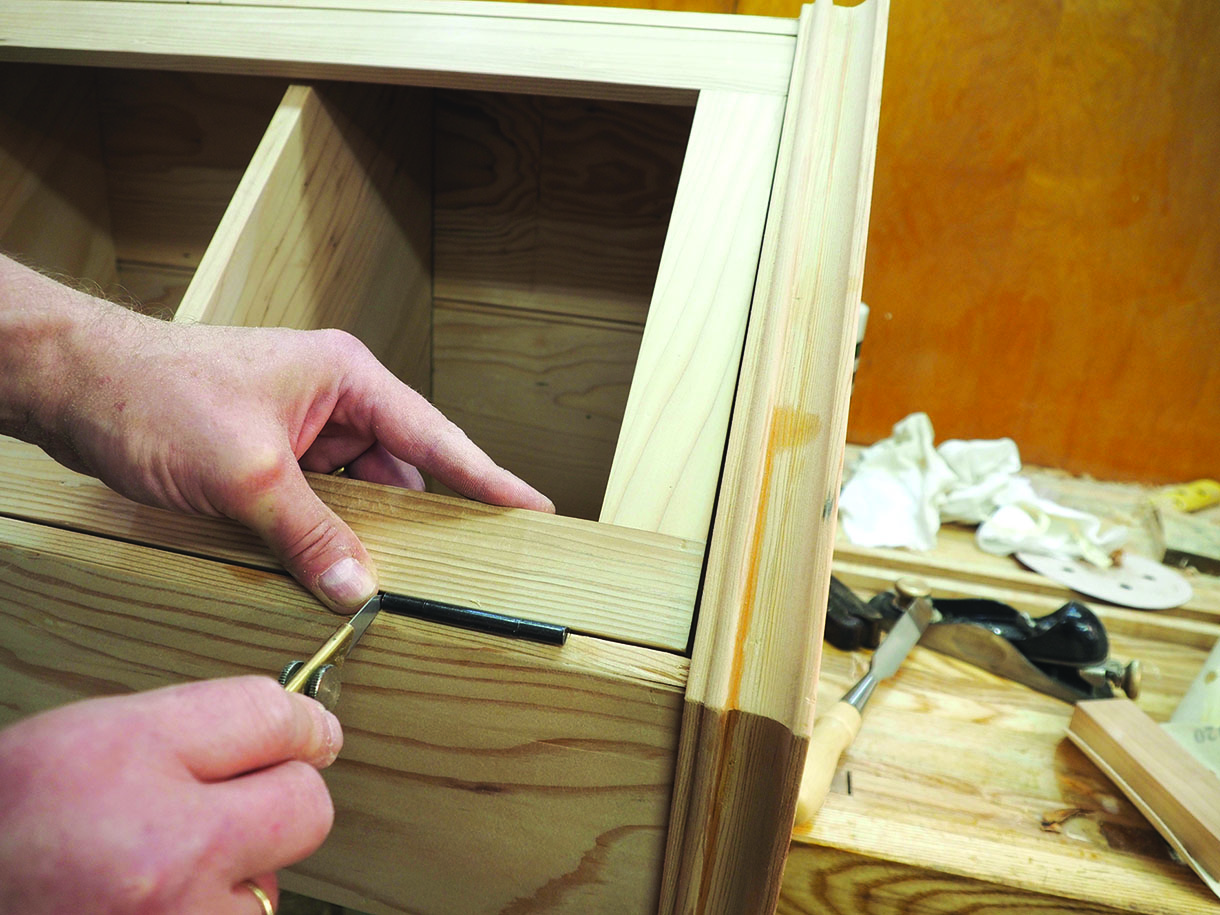
26. The door is held shut with 6mm rare magnets embedded in a hole in the inner bottom, a matching steel screw is aligned in the door. Give the whole cabinet a coat of Danish oil before installing the glass, which is held in place with an 3mm bead of wood glued in place
27. I went with a simple door design made from some thin strips of leftover wood. The pieces are all butt jointed using CA glue. And there you have it – a classic corner pine cabinet that would look great in any setting


