Mind, Body, Soul:
Andrew Thomas shows us how to carve this special contemporary sculpture.
Andrew Thomas shows us how to carve this special contemporary sculpture
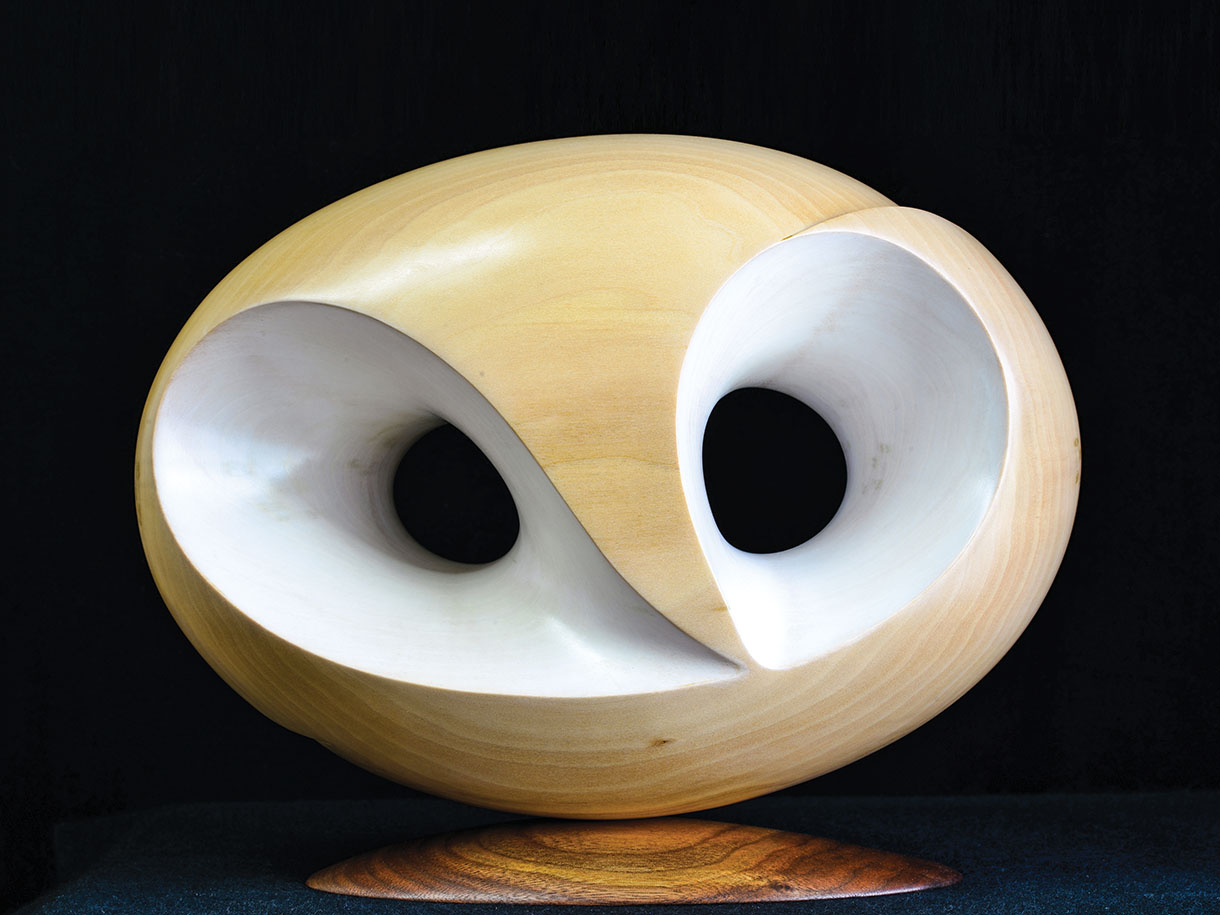
This is an elegantly designed contemporary sculpture, featuring two pierced sections that allow dynamic life through the form, dramatically adding to the effect of the light and shadow as it strikes through and across these positive and negative spaces. The inner pierced sections have been finished with wood bleach on both the front and rear sides to add effect, naturally enhancing the contrast between the inner and outer surfaces.
There is plenty of scope to modify the design should the reader wish to, but the main considerations should be the overall balance and proportions of the form, ensuring that they are harmonious in their composition and pleasing to the eye.
Things you will need
Tools
Swiss gouges
• No.2, 40mm
• No.7, 20mm
• No.9, 10mm
• No.9, 13mm
• No.12, 6mm
• No.2, 10mm
• Knife
• Saw
• Drill
• 16mm Brad toothed bit
• 45 x 8mm bull nose tooth burr
• 30 x 20mm bull nose tooth burr
• 2mm drill bit
Materials
• Sculpture: Lime (Tilia vilgaris). Dimensions: 300 x 220 x 150mm
• Base: American black walnut (Juglans nigra). Dimensions: 210 x 110 x 20mm
• Rustins wood bleach
• Danish oil
• Clear wax
• Brown wax
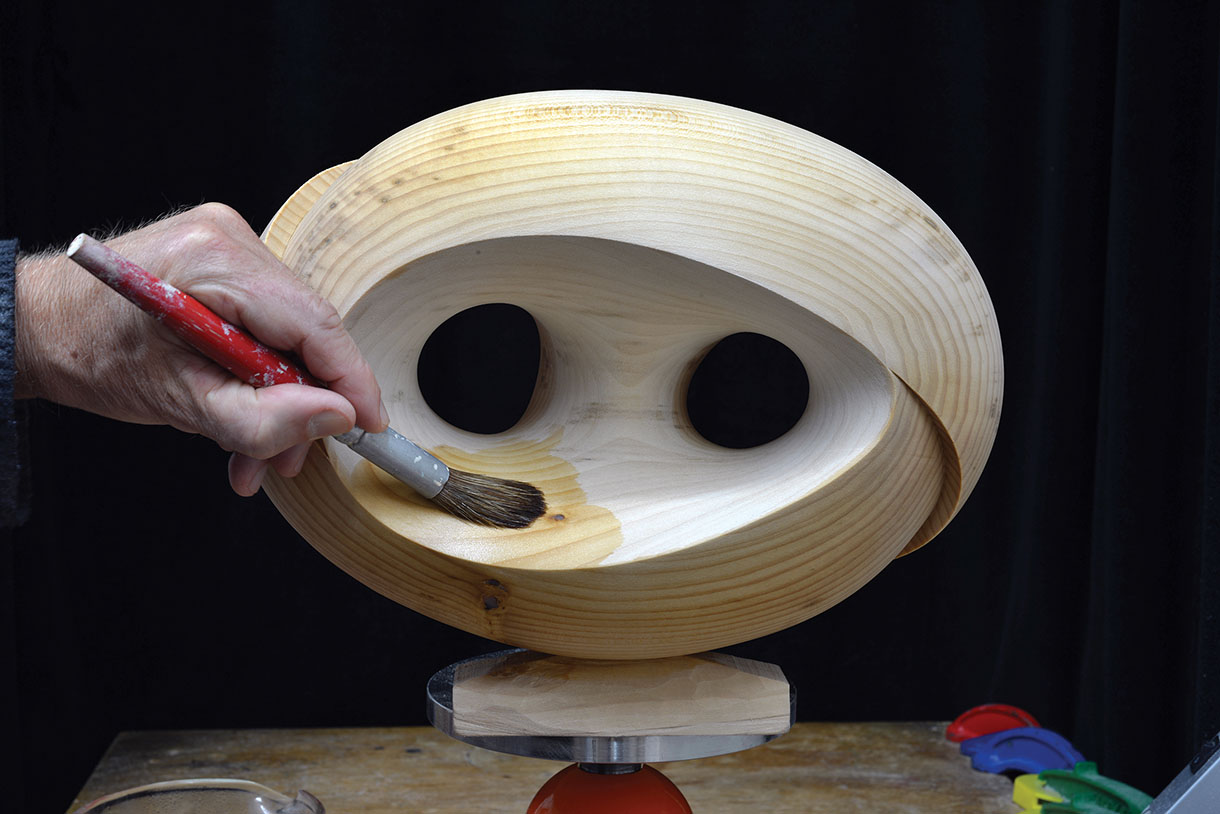
Drawings and how to resize them
To enlarge or reduce the size of drawings right click on the image to download it and then go HERE to watch a video on how to use paper with a grid to do exactly that.
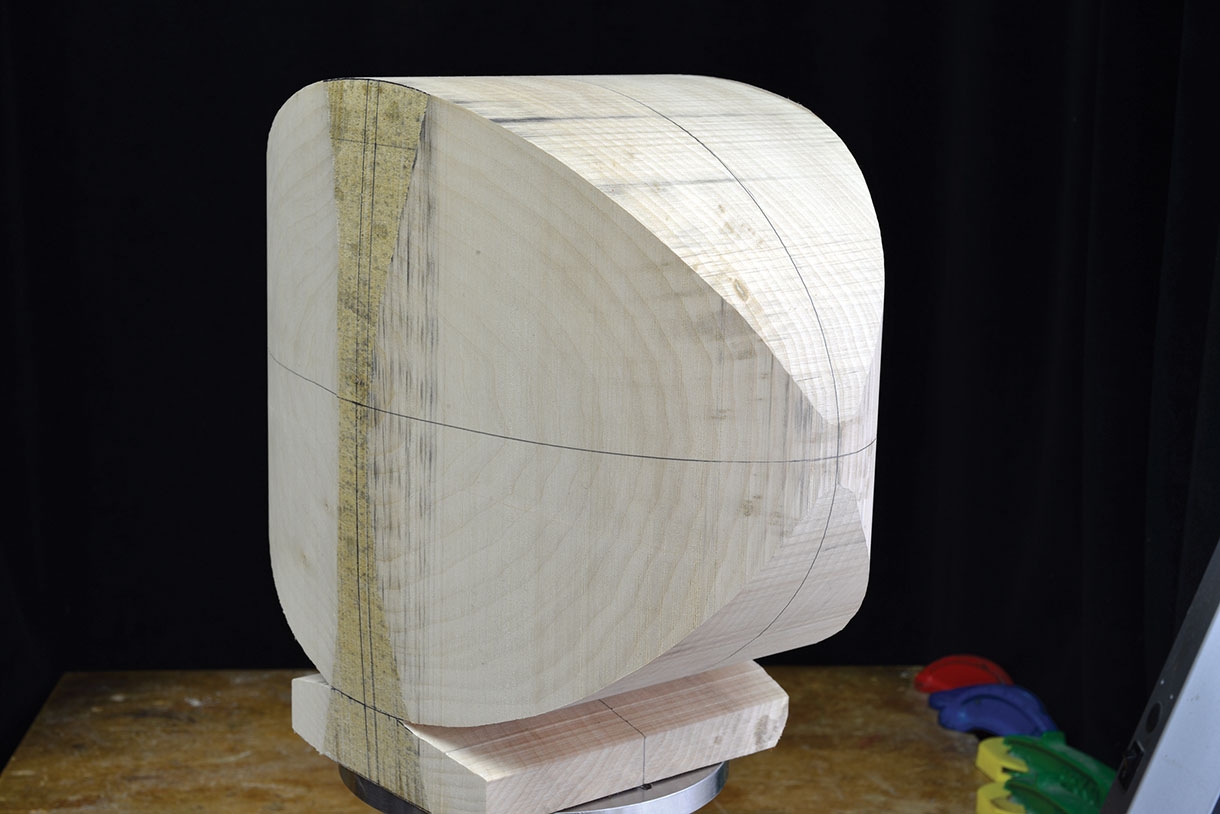
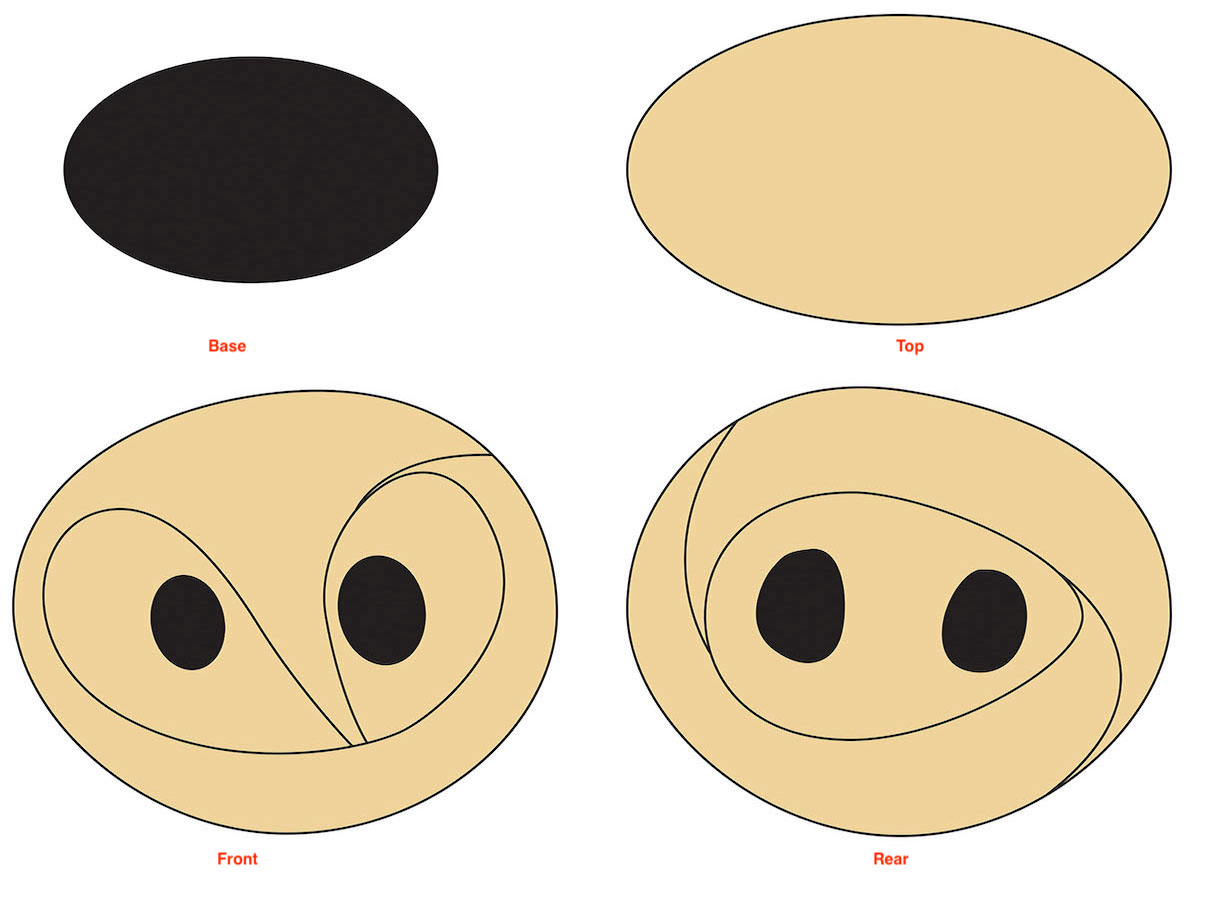
1. Scan or photocopy the scale drawings provided, enlarging them to the correct size for your wood, and print them out on to card to use as templates. Transfer them on to your block of wood, ensuring that they are in perfect alignment with each other and that the grain direction is running horizontally through the block. Leave an area of 30mm depth at the base to attach to your faceplate. Cut this shape out and secure it safely on to your vice. Measure and draw a centreline on all four sides
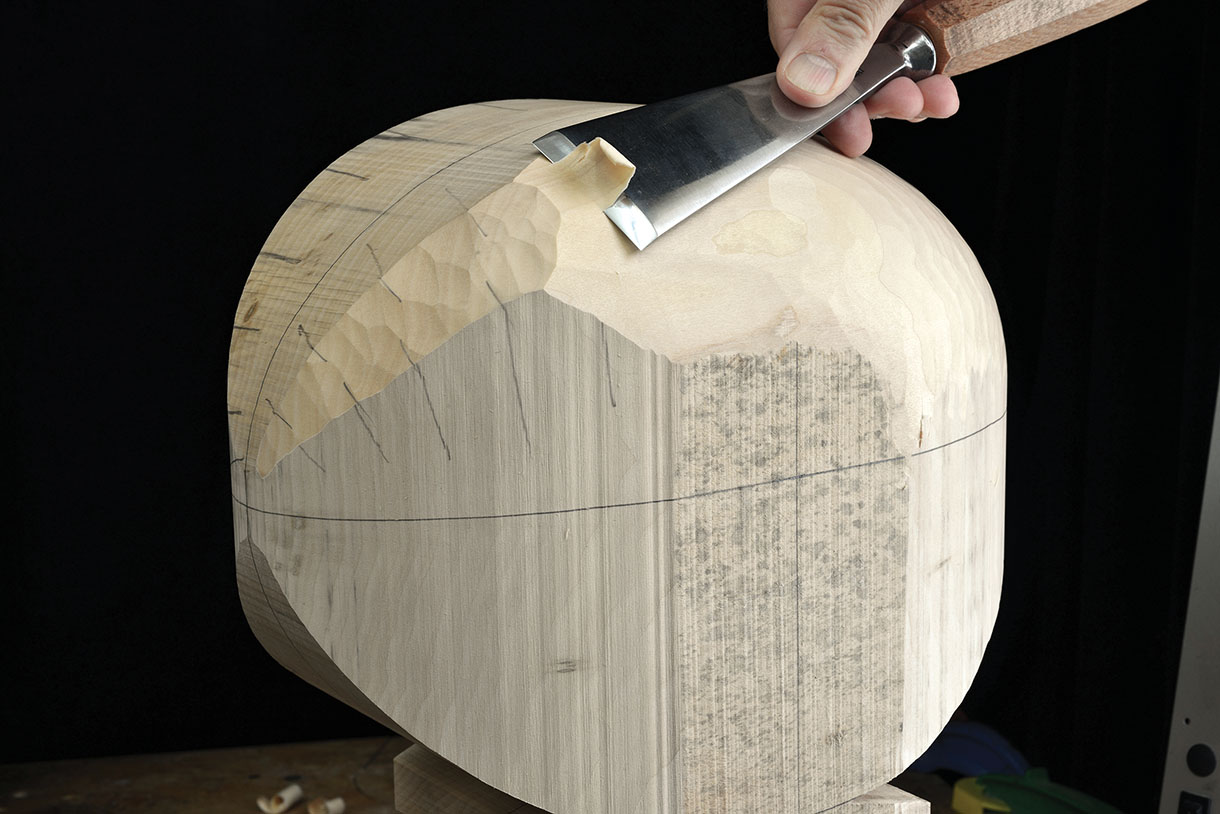
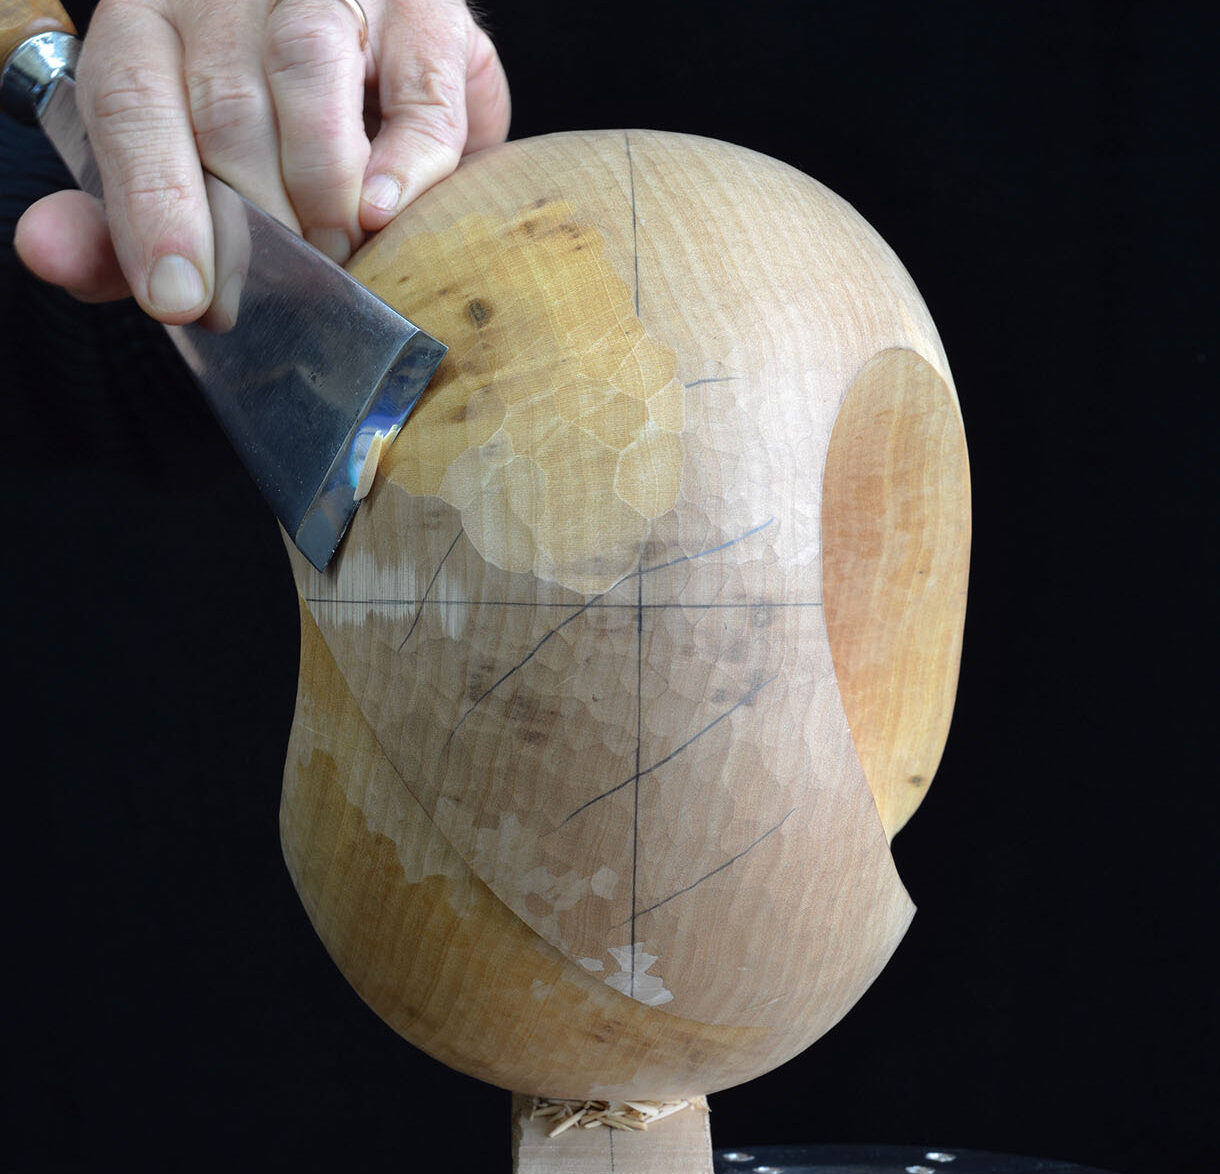
2. The first stage of this sculpture is to create an even contour around the complete surface of the form. To do this, divide the work into four quarters and replicate the curvature from one section to the other using a no.2, 40mm gouge. Start by removing the top square edge along the length of the side. Then create an even curve from the centreline on the side to the centreline on the top. As you develop the shape of the side, you will discover that a slight bulge emerges in the middle of the mass. This will need to be reduced by making a vertical cut from the top down to the middle line
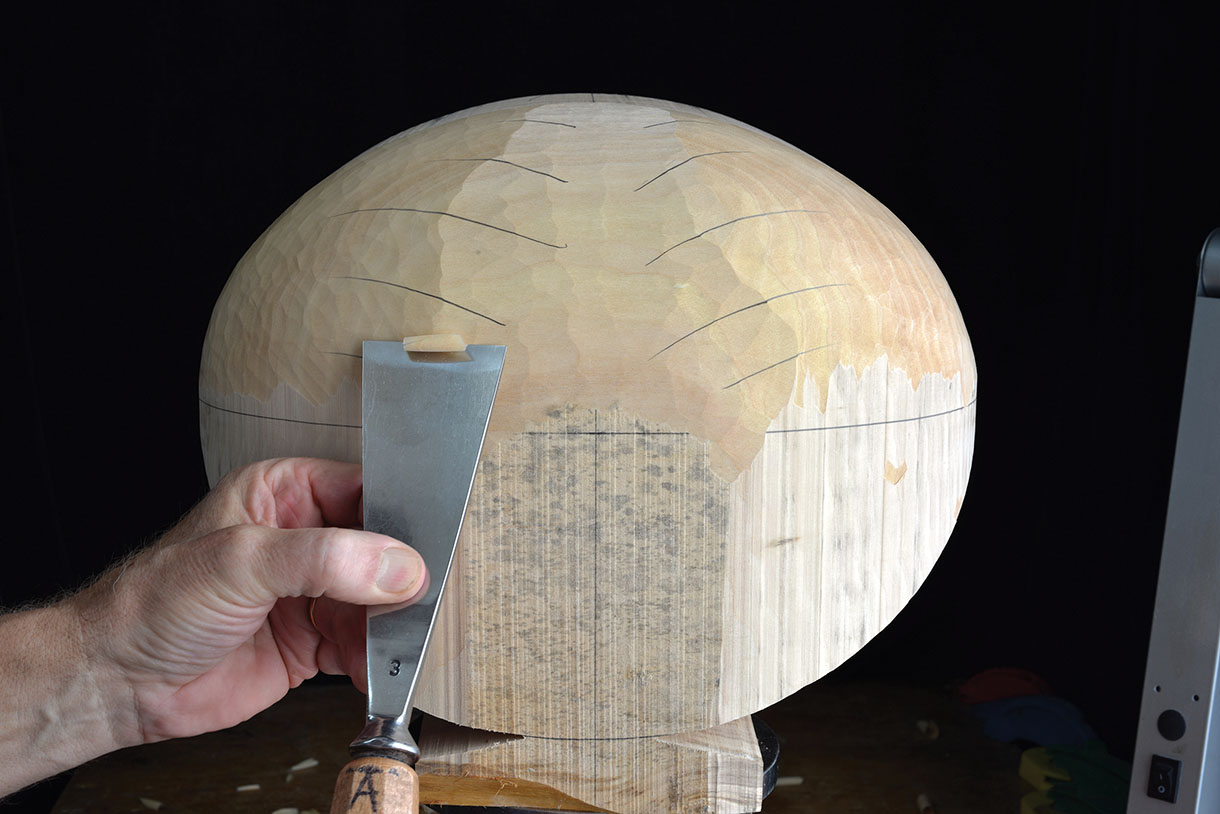
3. The surface either side of this cut will then need to be carved evenly across into the surrounding areas. When completed, the surface of the section should flow evenly from one end to the other, with no peaks or undulations
4. Repeat steps 2-3 on the opposite side to produce a symmetrical curve from centreline to centreline. If you have difficulty verifying the symmetry of this upper side, then use a profile gauge to assist you
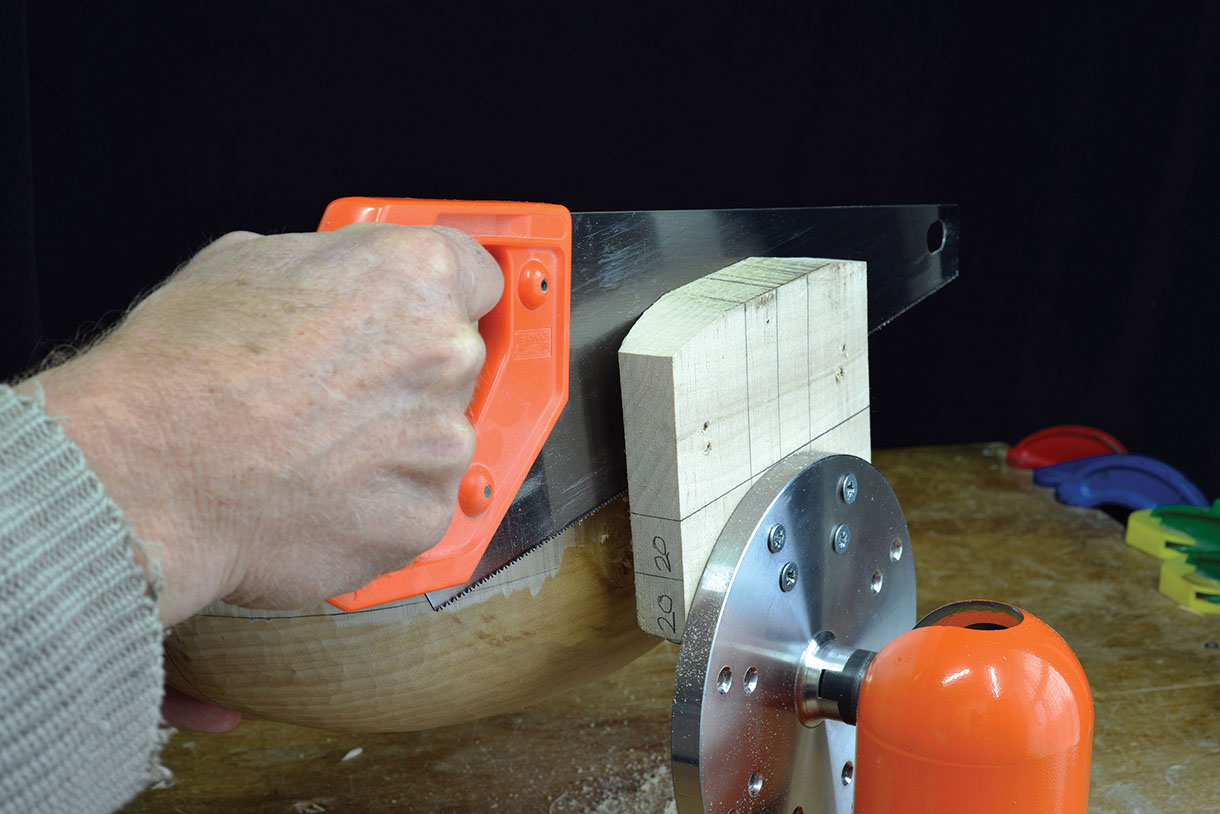
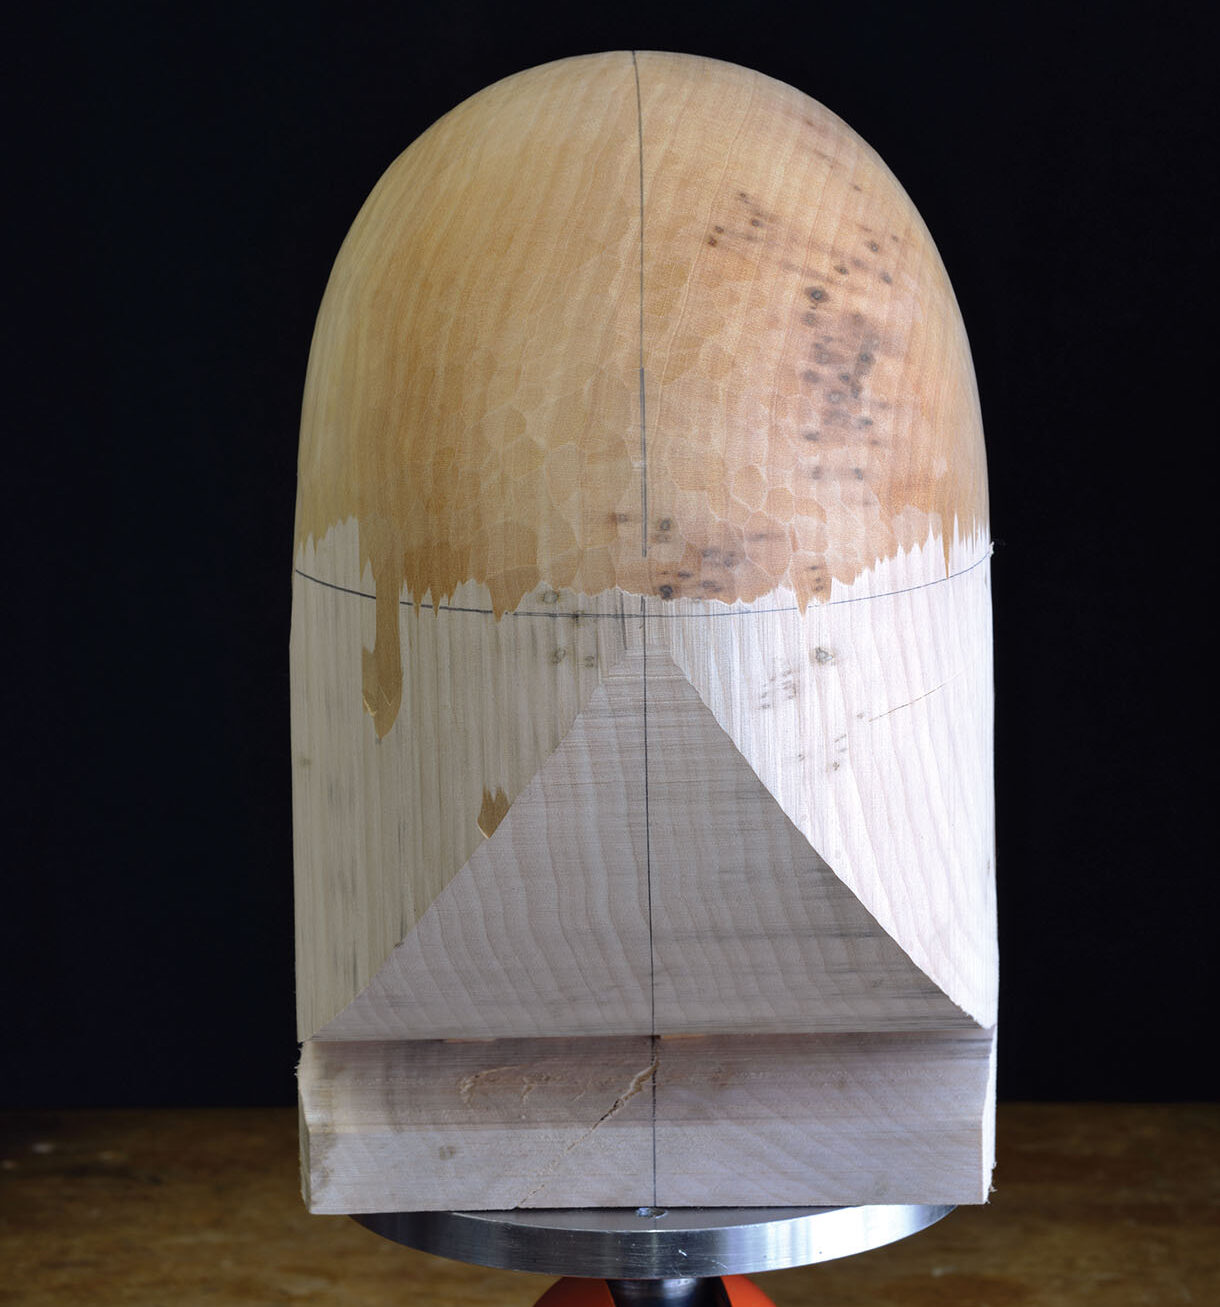
5. Next, we move to the lower half of the sculpture. To facilitate an easier working access to the underside of the form, a section of the faceplate base can be removed from both sides of the centre. Measure 20mm out from the centreline; mark these positions on both sides of the base and along the underside of the wood. Use a saw to cut a few millimetres below the sculpture design line until you reach the 20mm mark. Then cut along the line on the underside of the base to meet up with the previous cut, and remove the waste
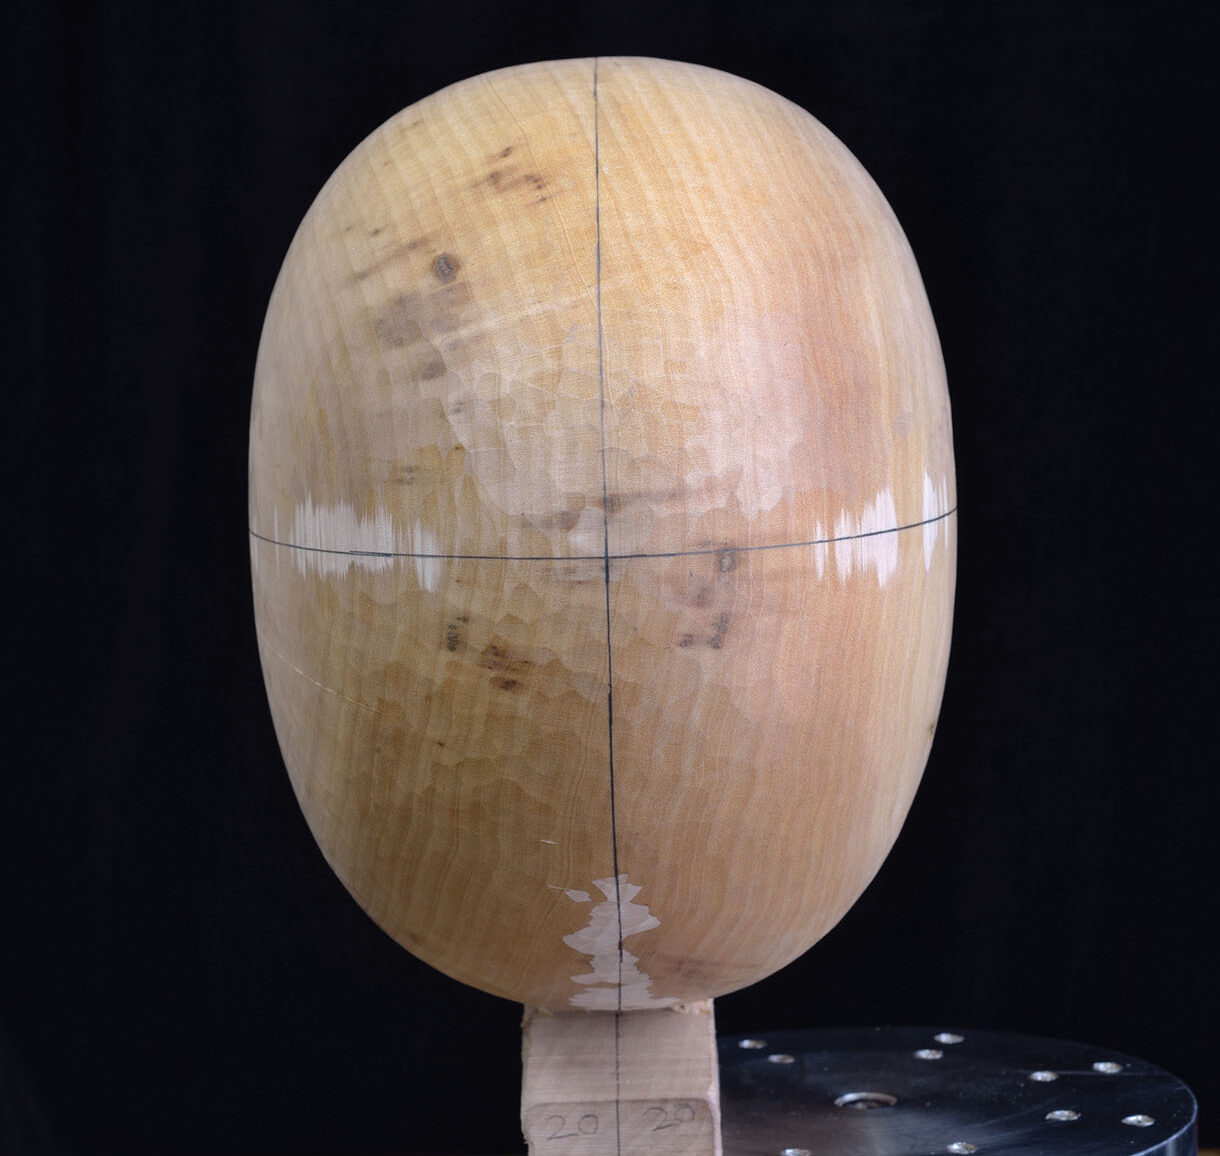
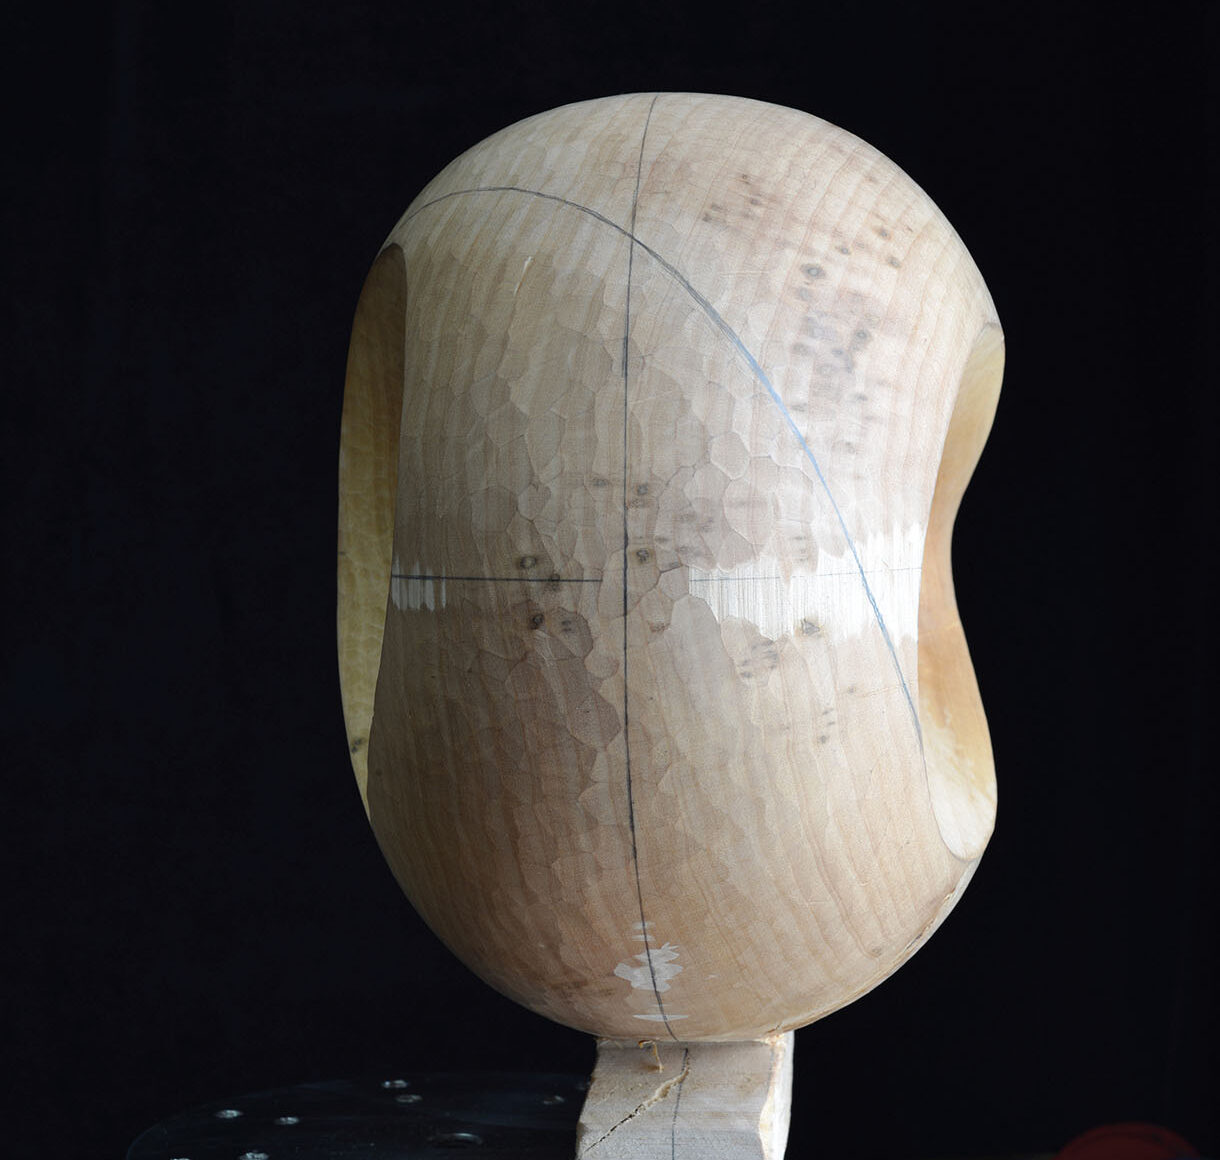
6. Use the same steps as outlined above to carve the lower section, uniformly in relation to the curvature of the upper one
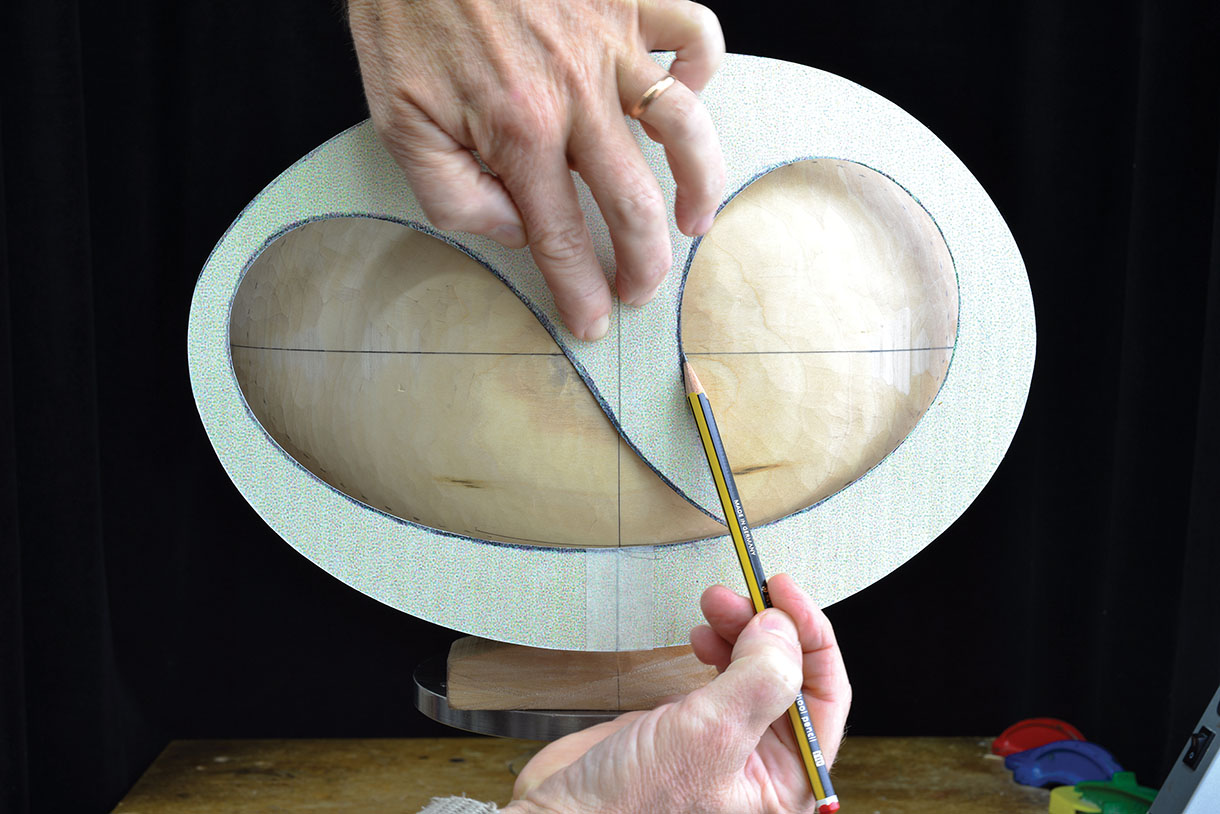
7. The second stage of the sculpture is creating the hollowed and pierced inner sections on the front and back of the form. Using the templates to assist you, transfer the lines of the inner sections on to the front and back of your wood
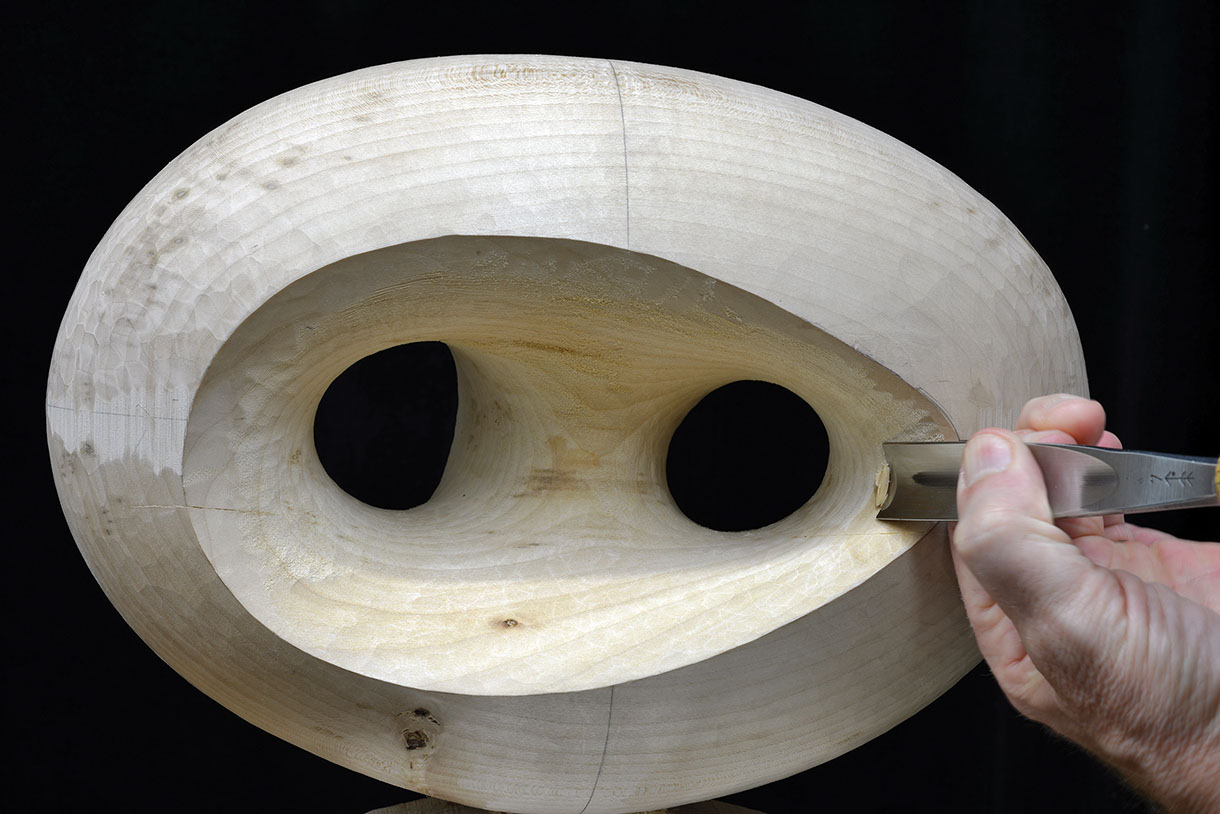
8. Use a No.7, 20mm to accurately carve all the way around the inner edge of the design line, towards the centre of the section, as deep as the tool will allow you go. At the central lowest position where the angle becomes tighter, use a no.9, 10mm to hollow this area
9. Before carving the inner section on the rear side of the sculpture, the two piercings can be made with a drill and 16mm brad toothed bit. Measure and mark on your wood the central vertical position of each section. Then measure out 60mm from the centreline and mark this position on each section. Place the drill in these positions and angle the bit so that it exits the wood in the approximate centre position at the rear
10. The left side hole from the rear view should be slightly higher than the right side, but there is plenty of scope to modify this area of the design should the reader wish to do so
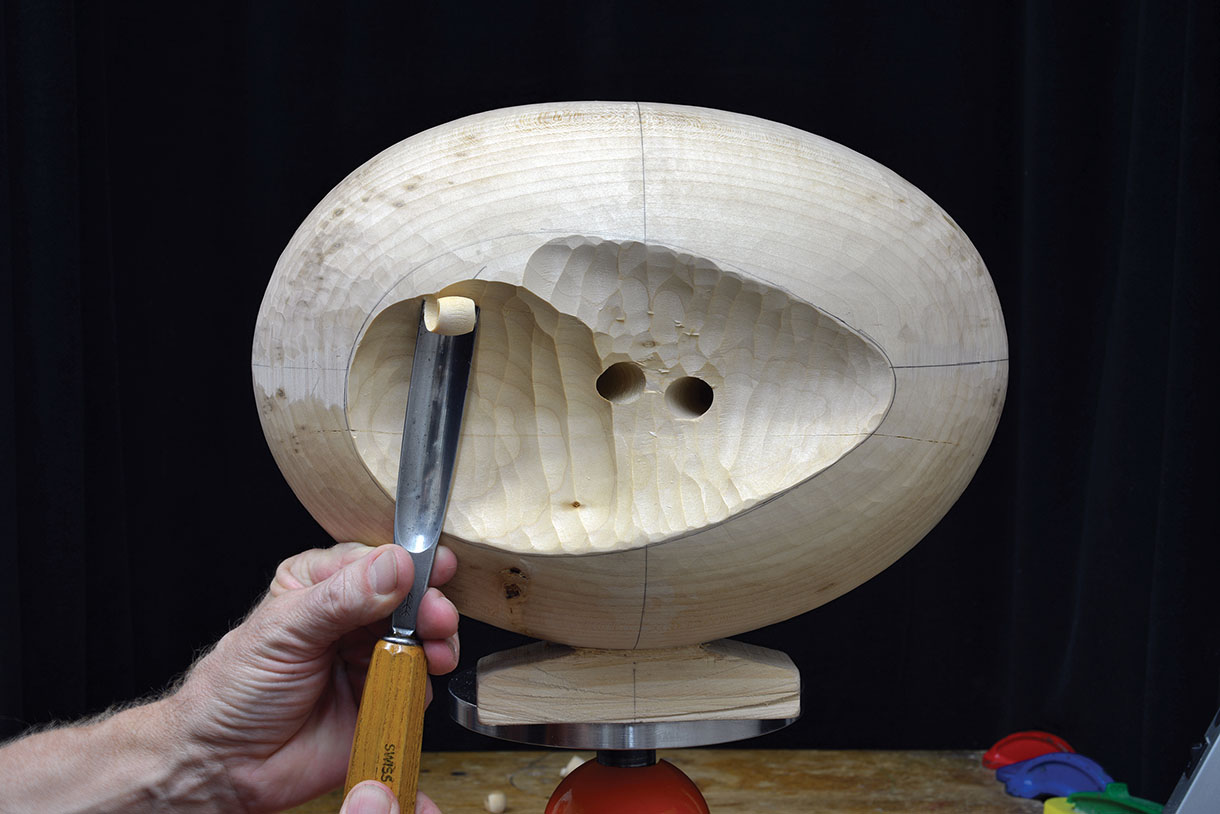
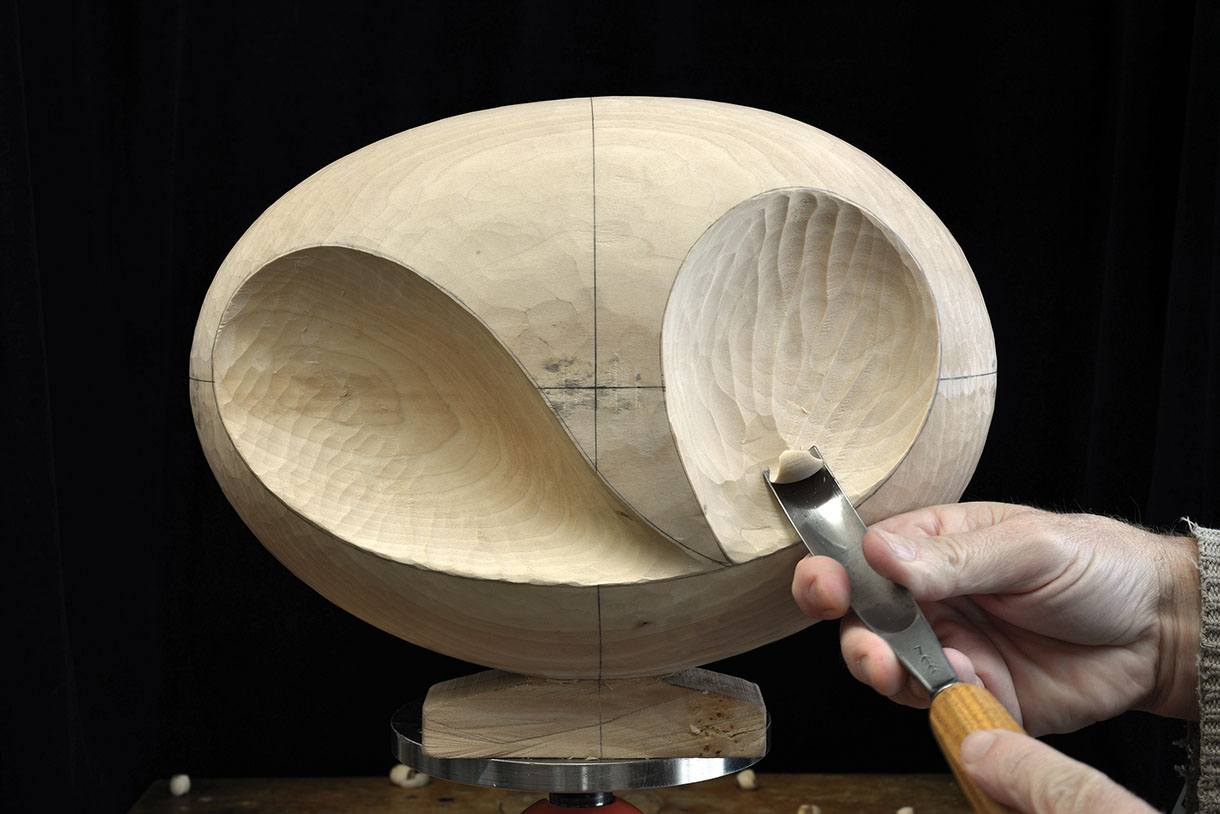
11. The rear section can now be hollowed using the same technique as outlined in step 8

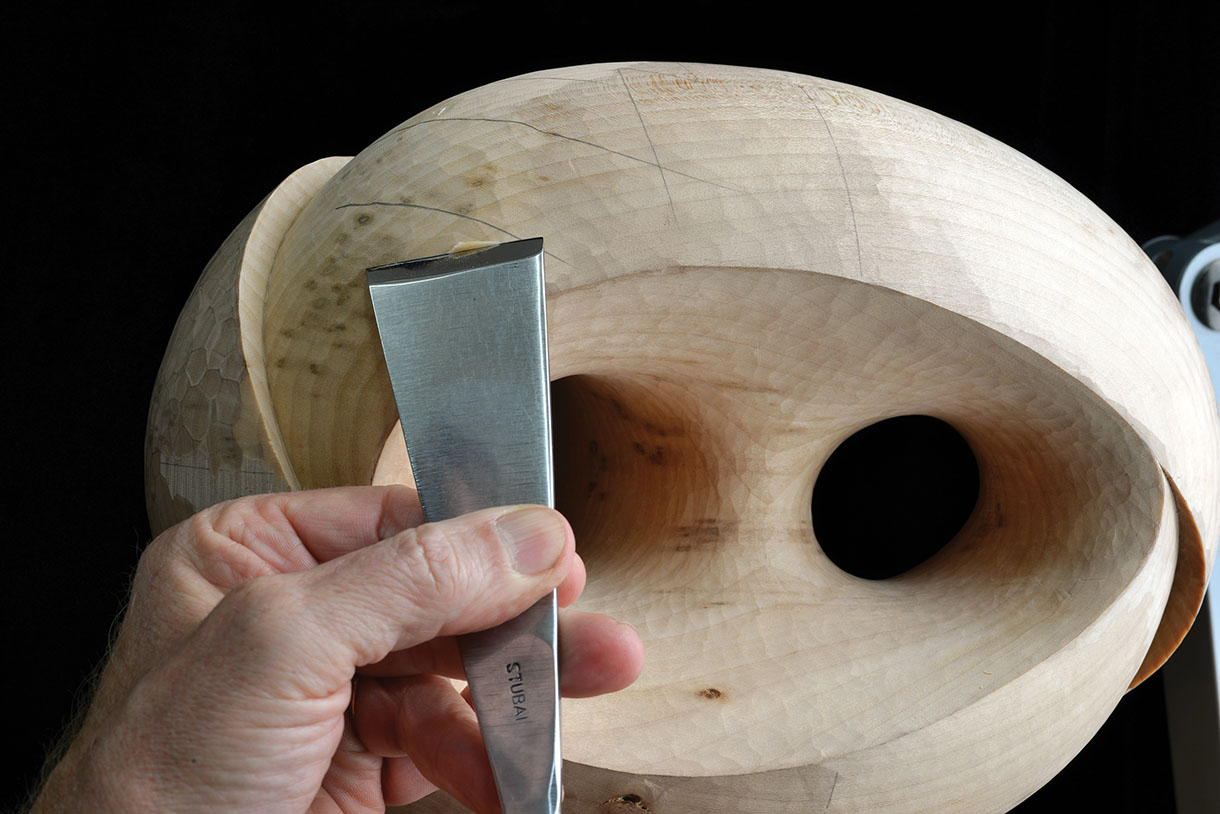
12. With the front and rear sections now delineated and drilled, the next job is to gain extra depth down into them. Use a combination of the no.9, 10mm and no.9, 13mm, working around the surface of both sections into the holes, gradually working your way to the centre of the form
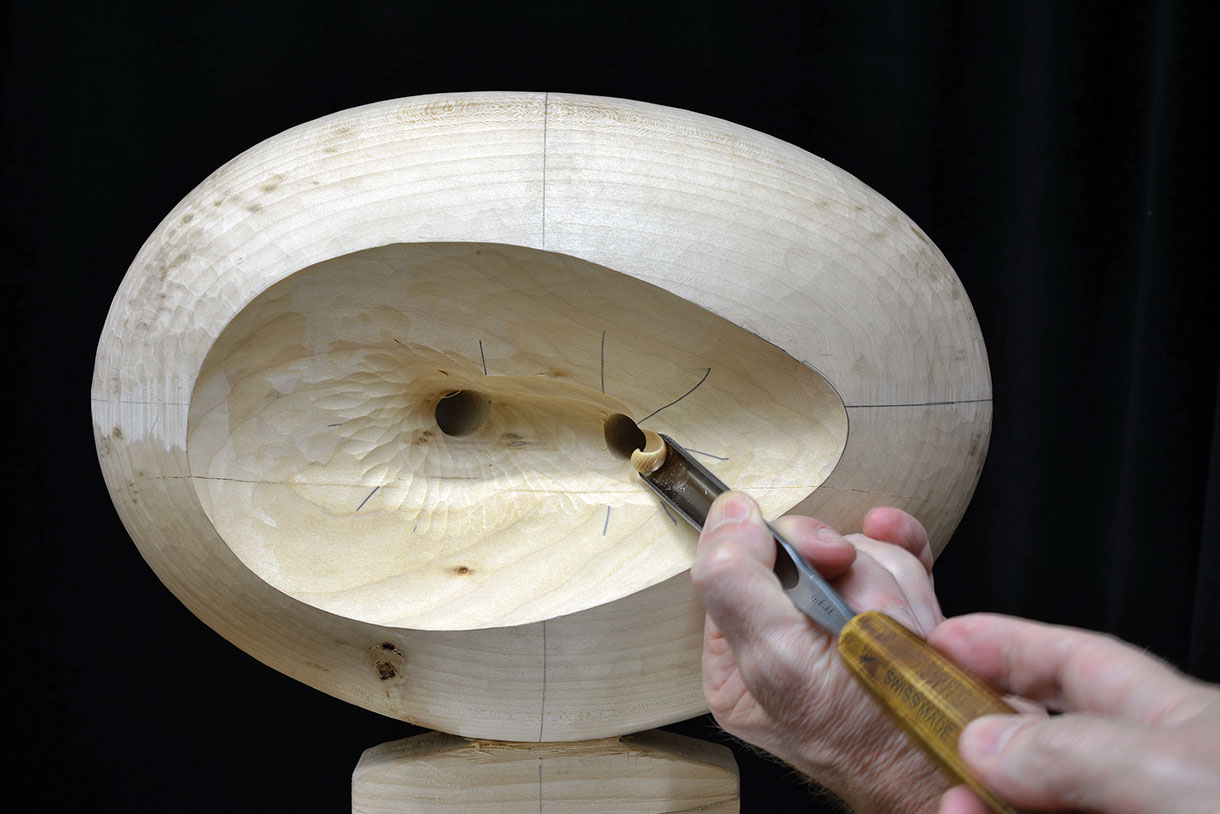
13. Do the same on the rear side, ensuring that you keep the depth of the surface even
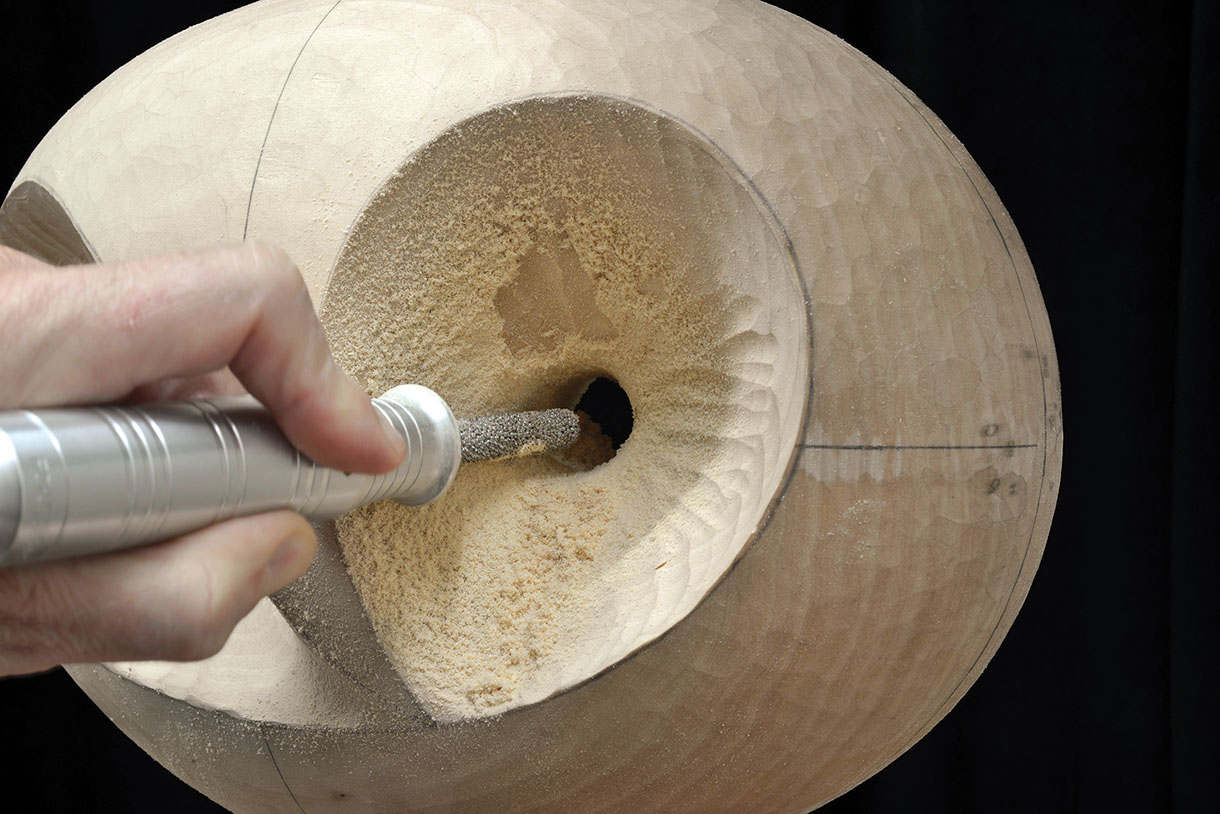
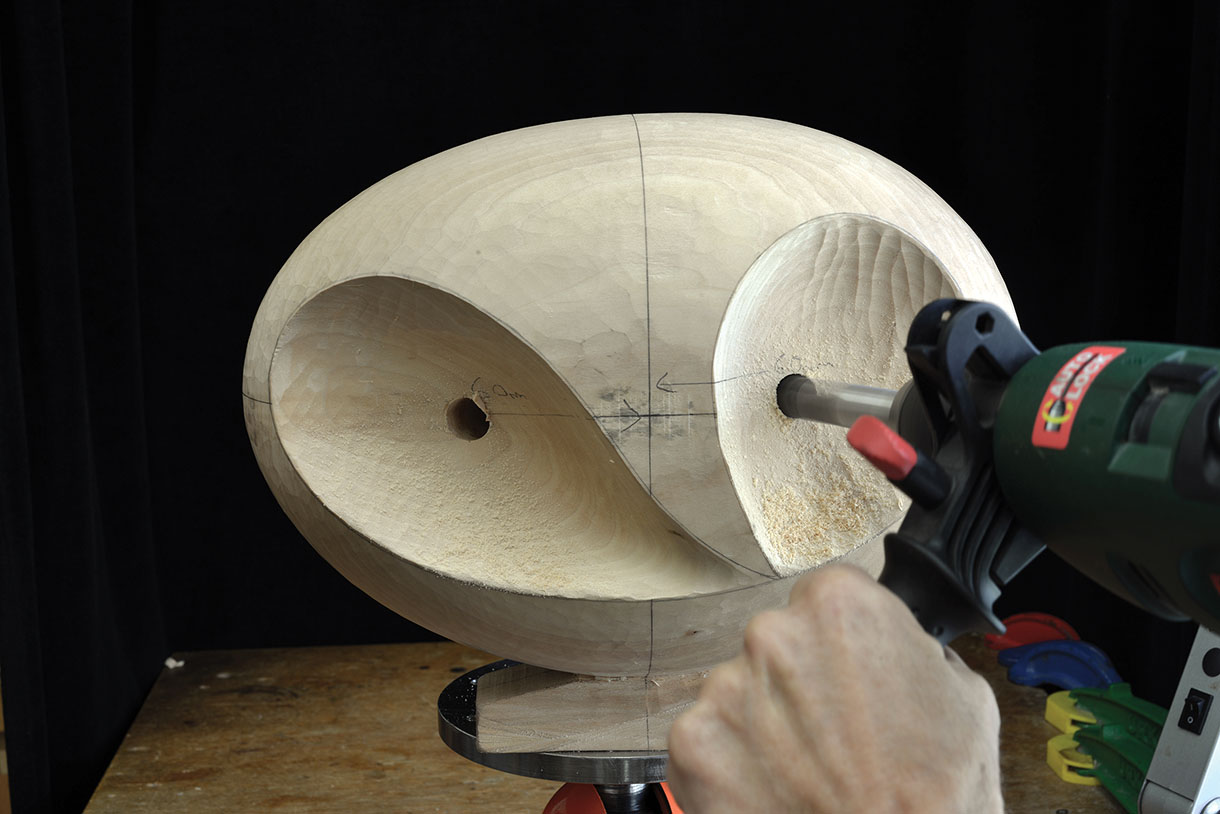
14. At this stage of the carving, it is far more effective to swap to the use of rotary carbide burrs if you have that option, as these are perfect for hollowing and expanding the size and shape of the piercings. If you don’t have this option, then the same can be achieved with the no.9 gouges. Start by using a 45 x 8mm bull nose tooth burr on the flat side edge, working carefully around the hole to expand its diameter

15. Then turn the piece around to work on the rear side of the holes, using the same technique to increase their apertures. Repeat steps 14 and 15 until they are approximately 35mm in diameter
Top tip: I must emphasise at this point that the 20mm wide bull nose tooth burr is a very aggressive tool to work with and will give an almighty kick in the blink of an eye if it is worked into a hole or hollowing anywhere near its own size. Always open out any holes or hollows initially with either gouges or the 45 x 8mm bull nose tooth burr first before using this cutter.
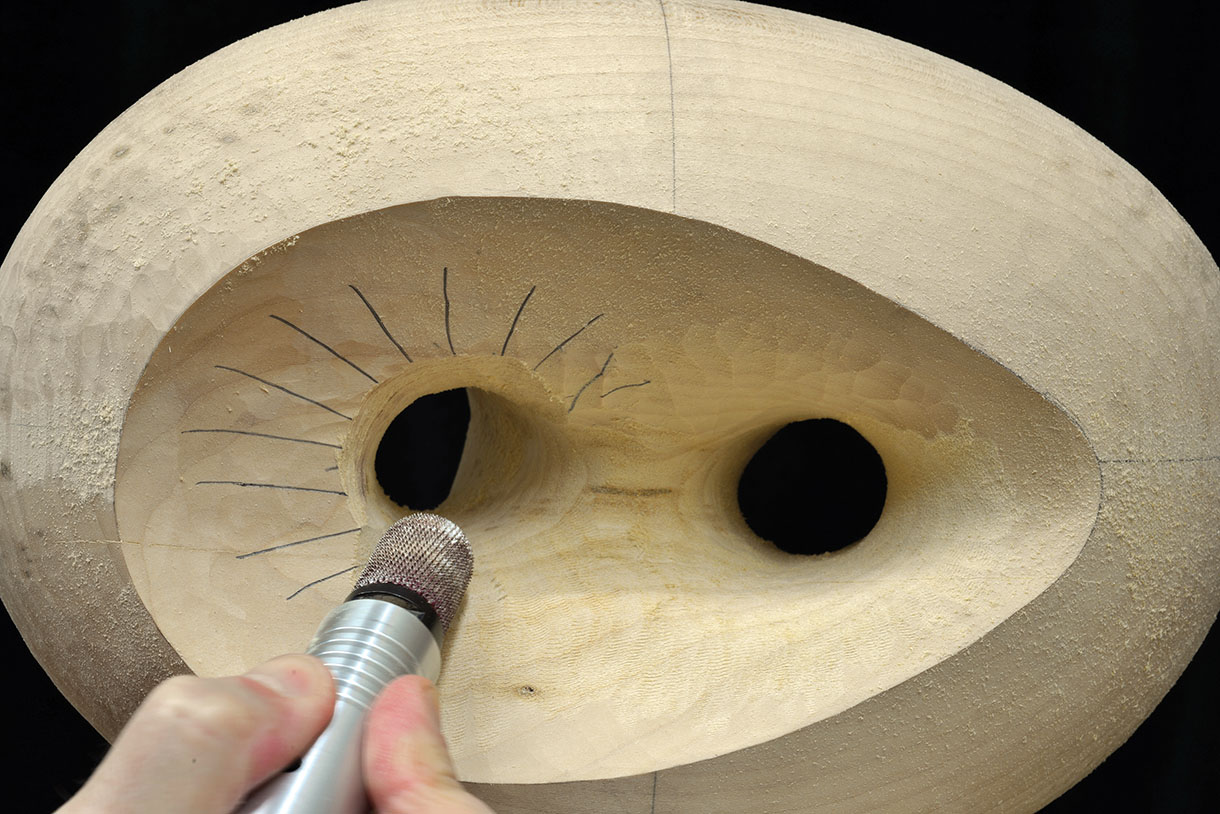
16. Now swap over to a 30 x 20mm bull nose tooth burr and work extremely gently around the edge of each hole, front and back, gradually increasing their diameter and blending the surrounding depths evenly together. From the front view, the left hole should be finished larger than the right one, at approximately 50mm at it widest point. The right one should be around 40mm. These can be made either circular or elliptical
17. When the carbide burr work is complete, the surface of the inner sections will need to be skimmed over with the no.7, 20mm gouge to eradicate all of the marks left from the burrs and to create an even depth across the surface from one side to the other
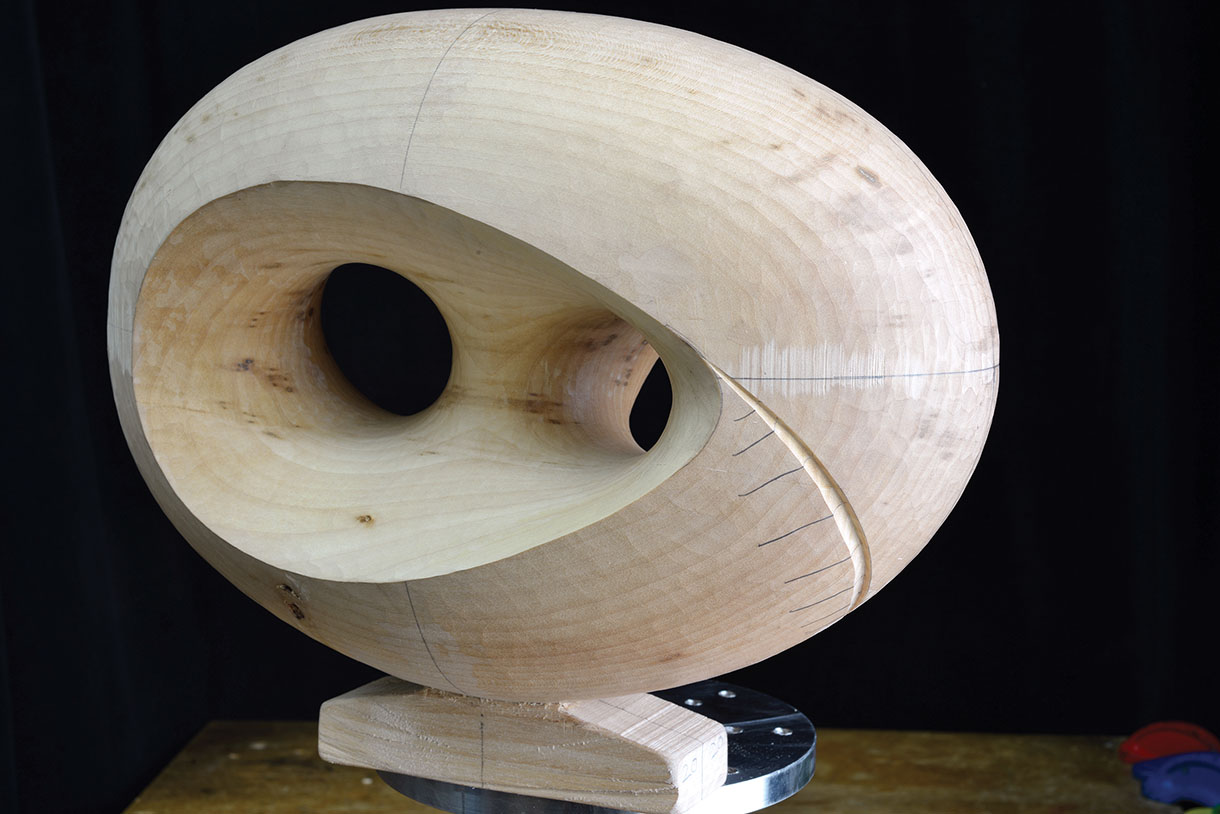
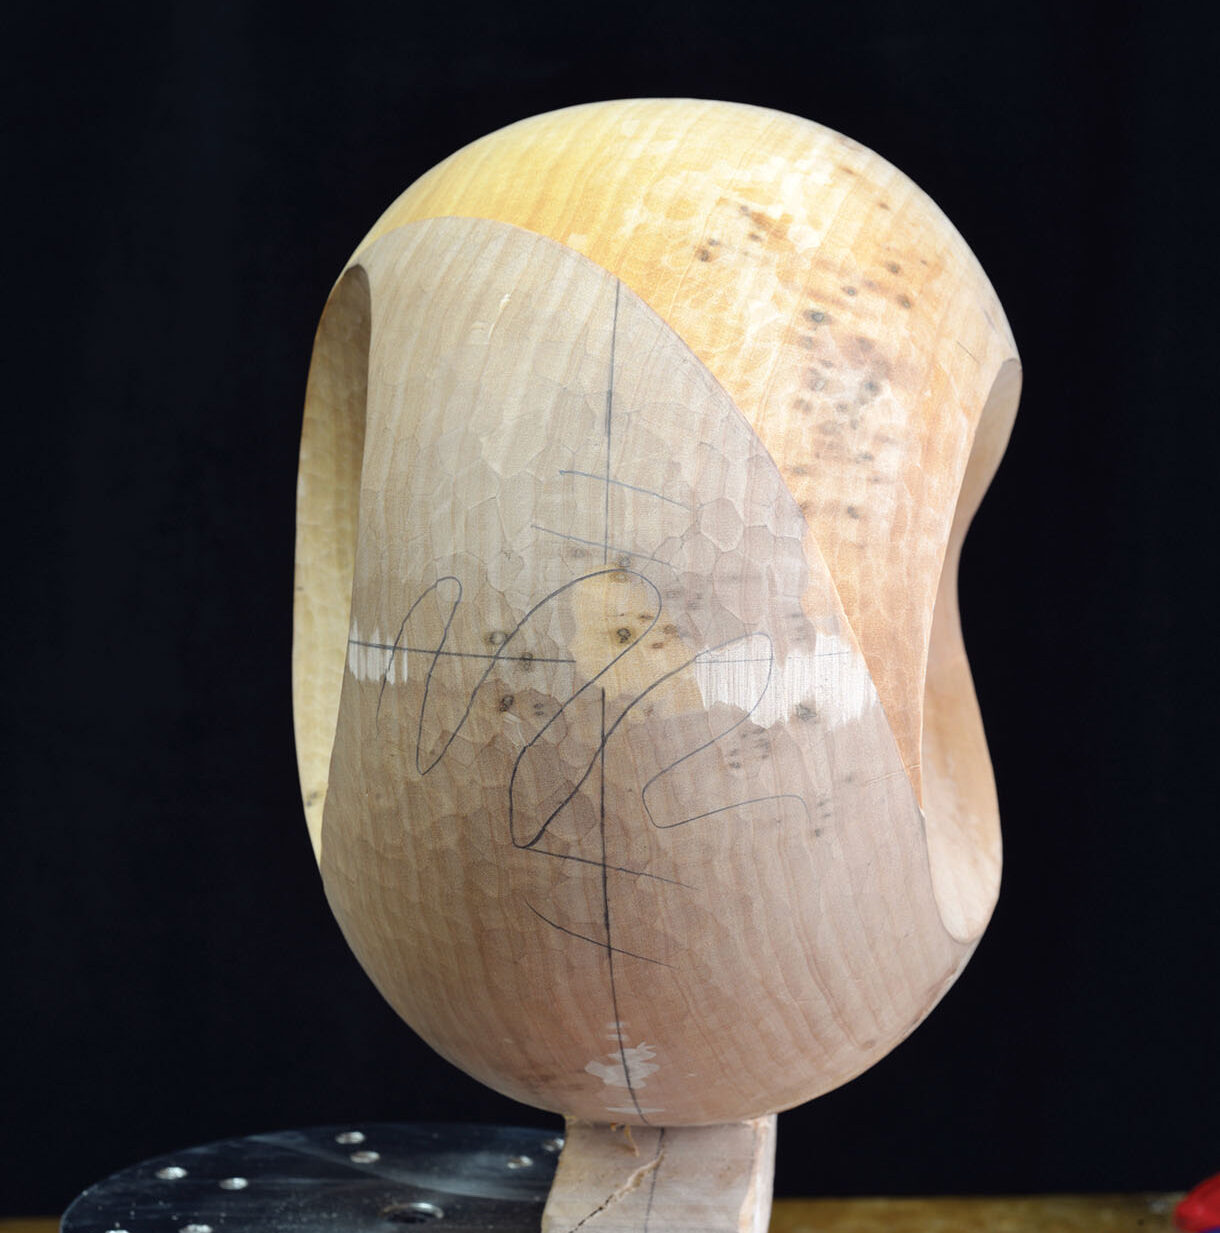
18. The third stage of the carving is to create a break in the depth of the outer surface on both sides of the sculpture. First, draw a design line that flows naturally from the corner of the inner section on the rear of the form, down underneath and about 30mm past the centreline. Use a no.12, 6mm V- tool to carve a channel along this line
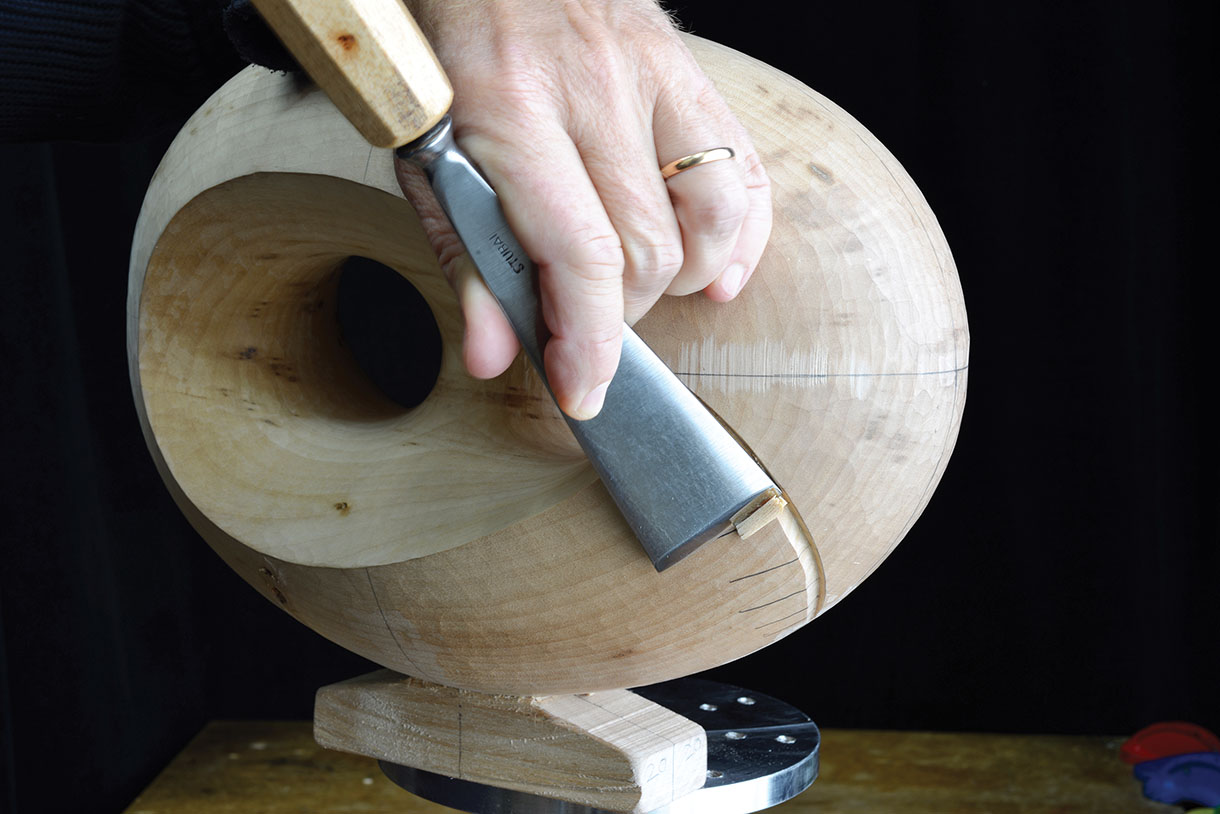
19. Then use the no.2, 40mm to pare the wood back along the lower edge into the V tool channel. Repeat steps 18 and 19, gradually increasing in depth across the surface until you reach 8mm in the centre
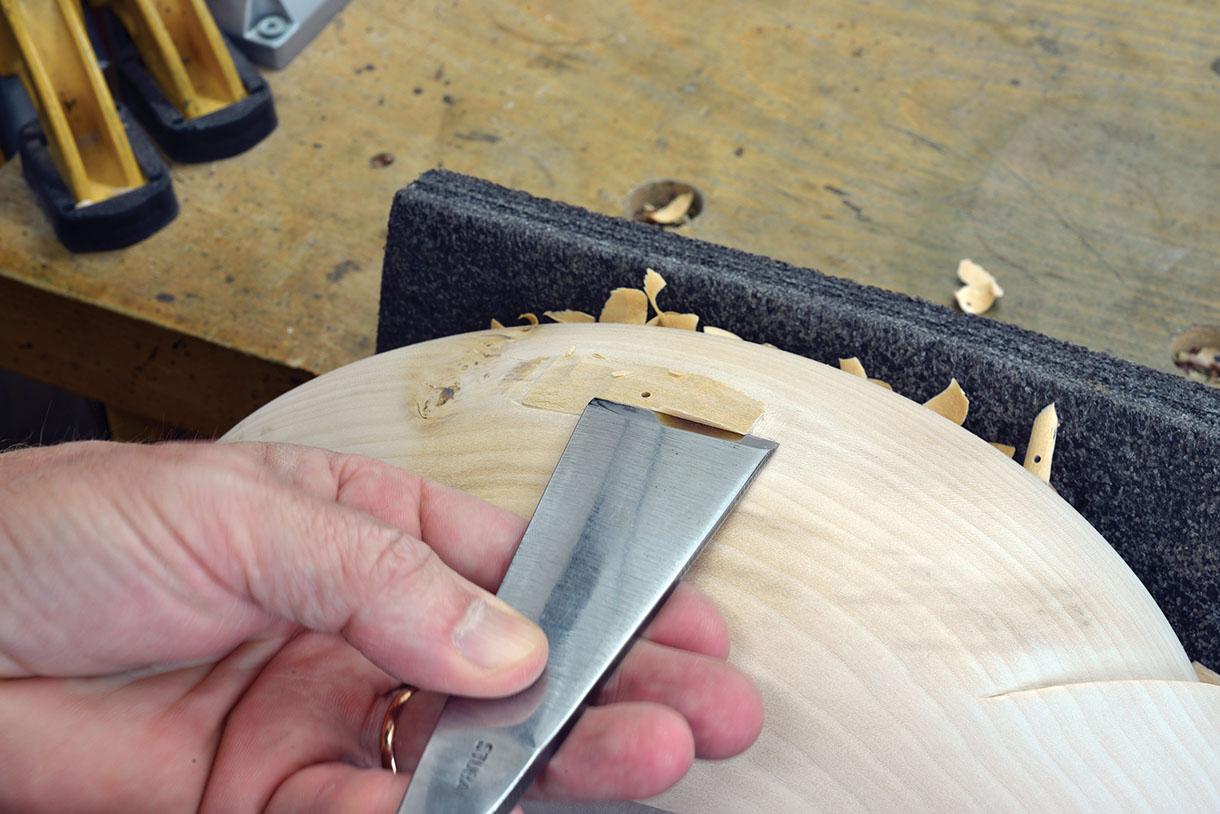
20. The flat edge created will then require squaring neatly in the corner. Use a razor-sharp knife to cut a slice deep into the corner. Then use a no.2, 10mm to pare the depth evenly along the edge and flush into the knife slit, producing a sharp inner angle
21. The area above this detail will now need to be shaped so that the contours flow evenly from front to rear, and down along the side. Use the large no.2 gouge to achieve this
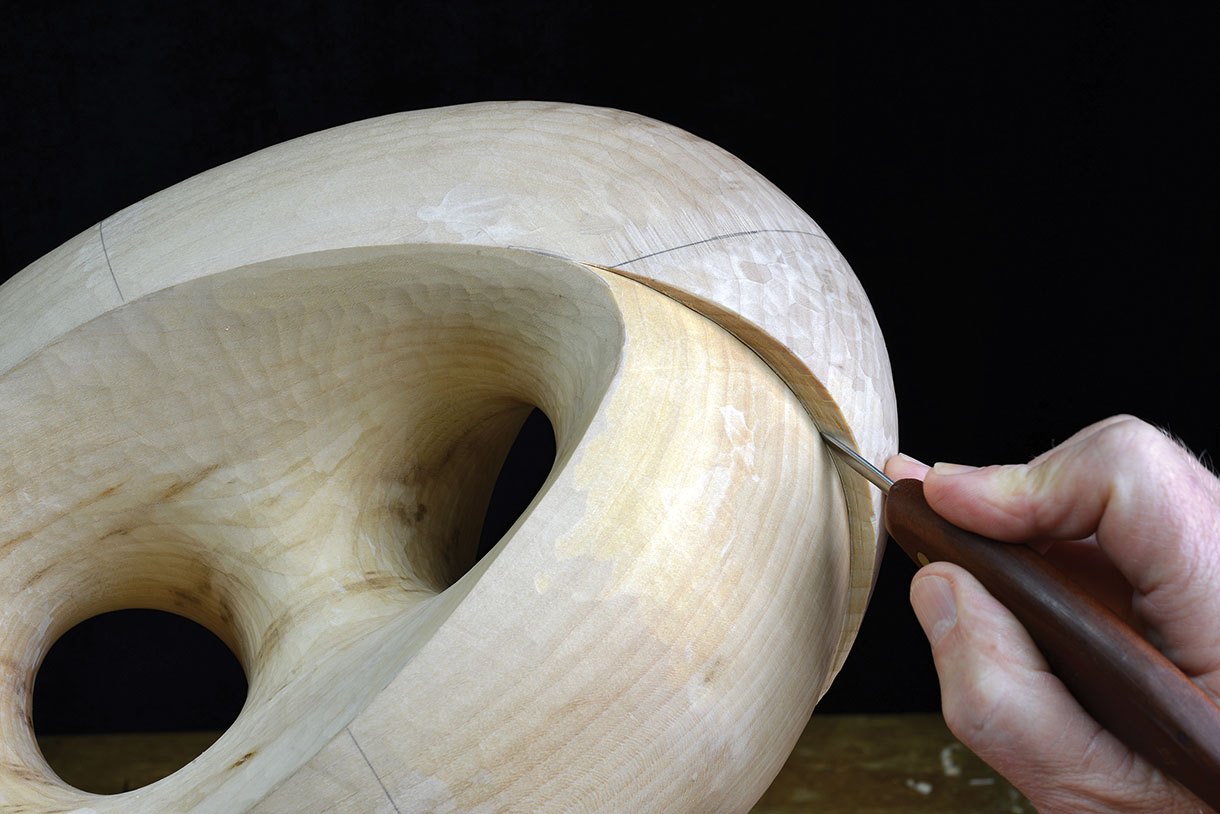
22. The opposite end is slightly different in its design. This line here flows from the top of the right inner section, around the side and down to join the inner section on the rear side. Draw this on to your form
23. Use the same techniques as outlined in steps 18 to 20 to produce the detail, but this time pare the wood away from above the V tool cut. The area to the right of this detail will then need to be evenly blended across the sculpture
24. The centre of this side, directly below the detail just carved, is the final area of the sculpture that needs shaping before sanding. Use the no.2, 40mm to pare back the peaked mass in the centre so that it flows more naturally in relation to the profile of this edge
25. Starting with 100 grit, work over the complete form, following the line of the grain wherever possible to remove all tool marks. Dust off the surface then brush or pour hot water over the complete carving and leave it to dry, thus raising the grain and allowing the following grit to be worked more easily and effectively. Next, work through 150, 240 and 400 grits, removing all of the scratches from each previous grit and repeating the hot water process in between
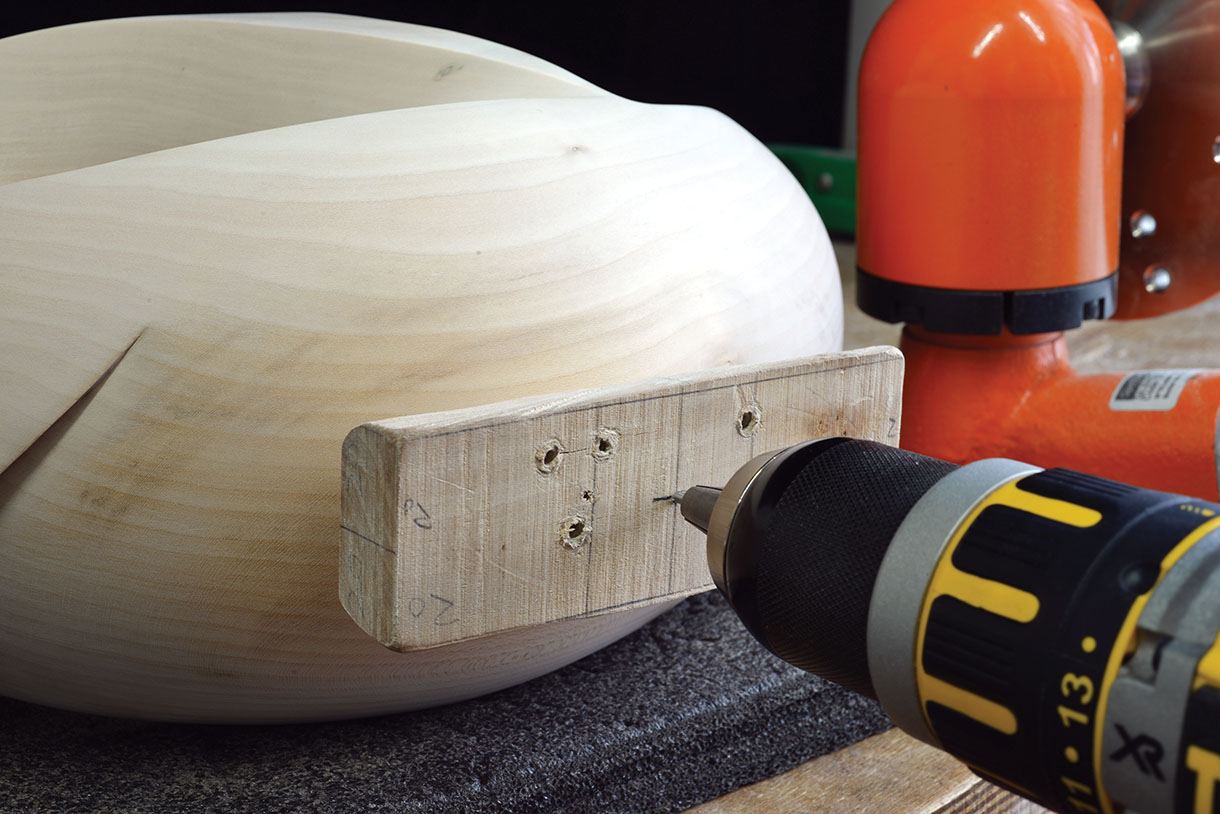
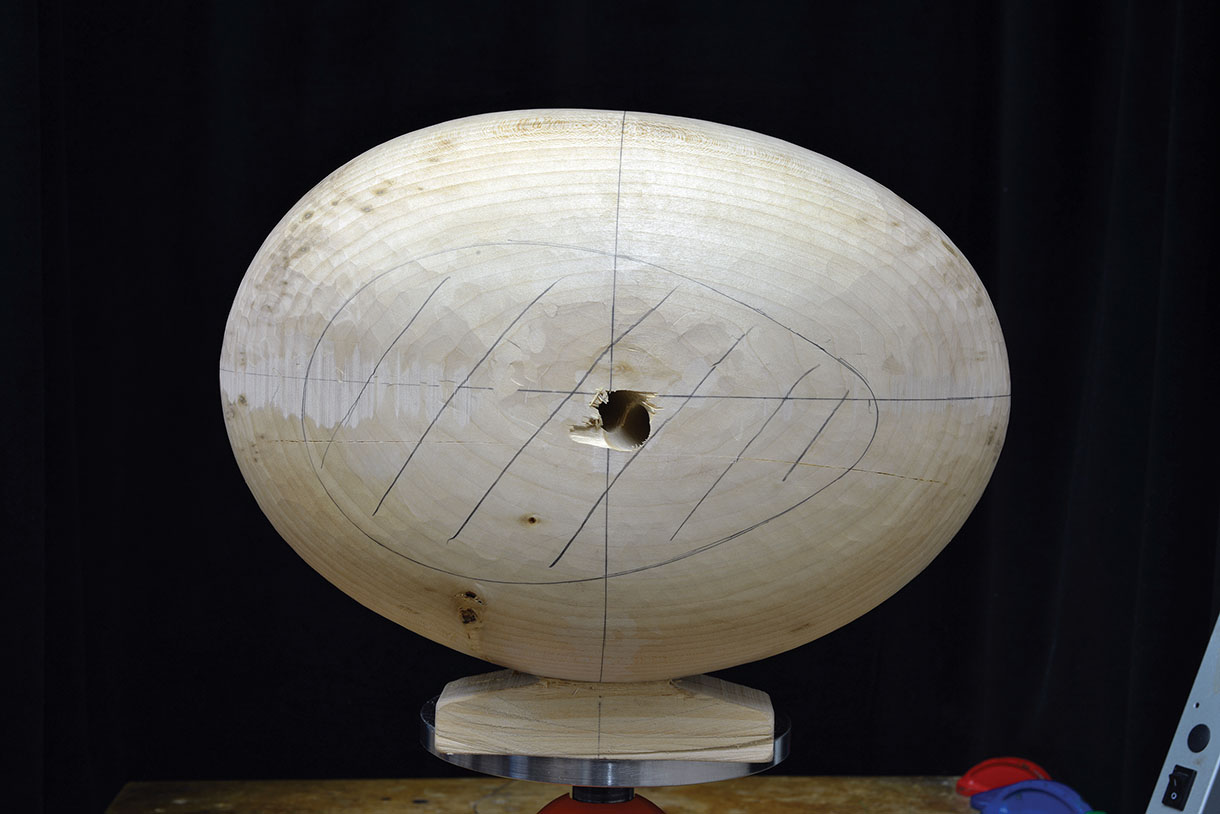
26. Before the base is removed, it is wise to make a small hole in the very centre of the block where the sculpture will be attached to the base. This will ensure that the piece will be perfectly positioned when mounted. Use a 2mm drill bit, making sure that it is goes level through the block into the sculpture, to a depth of at least 10mm. Now cut the base off
27. Use the no.2, 40mm to tidy up the lower edge, and then sand through the various grits as outlined above

28. The inner sections of the sculpture were finished with Rustins two-part wood bleach, which creates an effective contrast to the natural colour of the wood around the surface. Part A was applied first and left for 20 minutes to react, which turns the wood a darker colour
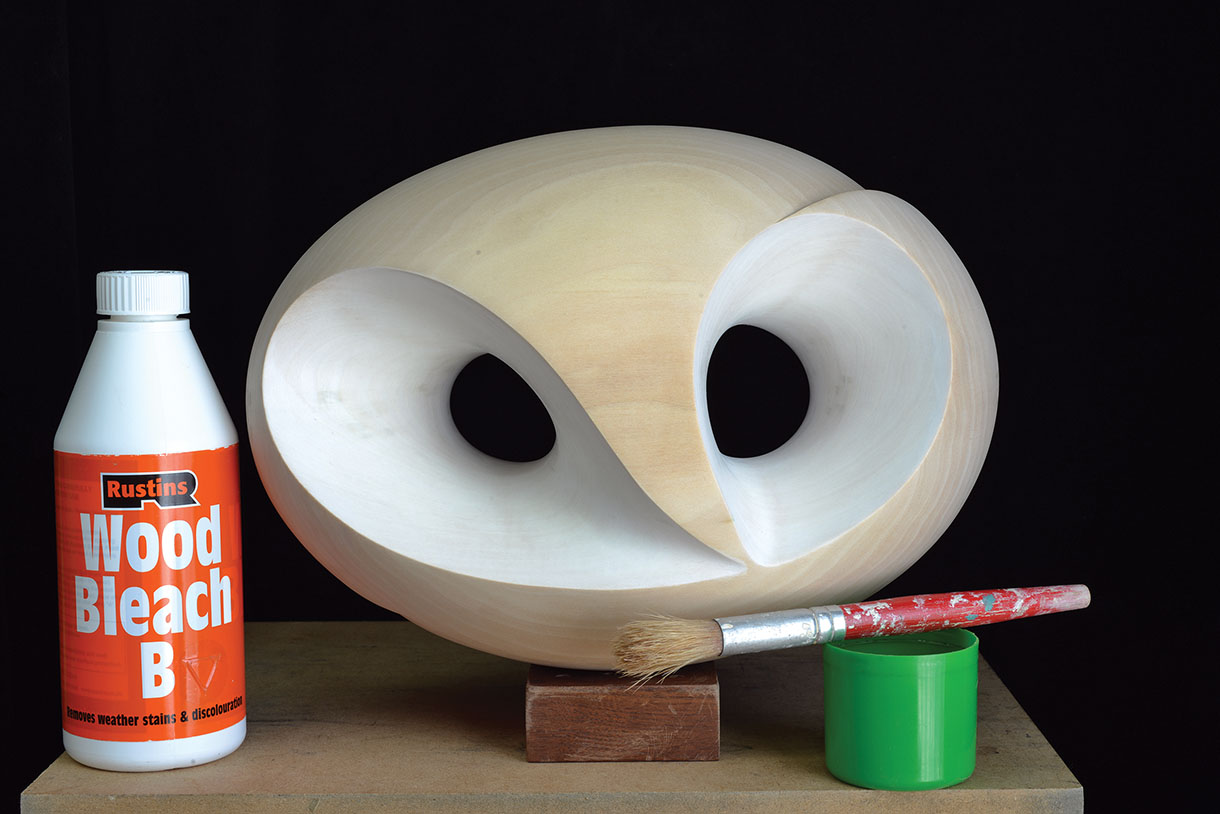
29. Part B was then applied and left for two hours, which lightened the wood. Parts A and B were then repeated three times again to produce the desired finish. The complete sculpture was then polished with several applications of clear wax

30. The base is shaped by simply curving the entire surface from the centreline evenly down to the edges. A 4mm hole is then made in the centre to attach it to the sculpture
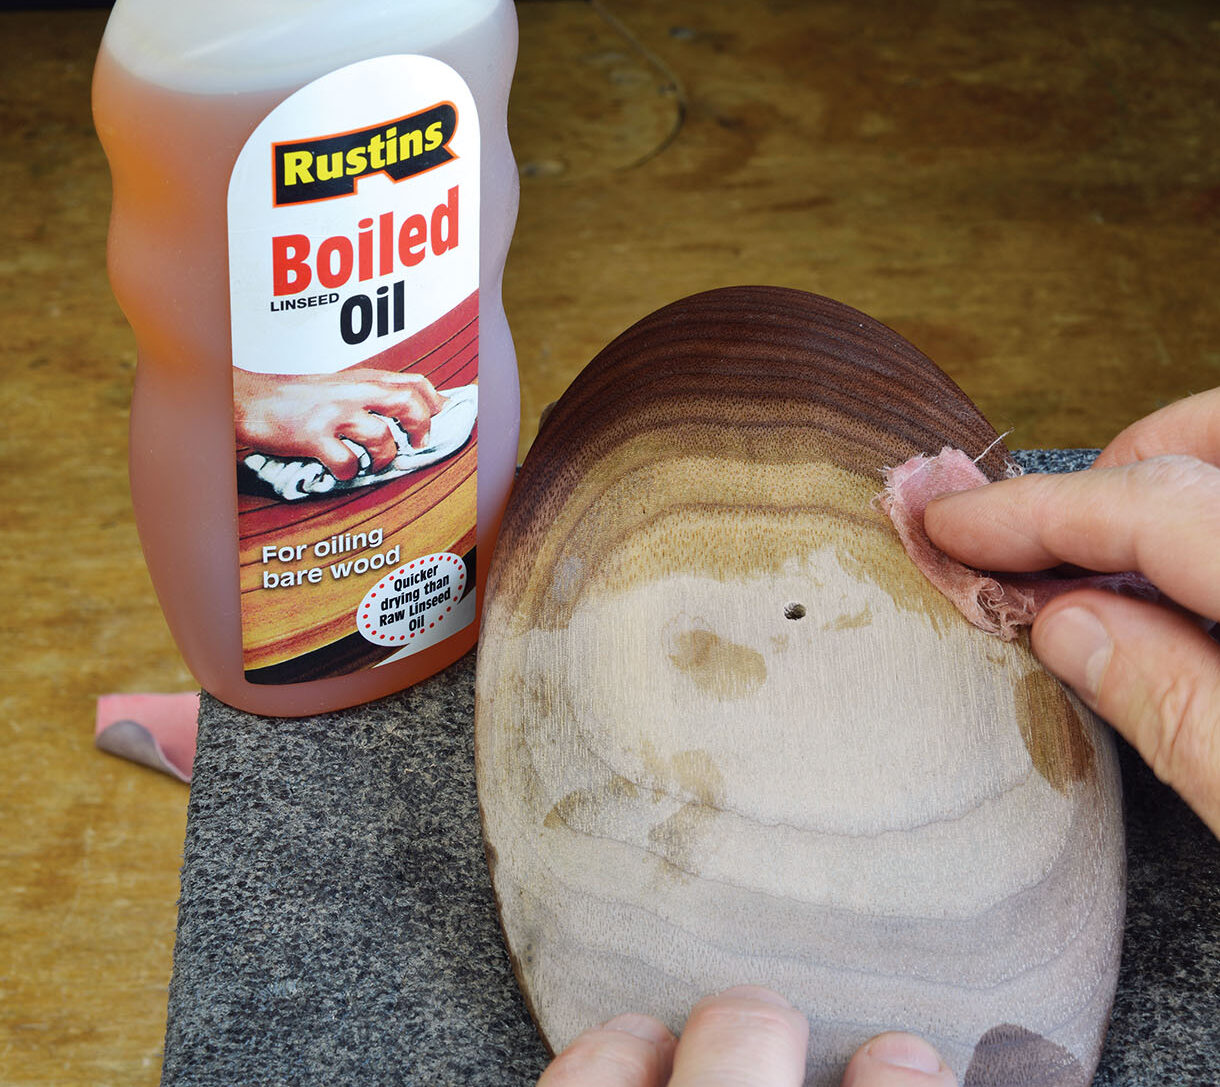
31. The example used for this project was finished with one good application of boiled linseed oil, which beautifully enriched the natural colour of the grain. This was left for a week or so to dry before applying several coats of dark wax polish

32. Here is the finished shot of the reverse of the piece


