Oak Side Table:
Colwin Way combines spindle turning, faceplate work and joinery to make this handy side table
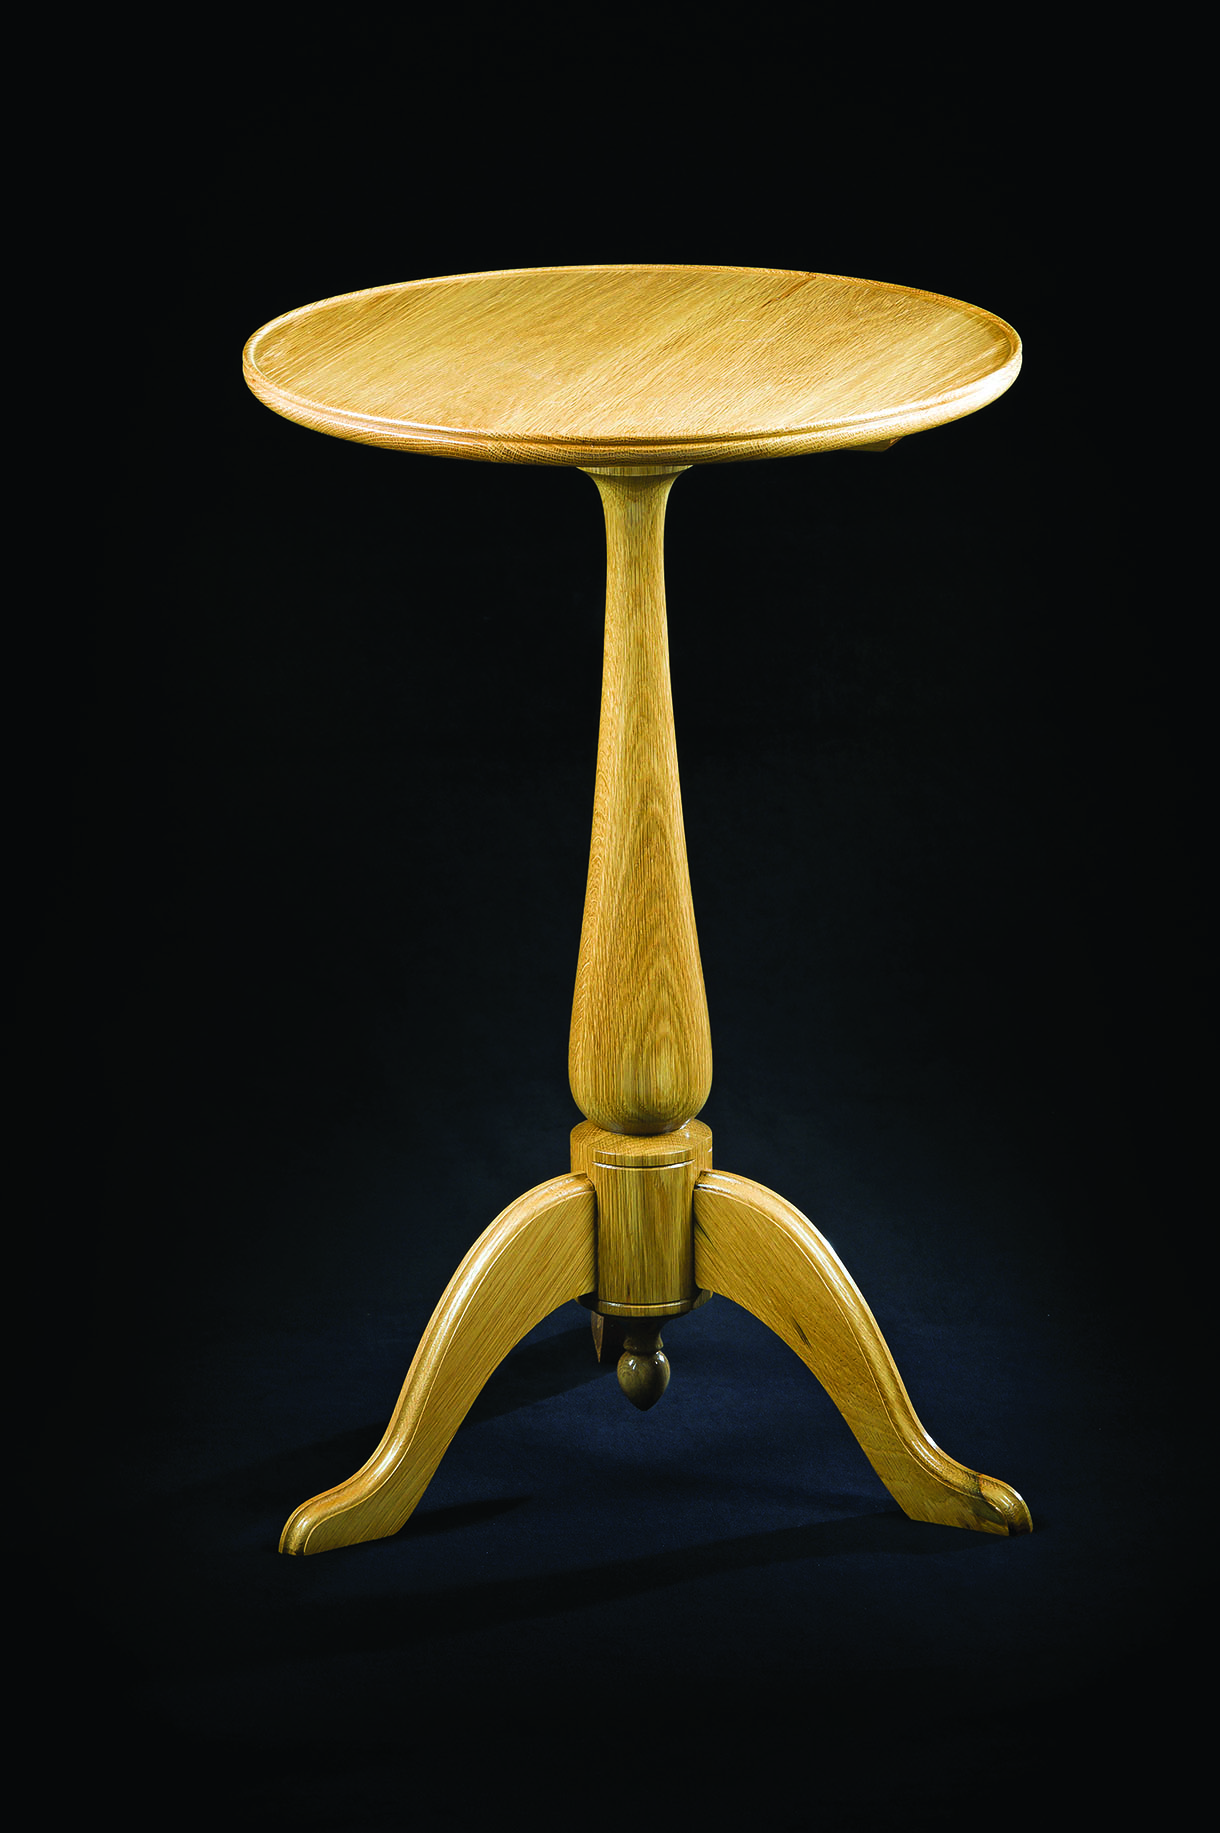
Colwin Way combines spindle turning, faceplate work and joinery to make this handy side table
Plans and equipment
Preparing the timber
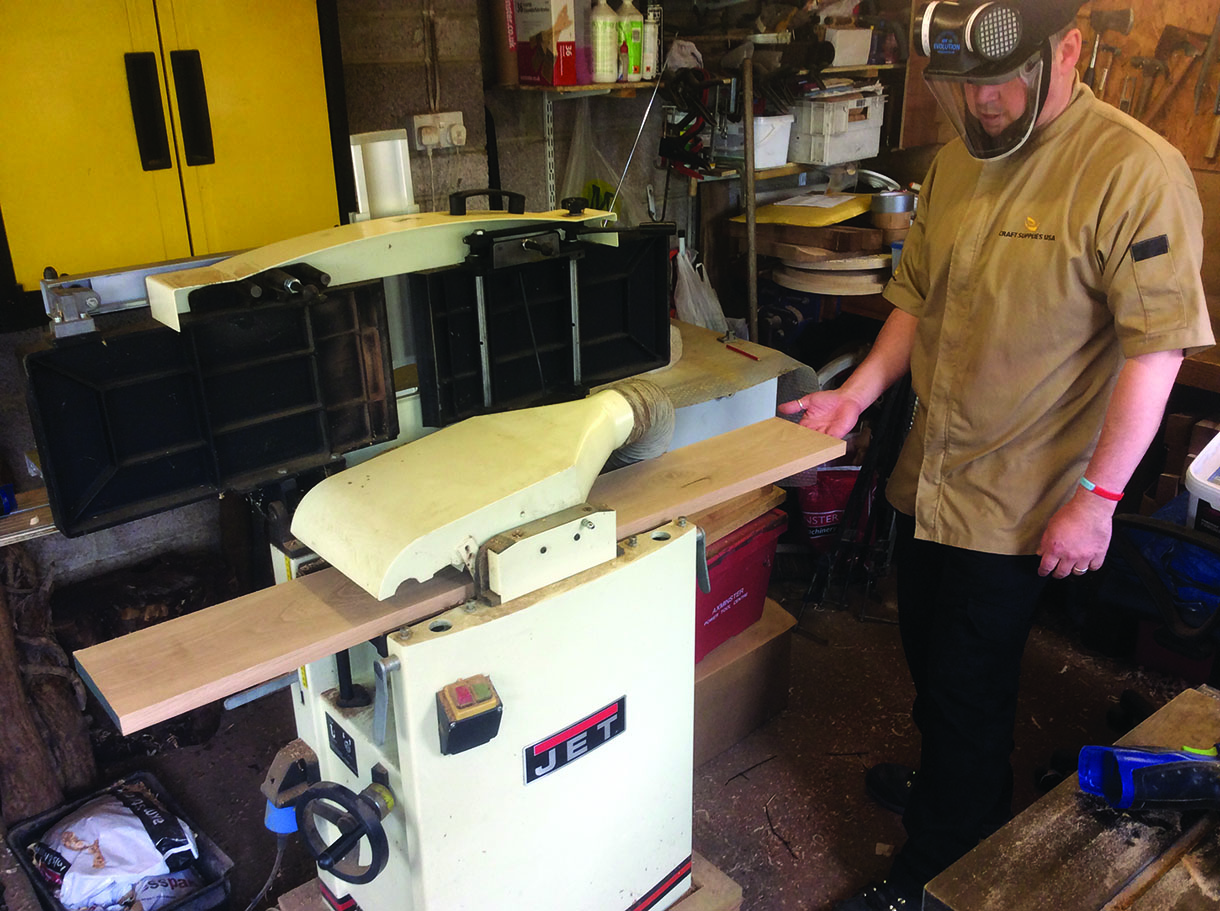
1. I prefer to buy rough sawn timber and prepare it myself, however if you don’t have access to a planer/thicknesser then most timber yards offer a planing service. I’ve already surface planed one face of my boards and am now thicknessing down to my desired thickness. After planing and thicknessing, true the edges to the faces to make sure the boards are perfectly at 90° to the face. This is absolutely key when gluing up several boards together to keep them flat
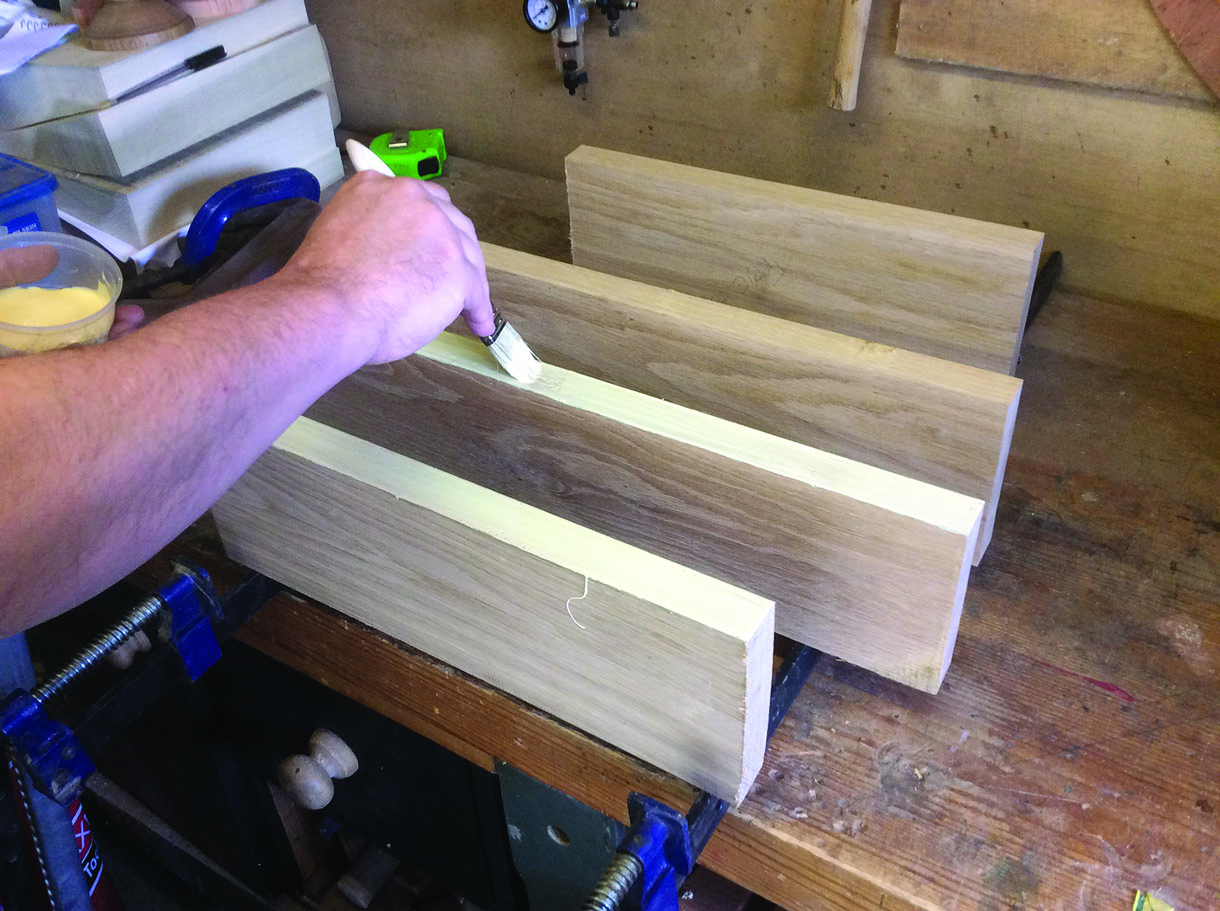
2. When everything has been prepared and the edges are true you can start the gluing up process. First, however, dry fit everything together and adjust any clamps ready at the right position to start clamping, this will save time and mess when the timber is covered in glue. Paint the glue onto the edges, wiping off any excess as you go, then lie the boards down and position them together. Tighten your sash clamps slowly doing a turn on each to avoid slipping. Keep an eye on the boards to make sure they stay flush
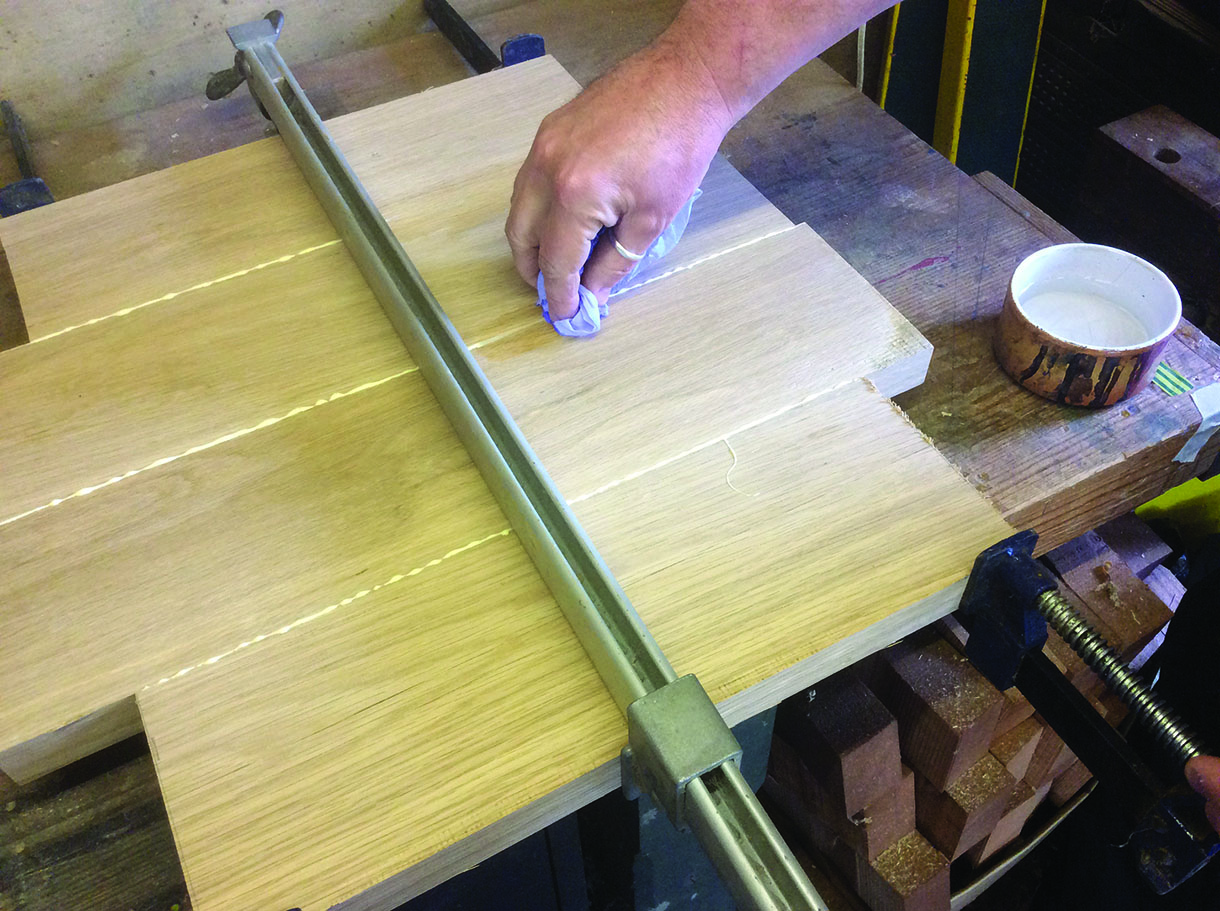
3. To help with any problems in the boards bowing or cupping I always add a clamp or two on the opposite side to the main clamps. When you’re happy with the joints and the glue is evenly seeping from the joints, clean up with warm water and a rag. It’s easier to do this at this stage rather than when the glue is dry
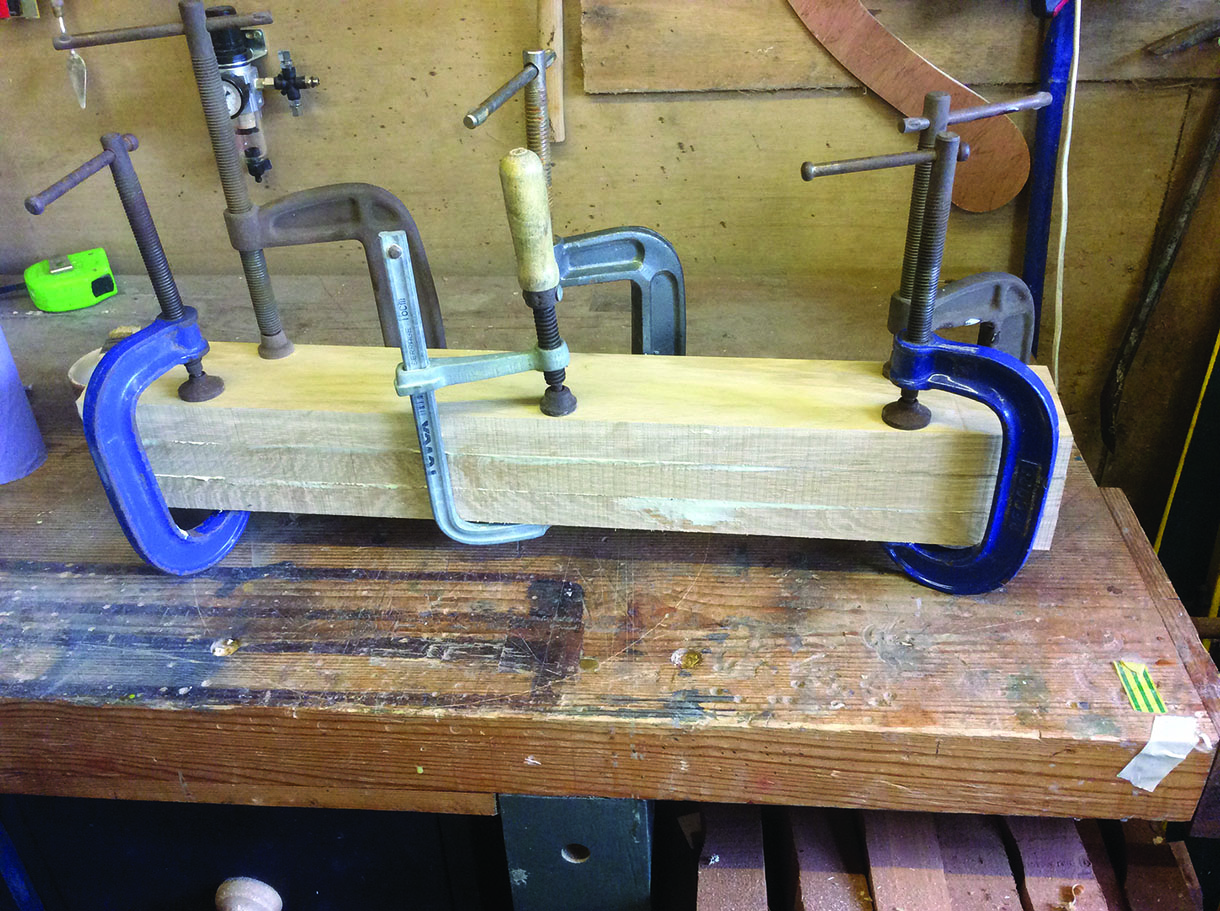
4. Here you can see the centre spindle of the table all glued up together with plenty of G clamps giving a good even pressure. All of the glued sections now need to be left overnight to properly set before removing the clamps. I’ve used a good quality PVA glue as I find it easy to apply and wipe clean during the gluing operation
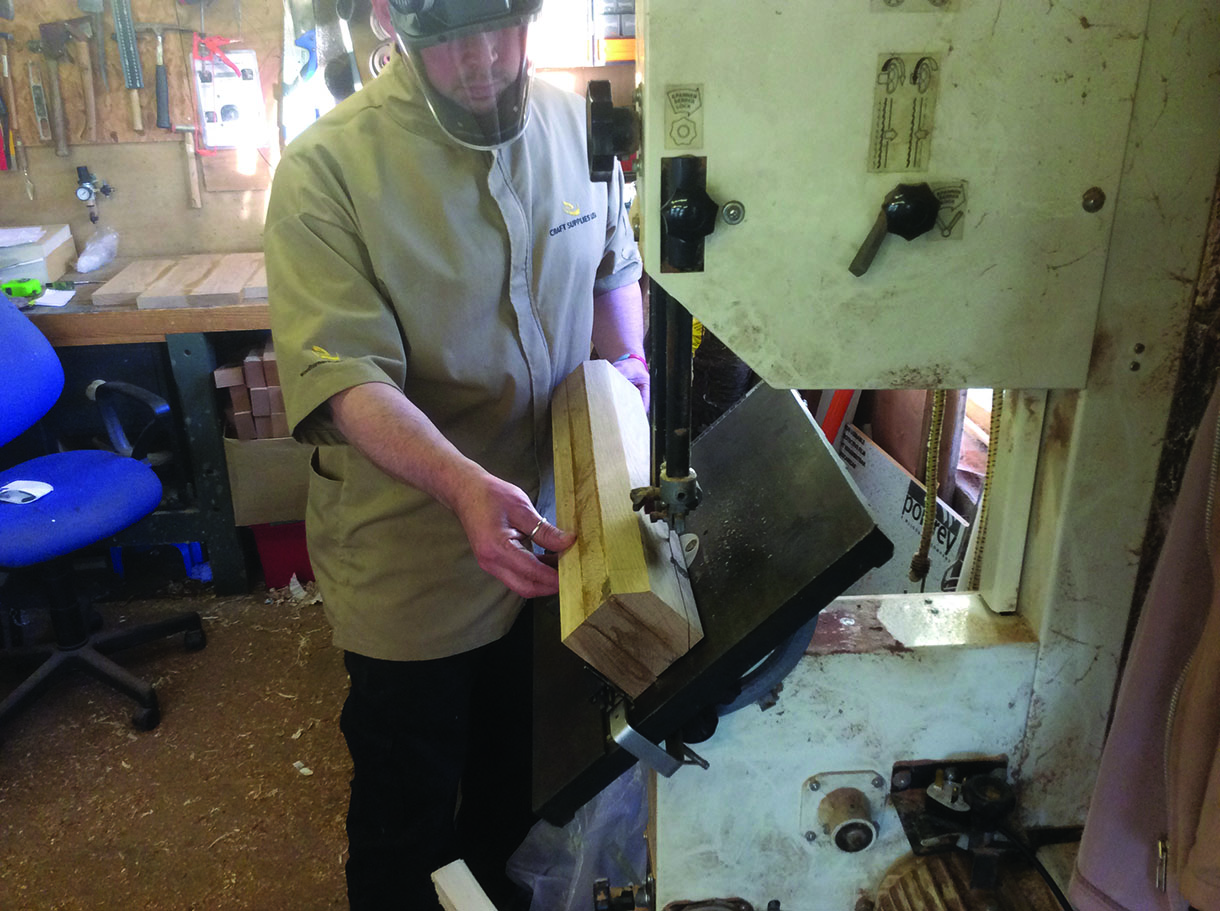
5. Once the glue has set you can remove all the clamps and prepare the sections for the lathe. Firstly, set the bandsaw to remove the corners from the centre spindle which will make rouging down much easier, however this step can be skipped if you want to and just means that you have a little bit more to do on the lathe
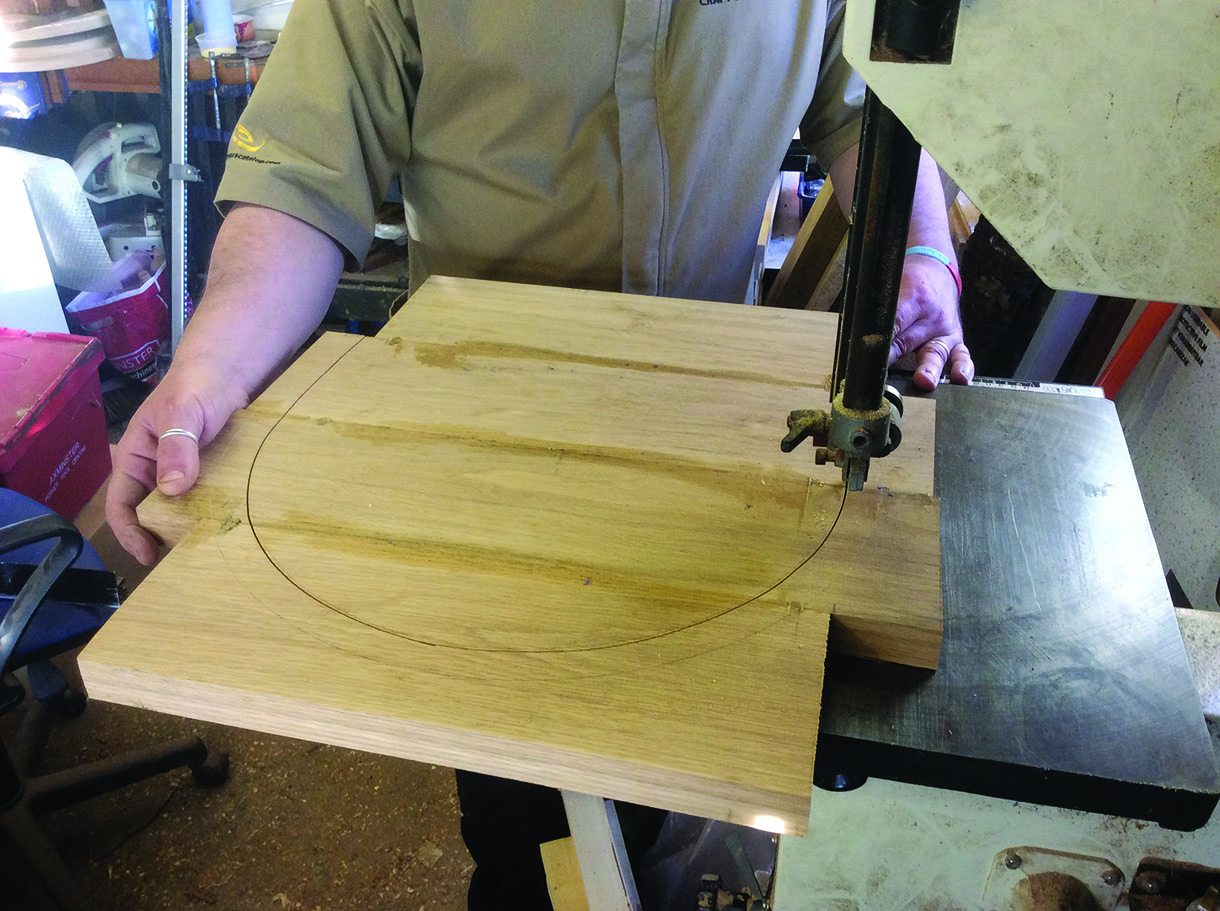
6. Next we move onto the table top itself. Using a set of dividers, mark a circle to 400mm (this is 5mm smaller than the max swing on my lathe). Use a bandsaw to cut out the circle, keeping close to the scribed line. Note the bandsaw guides are down close to the timber, this does two things: firstly it keeps the blade guide close to the working area and supporting the blade, but most importantly it keeps any unused area of the blade covered. If you don’t own or have access to a bandsaw then a jigsaw will work perfectly
Turning the main spindle
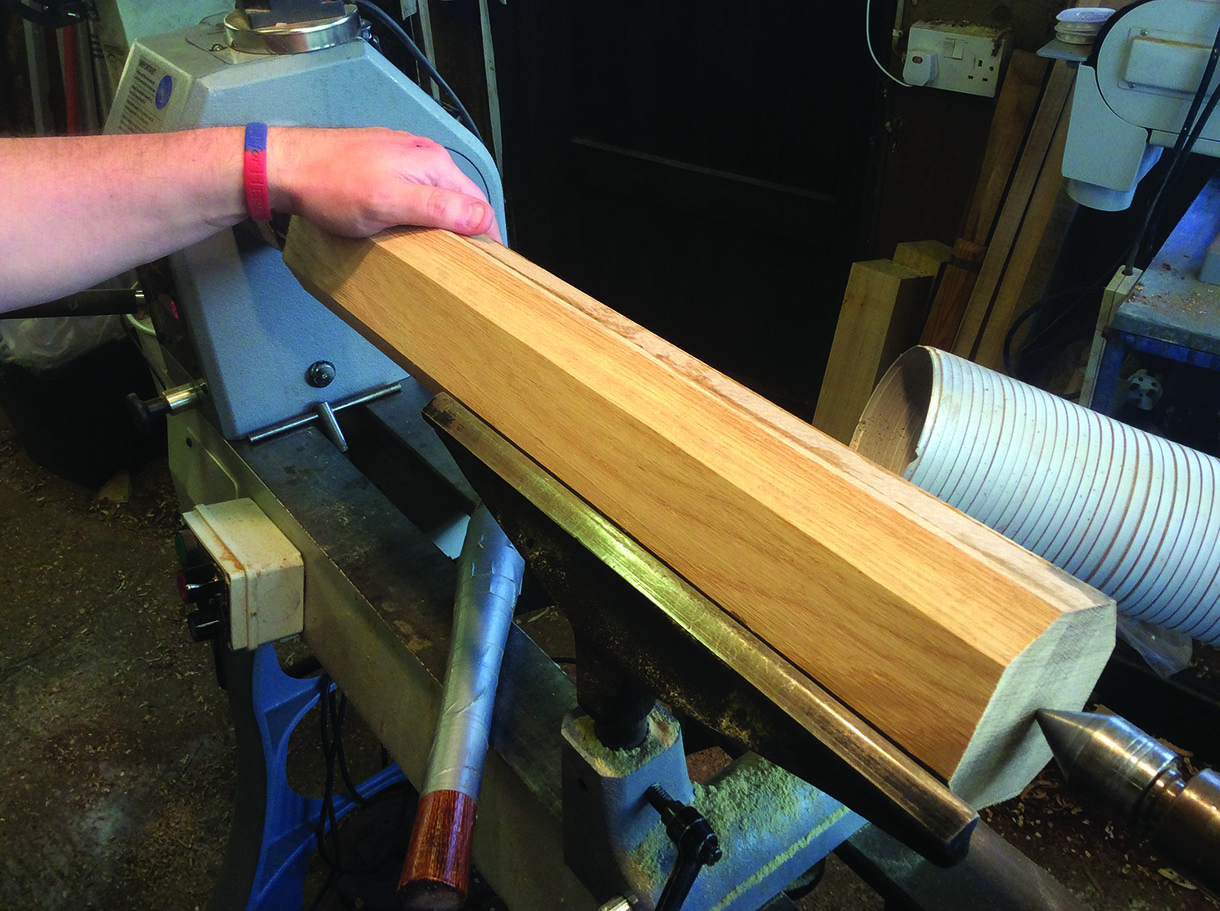
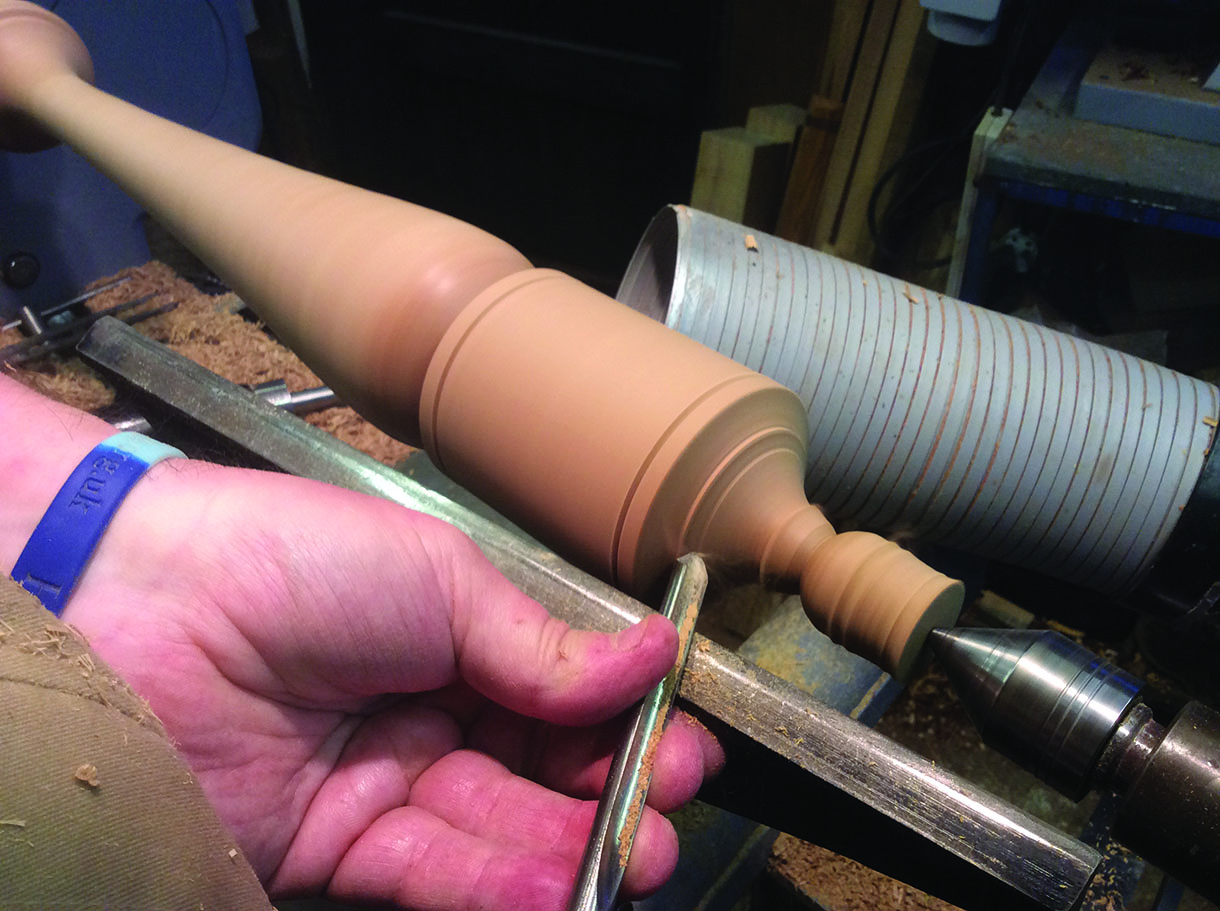
7. Now let’s start turning! Mount the table spindle to the lathe using a four prong drive and a revolving tailstock centre. You can clearly see here the eight-sided section we prepared earlier, the toolrest is positioned overhanging one side and just below centre point
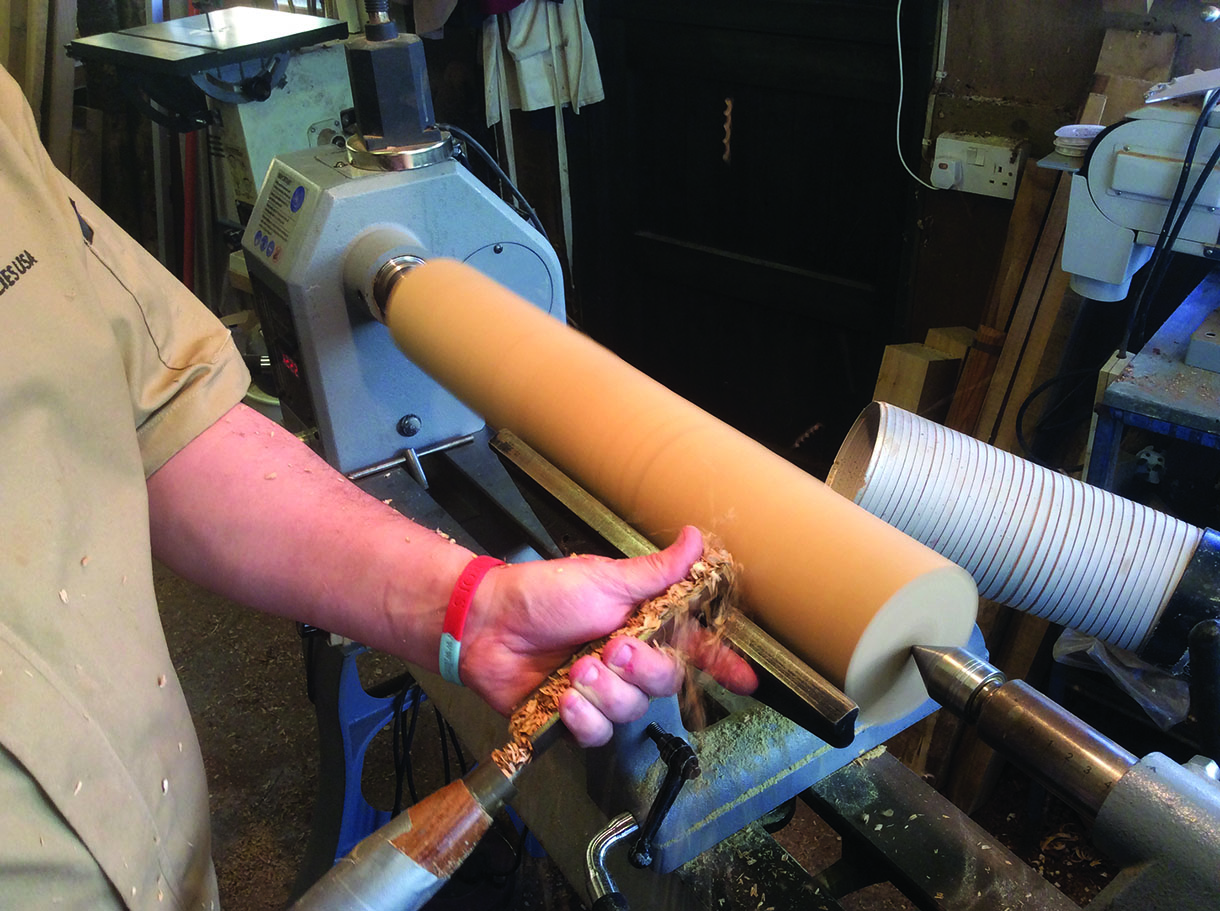
8. To rough down long sections without a double-stem toolrest, overhang one side of the timber by about 25mm and rough down to a cylinder before moving the toolrest along, making sure you turn the lathe off when doing so
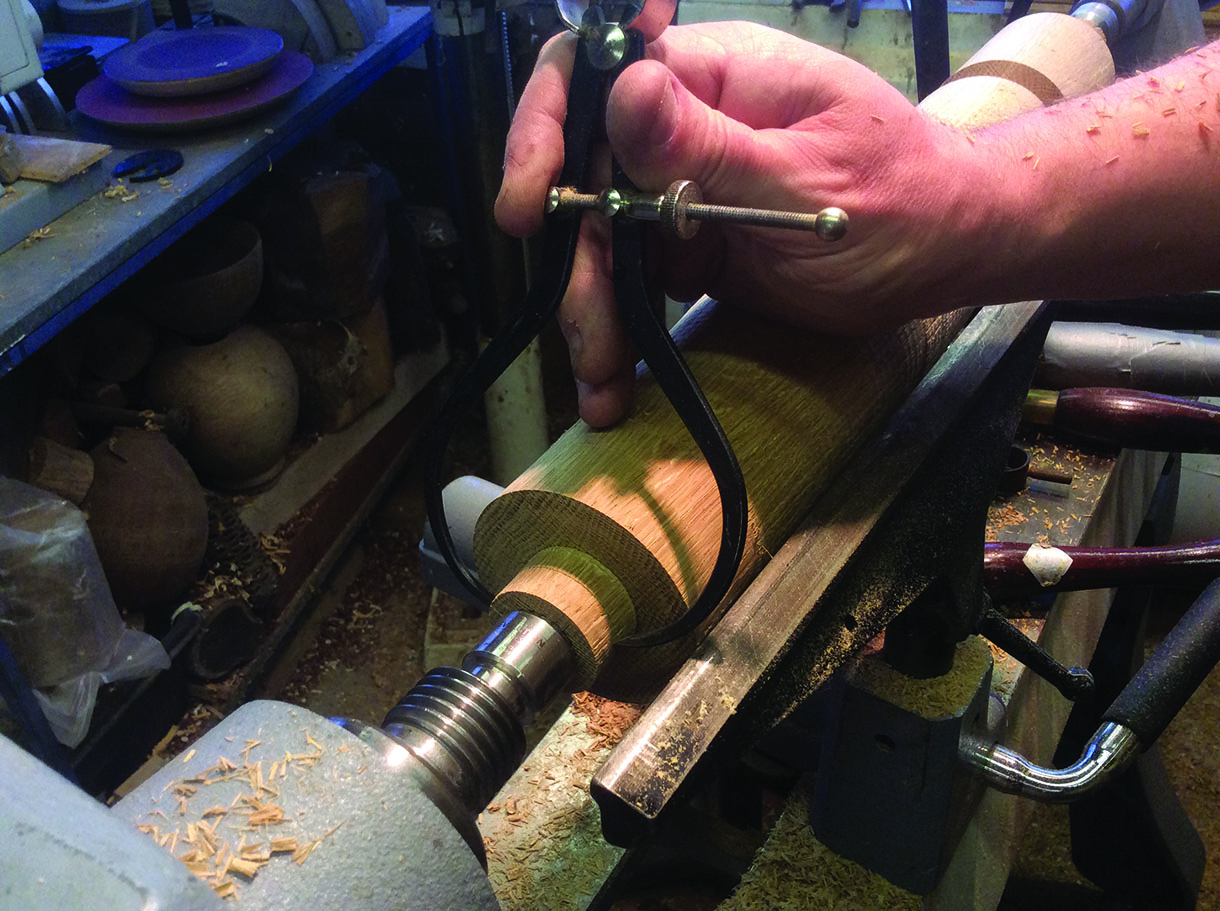
9. One of the first jobs when turning the spindle is to make the tenon that will be used to fix to the table top. This needs to be a good fit so drilling a tester hole in a scrap piece of timber is recommended. Using a set of callipers, adjust them to fit over the Forstner bit you’re using, then in turn size the first 5mm of your tenon. When you get this first section fitting well you can continue to size the rest of the tenon. This gives a bit of room for error and a second chance just in case you take a bit too much off the diameter on your first attempt
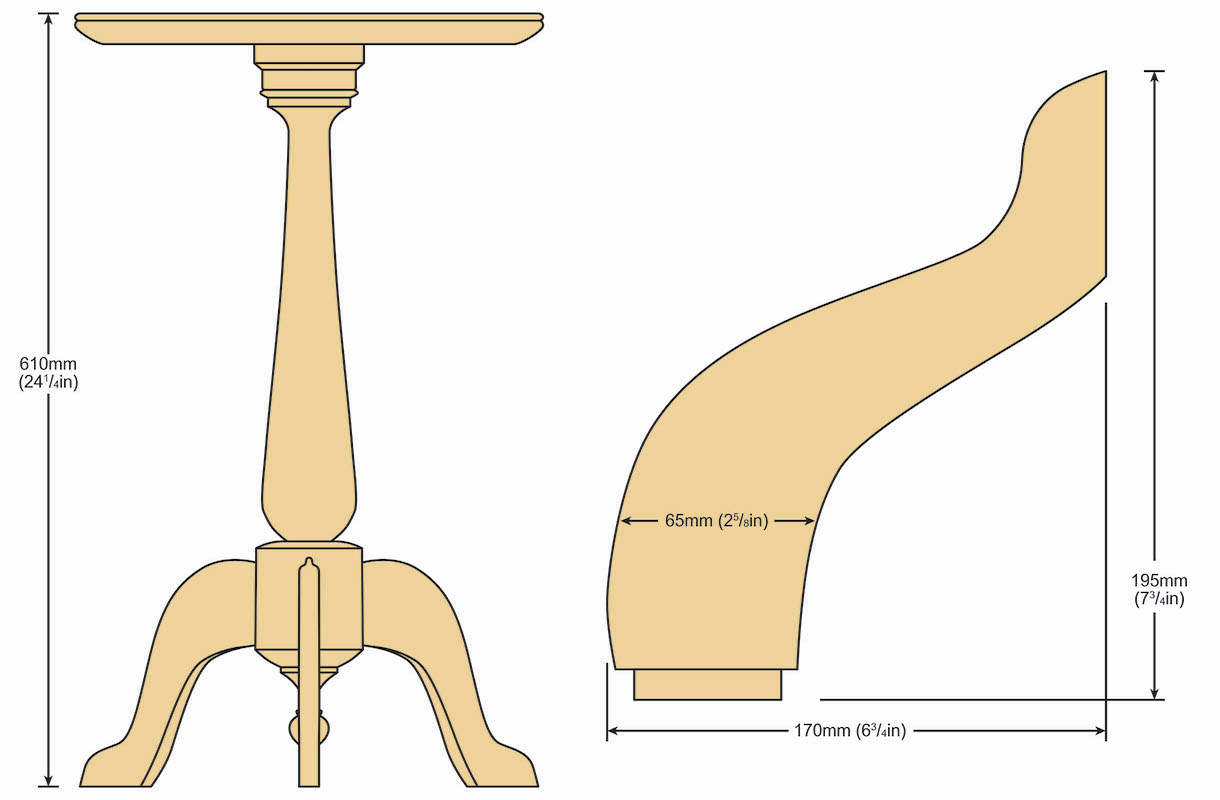
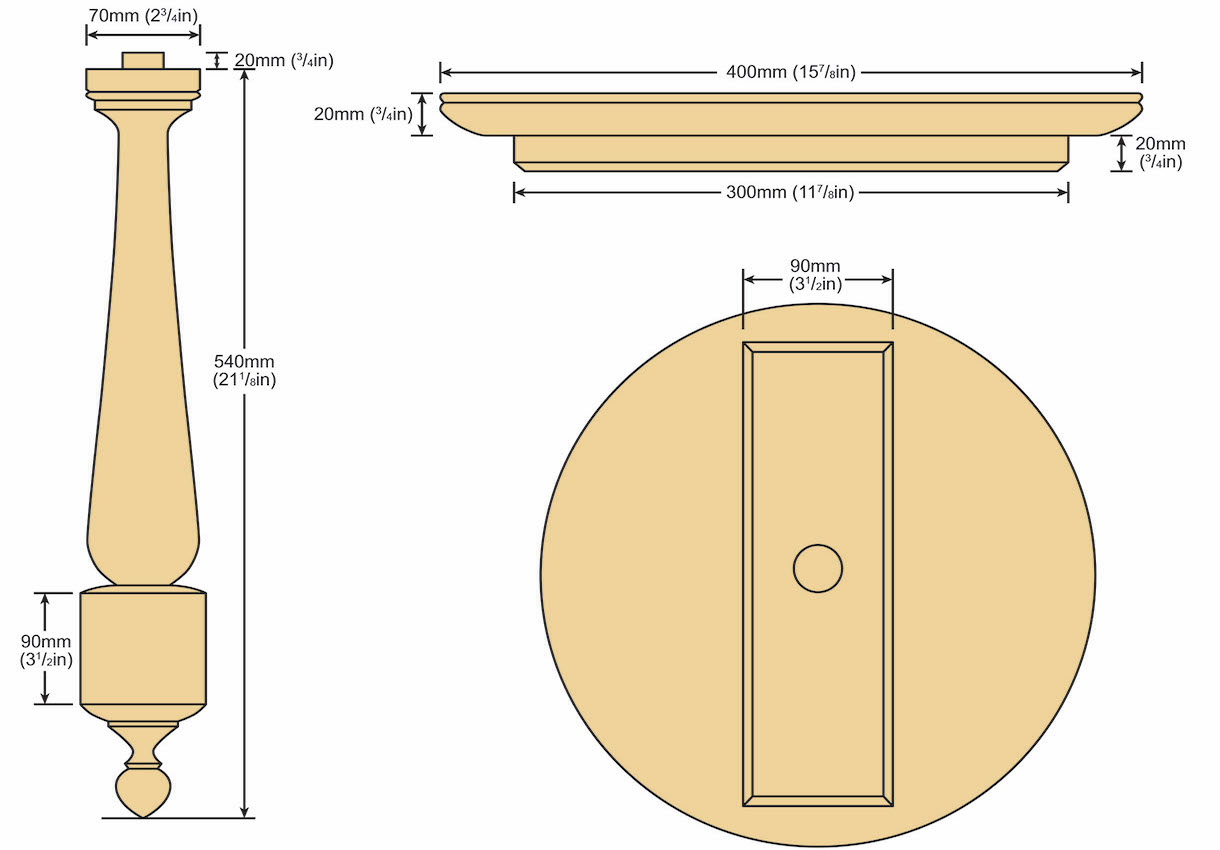
10. You can now carry on and turn the rest of your spindle, here you can see me turning the detail on the bottom of the spindle. The large flat area is for adding the mortises later and the measurements for all of these sections can be found on the line drawings. The drawings are there for you to copy if you want to but try to put your own stamp on the design somewhere, even if it’s just a slight change to a bead or cove
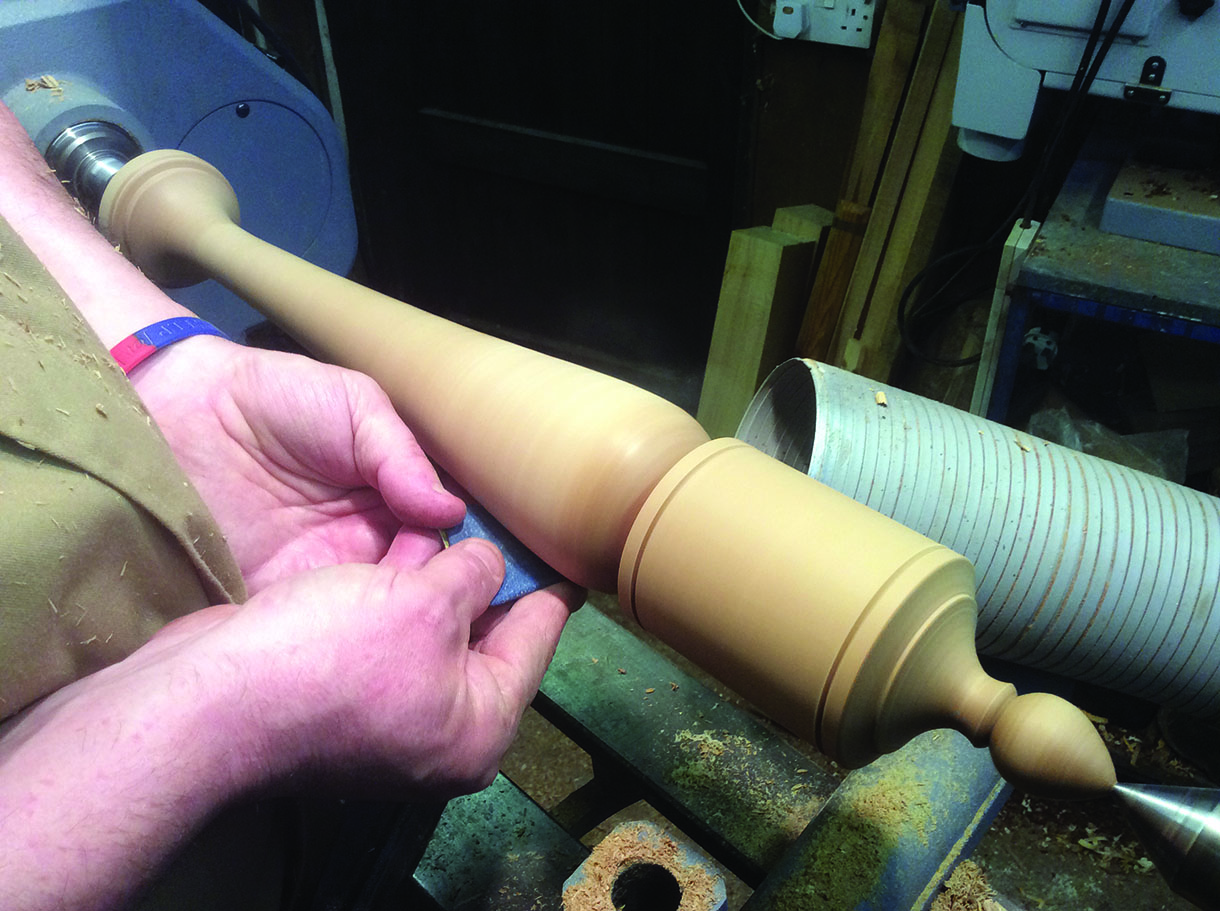
11. The spindle is now ready for sanding. Work through the grades 100–400, stopping periodically to check, and hand sand with the grain. Always be sure to remove the toolrest when sanding to keep your fingers from being pinched
Preparing and cutting the mortise
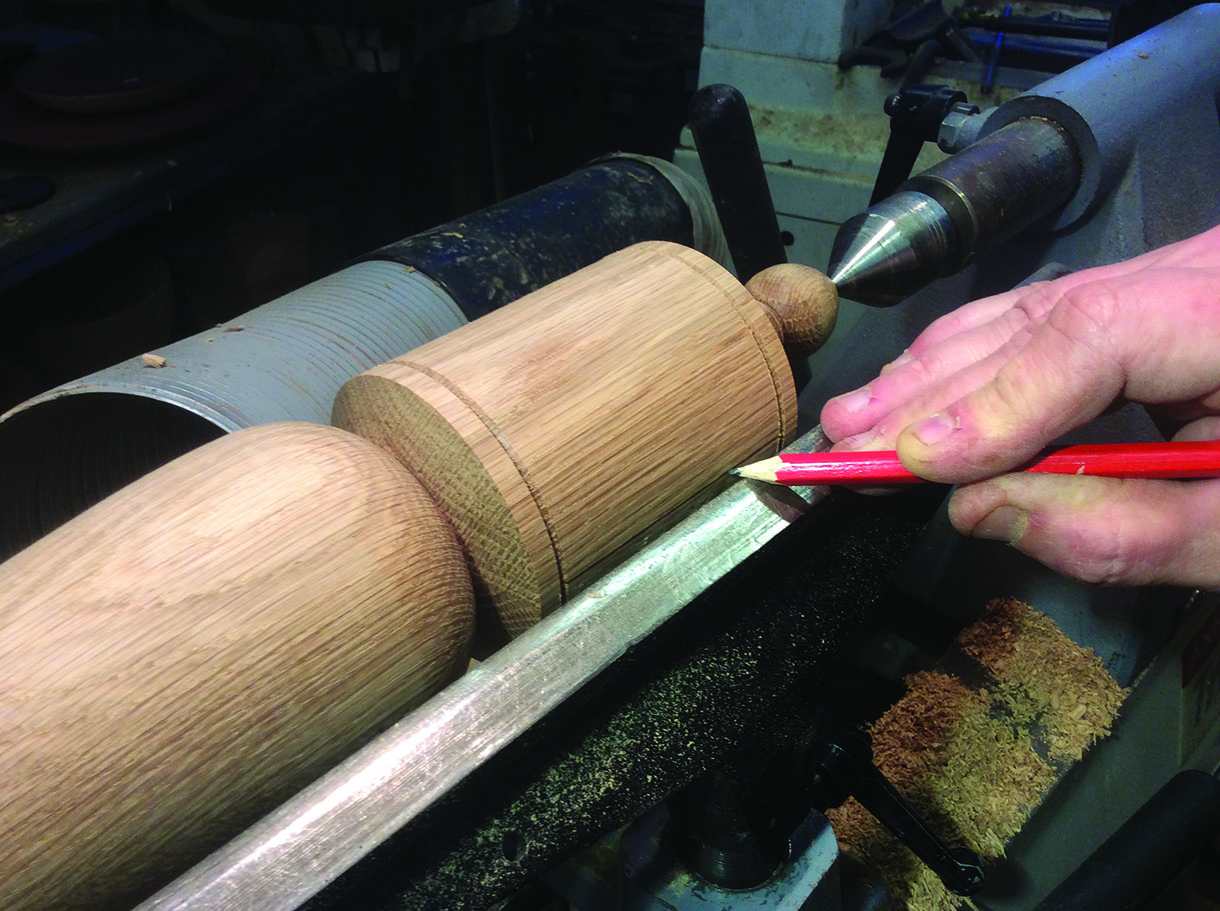
12. Draw a straight line in preparation for marking out the mortise positions. Most lathes have an indexing feature of some sort which we’re going to utilise here. Indexing works by dividing the positions you can stop the lathe into 36 points and we’re going to divide these 36 points into three positions which simply means multiples of 12. Start at an index point and lock the lathe, use the toolrest to draw a straight line along the point you’re going to cut your mortise. Now count 12 positions and draw another line then another 12 positions and a third line, another 12 positions which should take you back to the start
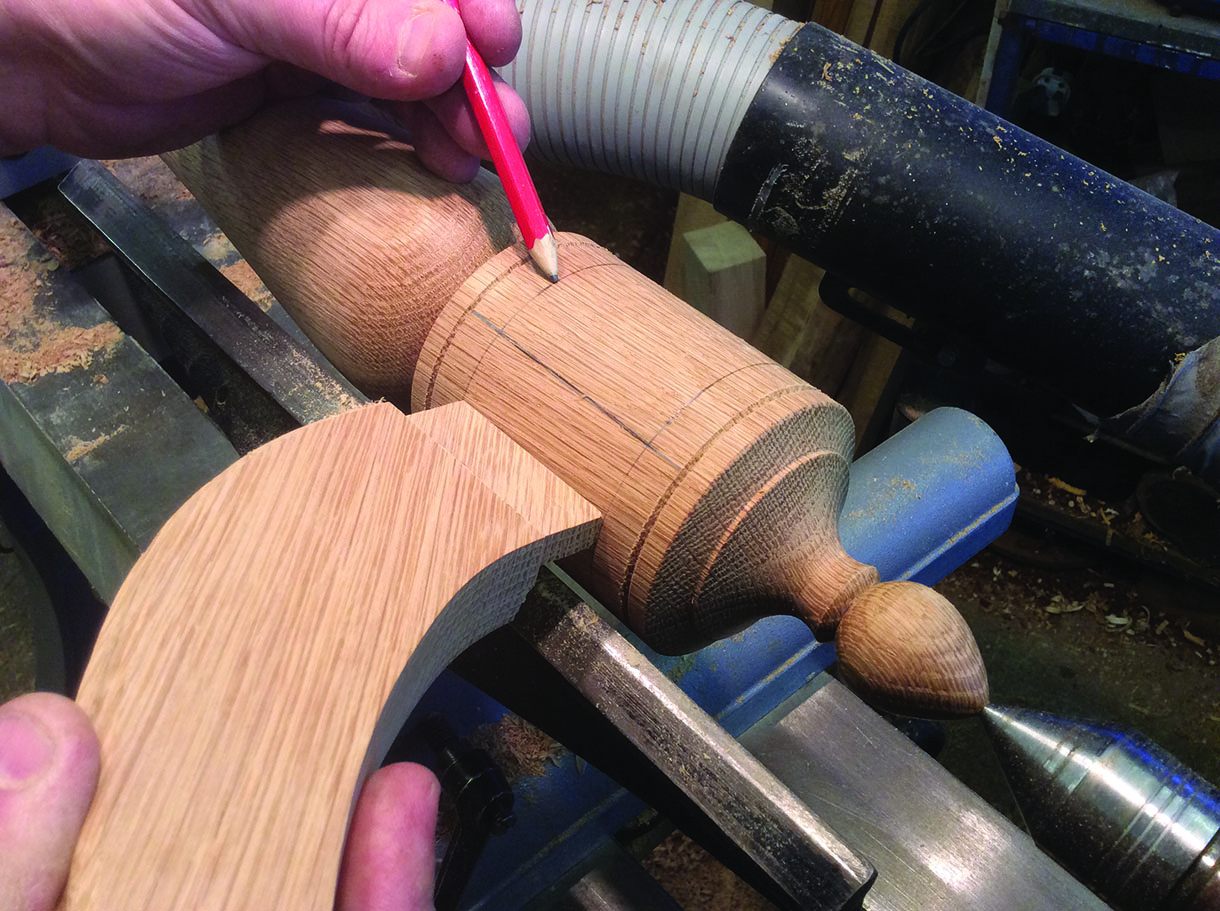
13. Now the spindle has been indexed we can decide how wide to cut our mortise. I’m going for 55mm wide, which will match the width of the tenon on our legs. Plot the width onto the spindle with a pencil line
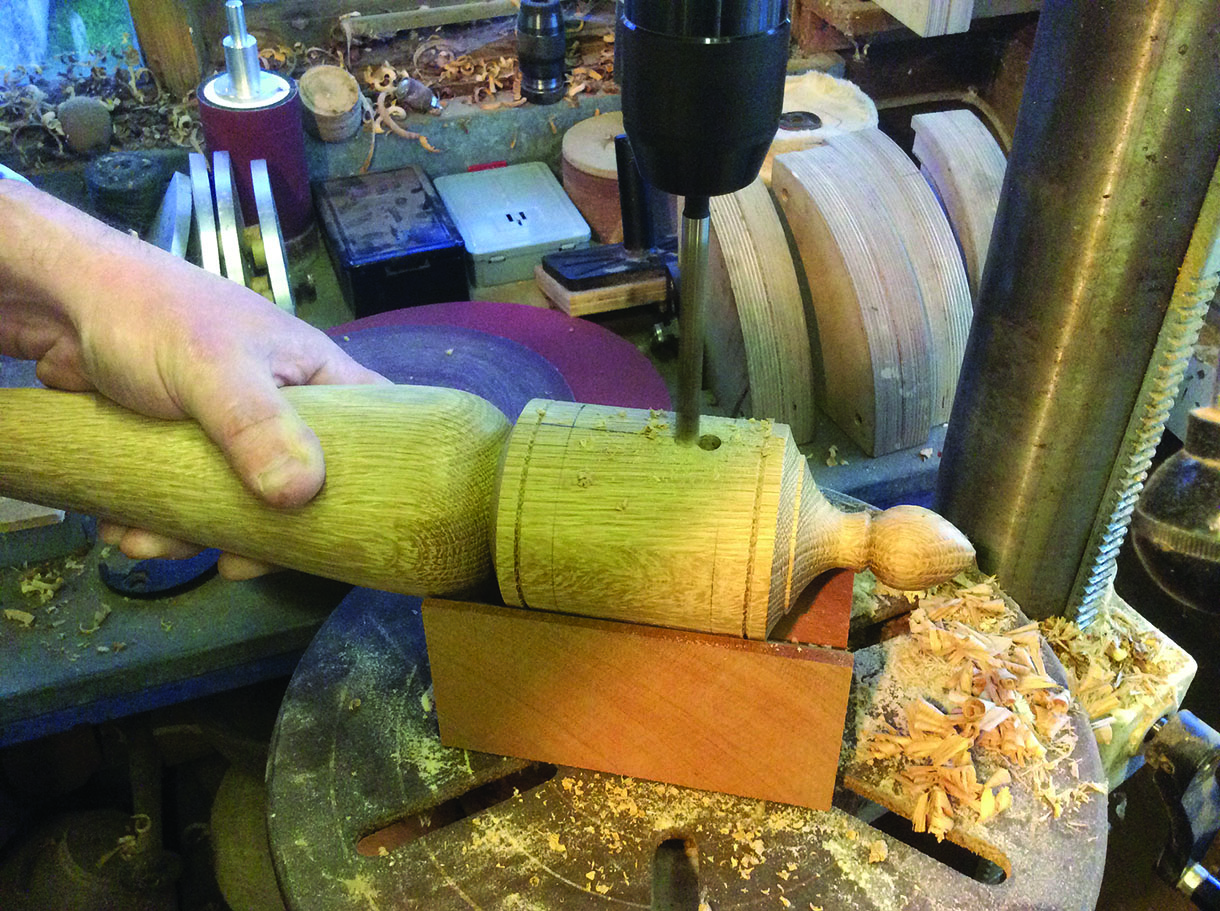
14. Now we’re going to cut our mortises into the table spindle. If you have a mortiser this job will be a lot easier, however I don’t so I’m going to have to adapt the task to my tools. I’m using a V block made from a piece of scrap wood big enough to take the spindle. Carefully position the spindle so the first indexed mark is facing directly upright and, using the 55mm pencil marks you’ve added earlier and the indexed line, start drilling a series of 8mm holes using a lip and spur bit. Set the drill stop to a depth of 25mm

15. Repeat the drilling process on all of the mortise positions before returning the spindle to the lathe. It’s quite important that you keep the drill holes close together when drilling the mortise as this will help when removing the waste with a chisel. Lock your lathe in position and take small cuts with a sharp chisel to open the tenon to a constant 8mm clean mortise, then put aside until the legs have been made and the mortise properly sized
The table top

16. I’ve prepared a rectangular piece of timber to act as a brace for the underside of the table, this brace will also house the 40mm hole for the spindle tenon. Find the centre with a square and marking gauge then mark with a bradawl
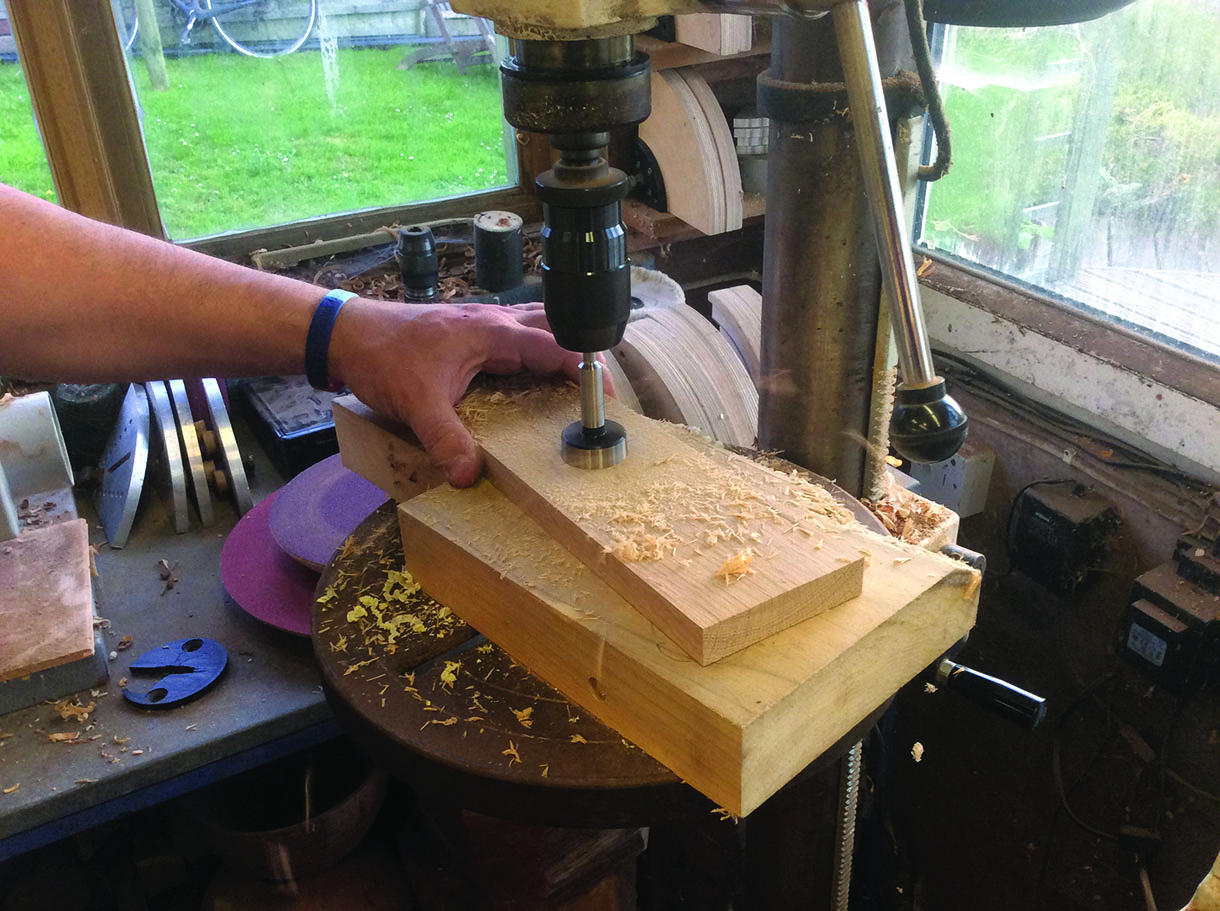
17. Using the marked centre, drill a hole at 40mm diameter all the way through the brace. Support the brace with a piece of scrap wood and, if needed, use a clamp to hold the piece tightly down to the pillar drill bed
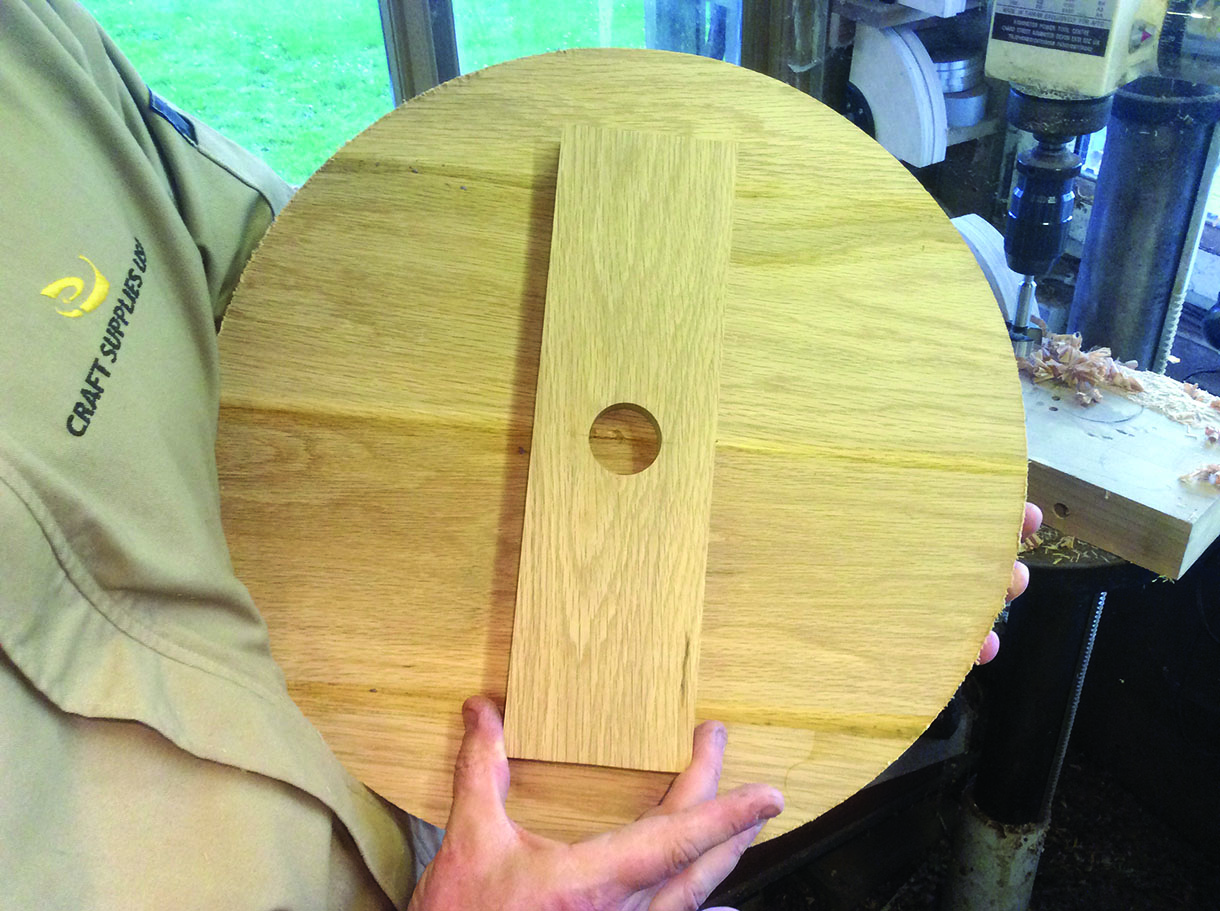
18. Here you can see how the brace will work across the grain of the table top to help keep the timber flat. The brace will be drilled and screwed into the underside of the table and not glued. Leave the brace to one side and let’s start turning the table top
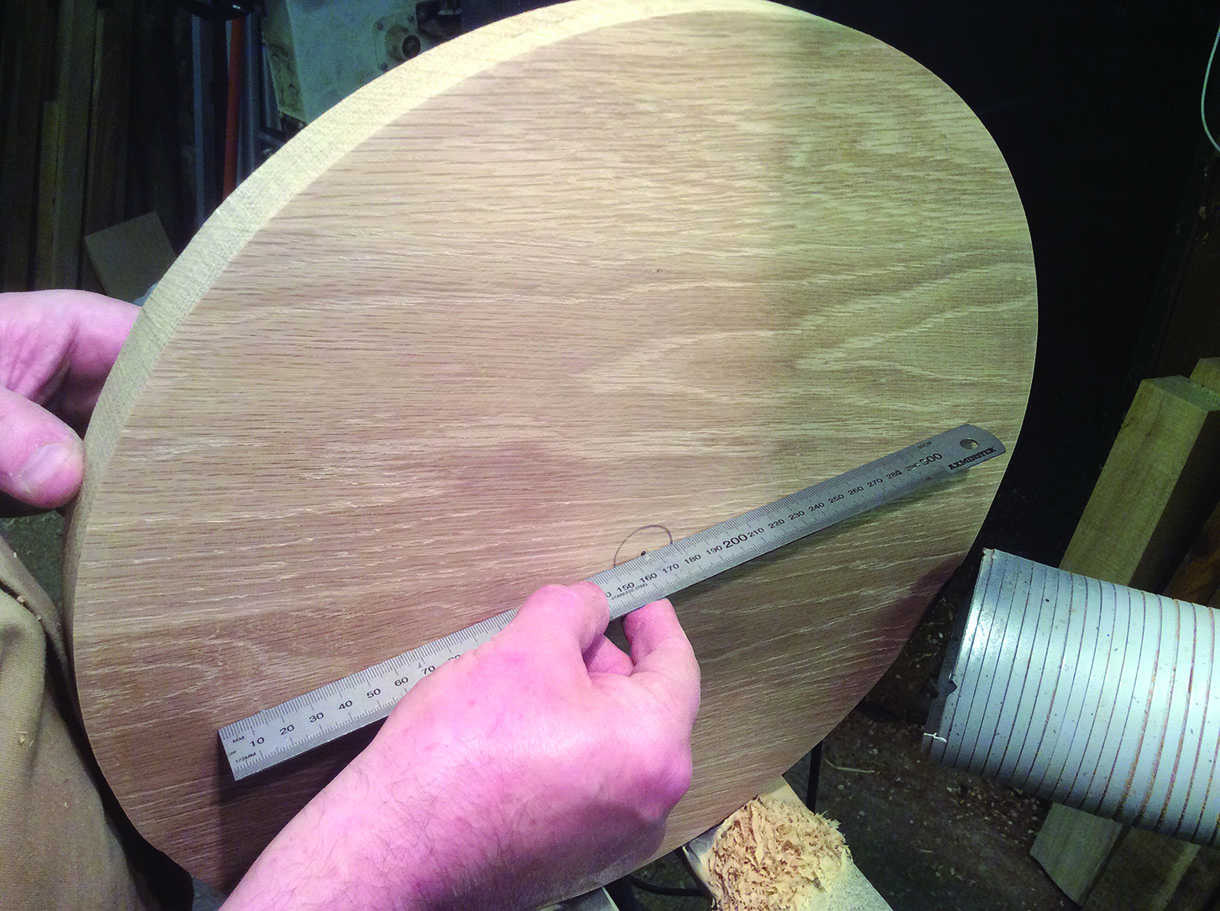
19. The prepared table top blank starts off at 30mm thick giving me plenty of timber to secure with a faceplate. I’m going to use this method to attach the timber to the lathe to flatten off one surface, checking with a rule before sanding and sealing. This face is going to end up as the underside of the table and it’s where we will attach the brace so being flat is very important. Before taking the blank off the lathe, mark a small centre point with a pencil, this will help when reattaching the faceplate in order to turn the top of the table
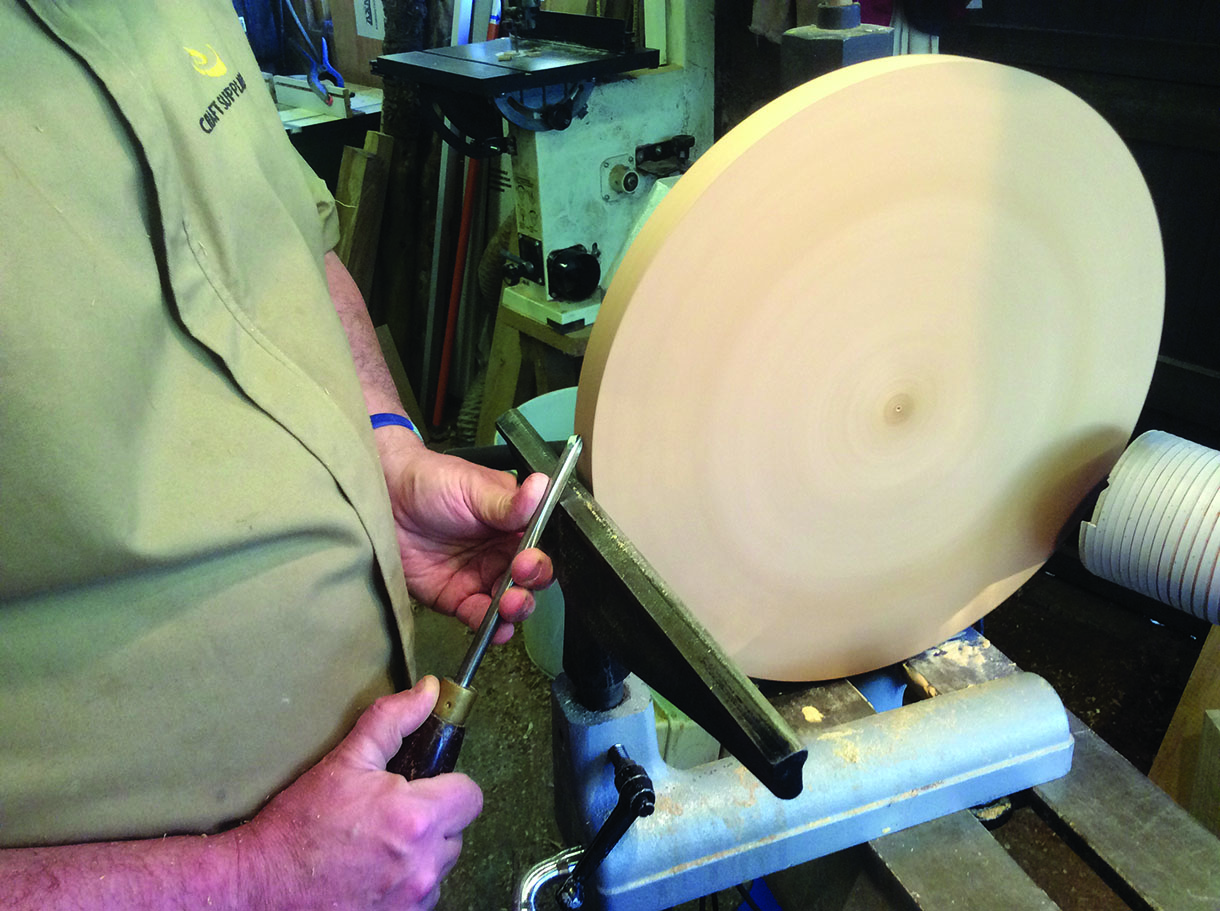
20. Now turn the top over and reattach the faceplate to this clean and dead flat surface. You want to be able to conceal any fixings marks with the brace when you take the faceplate off, so ensure your faceplate fixing positions are within its width. Start by truing up the blank with a 6mm bowl gouge, dropping the handle low to give a clean finish
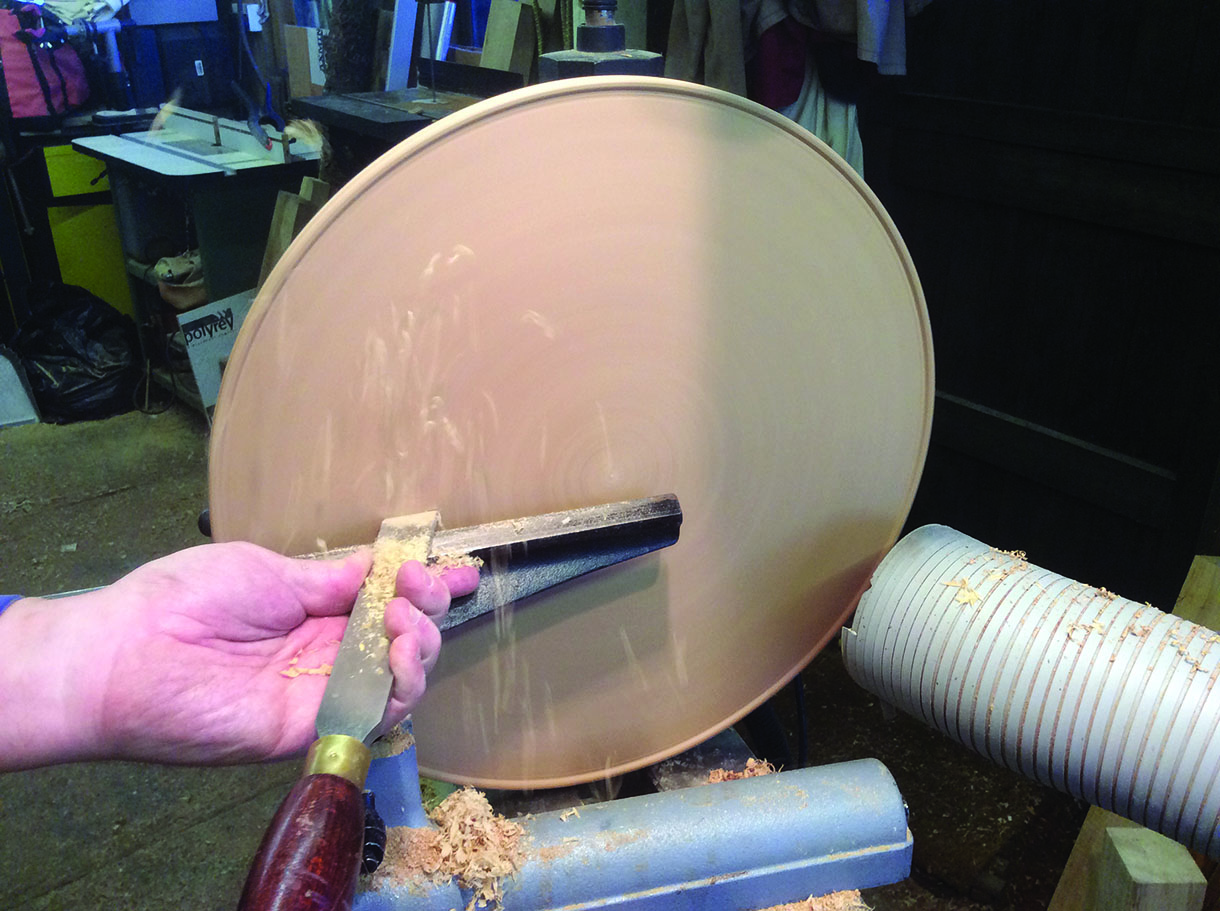
21. I’ve left a lot of waste wood to clean off this surface as the timber started off at 30mm thick and I want it about 20mm but this will also give me the opportunity to turn out the faceplate screw holes that will be in this face. I also want to include some sort of lip to the outside edge of the table top to stop things rolling off, as you can see by this picture. Most of the turning work here is done with a 10mm bowl gouge but to flatten off, I find a wide skew and gentle scrape works really well on the side grain of this oak
Making the legs
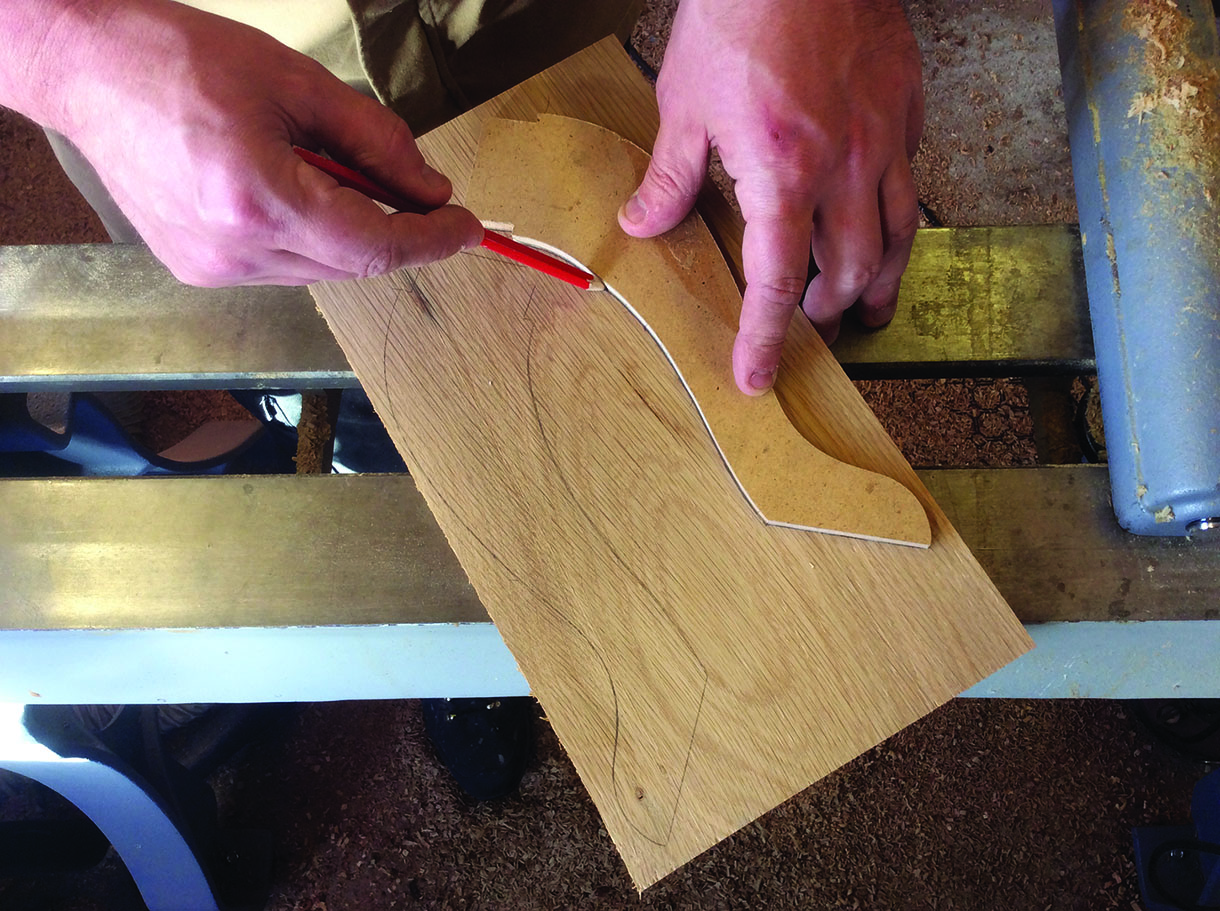
22. Prepare the oak to 20mm and make a template out of 6mm MDF, meaning you can repeat the profile over again. Draw around the template with the grain running down the length. When all three have been marked, cut out
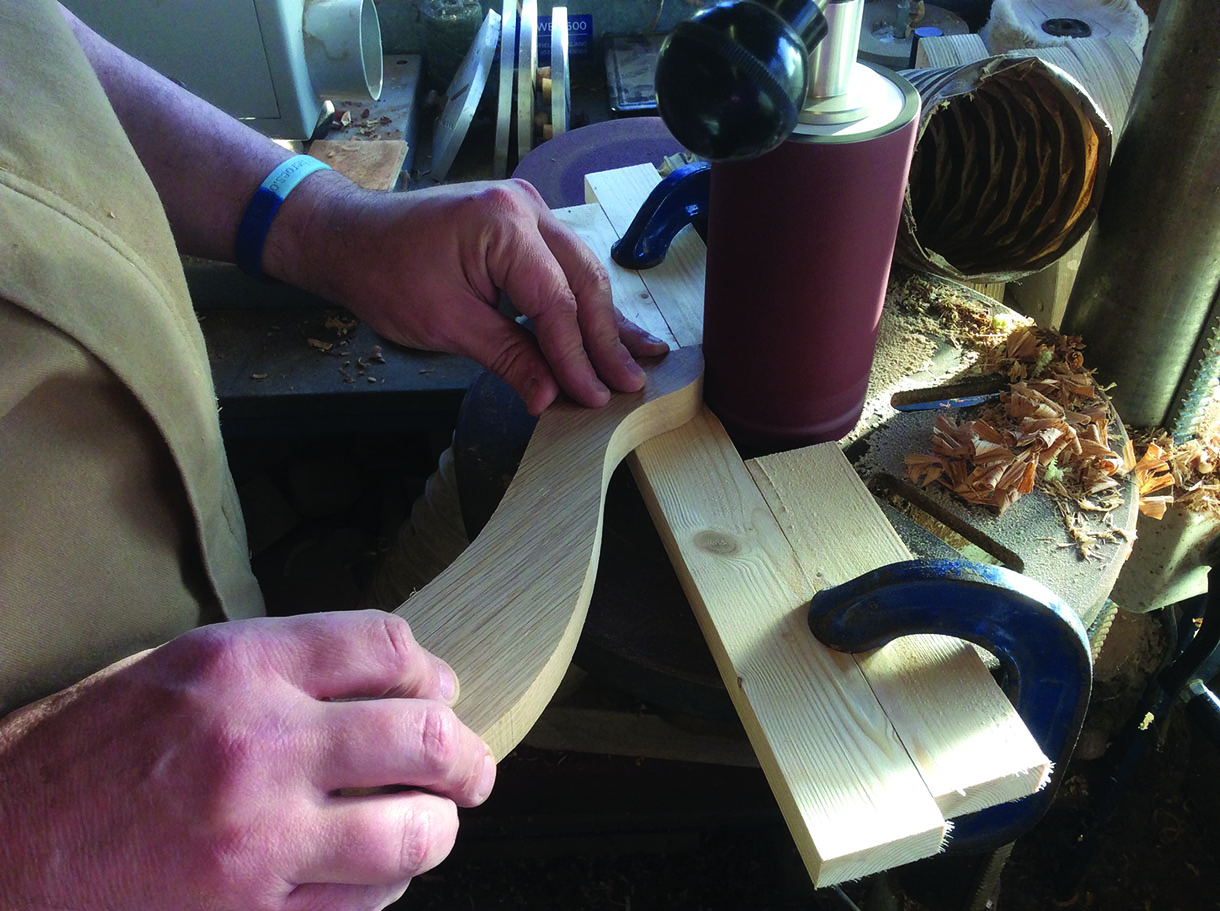
23. Before we put any moulding on the legs ensure the legs are sanded smooth, use a sanding bobbin held in a pillar drill. Clamp pieces of scrap wood to the drill table to elevate the legs
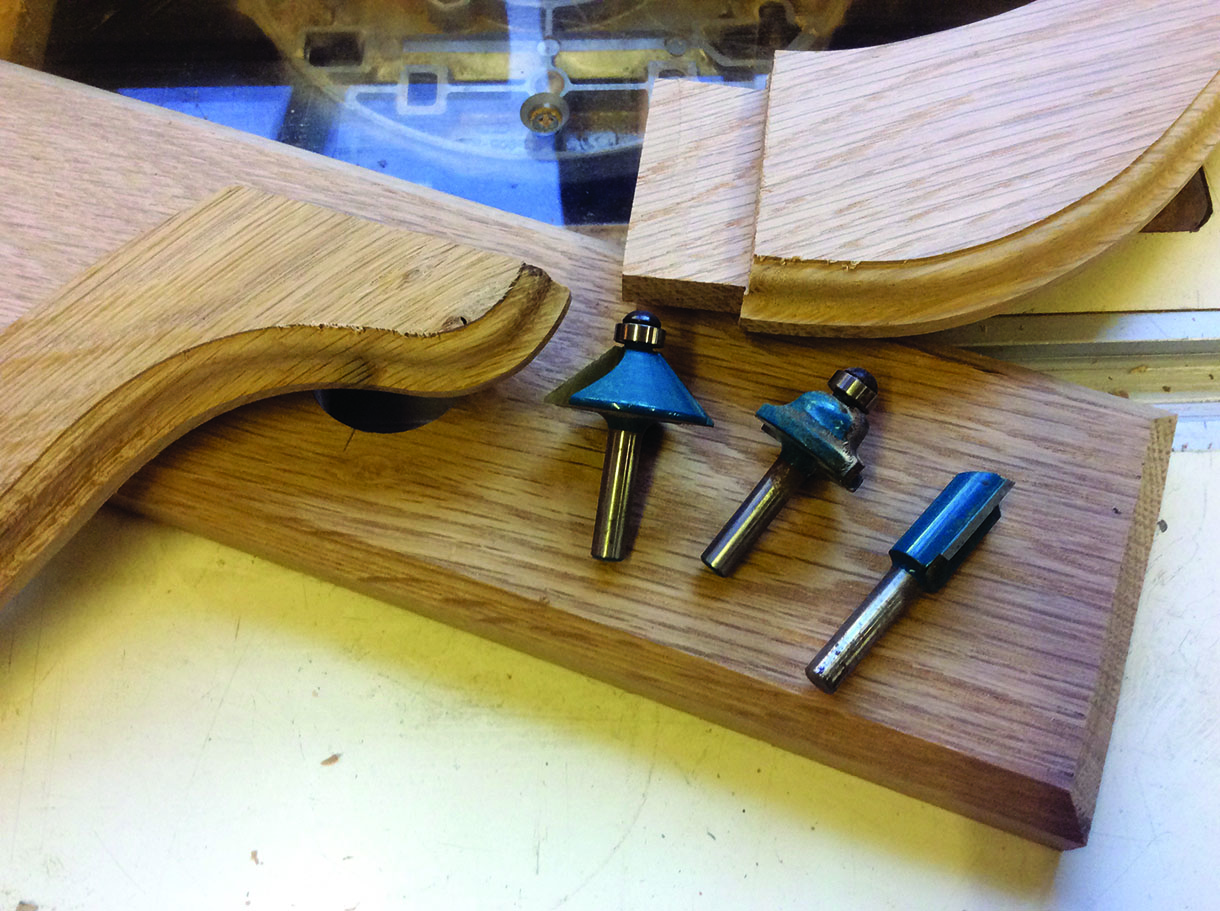
24. I used three router cutters on the table. The chamfer cutter (left) was used to chamfer the edge of the brace, the ogee moulding cutter (centre) was used to put a decorative edge on the legs and the 12mm straight flute cutter (right) was used to cut the tenons on the legs with the aid of a router sled
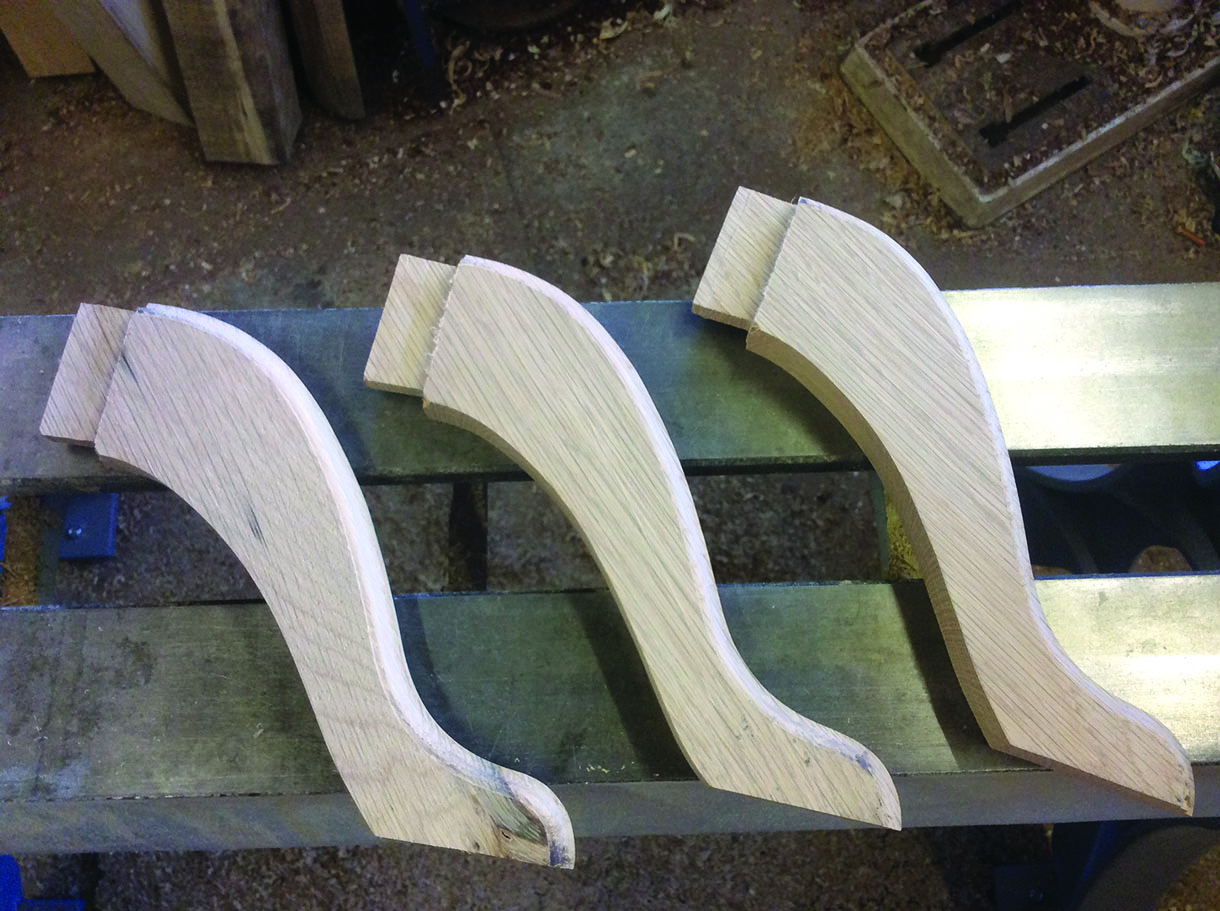
25. Here you can see the finished legs, note that the tenons have also been cut 5mm in from the top and bottom of the leg. Test the legs in the mortise and tweak to make them fit well before gluing
Assembly

26. To assemble the table, drill and countersink the brace in four positions 25mm in from each corner, then screw to the table top. After dry fitting each leg, glue the mortise and slot in the tenoned legs. Lie the table top face down onto the bench and glue the mortise before offering in the tenon, leave it in this position for the glue to dry overnight. Use a hard wax oil to coat the table to ensure the surface will withstand hot cups of tea and wine stains


