How to Successfully Part Off Spindle Work
Richard Findley takes a look at the best way to part off your spindle work
Richard Findley takes a look at the best way to part off your spindle work
The action of ‘parting off’ is to separate the item you have been turning from a section of waste that is usually attached to a driving centre. Parting is not something that is needed every time you work on your lathe, but on those occasions when you need it, having the confidence to carry it out successfully will be of great benefit. I would usually part off items that are held between centres, that have one end that doesn’t matter about drive marks, such as drawer pulls or handles of one sort or another. Items such as table legs or stair spindles, where neither end will be seen, won’t need parting off. Some items will have waste portions at both ends. In this case, you can part the work on the lathe, but you will need to remove the waste from the other end by another method, so there may not be a benefit in parting on the lathe: the choice is yours. The action of parting off is relatively simple, but there are a number of pitfalls that are just waiting to trip up the unwary turner. It is these pitfalls that I intend to highlight and show how to avoid in this article.
Tool choice
The item that you have been working on is nearly finished: the shape is good, the finish is good, it is sanded smooth. Now your work just needs parting from the waste and it will be ready to apply your finish of choice. Which tool should you use to make that final parting cut? As turners, we have various gouges, chisels and parting tools to choose from and it would seem obvious to pick up a parting tool: surely it does as it says?
Actually, of your tool selection, this tool is probably the least favourable option. Of course it will part off the work, but the cutting action of a parting tool is harsh on end grain compared to other cutting tools and will almost certainly leave a torn surface.
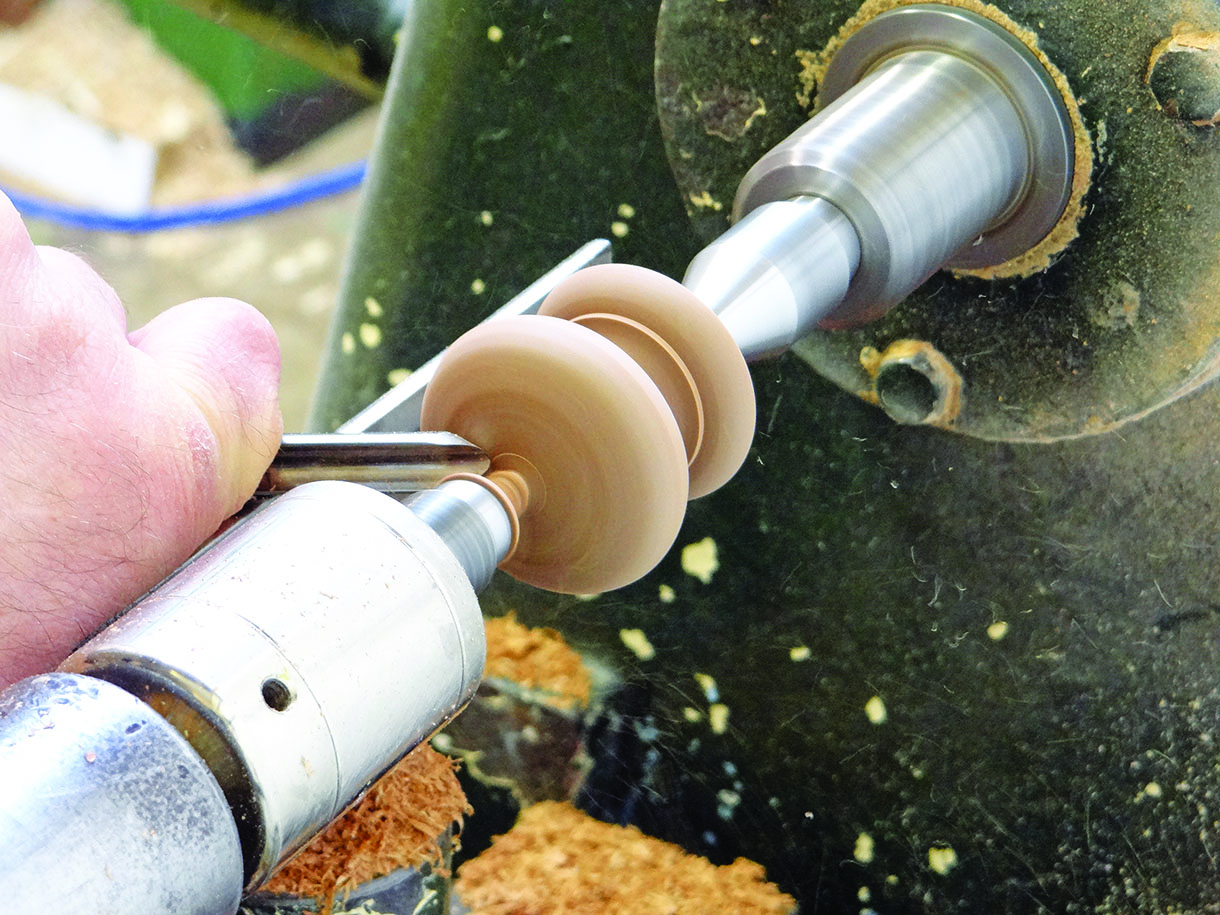
Parting tool in action
Using a parting tool across end grain results in a rough and torn surface
So why is it called a parting tool if it’s no use for this job?
I’m not 100% certain of the answer here, but it may be because of a link to metal turning lathes, where a similar tool is used for parting. Whatever the answer, my suggestion would be to avoid using a parting tool for parting off and keep it for sizing cuts on spindle work.
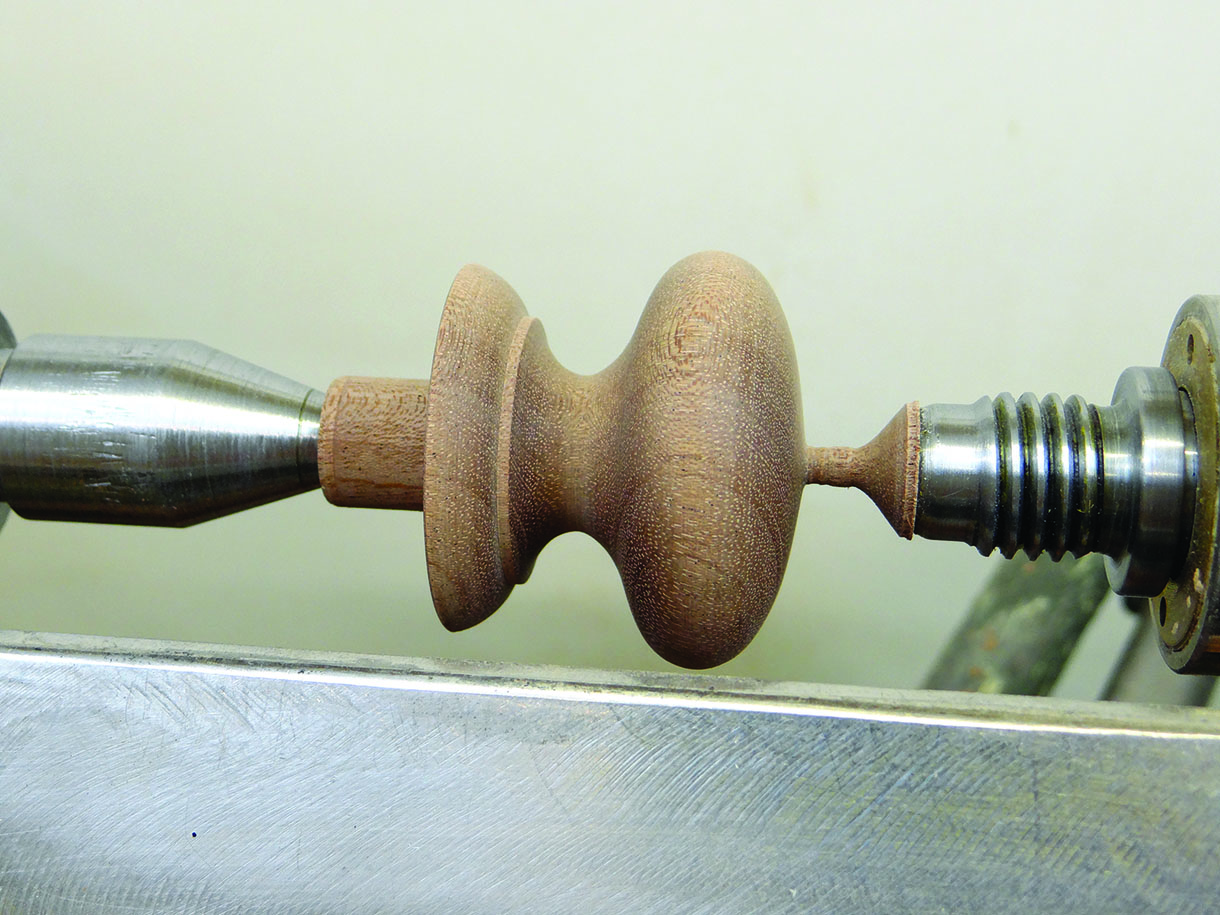
My suggestion for parting is to continue to use whatever tool you have been using to cut the rest of the job. For this article I photographed the making of some sapele drawer pulls, which have a pleasant curve to their face, and need to stay that way once the waste is removed. I used a spindle gouge to cut the curved face and continued to use it for parting off. If I had been using a skew chisel, I would continue to use this tool until the work was parted off. The reason for this is that the pressure applied to the wood with different tools will vary, which means there can often be a visual difference between the part cut with a gouge and a part cut with a skew, which will often be emphasised under a coat of finish. By sticking with the same tool throughout, you will immediately remove this potential issue.
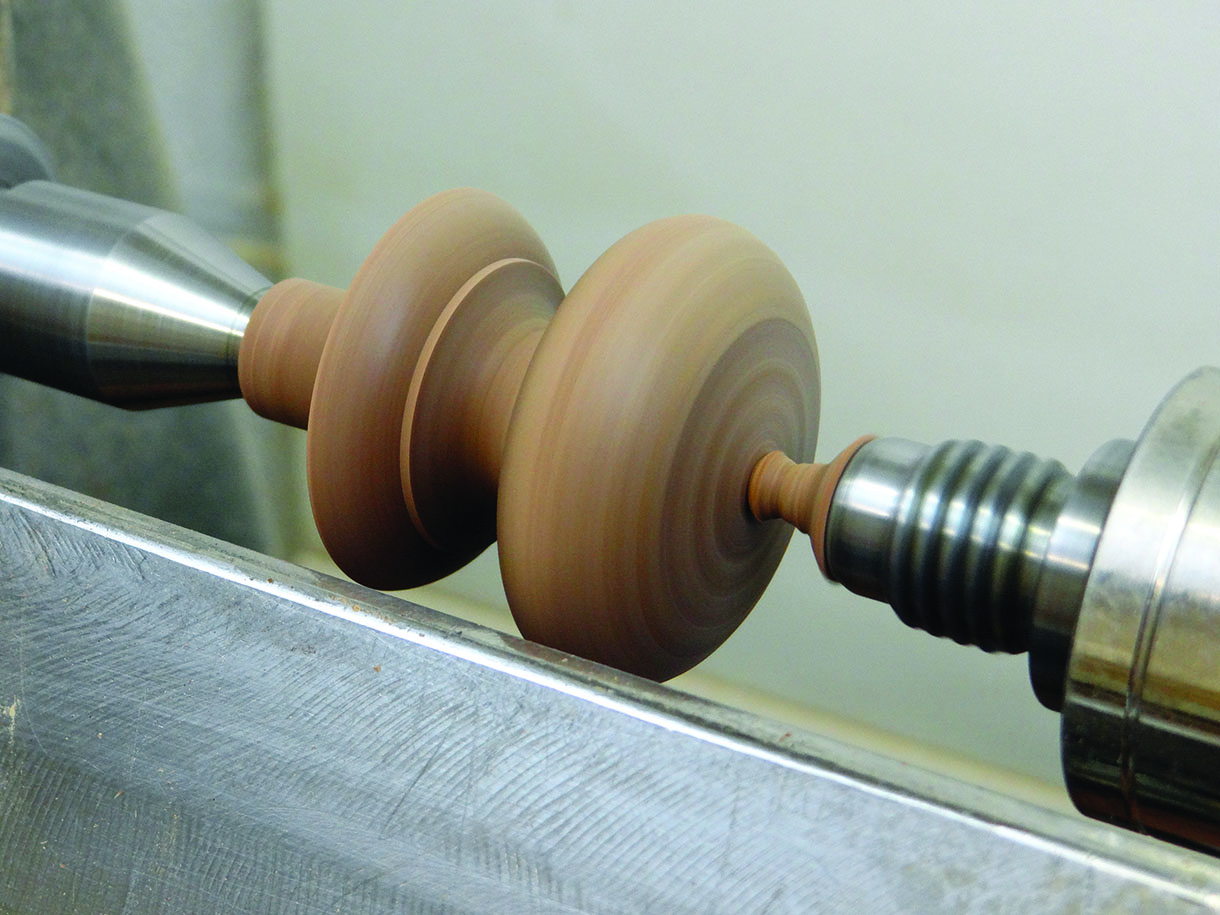
Working partly with spindle gouge and partly with skew: note difference in surface colour and texture left by each tool
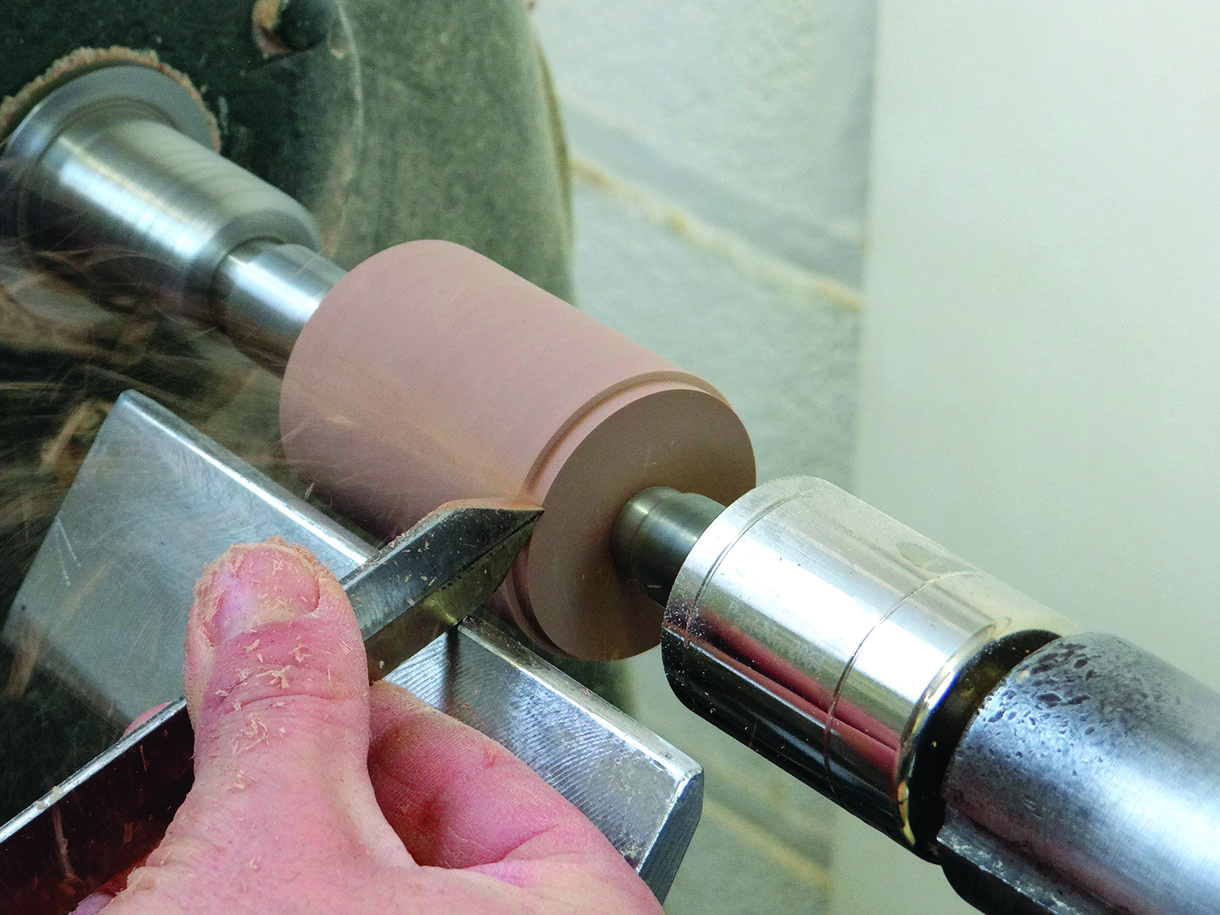
Leave a small nib
The temptation when parting off, is to try to maintain a curve right through, until the item is parted. The problem with attempting this is that the last few fibres of wood, connecting the work to the waste will almost always snap, rather than be cut, because of the forces involved in turning. This will result in damage to the end grain fibres, which can run surprisingly deep into the wood, being almost impossible to tidy up without reshaping the work and potentially spoiling it. The only answer is to cut the curve of the work as close to the centre as you dare, then part off leaving a tiny nib that will need removing at the end. This way, any end grain damage will be in this nib, rather than in your work, and is easily removable. How small you cut this nib will come with experience. The timber being used will be the main deciding factor. An open-grained timber such as oak (Quercus robur) or ash (Fraxinus excelior) will need a larger nib leaving than a tight-grained wood like maple (Acer saccharum). Softer woods will also require a larger leaving than on more dense timbers.
Waste area is taken down to a suitably thin section before final parting off
Parting without leaving a nib results in a patch of damaged end grain which is virtually impossible to remove
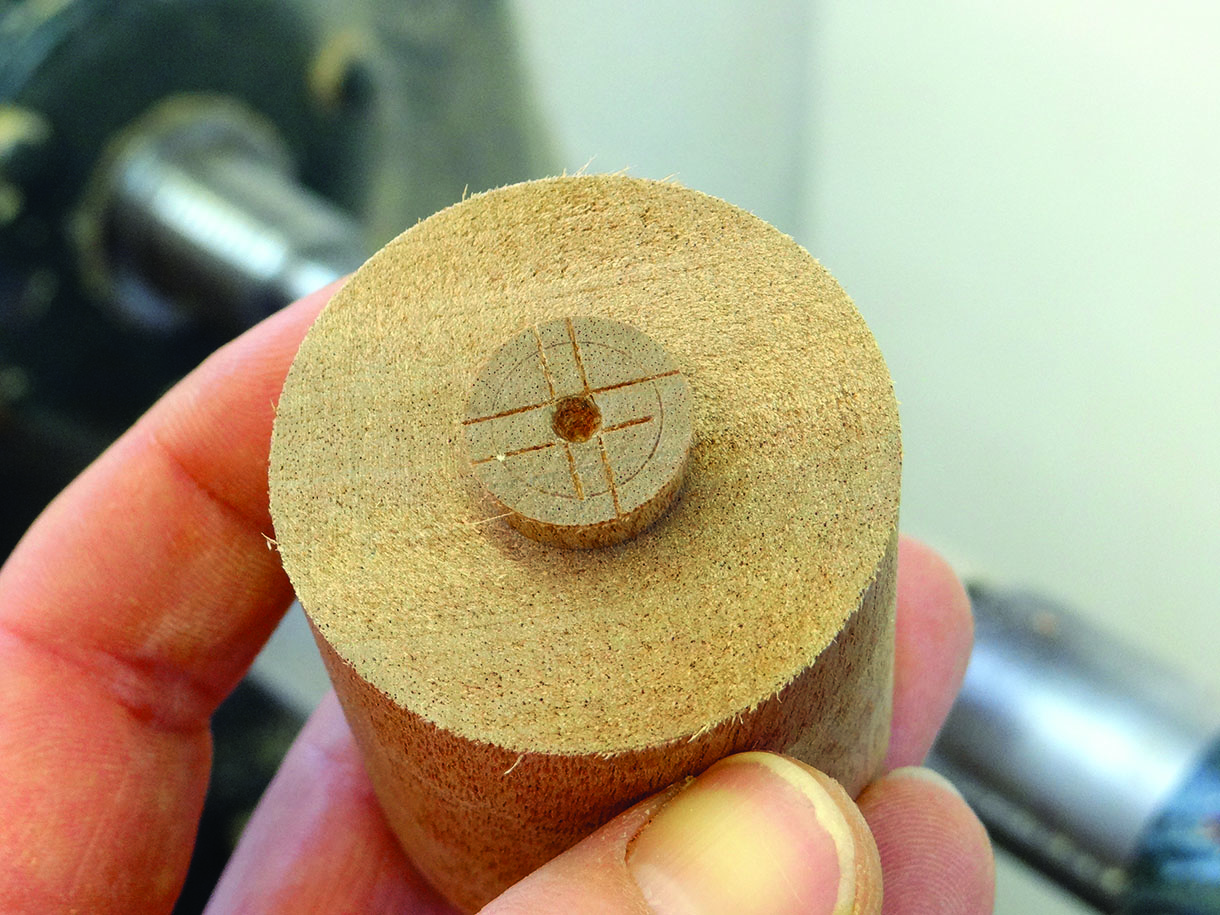
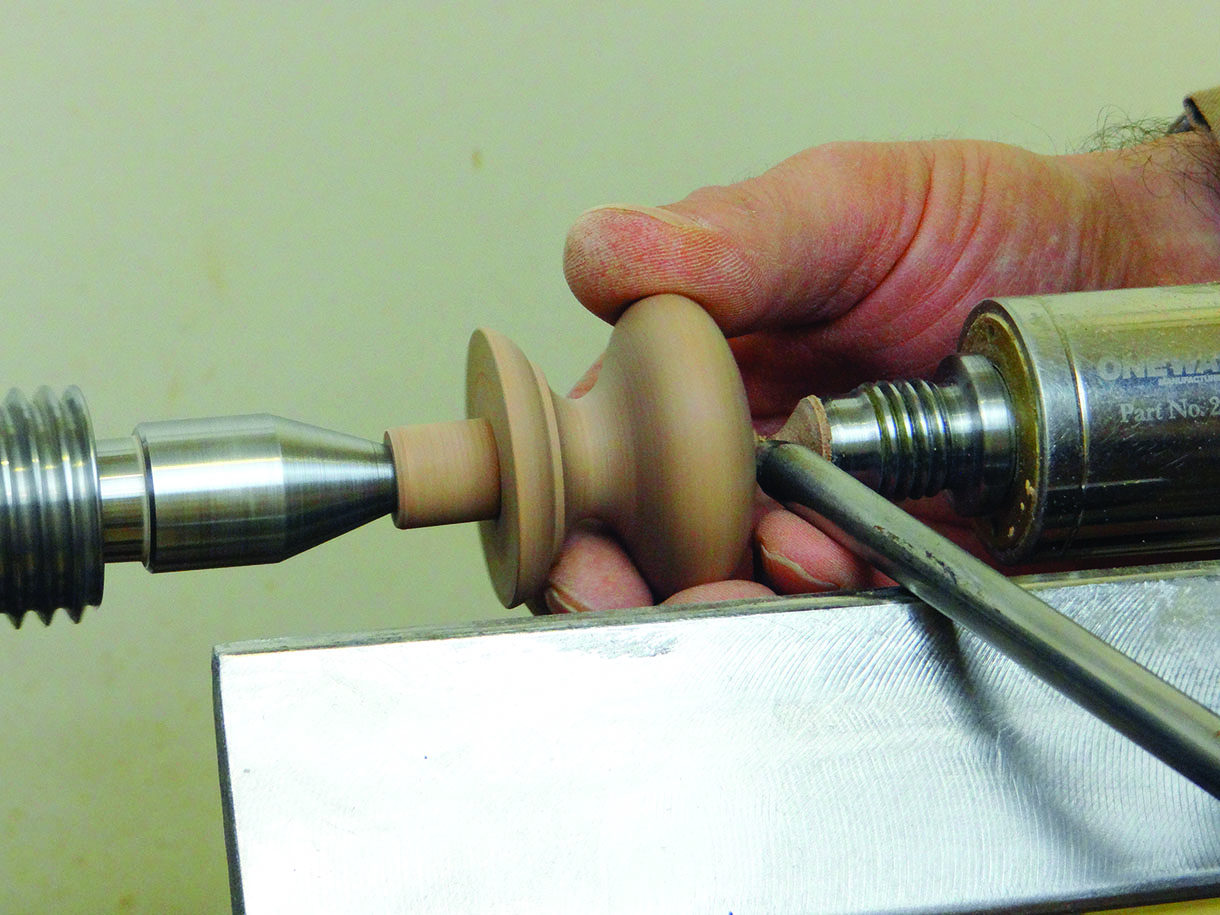
Removing the nib
The nib should be quite small, so removal should be pretty straightforward. There are two options that I regularly use. The first is to carve it away using a sharp chisel, in much the same way that you would sharpen a pencil with a chisel. Hold the work below the level of the nib, keeping your hands away from the sharp edge of the chisel. Using a slicing cut and work with the grain, slicing and rotating the work alternately until all that is left is a small area of chiselled or carved surface. This can then be hand sanded and blended with the last abrasive grit that was used to finish the item.
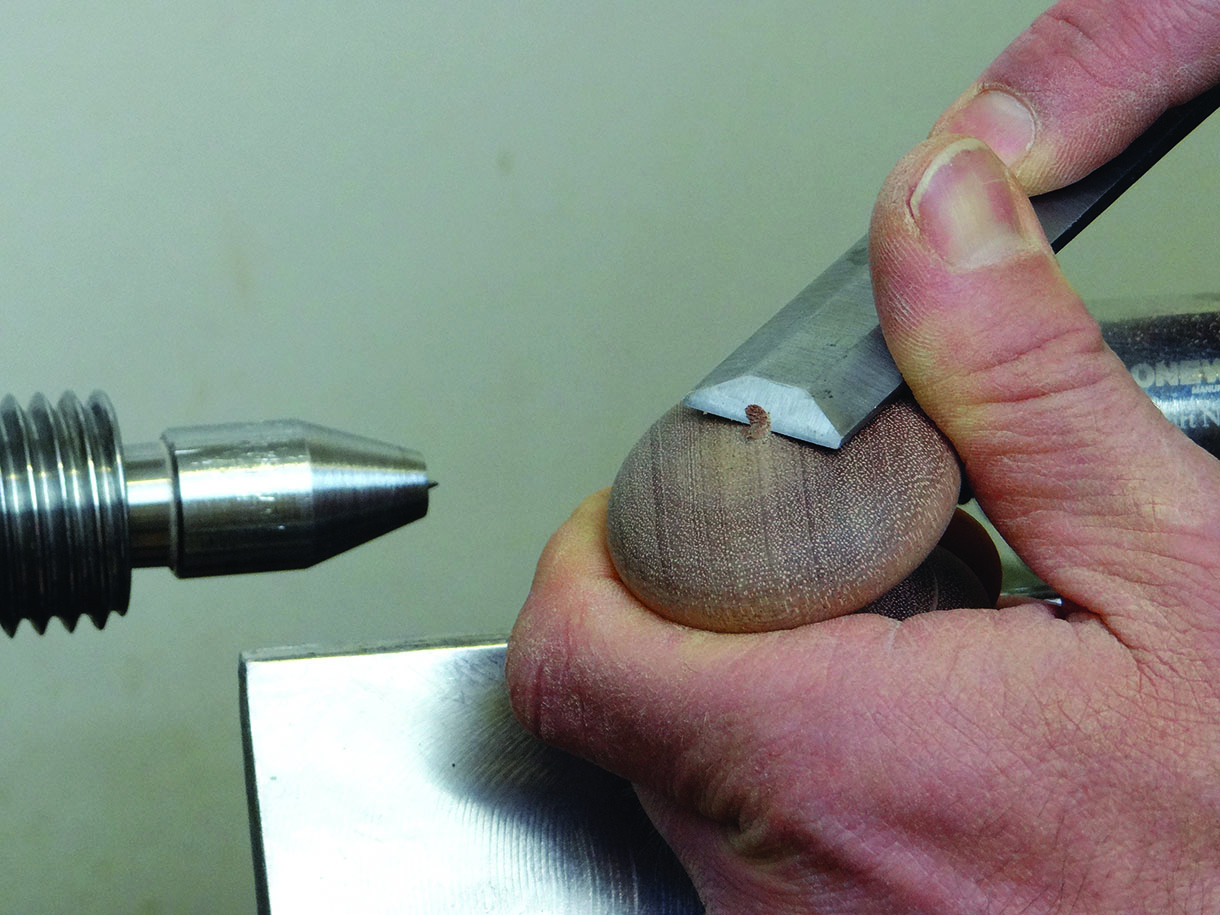
Paring away the nib with a sharp chisel
The chisel cut surface

Sanding away the chisel cut area
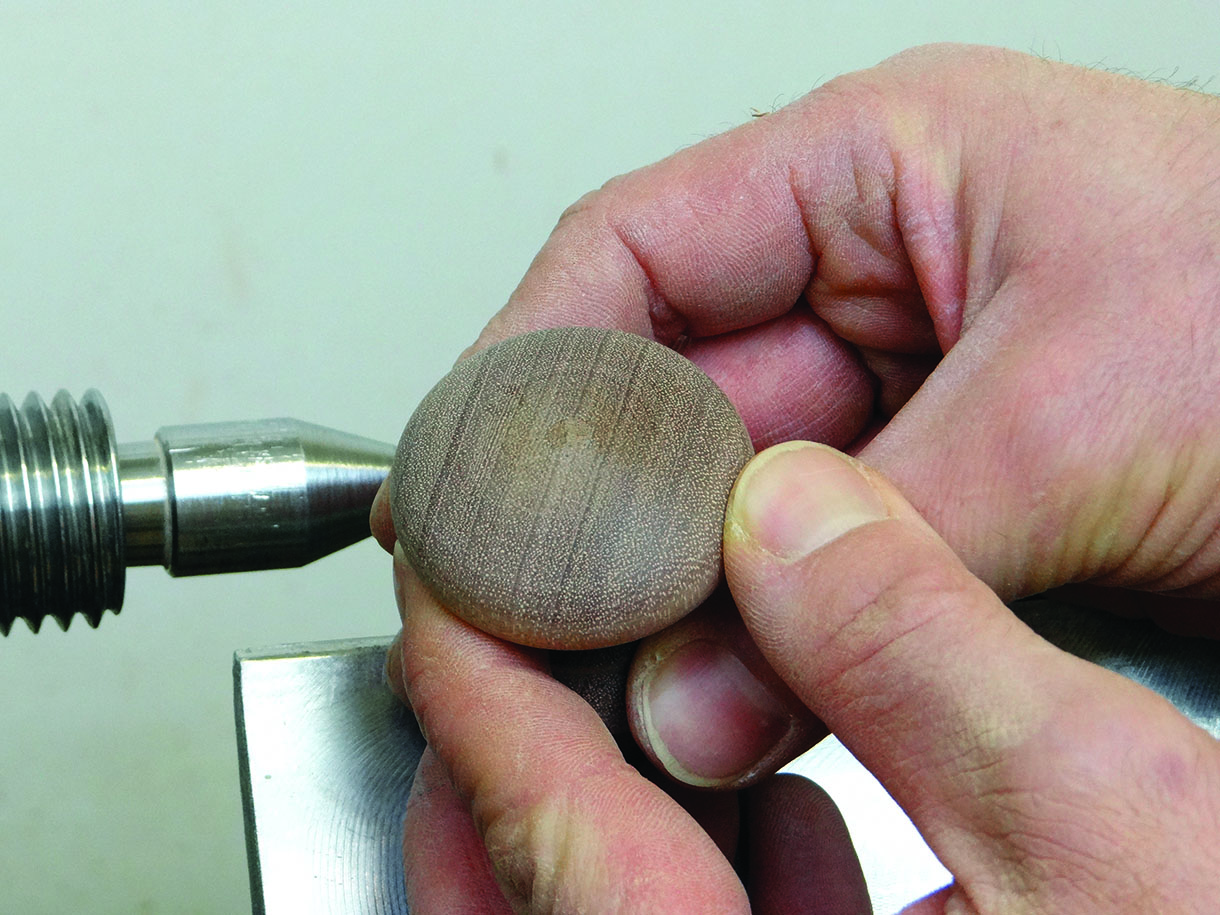
The alternative method that I use on a larger run of items, is to mount a sanding arbor in the chuck and power sand the nib away. This method is easier on the hands but care needs to be taken to avoid mis-shaping the work. A firm grip on the work with gentle pressure on the pad, along with continual movement of the work, should give the best results. Check the surface frequently, both visually and by touch. I often use a finer grit on the arbor from the last grit used on the lathe for power sanding. If I finished the work to 320 grit, I often use 400 grit on the arbor to avoid odd sanding scratch patterns.
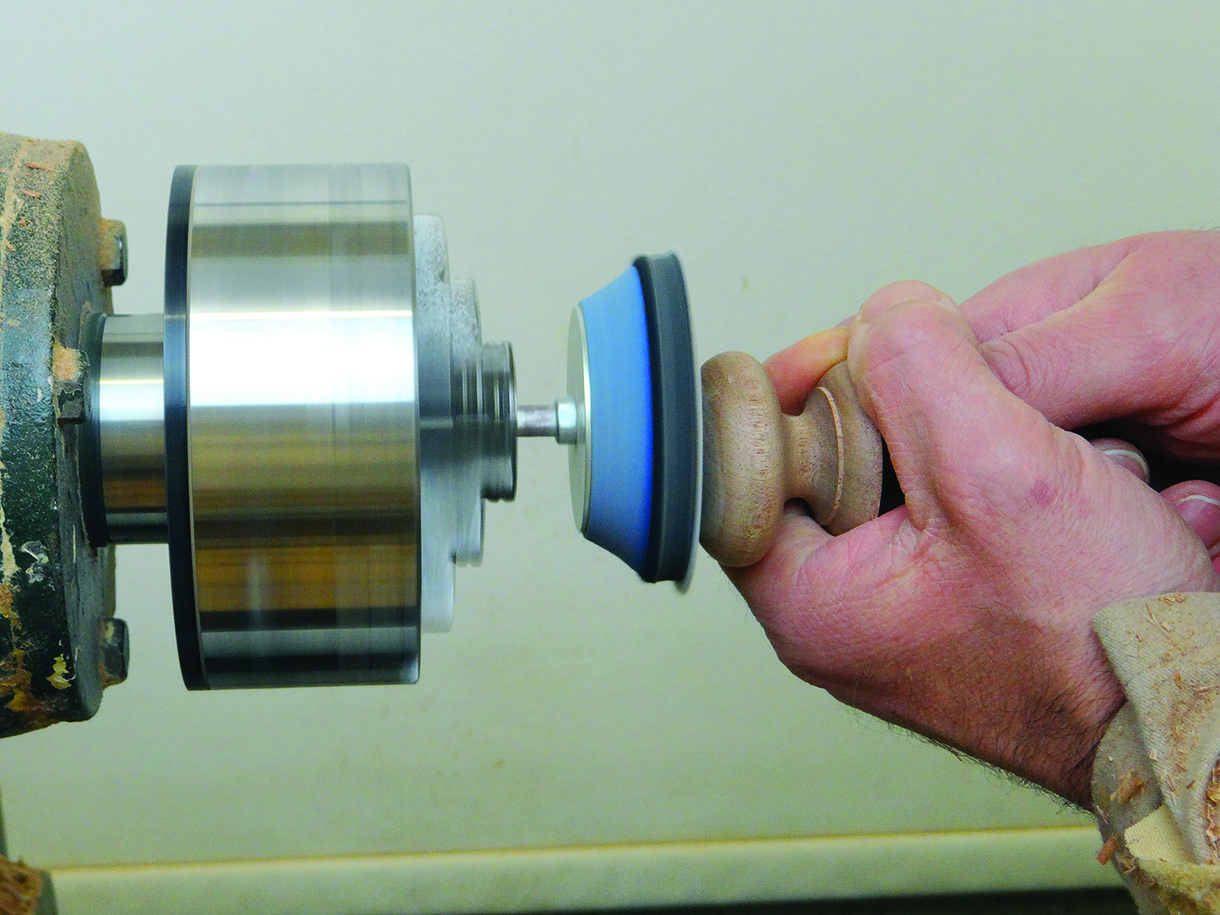
Power sanding the face
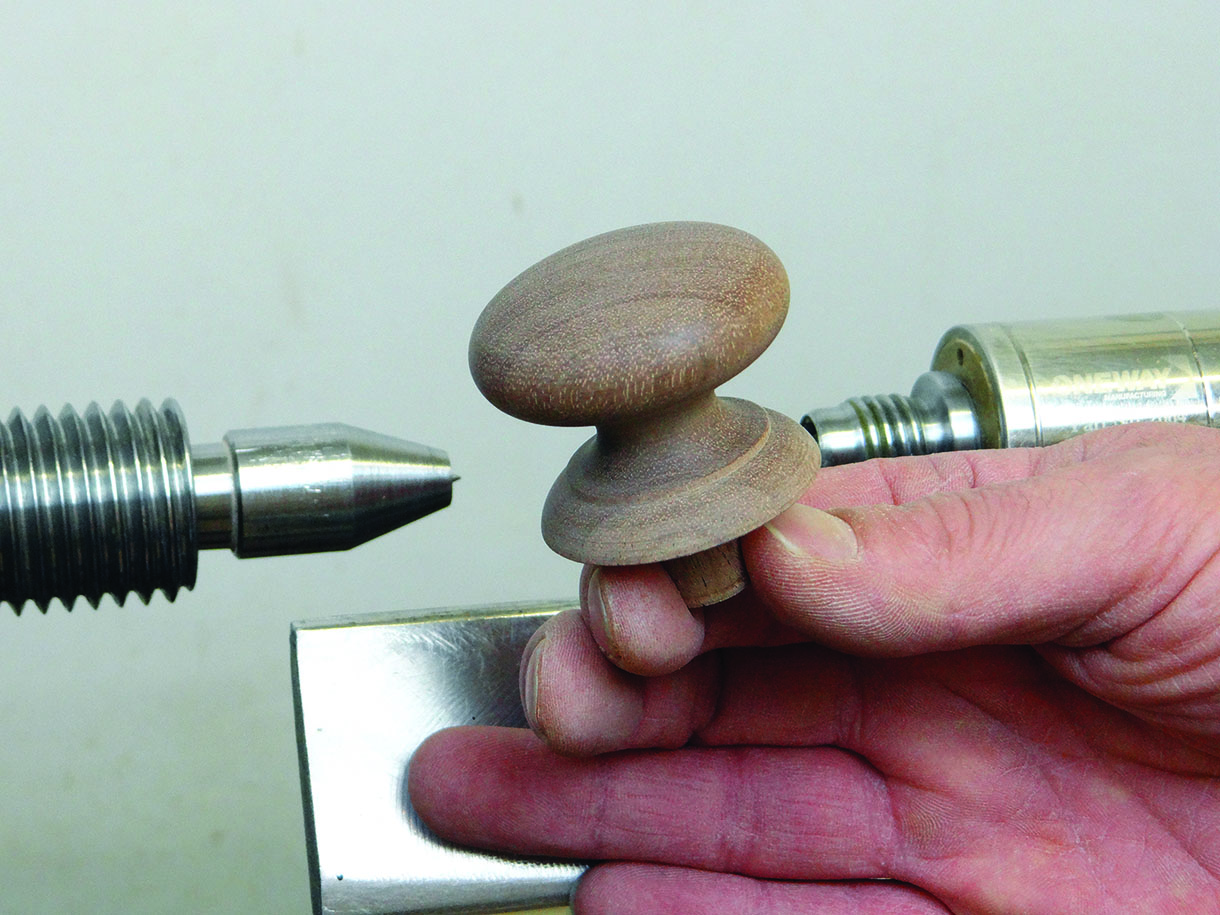
The finished drawer pull
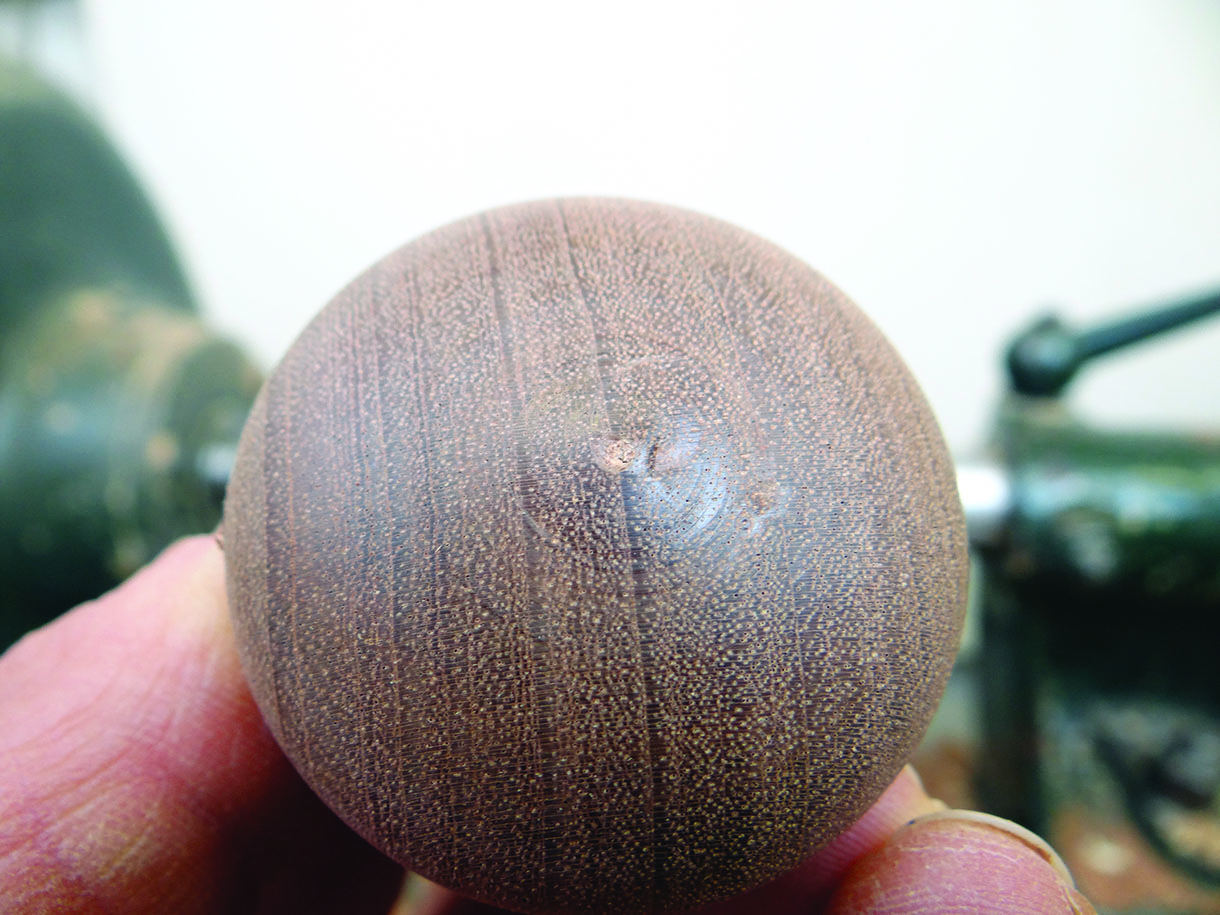
Compression marks
A common problem with parting off on the lathe is a strange discolouration on the end grain of the work. This usually shows as a pale ring or area close to the centre and is caused by the pressure of the tool’s bevel compressing the end grain fibres of the work. Some woods seem to be more susceptible than others to this: sapele and maple are often culprits, I have found. As this is a form of damage to the end grain, it can’t be sanded away. The only way to remove it is to cut it away, so it is best to try to avoid it in the first place. There are three tips I can offer to eliminate this problem. The first is to apply less pressure to the work. As always, if you need to apply pressure anywhere, it should be tool to toolrest, rather than tool to wood.
A second easier solution to this problem (although you will still need to address the pressure to the wood) is to remove or soften the heel of the tool’s bevel. This heel is quite harsh on a freshly sharpened tool, but by rounding it or grinding it away completely, it will make the contact between the wood and the tool much more gentle. I do this on my spindle gouges and skew chisels.
The third solution is more indirect, but it can be a great help: leave more waste between the work and the lathe centre. Often these compression marks can be made because you are working in a tight space without sufficient room to manipulate the tool. By leaving more waste it allow you to make the cut in a more natural and fluid action, without unnecessary restriction. I would always recommend leaving at least 15mm of waste, but more is better than less.

Telltale compression marks on end grain
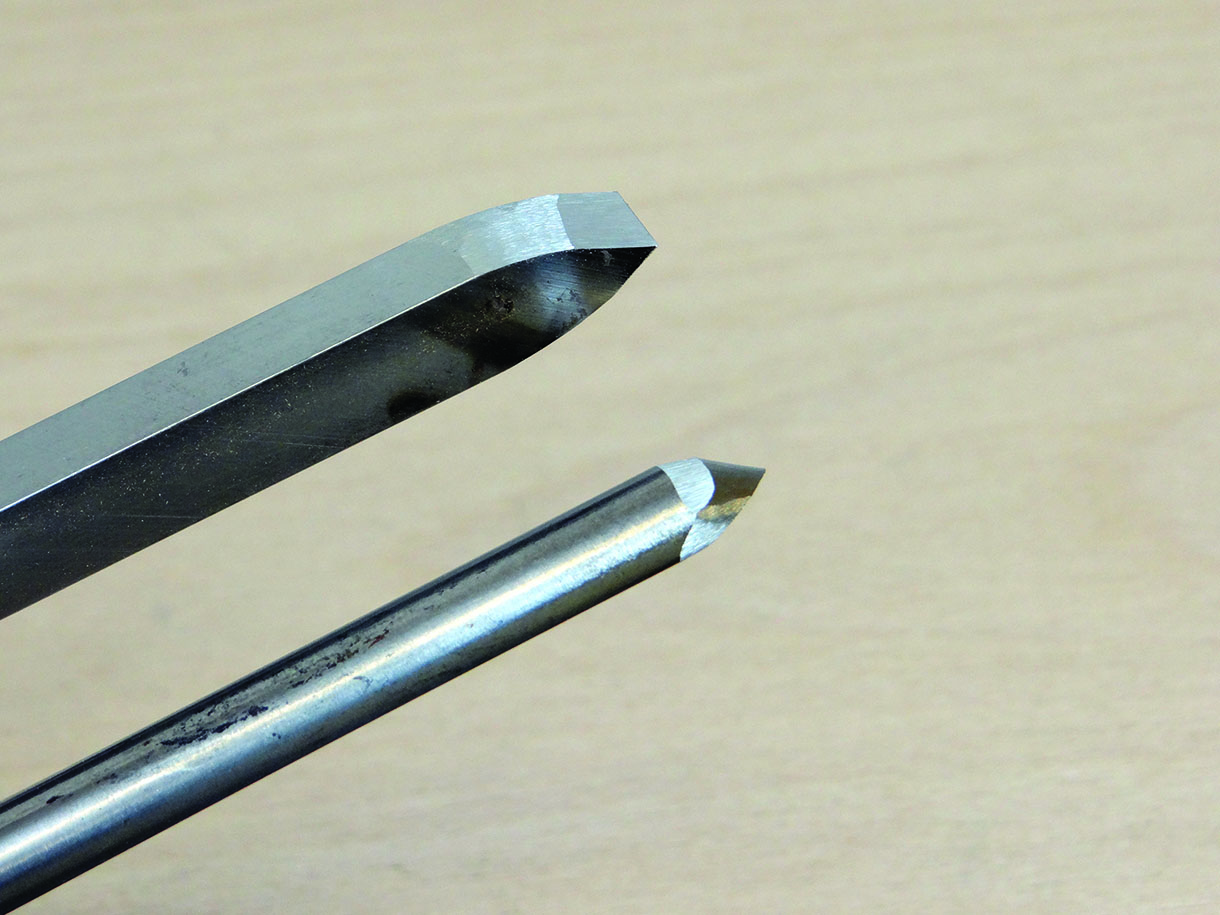
Softening the heel of both spindle gouges and skews will achieve a cleaner surface finish on your work
Catching the work
Something that is often overlooked when discussing parting off, is just how to catch the work once it is no longer held between centres. In my opinion as a left hander, this is one of the few times in life that being left handed is of huge benefit over being a righty. Right handers will find that they have to contort themselves, reaching over the headstock of the lathe, whereas lefties can catch the work in a very comfortable and normal turning position.
Whether you favour your left or right, the action is quite simple. However, as you progress through the cut, you can expect the work to do one of three things:
1. Drop neatly into your hand
2. Bind in the cut and mark the work with the waste piece or the tool
3. Spin out of centre and hit the toolrest before bouncing on the lathe bed and ending up on the floor
To ensure the outcome is option 1 rather than 2 or 3, you need to make sure you give yourself space to work by turning down the waste as small as possible. You can loosen the pressure between centres a little to avoid number 2 and cut in as smooth a fashion as possible to avoid number 3.
Keep your back hand loosely supporting the spinning work from the rear, as you make space in the waste. Once you are comfortable with everything, go for it. Don’t rush or apply too much pressure, just continue the cut smoothly as normal. Remember the very centre of the work is spinning much slower than the outer edge, so proceed slowly and cut though the last few fibres. The work should simply stop spinning and come away, without any real drama, into the hand that is supporting the work. Done properly, this should be quite anticlimactic.
Parting should not be dramatic
Top Tip
If you aren’t confident with the techniques for parting off, it isn’t a problem. Take your work to the point where you would be ready to part, then remove it from the lathe and saw off the waste. A hand saw is always the safest option, but for small diameter work that is long enough to safely grip, you can use a bandsaw. Larger diameter work can still be cut on the bandsaw but a V-block should be used to support
the work and avoid it spinning. Once sawn off, the tiny nib can be treated as described previously: removed and blended with abrasives.
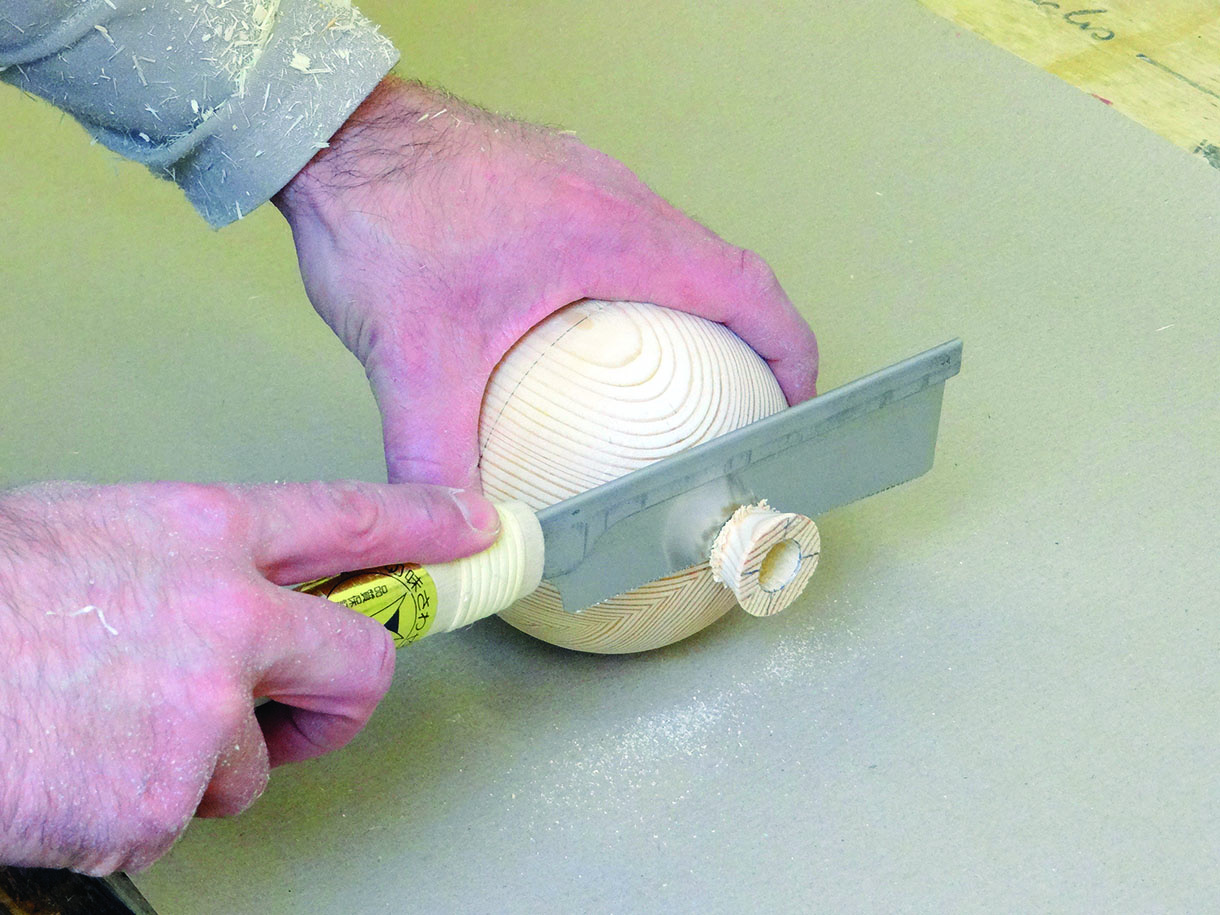
Remove waste with a hand saw if you don’t feel comfortable with parting on the lathe


