What You Want to Know About…Carving in the Round
Peter Benson looks at keeping tools sharp for carving figures
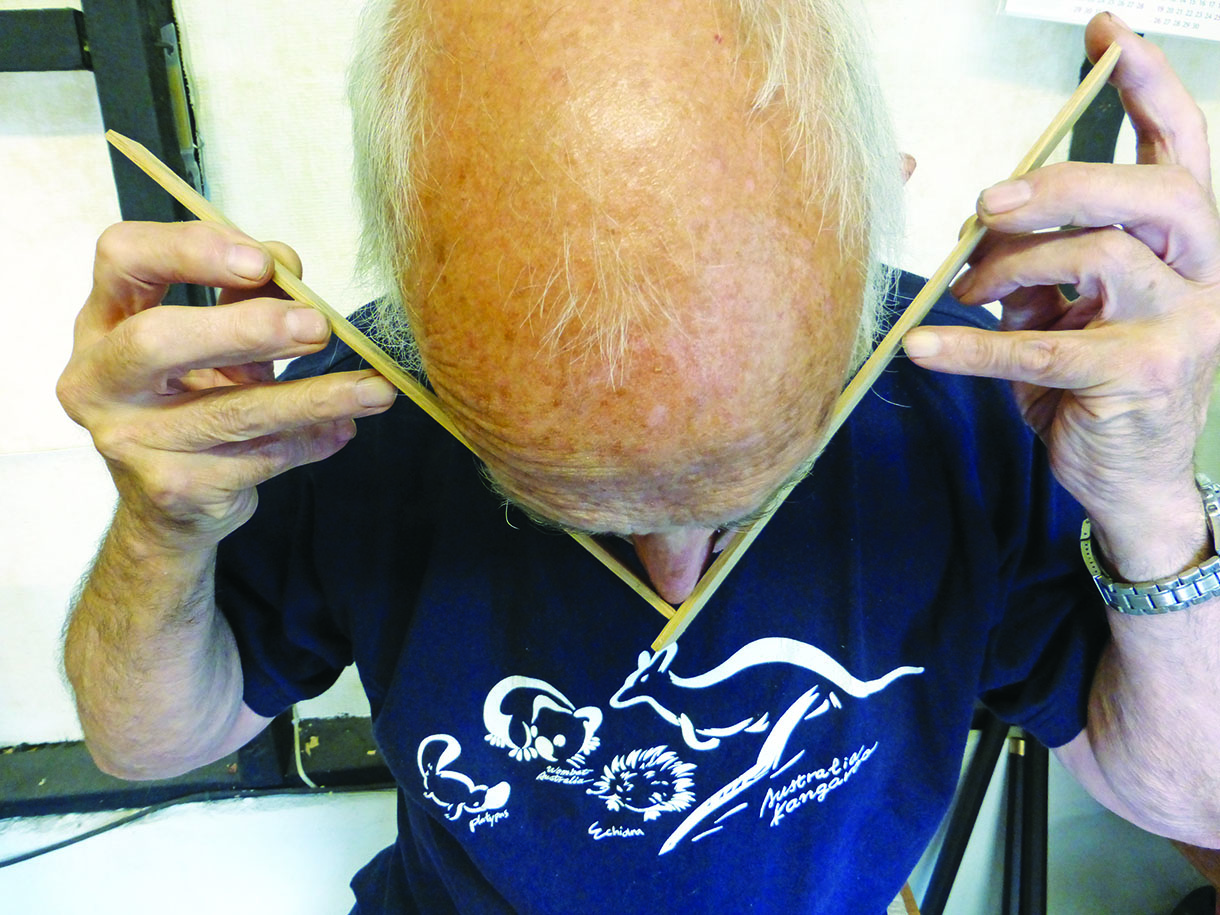
The angles of the face looking from the top. It is important that these are established early in figure carving
For this article on queries I received at the European Woodworking Show at Cressing Temple Barns last year, I will deal with a third general area that visitors were worried about: how to deal with carving figures in the round – animal and human.
For figures in general it is most important to study the basic skeleton first and then look at as many pictures of your subject as possible to get an idea of what sort of pose and position is typical of that subject. Many carvings of animals and humans are basically accurate but don’t sit right. The balance and centre of gravity are all wrong. How many carvings of birds have you seen that are falling backwards off their perches, or people that are supposed to be moving but look like statues?
Such errors are nothing to do with carving but are as a result of insufficient research. We must remember that we can only carve things we know about and understand. We must study, look and learn before we start carving. Plasticine models or maquettes can be a great help and their value shouldn’t be underestimated. There are many good books available that can give a wealth of useful information.
More specifically, in spite of numerous articles in this magazine on the subject, many carvers still have great difficulty carving good human faces. It is important that the general proportions of the face are learnt thoroughly, and this information is readily available.
The first stage in carving any face is to cut back the angles of each side of the face making an angle in the centre of no more than 90°. Look at how deep set the eyes are and how far back into the face the nose goes. The back of the nostrils should be as far back into the face as the tip of the nose sticks out. How many times have you seen short flat noses with the nostrils far too close to the tip of the nose? Look at human noses carefully and you will never make that mistake again. Look at how far the eyes go round the side of the face and how deep they are from the bridge of the nose. We are hunters, so our line of vision should stretch through 180° from right to left. Therefore, you should be able to see half an eye when looking at
a face from the side.
It is well worthwhile taking a series of pictures of someone in the family from the front, side, back, top of the head and under the chin. Even if these are nothing like the carving you want to do, there will not be any great difference, assuming the ages of the subjects are not too different.
The secret with almost all the problems you are likely to encounter is to collect and study as much reference material as you can. Modern phones and cameras are wonderful for this as you can take hundreds of pictures and delete those you don’t need.
Questions
I have had a couple of queries as a result of my last articles and you may be interested in them and my answers.
One
Now, this endless problem with keeping carving gouges sharp, I have taken note of Peter’s advice on grinding a flat cutting edge to the gouge (how you do that on a spoon gouge I don’t know!). The problem I have is that after sharpening and stropping a good edge on my bent gouges with a Tormek T7 machine, I lose the edge when doing a quick strop (Tormek is too slow) with my pro max mini bench grinder, I must point out that I haven’t got felt or cloth wheels for it yet (3in x 10mm spindle wheels are difficult to find) so I can’t expect to get a silk purse out of the sow’s ear that came with the grinder. But the questions I have for Peter are:
1. How do you make and attach the angled block of wood to the toolrest, or do you just cut a wooden triangle and hold it with one hand
on the toolrest?
2. What are the best wheels to get for honing with a grinder, felt or cloth?
3. What is the best honing paste to use on grinders or is there a harder honing block product to dress the wheel with? I’m using my Tormek honing paste at the moment but it’s not doing a good job.
Robert W. – via email
The answer is…
I will deal with this one query at a time.
• When grinding a flat bevel on any tool, spoon gouges included, the tool shaft should be parallel to the shaft of the grinder, i.e. at a right angle to the rotating wheel. By gently rocking the tool from side to side you should get a flat bevel across the full width of the tool.
• Stropping or honing the edge after grinding can be done by hand on a suitable strop or on a felt or rag wheel on a bench grinder. As most grinders run at around 2500rpm or more, wheels should be no larger than 100mm in diameter or you will overheat the tool edge.
• The angled block to give the right honing angle can be screwed or glued onto the machine rest.
• I use a 100 x 25mm medium felt wheel for shallow gouges and ‘V’-tools and a close stitched rag wheel for deeper gouges.
• I have used most compounds and have found little difference. The important thing is that it is soft enough to remain on the surface of the wheel. Heating the wheel up with a piece of waste steel can help with this. One of the main purposes of the compound is to cool the honing surface. Without it you will still hone the tool but will create a lot of smoke and may overheat the tool.
• If you get in touch with me through the magazine I will let you know where to get the wheels you need.
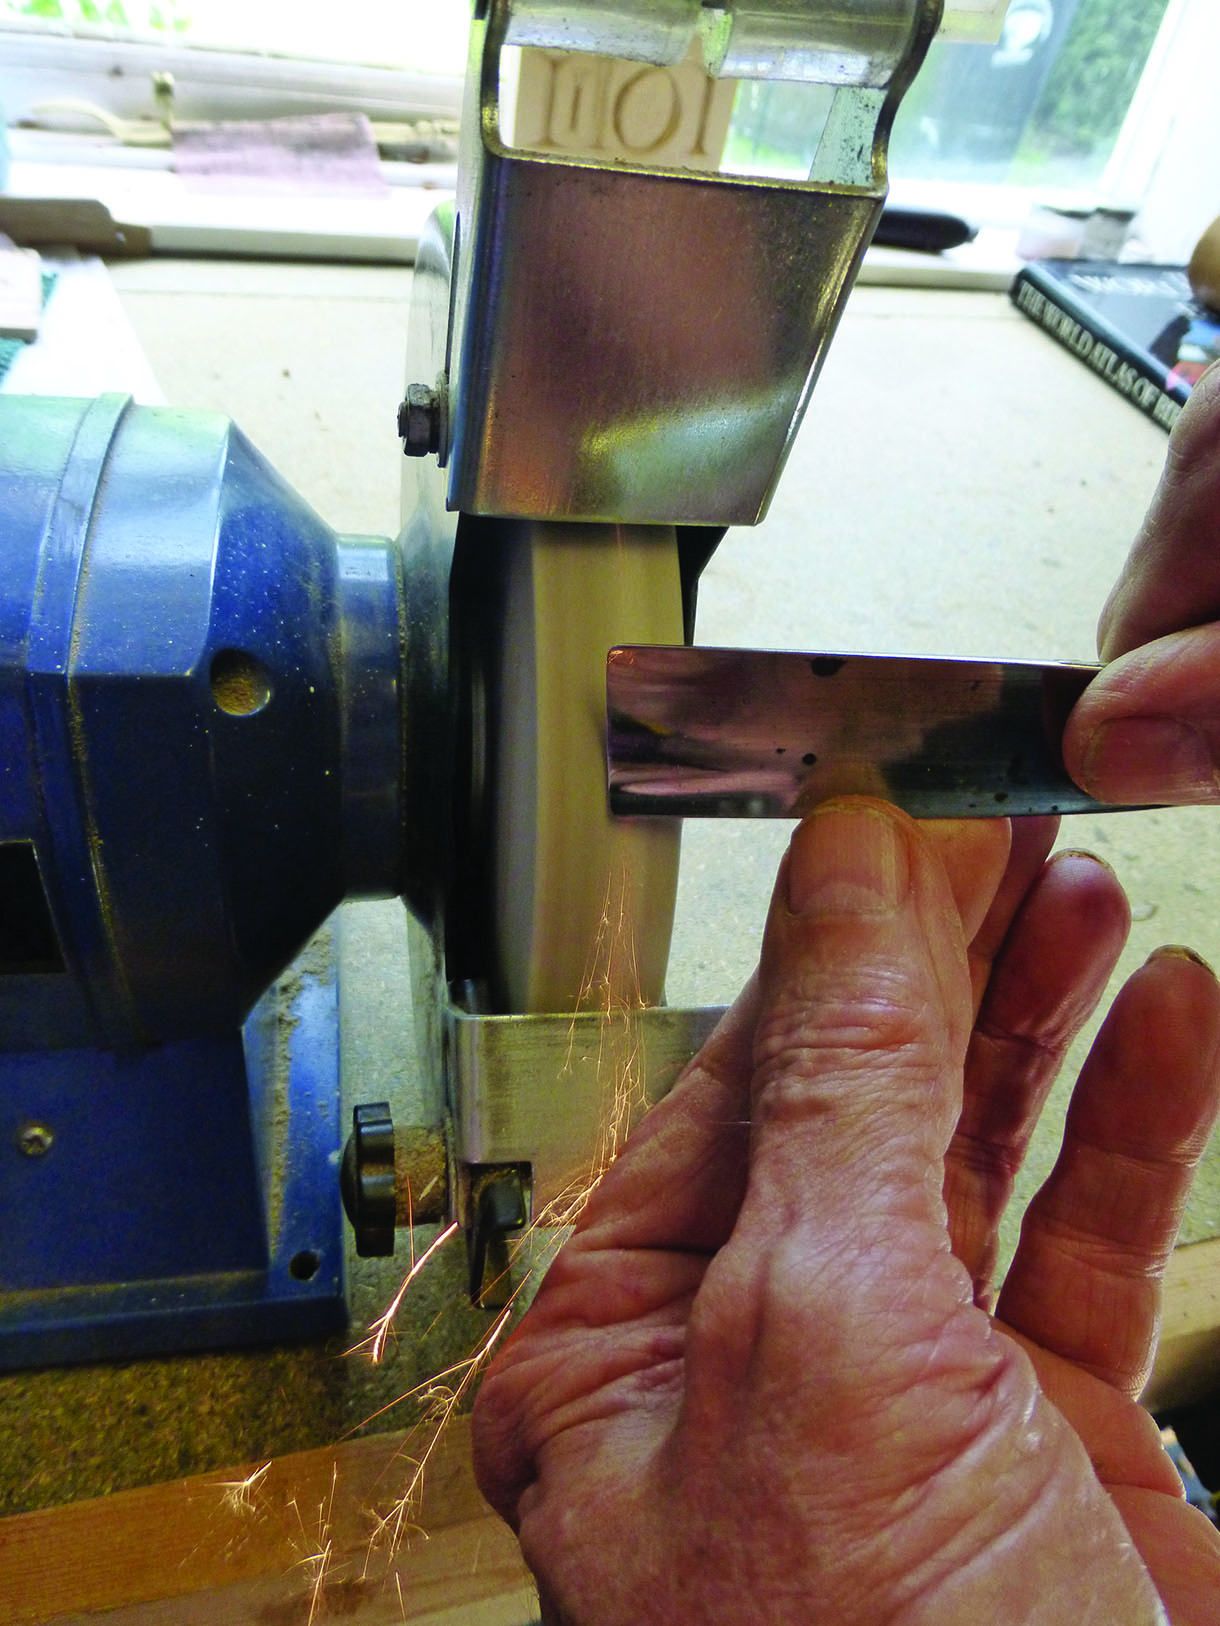
This shows the forming of a flat bevel holding the tool at right angles to the direction of rotation rocking it back and forth to keep the bevel in contact with the grinding wheel. This can be any fine abrasive wheel and the direction of rotation is unimportant. Guards have been moved for clarity
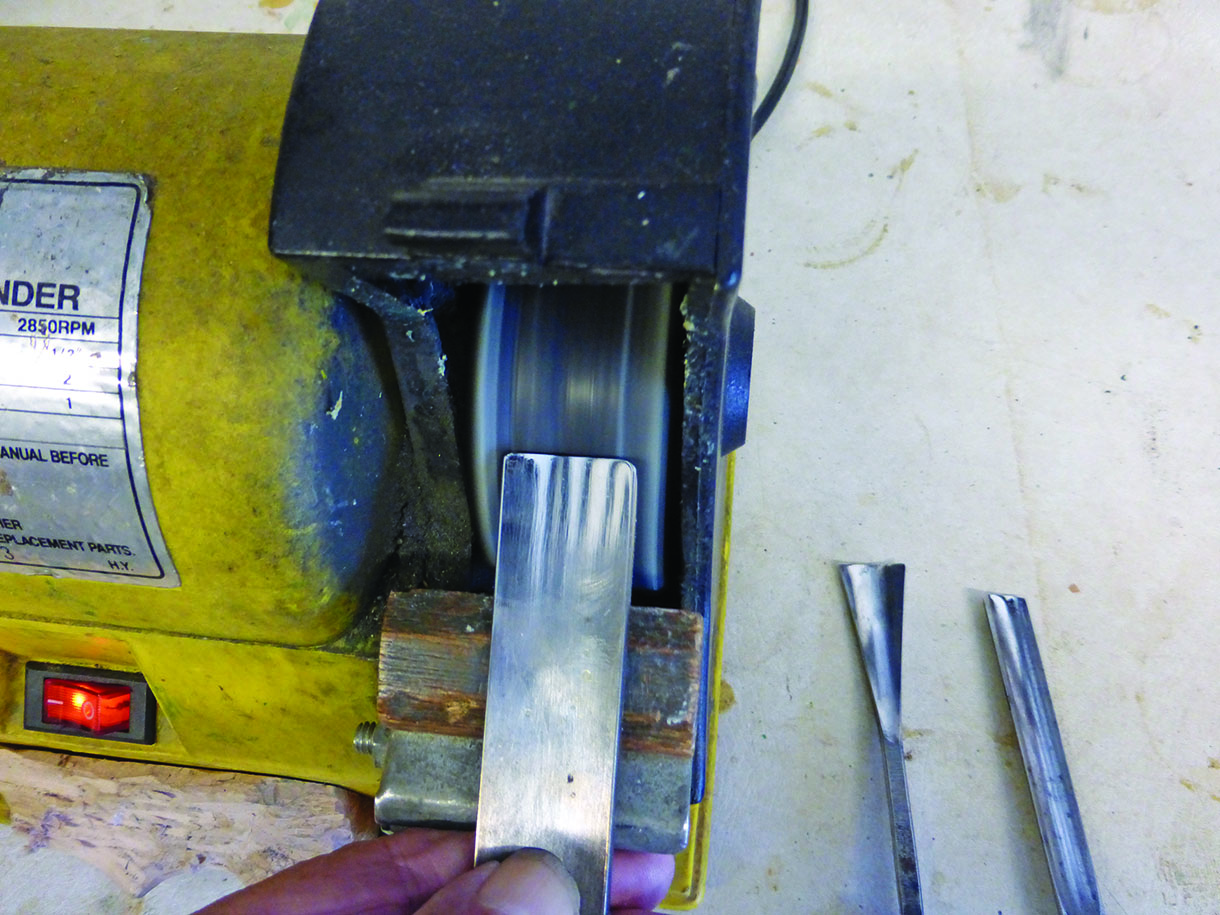
Honing is done on a rag or hard felt wheel rotating away from you at the top (opposite to the normal direction of grinding wheels). An adjustable rest can set the angle or a wooden block added if the rest is not adjustable
Two
I was reading an article ‘Old carving tools – good or bad buy?’, by Peter Benson in the Mar/Apr 2016 issues of Woodcarving magazine. Peter suggests it is never a good idea to buy sets of carving tools. With this seed planted in my mind I read on, waiting for that gem of knowledge suggesting which tools are good for a beginner to start with. I was disappointed. In Australia, I have not been able to find specialist carving tool suppliers. Also, I am not aware of any woodcarving clubs in the cities, let alone where I live – a six hours drive from a major city. Opportunities are limited, but I was lucky to come across a copy of the magazine. So, I am limited in availability of advice and opportunity to try or buy tools. Could you please advise me of the best path to take to start a beginner’s toolbox and possibly a hit list of tools in priority order. I would like to start with quality tools, which I would need to order from Britain (or somewhere outside of Australia). In advance, thanks for your time.
Tony W.
And the answer is…
The choice of tools will always be affected by the type of carving intended as well as the experience and pocket of the carver. Assuming that around six tools are within your price range, as most hobby carvers generally only use around this number of tools at any one time, I would recommend that you choose the following range of sweeps in sizes to suit you. You will probably need a fairly large gouge for roughing out and I suggest an 18mm x 6 or thereabouts. For basic hand carving I suggest one of a No.3, one No.5 (probably around 6–12mm), a No.9,6mm, a No.39, 6mm ‘V’-tool and a No.10 or No.11, 3–5mm Veiner.
This choice should cover most types of carving that you might attempt and will give a good grounding in tool management. I would only add further tools if you find that you need them for any particular purpose.
You don’t say where you are in Australia but there are definitely carving tool suppliers there – a search on the internet would be of help. I know Woodworks supply Stubai tools which are very good and I am sure there are others available like Ashley Iles, Pfeil or Henry Taylor. My only experience is in Western Australia where there is a thriving woodcarving community. Thank you for your comments and I hope this helps.
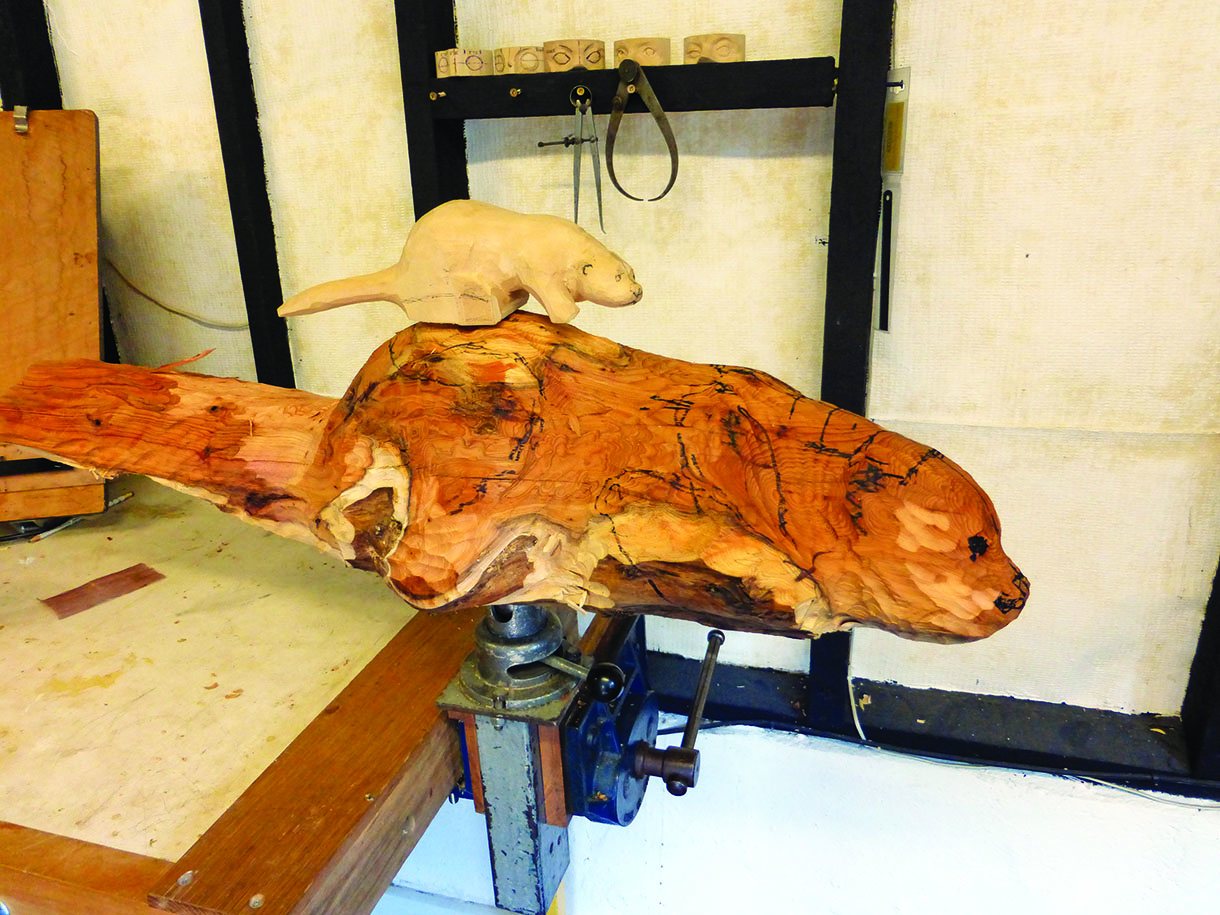
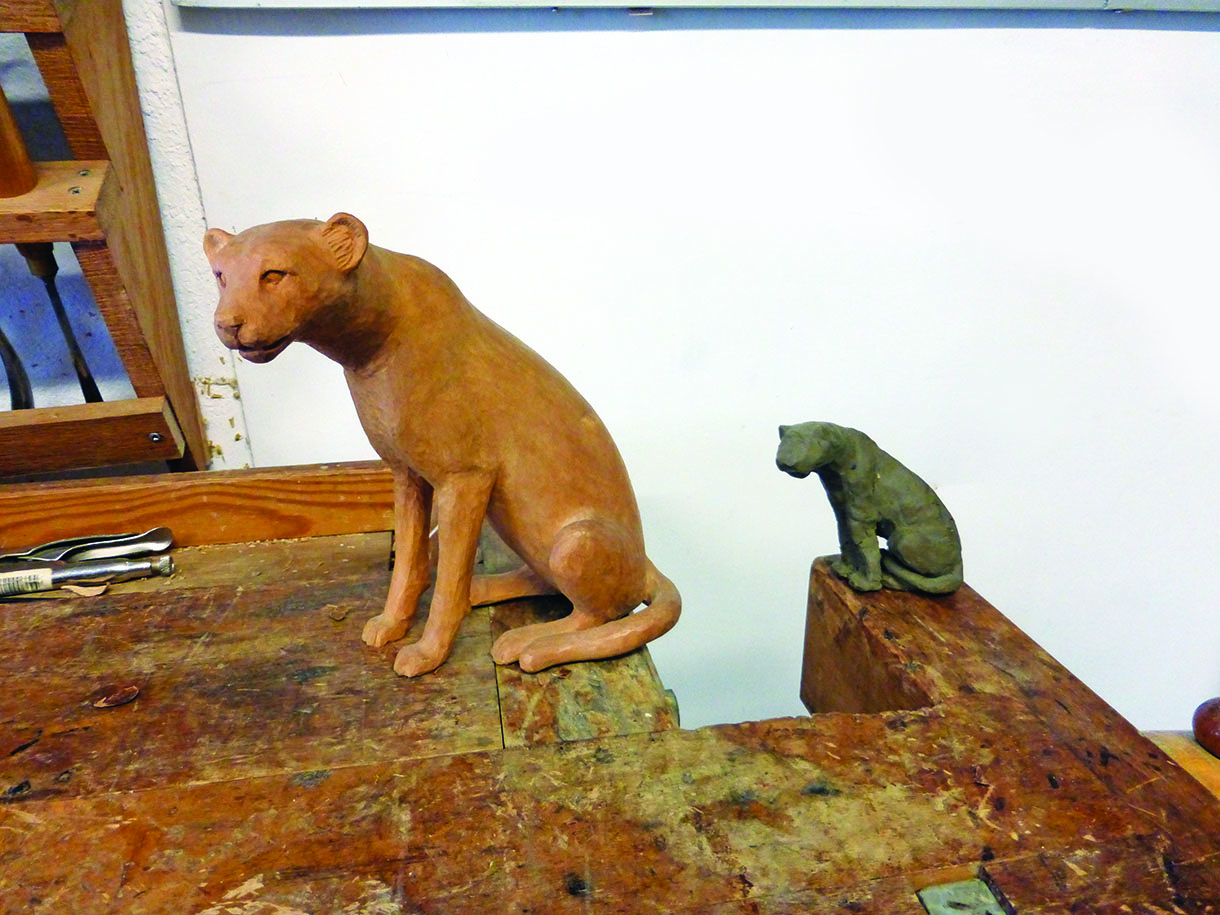
Maquettes do not have to be in clay or plasticine. Softer woods like jelutong are ideal for sorting out details before attacking your expensive piece of wood

Plastic skulls are not expensive and can be a great help in getting the head proportions right
Clay or wooden maquettes can be any convenient size – they are really to get your ideas firmly in your head before you start carving. Any obvious problems can be sorted out at this stage


