Should I Use a Traditional or a CrushGrind Mill Mechanism?:
Chris West helps you to make an informed decision on the pepper and salt mechanisms you use for your turned mills
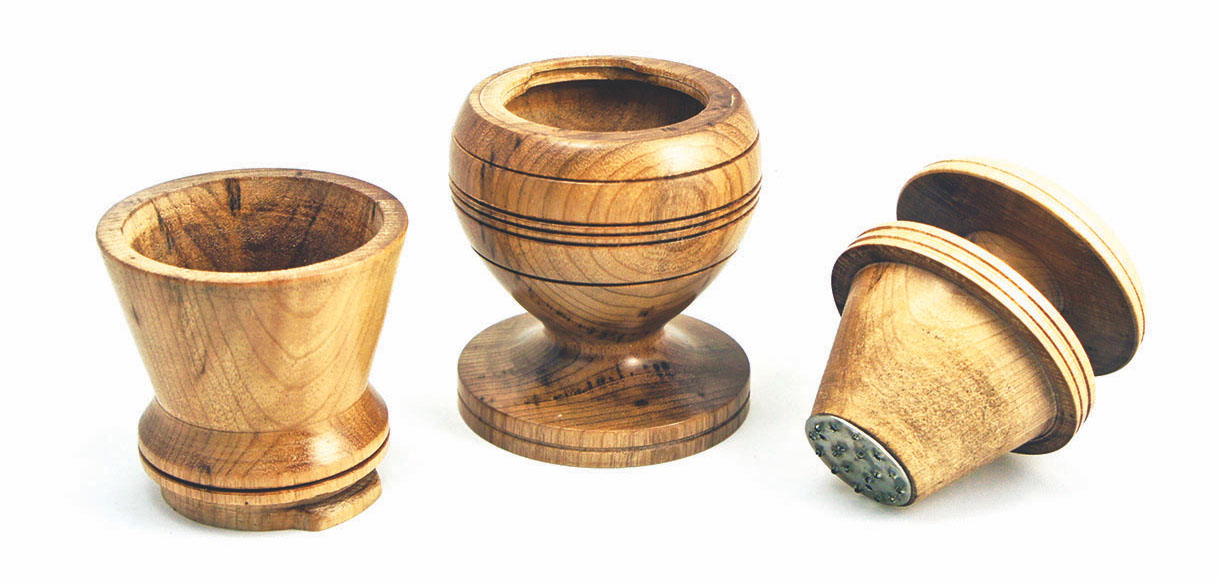
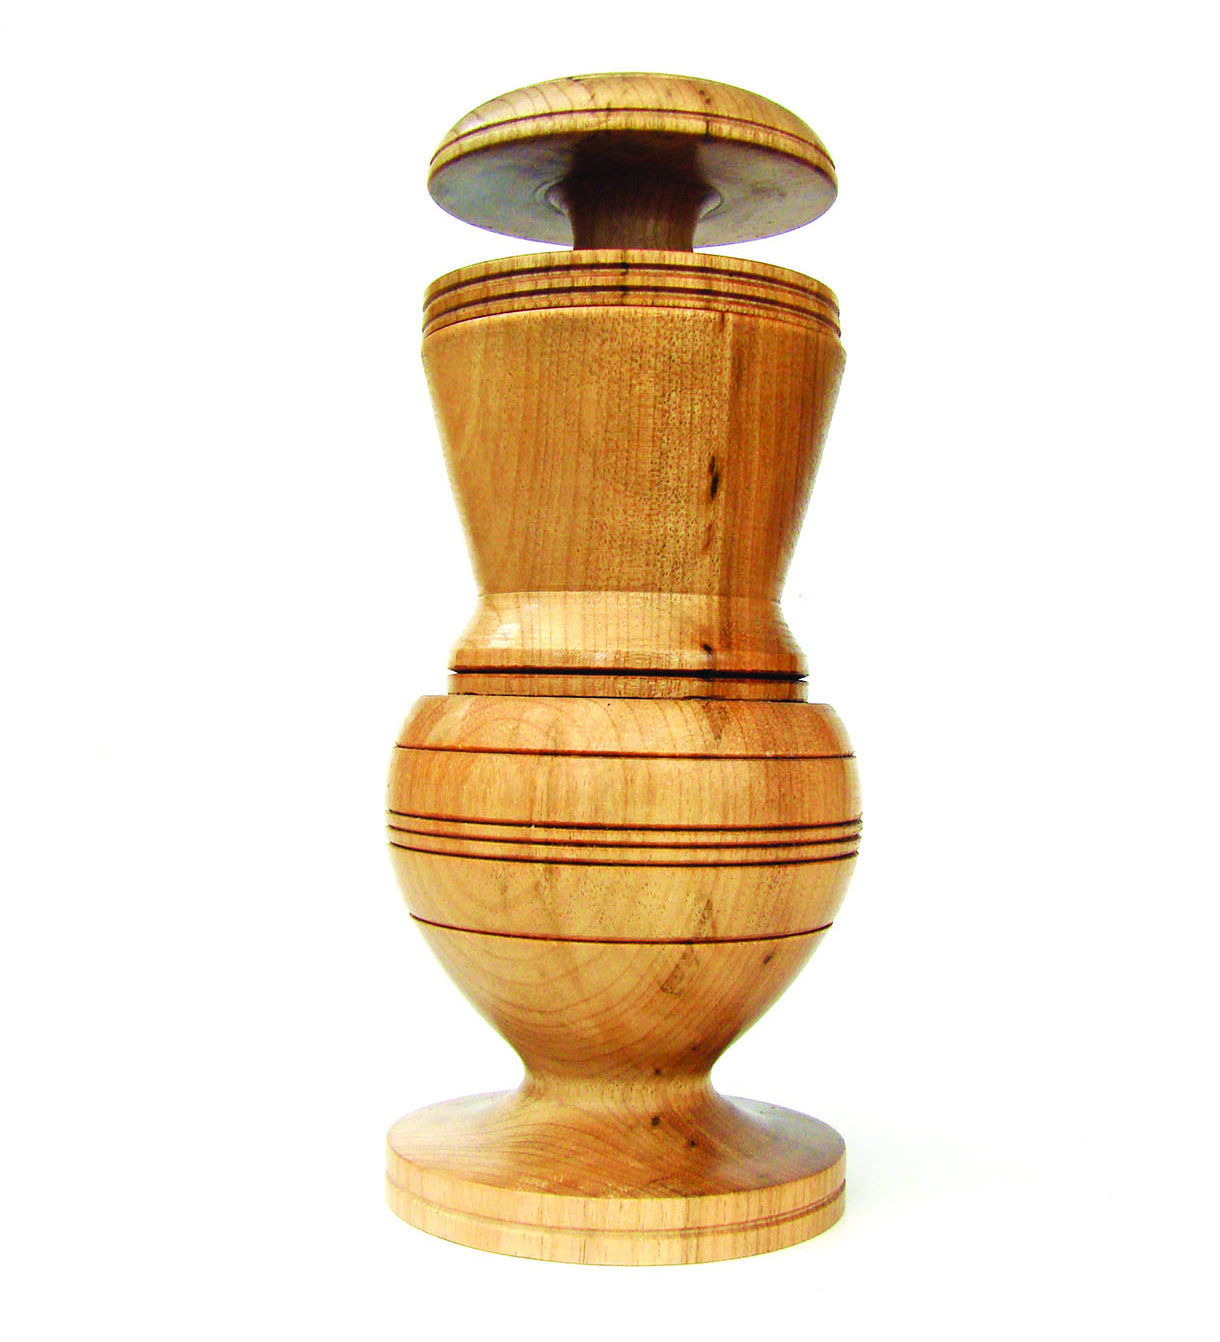
Replica of Mary Rose pepper mill, made in sycamore
History
Two words that crop up all of the time are ‘mill’ and ‘grinder’. Basically they both refer to the same thing: the turned container that holds a condiment which is ground or milled to a more acceptable size, i.e. a peppercorn becomes ground pepper. In this and future articles, I will be using what I consider the more modern word, mill.
I am often asked, ‘Which type of mill mechanism should I buy?’. There is no definitive answer to this question. The first thing to understand are the pros and cons of the two basic types of mechanism available.
Before we get into talking in detail about mechanisms, it is well worth learning a little about the history of grinders/mills. The story of the use of pepper and salt mills begins in the 1500s. While I could be a geek and write about the history of salt shakers, I will restrict myself to mechanical and wooden grinders/mills that grind peppercorn or salt. ‘What about a pestle and mortar,’ I hear you ask; don’t nit pick!
The first grinder I’m going to mention is the one found with the Mary Rose, Henry VIII’s battleship, which sank in the Solent Water just off Portsmouth in 1545. The ship was on her way to engage the French in battle. It’s thought that she fired a broadside at the enemy and was turning to fire the other broadside when water flooded into her open gun ports and the ship suddenly capsized, in full view of Henry VIII who was watching from the shore.
The original grinder is preserved at the Mary Rose Museum in Portsmouth Historic Dockyard. I turned a replica of this historic item from sycamore (Acer pseudoplatanus), although the original was turned from ash (Fraxinus excelsior).
Modern grinders are based on those turned in the early 1800s by Peugeot Frères who developed a pepper-grinding mechanism using hardened steel. In 1997 they introduced a stainless steel mechanism for salt. Sadly, the mechanisms alone are not sold commercially; they have a good reputation which is well deserved. Other manufacturers have developed similar mechanisms which are used in traditional mills. These are available in kit forms allowing woodturners to turn pepper
and salt mills.
The next step forward was the development of the CrushGrind mechanism and products, by IDEAS Denmark A/S. Based on a pepper grinder made by the Japanese inventor Mitsui Kamioka, the development of CrushGrind was begun in 1992 with the objective of developing a multi purpose ceramic grinder which was suitable not only for pepper and salt, but also for spices and herbs amongst other condiments.
Choosing a mill mechanism
There are a number of quality pepper and salt mechanisms being manufactured around the world. However, only a few are available for purchase by individual woodturners. Those mentioned here can be bought as mechanisms alone, but others may be available where you are.
There are two basic types of traditional pepper and salt mechanism, examples of which are shown below. The traditional mechanism relies on a finial nut at the top of the mill, for adjustment of the grinding of the condiment while the CrushGrind has an adjustment nut at the base of the mill.
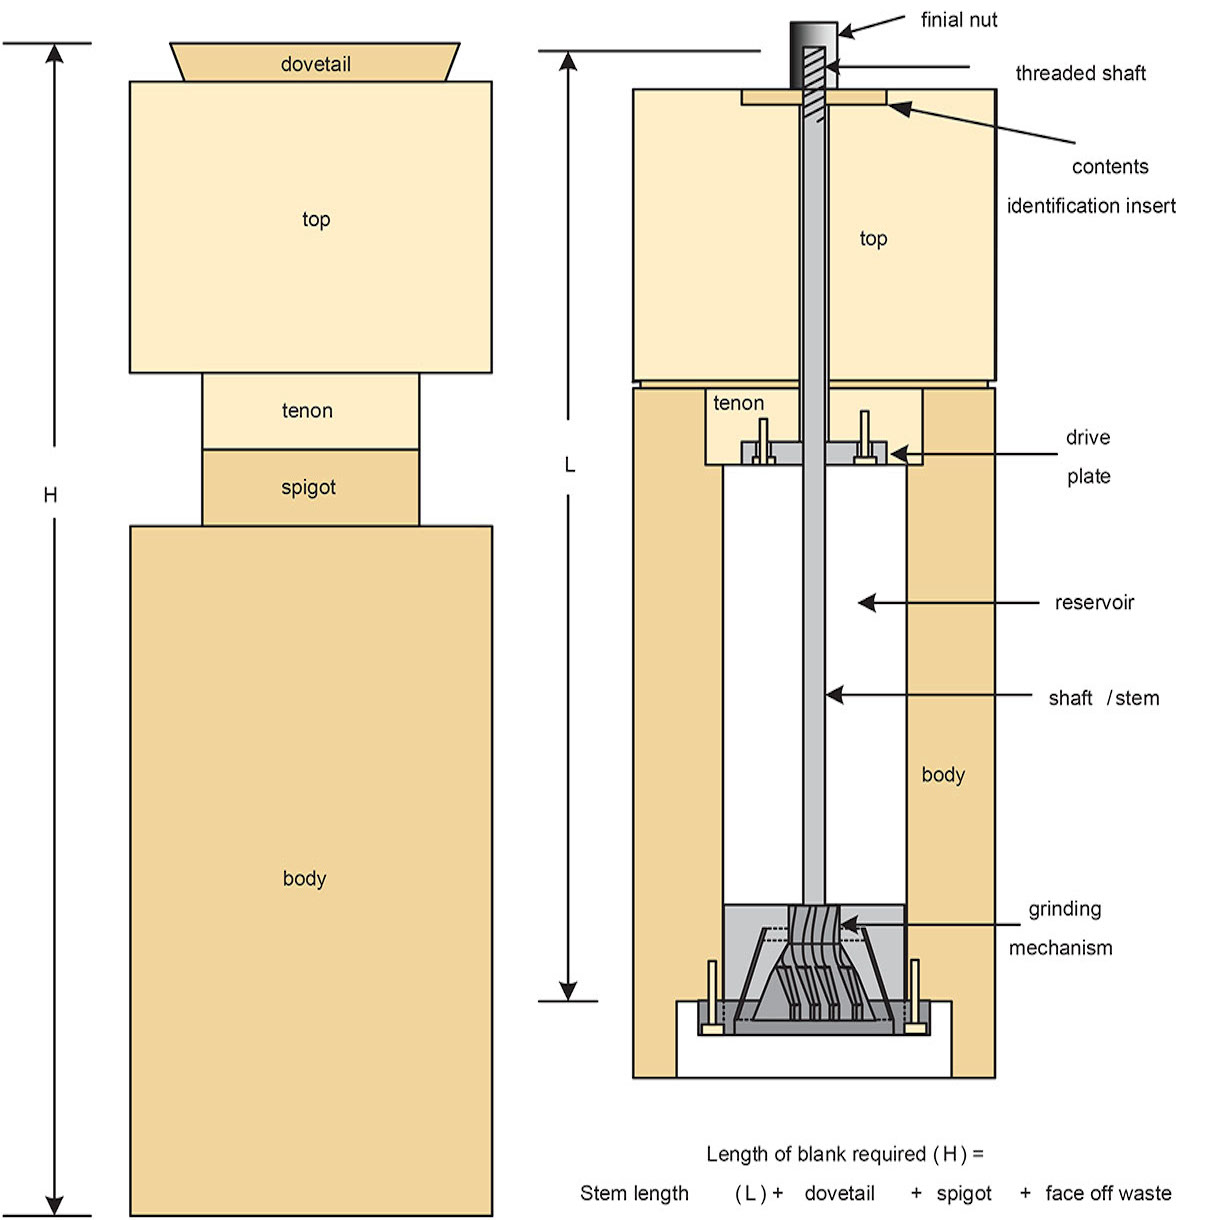
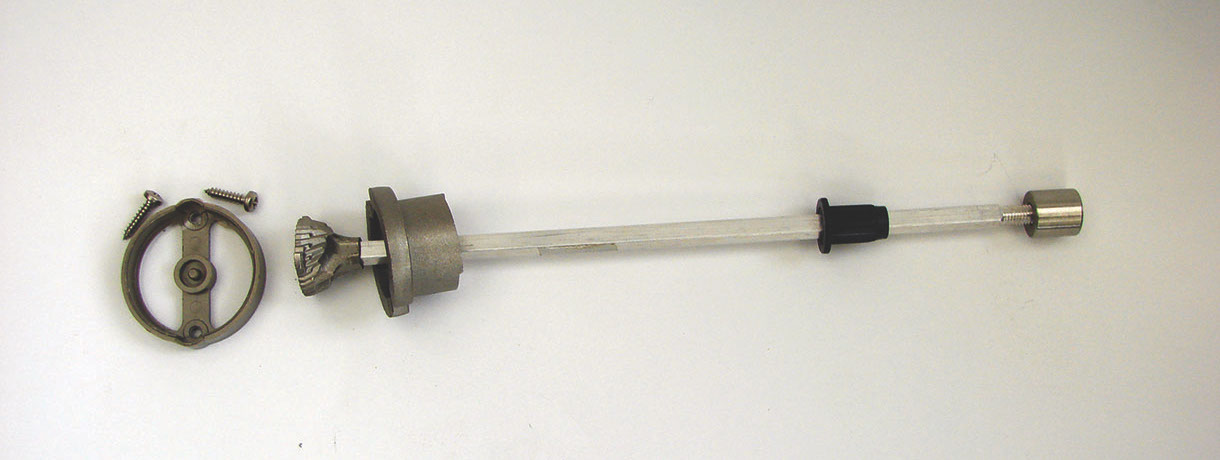
Anatomy of a traditional pepper or salt mill
Traditional mechanisms
Pepper grinding mechanisms are made from hardened stainless steel, while the salt mechanisms are moulded from hardened plastic. It is important to ensure that stainless steel screws are used to secure the salt mechanisms. They can also be used for the pepper mechanisms, but you will often find that zinc plated steel screws are supplied with the pepper mechanism.
Some manufacturers produce mechanisms made from ceramic, which can be used for both pepper and salt. It is important to identify clearly which mill is for the salt and which for the pepper.
Mechanism drive plug and plate
One particular UK mechanism uses a plastic drive plug made with a square hole through it. The plug has ‘wings’ on the sides, which compress when driven into the 9mm hole in the base of the tenon.
Other UK and US mill mechanisms have a circular drive plate with a 5mm (3/16in) square hole punched through the aluminium. This is fixed with two screws into the base of the tenon.
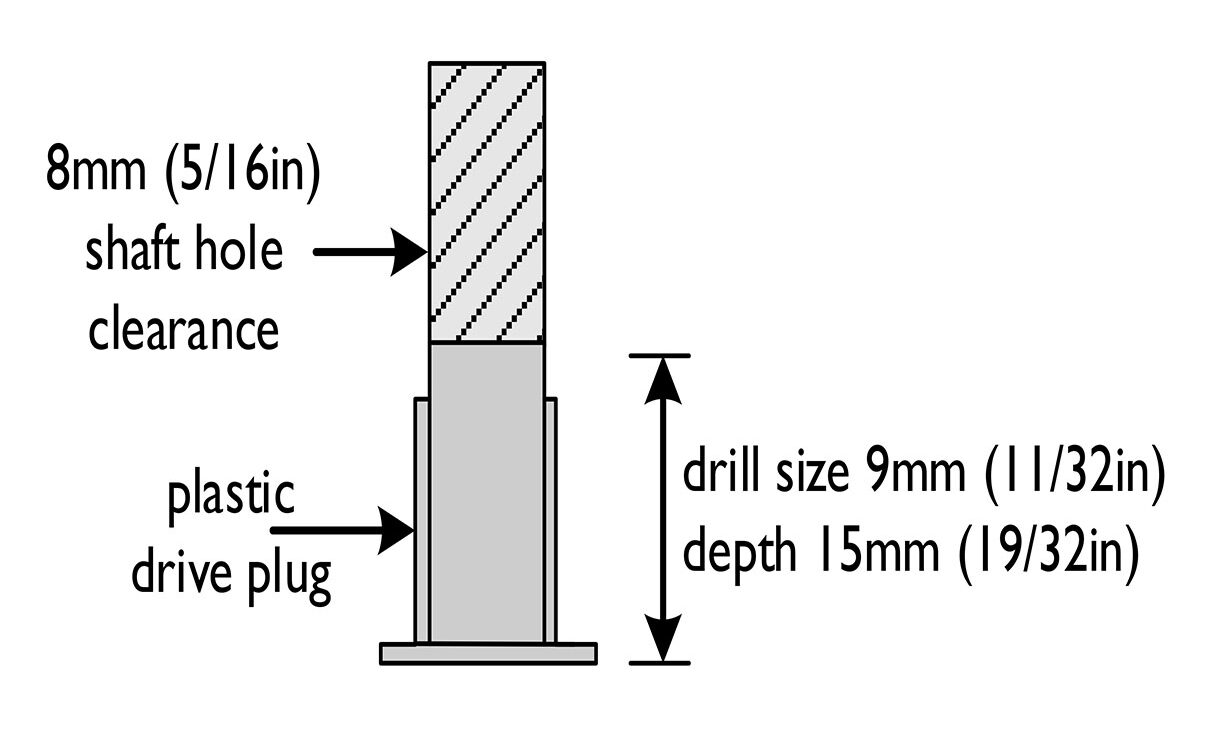
Drilling requirements for a drive plug
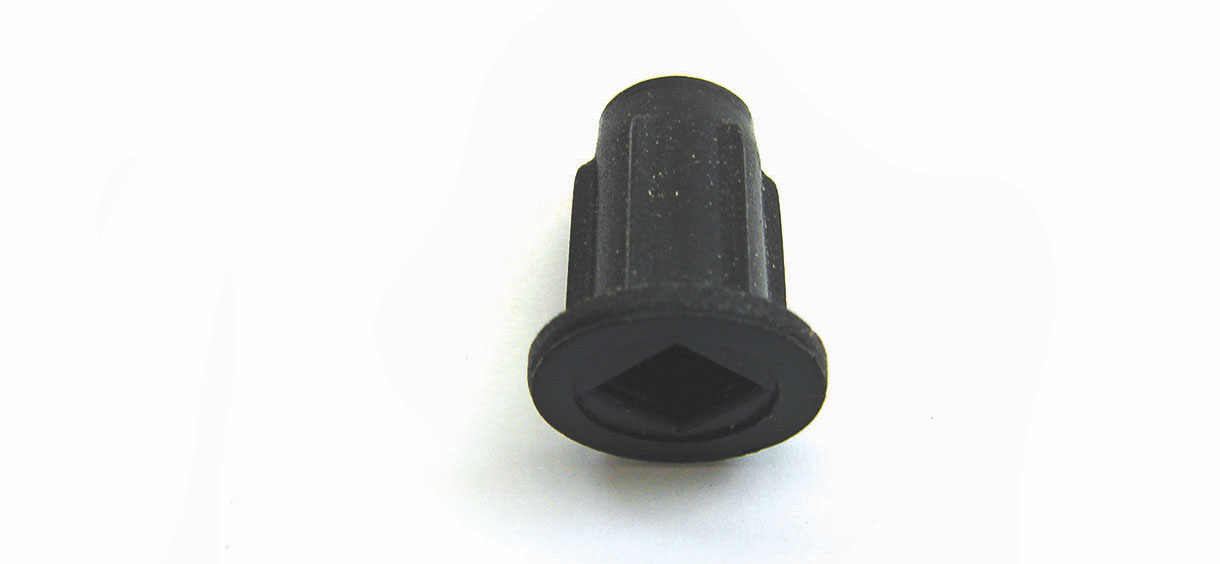
Plastic drive plug
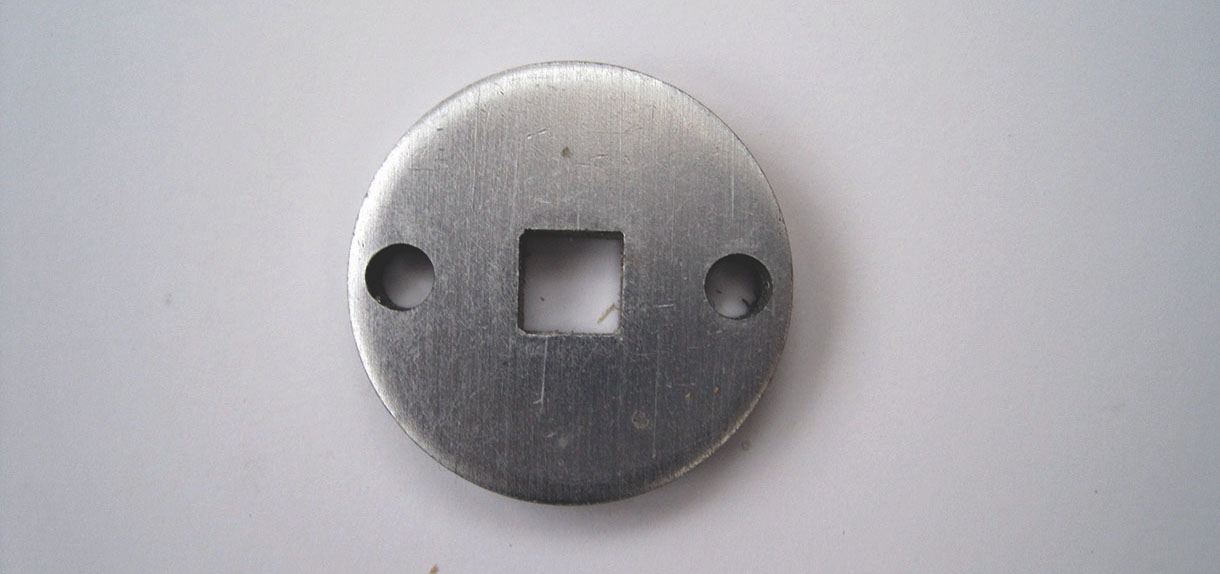
Aluminium drive plate
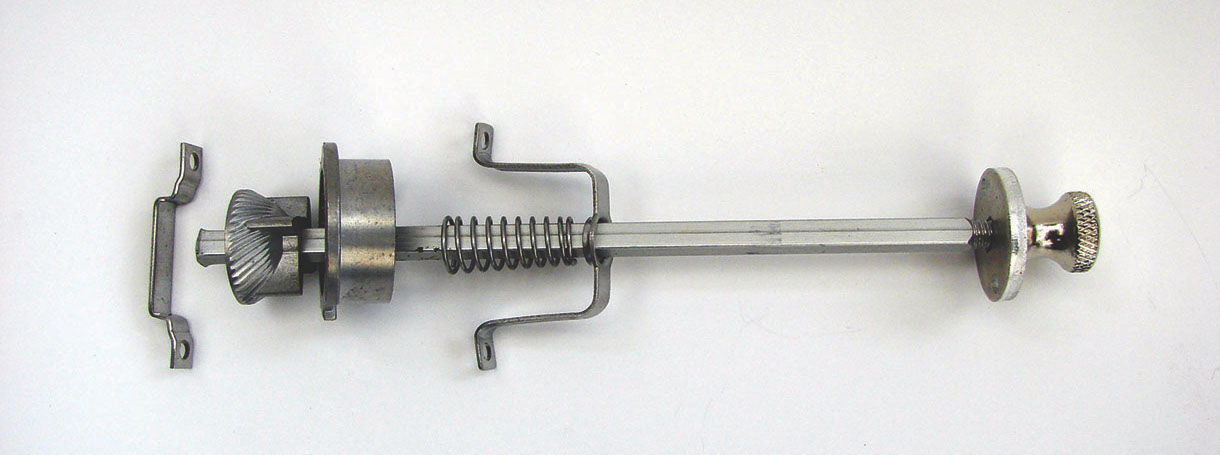
CrushGrind mechanisms
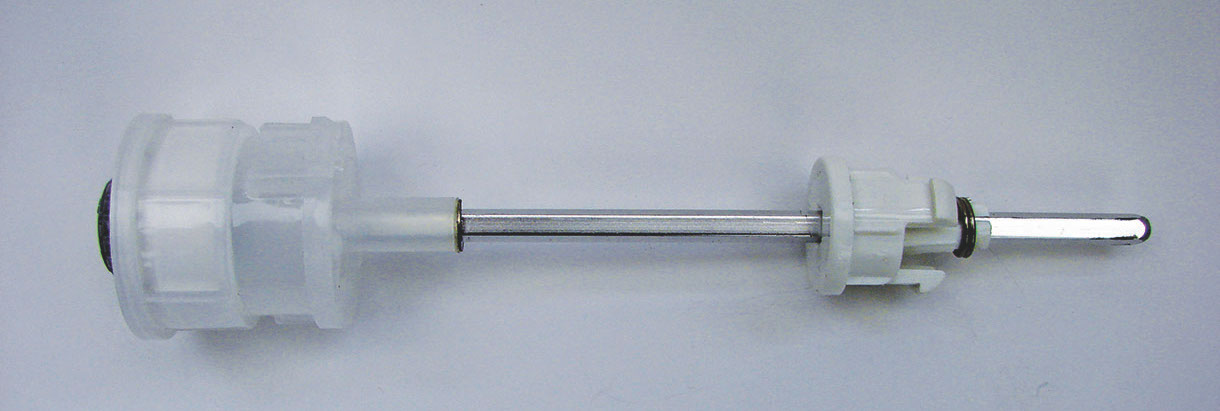
Shaft mechanisms
There are two varieties of CrushGrind mill mechanisms: the shaft and wood mechanisms.
The drive plug on the shaft can be moved along the aluminium shaft as required, and the shaft shortened as necessary using a hacksaw and cleaned up with a file. Adjustment to the grind is facilitated by the knurled knob at the base of the mechanism.
Wood mechanisms
It is not easy to see in a photograph, but the top half with the spring clips revolves when the bottom half is fixed in the base of the mill. The grinding adjustment is the same as for the CrushGrind shaft mechanism.

Choice of wood
A number of questions arise when choosing the wood for your mills and a little time spent on this could well enhance the design and quality. The choice of woods and finishes available to you nowadays is extensive. Are you going to leave the mill natural? Is it going to be oiled, sprayed with an acrylic finish, receive coats of a polyurethane finish or be coloured? Knowing what finish you are going to use will help in your choice.
Whichever wood you choose it must be dry. If not, the finished mill can become oval in shape and the tenon will jam inside the main body, making it unusable. Try to avoid wood containing large knots, unless you feel that the knot will enhance the end result. Branch wood can be turned into mills but I would suggest that the pith should be in the centre, allowing it to be drilled out. As with wet wood, there is the risk of the wood moving after completion because of inbuilt stresses.
Since we are making items associated with food, it is essential to avoid woods considered to be toxic. Also many woods cause adverse reactions with turners either in the form of external irritation or internal problems. Refer to the UK government’s Health and Safety Executive (HSE) advice on toxic woods for more information.
One wood I have used in a project is yew (Taxus baccata). Reported adverse effects from handling the fresh plant material and wood include dermatitis, systemic effects (e.g. headache, blood pressure drop) and cardiac effects. Recent research by the Royal Botanic Gardens, Kew, shows that an array of taxine alkaloids can be found in the heartwood, bark, leaves and seeds of yew, at varying degrees of toxicity. However, it is suggested that these compounds are more likely to be released from the wood when filled with liquids
rather than in a dry form.
I have also used spalted beech (Fagus sylvatica) for mills. Spalting is part of the decay process and is caused by fungus attacking the tree. Dust particles from the wood may contain the spores of the fungus, which can affect the respiratory system and, according to HSE advice, may cause a decrease in lung function.
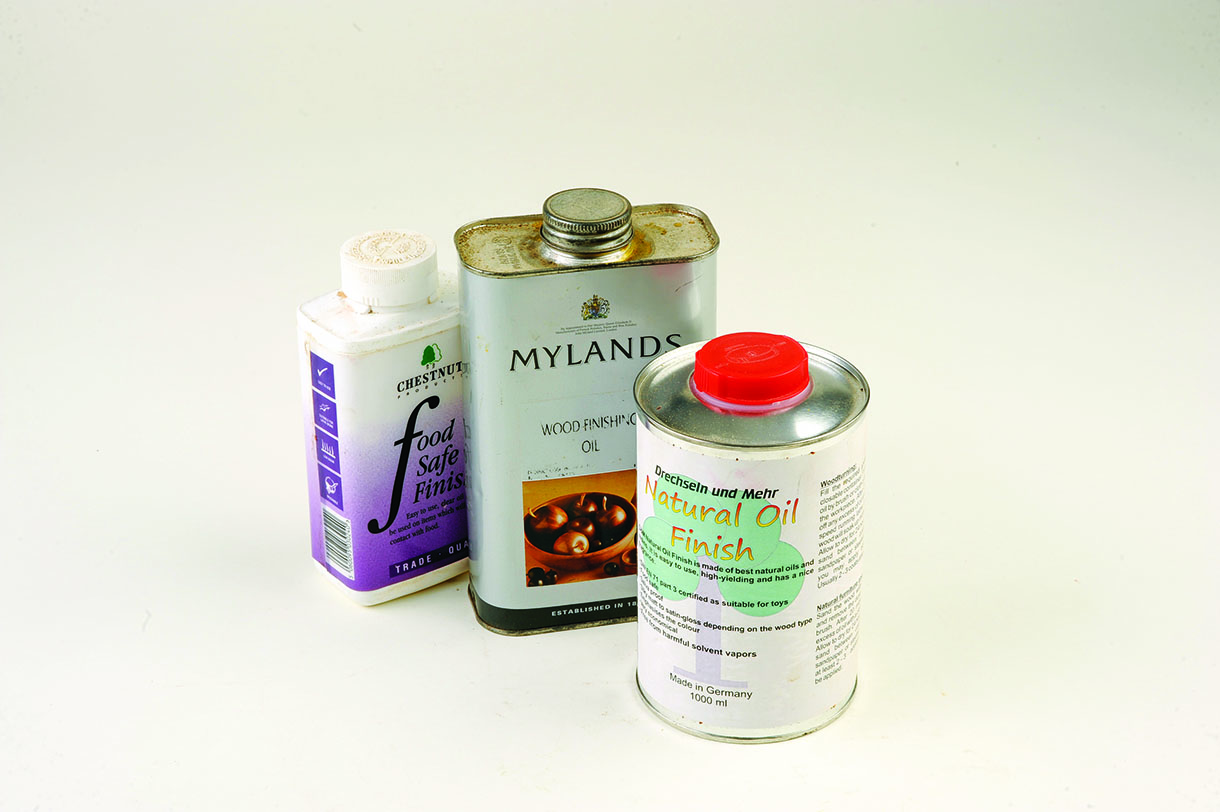
Most commercially available pepper and salt mills do not have a finish on the reservoir. If you are worried about the toxicity of woods, consider lining the reservoir with a plastic tube. Alternatively, coat the inside with a barrier or a certified food safe finish. Certification varies between countries but will be clearly labelled as food or toy safe.
All wood produces fine particles of dust so, regardless of what wood you are using, good ventilation, dust extraction and face masks must be considered as an integral part of your workshop.
False tenons in either traditional or CrushGrind mills
Difference between a spigot and tenon
An observation I have made while watching professional woodturners demonstrate, both in the UK and in the US, is that they inadvertently use the words ‘spigot’ and ‘tenon’ to describe the same thing.
The dictionary definition of tenon is: ‘a projection on the end of a piece of wood for insertion into a mortice’.
And that of spigot is: ‘a short projection on a component designed to fit into a hole or slot in a mating part’.
In my opinion, there is little or no difference between the two given these descriptions. I have decided to use my own definitions for these two words, which will apply throughout my articles.
They are:
• Where a projection is being used as a means of holding a piece of wood in chuck jaws and will be eventually removed as waste wood, this is known as a SPIGOT
• Where a projection is being used as an integral part of a turned object and will be there on completion whether seen or not, this is a TENON

A blank for a mill: using different woods for the top and body
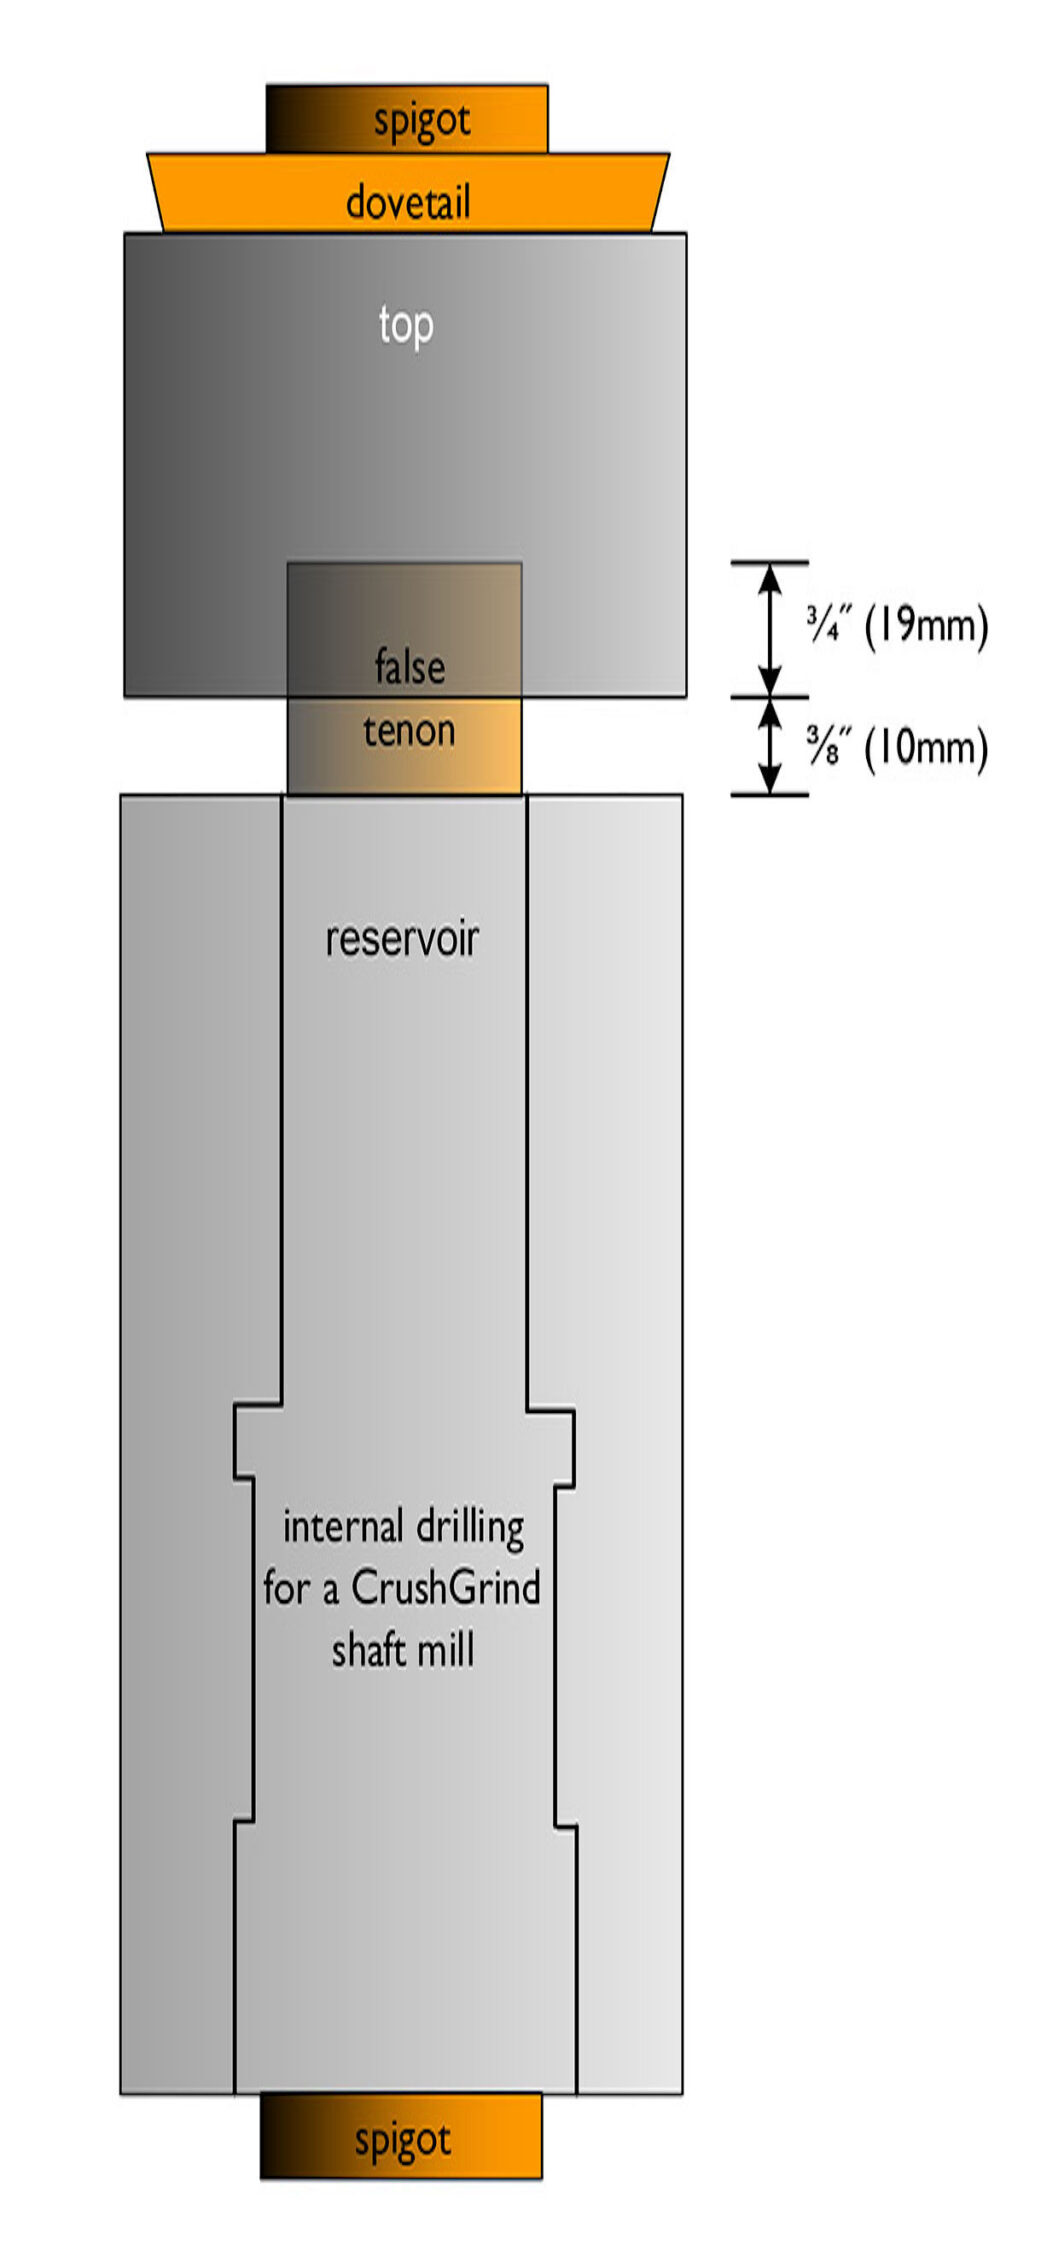
Blank utilising a false tenon
Turning the body
Normally the top and body are turned from either the same plain wood with the plan to texture and/or colour them, or from two different types of wood. There will be approximately 25mm (1in) of ‘lost’ wood,
which will include the tenon destined to be inside the bottom of the mill and the spigot which will be removed.
An alternative method is to use a false tenon which is especially appropriate where the top and body of the mill will be left natural and the grain on the blank is outstanding. It is imperative that the top and body flow seamlessly together.
With this method there will not be any lost wood; the top is given a ‘false tenon’, turned from the same wood and glued into a similarly sized hole in the top of the mill. A spigot is turned at the bottom of the body, so that an appropriate diameter hole can be drilled in the top of the mill’s body. The bottom of the body can then be reversed, the top hole being held in expansion jaws for the removal of the spigot and drilling of the mill’s mechanism.
Finishing methods
Three things make a piece of turning attractive: the wood used, the shape turned and the finish. Mills receive a good deal of handling, so they need a durable finish. Time spent on finishing will make the difference between your mill being so-so and looking wonderful. In my opinion, finishing begins with the last cut with the gouge or skew chisel.
Sanding
The choice of a sanding cloth is a personal thing. Cloth-backed aluminium oxide paper serves me well for most of my sanding needs. For particular woods, I will sometimes add either oil or a paste wax to help lubricate the paper and reduce clogging. With most woods, I start with 180 grit paper and work my way to 400 grit. If your lathe has reversing capabilities, reversing between grits can give a smoother finish. On smooth surfaces, I take the opportunity to stop the lathe after each grit and sand horizontally with the grain. Throughout sanding, the speed of the lathe is around 500rpm.
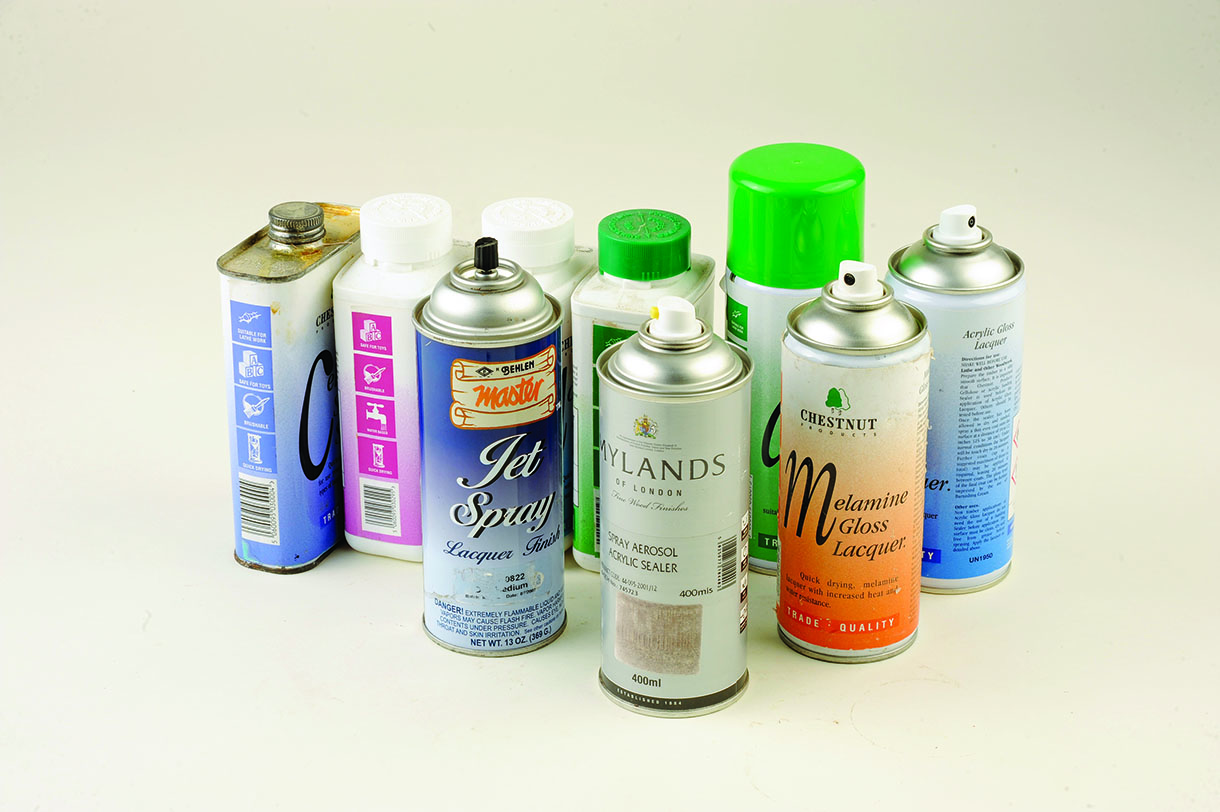
Sanding sealers and lacquers
A cellulose sealer, a mixture of 40%:60% cellulose sealer and cellulose thinners, will give a waterproof finish. This is best applied by brush and will dry very quickly. Before any further finishing product is applied, rub over the rotating mill with a white synthetic finishing pad to remove ‘nibs’ of sealer. Cellulose sealer is also available as a spray.
All of my non-oily woods receive several coats of either melamine or acrylic gloss lacquer. Spraying can be carried out while the mill is still on the lathe, but usually because of time constraints, I spray away from the lathe in a dust free and well ventilated area of the workshop. Acrylic lacquer will dry in 20 minutes, subject to the ambient temperature. I recommend that the mill parts are put back on the lathe when dry, to receive a de-nibbing between coats. The end result will be well worth the extra time. Usually a maximum of three coats will suffice. I like to leave the sprayed items overnight before beginning the buffing process. I find that this ‘hardening’ time gives a better end result than trying to buff immediately.
Defects and the use of cyanoacrylates
You will occasionally find that a particularly attractive piece of wood you wish to use has small cracks; yew is prone to these. Cyanoacrylate can be used to fill the cracks. It comes in three consistencies: thin, medium and thick. Usually the thin or the medium will be suitable, depending on the size of the void to be filled. The hole or crack is first filled with matching wood dust before adding the cyanoacrylate. Once dry, the crack is firstly hand sanded before sanding with the lathe switched on. I would not recommend that you try speeding the process up by using a quick-drying accelerator, which may cause a white haze on the surface. Be patient!

Oil
Oily woods such as rosewood (Dalbergia spp.) and olive (Olea europaea) lend themselves to an oiled finish. Both Danish and finishing oil are suitable, but patience is required for any oil application. If possible, leave the oiling process until the end of the day and allow the piece to dry overnight. De-nib the surface between further coats. Leave the piece for at least a week before progressing to the buffing process.
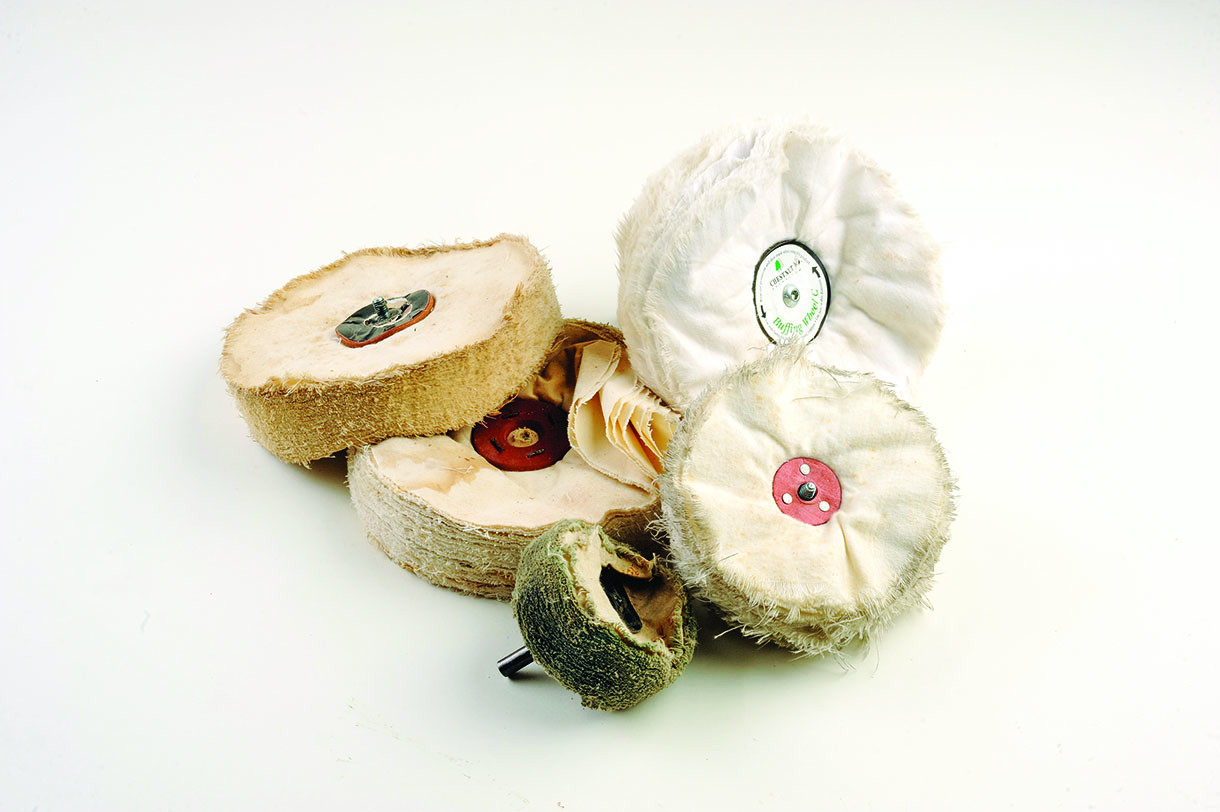
Buffing
All of my mills receive the buffing process. I have three 150mm (6in) loose-stitched mops, which I mount individually on a right-hand-threaded polishing mop adapter held in chuck jaws. The first mop, a sewn mop, is lightly loaded with a gentle abrasive powder that will remove minor scratches. I should stress that this is not a substitute for a rushed sanding phase!
The second mop, a different sewn mop, contains a micro-abrasive polishing product, to remove traces of the first abrasive compound and create a deep shine. Do not press on the mill too hard, or ‘smearing’ will appear on the polished surface. The third and final mop, a loose mop, is for applying carnauba wax. Apply a small amount and buff to create a final polish.
An alternative to the above is to apply a micro crystalline wax by hand. The benefit of this type of wax is that it does not show fingerprints.