Cramps, Cauls and Strategies:
John Lloyd has ideas for stress-free glue-ups
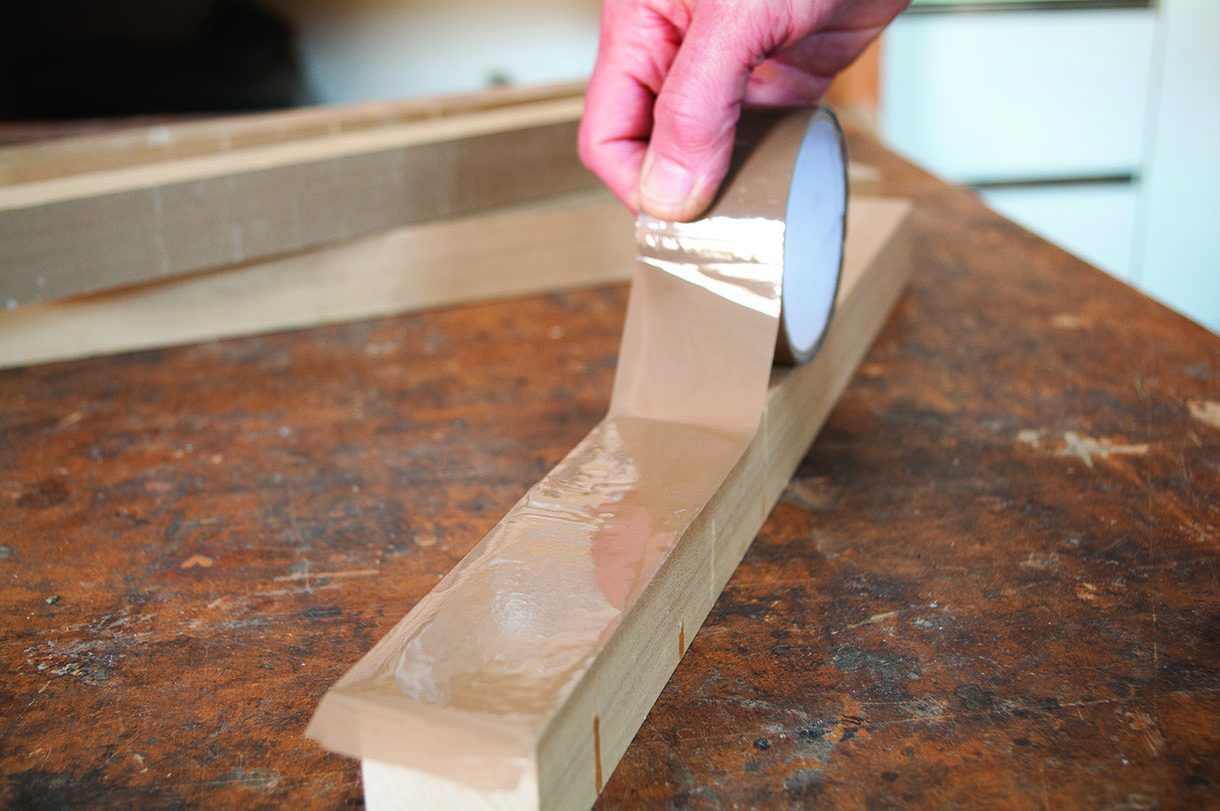
Parcel tape on a cauI prevents permanent attachment
I have just a little more help for you so that you have a fighting chance of keeping the Men in White Coats at arm’s length during the, sometimes rather tortuous, process of gluing bits of wood together.
Using cauls
First things first, choose your glue, second ALWAYS DO A DRY RUN, this will give you a final chance to check that none of the parts are missing, that they’re all facing in the right direction, confirm the best gluing sequence and make sure that enough of the right cramps have been selected and that they’re all set to the right length.
Dry run successfully accomplished, it’s time to apply some glue and get this over with, right? Well, no! The problem with the dry run is that, by definition, it’s dry. Just when you thought you had everything under control, you add something slippery to all of the joints, not necessarily a bad thing, after all something slippery will obviously help those, perhaps rather snug, beautifully cut, joints to slide effortlessly together. Conversely, it might also help them to slide effortlessly out of alignment, it rather depends on the type of joint. Control is what is needed here and a great way to guarantee that you remain in complete command of the situation is to add some ‘cauls’. These are just battens of reasonably chunky cross-section (perhaps about 30–40mm square), used in pairs to get everything into line before any cramping pressure is applied across a glue joint. It is, of course, a bit of a bonus if the cauls don’t get themselves permanently fixed to the components they’re trying to keep under control, a piece of self-adhesive parcel tape added to one of the faces will ensure that the glue hasn’t got anything to get hold of, or maybe add tape to all four faces, it’s way too easy to end up with the caul facing the wrong way in the heat of the moment.
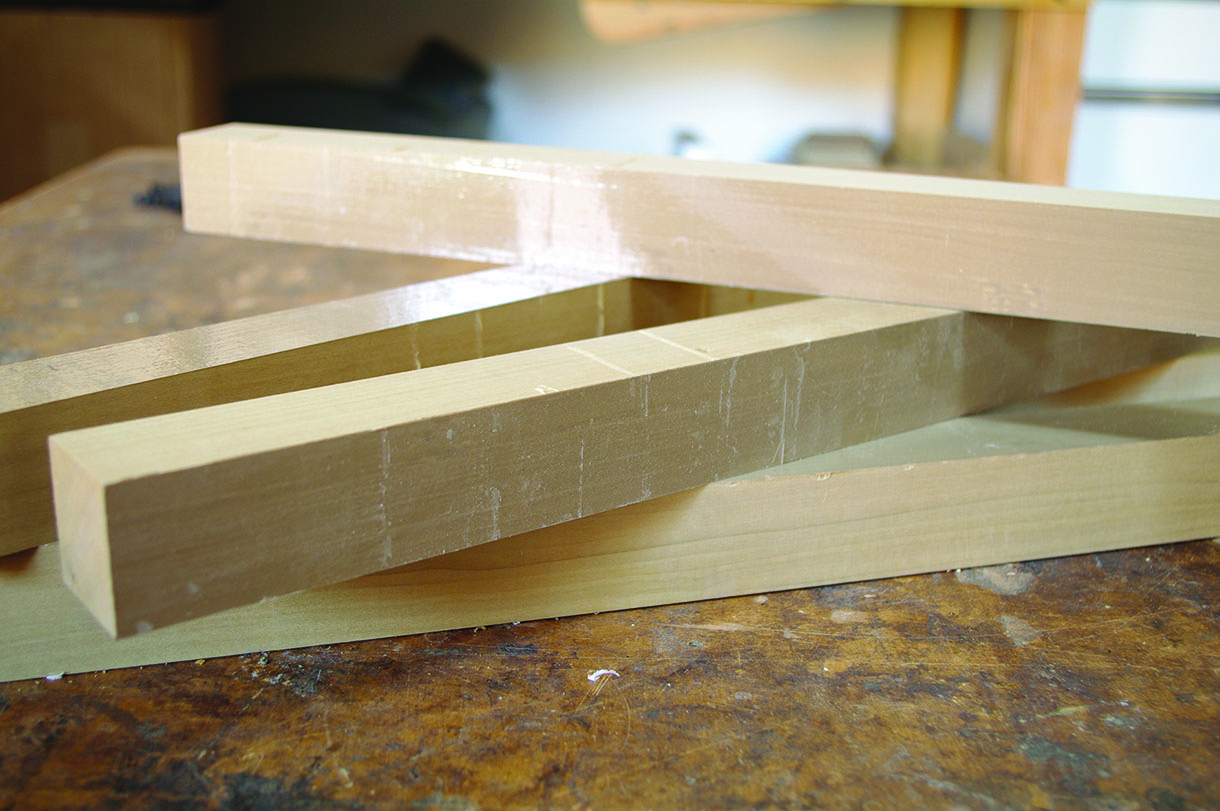
There are a few things to bear in mind when considering the use of cauls: the components being glued together must be of the same thickness, the surfaces must be in register and all the faces at right angles to each other. What I’m saying here is that a straight, flat caul can only be used to keep straight, flat things under control, so not much use for coopering. Cauls actually do several things, they allow thin material to be cramped without buckling, keep the surfaces of several components aligned and also prevent uneven cramping pressure from distorting the glued assembly. The sequence when employing cauls is to add glue,
get the pairs of cauls into position and cramped firmly into place, then apply pressure across the joint to bring the glued surfaces together. This system works really well when jointing things like table tops or panels, particularly when simple butt joints are being used, i.e. no tongues or biscuits, as soon as the cauls are in place, you are in complete control.
Taped cauls
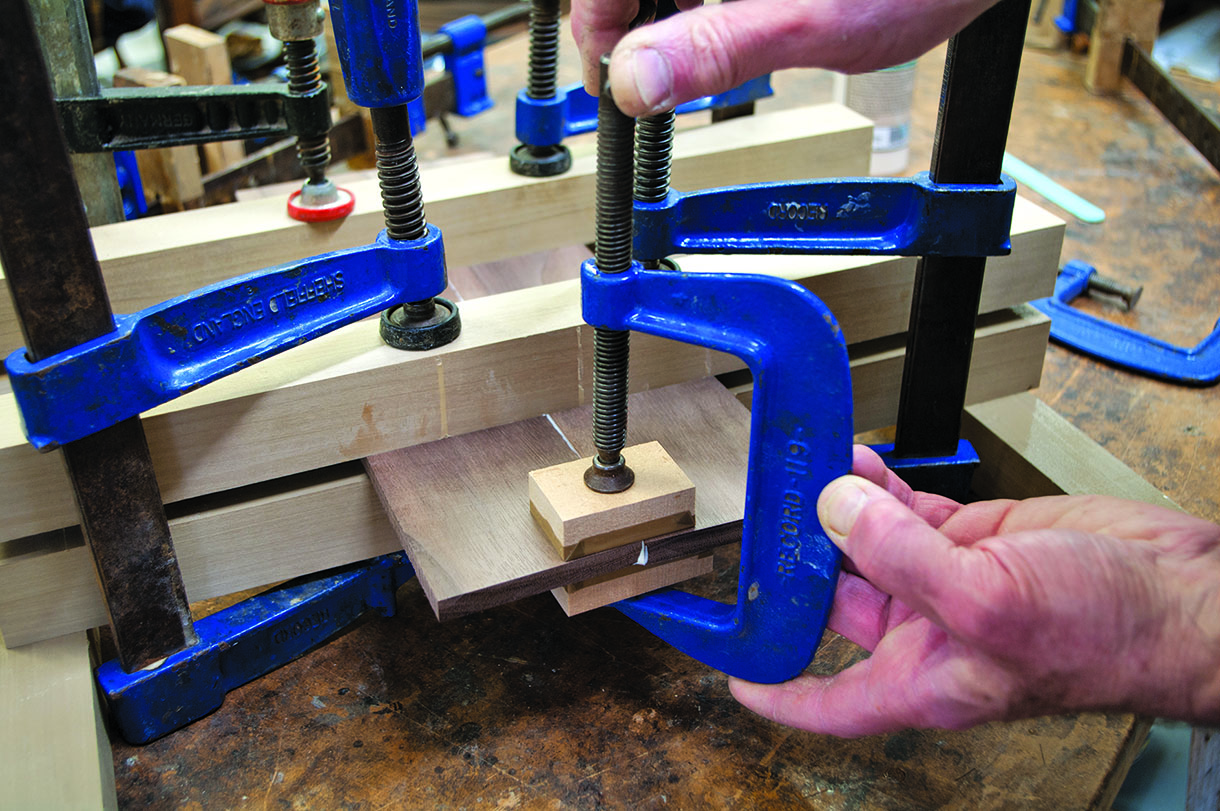
Apply cramping pressure to the cauls first, adding small blocks will keep the ends in register
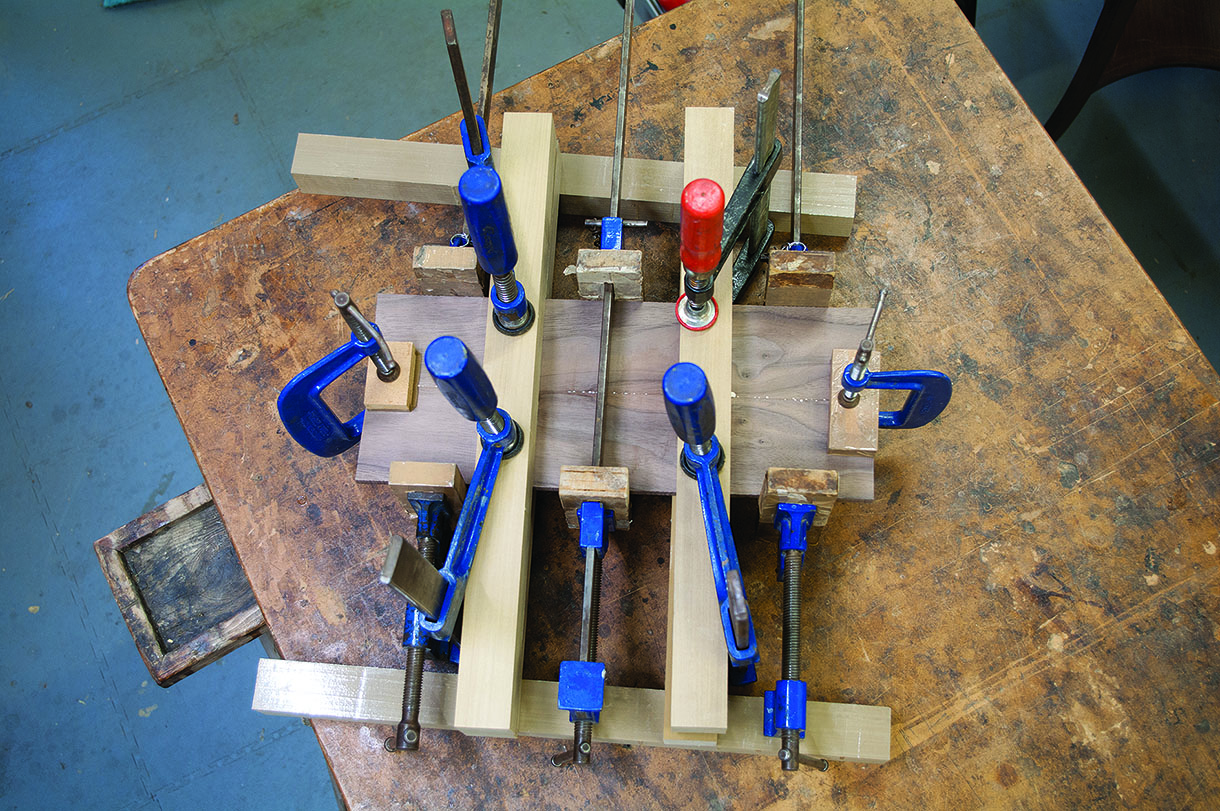
Then apply pressure across the joint with sash cramps
Using cramps
Now that you’re applying pressure across the glue lines, how many cramps do you need to get good, even pressure for the full length of the glue-line? All you need to know is that pressure spreads at 45° in all directions from the point where the pressure is being applied, so starting from the joint line at the end of the boards, extend an imaginary line at 45° to the outside edge of the board, this is the position for your first cramp. Now just work along with 45° zigzags from the edge to the first joint line and back out to the edge again, every time you hit the edge, you need another cramp – simple. You will see from this that the narrower the boards being jointed, the more cramps you will need, and conversely, wider boards need fewer cramps. You can always add a wide packing piece between the cramps and the edge of the outside board, which will spread the cramping pressure over a wider area and reduce the number of cramps required.
So, cauls can be a really good idea but they’re not going to be the solution for all of your gluing challenges. The other big thing to consider is whether cramping pressure is being applied in the right place and at the right angle. Now, this is really important for mitres or any other joint where the components are at anything other than at right angles to each other. The main thing to remember here is that the cramping pressure must be applied at right angles to the joint line, e.g. the shoulder line for a mortise and tenon or the jointing surfaces of a mitre, any other angle will actually keep the joint apart. What can be a little surprising is that if you get this right, especially for a mitre, where there is no joint as such, just the two surfaces butting together, even with some slippery glue added, when the cramping pressure is applied there is no tendency at all for the two halves of the joint to slide out of position.
Having decided that right-angled pressure is what’s required, how is this happy state going to be achieved? Well, what you’re going to need are some temporary cramping points each side of the joint, with faces parallel to the joint line (and to each other). These can be cramped on, especially if you’re working with veneered components, or perhaps glued on if you’re working with solid wood. The cramped-on variety can be homemade, I usually make the angled cramping points from lumps of softwood, attaching these to a piece of thin ply which extends out beyond the softwood, the plywood section gives you somewhere to put a cramp to attach it to the component being glued. This is also a great system for cramping curved components, like seat rails, with angled softwood blocks at each end of the ply, which can flex around the outside of the curved component.
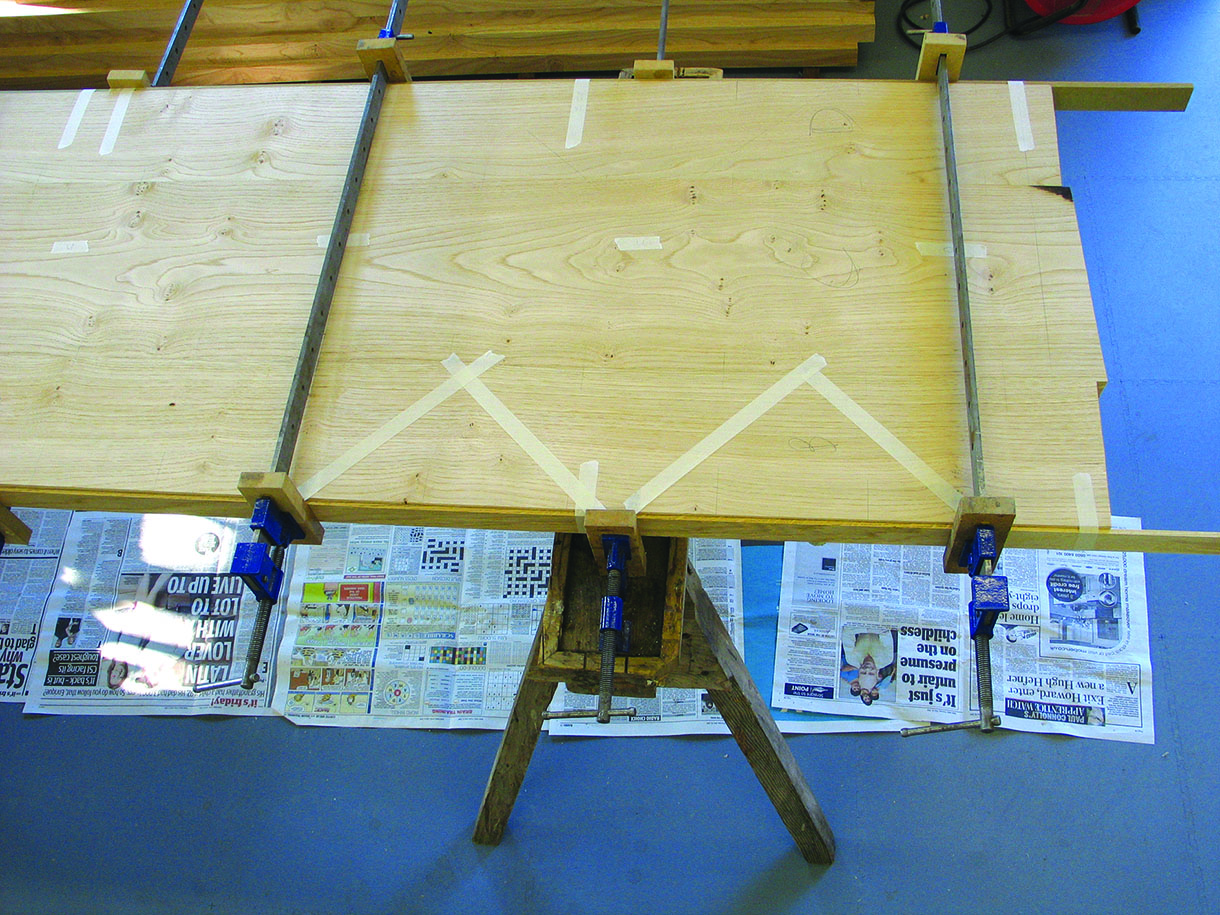
Remember to consider how cramping pressure spreads when deciding on the spacing and number of cramps
Pressure MUST be applied at right angles to the face of the joint
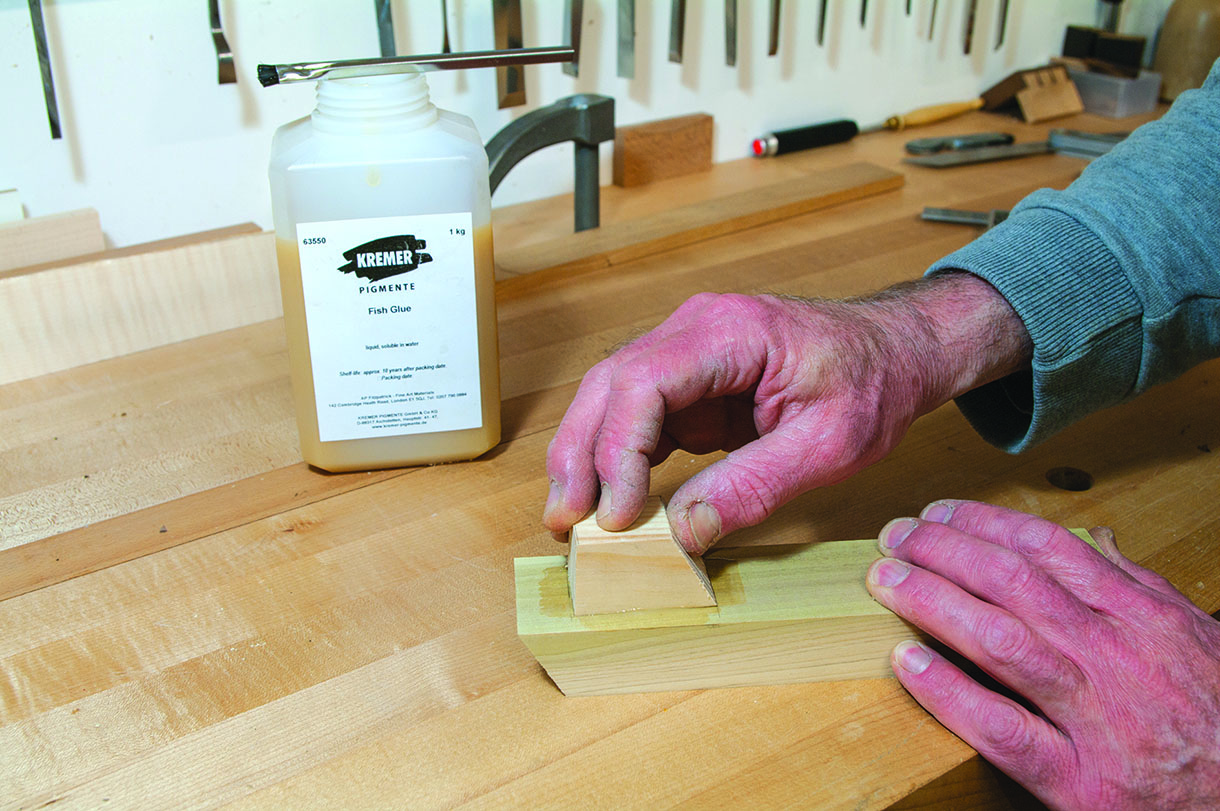
Temporary blocks with angled cramping faces can be added using animal glue and a ‘rub-joint’
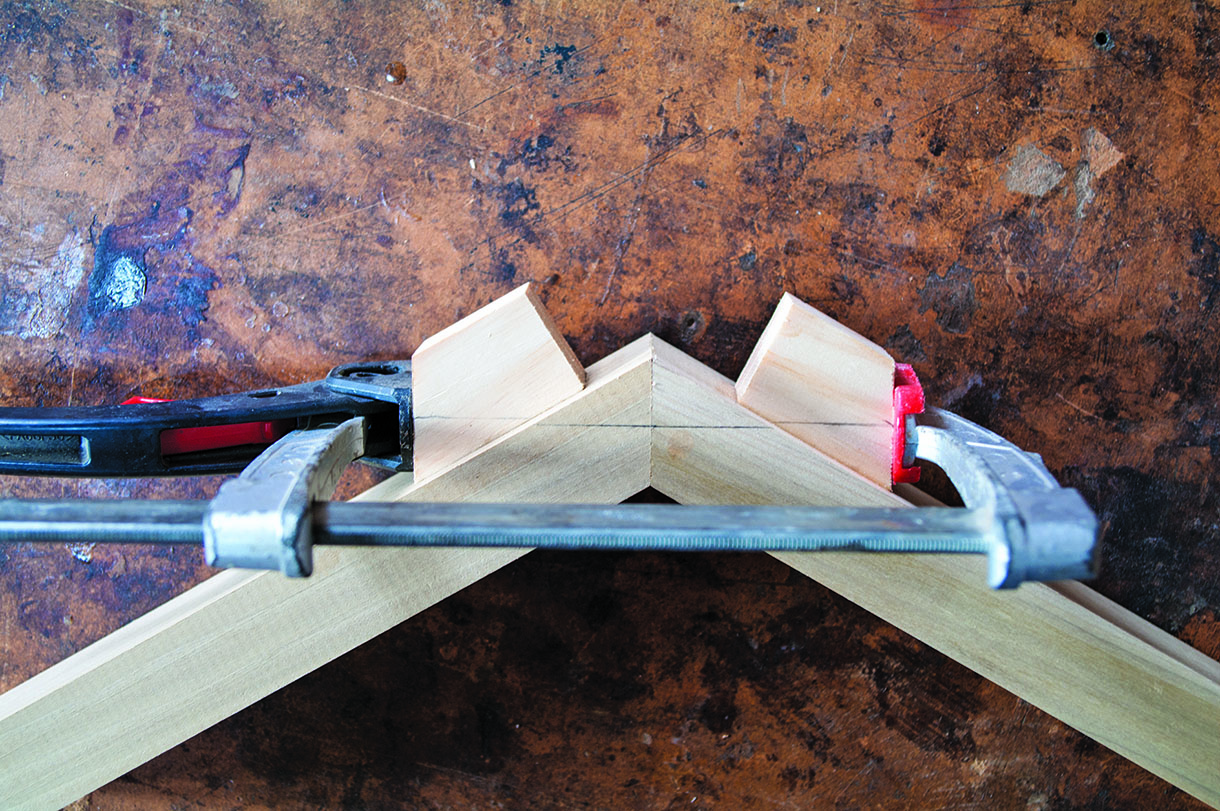
Cramping onto the temporary blocks applies pressure right where it’s needed
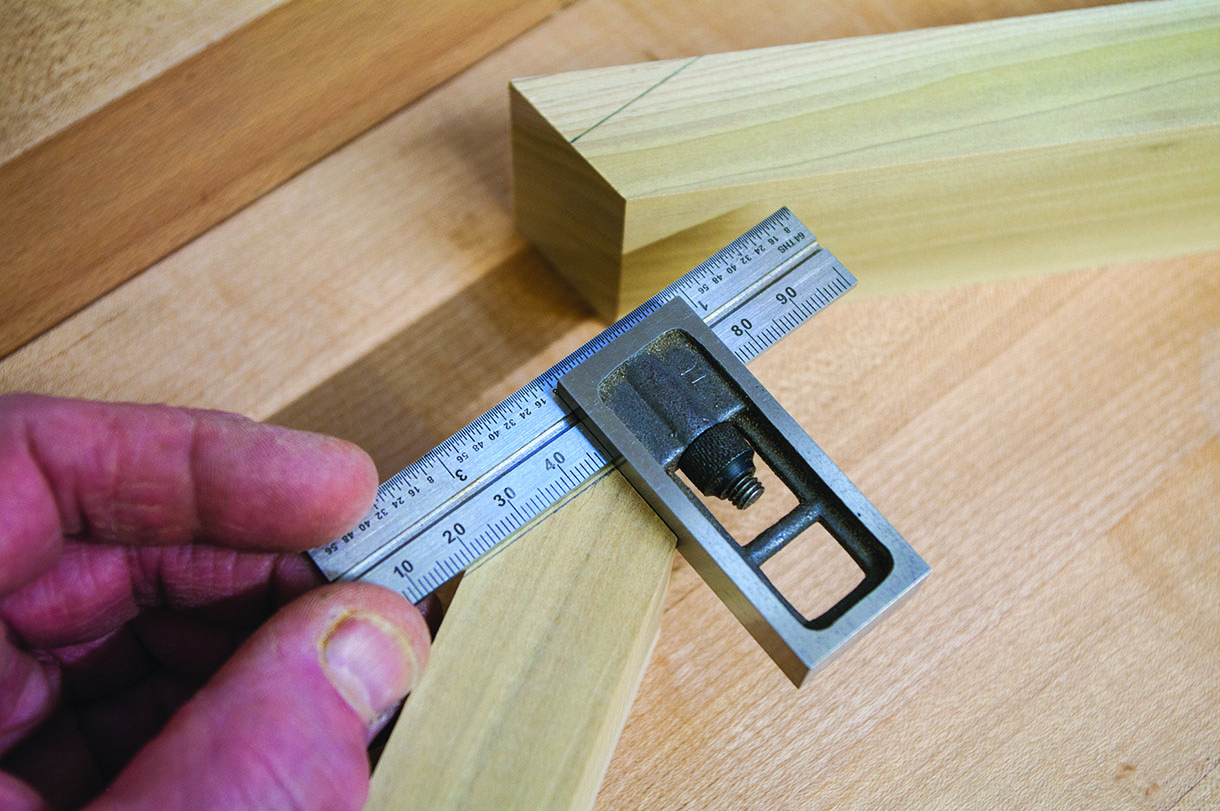
For this temporary cramping block arrangement to work needs a bit of careful laying out and angle cutting, the temporary cramping points need to have their faces parallel to the joint line, and the mid-point of the joint line must line up with the middle of the cramping point. What this achieves is pressure being applied to the middle of the joint line, and at right angles to it, with this arrangement nothing will slip out of alignment.
To make the temporary cramping points, just dry assemble the joint and place the cramping block material next to it, extend a centre-line at right angles from the middle of the joint line and across the block
material, this gives you the point where the cramping pressure has to be applied. The cramping face of the temporary block just has to be at right angles to the centre line, (parallel to the joint line). Just make sure that the cramping face is big enough for the jaws of a cramp to sit comfortably over the centre point, so that pressure will be guaranteed to be in the right place.
As mentioned before, if the components being glued are made from solid wood the cramping blocks can be glued on, this means that fewer cramps will be required for the whole cramping setup, which generally makes life simpler and much less cluttered. It doesn’t really matter which glue is used but if you’re into using animal glue, this can be a good choice, it will clean up easily when the temporary blocks are removed. A rub-joint should be fine for attaching the blocks, just add a little glue to each surface and rub them together fairly vigorously to squeeze out any excess glue, the glue will grab pretty quickly, especially if you’re using hot animal glue but should also work with a cold-set glue like fish glue, or even PVA. Just leave to set overnight before you think about putting any pressure through them.
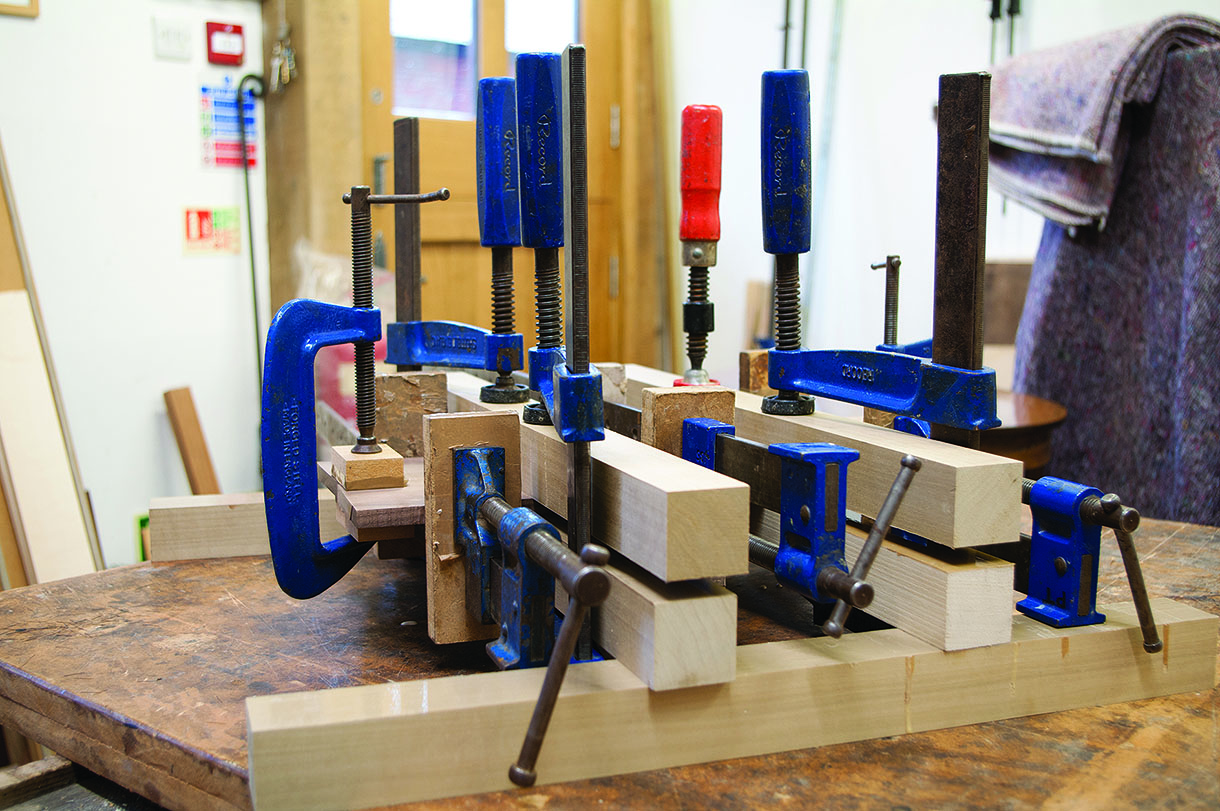
Using Blokkz
An alternative to homemade cramping blocks are the rather cunning aluminium cramping gismos called ‘Blokkz’. The clever bit here is that the ends of the Blokkz are circular which ensures that the cramping pressure is always applied in the right direction, no need to work out those tedious angles with these, just a bit of thoughtful positioning, but be careful to protect surfaces from unwanted cramping marks.
You will see that we used Blokkz as part of a ‘demi-lune’ table glue-up, in this instance they’re being used to really good effect to enable cramping in two directions at once, this is a real case in point of a well thought out strategy resulting in stress-free gluing for a challenging shape. Always think about getting the pressure at right angles to the joint lines and things will generally go pretty smoothly, there’s absolutely no point cutting beautiful, accurate joints if you can’t be bothered to work out a cramping solution that gets the pressure in the right place when you’re gluing up. There are never any prizes for gappy joints.
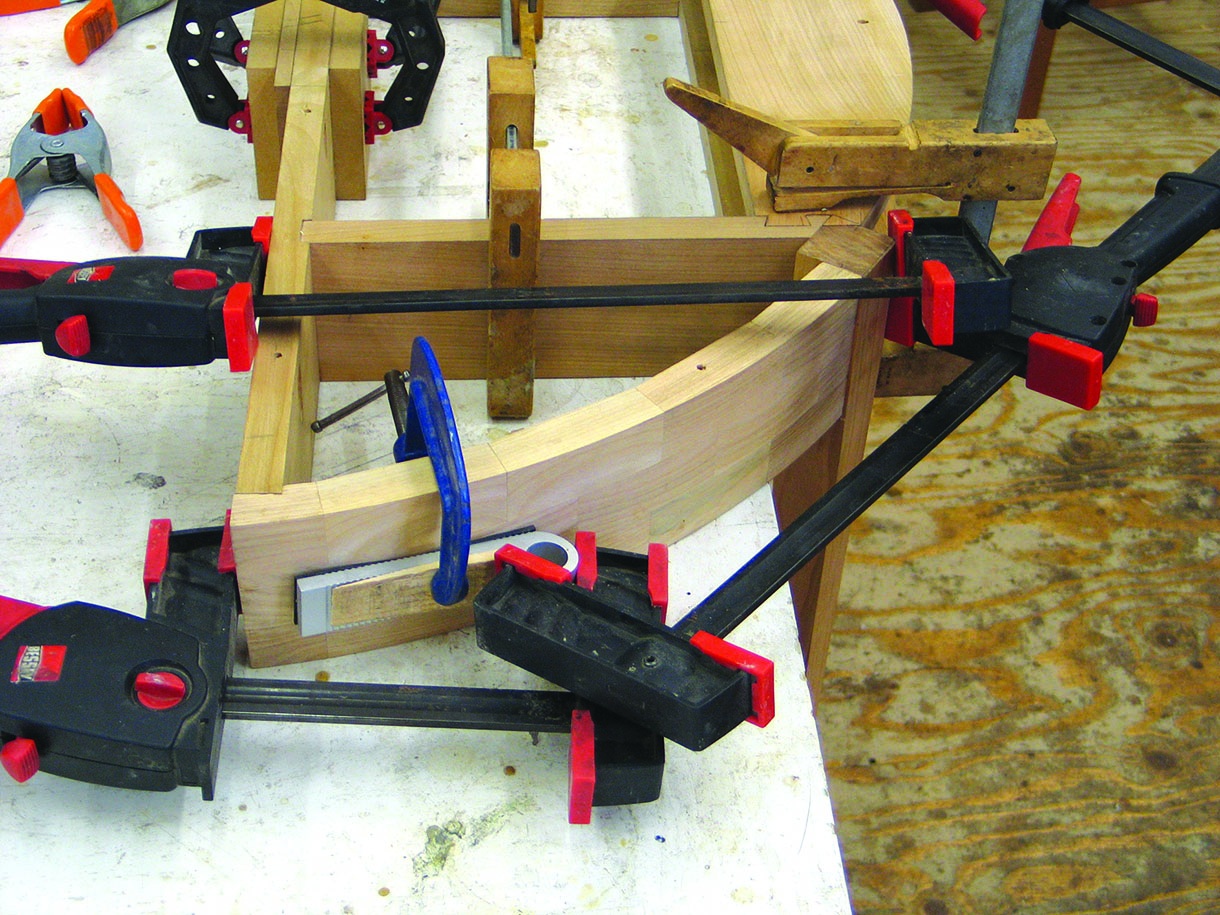
A well thought out cramping system gets the pressure where it’s needed and keeps stress levels to a minimum
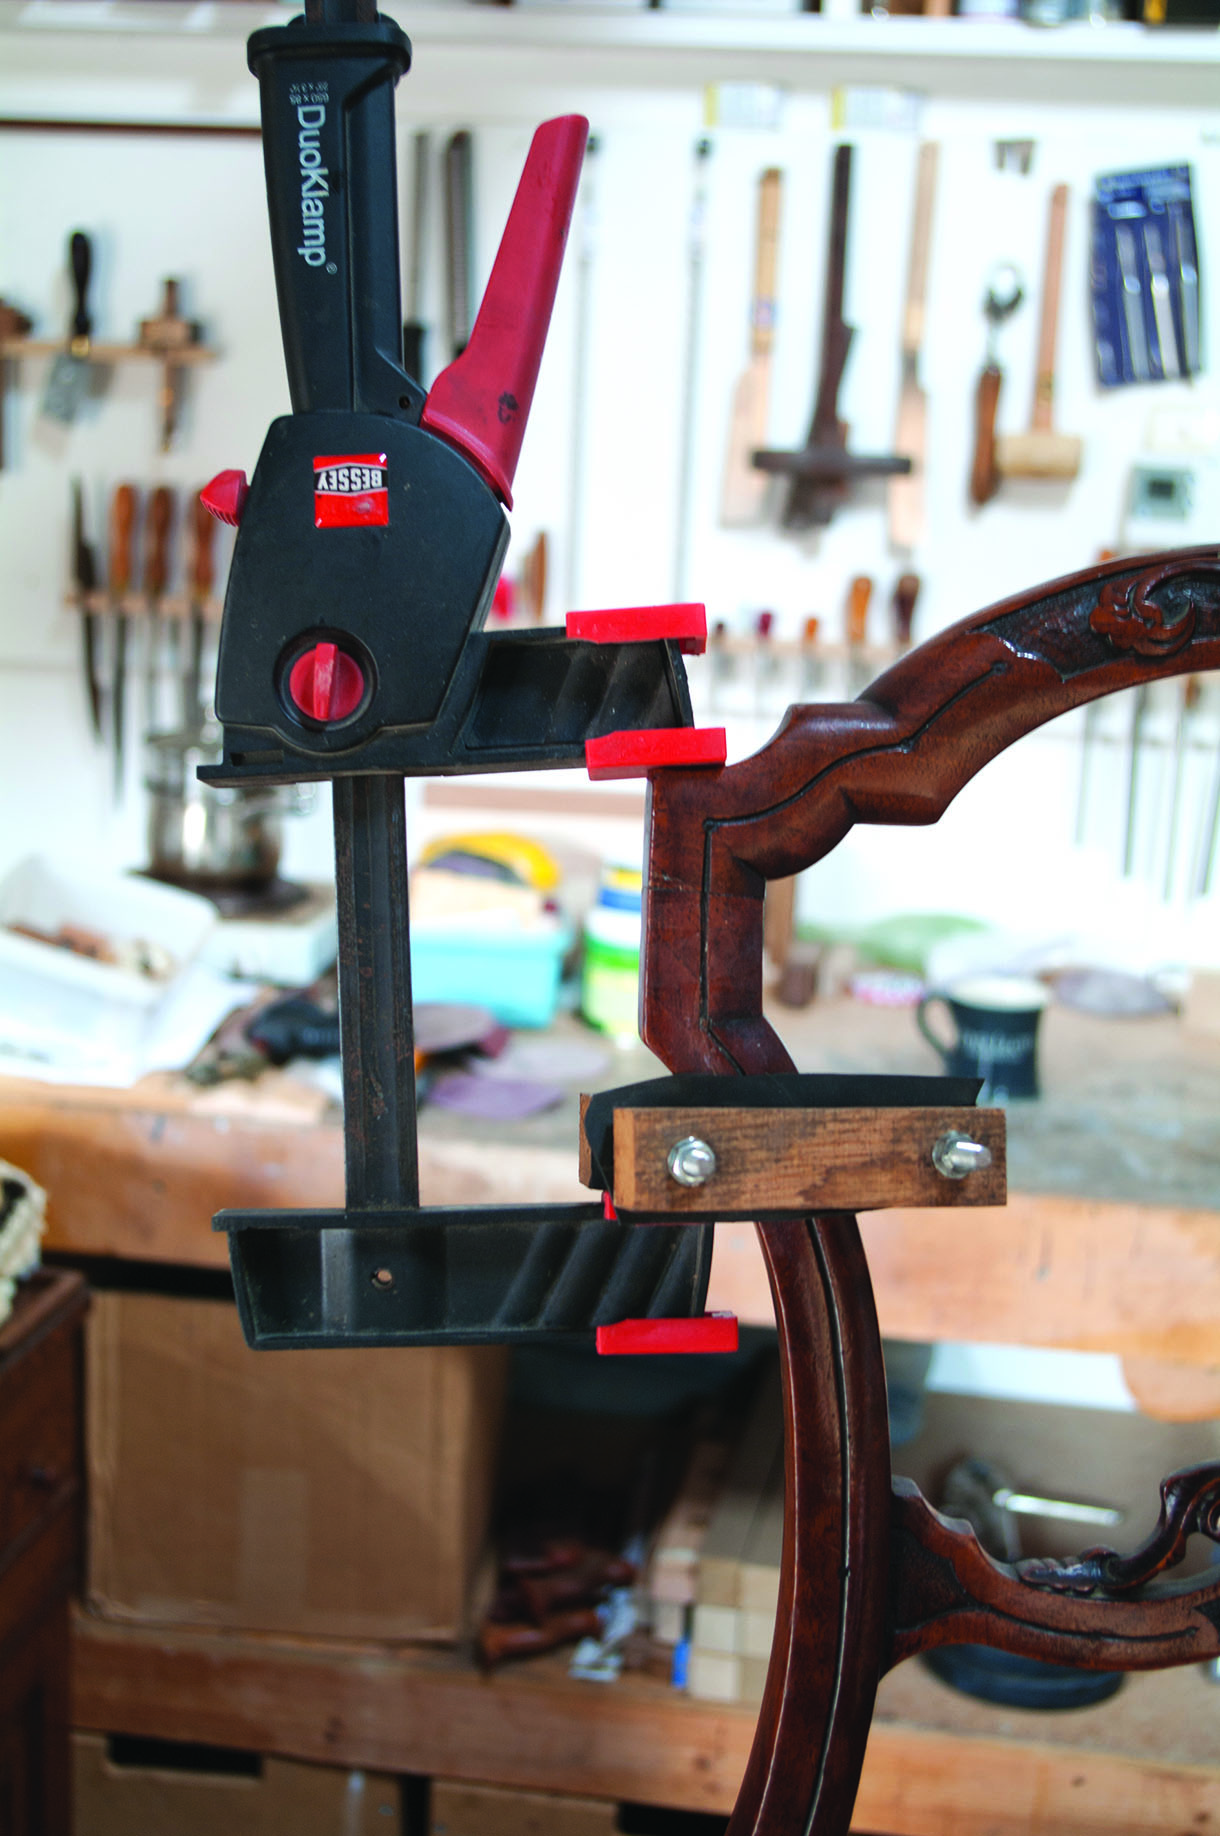
Cramping odd shapes will benefit from temporary cramping blocks, these secured using nuts and bolts with old inner-tube for grip and softening


