Turning Small Natural Edge Bowls:
Peter Westermann offers three design options for natural edge bowls
Peter Westermann offers three design options for natural edge bowls
I often get e-mails from the gallery where I sell much of my work along the lines of: ‘I need more small natural edge bowls for Christmas/Easter’ or ‘If you are making any, I could do with some small yew bowls, just sold the last bark edged one’. I have been making these kind of bowls for 15 years and I am still fascinated by the process and fortunately they continue to sell. In this article I will try to explain their appeal and describe how I make them. This is a personal method of working; everybody will have a different approach.
Choice of wood is the starting point
I know more or less what I want to make, more small bowls, but exactly what I can make will depend on what wood is available. Almost any recently cut wood in log form can be used but yew (Taxus baccata), laburnum (Laburnum anagyroides) and oak (Quercus robur) usually work well. If they have a high colour contrast between the heartwood and sapwood, then all the better. Ash (Fraxinus excelsior), oak and other timbers that have prominent growth rings can be treated with liming wax to emphasise the rings. The chief requirement is that the bark is undamaged and still well attached. The minimum useful diameter is about 90mm, there is no maximum apart from what can be moved, cut and turned on your lathe.
I do not usually start with a drawing with dimensions; the size and shape of the final product will be largely determined by the section of log that is mounted on the faceplate.
I look at what logs there are and try to make best use of them. Usually the only measurement I make is the size of the spigot, to make sure it will fit in my chuck jaws and be held securely. The freedom to work by eye and hand is what I like. There is a huge variety of shapes possible: ogee, part of a parabola or ellipse or circle, a simple U or V. Additional variables for circular logs are the diameter of the log, the width of the bowl and the length of the log used. Logs do not need to be perfectly circular or symmetrical, sometimes an unsymmetrical shape can be used to advantage.
Option 1: Laburnum cross-grained bowl
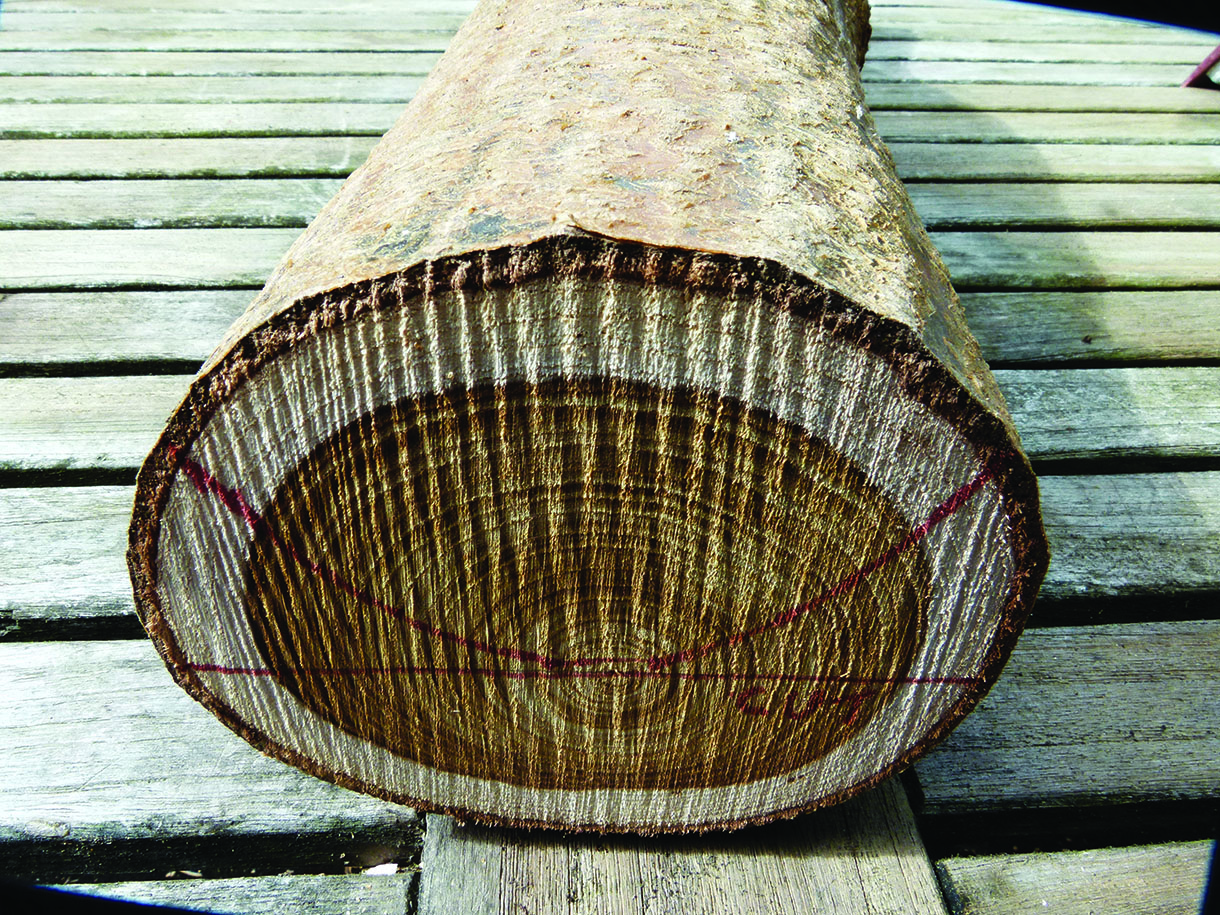
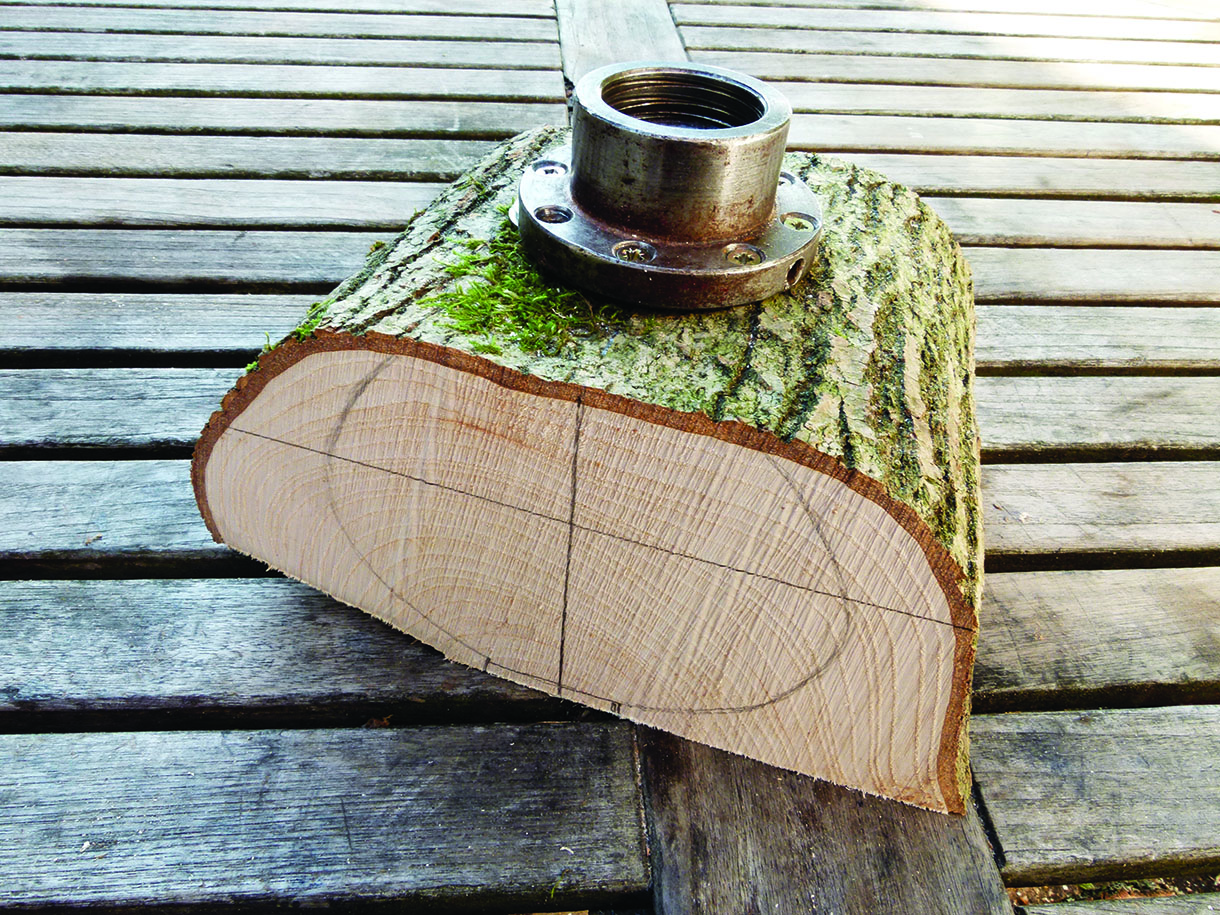
1. A laburnum branch about 120mm diameter, which gave a log 130mm in length. The pencil line marks where the log will be cut to give symmetrical growth rings. Mark a rough position of the bowl on the log
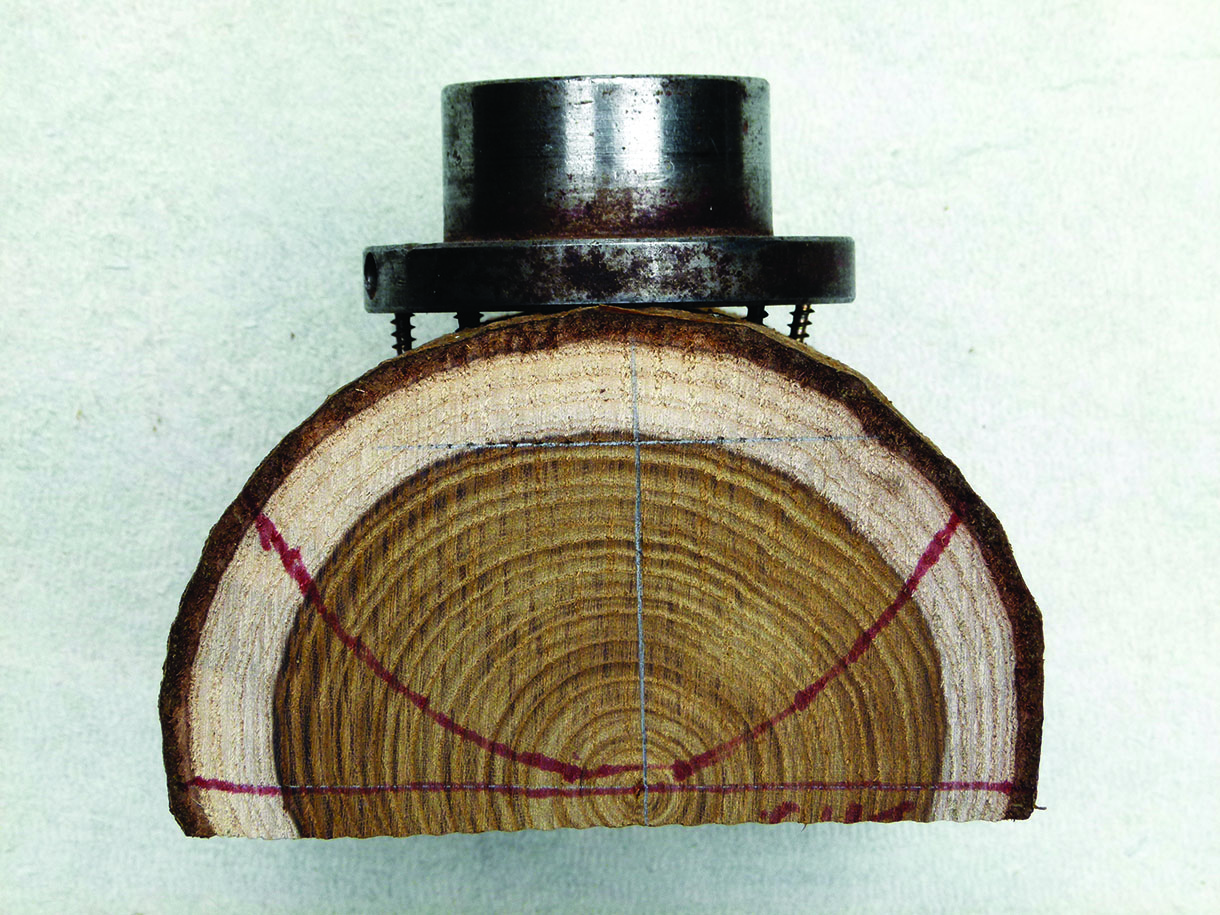
2. Securely attach a small 75mm faceplate to the top of the log using eight screws at 4mm diameter and 35mm long. Adjust the orientation so the faceplate is level with the line drawn perpendicular to the axis. Add wedges underneath the faceplate in the ‘void’ areas to provide extra support. Hot-melt glue the wedges in place to secure. The object is to get the centre of the bowl lined up with the centre of the growth rings
3. Cut off the corners of the blank using a bandsaw with the faceplate tightly screwed on. Check again the log is secure

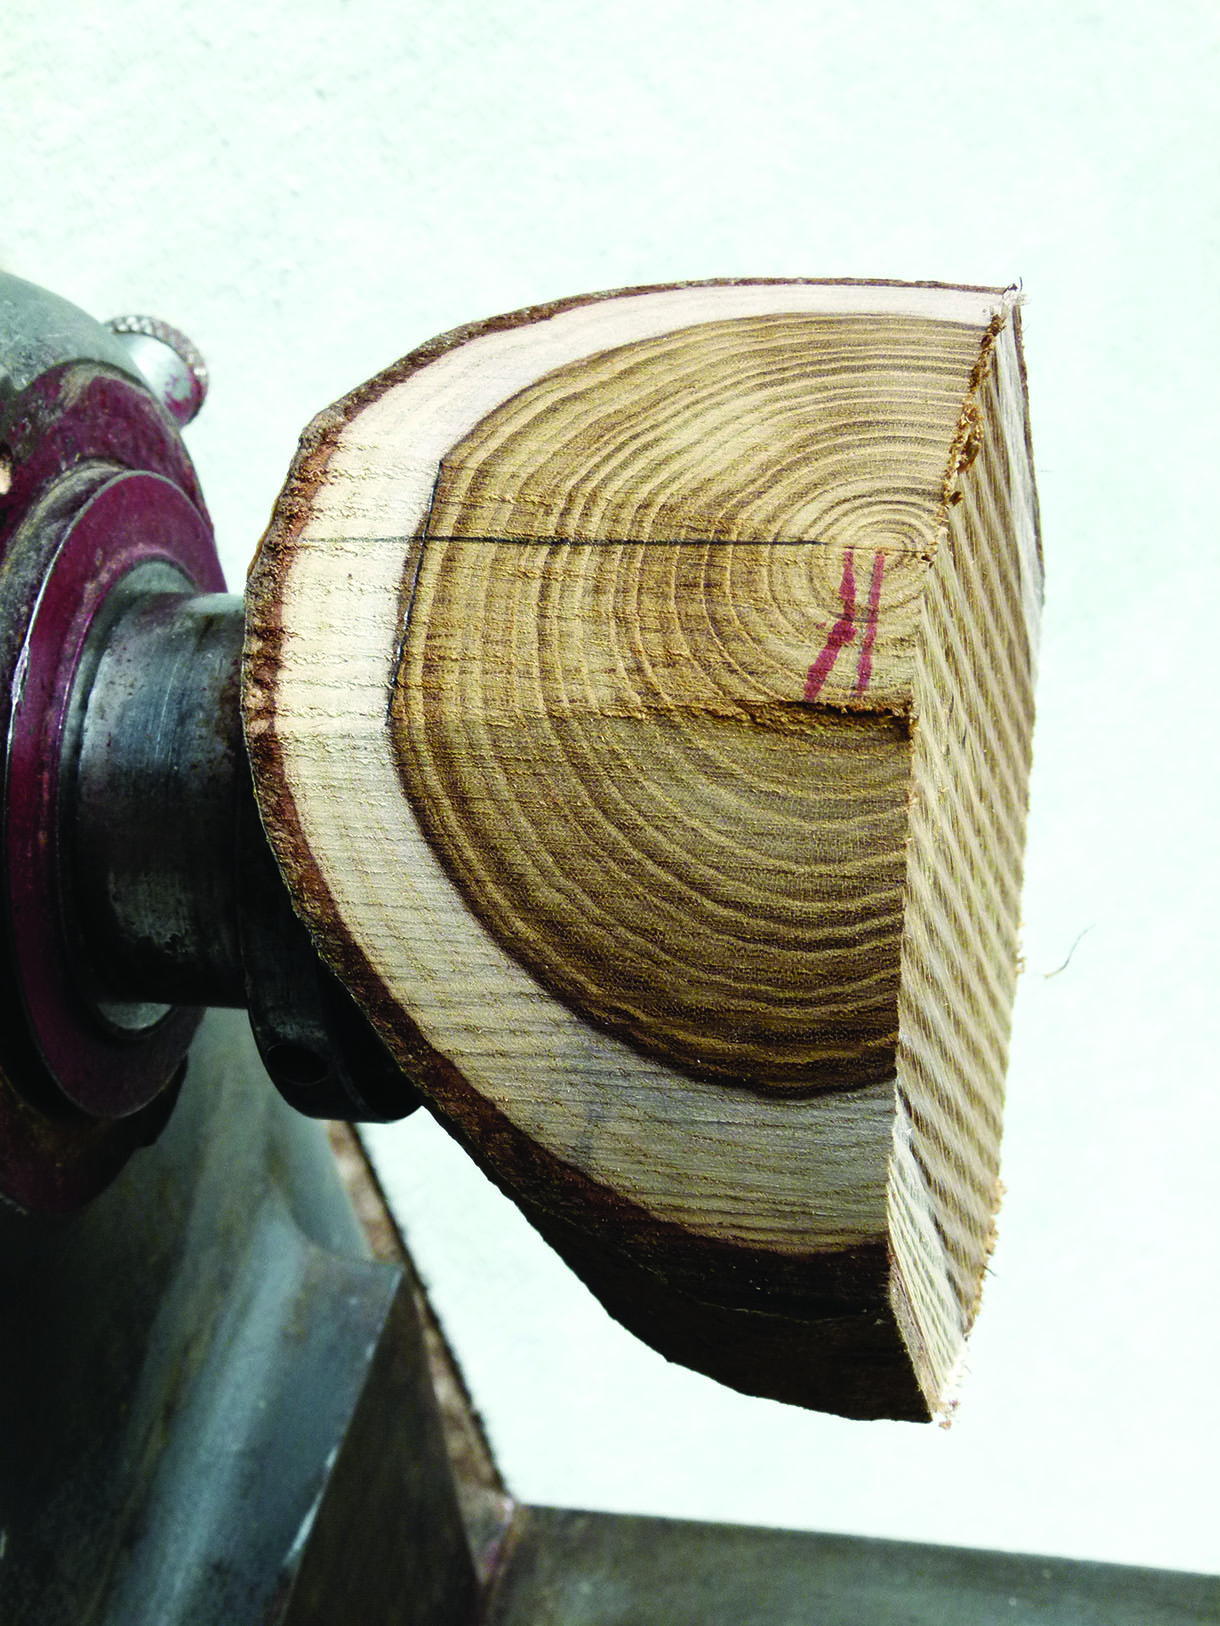
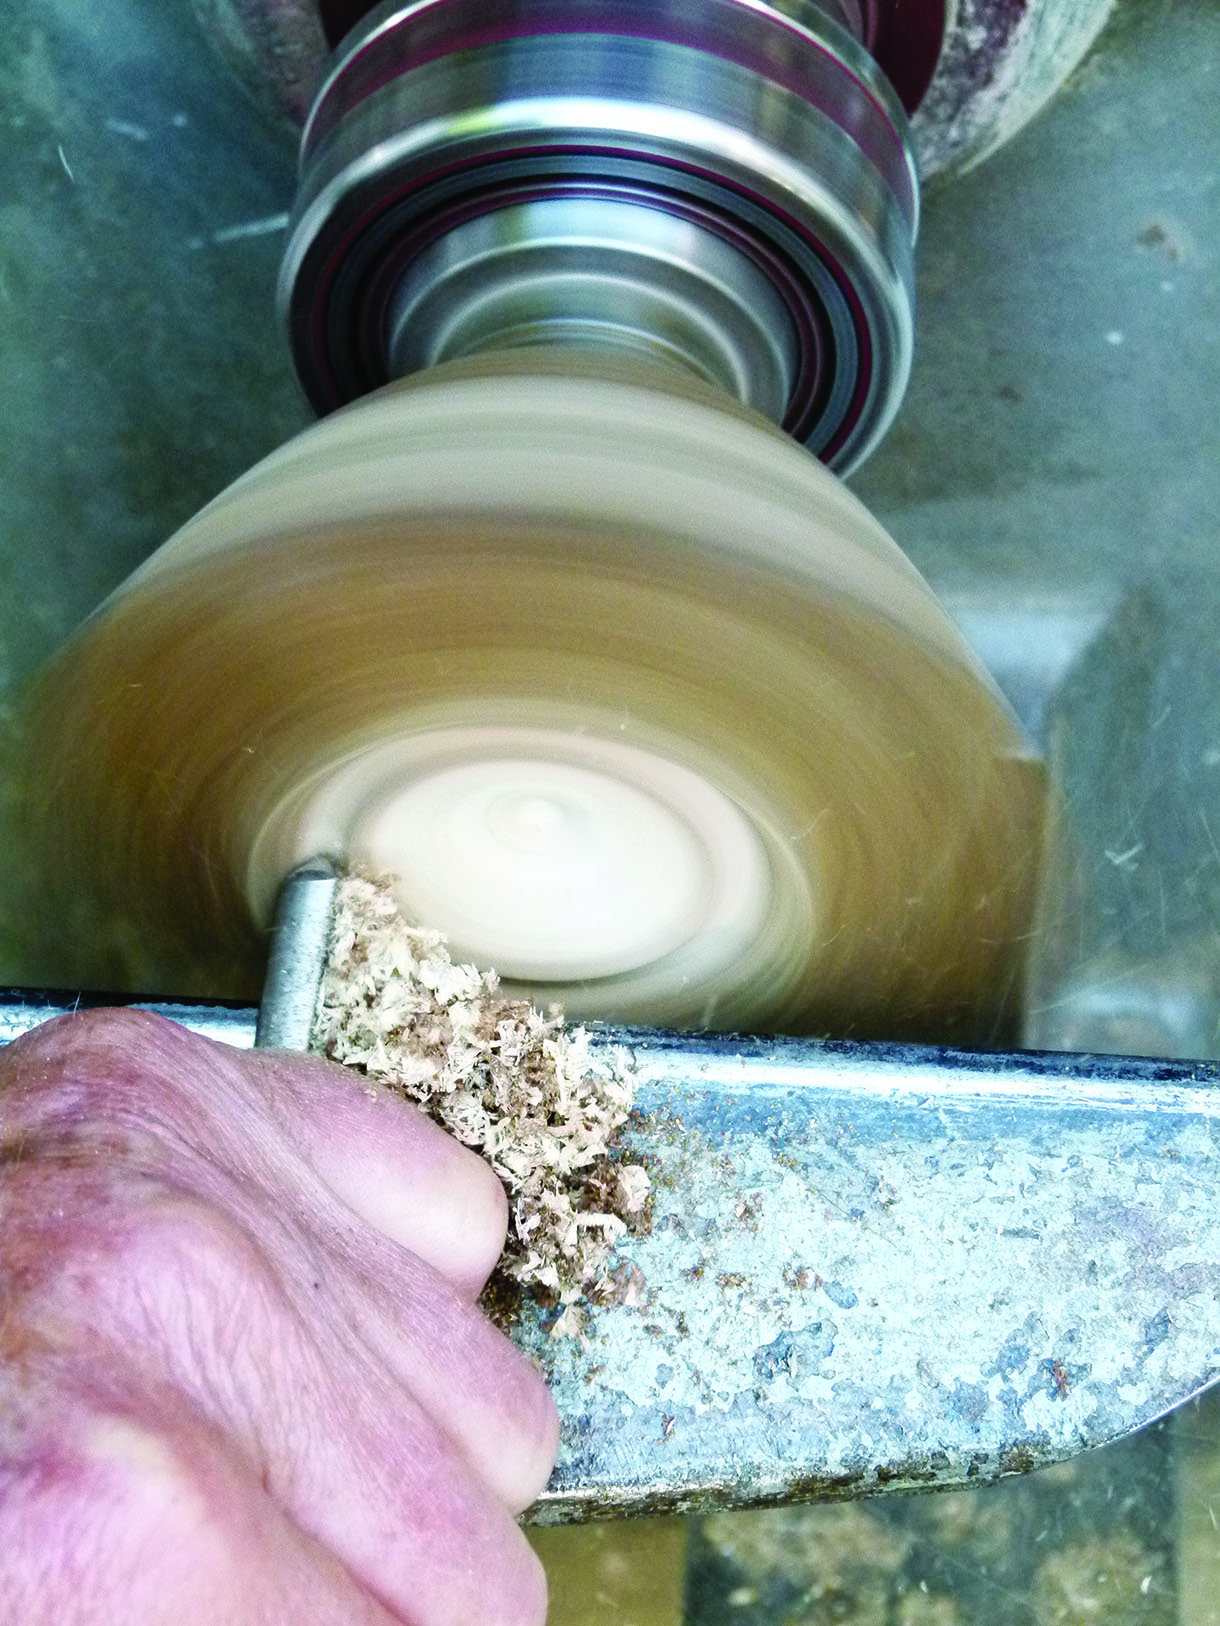
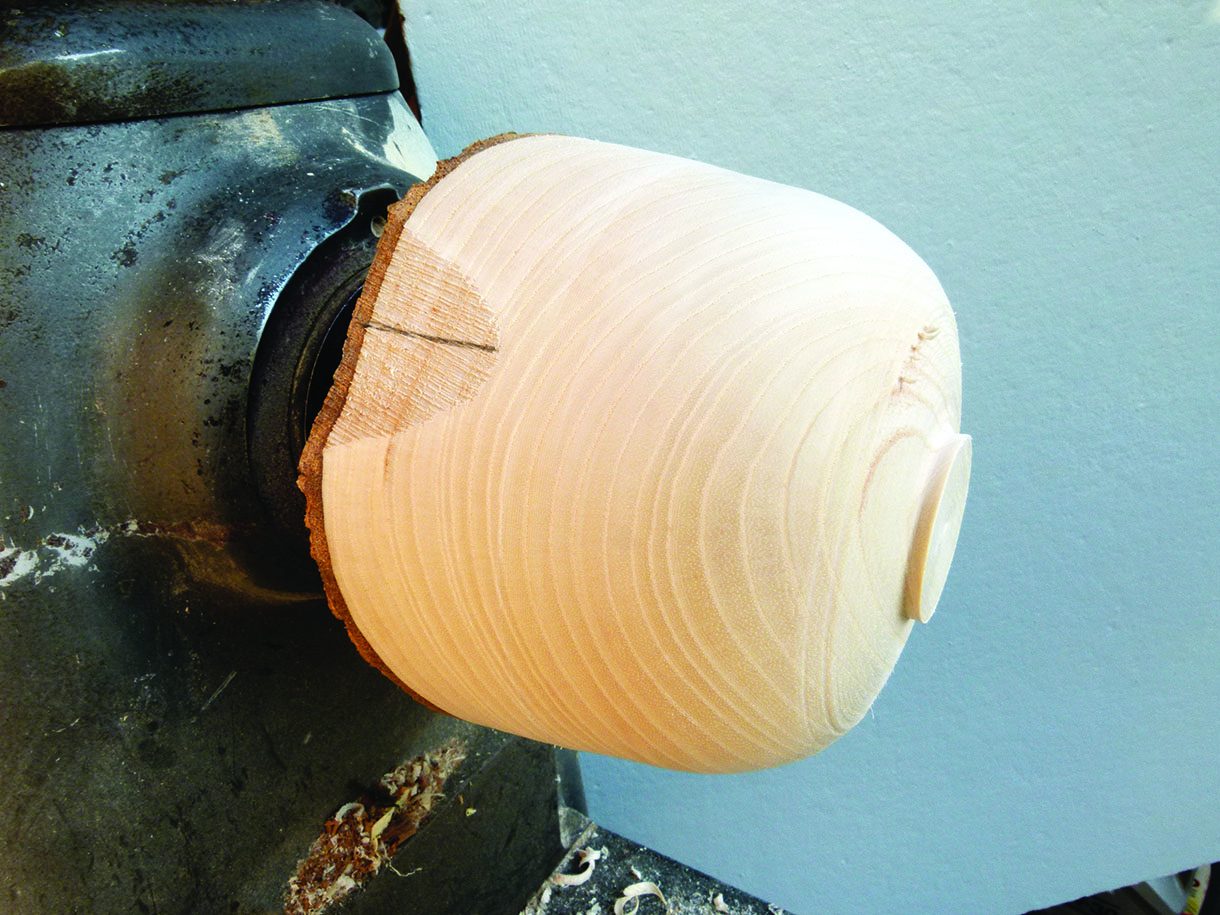
4. Slowly bring the lathe speed up to about 1200rpm. Gently round the base and slowly work up the sides of the bowl. Use a 16mm diameter bowl gouge with a relatively straight across grind
5. Use a 13mm bowl gouge to adjust the shape to what you want
6. Next, refine the shape. It is worth spending time on this. Use the trailing edge of a spindle gouge for rounding/shaping the bottom of the bowl. The final size and shape of the base will be decided when the bowl has dried. Finish the top bark edge with a 13mm diameter gouge. If it starts to separate, apply superglue before the final cut
7. For sanding natural edge bowls use an angle grinder run at a low speed to prevent too much heat being generated. Run the lathe backwards so the work is moving away from the abrasive disc. Start at 120 grit and work to 240, then coat in melamine sanding sealer. Leave the sealer until is it completely dry, then start at 180 grit and work down to 320 grit. Woods like yew and laburnum are easily subject to end grain cracking. If this happens, use a mixture of wax and liquid paraffin to lubricate the sanding process
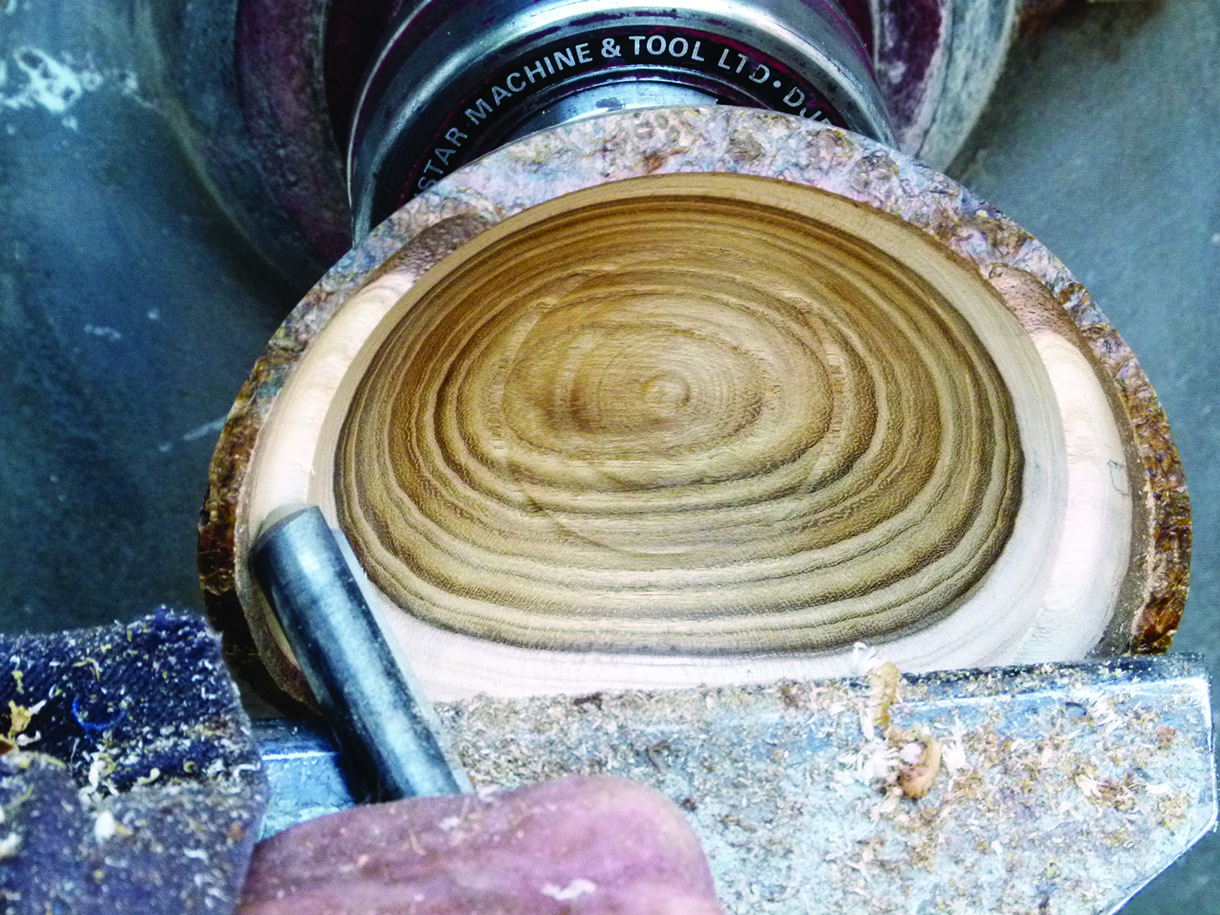
8. When turning thin bowls it is vital to centre the work precisely so that the wall thicknesses are even. Mount the bowl in the chuck with the faceplate still attached, then rotate the work by hand and if the bowl does not run reasonably true in the chuck it is easy to re-cut the spigot. If necessary, a little side pressure with a thumb and a downward tap with a mallet towards the chuck will usually allow the work to run true
9. Start to hollow out the bowl with a 10mm gouge. It is important to start with small cuts as the spigot is narrow and the bowl can easily be knocked off centre
10. Try to keep the shape of the inside as near as possible the same as the outside surface. Then aim to take even cuts until the final thickness is reached

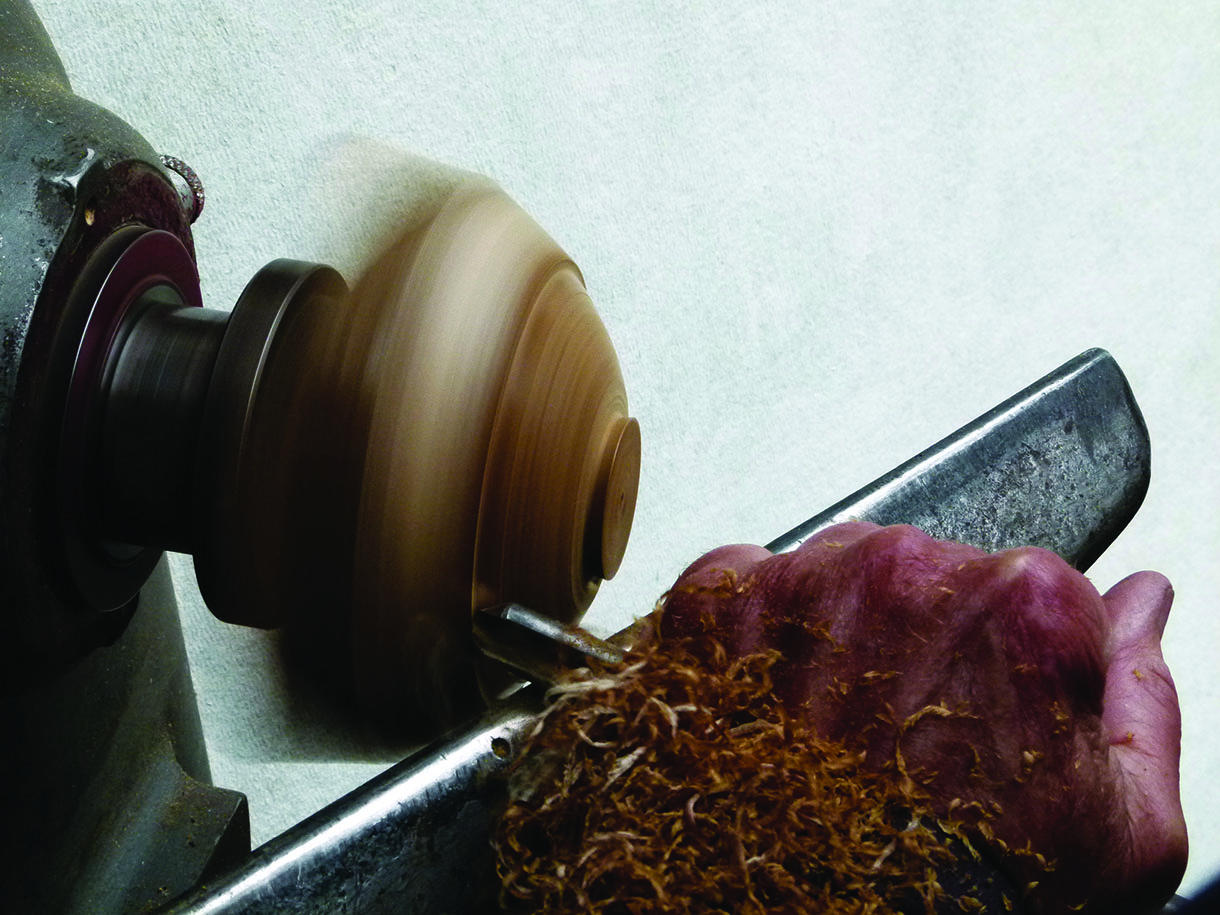
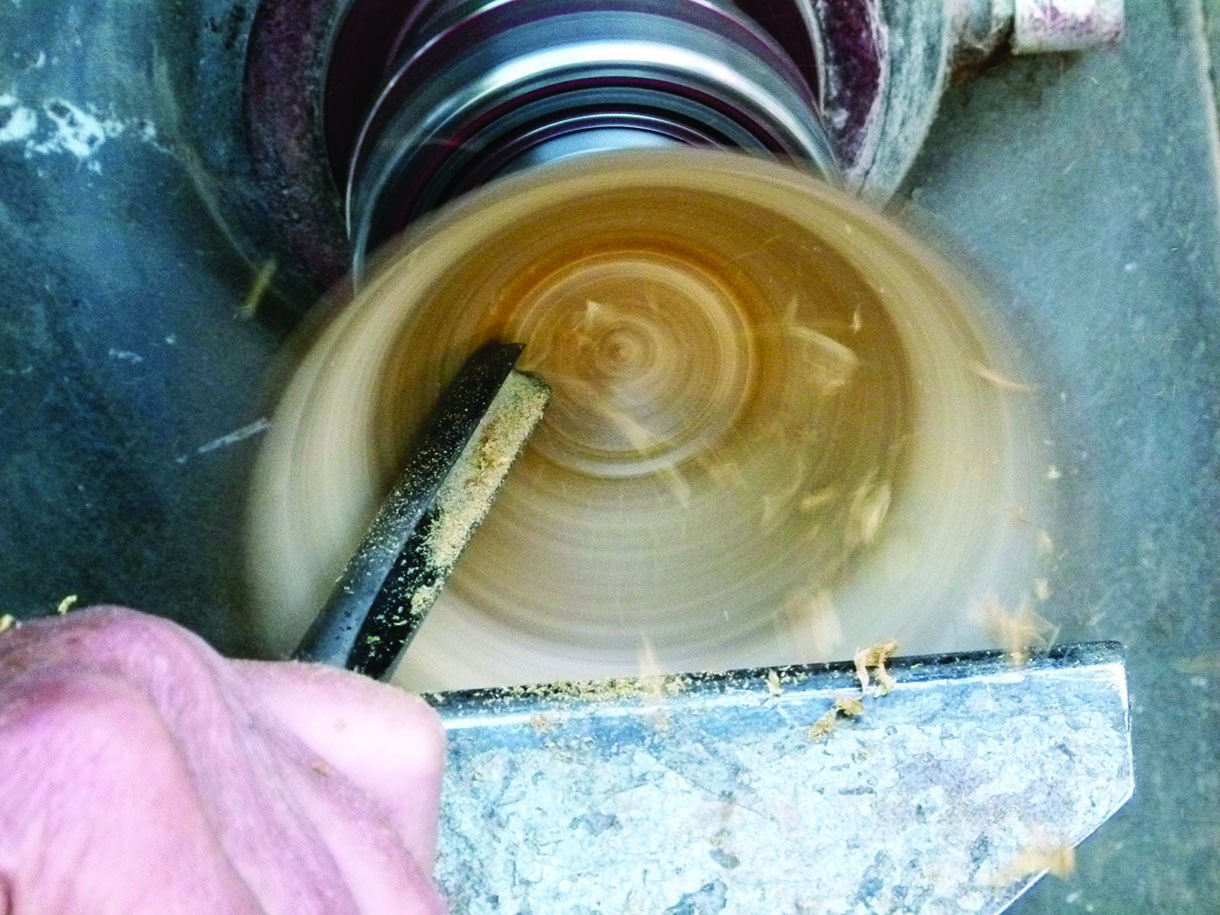
11. With the lathe speed at 1500rpm, use a 12mm gouge on its side to make the entry cut. The ghost of the revolving edge is clearly visible in good light
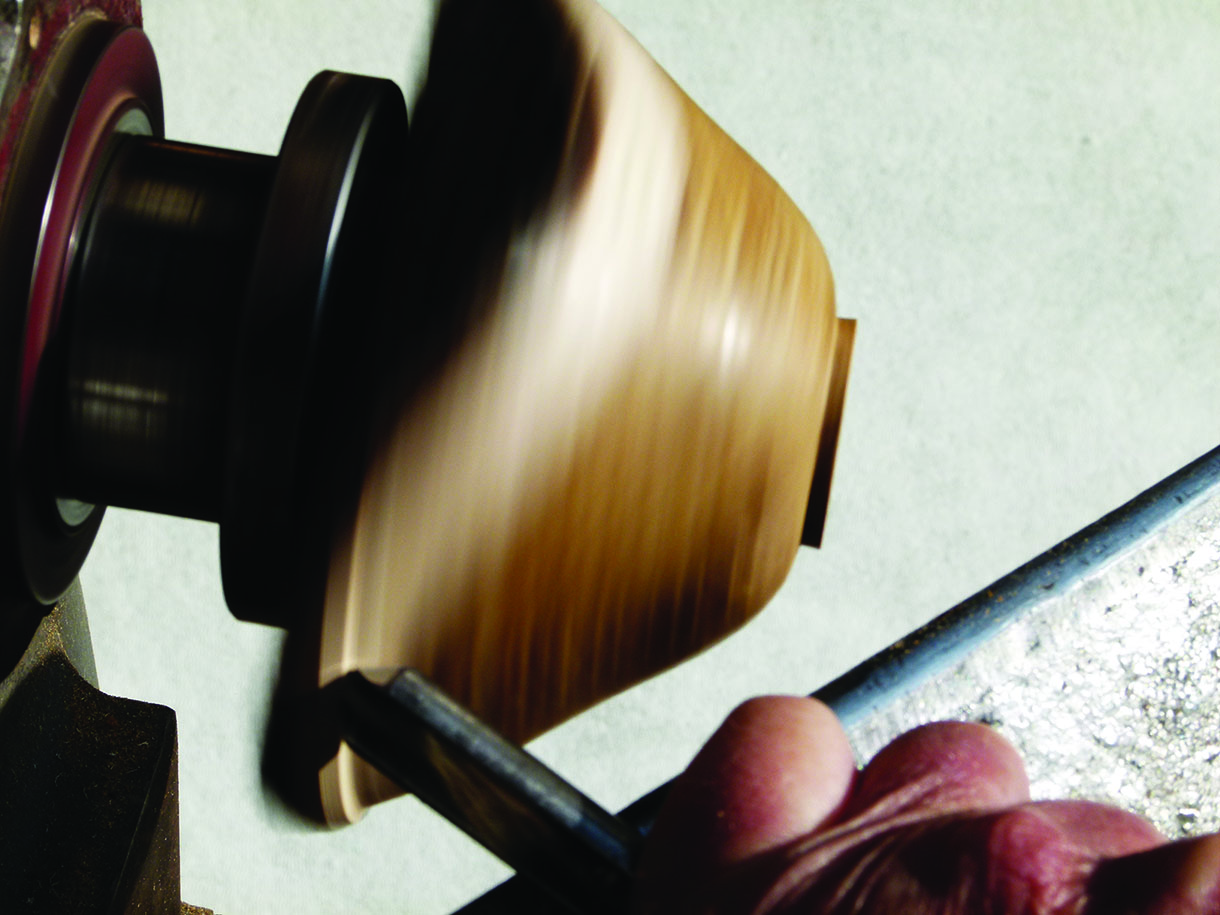
12. This photo shows that the gouge is not cutting wood all the time. Keep a strong downward pressure on the toolrest to stop the gouge jumping/vibrating. Leave the wood quite thick until the last cut as the wall of the bowl provides support for the final cut
13. The 12mm gouge will go nearly to the bottom of this V-shaped bowl as I have ground off the back of the bevel
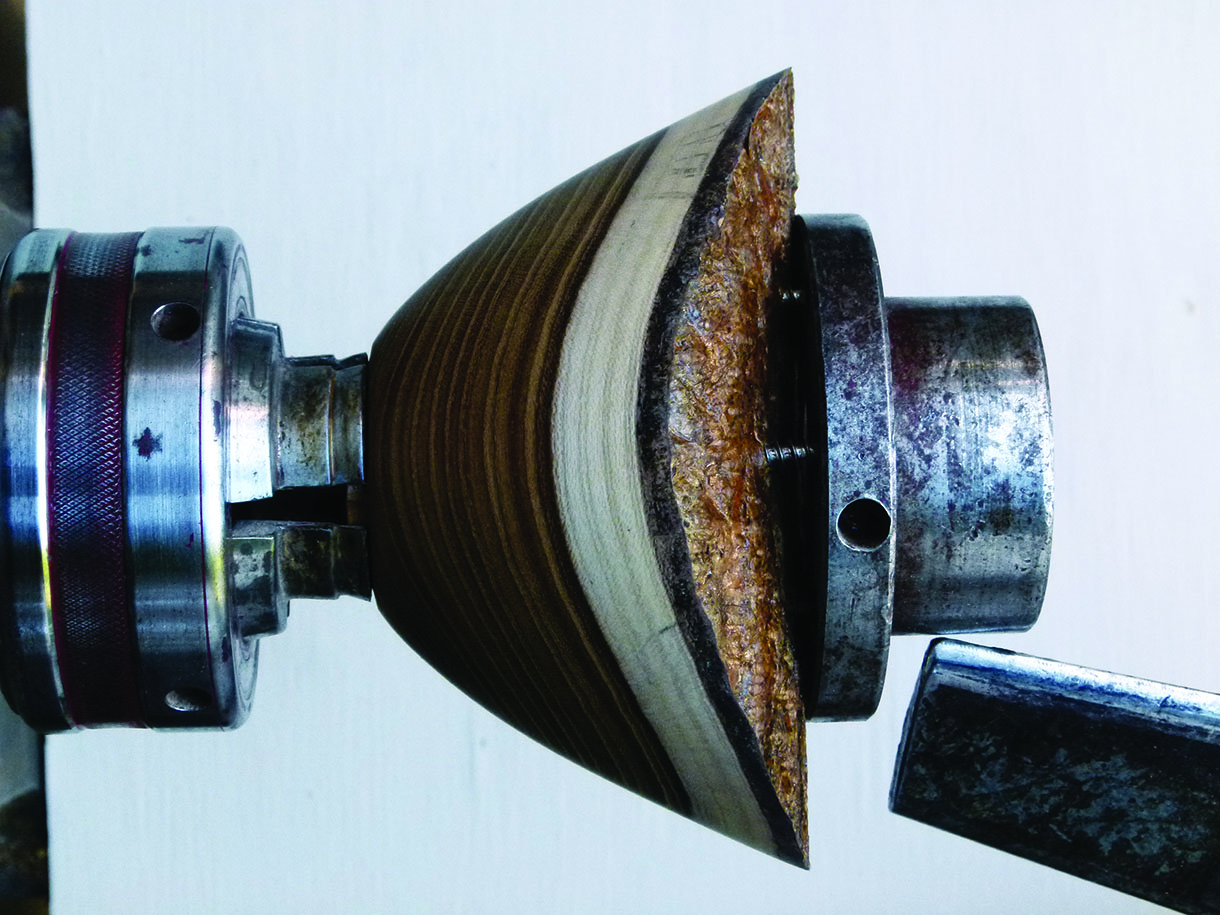
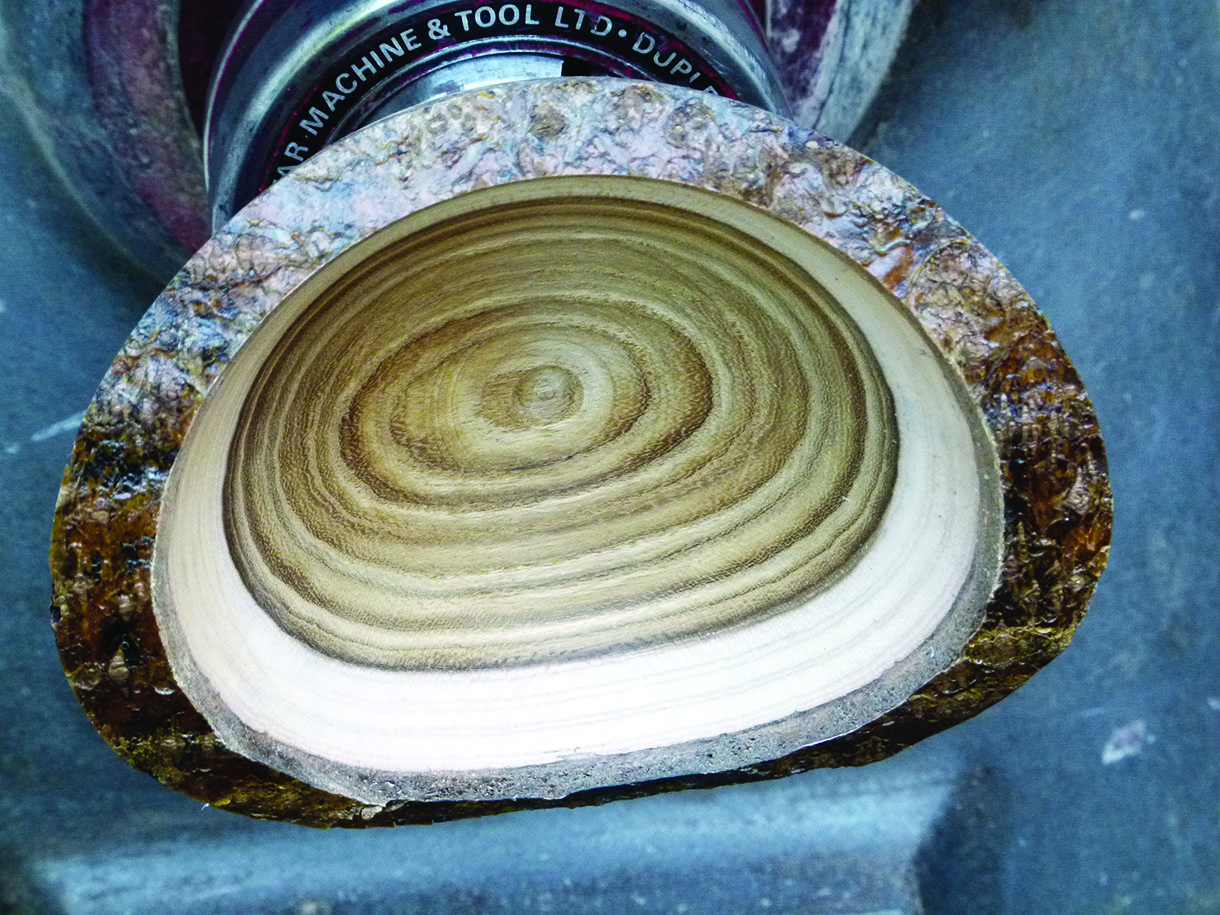
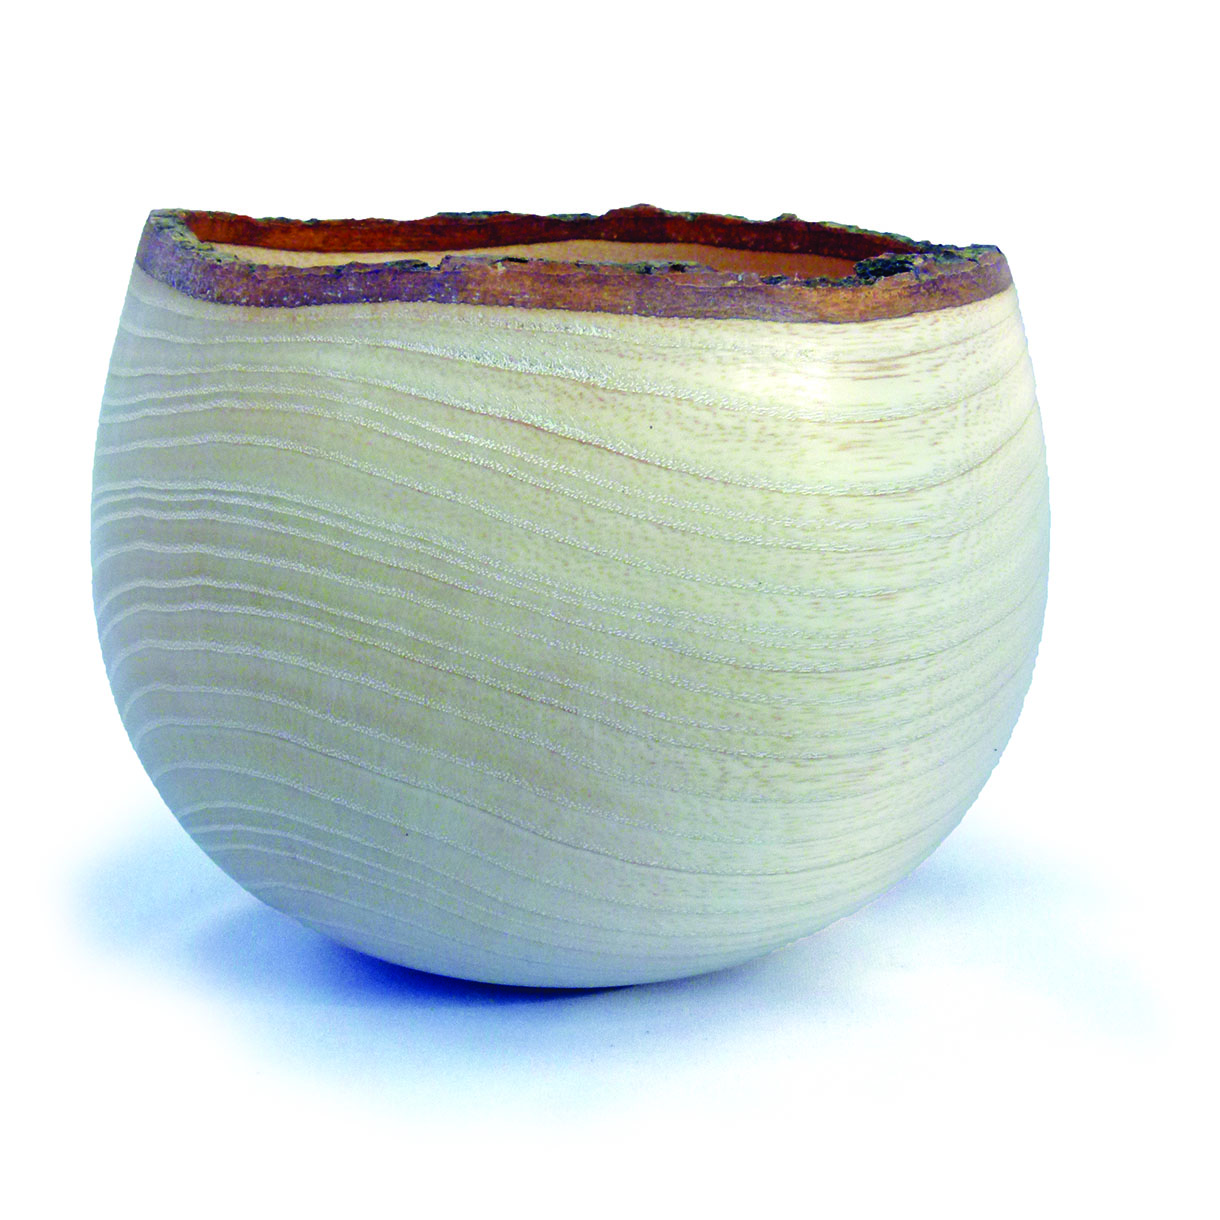
14. Here you can see how well the axis of the work lines up with the growth rings. Give the inside of the bowl a final sanding with a Proxxon long neck angle grinder, fitted with a 50mm sanding disc cutting on the lower edge of the disc to minimise the risk of a catch. If you are unsure about this method, sand the solid areas and then stop the lathe and sand the uneven area by hand with the lathe stationary. The next step is to allow the bowl to dry slowly. I usually start with a few days in the garage followed by a week or two in the kitchen. When the bowl is dry it will have moved but is unlikely to have cracked. This movement is part of the appeal; it is not absolutely predictable but usually the effect is pleasing. Customers tend to ask ‘How did you make that? It isn’t round’
15. Mount the dry bowl on a foam-backed dolly so it can be turned between centres
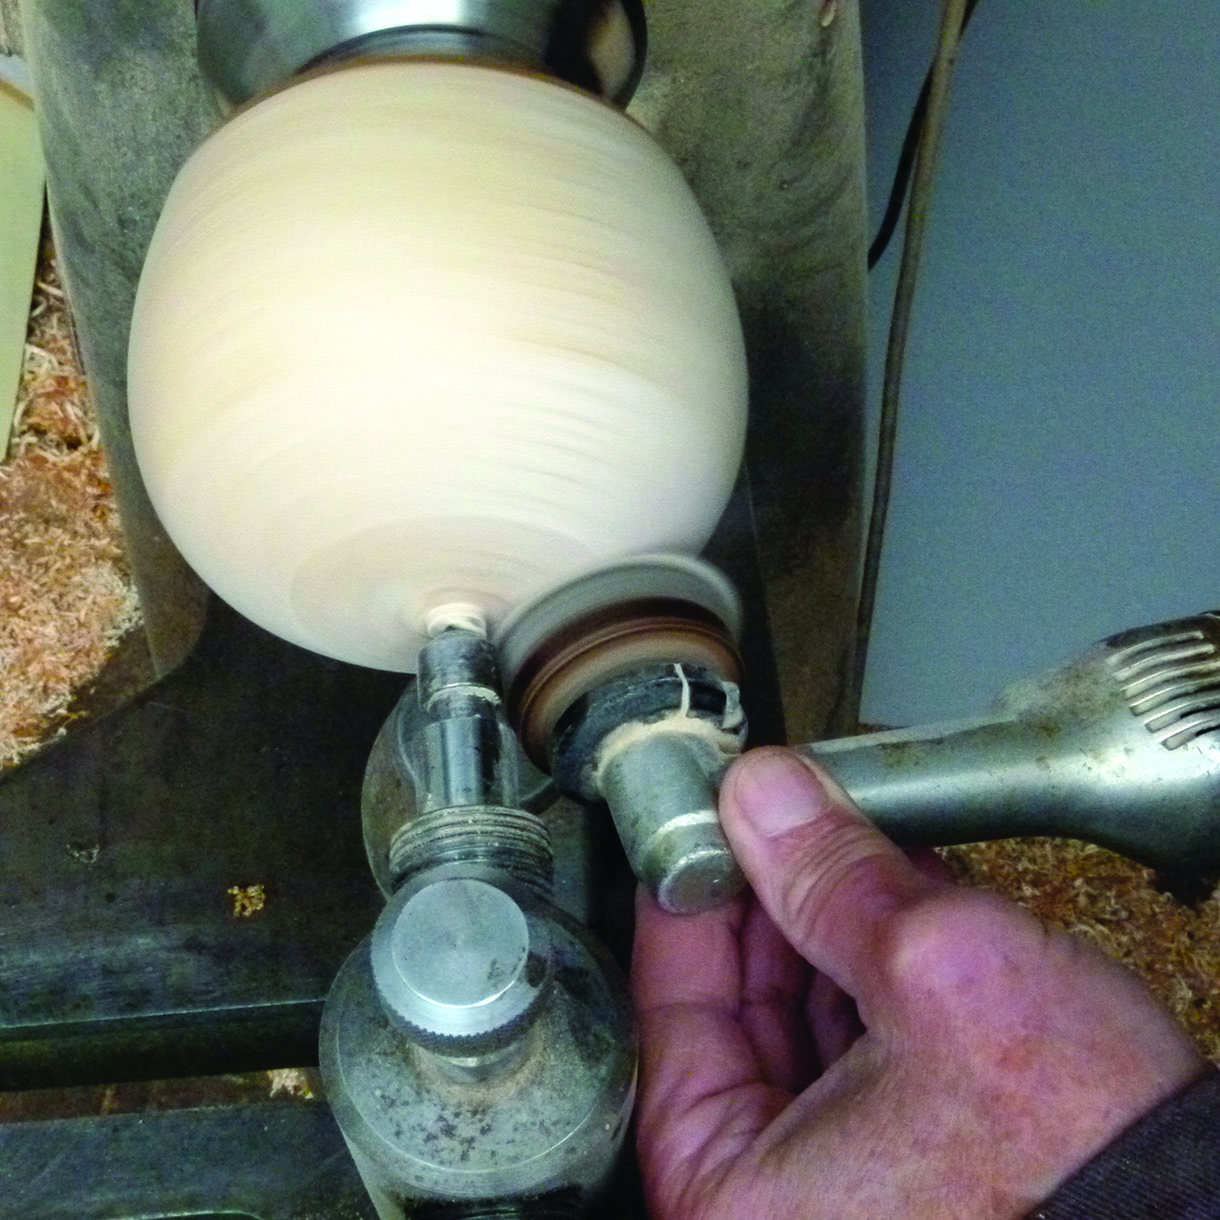
16. I find a spindle gouge is best for removing the spigot apart from a small central pip. Use a 10mm bowl gouge to blend the base with the existing curve of the bowl
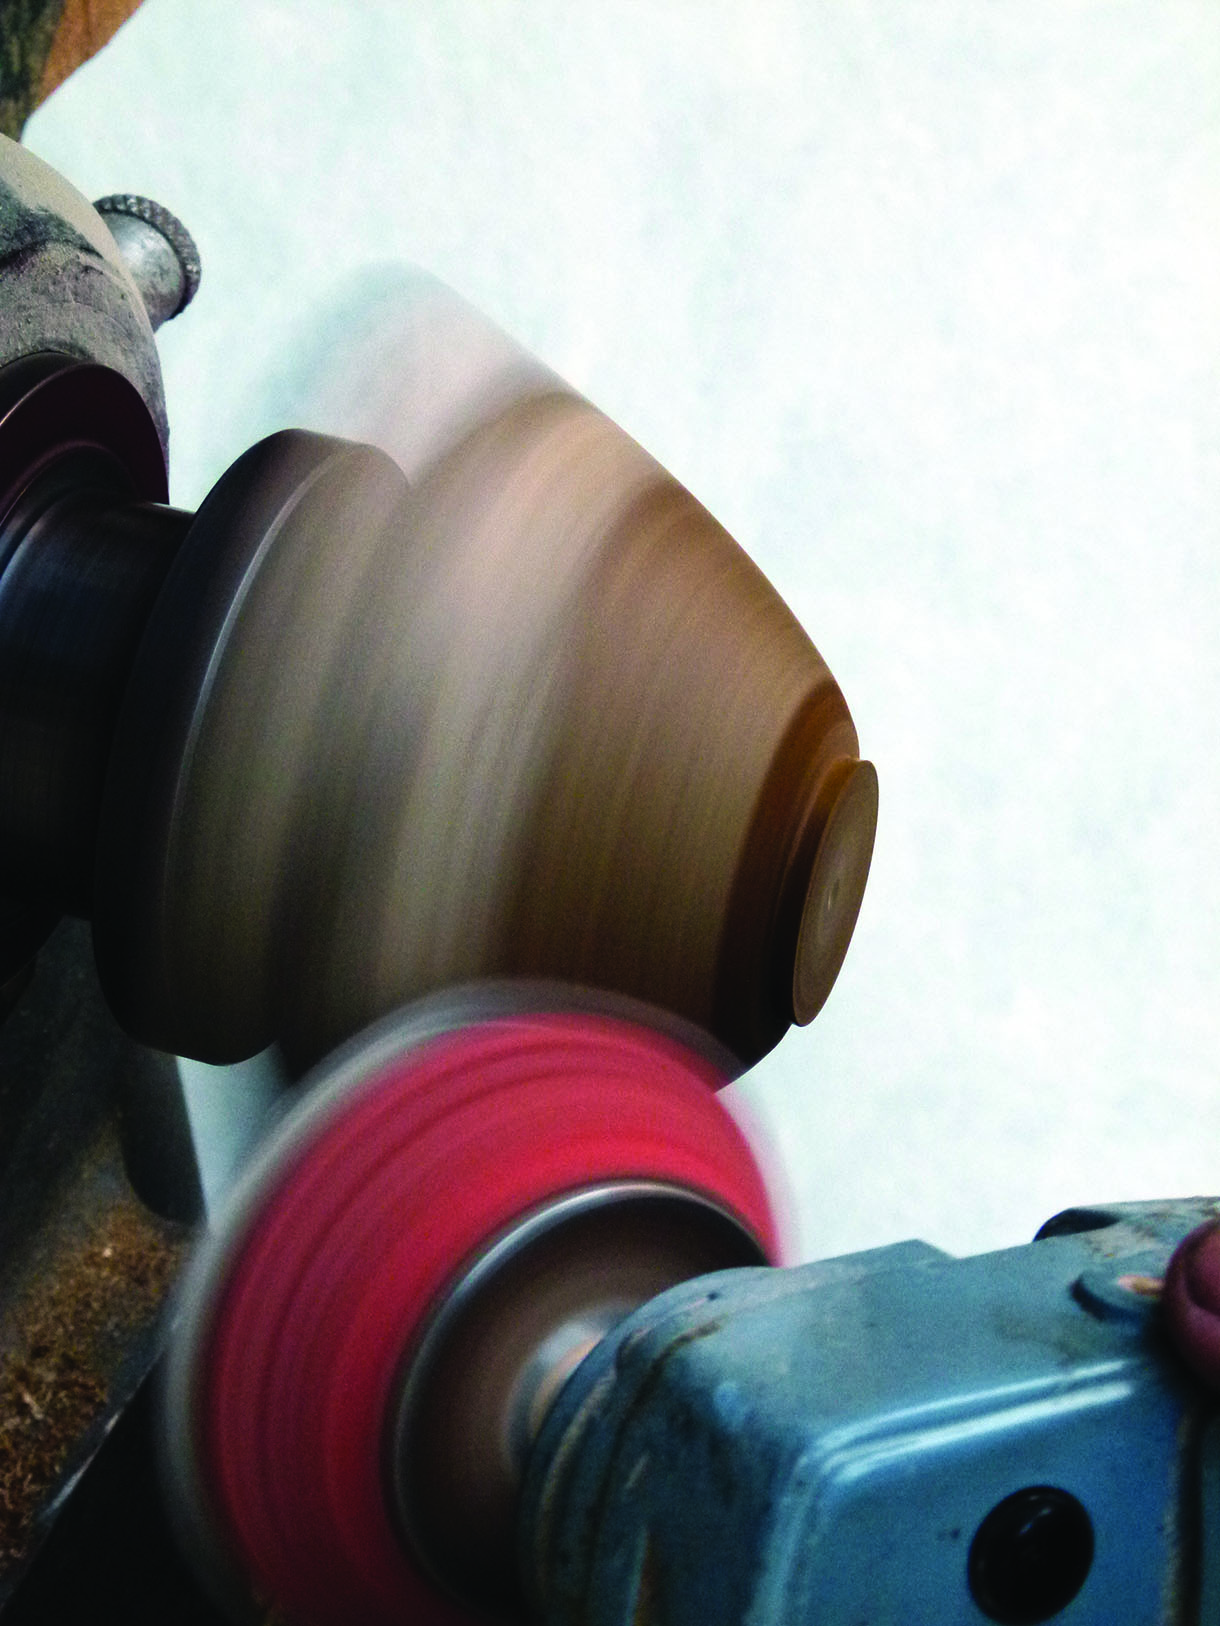
17. Final blending, smoothing and sanding is accomplished with a long-neck grinder/sander. The newly turned base and lower part of the bowl will be round while the upper section will have moved a little. To accommodate this difference the speed of the lathe needs to be reduced to about 400rpm so that the sander can follow the bumps. Note: I am sanding on the top edge and have approached the work from the back of the lathe, so the work is running away from me
18. After sanding, finish the bowl with melamine sanding sealer and buff with ‘Pro-Fin’ finishing compound
Option 2: Ash cross-grained bowl
1. Screw half an ash log about 140mm long to a 75mm faceplate. The top surface of my log was virtually flat so only one small washer was required for alignment. A possible shape has been marked in pencil. This is an interesting squashed rounded form that is not too difficult to make with an easy cutting wood such as ash. The growth rings should align well with this form
2. Turn the log almost to a cylinder and form a 42mm spigot on the base

3. Form and sand the rounded outside surface. Mount the bowl in a chuck prior to the removal of the faceplate
4. This photo shows a much later stage when the hollowed dried bowl is mounted on a foam dolly and the base is being sanded with a small angle grinder to give a completely rounded base
5. Lime the finished bowl to accentuate the grain
Handy hint
1. After sanding I usually apply a coat of melamine sanding sealer which is quickly wiped off with a paper towel. This tends to seal the wood so that colour from the heartwood is not carried to the sapwood as can happen with oil finishes
2. If the finish is not good enough I leave the sealer to dry overnight. The melamine content of the finish
means that it is usually possible to continue sanding with 240 grit without clogging the abrasive. I will then power sand with 320 grit and give another coat of melamine sanding sealer
Option 3: Yew cross-grained bowls
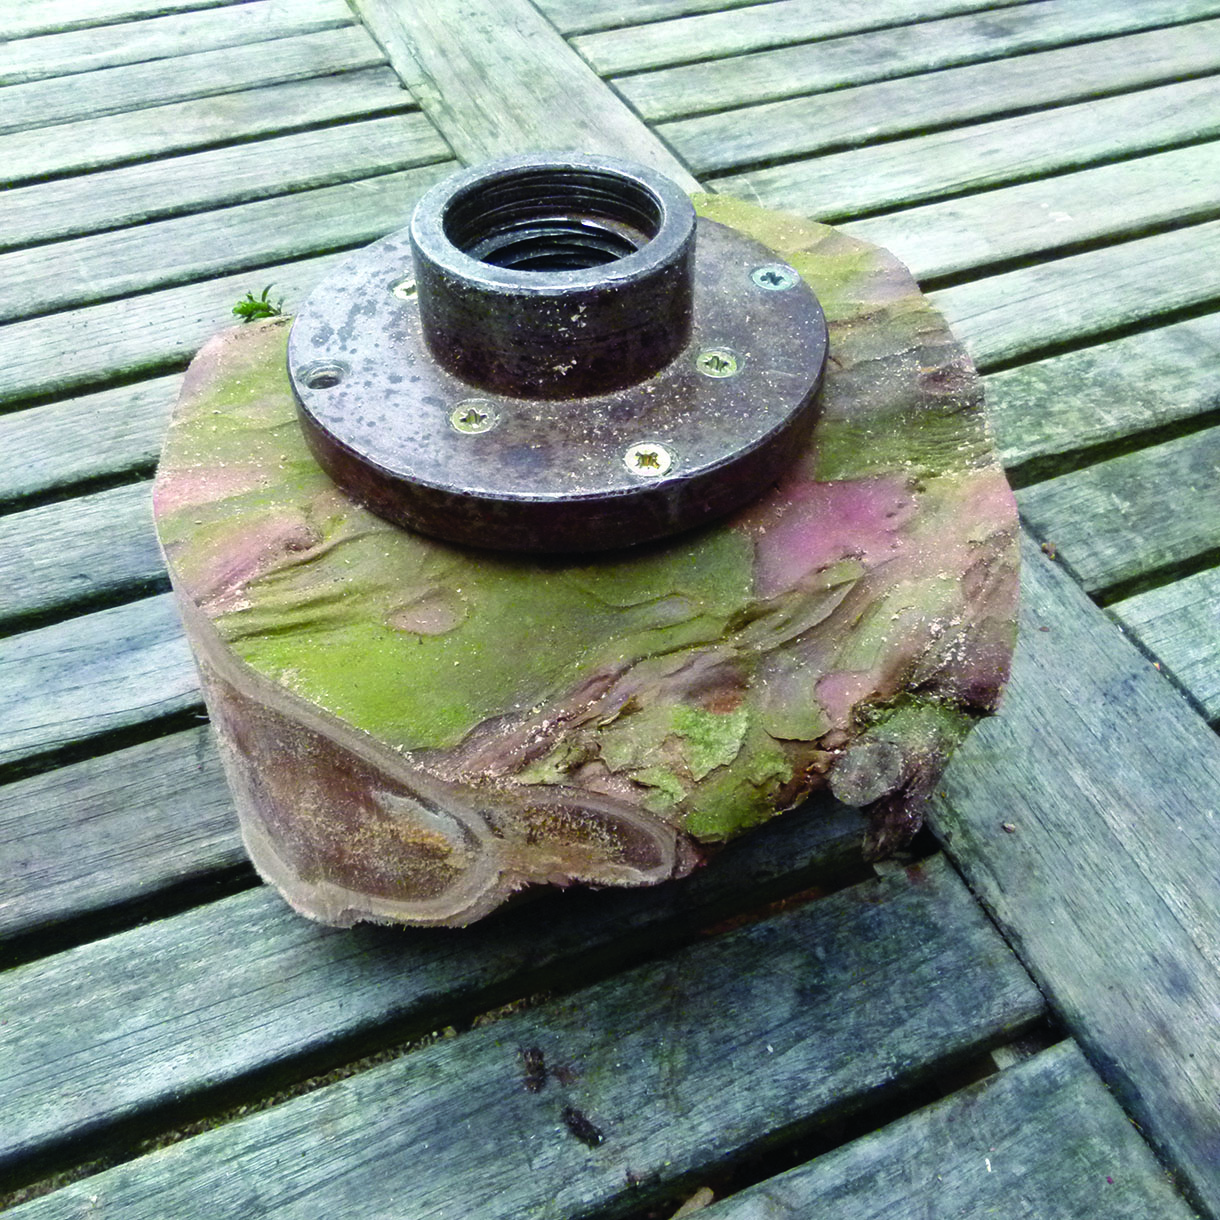
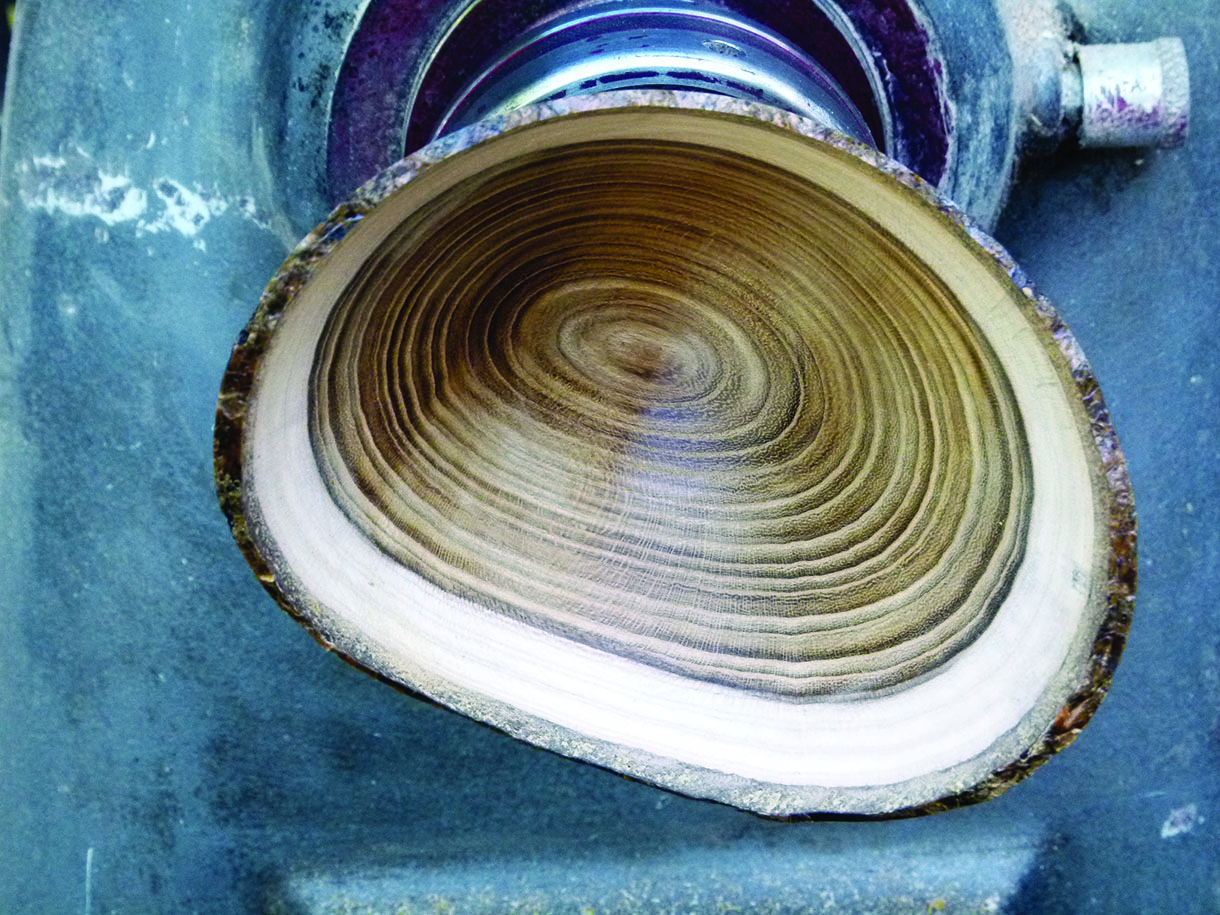
1. An irregularly shaped yew log has been cut roughly circular, with a diameter about 160mm, on a bandsaw and screwed to a 100mm faceplate
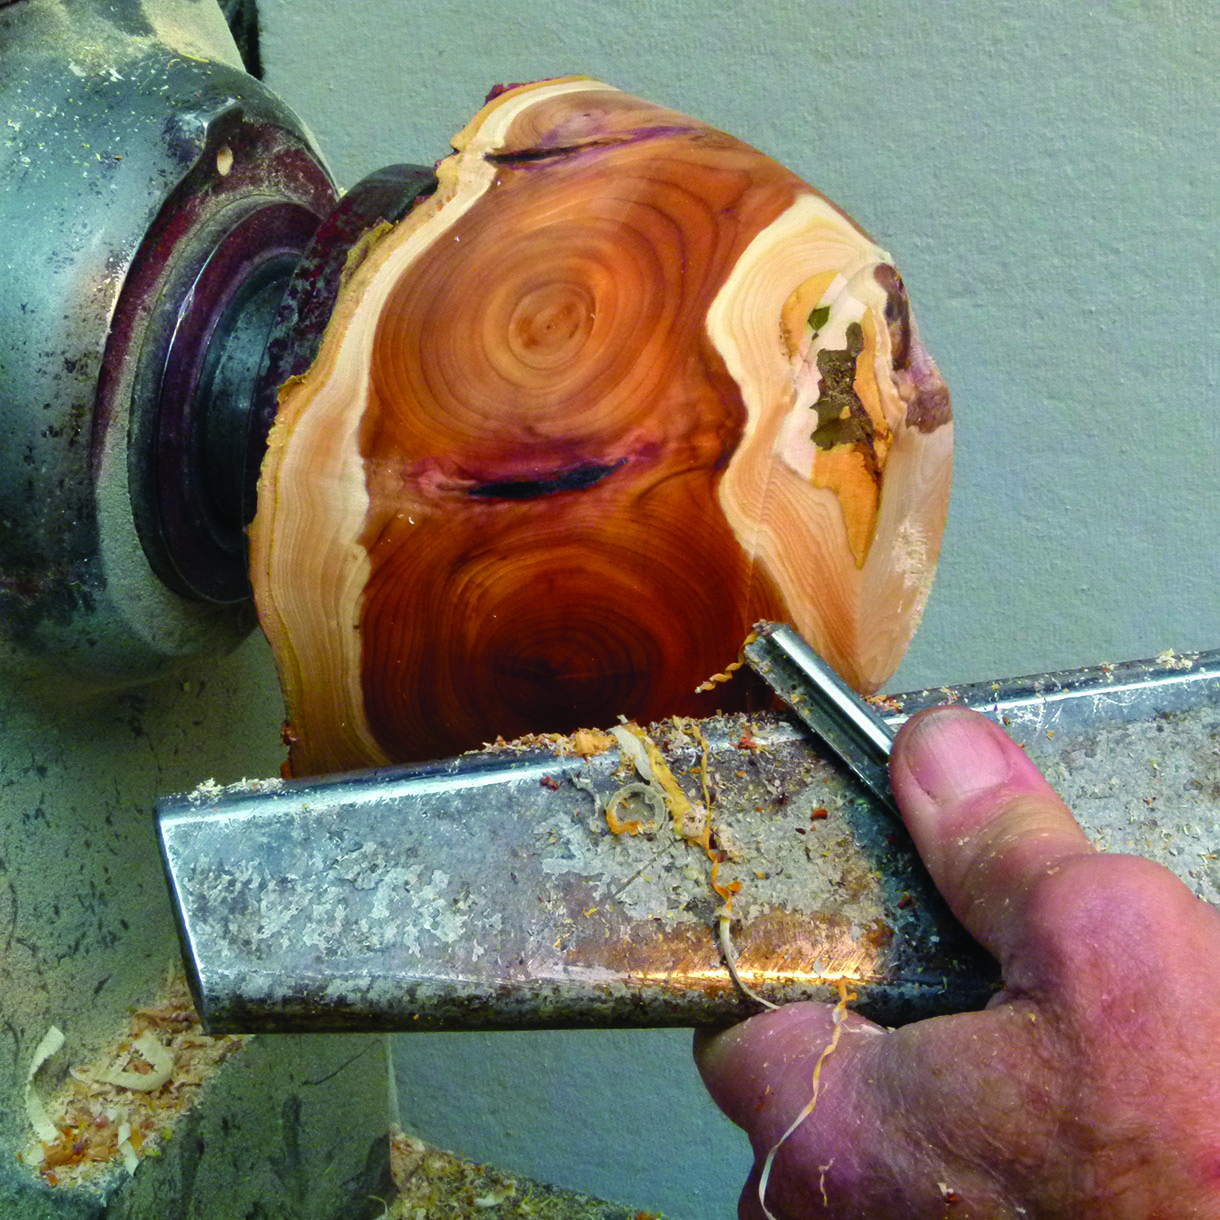
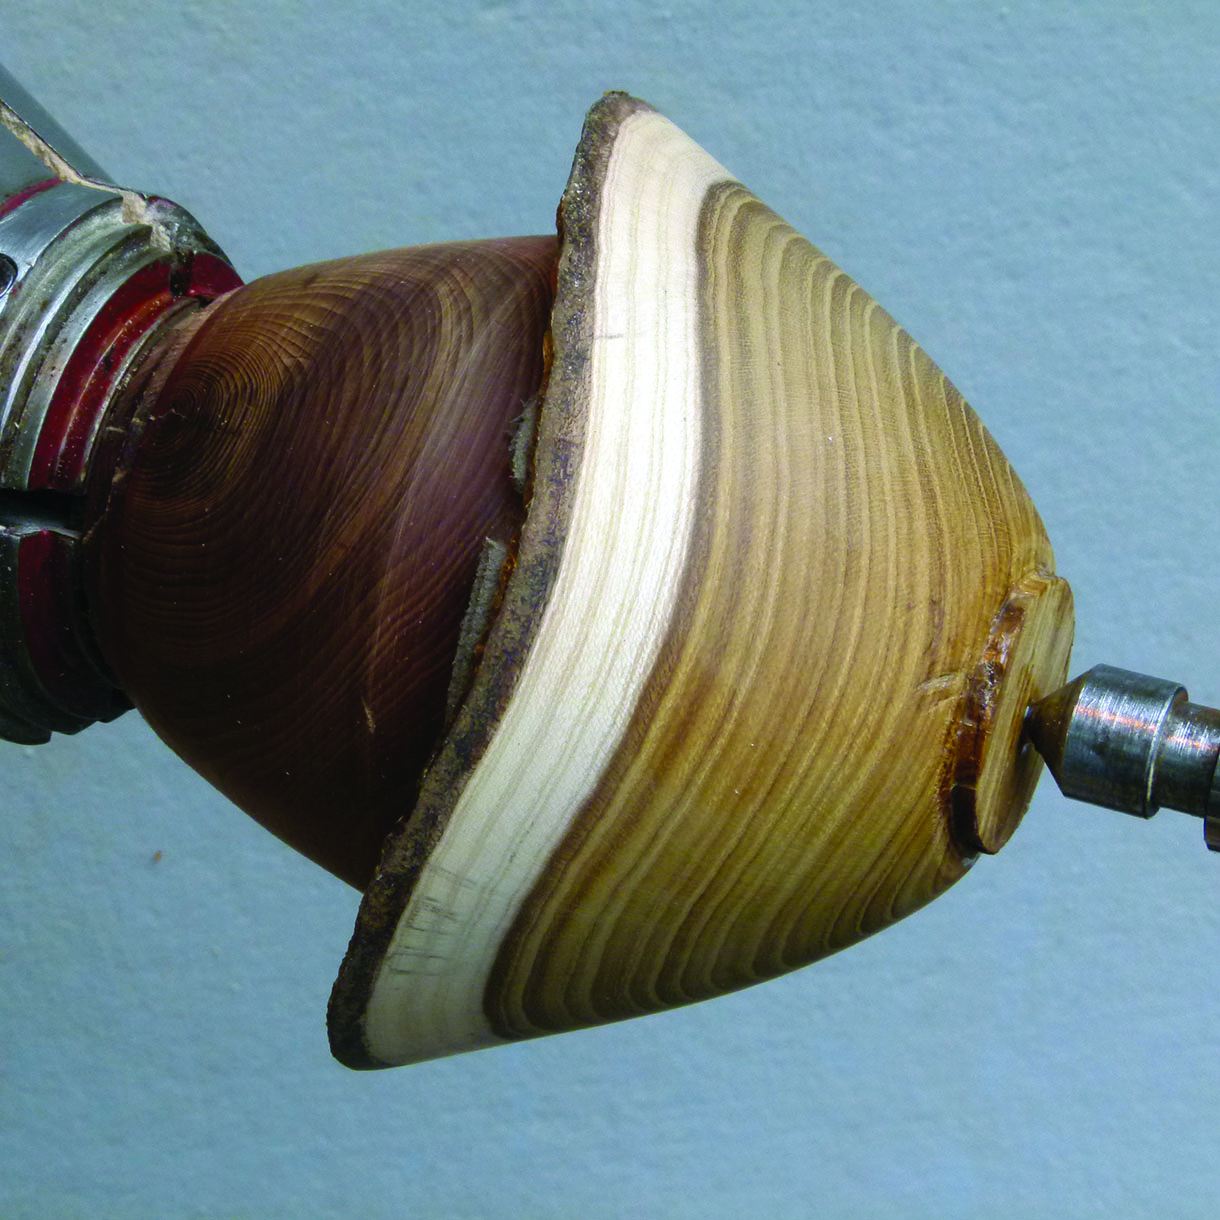
2. As the wood was full of knots and discontinuities I did not want to take too big a cut so I used a small 10mm bowl gouge to round the outside of the bowl. Go for a simple open shape as this is technically an easy shape to achieve and will display the figure of the wood
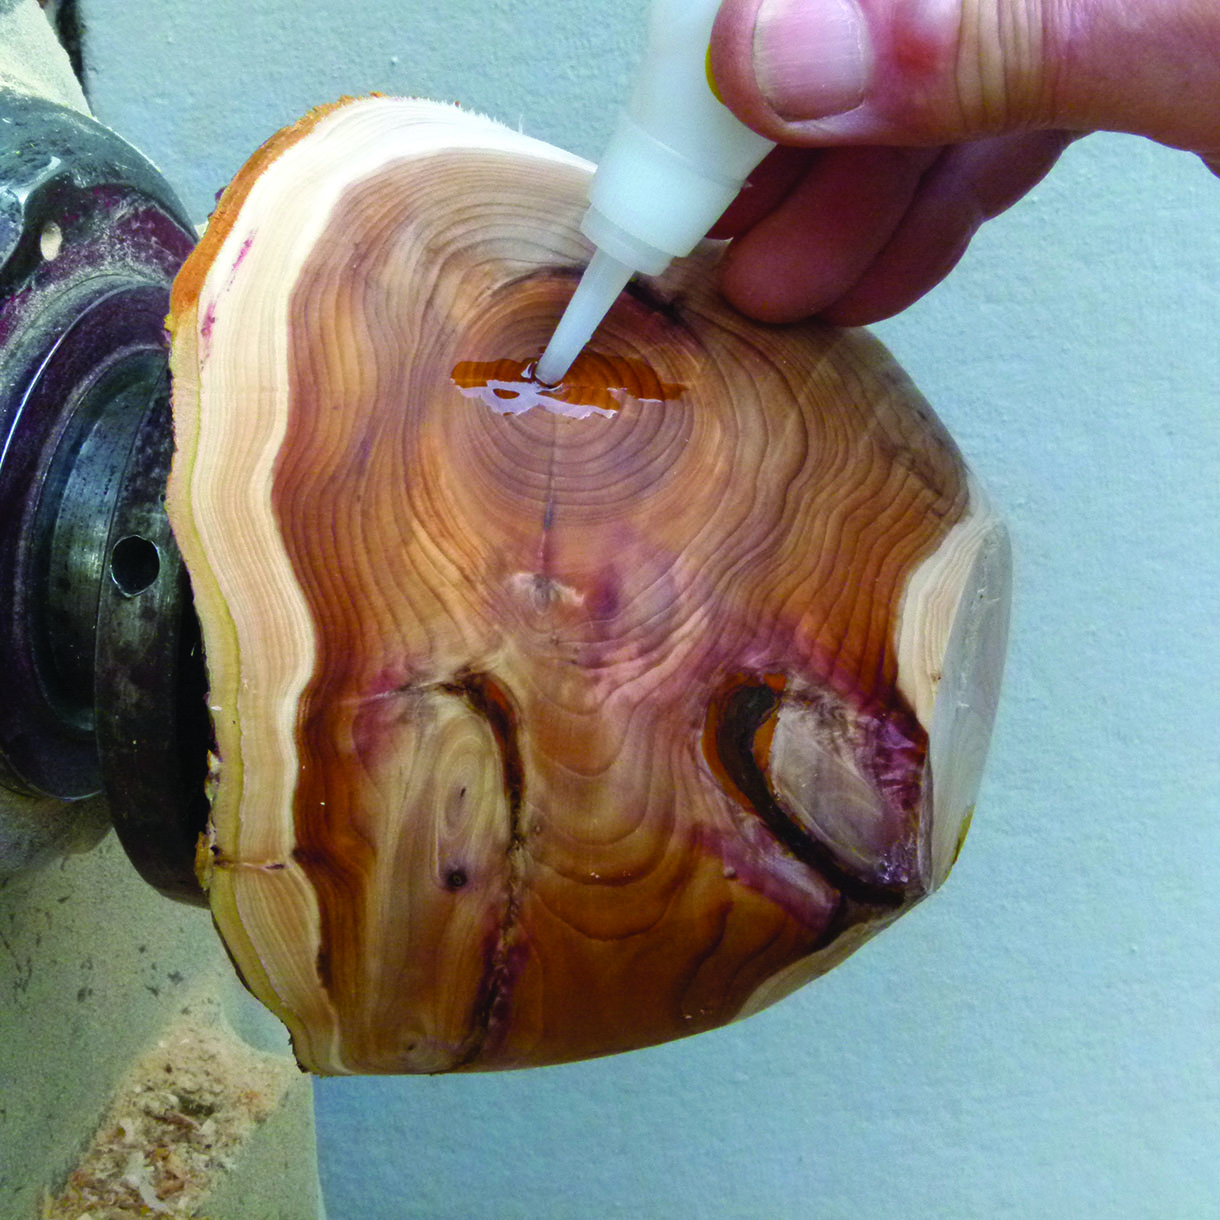
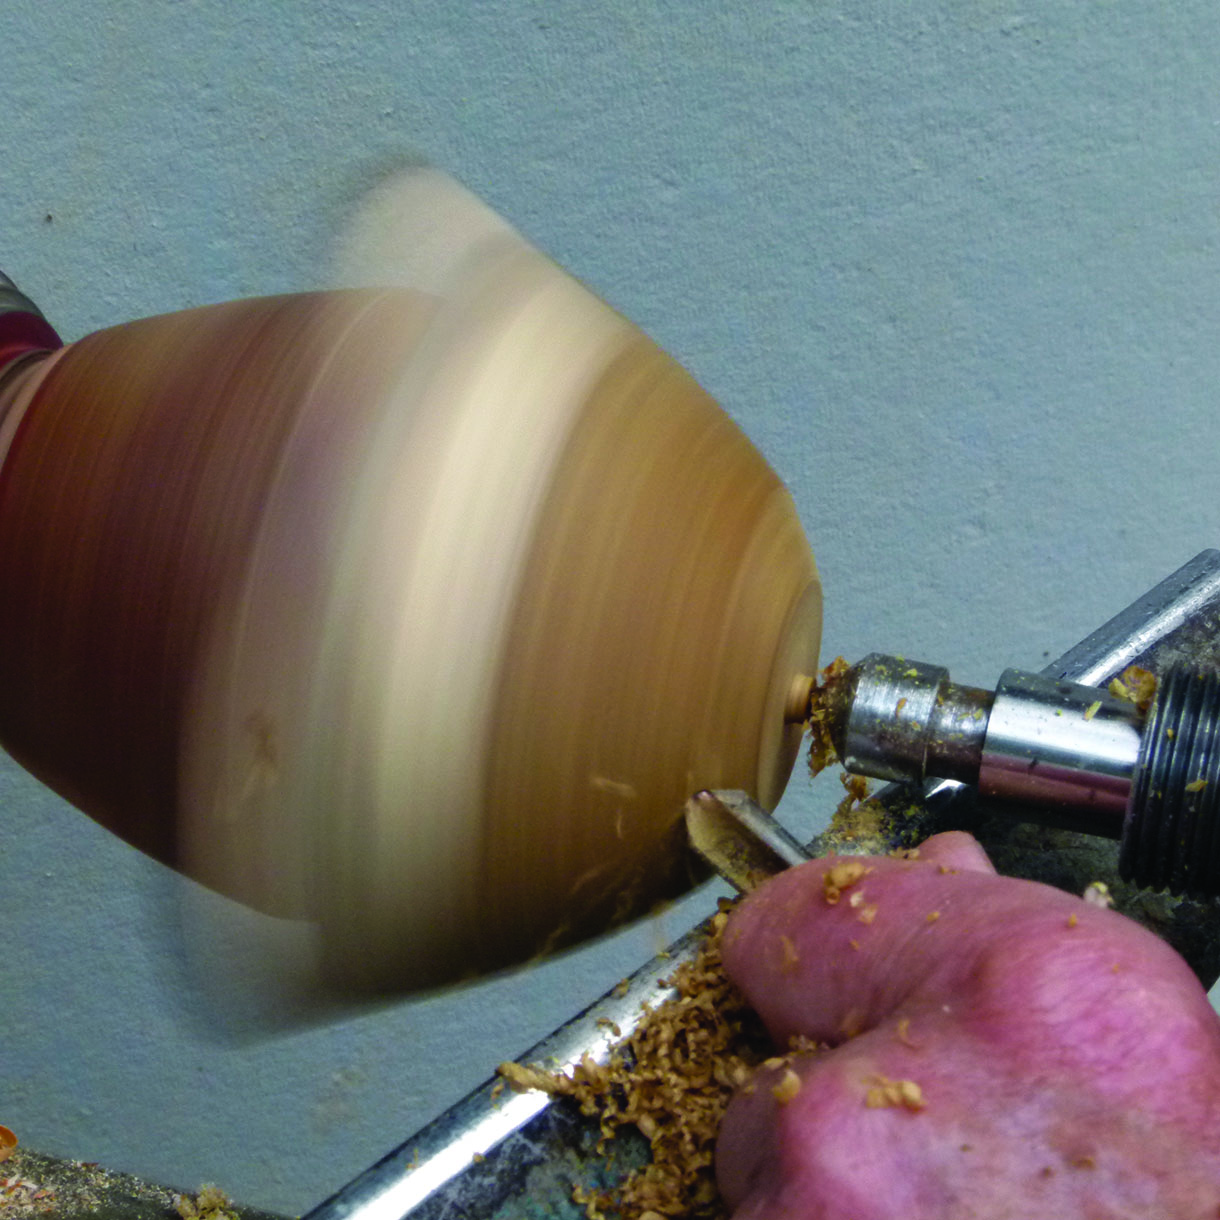
3. It’s best to fill any cracks with superglue before final turning. This particular bowl needed several applications and several final cuts
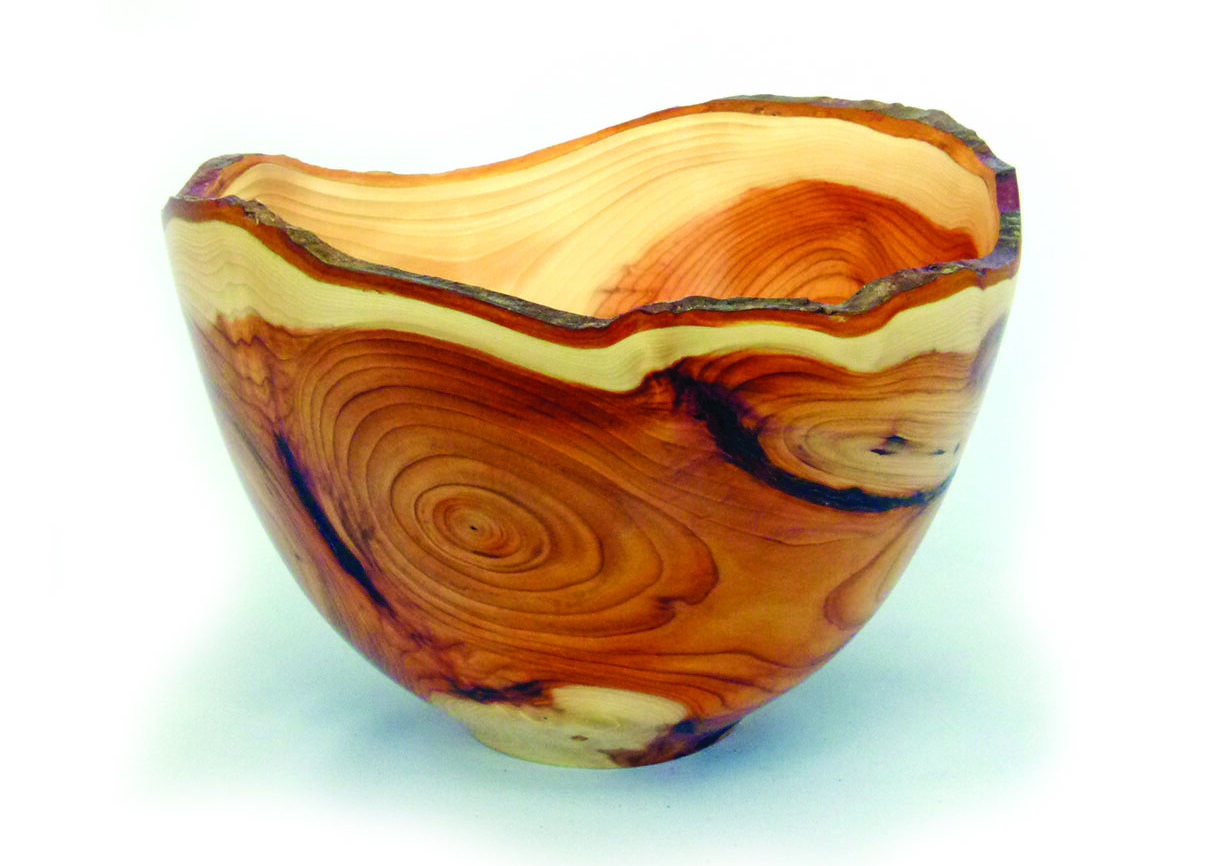
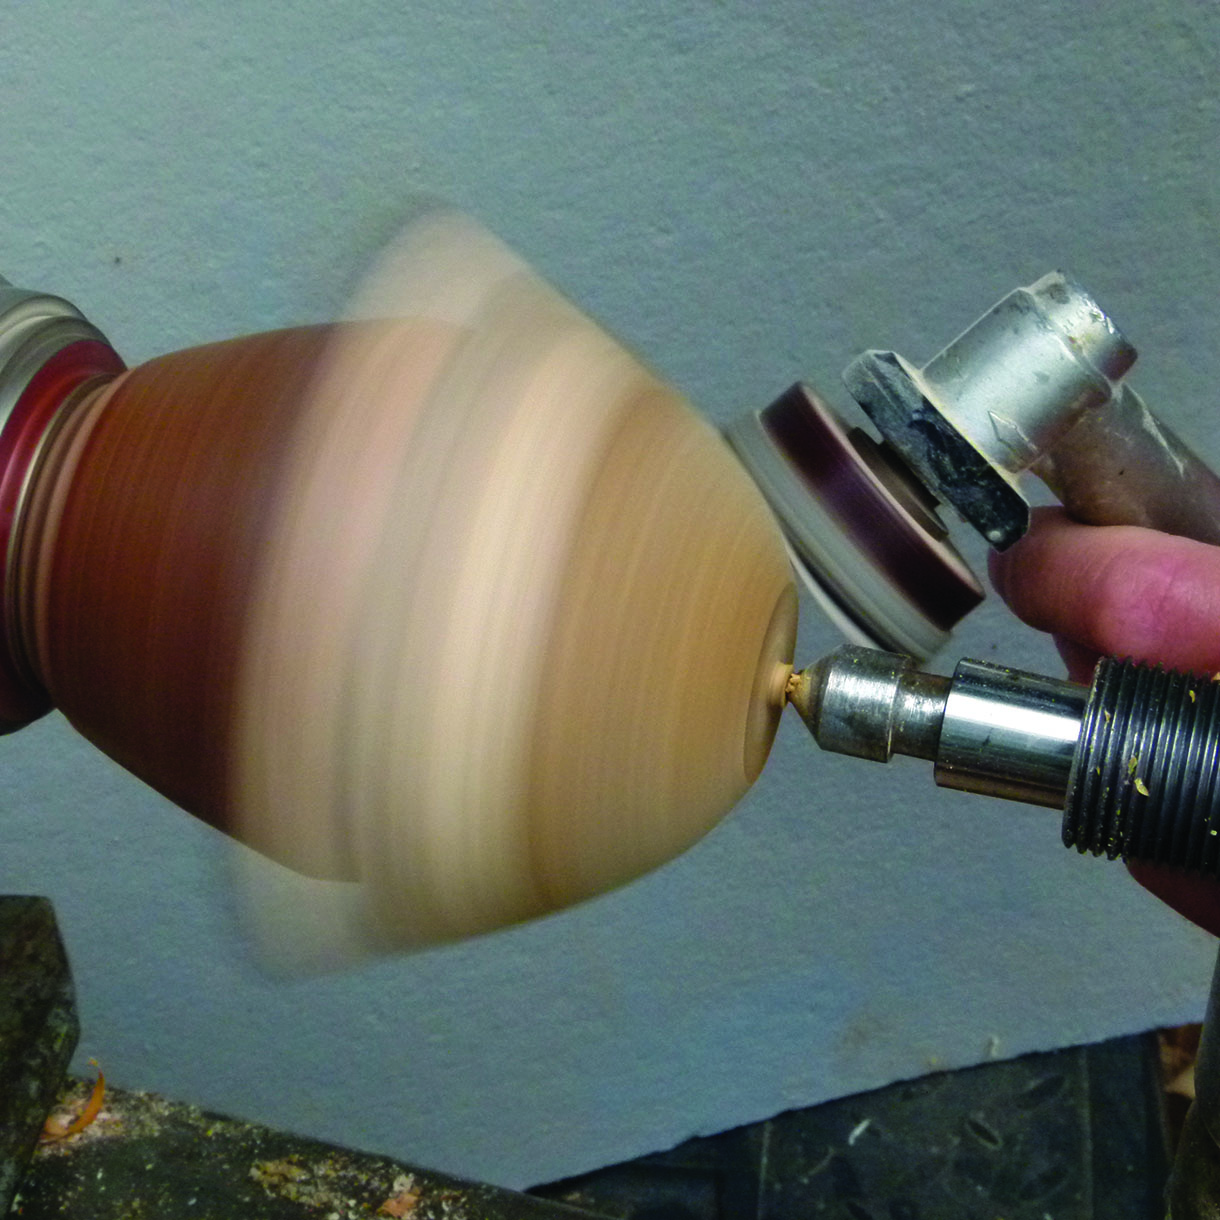
4. The finished bowl – thanks to the invention of superglue
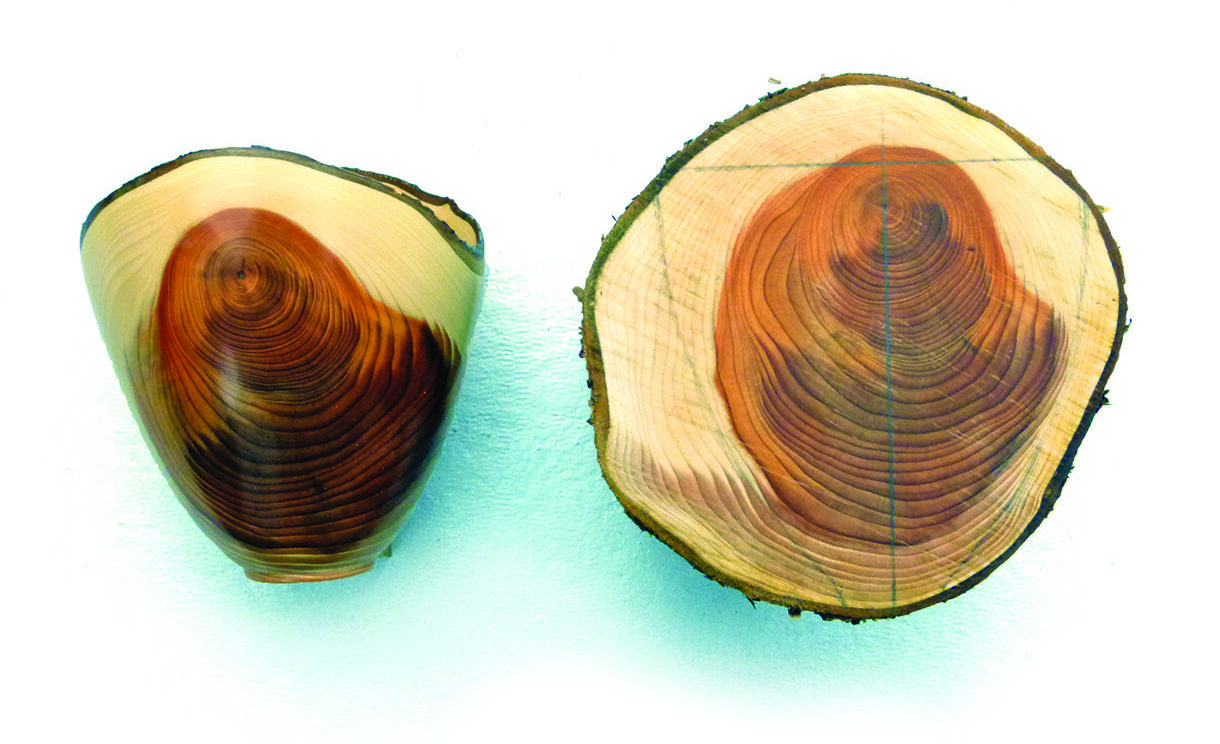
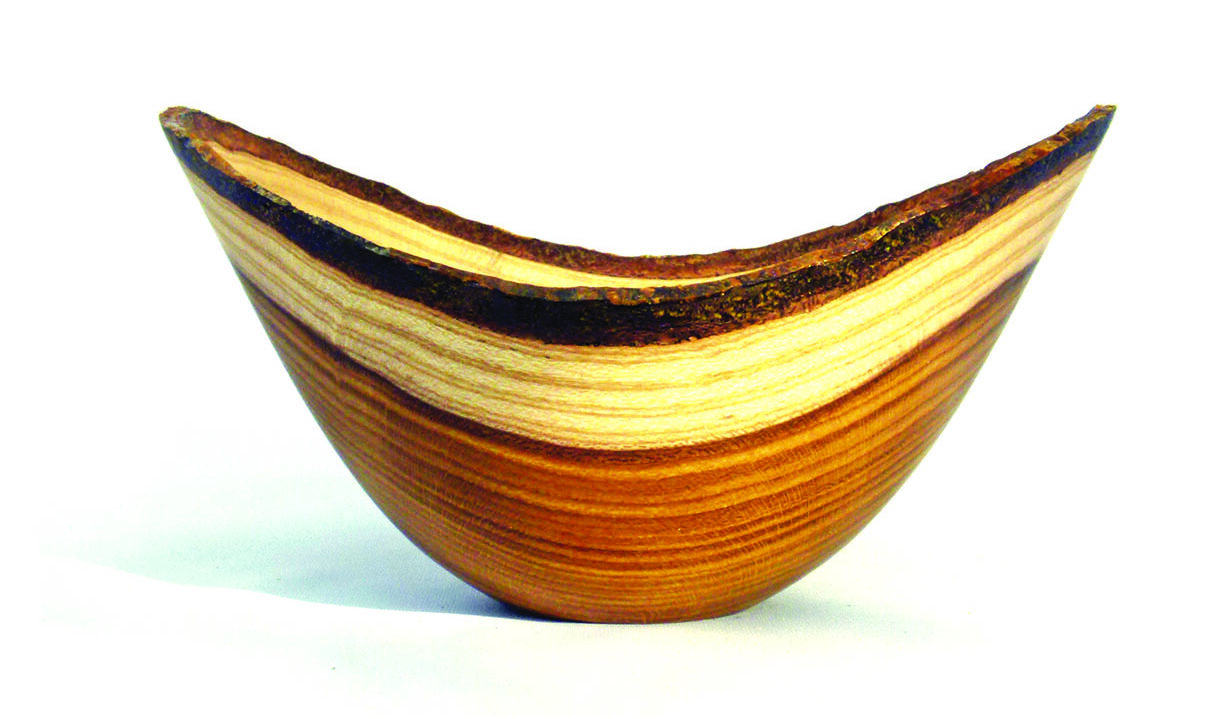
5. A composite picture showing a finished yew bowl and a section of the branch from which it was cut. Here I used the pith and as much as possible of the branch so the final shape was largely decided for me


