V-tools – Love Them or Hate Them:
Peter Benson explores using and sharpening a V-tool.
Peter Benson explores using and sharpening a V-tool
The V, or parting, tool is probably the most badly sharpened, misused or misunderstood of all the tools available to the carver. Those who can maintain them and use them successfully love them, but the majority, who have listened to all the different opinions on how to sharpen them correctly and haven’t succeeded, hate them with a passion or refuse to have them in their toolboxes. This is really the basis of the problem – when sharpened correctly (meaning that the tool will cut cleanly and easily) it can be one of the most versatile and useful tools a carver can possess. Most carvers have tried a variety of methods to achieve this and many have failed, ending up with a tool that can be a nightmare to use.
Why is this? You may well ask. Probably the first problem is that there are so many different views on what a V-tool should look like and how best to sharpen it. This is due, in large part, to its versatility. If used for lettering you may need the cutting edge to slope back to the apex of the V. If undercutting you may prefer the reverse slope.
This is fine for the specialist but the average carver simply needs it to cut a clean V in the wood neatly and easily. My first piece of advice here is to concentrate on what you need the tool to do rather than how it looks. If the cutting edge is not perfectly square but it will cut as you require, it is right for you and this should be borne in mind when sharpening.
Types of v-tool
Let us look, first of all, at what V-tools are available. Manufacturers’ catalogues will give each tool a number representing the angle of the V. The most common are 45°, 60° and 90° angles, although other angles, from 22° to 120° are available from different manufacturers. The size given is the length of the sides of the V, not the actual width. You may find other variations specific to individual makers. While I have a variety of different tool in my toolbox, by far the most used are those with a 60° angle. I find these the most versatile and easiest to keep sharp. If you are doing very fine work you may prefer one with a steeper angle to give more definition.
Bevel sloped with ears – also called wings – back
Bevel sloped with ears forward
Using the tool
I have found that one of the problems many carvers have with the V-tool is that, when used by hand, it can very easily slip out of the cut and make unwanted cut marks elsewhere on the carving. As a result of this I tend to recommend the following two methods of using the tool. This may not suit everyone but I have found that it works.
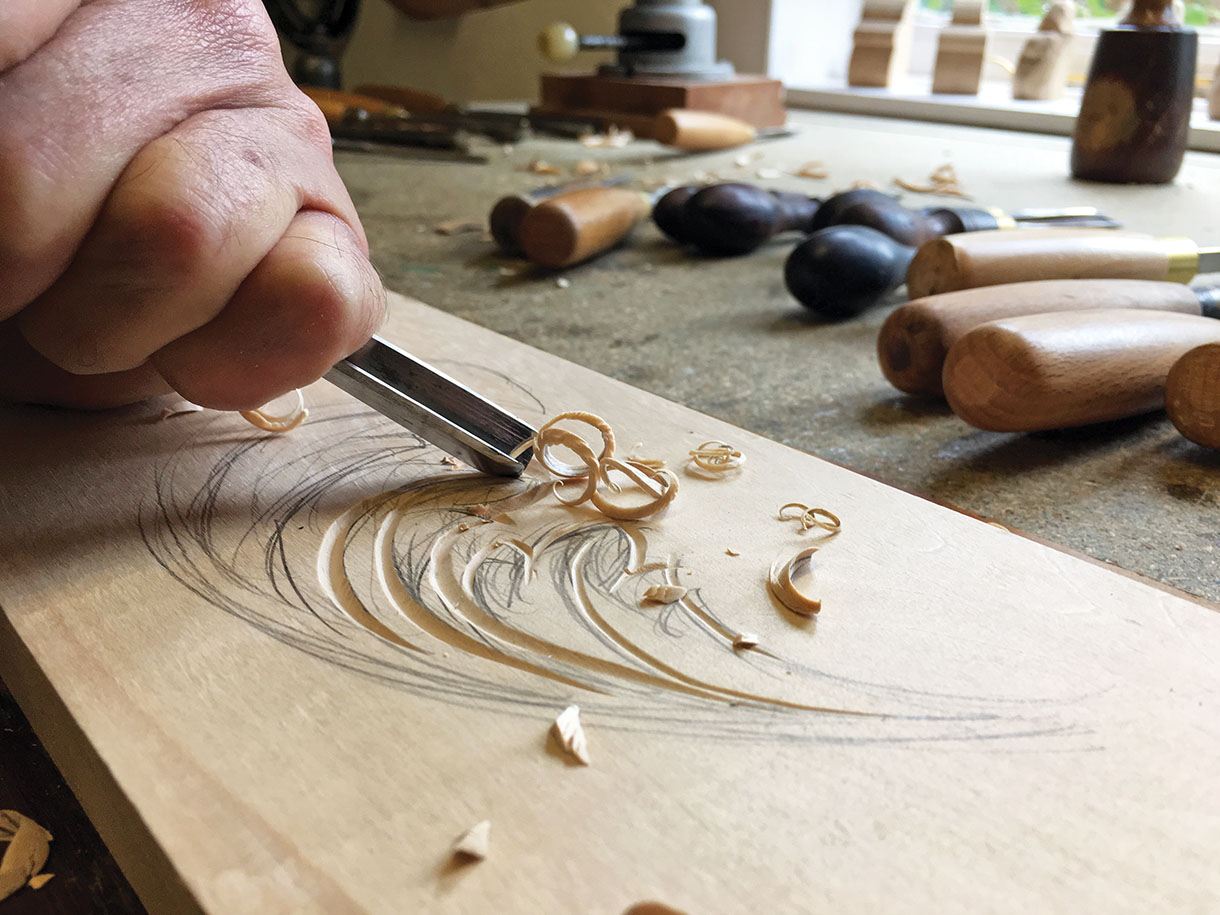
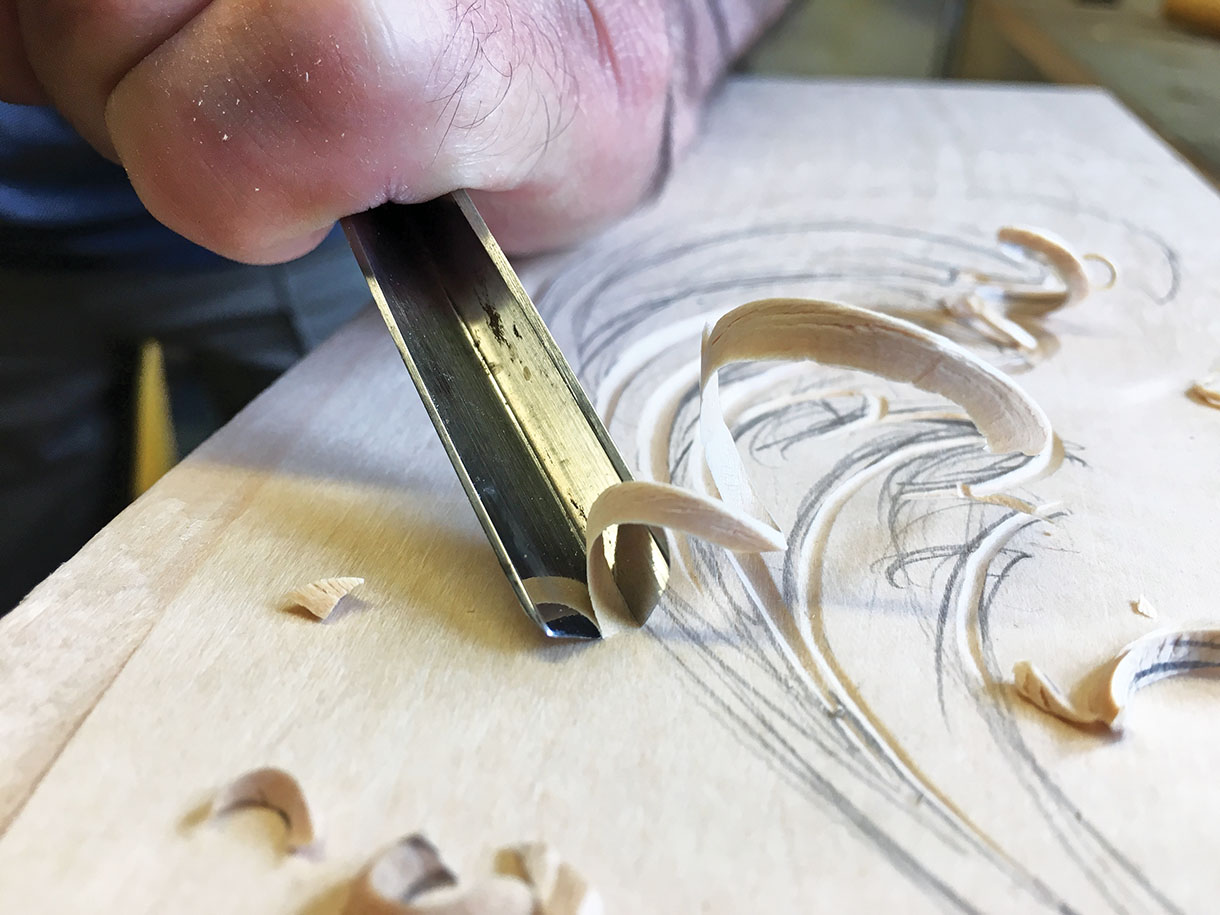
First, you have much more control of the tool if it is used with a small mallet using gentle and regular strokes, keeping the tool in the cut by maintaining a constant angle. Also, keeping your line of sight directly along the line of the tool can help to keep to the line drawn. I like to draw a double line if possible and keep the two cutting edges along the lines to maintain a constant width. If only a single line is drawn it is very often obscured by the shaving produced and you have to stop frequently to clear the cutting edges. If it is not practical or desirable to use a mallet, you might like to hold the tool in front of you with the fingers of both hands on the shaft keeping your eyes looking down the centre of the V to the line you are cutting. Keeping your little fingers in contact with the wood will give you complete control.
One final word here – remember, the deeper you cut into the wood, the more you are trying to remove and the more difficult it will be, so don’t try to bury a tool with a steep angle into the surface to get a wider cut, use one with a greater angle giving a shallower cut.
Using two lines to ensure parallel sides
Cutting a fine V along a line
What about the sharpening?
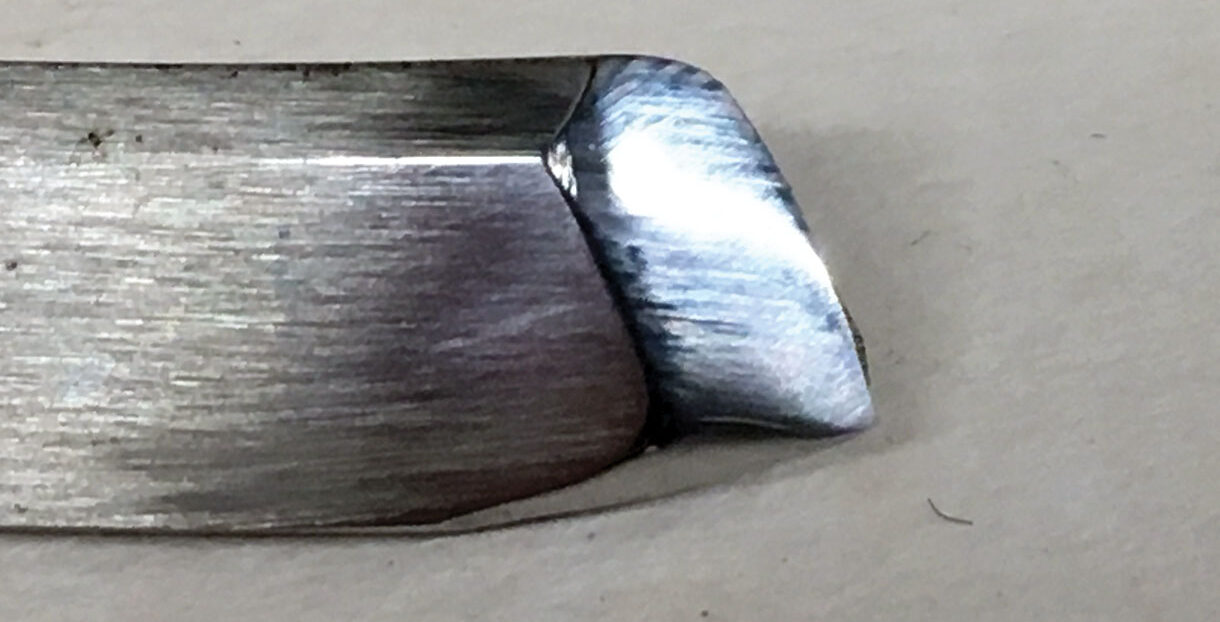
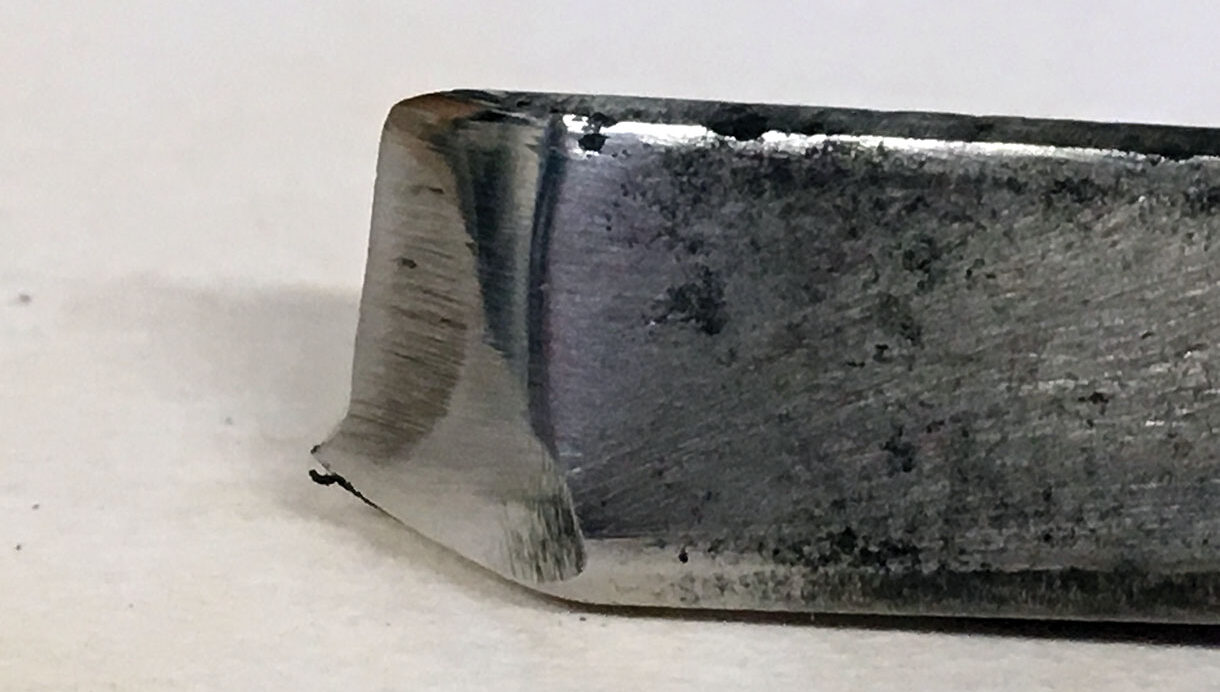
As with all your carving tools, you will hear dozens of versions of how to sharpen them and every method has proved successful for somebody. All you need to do is find the method that works for you. Before you embark on the sharpening voyage you need to understand what you are dealing with and what you want from the finished tool. The structure of the tool is such that the thickness of the metal of the sides is quite a bit less than that at the apex, or point, of the V.
Each bevel ground as flat chisel
Angle of bevels at side and bottom equal after honing
For a smooth, clean cut the angle of the bevel needs to be constant as the edge passes through the wood. Any variation will cause the tool to jam in the cut. If the line of the bevel is the same at the bottom and the sides the angle will be different due to the variation in thickness. Therefore, to keep the angle the same the bevel will be longer at the bottom than at the sides.
Note greater thickness of metal at apex of V
How, then, do we achieve this?
If you generally want the tool to cut in a straight line or with very shallow curves you can get away with the bevels of each side meeting at the apex as a sharp edge. This will give a very pronounced V in the wood and is preferred by many carvers, particularly for fine detail work or lettering. This profile does, however, have one drawback. If you wish to use the tool to produce twisting or curved cuts in hardwood there is a danger of the sides of the tool breaking out as you try to turn it. All is not lost as you can actually have the best of both worlds without any major difference in quality of cut.
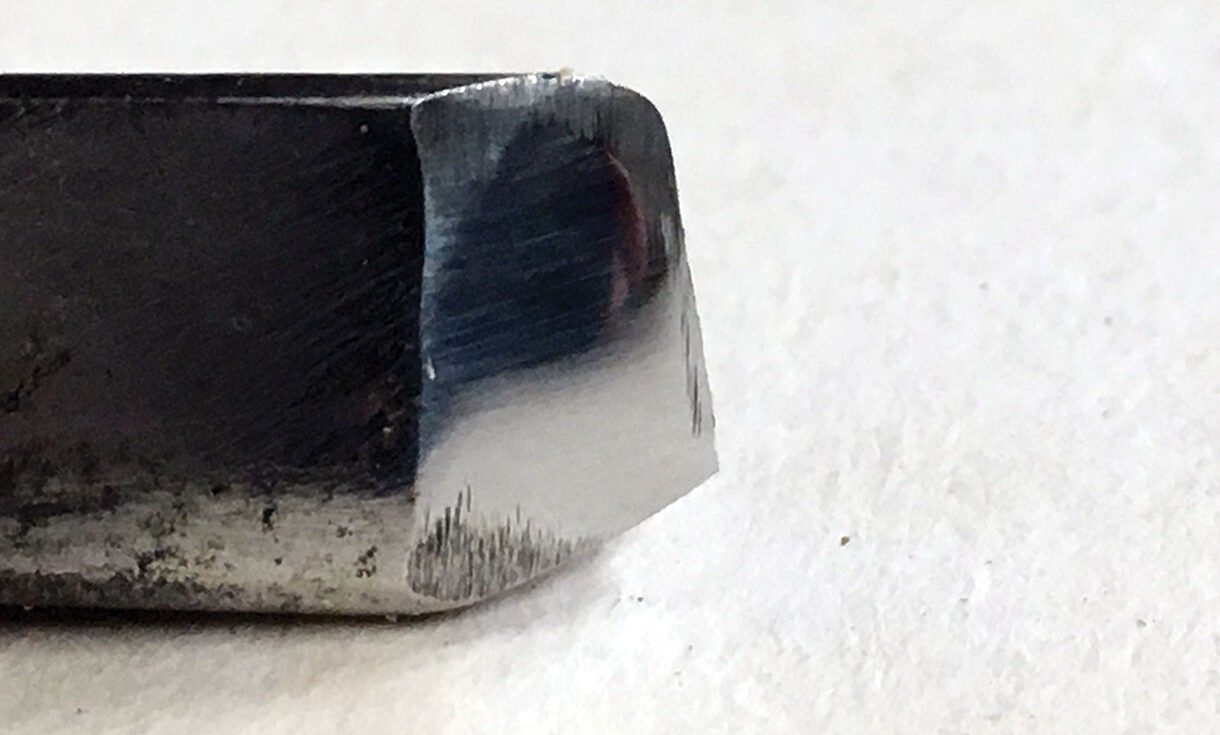
First, if you want the point of the V (the apex) sharp, you need to sharpen the tool as two flat chisels, making sure that the bevels are completely flat, thus keeping the angles even. This can be done fairly easily on a diamond plate or oilstone (see left image top of page). The most difficult part is to get the bevel at the apex the same angle as the sides. Careful grinding and honing can achieve this until it looks like the right hand picture at the top of page. I think most hobby woodcarvers will, however, go for the alternative method as it can be a lot easier to achieve what you want and the finished tool will be more to your liking – I stress that this is only my opinion.
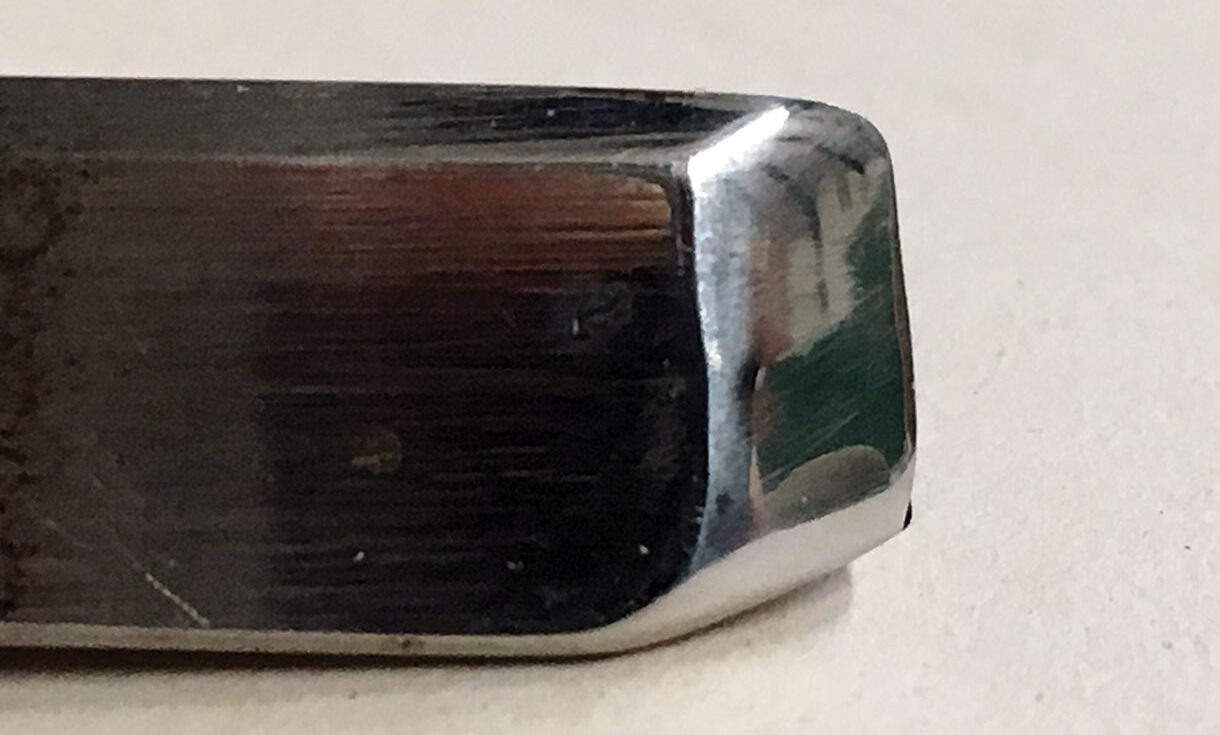
Here, the quickest and simplest way to do the job is to use your rotary sharpener with a hard felt wheel. After you have got the bevels as you want them on the oilstone or diamond plate, move to the power hone. Make sure you keep the bevel flat to the wheel’s surface as you polish each bevel but also round off the apex of the V, keeping the tool at the same angle. You will actually be producing, in effect, a chisel on each side and a fine gouge at the bottom. When used, this rounding off will allow you to turn and twist the tool as much as you like. As long as the rounding off is kept to a minimum you shouldn’t see any noticeable difference in the V that is produced. If you don’t have a power hone you can still achieve the same results on a stone and strop – it just takes longer.
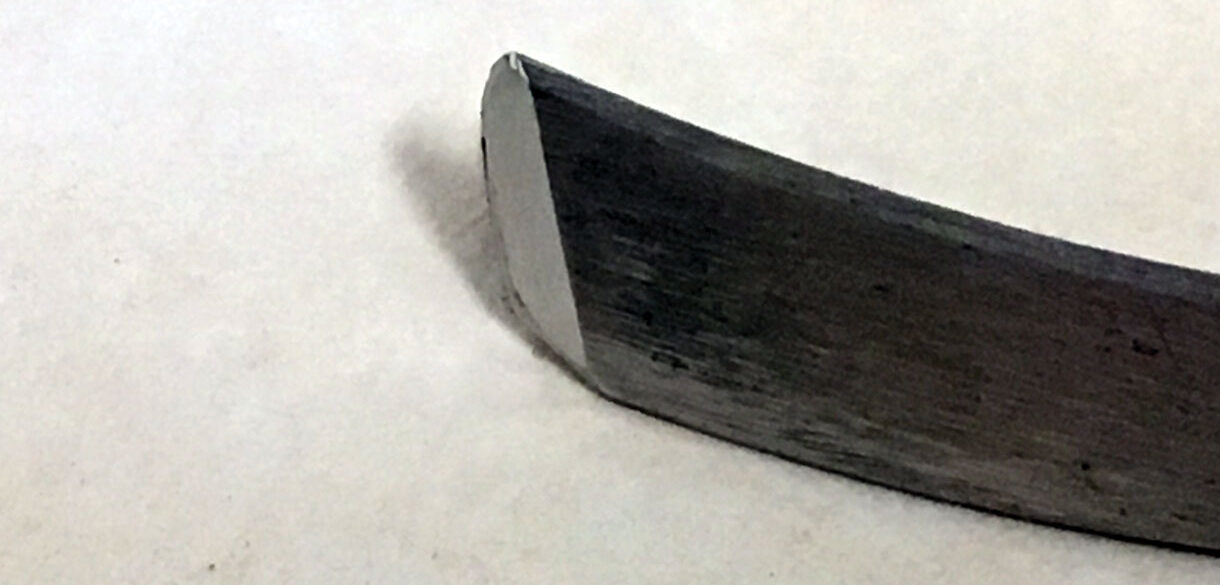
Whichever method you use, be careful not to get a sharp point or dip at the apex (see the two pictures above). This may take a bit of practice but is much less likely to happen if you are using a felt wheel.
If you think you are alone in having problems with V-tools, don’t. I threw away all mine some years ago as I just couldn’t get them right, and only bought new ones after being shown how to sharpen them successfully by Barry Iles of Ashley Iles Ltd. I now have tools ranging from less than 1mm to 30mm, including straight, bent, back bent, side bent, spoon and of various angles. Each of these serves a useful purpose as long as I manage to keep it sharp.
Now, V-tools are among my favourites but, like Marmite, I am sure there are some who will never be converted – to either!
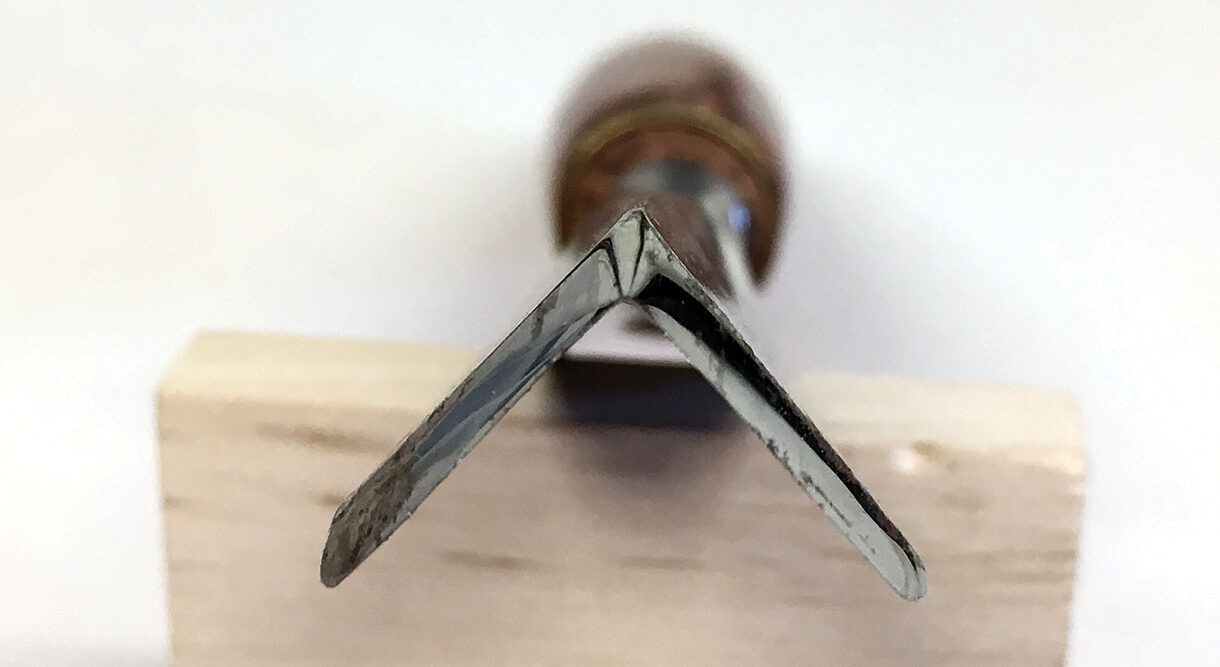
Too much metal at the apex
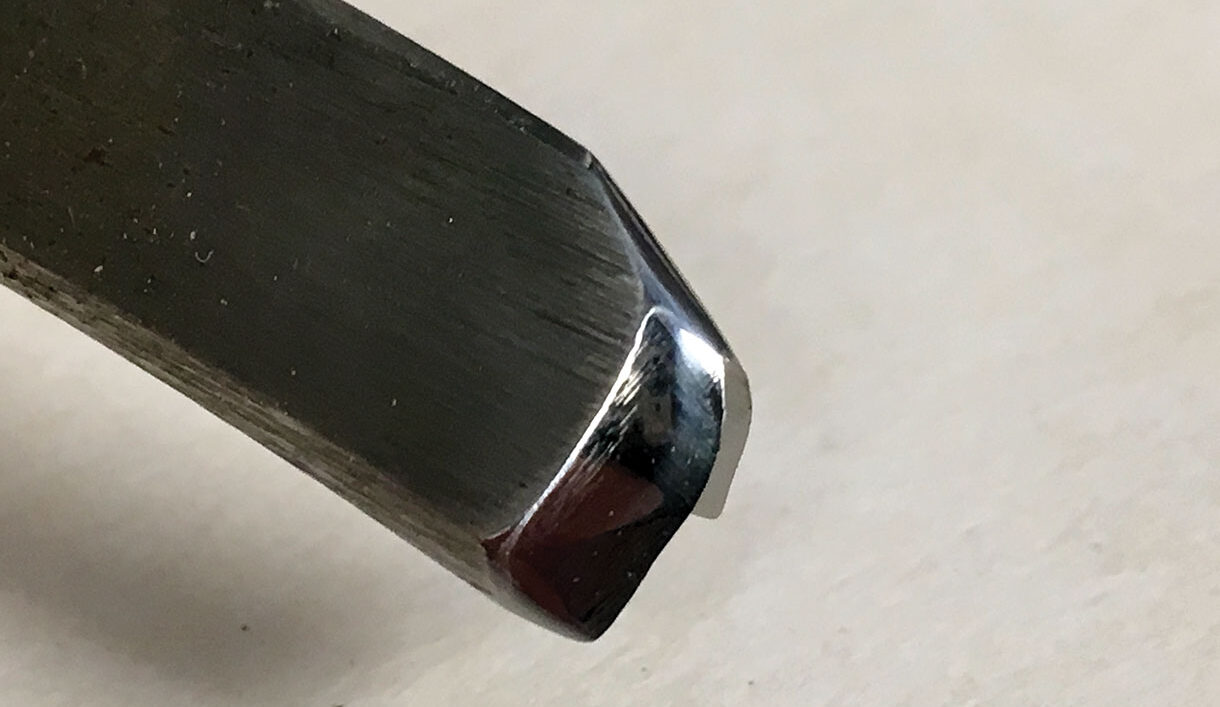
Apex ground away too much
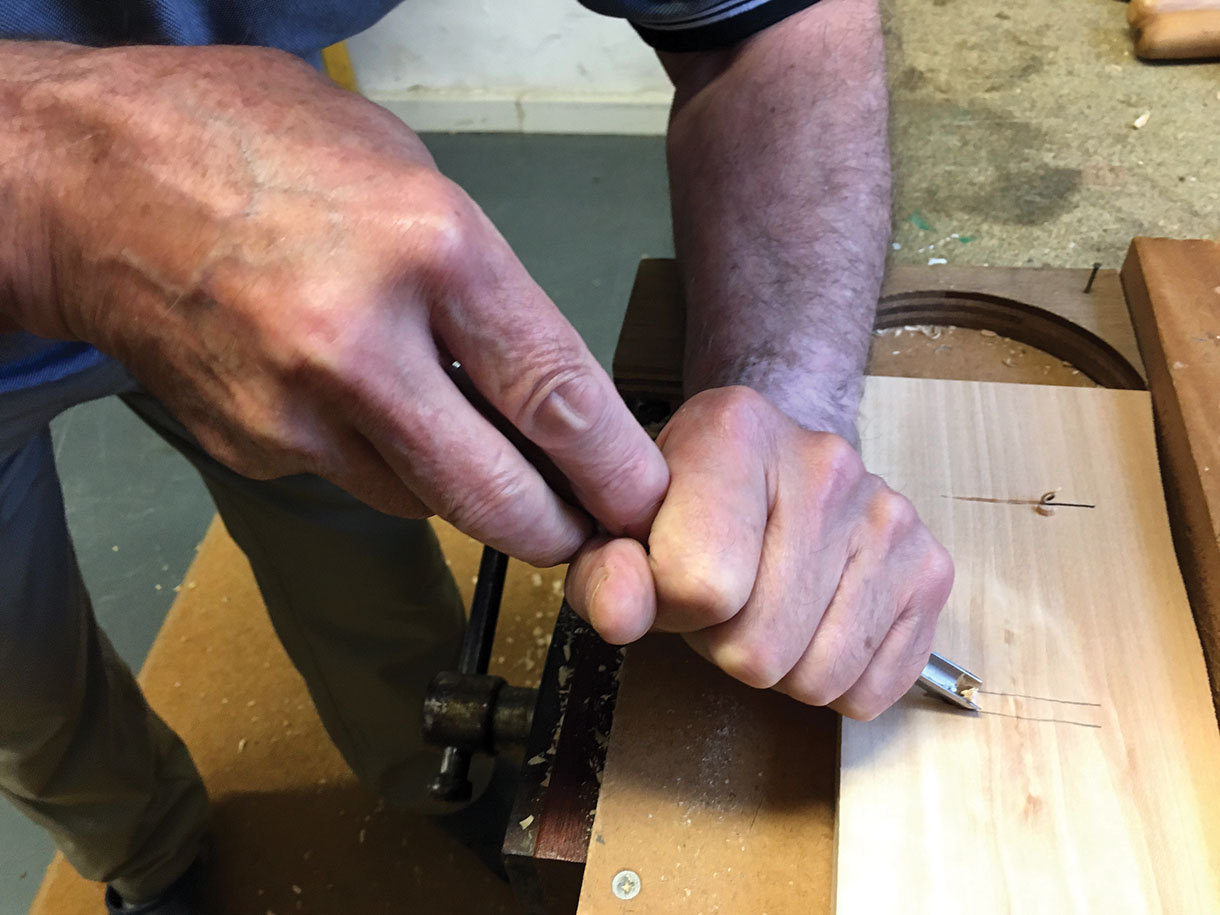
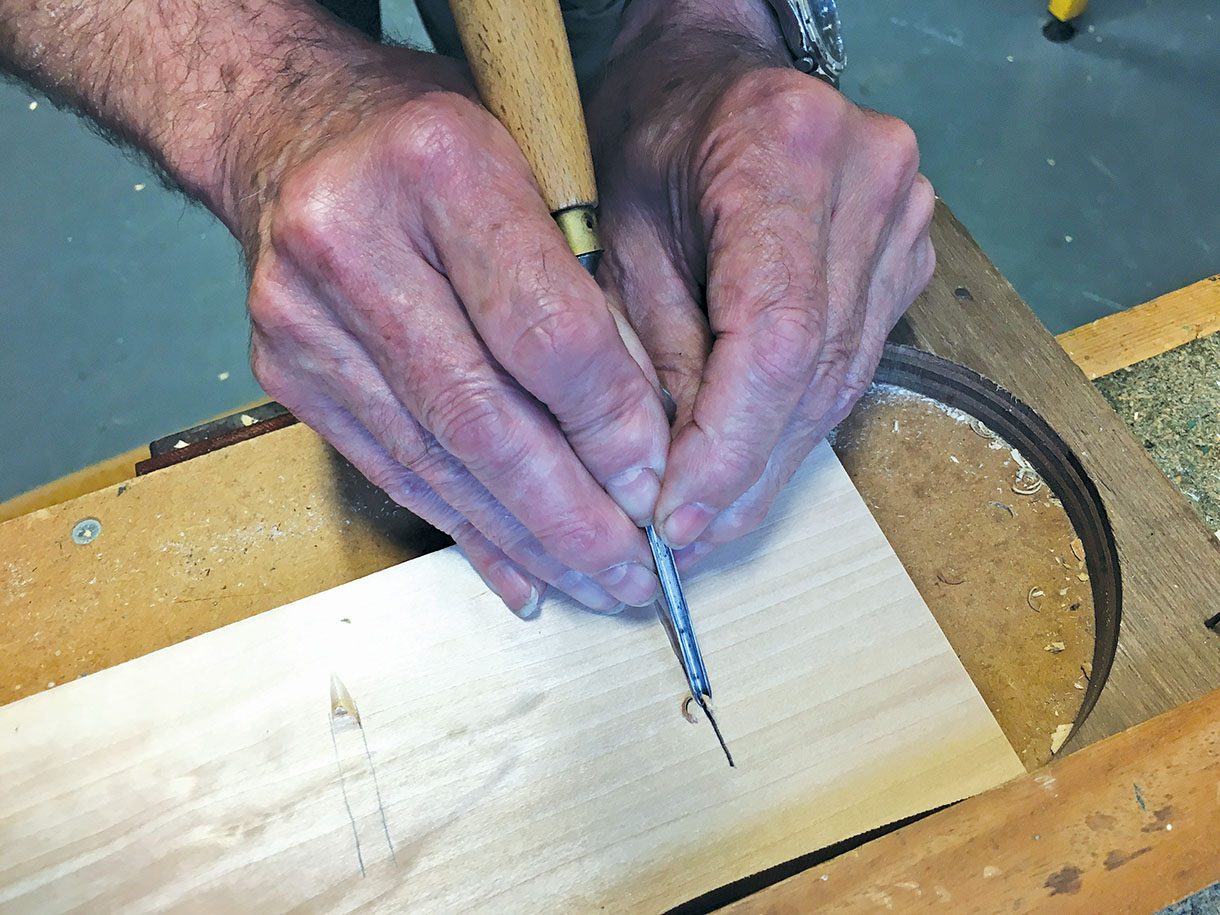
Here the V-tool is being used on its side to only use one side of the V walls to create a vertical shoulder against the
work line


1 Comment
Your article hit all the points I have experienced through the years. I “shelved” my v tools for years because I could not get them the cut correctly. User error! ! Once I dedicated the time to LEARN how to properly sharpen them. They are used constantly. Even go the extra mile in the designing to use them for greater detail effects. It is just a tool composed of metal and wood. The monkey operating it just needs to understand how to make the music come out of it
“What one man has done, another can do”