The Woodworkers Institute

We bring you the very best of woodworking!

“Make it with us”

Veneering a wheel on a Diamond Wedding box

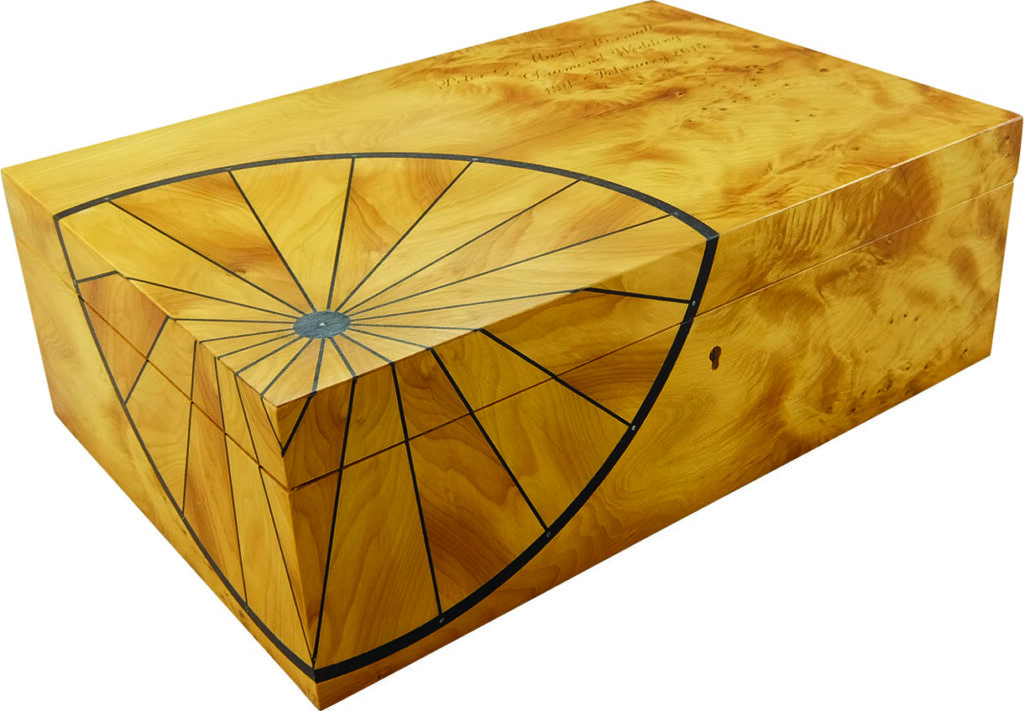
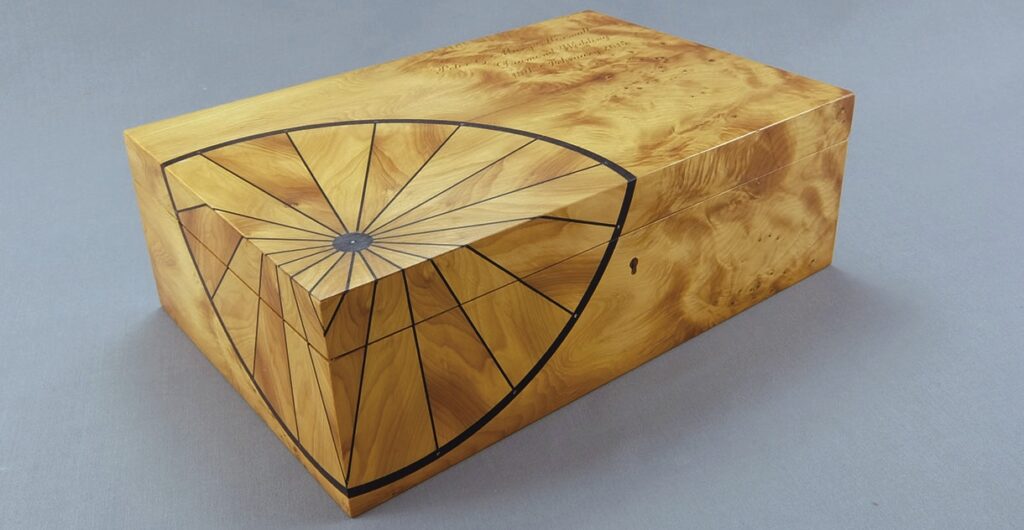
For her cycling-mad godparents’ anniversary, Louise Biggs decided only one type of decoration would be suitable – a bicycle wheel 

Wooden box with geometric design art.

As the making of the box has been shown previously I will concentrate on how I formed the wheel and applied it to the box with tiny Cubic Zirconia for a little sparkle. 

Tool List

For forming the veneer wheel
• Protractor
• Compass
• Straight edge
• Veneer knife
• Utility knife
• Veneer tape
• Self-healing cutting mat

Wooden box with bicycle wheel design inlay.
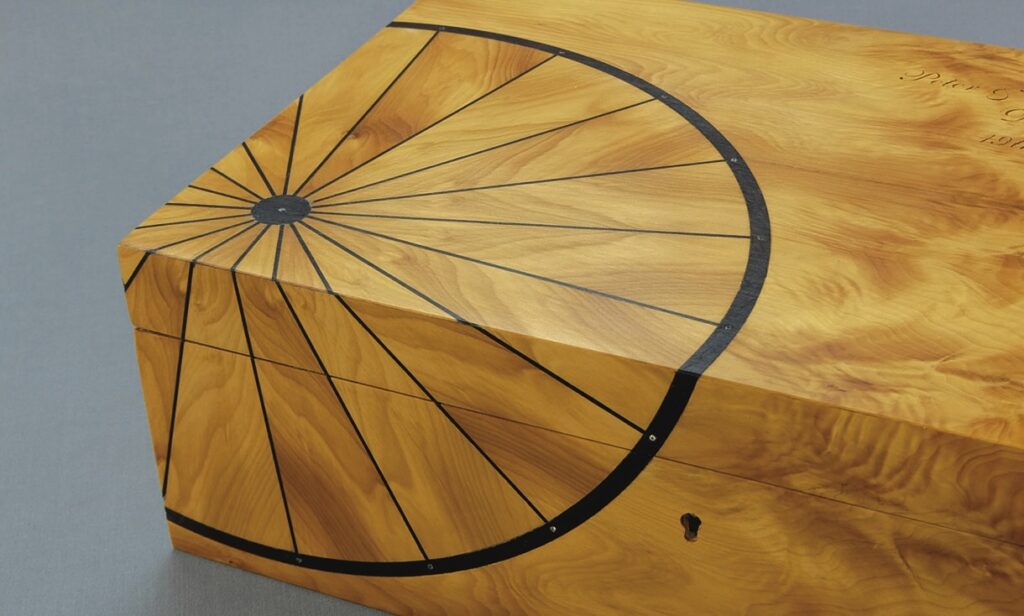
1. Having formed the basic stylised idea it changed slightly with the final design showing a buckle in the rim and broken spokes, something that both my godparents have experienced routinely. The box was veneered with yew (taxus baccata), fumed pommele eucalyptus (eucalyptus spp.) for the rim/tyre and preformed black lines for the spokes, over birch faced ply

Stages 

Box with geometric design on a table
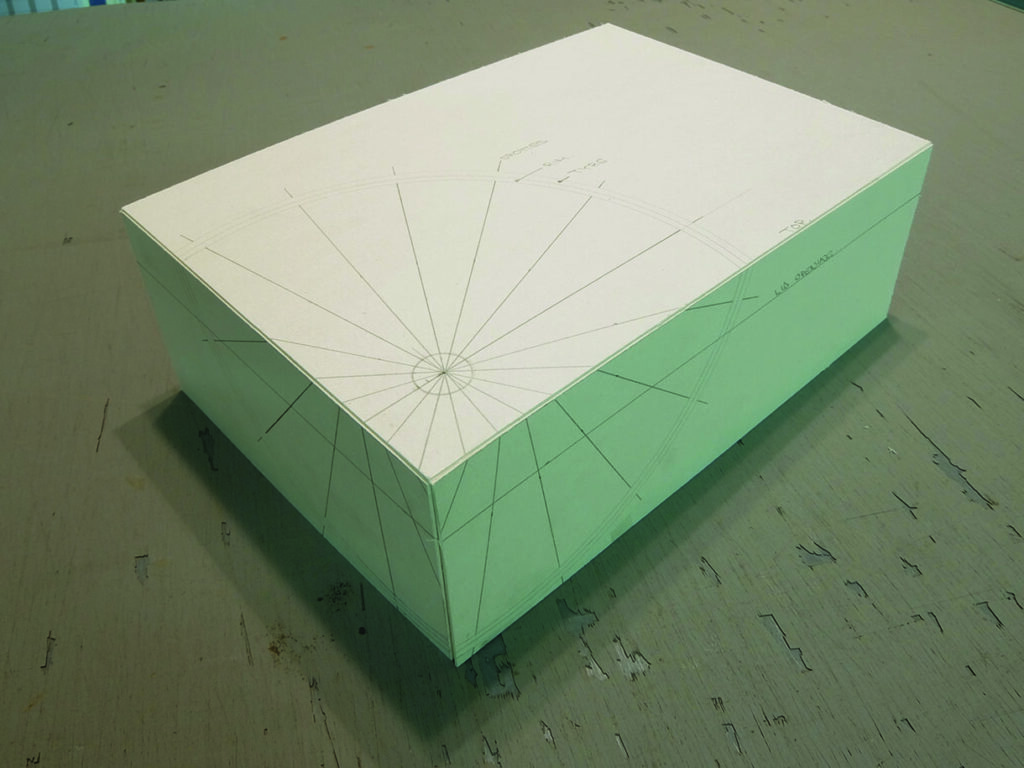
2. To work out the size and position of the wheel a card template was made of the box which allowed the design to be drawn flat using a protractor, rule and compass and then folded into the box shape. As I wanted the hub of the wheel to be in the corner of the top the radius of the wheel was measured to finish just off the bottom edge of the box
Wooden triangular pieces arranged in a circular pattern.
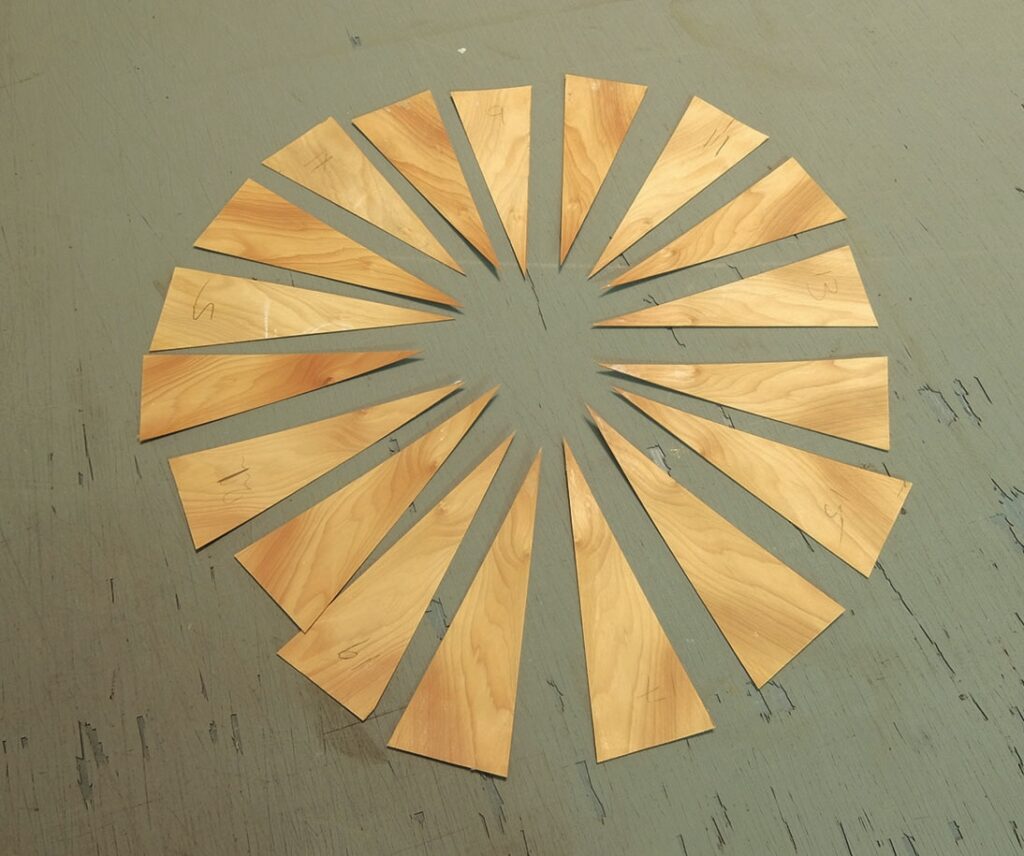
3. Having made a hardboard template of the required triangle, 18 consecutive pieces of yew veneer were cut and numbered using a utility knife and a rule so the grain could be ‘book-matched’ around the circle and 18 pieces of black line cut to length. I cut the veneers on a self-healing cutting mat as it preserves the life of the knife blades and helps in preventing breakout on the veneers
Wooden triangle with tape on drawing board.
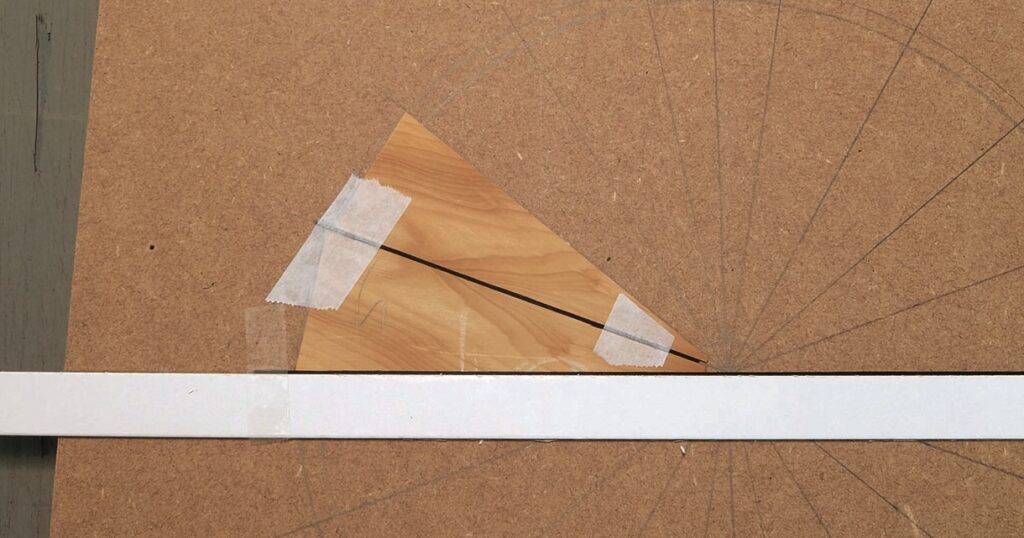
4. The design was marked out on a piece of waste board and a black line positioned on the centre line of the circle, kept straight with a piece of thick card adhered to the board. The first triangle was positioned with the next black line centred over the pencil line followed by the second triangle which was turned over to match the grain
Wood and tape project on a brown board.
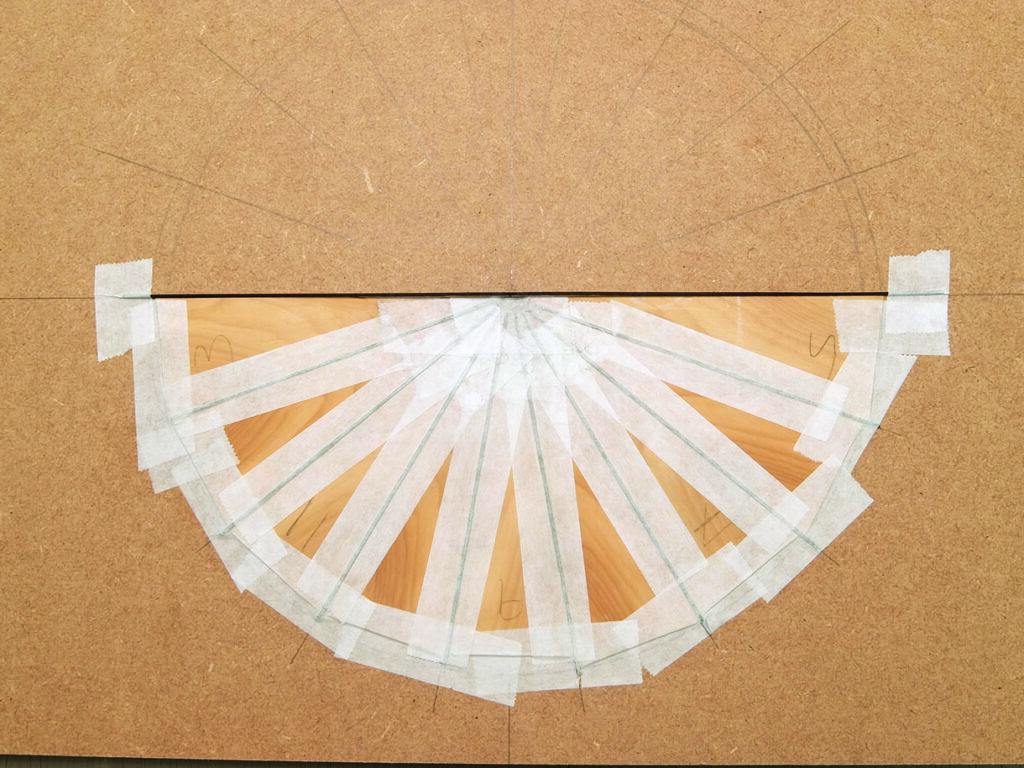
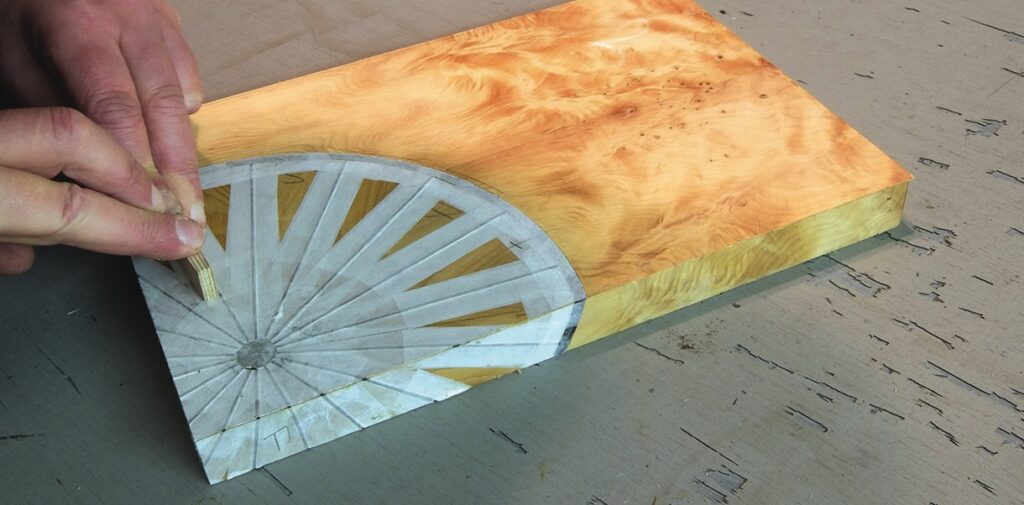
5. The process was repeated turning the triangle veneers each time and positioning the black lines until half the wheel was completed, taping each section of the design together and to the board with veneer tape
Hands measuring wood veneer with a metal ruler.
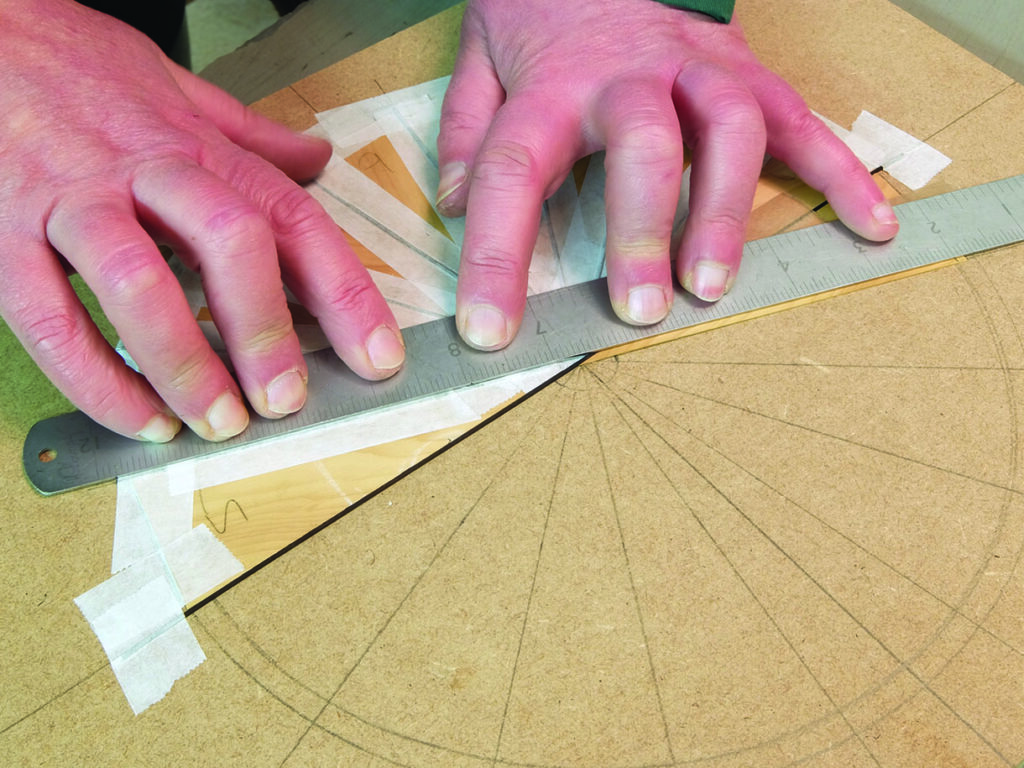
6. To build the second half of the wheel, with the aid of a steel rule/straight edge, each triangle and black line was checked to make sure it aligned with its opposite number. At this stage small adjustments could be made to the triangles to make sure everything aligned
Wooden pie chart segments arranged in circle
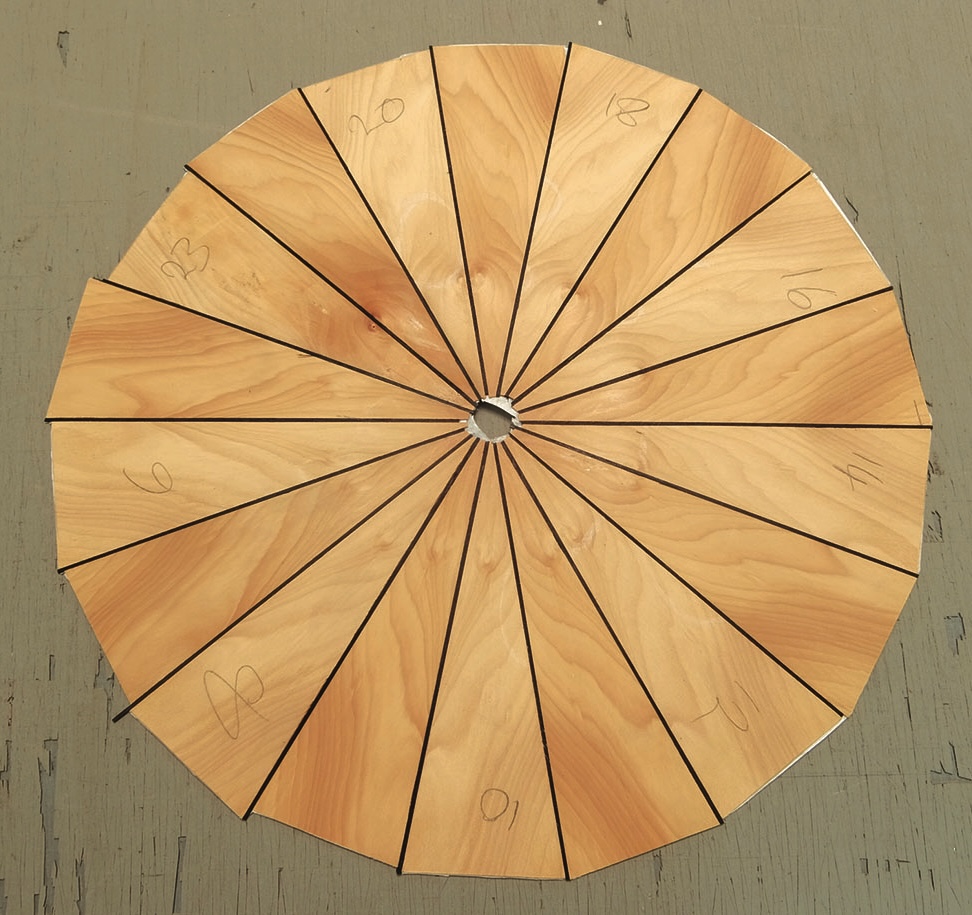
7. With all the veneers and black lines positioned a stylised wheel was formed ready to be trimmed to size before adding the rim/tyre and hub

Circle cutting jigs

Clear plastic drawing templates on white background
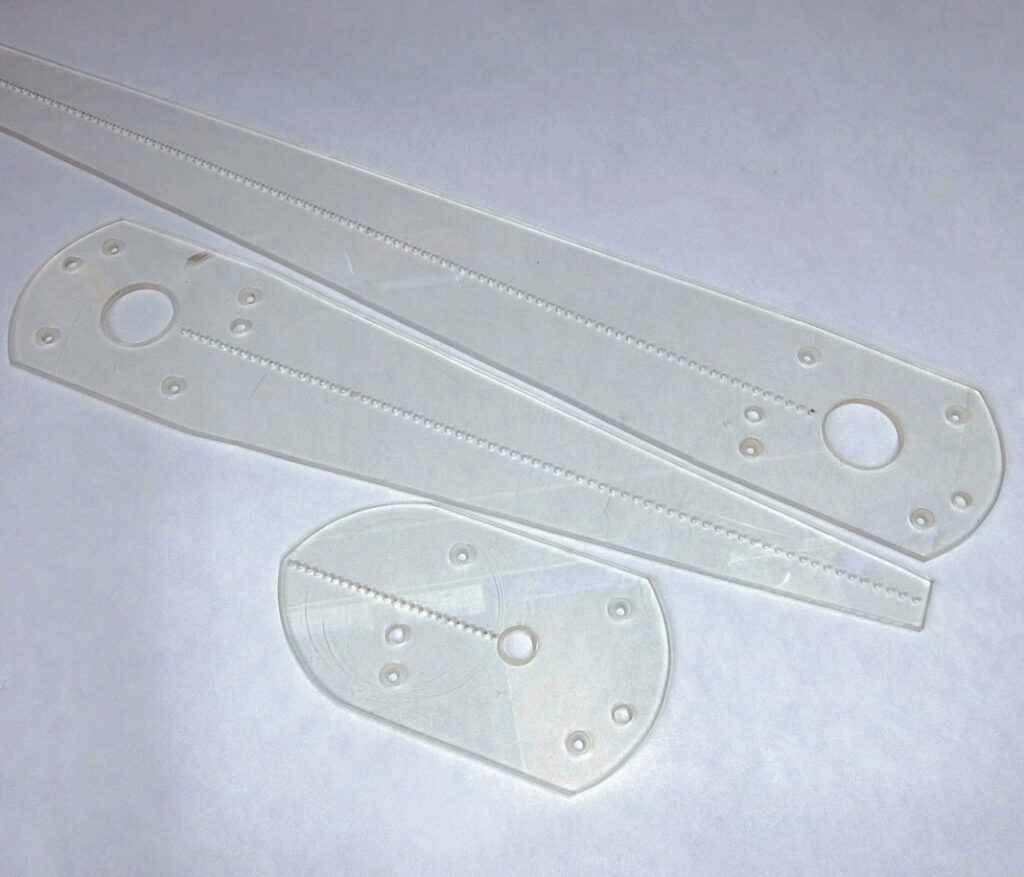
8. I made these jigs with fixing points for both of my routers based on a design I saw in the book Router Jigs and Techniques by Patrick Spielman. They are made from 6mm perspex and the jig is held over a tight fitting nail through one of a series of holes which forms the pivot point. The hole position and cutter size can be adjusted as required to obtain the correct diameter
Person using router for precise wood carving.
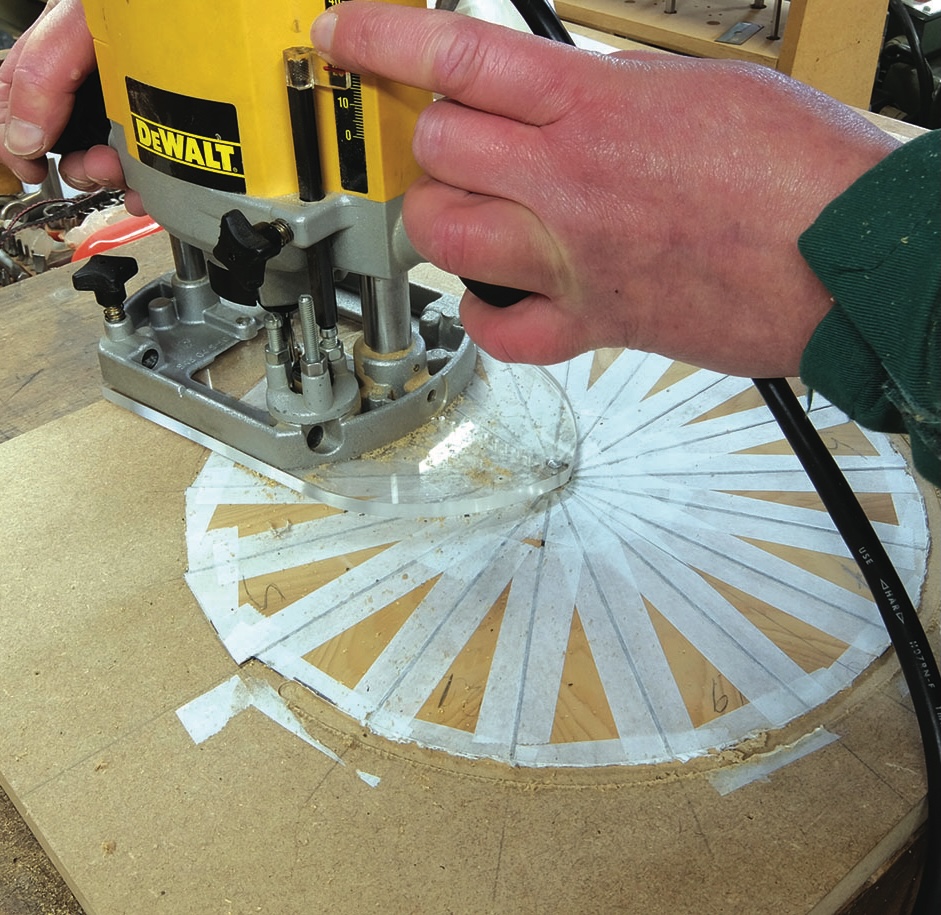
9. In order to trim the outer edge to a circle the veneer wheel was glued to a piece of waste board using wallpaper paste with newspaper in between to aid removal. I fitted the smallest circle cutting jig to the router and having selected the right size cutter to trim to the right diameter the router was carefully turned to cut round the veneer wheel before releasing the veneer from the board
Craftsperson cutting wood veneer with knife
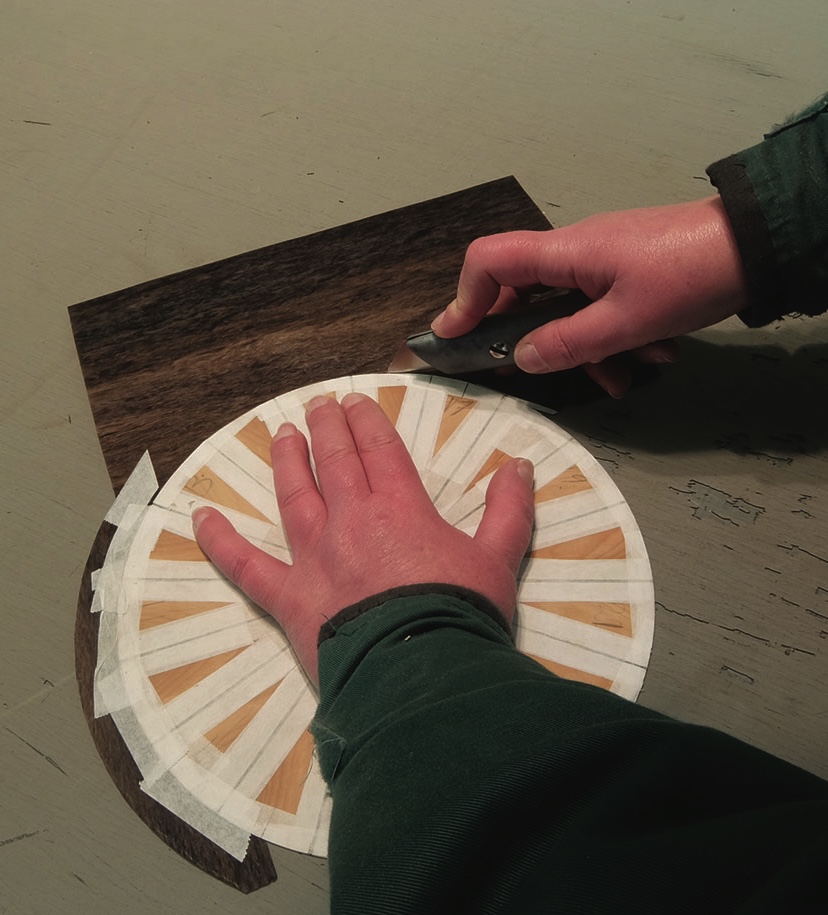
10. Four pieces of pommele eucalyptus were cut to fit around the outside of the veneer wheel. These were carefully cut in by hand using a utility knife before cutting an end joint through the two layers of veneer for a tight joint for each quarter. Each piece was then taped in place
Wooden circular table top with radial patterns.
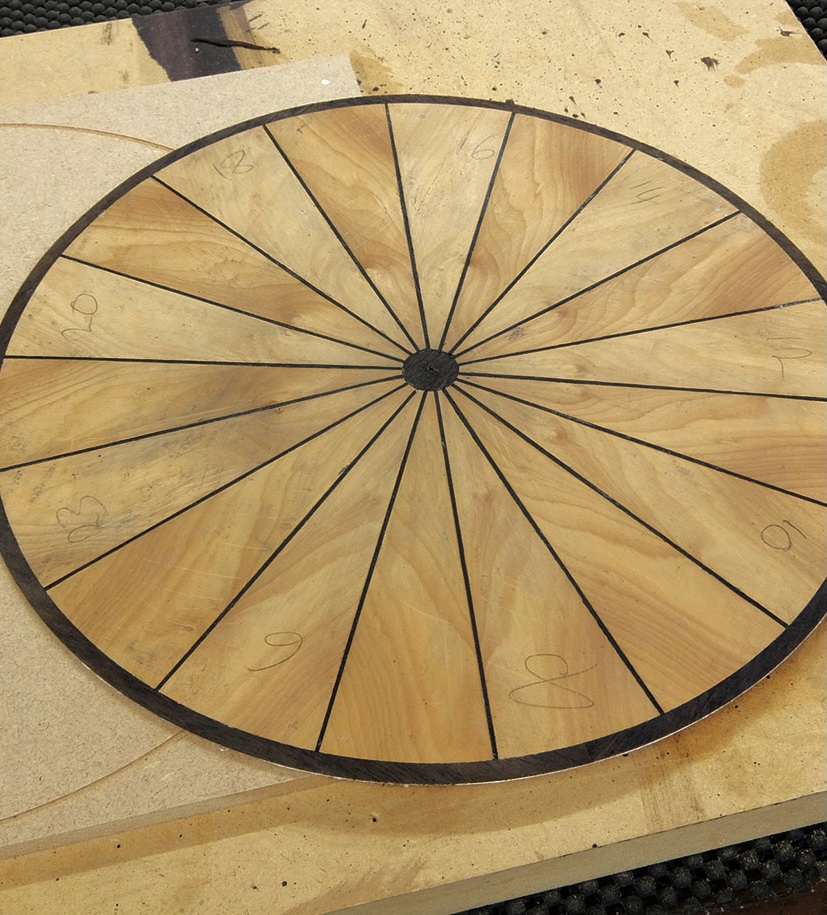
11. The veneer wheel was again glued to a waste board as in Stage 9 in order to cut the circle to form the rim/tyre. Before releasing the veneer from the board a small Forstner bit, whose size corresponded to one of my plug cutters, was used to trim out the centre hub. The plug cutter then cut the veneer plug. When released from the board and cleaned up the underside of the veneer wheel was revealed
Person cutting shapes with knife and purple ruler.
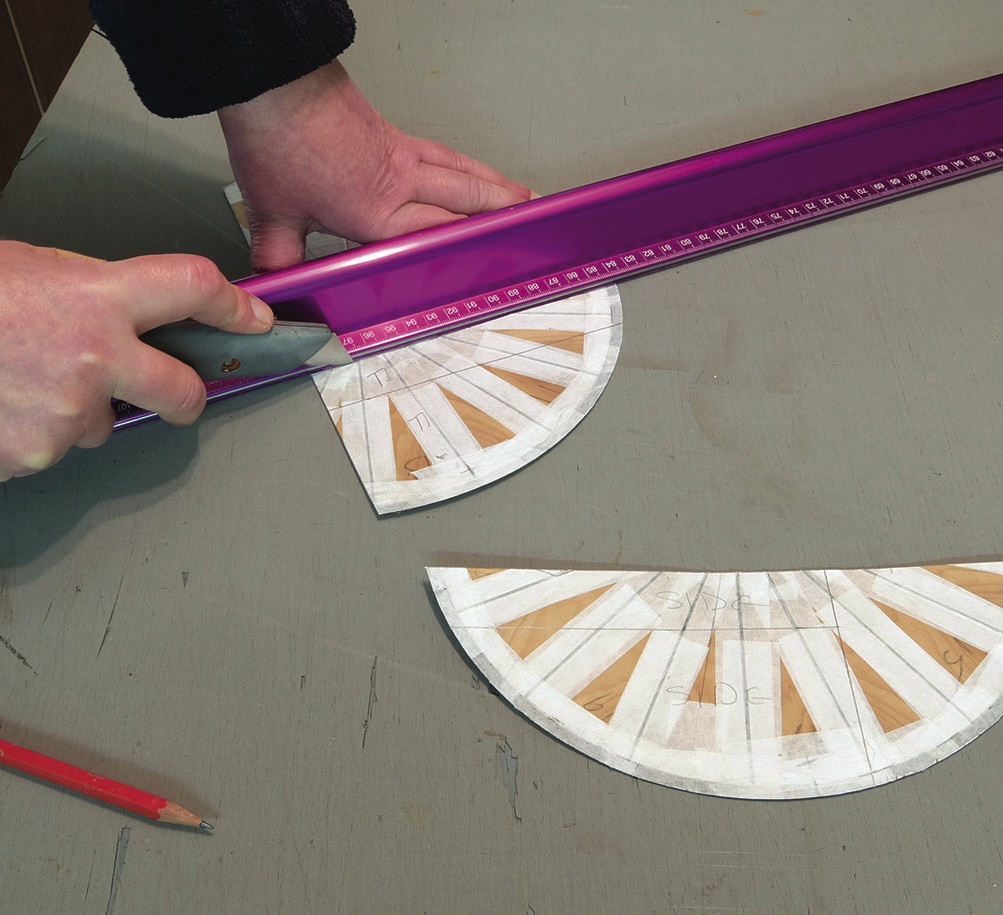
12. Next, the wheel was marked into the sections required for the top, side and front, marking the cut line for the lid at the same time. One section of the wheel was not used to allow the side and front to meet. Having double-checked the markings, the wheel was cut using a straight edge and a veneer knife
Wooden corner model with radial design pattern.
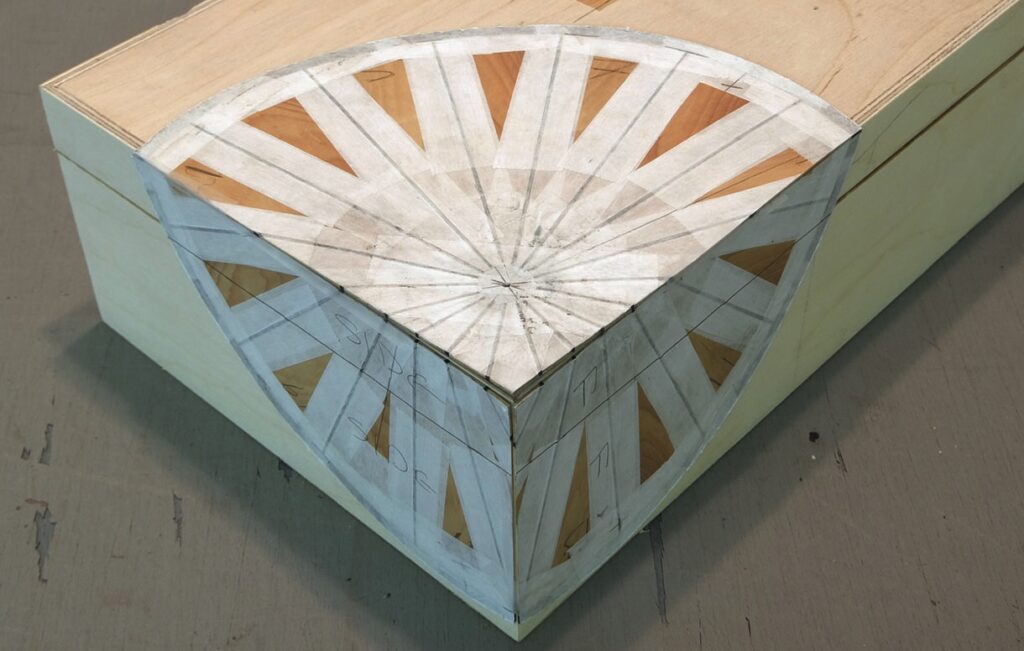
13. With the veneer sections cut they were placed on the box to check everything was correct. The veneer wheel had taken on the look of a buckled wheel, a nod to the problems faced by cyclists from time to time. There were slight discrepancies in the spokes on the side but this added to the effect by looking like broken spokes which usually accompany buckled wheels.
Craftsman cutting intricate wood veneer design by hand.
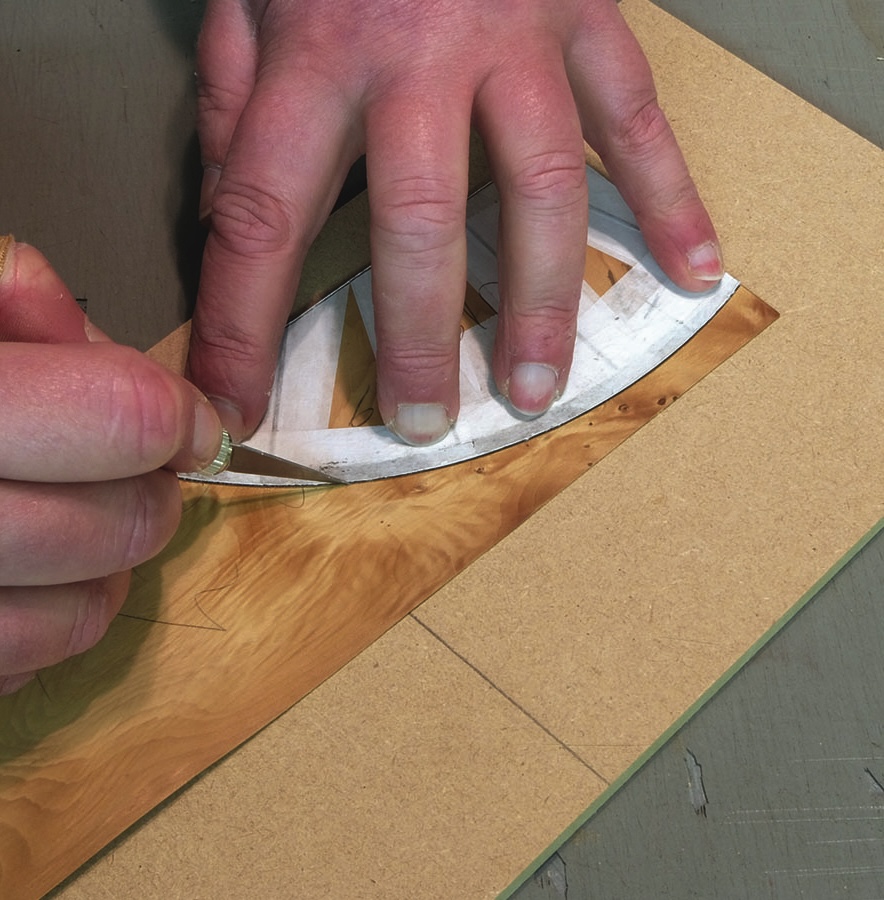
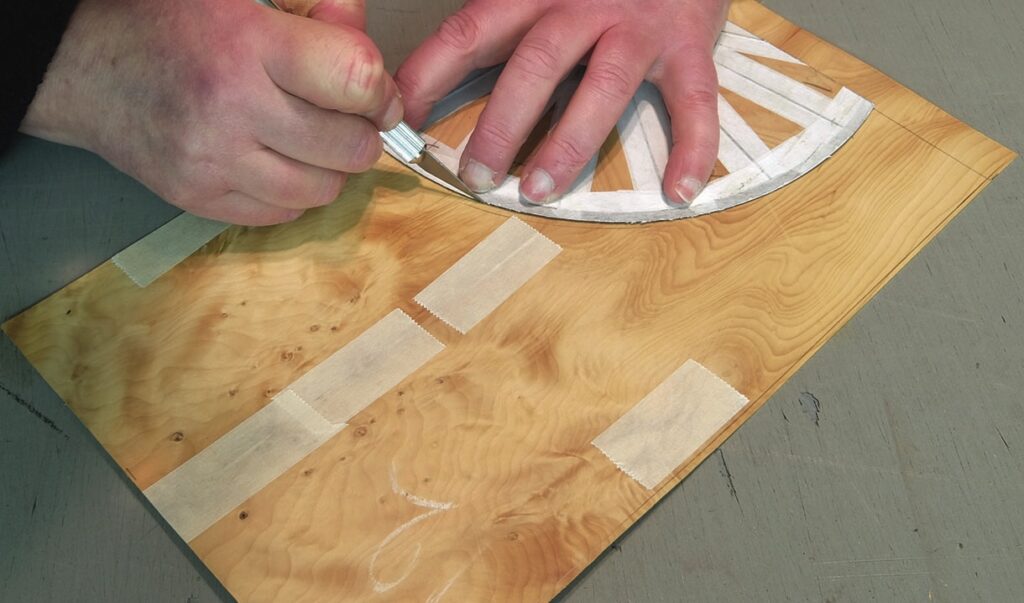
14. Before the veneer wheel sections could be glued to the box they each had to be cut into the yew veneer. Having previously cut to size the yew sections and marked them so that the grain patterns lined up, each section of the wheel was cut into its corresponding piece of yew by carefully cutting with a veneer knife around the shapes
Wood panel art with geometric design
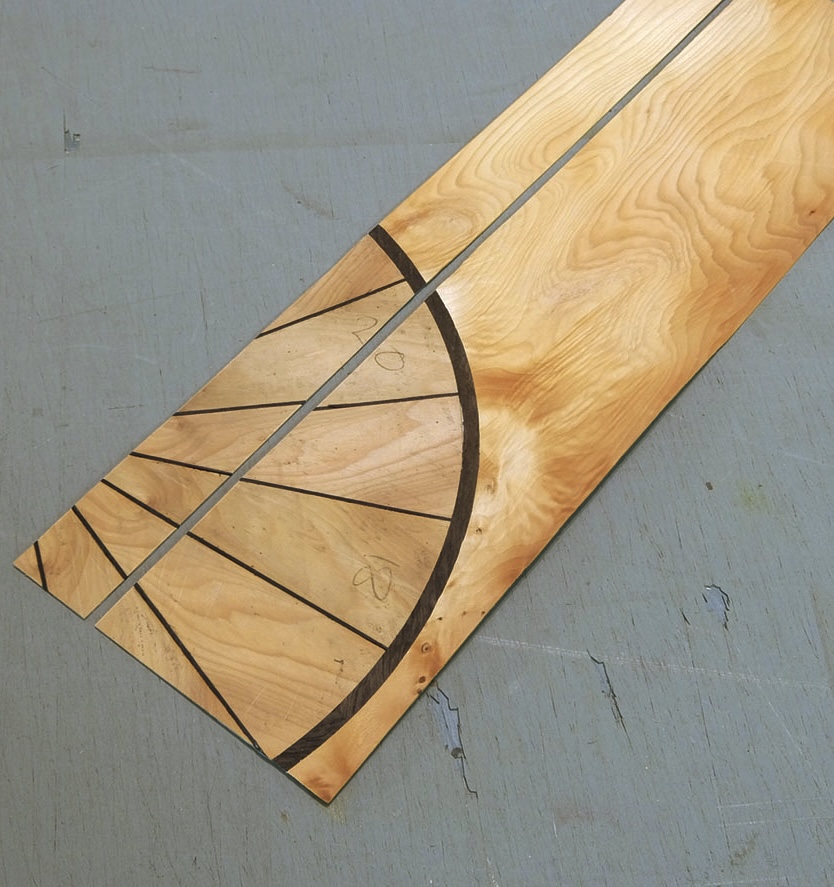
15. The sections were then taped together with veneer tape making sure that everything aligned between the lid and box sections
Person craftily cutting wood veneer design
16. With the back, side and front veneers glued in place two pieces of ‘book-matched’ yew were taped together for a tight joint and the top section of wheel cut in to fit
Craftsman measuring wood veneer marquetry design.
17. Before putting the lid in the press I made sure that the veneers between the black lines were pushed down to expel any trapped air and make sure the veneers were tight to the black lines and level on the back 
Wooden box with geometric inlay design.
18. After cleaning up but before polishing very small holes were drilled in the rim at the end of each spoke and one in the middle of the hub and using tweezers a tiny Cubic Zirconia glued in with a tiny amount of Superglue. A clear glue needs to be used and only a tiny amount otherwise the stones will not sparkle as well, but be careful not to glue your fingers!
Open wooden jewellery box with blue velvet interior.
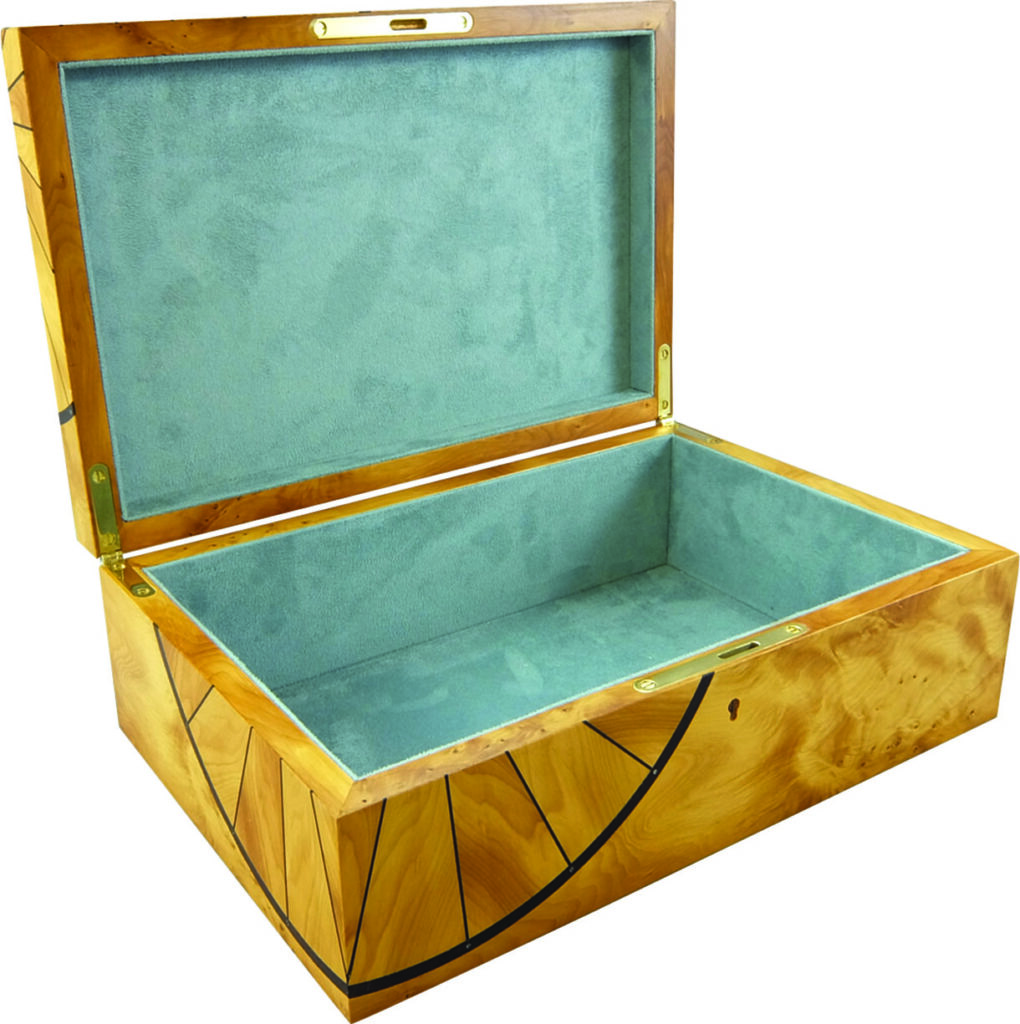
19. The open box showing the lined interior

Leave a Reply

Your email address will not be published. Required fields are marked *