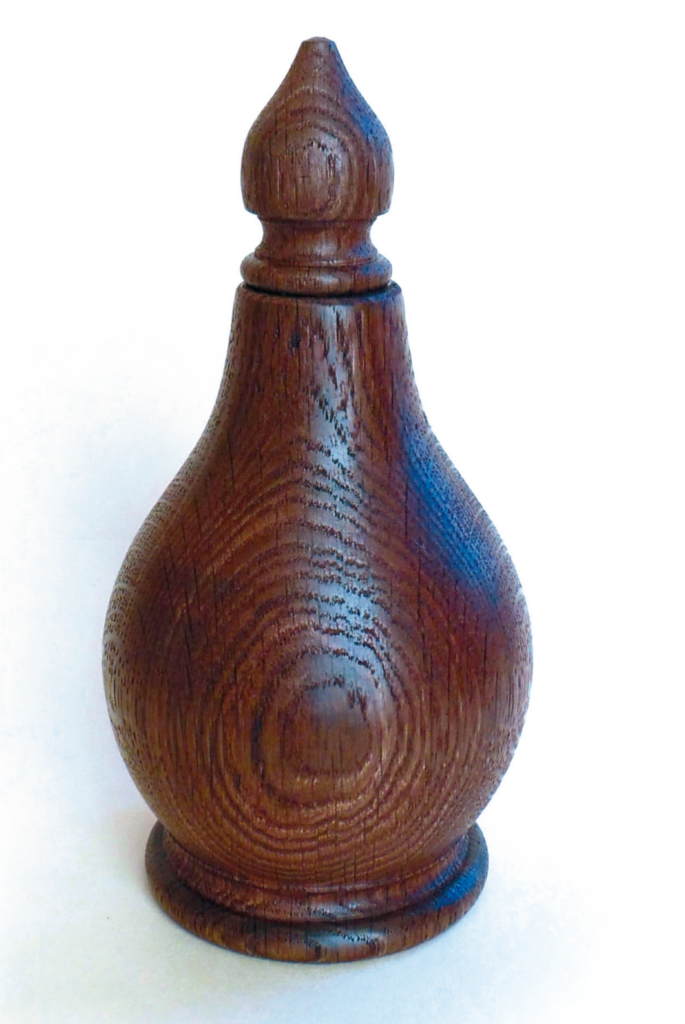
There is something about the word ‘apothecary’ that conjures up the image of an ancient sorcerer pouring steaming potions from a dark vase, broad and bulbous at the base and narrow at the neck, with a stopper to keep in the magic. Well, in this project we are going to use a little sorcery to turn a pale piece of ordinary oak into something dark, mysterious and ancient-looking. There are no wizard wands or magic words involved (unless you feel so inclined) but you will see the oak, sealed inside a transparent container, change colour before your very eyes in the space of a few hours.
This strange alchemy is achieved by the process of fuming with ammonia. The oak is sealed in a container with some liquid ammonia, from which the gas given off reacts with the tannin in the oak, causing it to become much darker. This replicates the process of ageing that occurs naturally in the wood, but at the rate of about a century an hour. In a few hours our pale new oak will be back in the Dark Ages. The colour will be the same all over, unlike the effect provided by wood stains, which tend to soak into end grain and give an uneven colour.
In case you are worried, the ammonia we use for this project is household ammonia – not the industrial stuff. It is sold in hardware stores as a domestic cleaning fluid and is generally between 5% and 10% ammonia. It is strong enough to darken oak but is safe to use if you follow the manufacturer’s safety instructions. Just use it in a well-ventilated space, wear eye protection and gloves to protect from splashes, and stand at arm’s length to avoid breathing in the fumes.
Making the apothecary vase starts by turning the outside of the vase and its stopper as one piece, then the stopper is parted off. The vase is hollowed through the narrow neck, first by drilling with a 13mm drill in a Jacobs chuck, then using a spindle gouge and a ring tool to open out the inside. The vase in its natural oak colour looks ‘pale and interesting’, but with the aid of a household cleaning product (or magic if you prefer) we turn it into something ‘dark and mysterious’.
Materials and equipment used
Oak, 95mm square x 200mm
Household ammonia
B rown wax polish
S pindle roughing gouge
Spindle gouge (with ‘lady’s fi nger’ grind)
B eading tool
Flat and round-nosed scrapers
Ring tool
13mm drill
Safety
Ammonia is an irritating and corrosive chemical and even at low dilutions can cause irritation to the respiratory tract and skin. Any splashes to the skin should be washed immediately with copious amounts of water. Splashes to the eye should be cleaned using a First Aid kit eye wash and medical attention should be sought.
Children are particularly susceptible to respiratory damage from inhaling ammonia. • Ensure the chemical is never mixed into any liquid bleach or chlorine-containing products as a toxic gas may result. Appropriate PPE is a must when working with ammonia products.
Sourcing Oak
I have used 95mm square oak (4in nominal) for this project. It is not easy to source anything thicker as kiln-drying only works up to 4in thick. If you can get some air-dried oak in a larger size, by all means make it bigger. Green oak that has been air-dried for at least three years is much nicer to work than fully-dried oak, but it has a tendency to carry on shrinking, warping and splitting when brought indoors, so you have to decide how much of that you are prepared to allow. If you use old oak from fence or gate posts (as I did), plane the surface and check carefully for nails, staples and anything else that may damage you or your tools.
DID YOU KNOW
The effect of ammonia fumes on oak was discovered many years ago when people noticed that oak beams in stables and pigsties darkened much more quickly than oak used in houses. It was realised that the fumes from the animals’ urine, rich in ammonia, were the cause. The Victorians liked their woodwork to look dark and ancient, so they took to exposing new oak to ammonia fumes to achieve the medieval look they so desired. Only wood that is high in tannin will respond to fuming with ammonia. The sapwood of oak – the whiter and softer outer layer near the bark – has no tannin and will remain pale, so make sure your oak is all heartwood. However, you can get some very interesting mottled effects by fuming oak burs that have swirls of sapwood among the heartwood and then turning them into bowls.
Shaping up
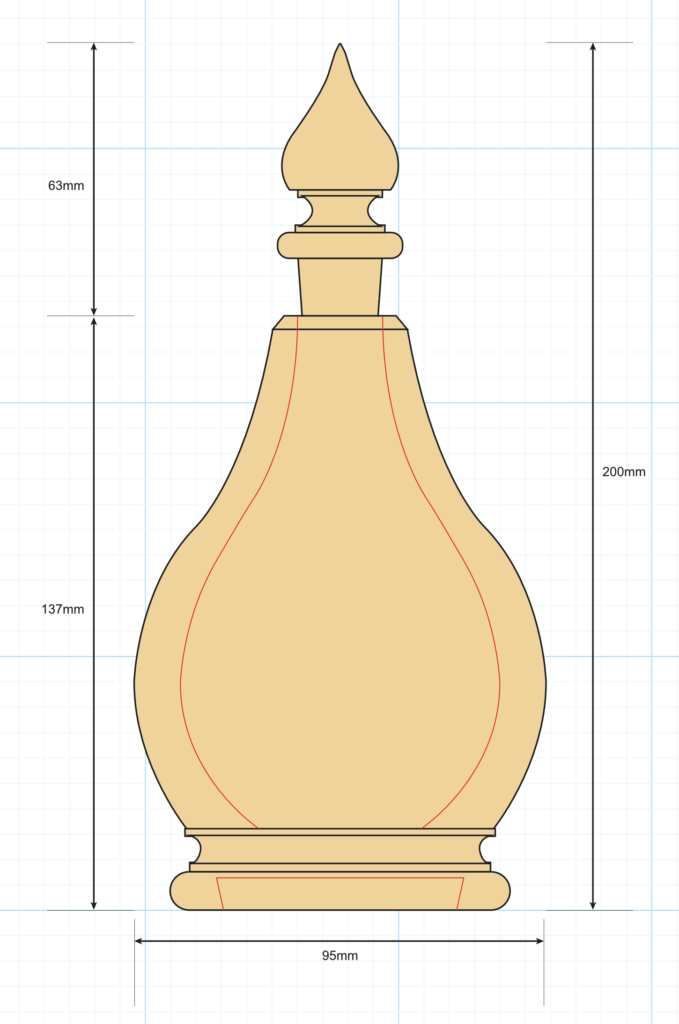
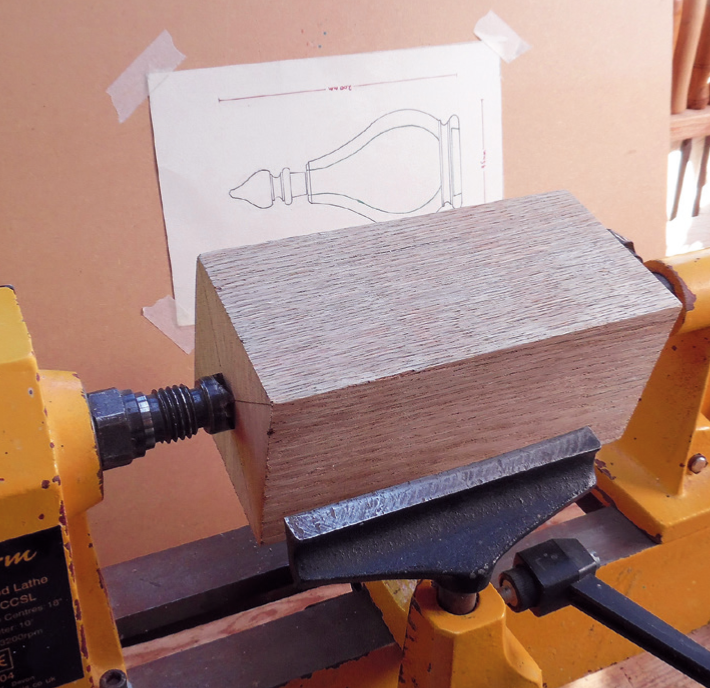
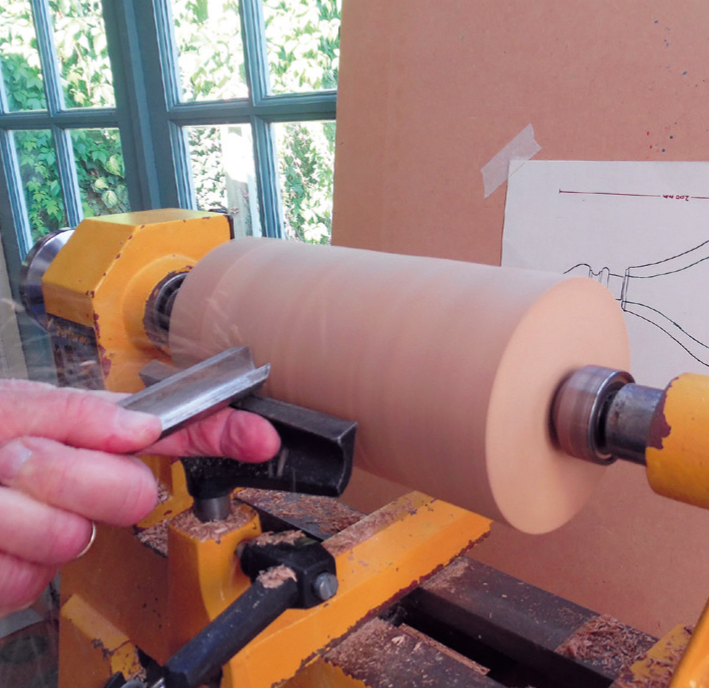
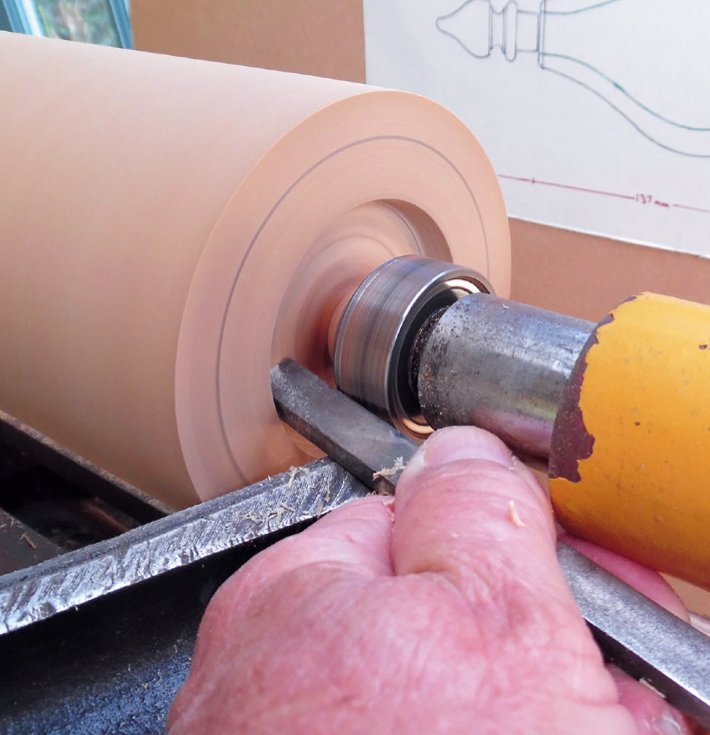
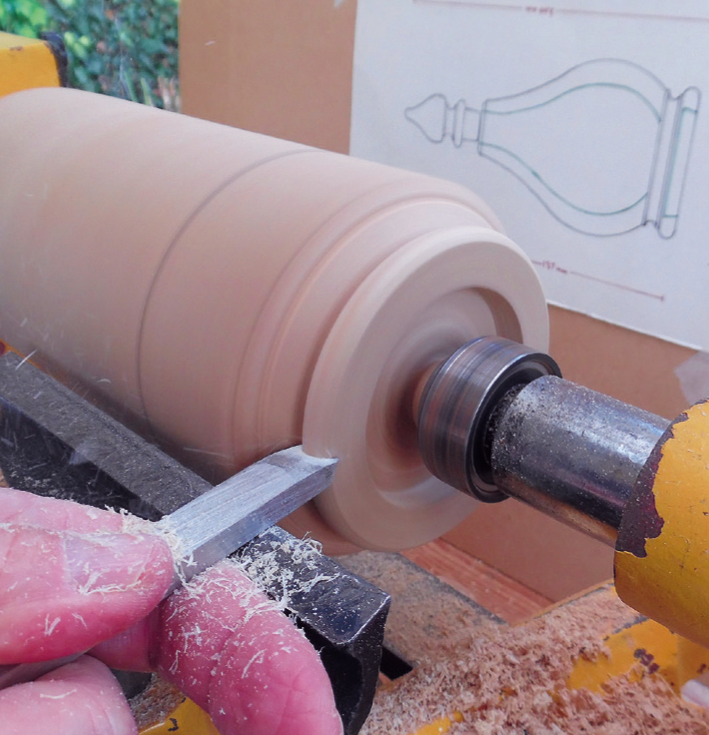
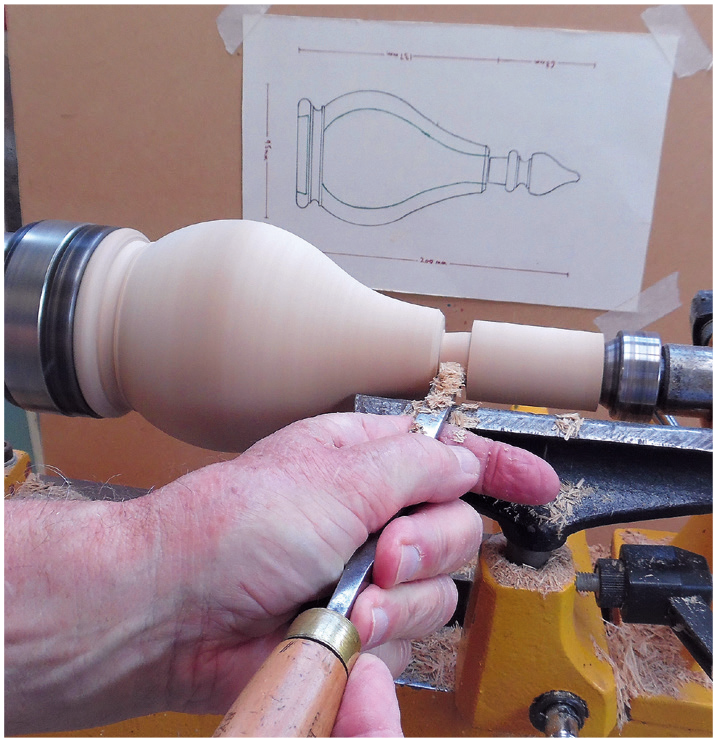
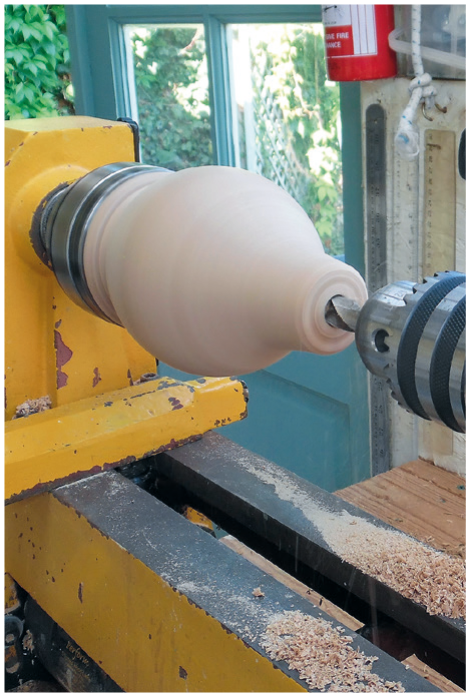
1. Get a piece of oak (free of sapwood) 95mm square x 200mm and mark the centres at the ends. Mount between centres on the lathe. Make a full-size copy of the drawing and put it on a board behind your lathe. You can then follow the curves as you turn, and you can measure off lengths and diameters from the drawing2. With the spindle roughing gouge, turn the block to a 95mm cylinder and square off the ends3. Cut a chucking mortise in the base to fit your chuck and draw the diameter of the base on the end4. Reduce the base area to the required diameter and turn a 10mm bead for the foot (I use a bead former for beads). Afterwards, take the work off the lathe and remove the nib in the chucking mortise with a chisel5. Re-mount the base of the vase in the chuck and steady the ‘stopper’ end with the tailstock. Rough out the shape of the vase and continue up to the stopper end with a cylinder of the neck diameter
Turning the detail
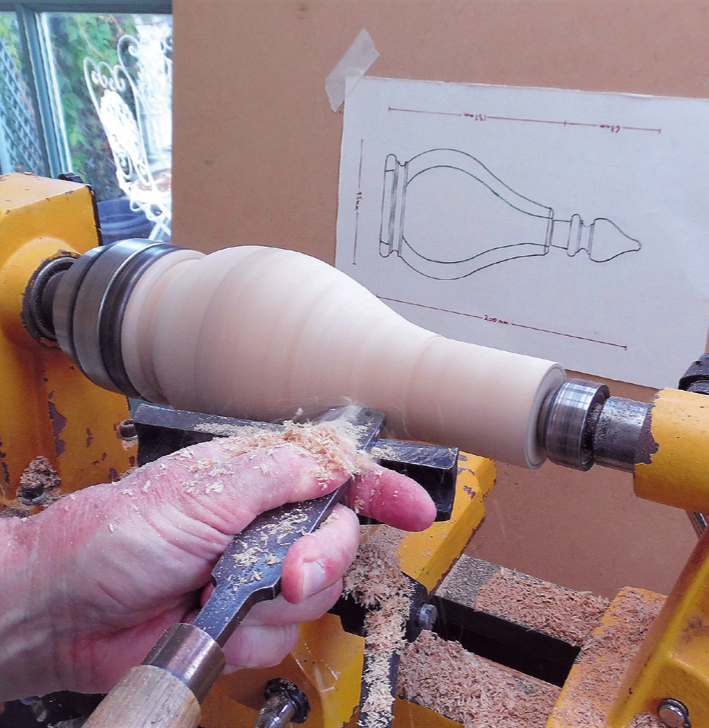
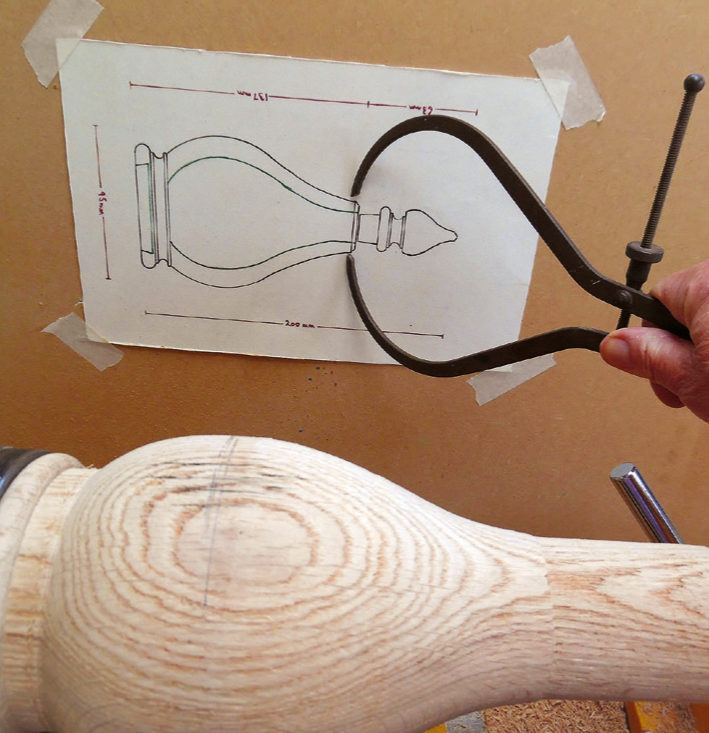
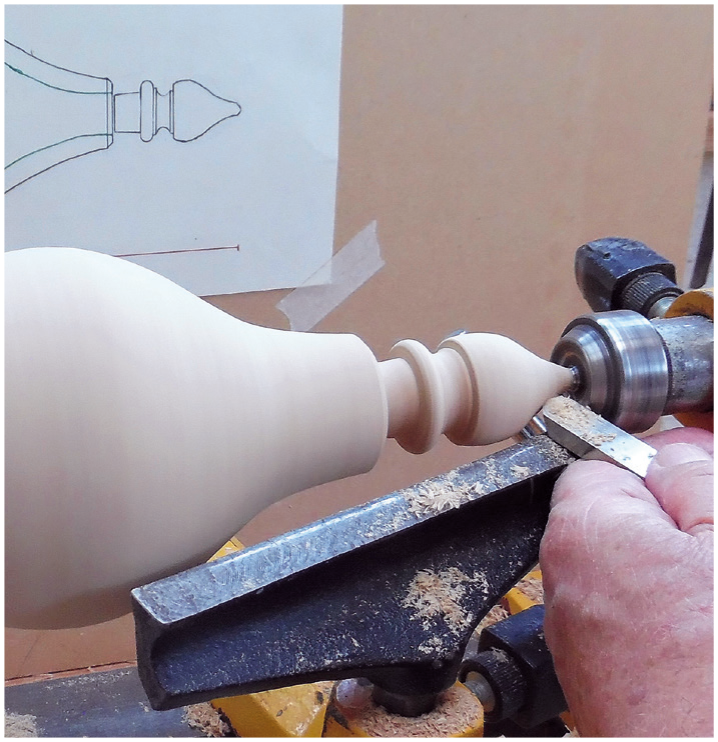
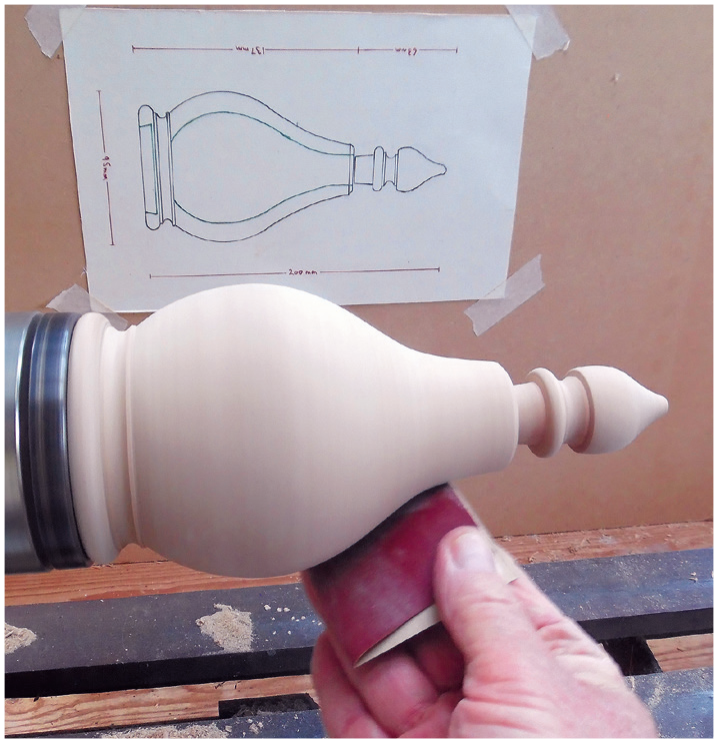
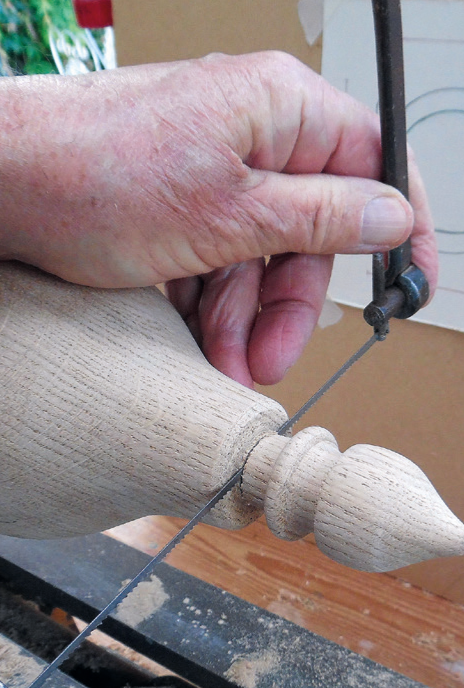
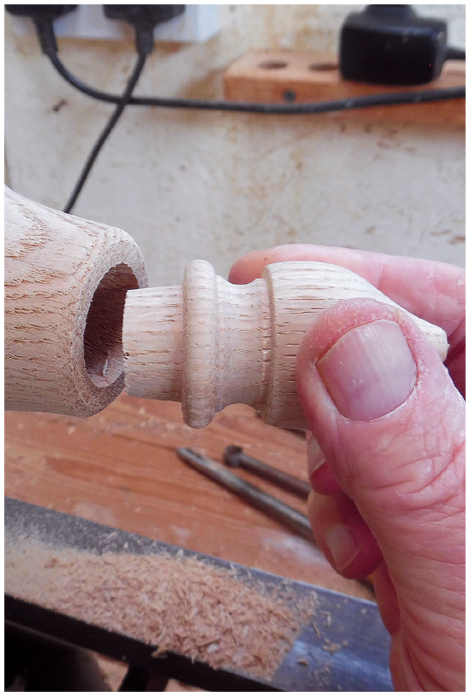
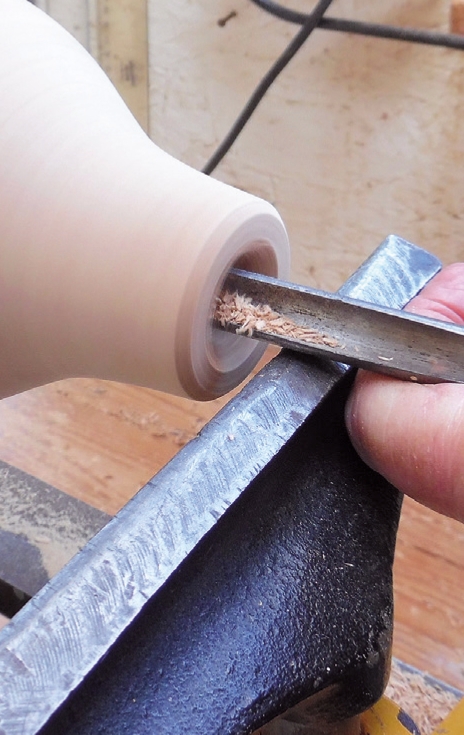
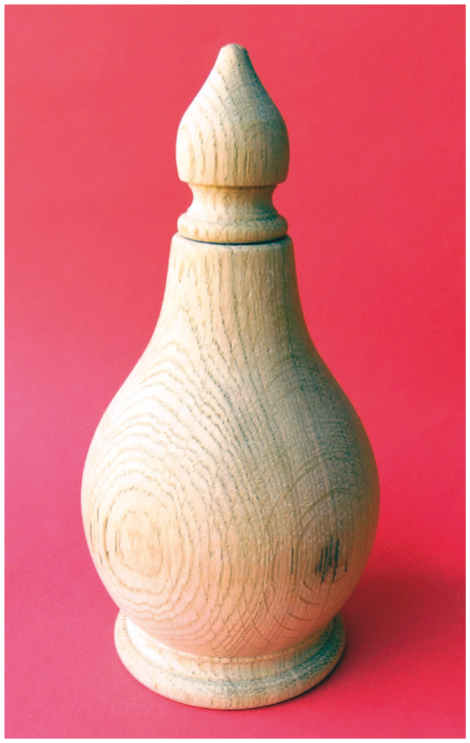
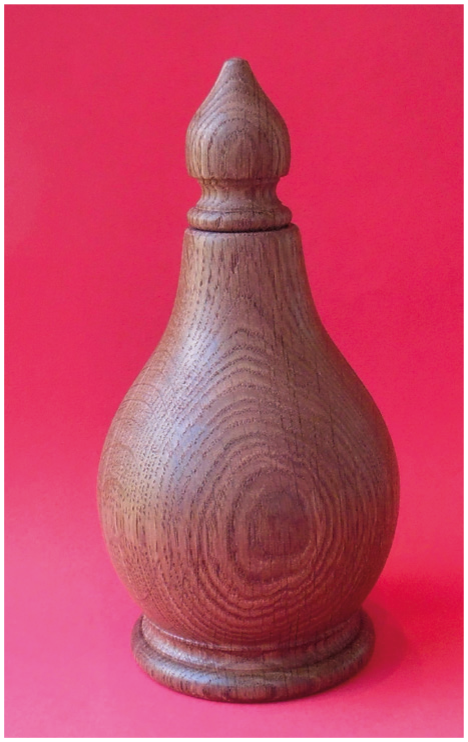
6. Check the diameter of each section against the drawing with callipers, then work the feature down to fit the callipers7. Work the vase to its final finish and cut in the cove between the foot bead and the vase body. Next, cut out the tapering part of the stopper that will go into the vase neck. Measure its diameter carefully and measure off its length from the drawing8. Shape the bead, cove and ogee that make up the rest of the stopper. Keep the tailstock in place to steady it, and then withdraw the tailstock to finish the point9. Now is the time to sand down the vase body and stopper, working down from 180 to 400 grit. Oak is a coarse-grained wood so don’t expect the mirror finish you get with fine-grained woods. The vase is meant to look old and worn, so the visible grain is part of its charm10. Now part off the stopper from the vase neck. This is best done with a fine saw as a parting tool would waste some of the wood and may send the stopper flying off11. To hollow out the vase, working on end grain through a narrow neck, it is best to drill out the centre with a 13mm drill in a Jacobs chuck. Check the length of the drill against the length of the vase so you get near to the bottom of the vase without going through it. Keep withdrawing the drill to clear the shavings12. Use a side-cutting tool to open out the neck of the vase to fit the taper on the stopper. Try to get a tight fit13. Open out the inside of the neck with a narrow spindle gouge in ‘lady’s finger’ grind and start hollowing the interior. Switch to a ring hollowing tool when the neck is wide enough to get it in. You don’t need to be too fussy with the hollowing because no one can see inside through the narrow neck without using a torch. As you can only guess at where the end of your hollowing tool is, the most important thing is not to come through the side of the vase14. Here is the vase at the end of the turning phase. It has the required shape of an apothecary vase, but in its pale, new oak colour it lacks any of the drama we would associate with that name. It’s time to embark on some hocus-pocus with our magic potion – sorry, household cleaning product
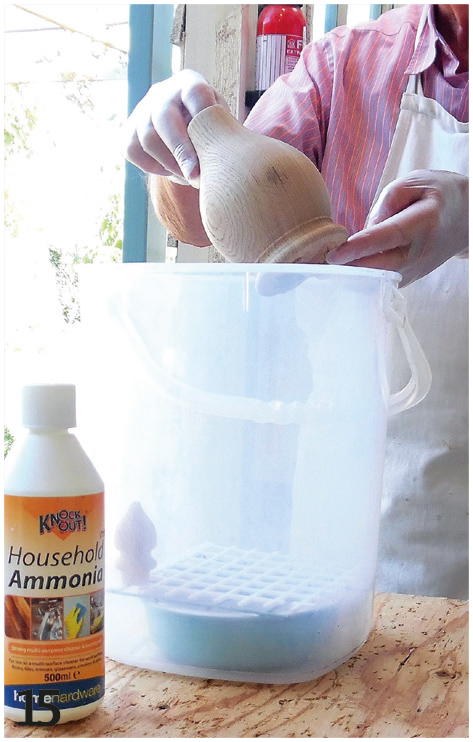
Fuming
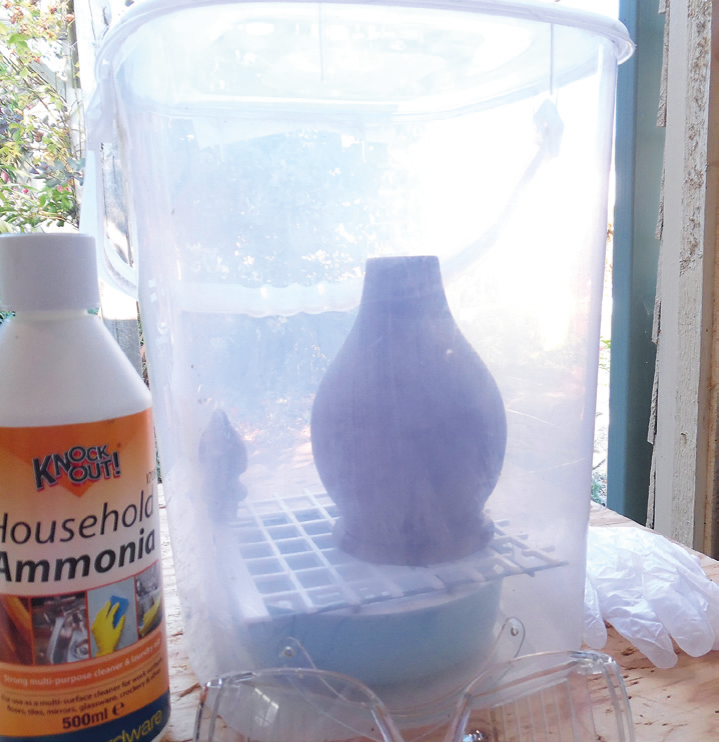
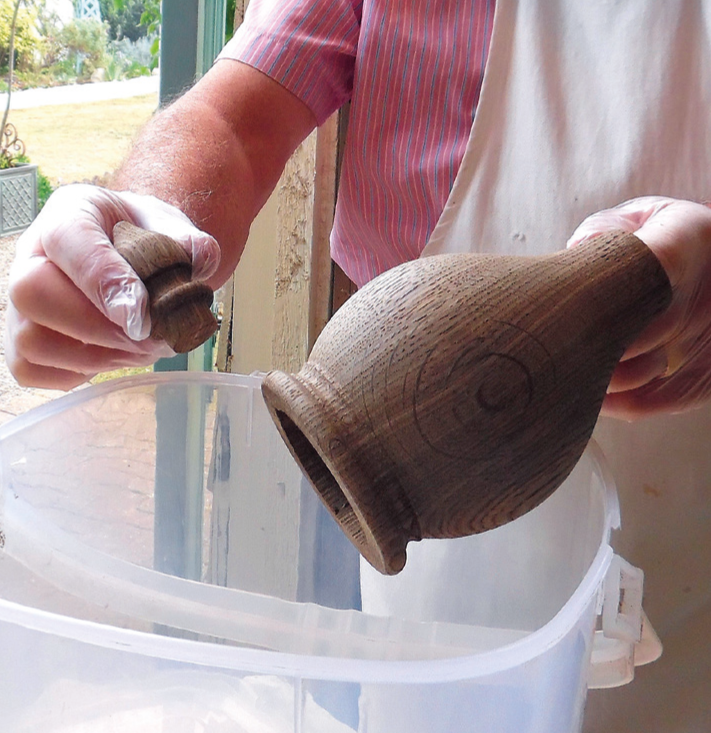
15. Get a suitable container that can be made airtight with the vase inside it, such as this plastic tub. Pour about 50ml of household ammonia into a dish and put it in the bottom of the tub. Stand the vase and the stopper on a support that will keep them out of the liquid and allow the fumes to circulate freely. Seal the lid so it is airtight. The ammonia is safe if you follow the manufacturer’s instructions, but be sure to wear eye protection and gloves16. After one hour the oak is darker, but it needs four to 12 hours to reach its full darkness, depending on temperature, the strength and volume of the ammonia and the amount of tannin in your oak. If it is slow to darken, add more ammonia. You can leave it in the fumes for 24 hours, but it probably won’t get any darker after that17. When it is dark enough, open the tub and stand back while the fumes clear, then take out the vase and stopper. They will be a bit whiffy for a few hours, so leave them to stand in the air
Finishing
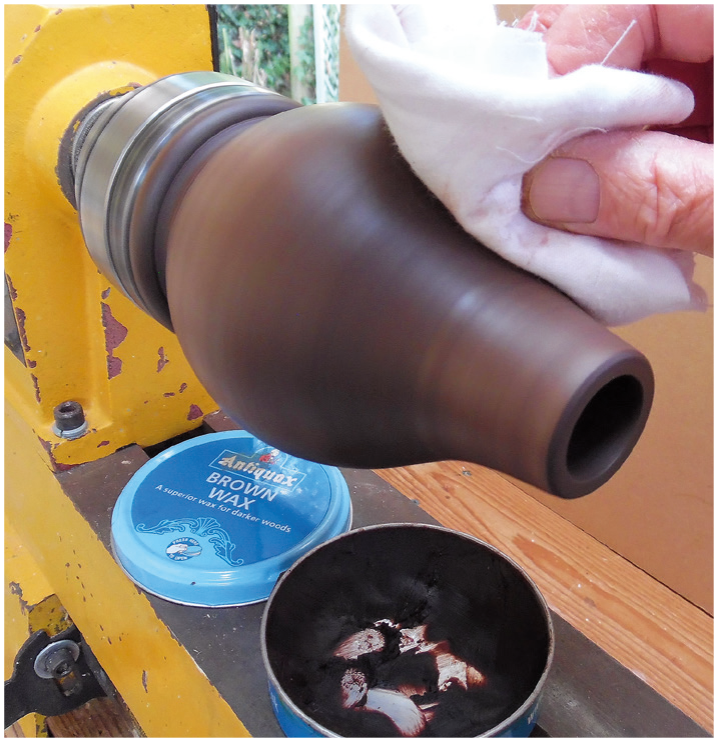
18. The fumed oak will have a dull matt finish so will be in need of a good wax polish. Remount the vase and stopper on the lathe. Apply the polish (I use Antiquax Brown) using a cloth with the lathe rotating. Hold the cloth between fingers and thumb so it will snatch out of your hand if it catches – do not wrap it around your fingers. Repeat with a dry cloth to buff it to a soft sheen19. The finished apothecary vase, looking suitably medieval although it is only a day old. Compare it to photo 14 to see the difference
To provide the best experiences, we use technologies like cookies to store and/or access device information. Consenting to these technologies will allow us to process data such as browsing behaviour or unique IDs on this site. Not consenting or withdrawing consent, may adversely affect certain features and functions.
Functional
Always active
The technical storage or access is strictly necessary for the legitimate purpose of enabling the use of a specific service explicitly requested by the subscriber or user, or for the sole purpose of carrying out the transmission of a communication over an electronic communications network.
Preferences
The technical storage or access is necessary for the legitimate purpose of storing preferences that are not requested by the subscriber or user.
Statistics
The technical storage or access that is used exclusively for statistical purposes.The technical storage or access that is used exclusively for anonymous statistical purposes. Without a subpoena, voluntary compliance on the part of your Internet Service Provider, or additional records from a third party, information stored or retrieved for this purpose alone cannot usually be used to identify you.
Marketing
The technical storage or access is required to create user profiles to send advertising, or to track the user on a website or across several websites for similar marketing purposes.
One Response
I have an oak bowl I would like to do this with. I already have a walnut oil finish applied. Will that prevent the darkening