Ramon Valdez has a solution for clamping longer boards
With the ever-growing popularity of the Roubo bench, I thought I’d share a new addition that I made for mine recently. My bench is about 84in long and the clamping capacity is about 6ft. Occasionally, I need to clamp longer boards. Funny thing is, no matter how long the clamping capacity is, it seems to end up just short of those projects with longer timber! I did, however, easily add 18 more inches by building my ‘Roubo bench extension’. Here’s my solution.
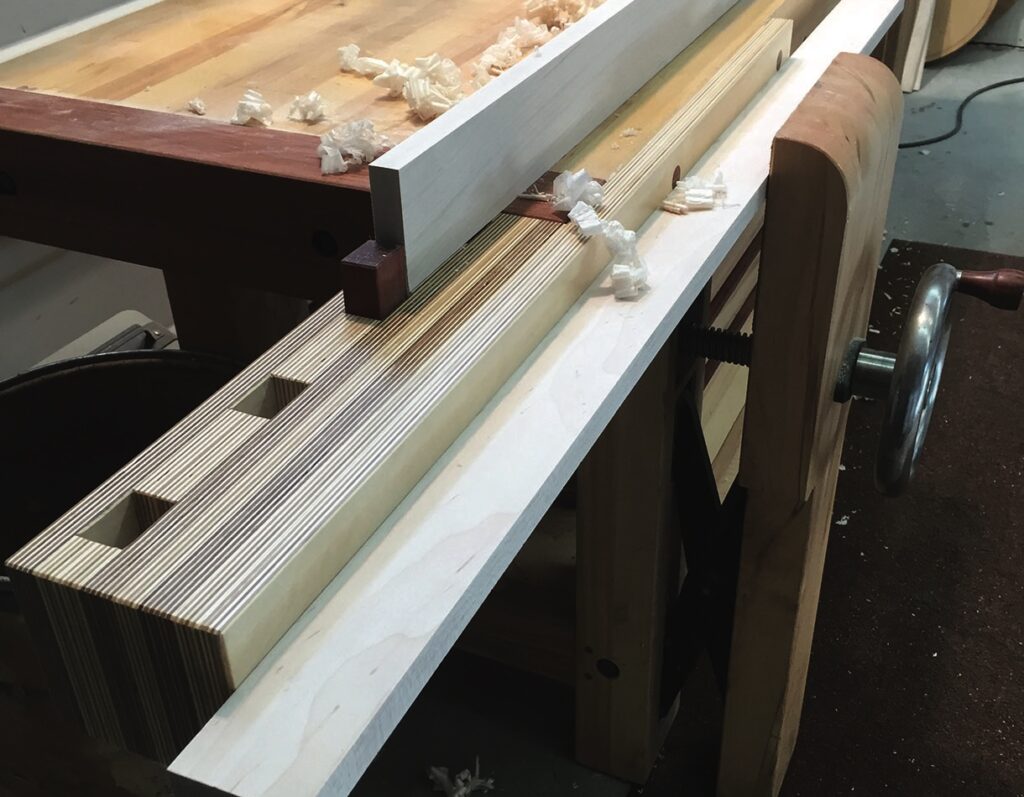
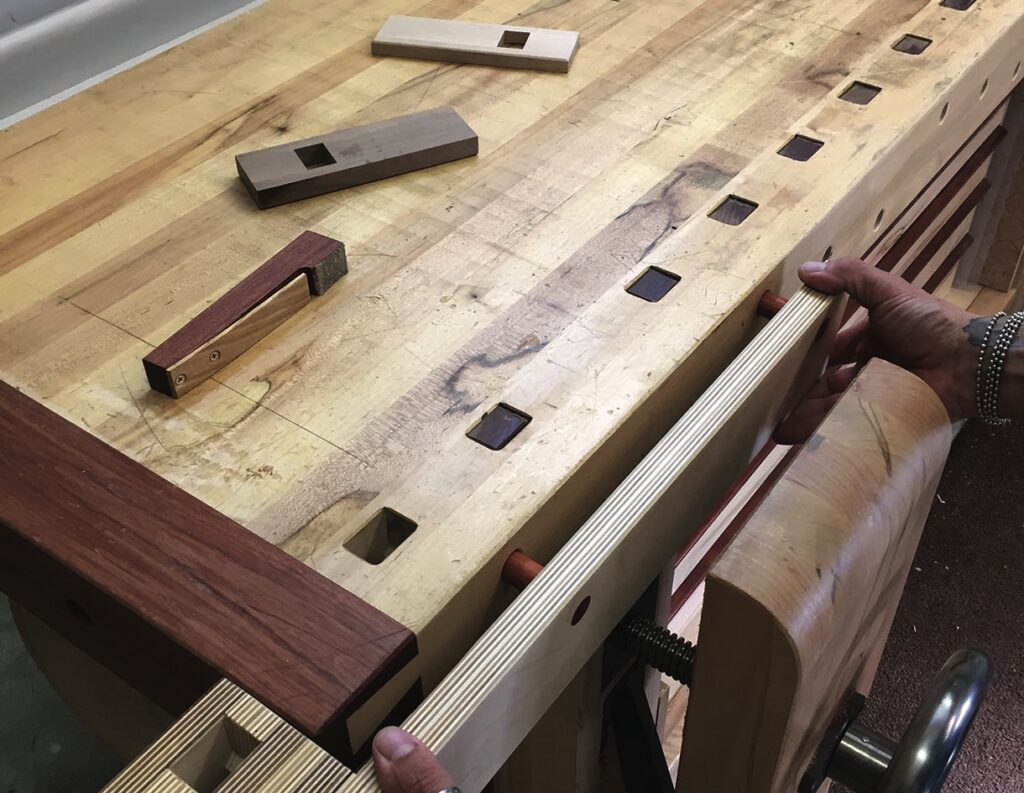
I made a ‘block’ of sorts that houses a few more bench-dog holes, or let’s just call them dog houses! I used Baltic birch plywood for its stability and ease of use. This block or extension goes to the left side of my bench, in line with the existing bench dog holes and utilises the front vice to clamp it firmly in place.
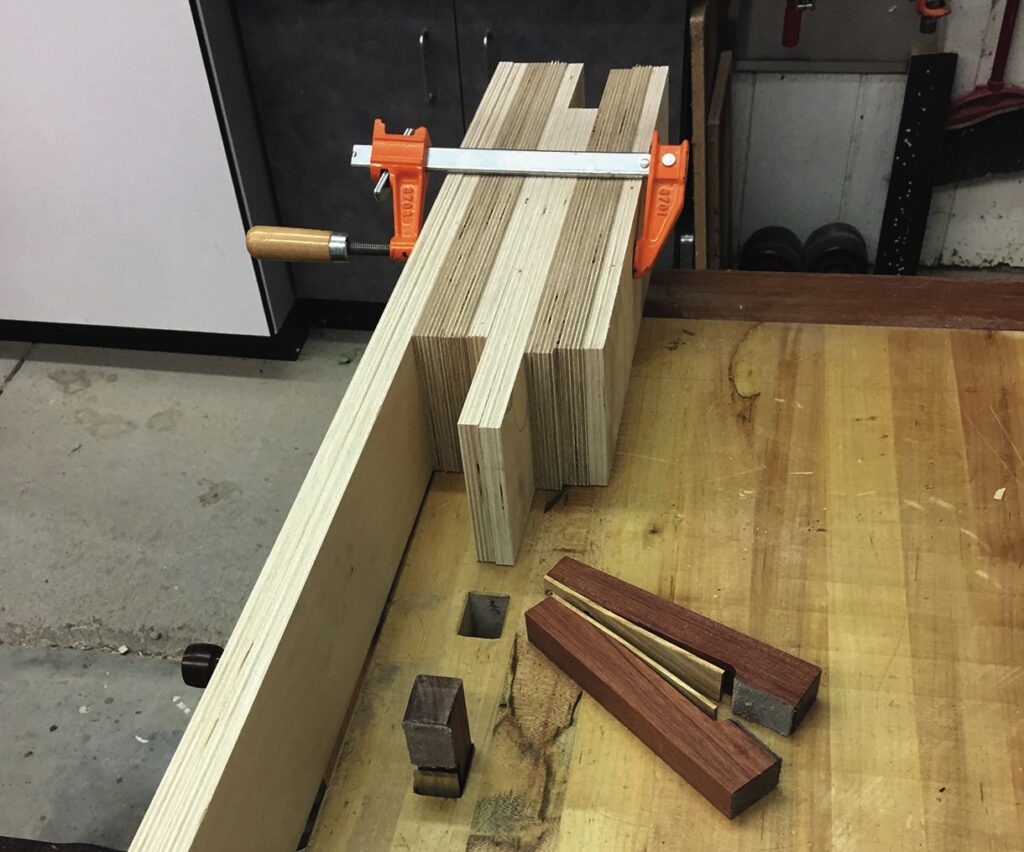
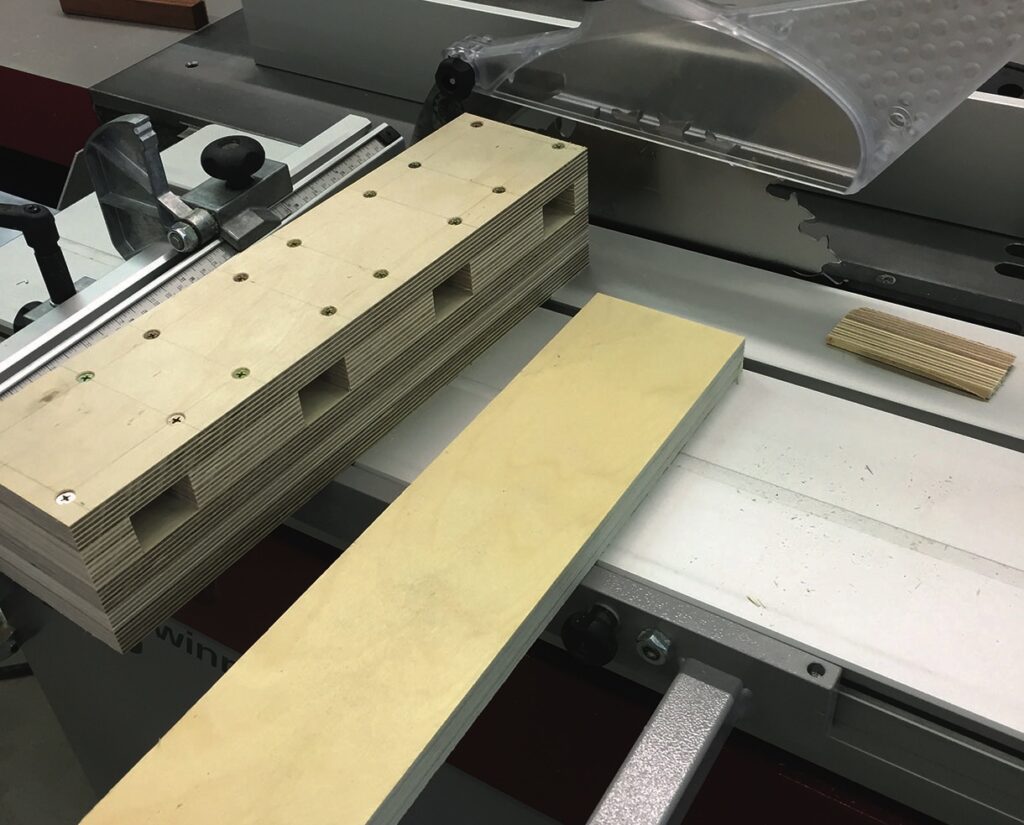
To start, I used two layers of ½in Baltic plywood for the part that extends onto the front of the bench. These are 36in long and the width (height) matches my bench, which is 4in thick. These front pieces have two ¾in dowels protruding from the back side, but now I’m getting ahead of myself. More on the dowels a bit later. I used three more layers (two ¾in and one ½in) to create the space or distance from the front of the bench to
the start of the bench dog holes. Incidentally, I cut all my parts a tad big, assembled the unit, then cut it to length and height (4in in my case)
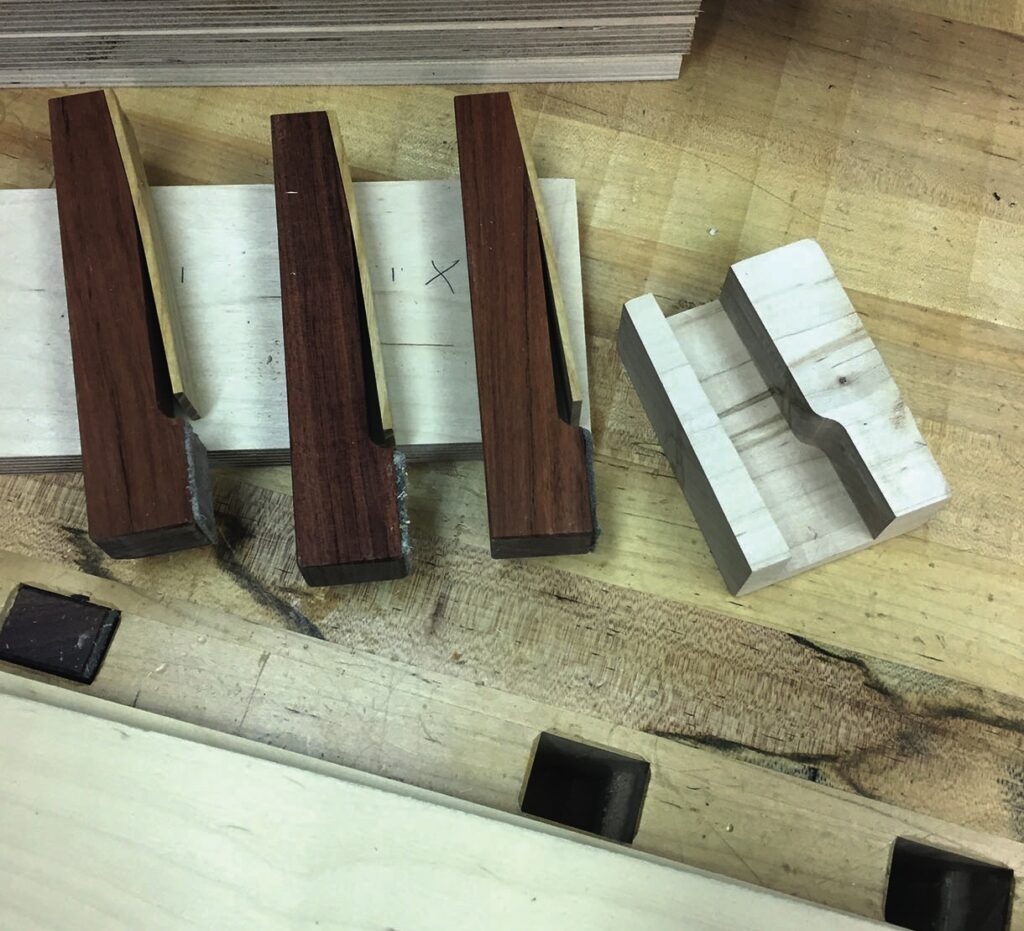
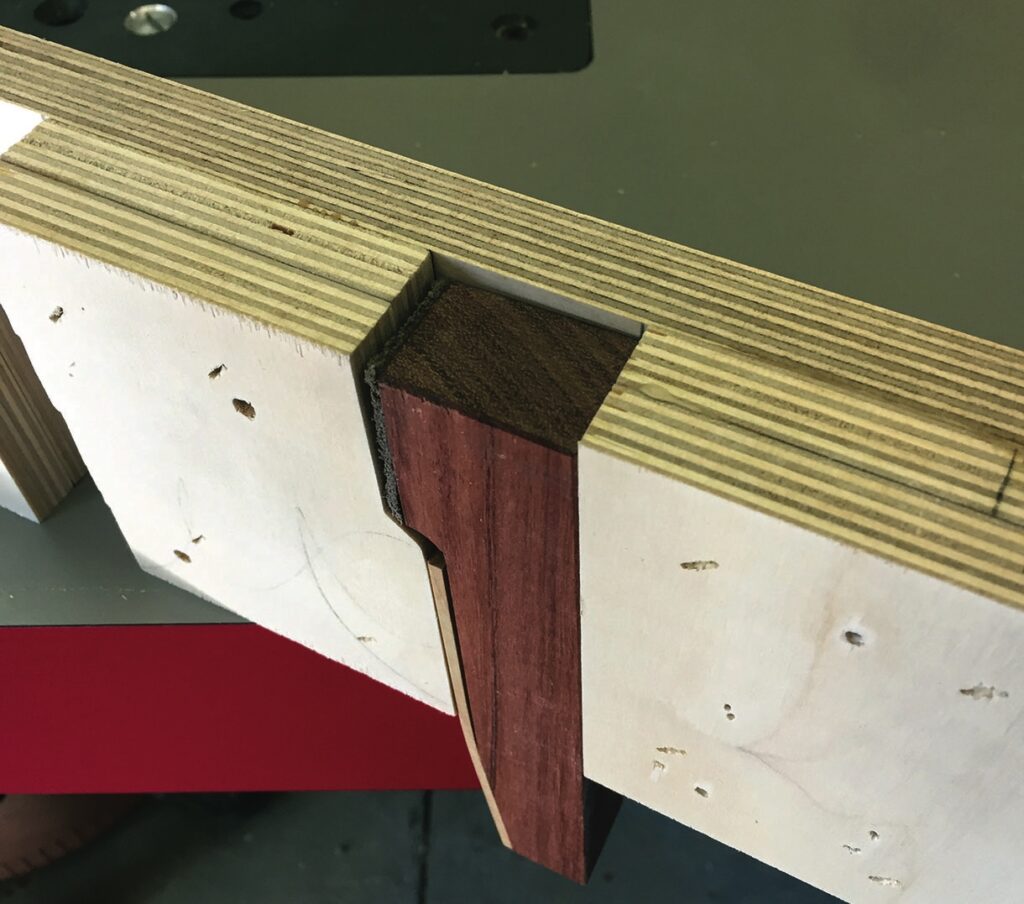
Creating the dog houses was easy. I even got lucky with two layers of ½in plywood being equal (actually slightly larger) to the width of my bubinga (Guibourtia demeusei) bench dogs. As I was creating the space
for the bench dog holes, I cut the cavities with a 2° angle to match the angle of the existing dog holes. This angle leans towards the end vice and helps with the holding power. These cavities were simple to make, since I was able to create the configuration as I stacked the layers, cutting the required angles, that would become the inside of the bench dog holes. Then, I added one more layer of ¾in Baltic birch plywood on the back side of the new ‘dog houses’ to cap things off.
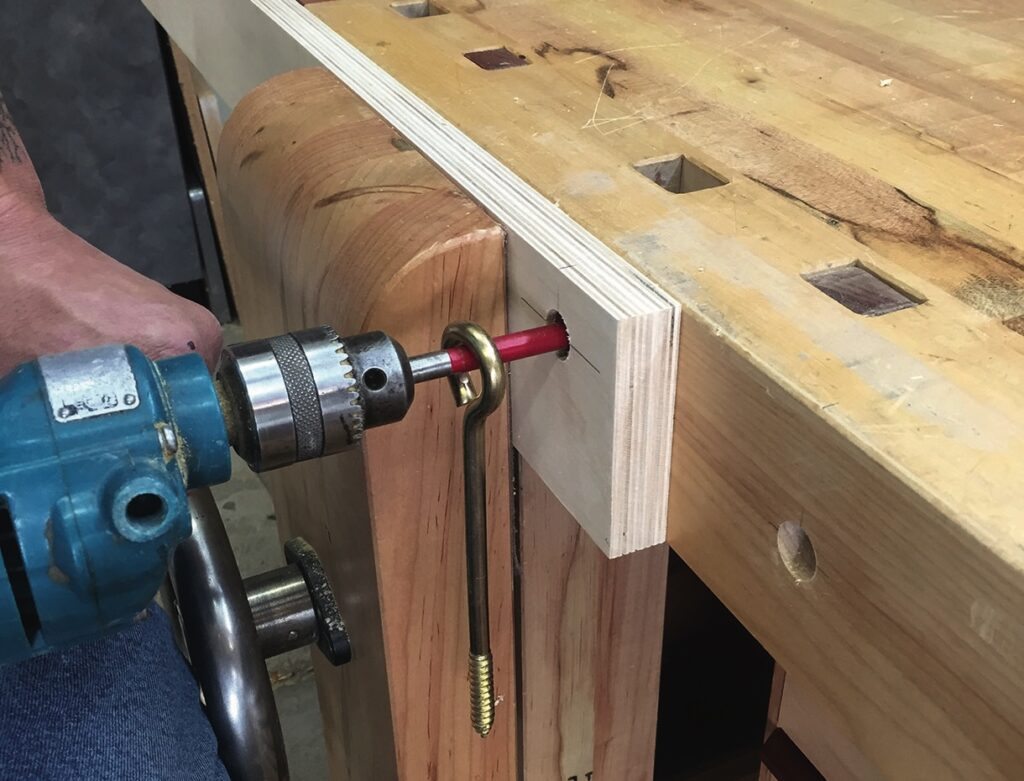
Once the ‘block’ of plywood was made, I cut it square and true at my sliding tablesaw, eased the corners a bit and clamped it into place with the front vice, making sure to keep the top edge flush with the bench top and
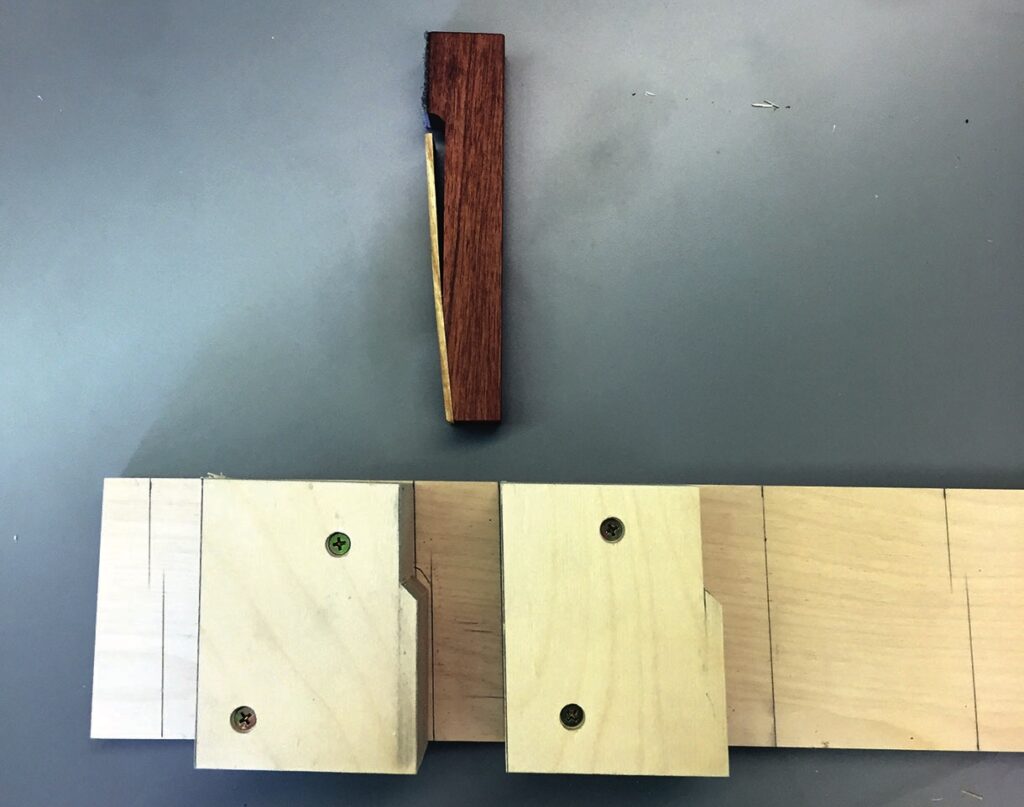
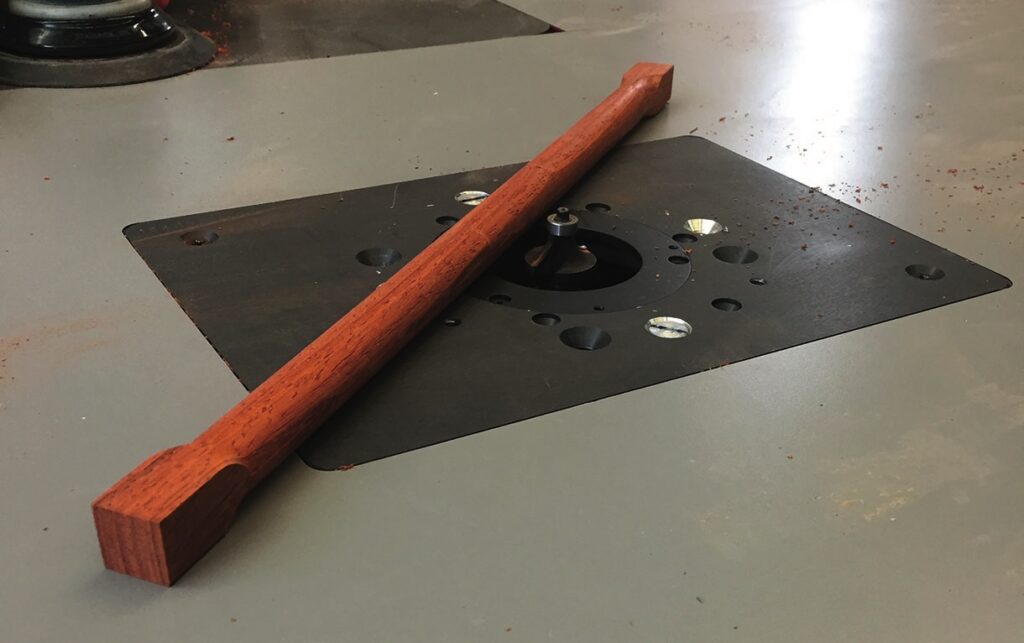
the ‘block’ tight to the end of the bench. Just for assurance, I used an additional clamp or two to ensure that it wouldn’t move while the holes for the dowels were being drilled. Now was the time to drill the two ¾in holes for the dowels. I used the simple and very effective method of keeping my drill bit level by slipping an ‘eye’ bolt over the smooth part of the drill bit. Any slight deviation in height, will cause the eye bolt to travel, forwards or backwards, telegraphing the need to adjust your levelness. Of course, your bench should be dead level for this to work properly. I learned this trick from my dad years ago! These dowels help to easily index the extension block and the front vice will hold it securely in place. I used padauk for my dowels although I wished I had used bubinga to match my breadboard ends. I simply did not have any at the time, but of course, found some up in my loft after the build! Before glueing the dowels in place, I routed a small ‘finger groove’ or cove at the far, bottom right hand end of the block to make it easier to remove after use. In addition to glue, I also used a wedged tenon technique for securing the dowels just to tighten things up and add some more strength. Ease the corners of the dowels that will engage the holes… and also chamfer the edges of the holes in the front of the bench to make engaging the block into place that much easier.
In use, I can quickly grab the extension (stored on my ’shop wall), line up the dowels and clamp it into place. This extension is not designed to take much downward pressure, although it does feel very solid. I suppose a person could make theirs even longer and perhaps add some sort of additional support leg. This bench extension was merely created to provide longer clamping options. You’ll notice that the doghouses are in line with the existing ones in the bench.

I sanded the inside of the dog houses while it was being constructed and then did a bit of sanding on all the exterior surfaces. After a seal coat and then a couple of coats of conversion varnish to help prevent glue from sticking to the extension, and this project is ready to hold another project in place!