The Woodworkers Institute

We bring you the very best of woodworking!

“Make it with us”

Two-part vase

Mark Baker reimagines a vase in the flowing style of Ancient Rome

Elegant wooden urn with natural grain pattern

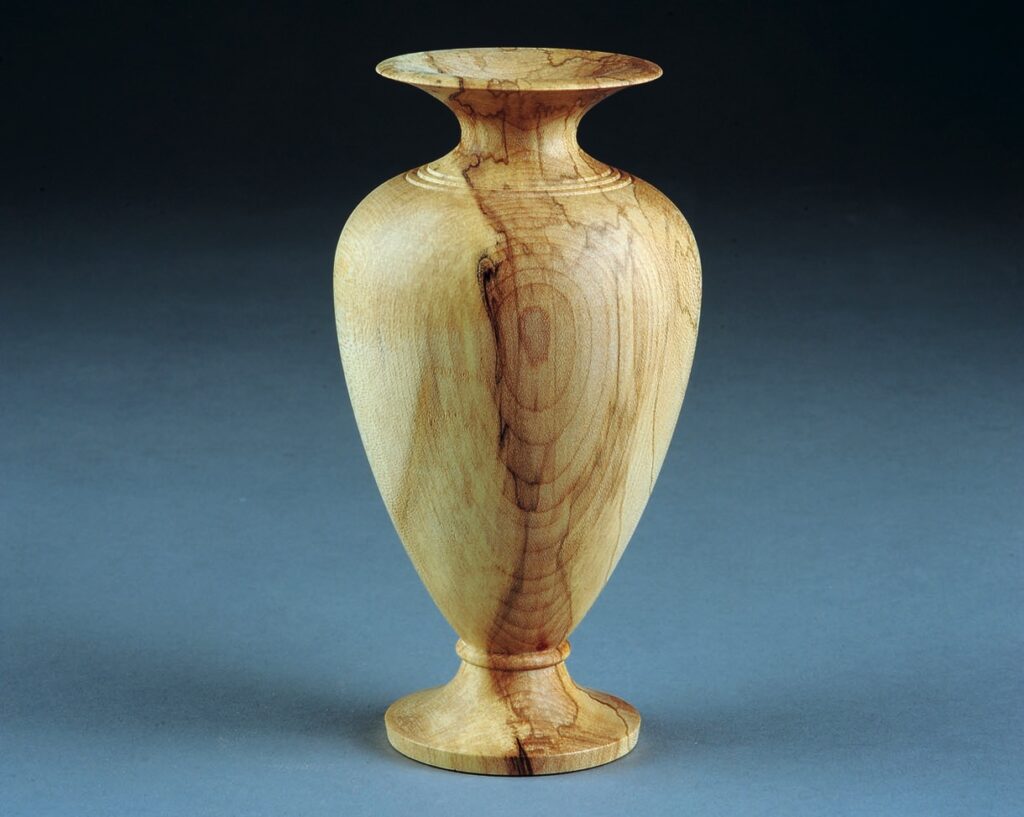
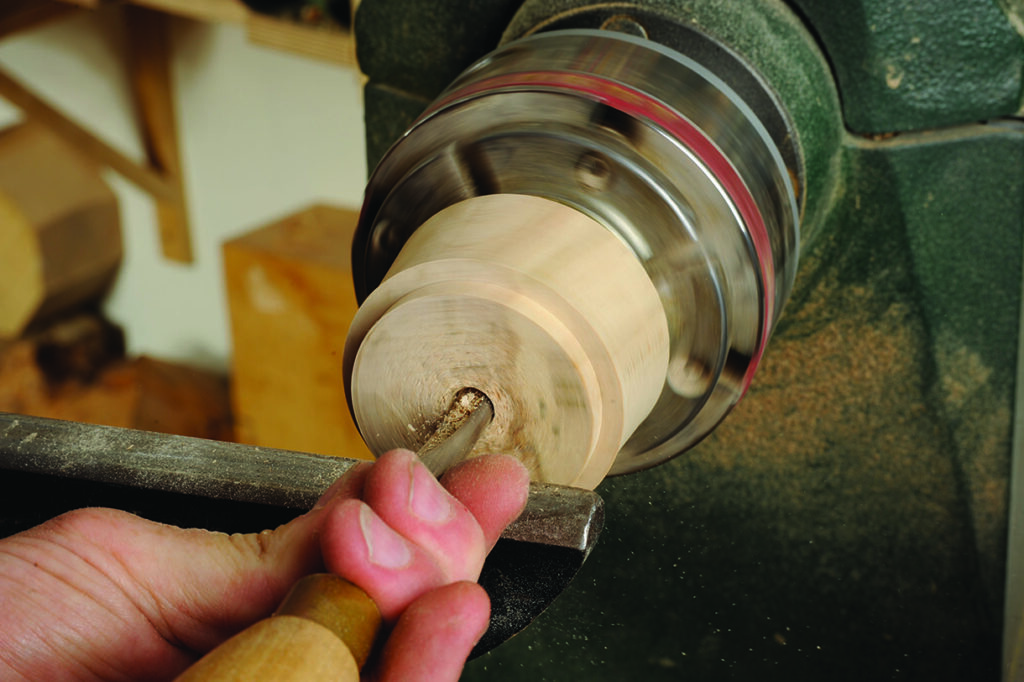
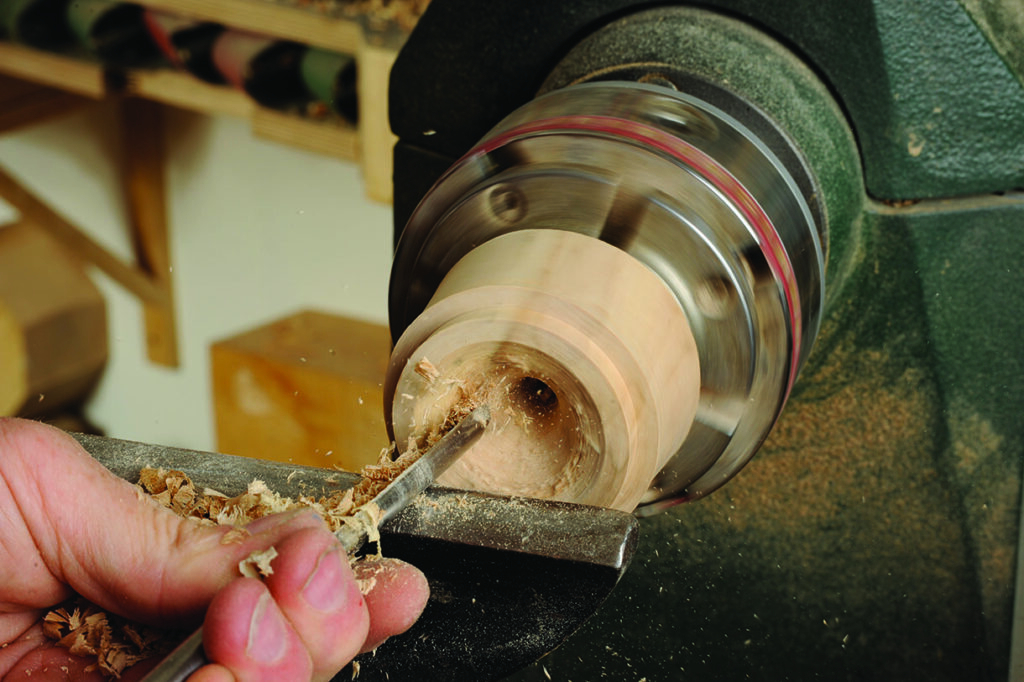
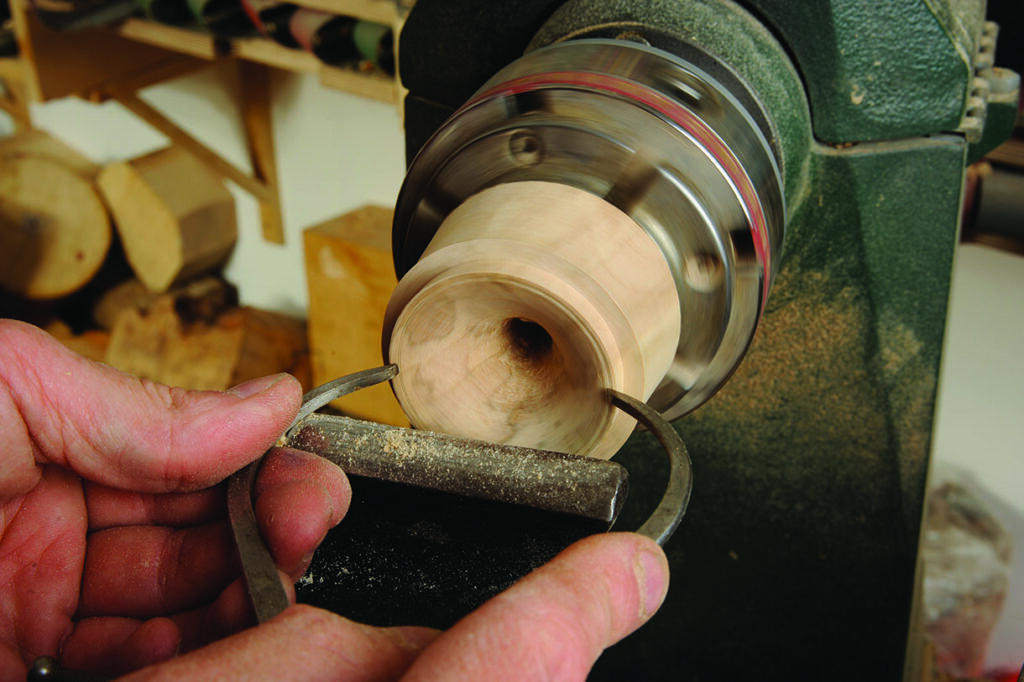
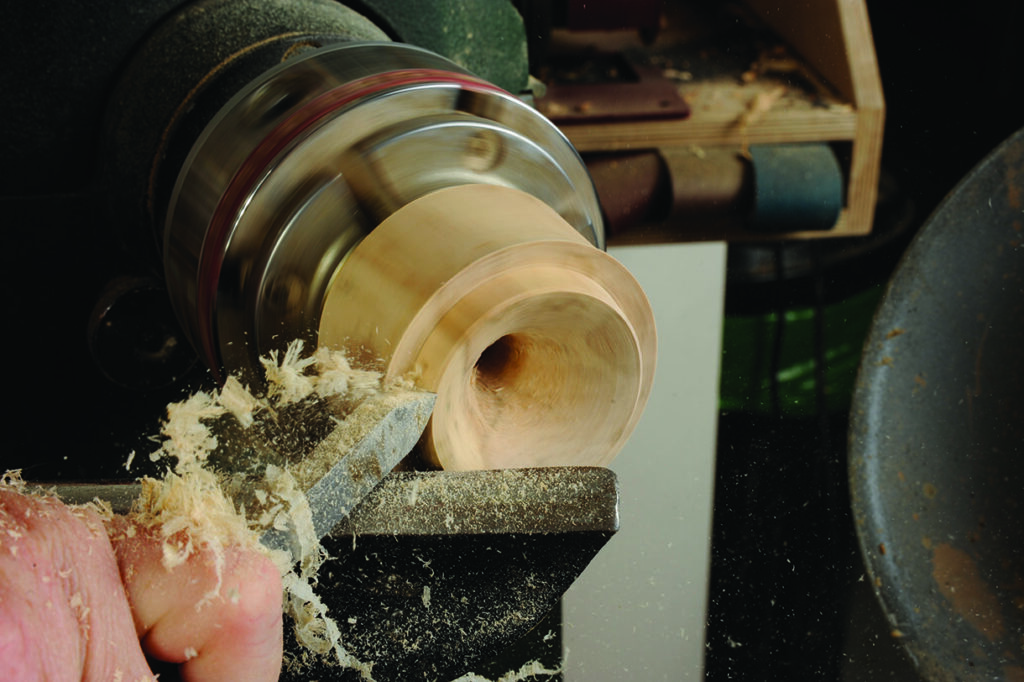
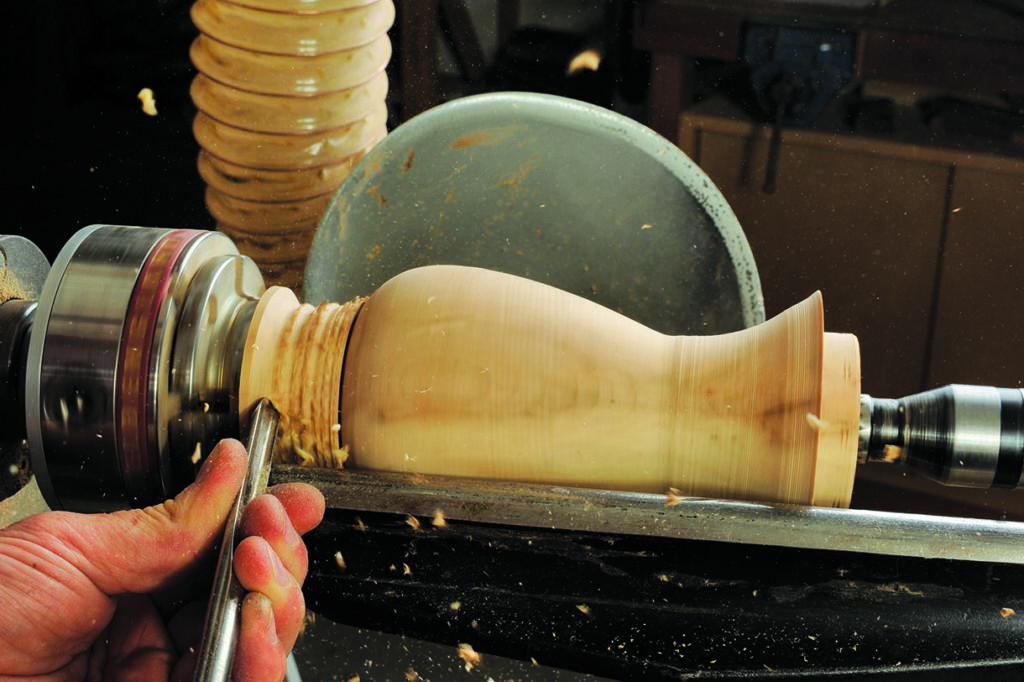
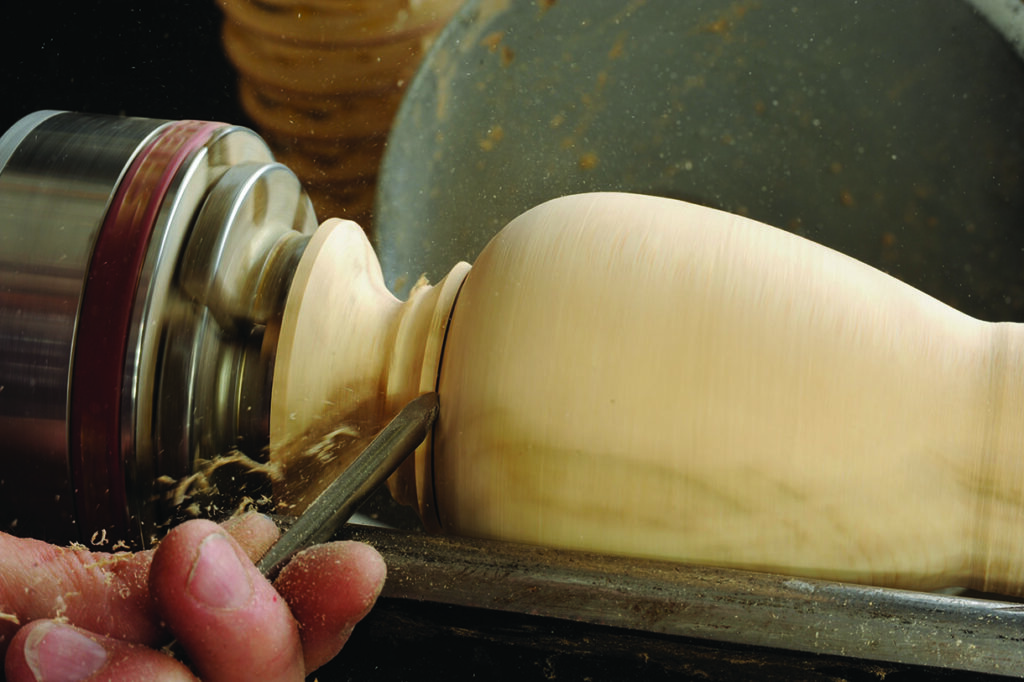
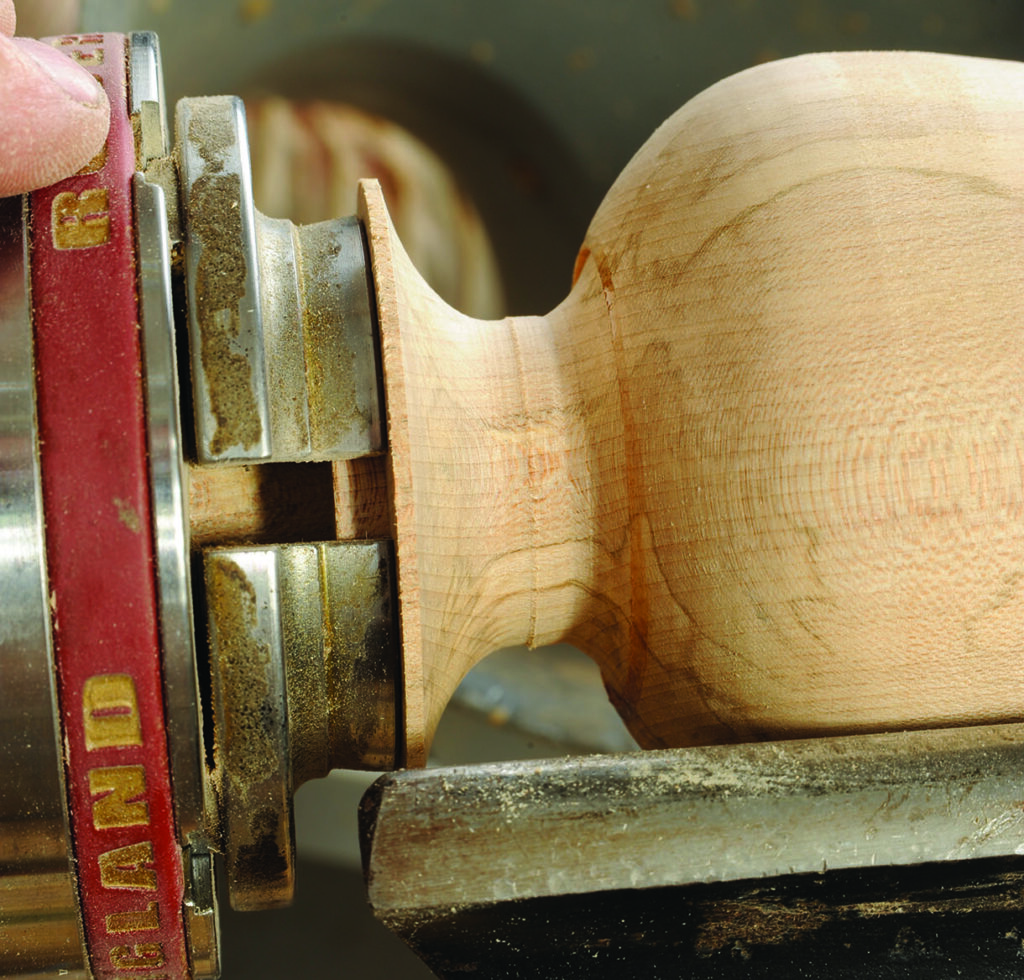
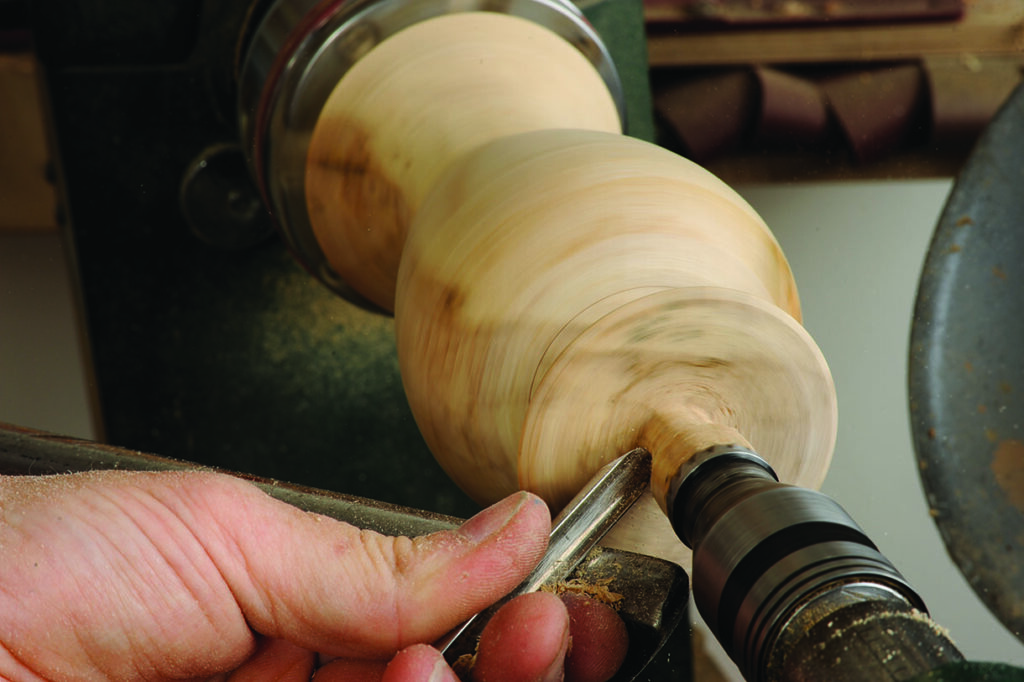
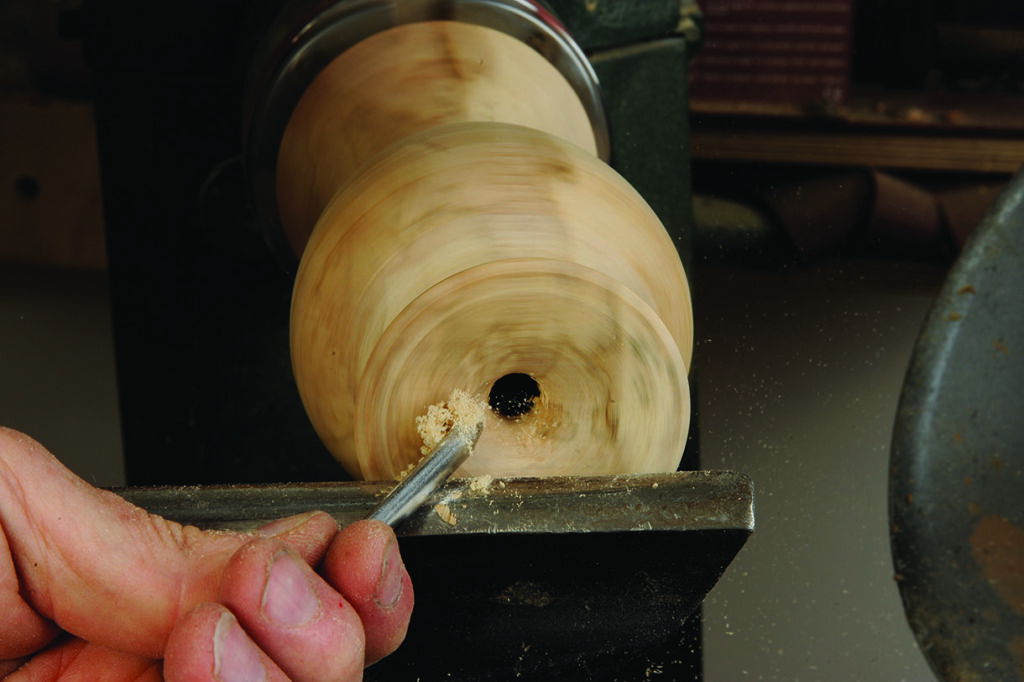
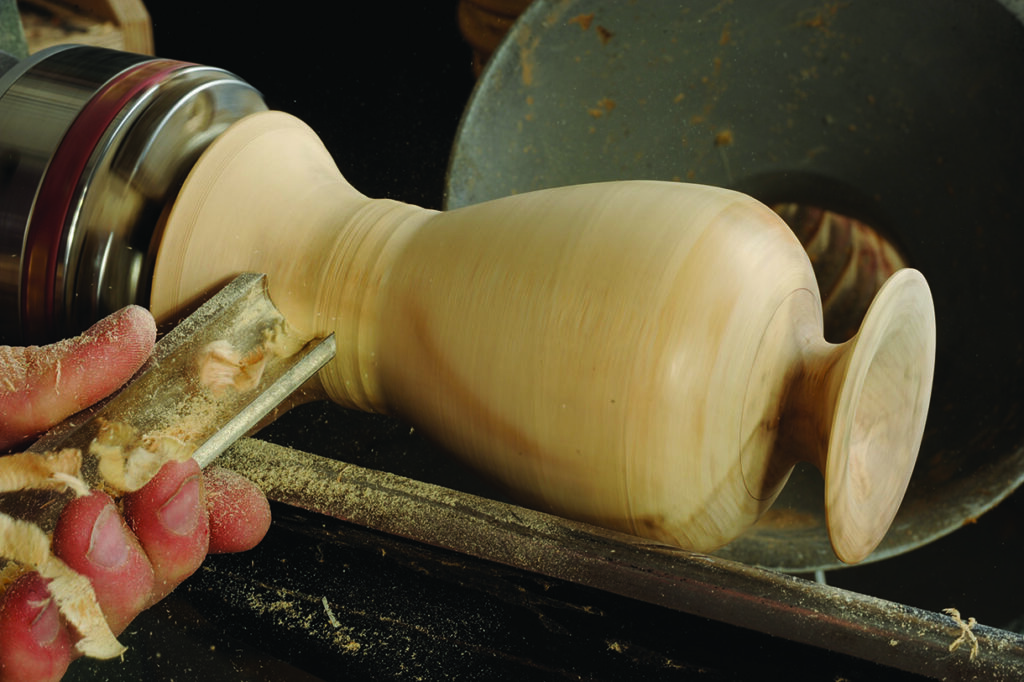
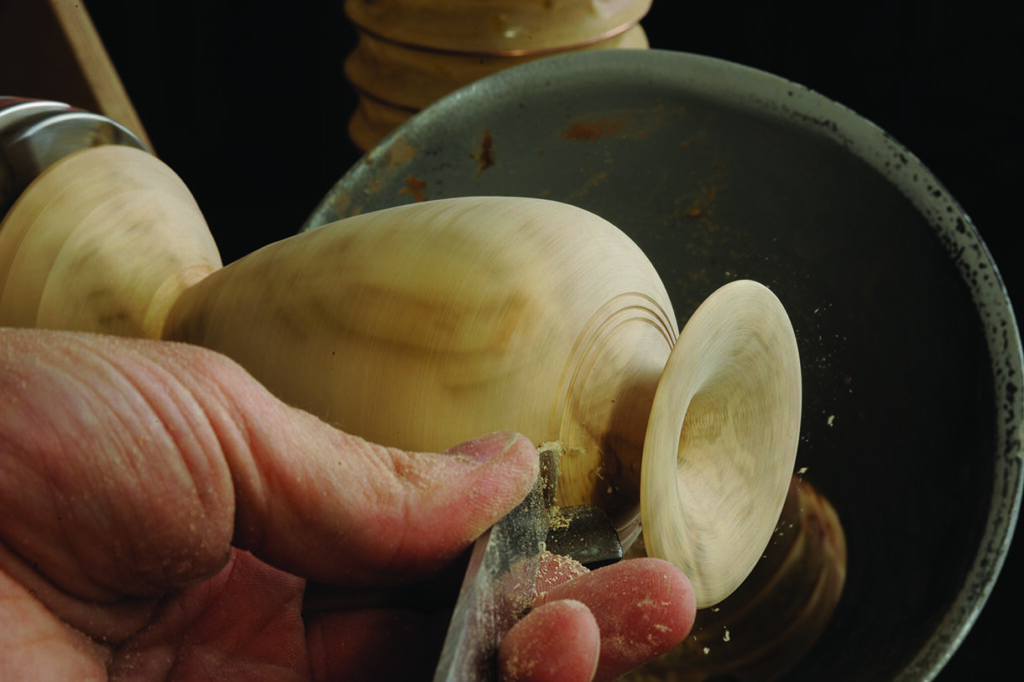
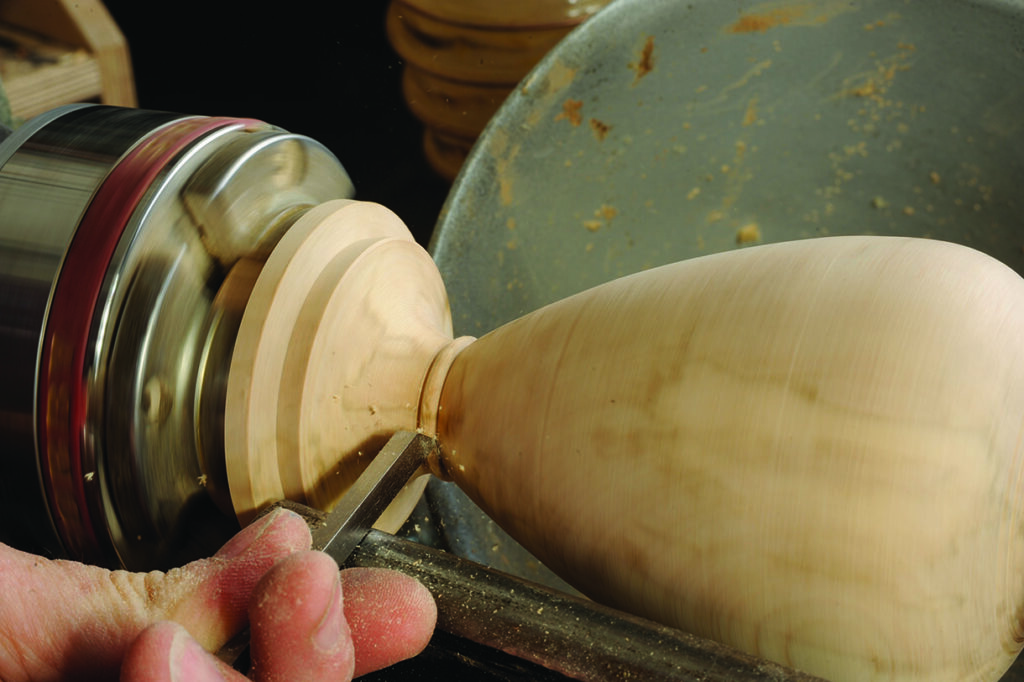
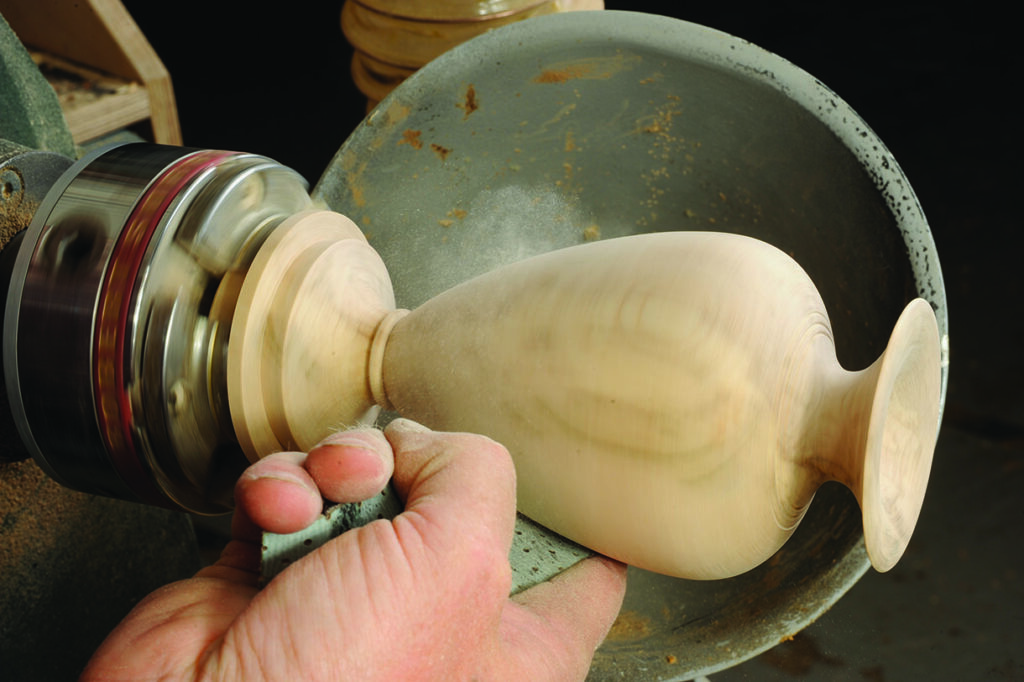
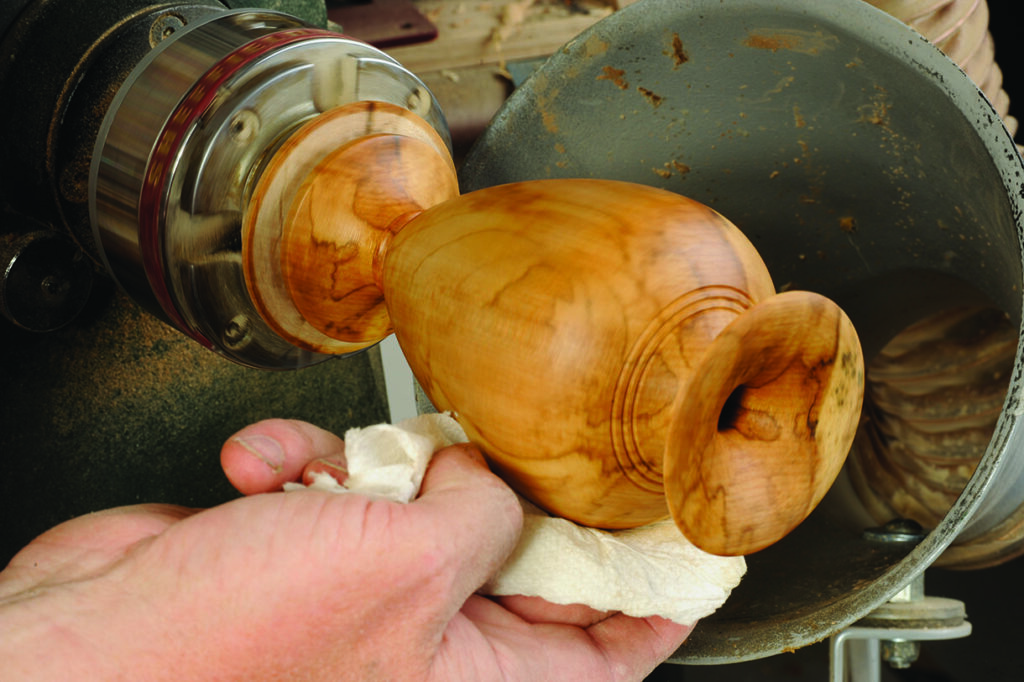
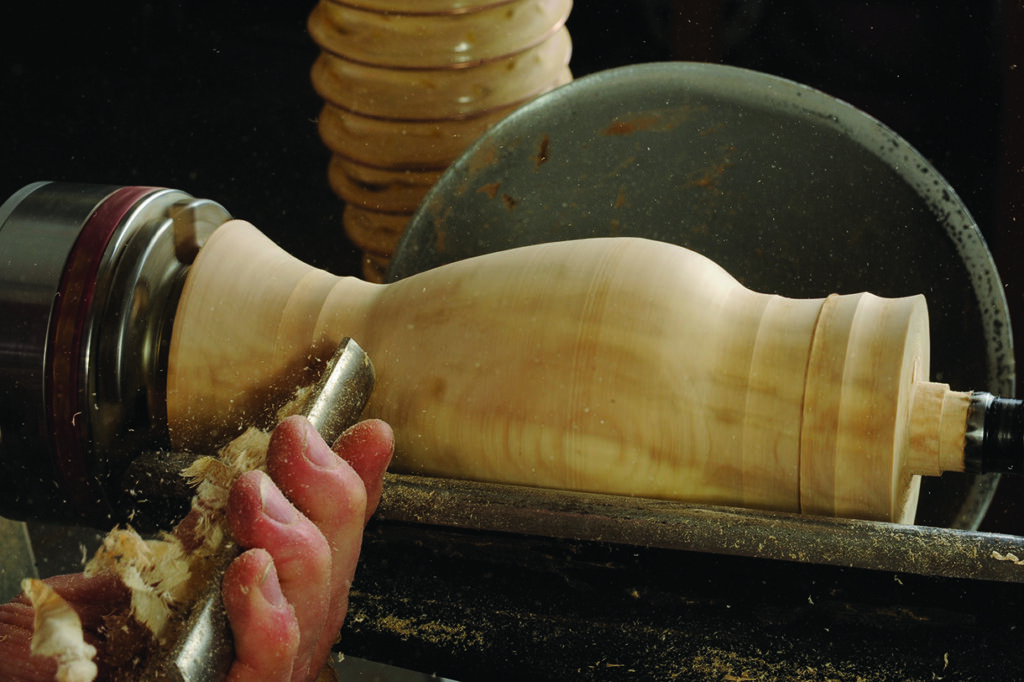
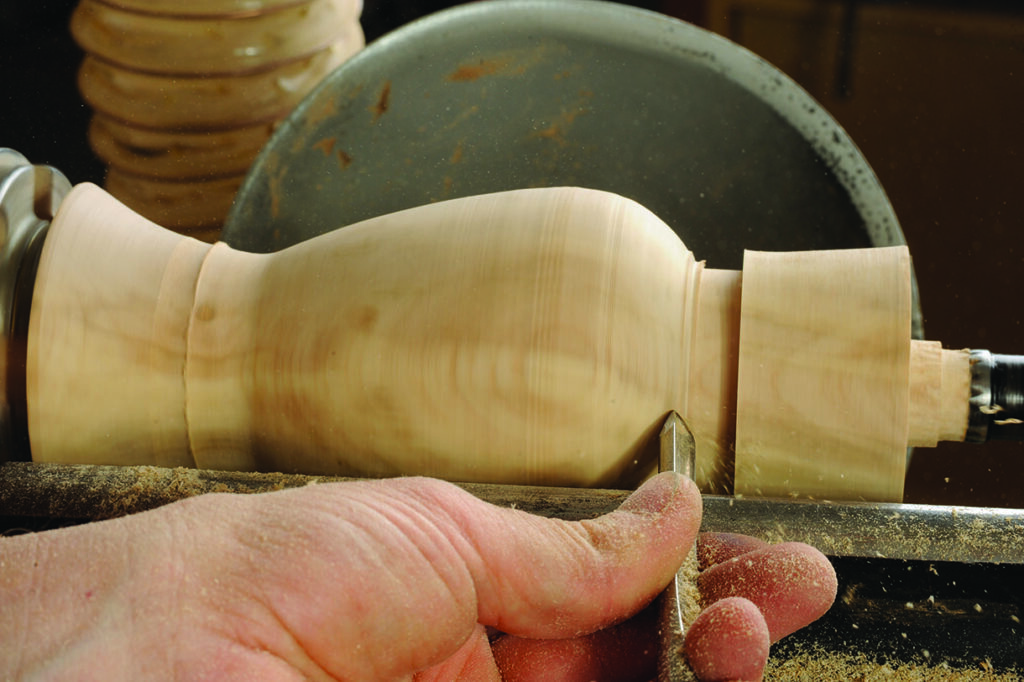
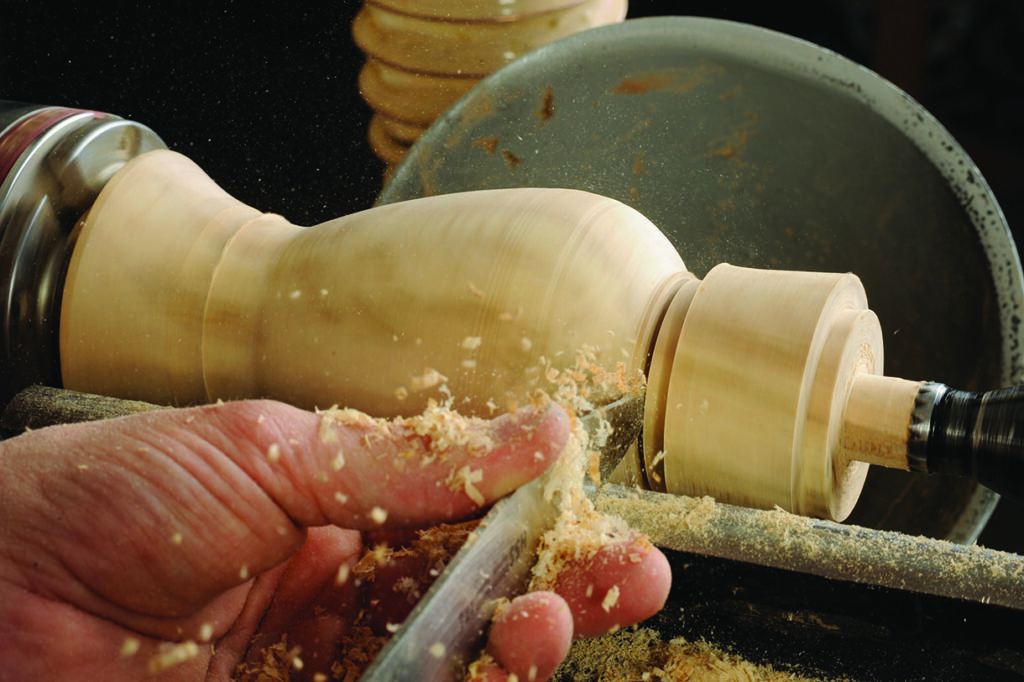
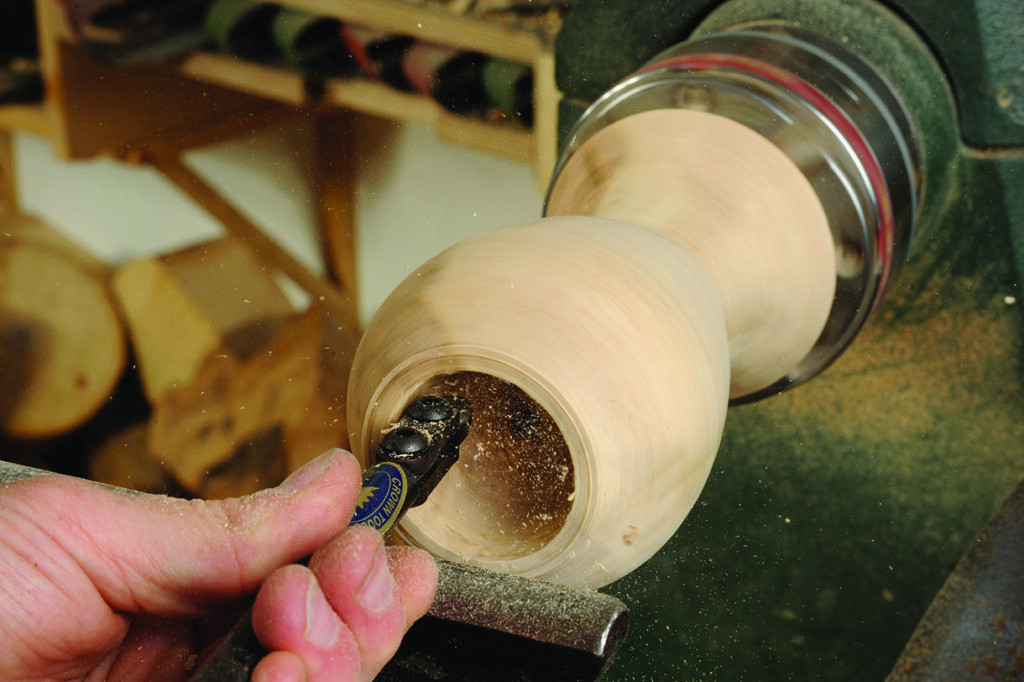
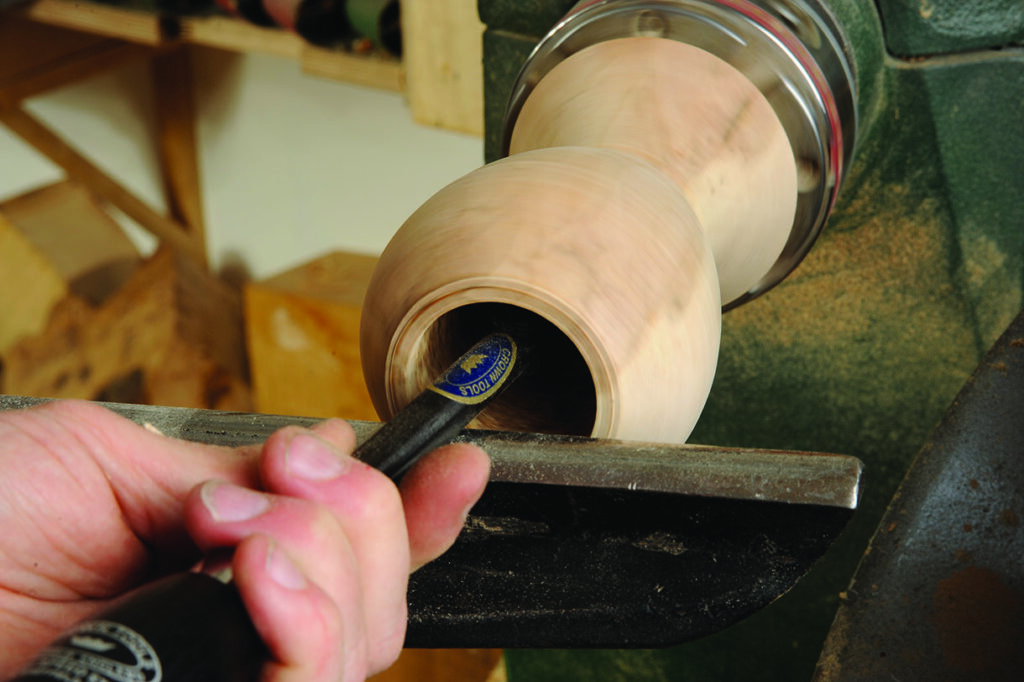
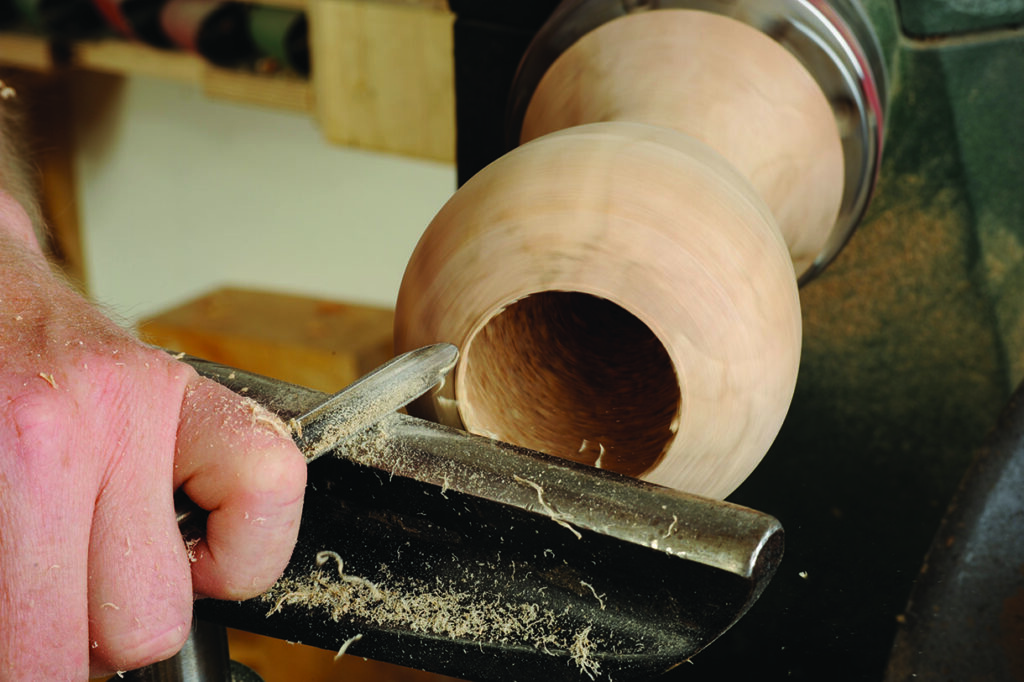
The shape of this piece has its roots in ancient Roman vases I saw in the British Museum, London. It is made in two parts so you do not need special tools to work through tiny holes, although you will need a tidy meeting point to disguise the join.

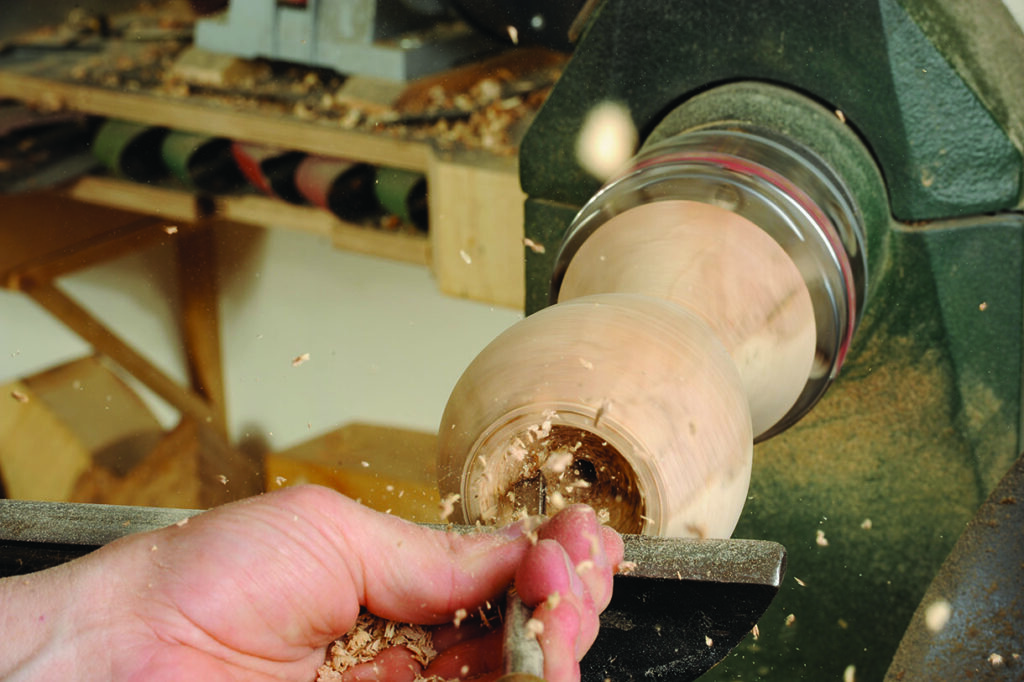
You now have all the spindle-turning skills needed for this. The techniques for the inside are the same as for the hollowing out of the scoop, and shaping the outside is no different to shaping the modern candlestick (see page 58). The join is just an extension of what you have done on a box. I have chosen sycamore (Acer pseudoplatanus spp.), but any close-grained timber that does not have a  pronounced wavy grain pattern will work. If you have a wild grain pattern it will be difficult to ensure continuity at the joint.

Plans and equipment

Detailed wooden vase dimension diagram.

Equipment and materials

• Spindle roughing gouge
• Spindle gouge
• Beading and parting tool
• Thin parting tool
• Scraper with rounded or French-curve cutting edge
• Chuck
• Forceps
• Revolving centre
• Drive spur
• Duct tape
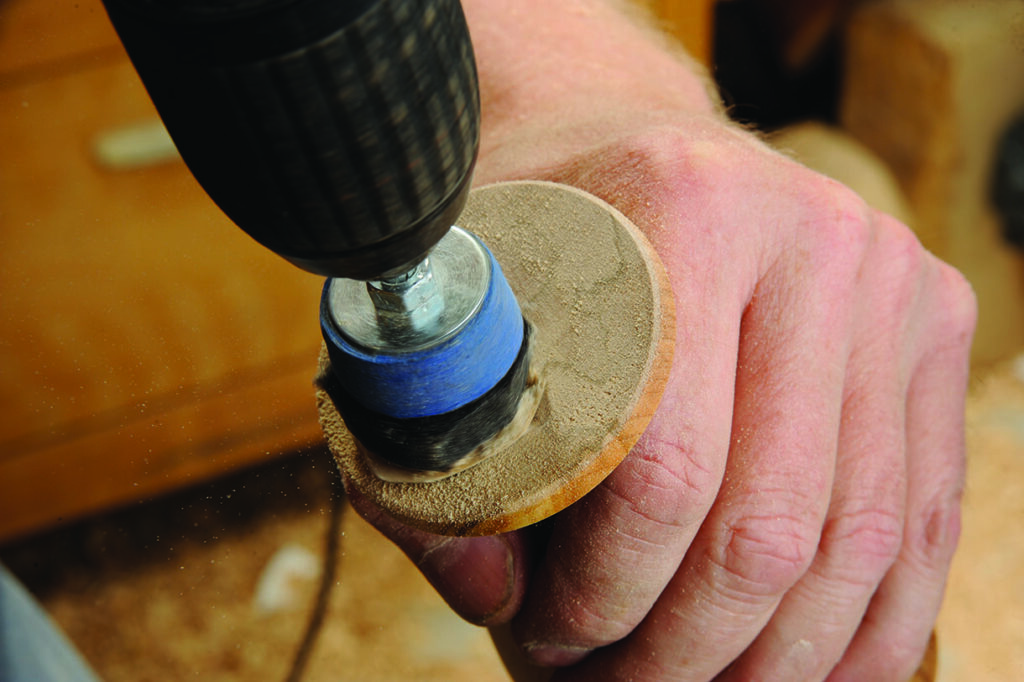
• Abrasives down to 400 grit
• Finish of your choice
• Personal protective equipment (PPE): faceshield, dust mask and extraction

Making the vase

Woodturner shaping a wooden vase on a lathe
1. Mount the wood between the centres, clean up one end and cut a spigot on it and then mount that end in your chuck.  Use the spindle roughing gouge to create a cylinder and to block in all the major areas. On my piece, the end nearest the tailstock had a split in it, but thankfully the wood was overlong so it could be removed without causing problems
Woodturning process on lathe with chisel tool.
2. Don’t make the lower part too thin or you will not have enough strength to hollow out the vase. Use a beading and parting tool to create the spigot on what will be the top rim section, which will fit into the lower part of the vase. Refine the body shape near what will be the opening with a spindle gouge
Woodturning process, hand carving a wooden vase.
3. Using a beading and parting tool, cut another tenon at the top so that it fits the jaws on the tailstock end. With a thin parting tool remove the top from the bottom, leaving the main part of the spigot on the top section and a small indicator section of the spigot just cut on the body part of the vase so you will know roughly the opening hole size in the main body
Woodturning on a lathe, creating wooden object.
4. Using either a drill or the spindle gouge, remove the bulk of the waste on the inside
Woodturning tool shaping wooden bowl on lathe.
5. The overhang of the spindle gouge may cause some vibration, so use either a thicker gouge or your scraping tool to refine the inner hollow further. Remember to work from the top to the bottom in sections so that you achieve the required wall thickness at the top first, before you finish off the bottom. Cut with the grain at all times when a smooth surface is required
Woodturning lathe shaping wooden bowl
6. A round- or flat-shanked tipped tool is ideally suited for this task as it gives a bit more stability than a round bar tool. Given the gentle curve of the shape, an ordinary style of scraper will go everywhere you need on the internal hollow of this project. Don’t cut to the final wall thickness though. Go slightly oversize as you will skim and refine the outer profile later
Woodturning on lathe with chisel tool.
7. At the lower section you need to work from the centre out up to the widest part. Note that we have so far stayed clear of the spigot line you can see on the rim area. Leave plenty of room clear so you know you have a big enough spigot to get an accurate fit
Woodturning with lathe and chisel
8. Use a spindle gouge to refine this top curve. You can at this stage remove the spigot line indicator and create a very slight taper on the opening that is wider at the top than the bottom
Craftsman turning wood on a lathe in workshop.
9. Sand the inside if you like. I used a pair of forceps to hold the abrasive, making sure not to have fingers inside the finger holes so that they wouldn’t get caught should the forceps hit a catch. In fact, the hole in the rim section is so small no one can feel inside but I still think it is worth sanding everything to a fine grit grade
Hands shaping wooden object on a lathe.
10. You can see here there is plenty of spigot on the lid part to help get an accurate fit

Top tip

If you are looking for inspiration for shapes to make, take a look at the tried and tested shapes used in ancient or modern pottery, ceramics or glass. 


Hand carving wood on a lathe machine.
11. Now remove the base section and fit what will be the lid end in the chuck. It needs a small hole down the centre. The spindle gouge is ideal for creating this
Woodturning on lathe, carving a wooden cylinder.
12. Now create a smooth curve leading into the hole using the spindle gouge. It is the normal gouge hollowing technique, so you end up creating a radius on the inner edge of the spigot
Woodturning on a lathe in workshop.
13. Now measure the opening of the base section and then transfer that measurement to mark the top of the piece
Woodturning a wooden bowl on a lathe machine.
14. Using the beading and parting tool, reduce the overall spigot width but create a taper so that the front is narrower than the back. You need to match the one that is on  the main body
Woodturning lathe shaping a wooden vase.
15. Check regularly for fit, making sure the front end of the taper fits in the hole without any gaps
Woodturning: crafting a vase on a lathe machine.
16. You need to get the taper to fit into the hole with the same wall thickness as you have on the top of the vase form. Rough in the curve on the lid. Once you are happy with it, check the grain alignment of the lid to the main section, mark it if necessary, and apply glue around the hole opening. Bring up the tailstock to centre and hold the two pieces in place while the glue sets
Woodturning with lathe and chisel creating vase
17. Once set, use a spindle gouge to remove the waste. As you can see, there is an overhang at the moment, so gentle cuts are needed
Woodwork with lathe shaping wooden bowl
18. Refine the shape but don’t remove too much from the surface. Aim for a flowing curve
Wood being turned on a lathe machine
19. You can see how the tapered spigot nestles below the top surface
Woodturning vase creation on a lathe
20. Remove the piece from the lathe and check to see that the curves flow together
Craftsman turning wood on a lathe machine
21. Fit the base spigot in the chuck, then bring up the tailstock for support and remove the spigot off the vase top end. Be careful near the revolving centre as there is a hole right through the top
Woodturning in action on a lathe machine.
22. Now use either the drop-handle peeling cut shown in the natural-edge vase project or the standard pull hollowing cut to create an upsweep curve to the rim from the hole
Woodturning bowl on a lathe in workshop.
23. Remove the waste on the lower section with a combination of spindle roughing gouge followed by a spindle gouge as you go deeper
Woodturning a bowl on a lathe, close-up view.
24. Before the lower end becomes too weak to support anything done on the top end, use the corner of a parting tool to cut three evenly spaced grooves, one of which is directly on the join. This groove on the join line disguises the line if the lid and body fit is good
Woodturning with chisels on spinning lathe.
25. Now go back to the lower section. The bottom of the body form has a bead, which is the meeting point with the base but should link visually through the bead with the upper bodyline. A bead forming tool, a spindle gouge or parting tool will work in this space to cut the bead. I used a bead forming tool
Craftsman using lathe to shape wooden vase.
26. Once this bead is cut, shape the foot area that sweeps up to the bead. The foot size must be enough to provide stability, but not look too big, thus making the piece look heavy
Craftsperson polishing wooden vase on lathe machine.
27. Now sand the vase and apply your finish. I chose oil again. Once this has been done, part the piece off from the waste wood
Sanding wood with handheld electric tool.
28. Remove the little stub left from parting off and sand the bottom of the foot clean before oiling it

Leave a Reply

Your email address will not be published. Required fields are marked *