John A. Nelson uses an easy trick to create a perfect ‘paint’ design every time on his
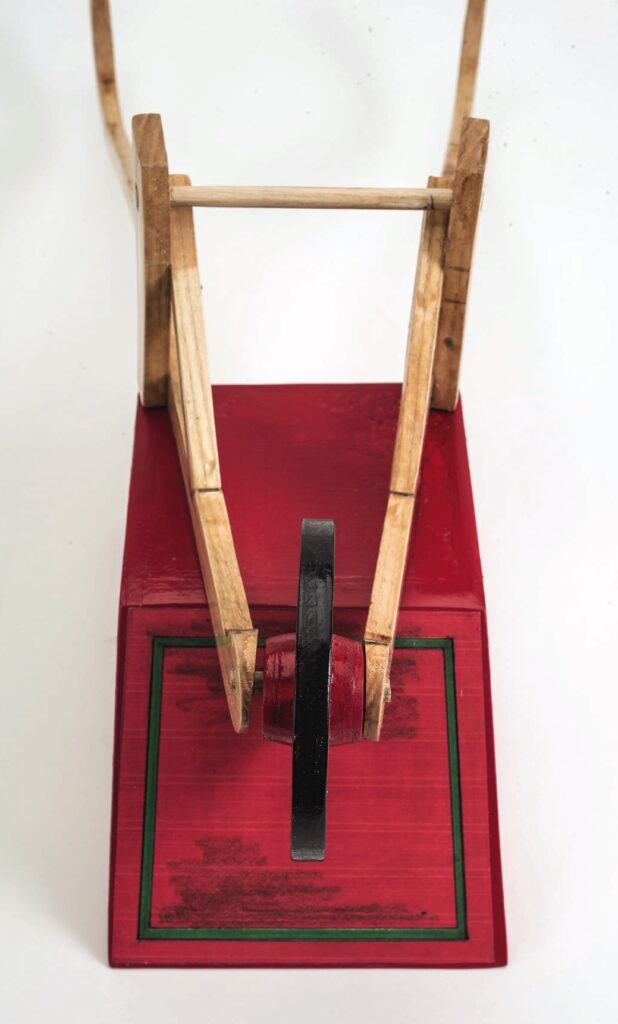
floral wheelbarrow
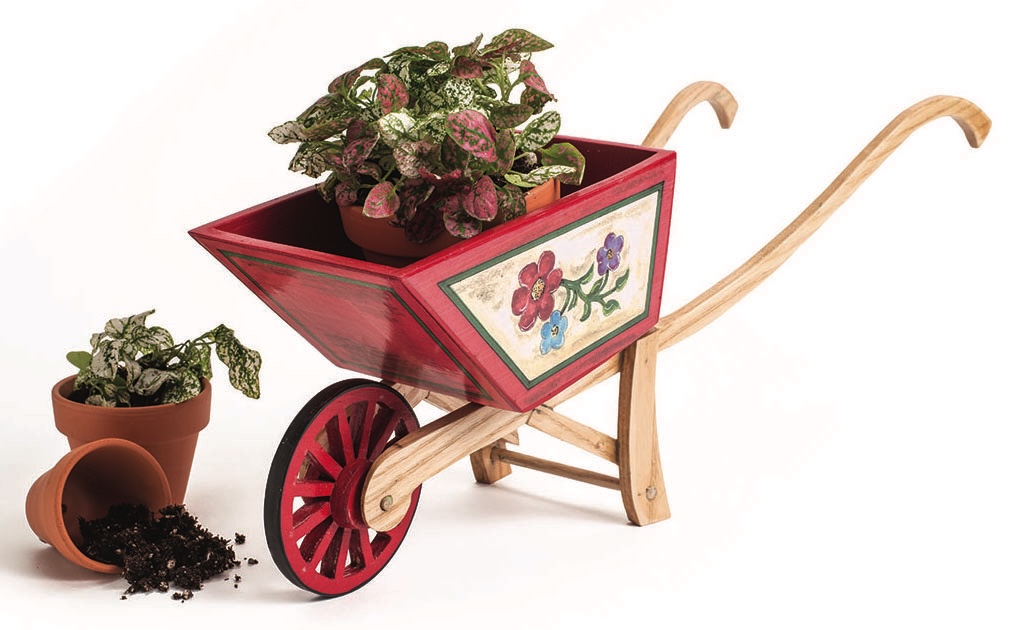
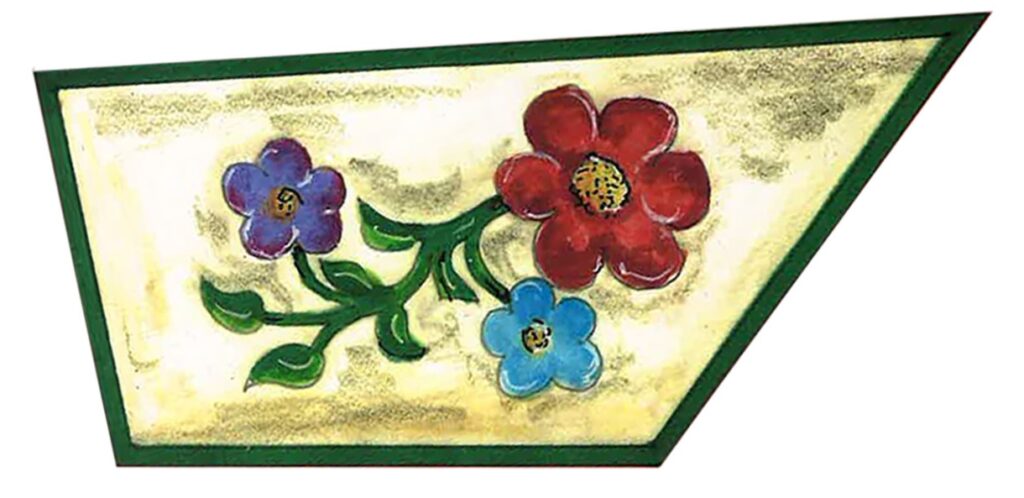
Bring a bit of the outdoors in with this charming wheelbarrow. Use it as a planter, centerpiece, or other display. You can paint or finish the wheelbarrow as you like or use my easy trick: use white glue or a clear-drying glue sealer like Mod Podge to attach a downloaded flower motif, creating the appearance of an expert paint job in minutes.
You will need
Materials:
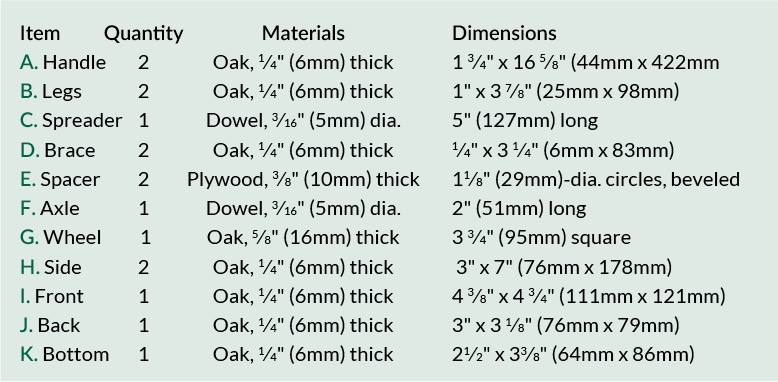
• Oak, 1/4″ (6mm) thick: 6″ x 33″ (152mm x 838mm)
• Oak, 5/8″ (16mm) thick: 3-3/4″ (95mm) square
• Dowel, 3/16″ (5mm) dia.: 7″ (178mm) long
• Plywood, 3/8″ (10mm) thick: 1-1/2″ x 2-1/2″ (38mm x 64mm)
• Wood glue
• Brads
• Acrylic paints: red, green, black
• Decoupage medium, such as Mod Podge (optional)
• Clear finish
Tools:
• Scroll saw blades: #3 reverse-tooth
• Hammer or brad nailer
• Clamps
• Drill with bits: 3/16″ (5mm) and assorted small
• Paintbrushes
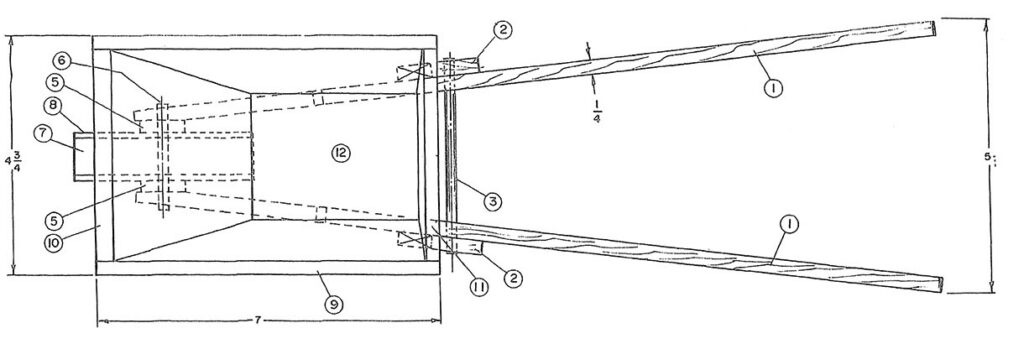
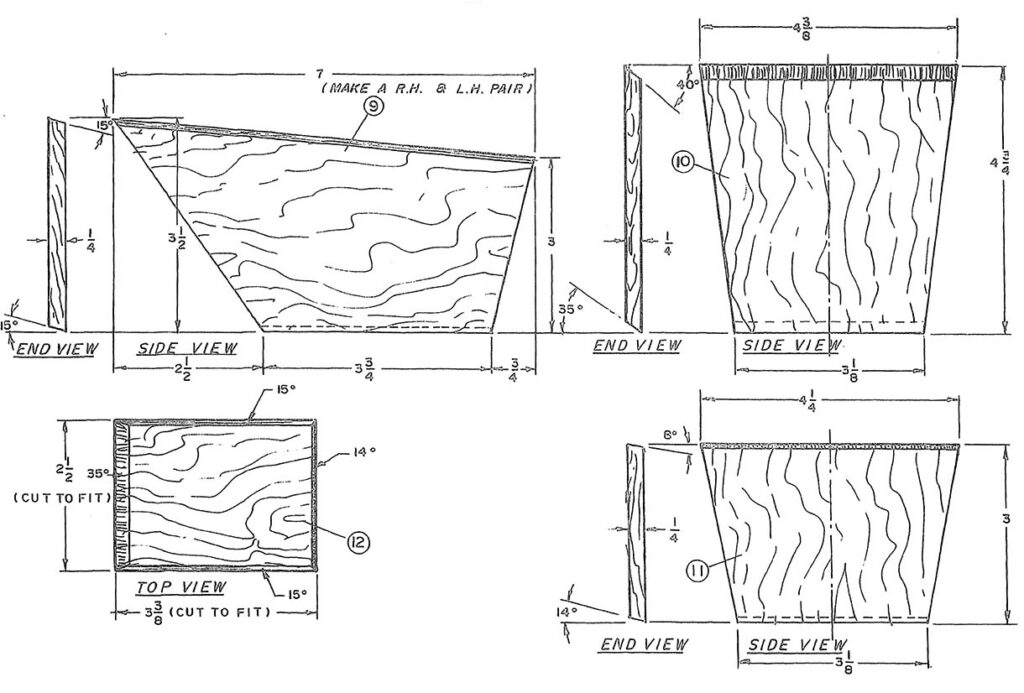
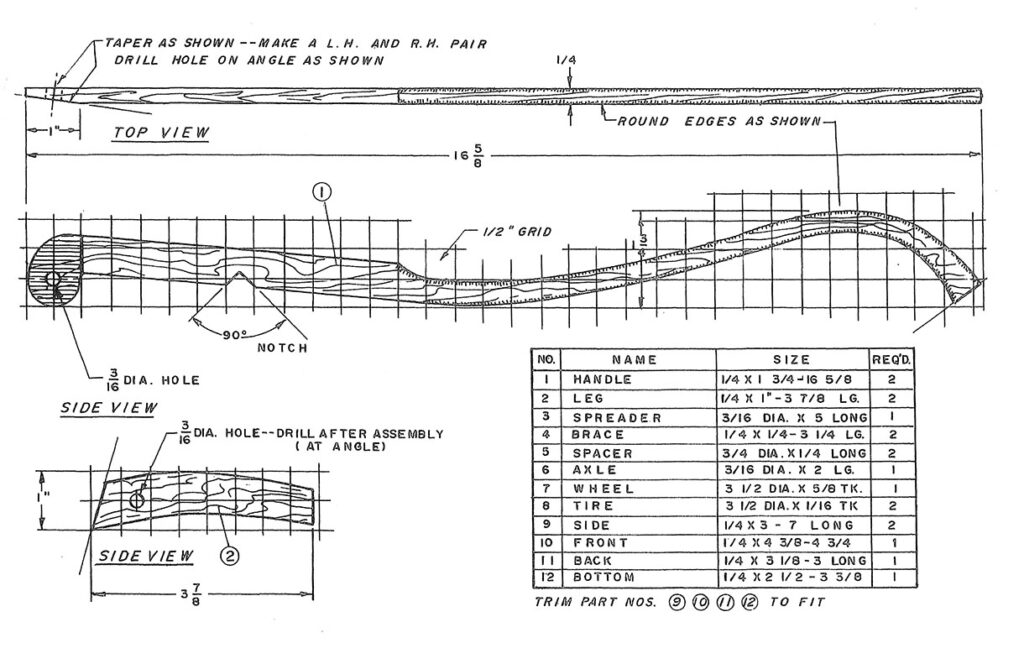
Cutting list
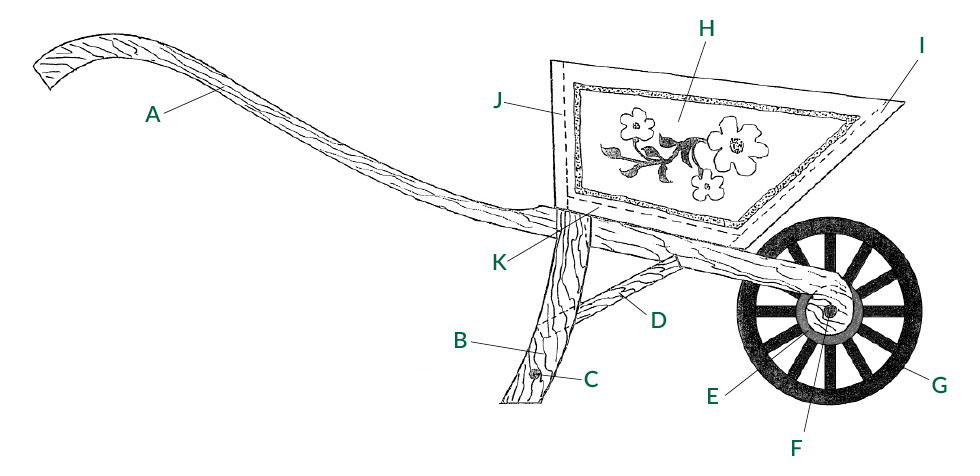
Making the wheelbarrow
Several parts require you to cut the pieces to the dimensions listed. Cut the wood for the other parts to the rough sizes, stack if desired, and attach the patterns. Cut the pieces, separate the stacks, and sand as needed.
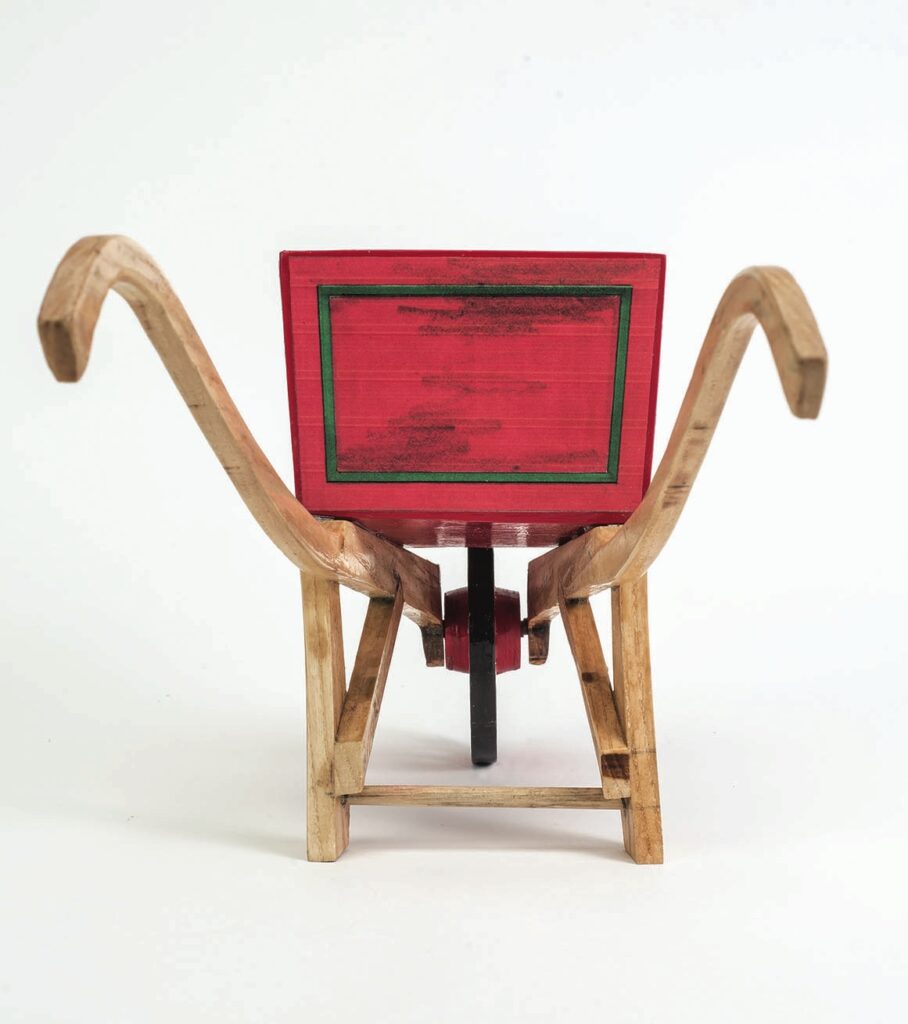
Use the top view of the handles to taper them properly. Sand a bevel into each spacer and then glue and clamp them to the wheel. Drill the axle holes. Glue the axle to one handle, position the wheel, and glue the axle to the other handle. Use glue and brads to assemble the wheelbarrow box and to attach it to the handles. Glue the legs and braces to the handles. Drill angled holes through the legs and attach the spreader. Paint the wheelbarrow box and wheel and let them dry. If desired, download and print the flower motifs and use Mod Podge or a similar glue product to attach them. Seal the project with clear finish.
on both sides of the wheel
This project was take fromScroll Saw Woodworking & Crafts issue No.63.