The Woodworkers Institute

We bring you the very best of woodworking!

“Make it with us”

Rustic beaded box

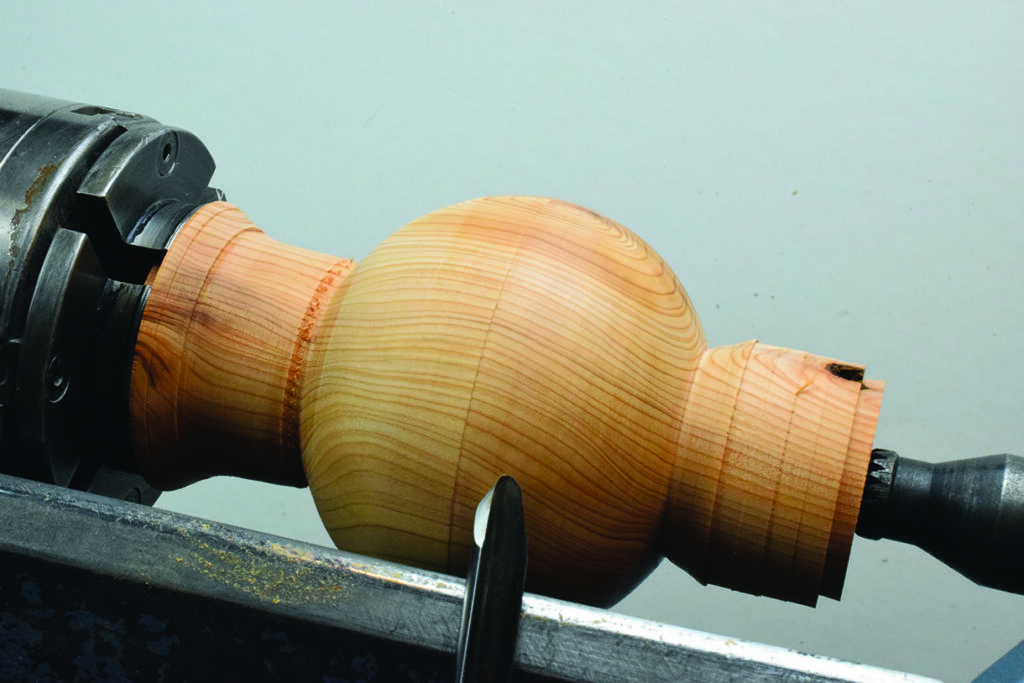
Pat Carroll uses a classic design feature that looks great and also disguises the join

Decorative wooden container with green beads

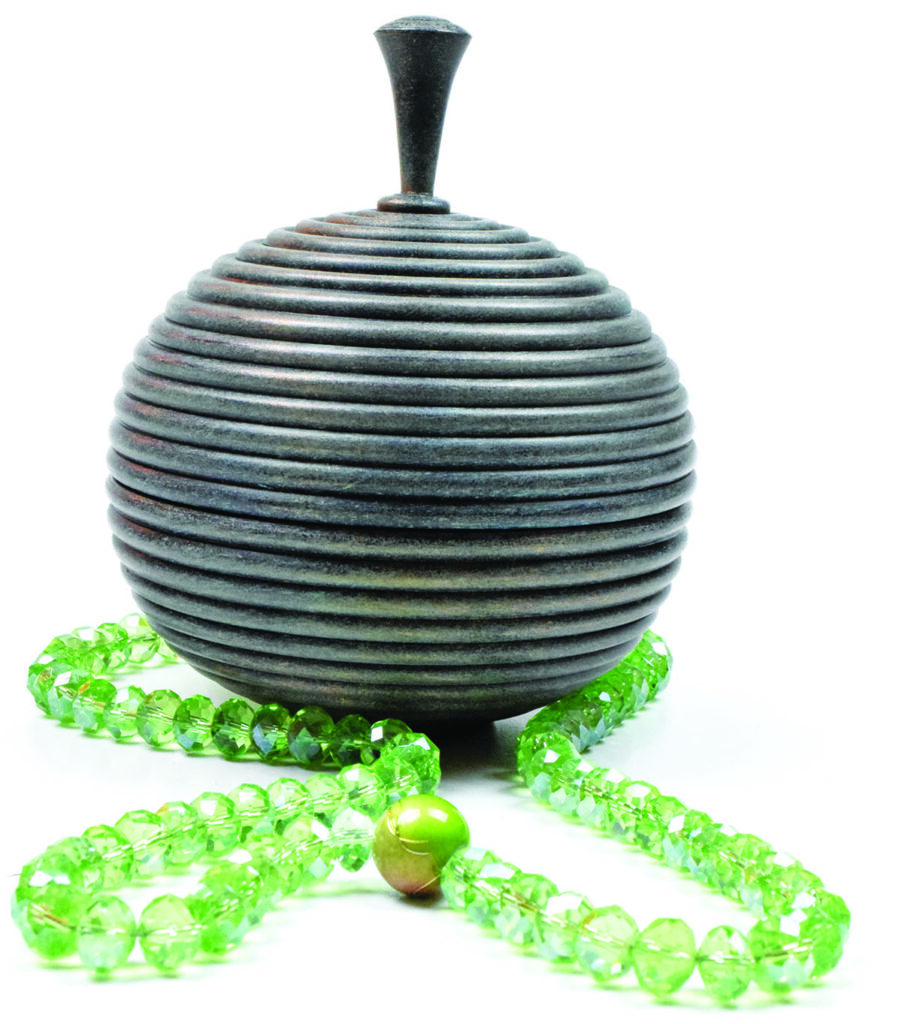
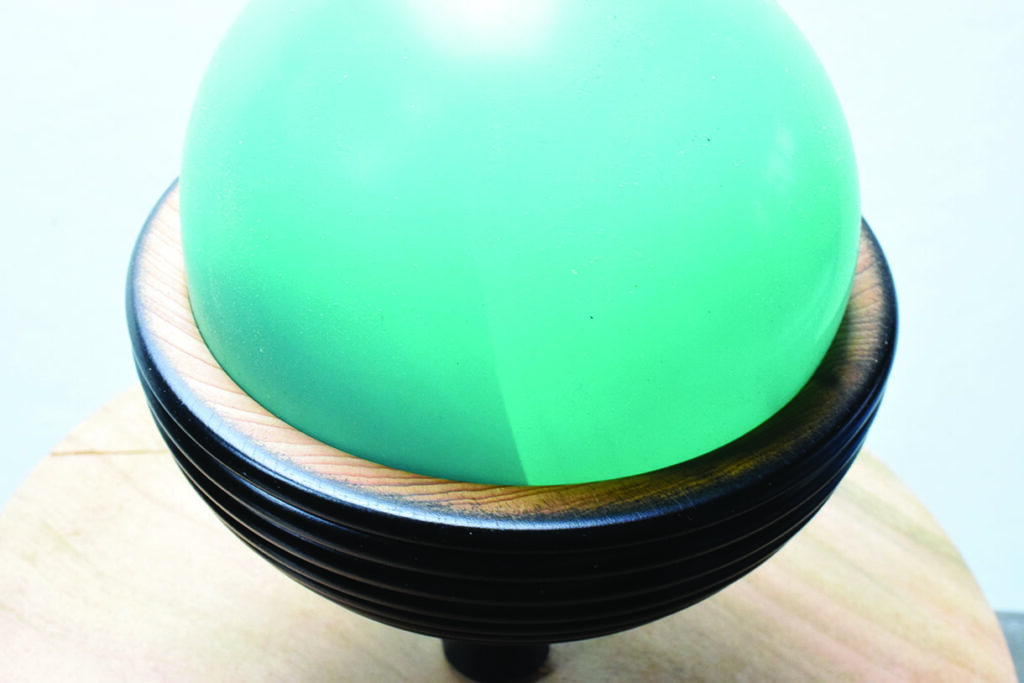
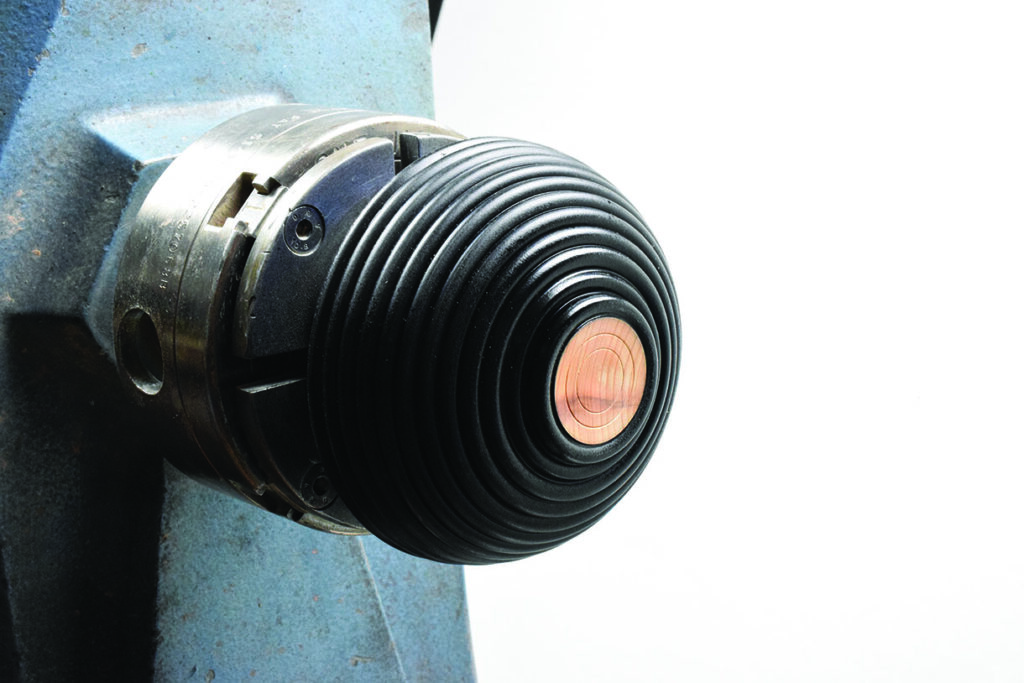
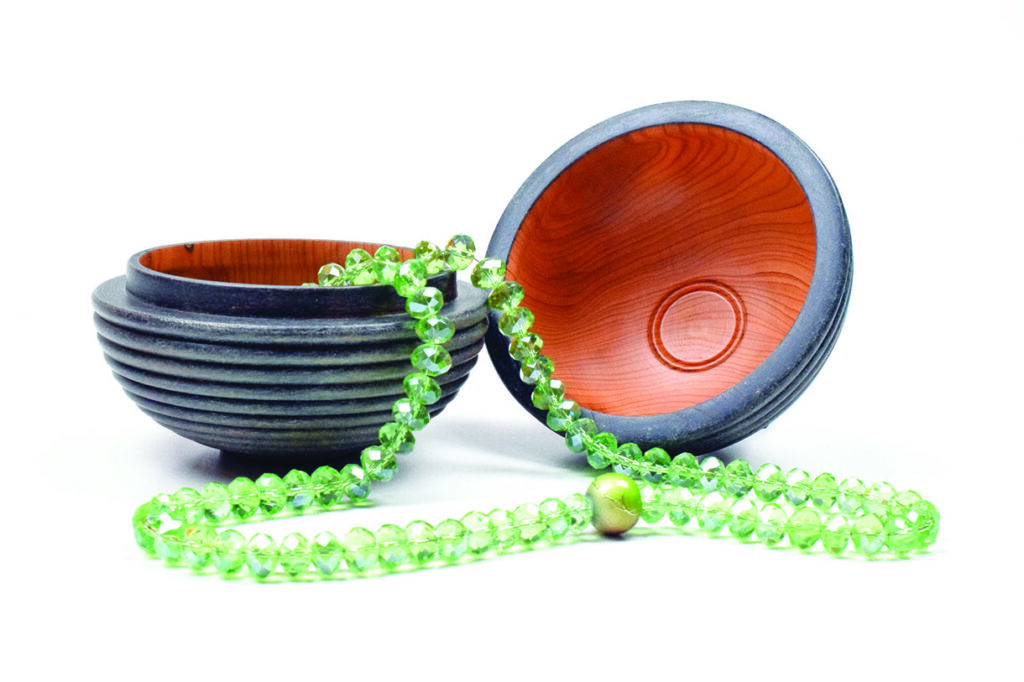
A rustic beaded box made from basic tools other than a homemade beading tool. The timber for this project is Irish yew (Taxus baccata). Further enhancements were added to the piece by using texture on the handle to accentuate the rustic feel of a well-used object. A design change was made to the piece with the addition of colour. Then Verdigris wax gave the aged look to the piece, finished off with a light brush of copper gild cream. A loose-fit lid suited this piece as it was designed as a trinket or jewellery box. The base needs to stay in place when the lid is opened so as not to risk losing its small contents. 

Plans and equipment

EQUIPMENT AND MATERIALS

Tools
• 25mm spindle roughing gouge
• 13mm spindle gouge 
• 6mm parting tool
• 4mm parting tool
• 6mm spindle gouge (beading tool)
• 25mm round nose scraper 
• Pointed detail tool
• Texturing tool 
• Callipers
• Dust extractor
• Danish oil
• Black spray paint
• Verdigris wax
• Chestnut gilding cream
• Abrasives, from 120 grit to 400 grit

Materials
• Yew (Taxus baccata) 220mm x 100mm x 100mm
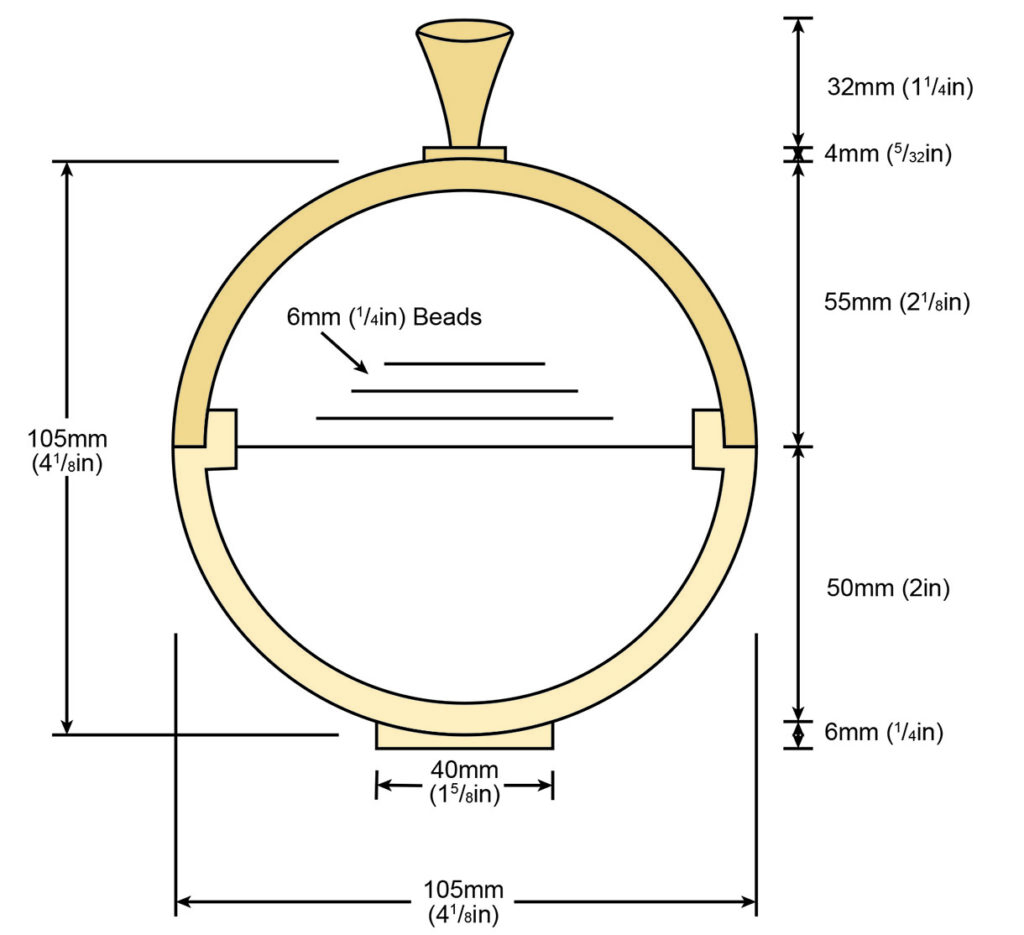
Plans

The measurements shown are guidelines. By all means follow the pattern or create the item to your ability, requirements and lathe capacity
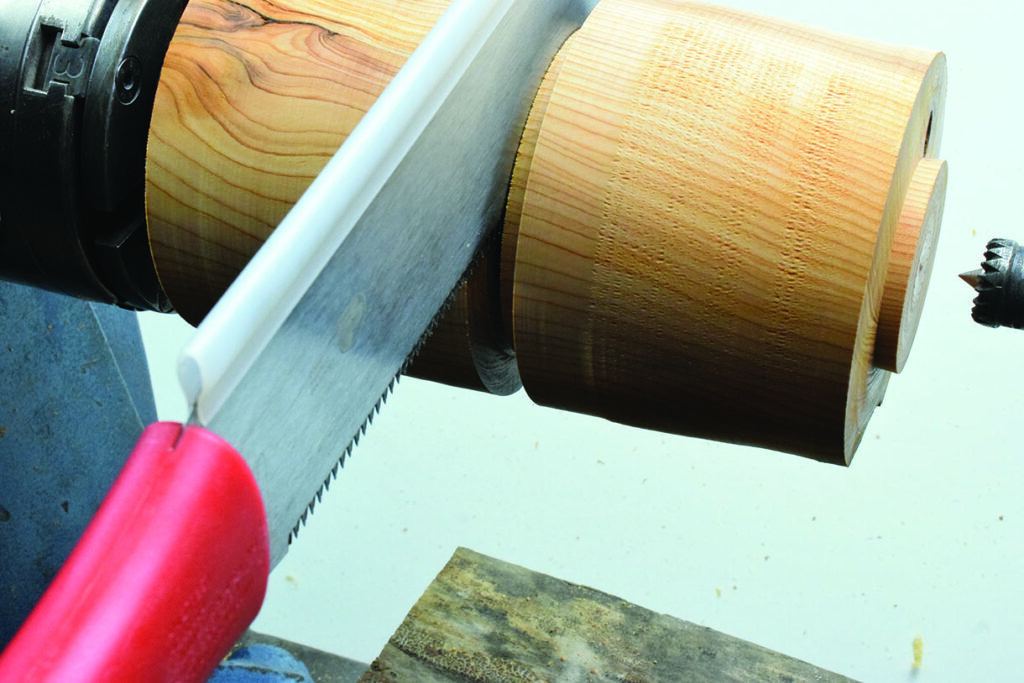
Diagram of a round wood section with dimensions.

Make the box

Woodturning on a lathe with gouge tool.
1. Use a piece of yew (Taxus baccata) with the grain running parallel to the lathe. The piece is mounted between centres and, using a spindle roughing gouge, brought to a cylinder. Remember to wear all safety equipment necessary. Instead of using yew, you could use any closegrained dense hardwood for this project. But whatever timber you use, make sure it is one that you can cut beads cleanly with minimal tearout
Wood lathe turning a wooden object.
2. A tenon is formed on each end of the piece to suit the jaws of your chuck. I need a 50mm tenon for my chuck, but of course adjust the size of the spigot to suit your chuck jaws. Once cut, insert the piece into the chuck and tighten securely. The piece in the chuck will be the top of the box
Pencil marking wood with ruler for measurement.
3. With the piece trued up, it is inspected for cracks or issues that may comprise safety during turning or the quality of the finished piece. Using a divider or ruler mark a centre line on the piece
Wood lathe peeling wood shavings during crafting
4. Using the 4mm parting tool, create a parting approximately 25mm into the centre of the piece. Then, using a 6mm parting tool, create a tenon to the recommended size on the plan. Again, using the 4mm parting tool proceed to part the piece off, leaving 1mm (witness mark), of the tenon on the top of the piece and a tenon of 6mm minimum on the bottom of the piece
Saw cutting wooden piece on lathe machine.
5. Complete the parting with a saw if you are not confident completing the parting off with a chisel when the lathe is rotating. Note the scrap wood on the lathe to protect the saw and lathe bed
Drilling into wooden log with a drill bit.
6. Drill a hole to the required depth into the piece. Use masking tape on the drill bit to give exact depth. This allows an easy starting point for the gouge
Woodturning with chisel on lathe
7. With the flute of the 13mm spindle gouge at 45° or the flute facing 10 o’clock, gently pull from the centre out, allowing the tip of the tool to cut. Although there is plenty of waste wood light cuts are best, helping to avoid torn grain
Woodturning tool carving wooden cylinder on lathe
8. Proceed all the way out with the cut stopping 1mm away from the witness mark left by the parting tool. Use the parting tool if preferred to clean the recess, and keep the walls parallel
Wood lathe turning cylindrical piece in machine shop.
9. Offer up the bottom of the piece to check the fit. Proceed with very light cuts until the two pieces fit comfortably together. Align the grain and bring up the tailstock for support
Wood lathe with calipers measuring wooden cylinder
10. If an exact sphere is the desired shape, check the diameter of the piece with callipers, then transfer the measurement to the piece ensuring the joining is in the centre. Cardboard templates or sphere jigs can be used. For this project, freehand was applied
Woodturning: cylindrical wood piece on lathe machine.
11. Remove as much waste wood as possible with the parting tool, working from the outside inwards. Light cuts to help minimise the risk of damaging the piece. Working to the line on both sides

Health and safety

Always ensure all health and safety issues are addressed regarding tools and equipment. Good dust prevention measures should always be adhered to in order to protect your health. A clean workshop helps make it safer.

Think twice, cut once.


Woodturning with chisel on lathe
12. Using a 13mm spindle gouge shape the piece, working from the highest point towards the centre with each cut. Working from the outside towards the middle, forming the piece, continuously check the shape
Woodturning on lathe with chisel tool.
13. Light cuts rolling the tool as if forming a bead. Refine the piece to the required shape, remembering not to cut into the joint area as this will cause problems with the spigot and tenon
Close-up of a sharp metal blade.
Close-up of a half-round bit drill

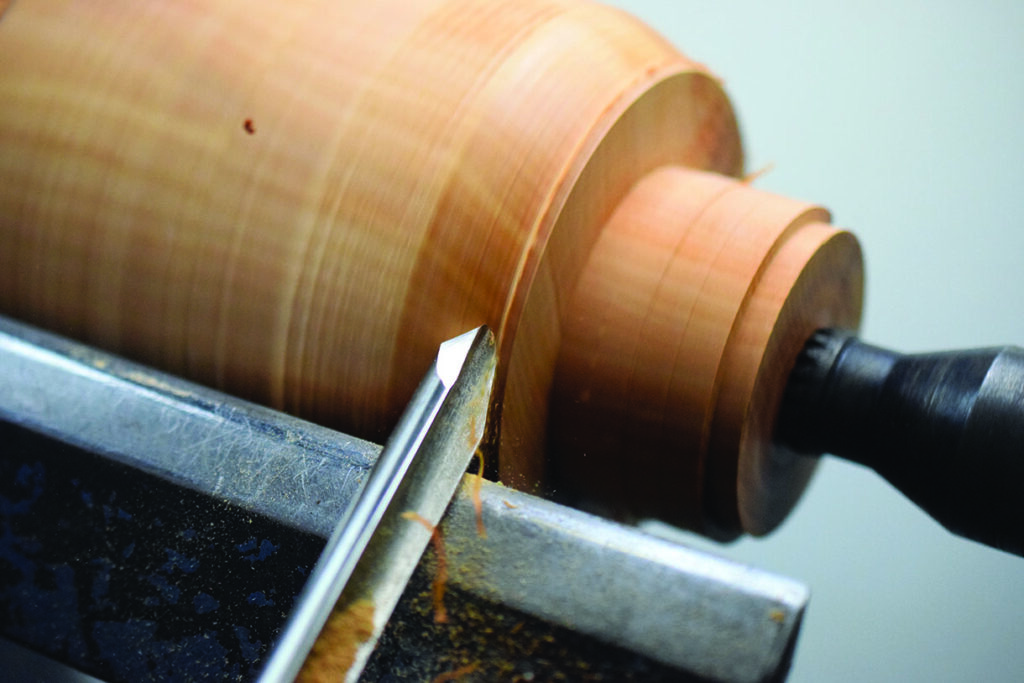
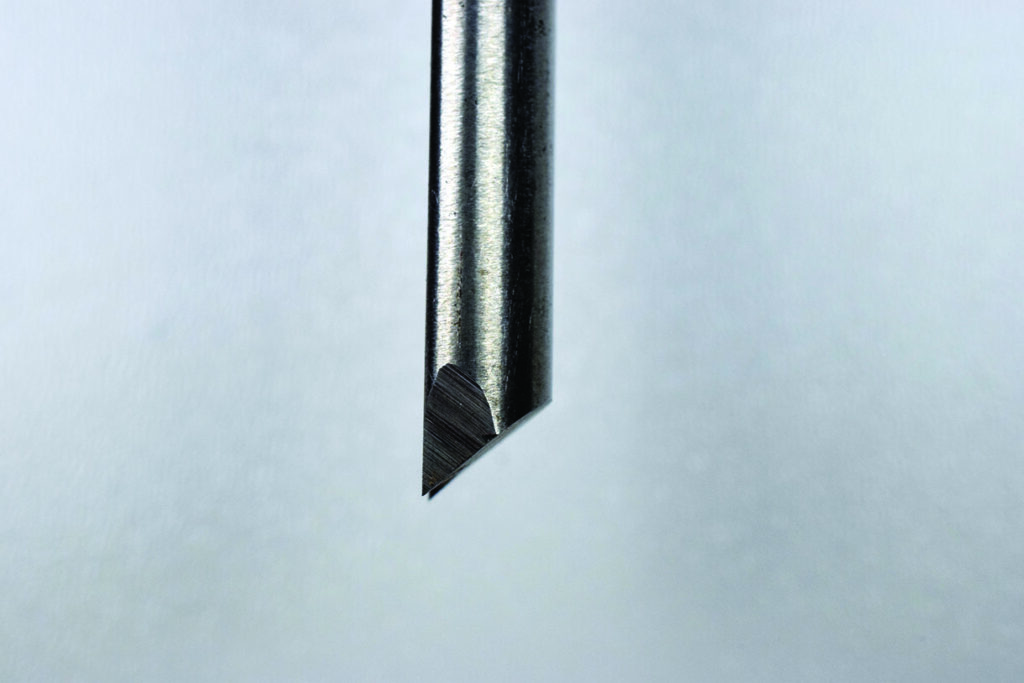
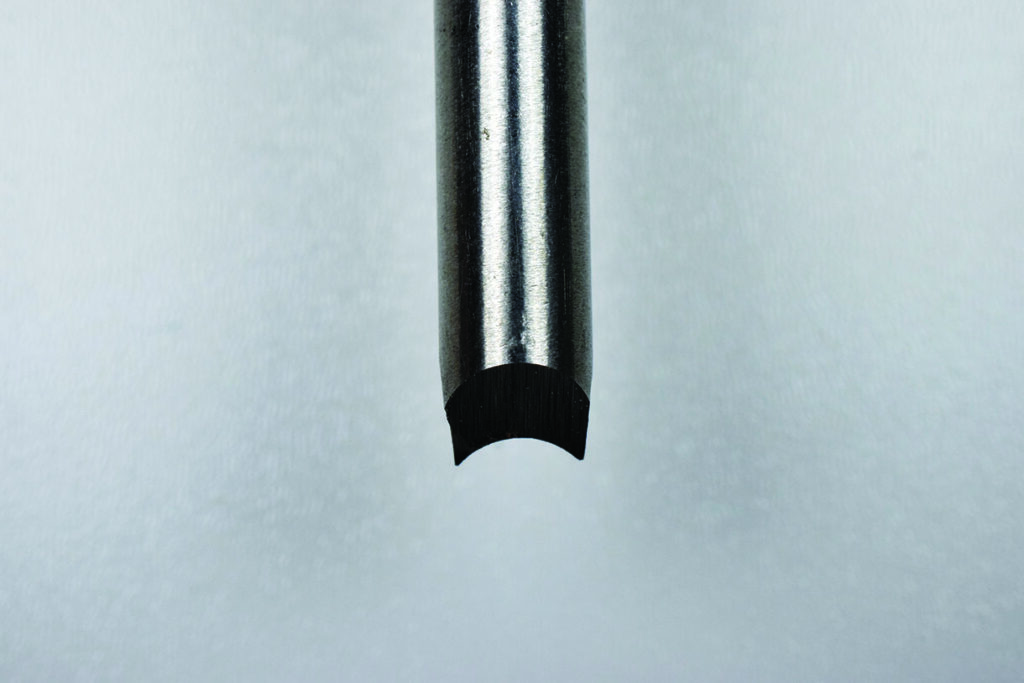
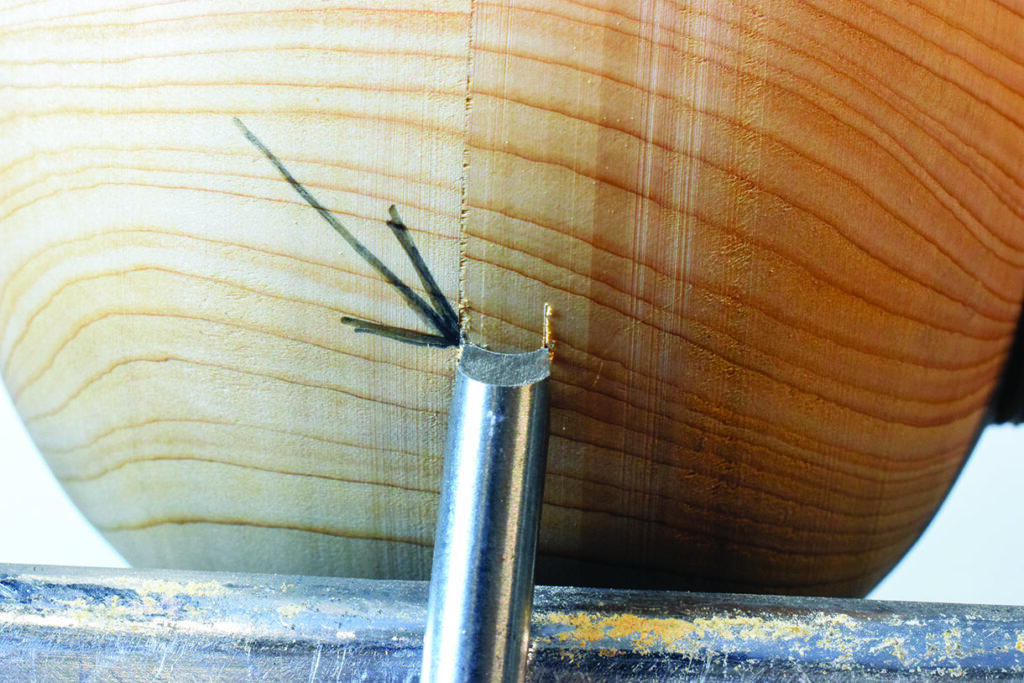
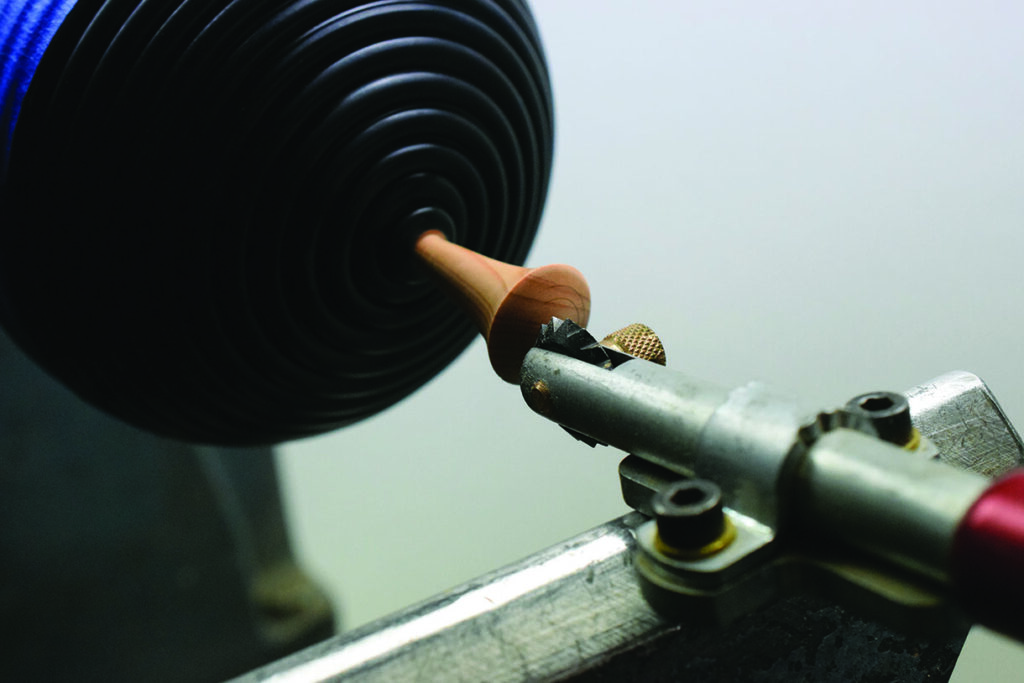
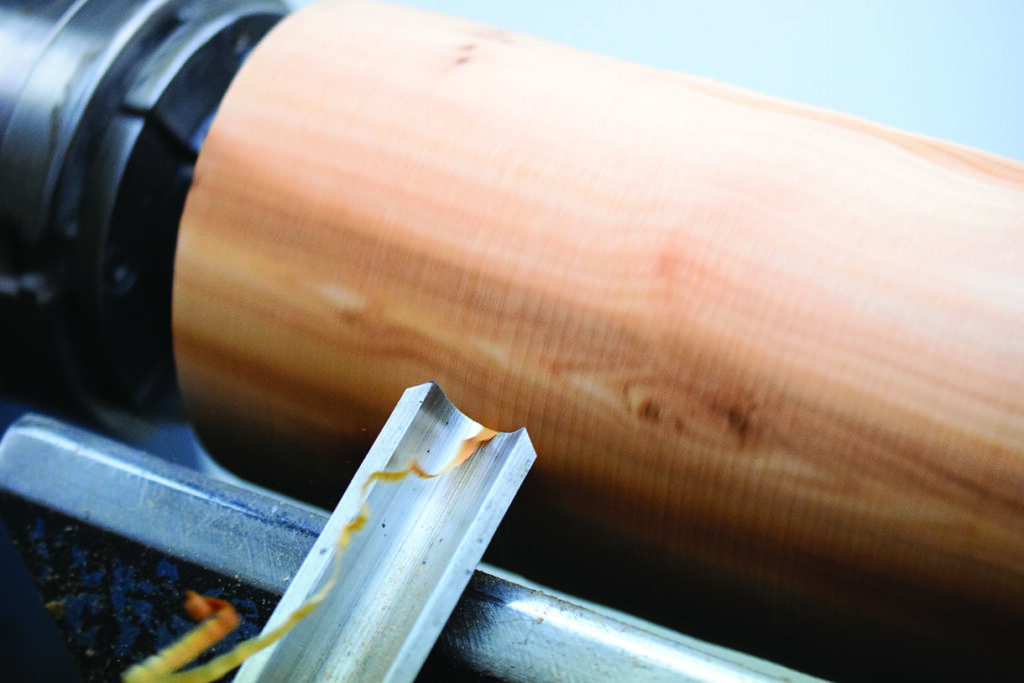
14. The tip of a 6mm spindle gouge has been ground to approximately 40°. The sides have also been ground to minimise burnishing the neighbouring beads with friction. Practice on a scrap piece of wood is advised 


Top tip

The angle used on the homemade beading tool is personal choice. Grinding the tool in stages helps to not heat the tool, and lose its temper. Many manufacturers make dedicated beading tools in various sizes.


Woodturning with bowl gouge tool close-up.
15. Use as fast a speed as is safe to help give a clean cut. With the left point of the tool exactly in the joint the cutting tip is exactly on centre, by raising the handle lightly engaging the cut. The tool is very minimally rocked from side to side allowing the wings to shear cut each side as it is rocked. Once the centre of the bead is formed, withdraw the tool or tear out can occur
Woodturning a wooden bowl on a lathe.
16. The next bead to the left of the joint is formed next, ensuring the point of the tool is again in the joint. Check for a clean joint on the piece. Proceed with marking out at least three beads at a time, using the beading tool. This also gives a reference point for the tool to engage the cut. Proceed as far around the piece as possible on both sides 
Close-up of lathe-turned wooden spindle
17. At this point the piece is sanded, starting with 150 grit and finishing with 400 grit. Note extractor pipe in picture. A dust mask is also recommended. There is never overkill in safety precautions
Close-up of carved wooden bowl on lathe.
18. The top is now hollowed with a 13mm spindle gouge, using the same technique as in step six. The inside is refined using a 25mm round nose scraper and a bead added for design, then sanded through the grits and finished inside with Danish oil
Woodturning bowl on lathe with intricate design.
19. The top is removed from the chuck and the bottom fitted and secured in the chuck. The top is fitted and masking tape is added for further security. More waste wood is removed and the beads on the top completed. Always use the tailstock when possible for securing the piece
Woodturning tool carving a spinning wooden piece.
20. As the handle was finished and texture applied to the top, the decision to add colour was taken. With the piece sprayed black, several light coats are applied and allowed to dry. Use caution with dyes as they can bleed into the inside of the piece
Green glass sphere on wooden base.
21. Due to the afterthought of the colour addition, the inside of the rim had to match the outside. The inside was finished with Danish oil and, to protect it from over-spray, a balloon was inflated to fit tight to the surrounding edge
Close-up of a metal lathe chuck.
22. The top is removed and the rim is painted to match the outside of the piece. The base is then hollowed using the same procedure as in step six. The inside is sanded from 150 grit to 400 grit and Danish oil applied
Metal chuck holding a black ribbed object
23. A scrap piece of wood is used as a jam chuck to finish the base. Masking tape is again used as a further safety precaution. The beads are completed and the remaining natural wood is sprayed black
Close-up of black ribbed machinery component.
24. Verdigris wax is added for an aged, worn look. A light brush of copper gild cream adds to the rustic effect. When the paint dries, the base is cut back to the natural wood, again sanded through the grits and detail lines added for visual affect. Two more coats of oil are added to the interior. It is lightly denibbed with 320 grit between coats
Green beaded necklace in wooden box
25. Here’s the finished piece with a loose top lid

Leave a Reply

Your email address will not be published. Required fields are marked *