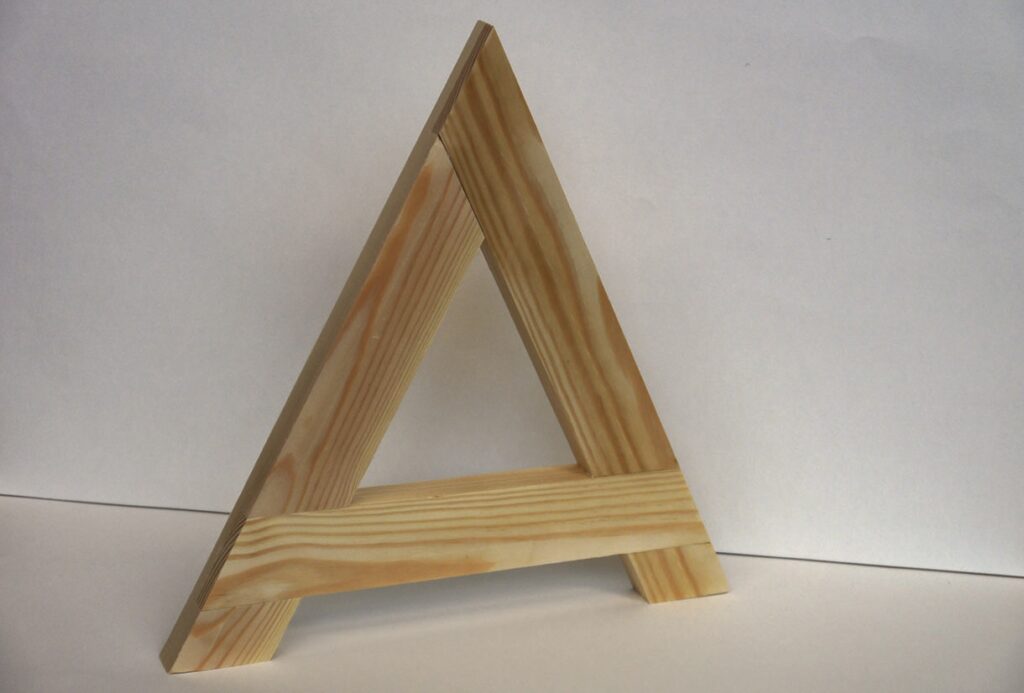
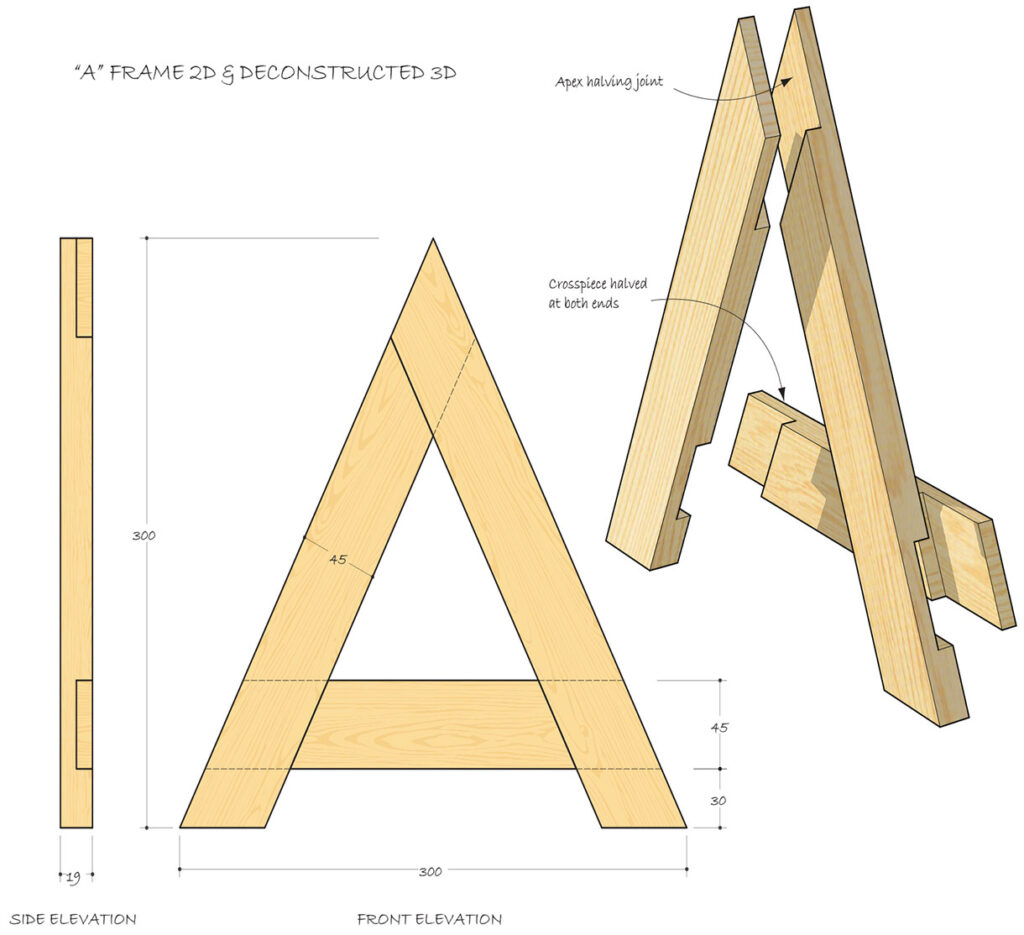
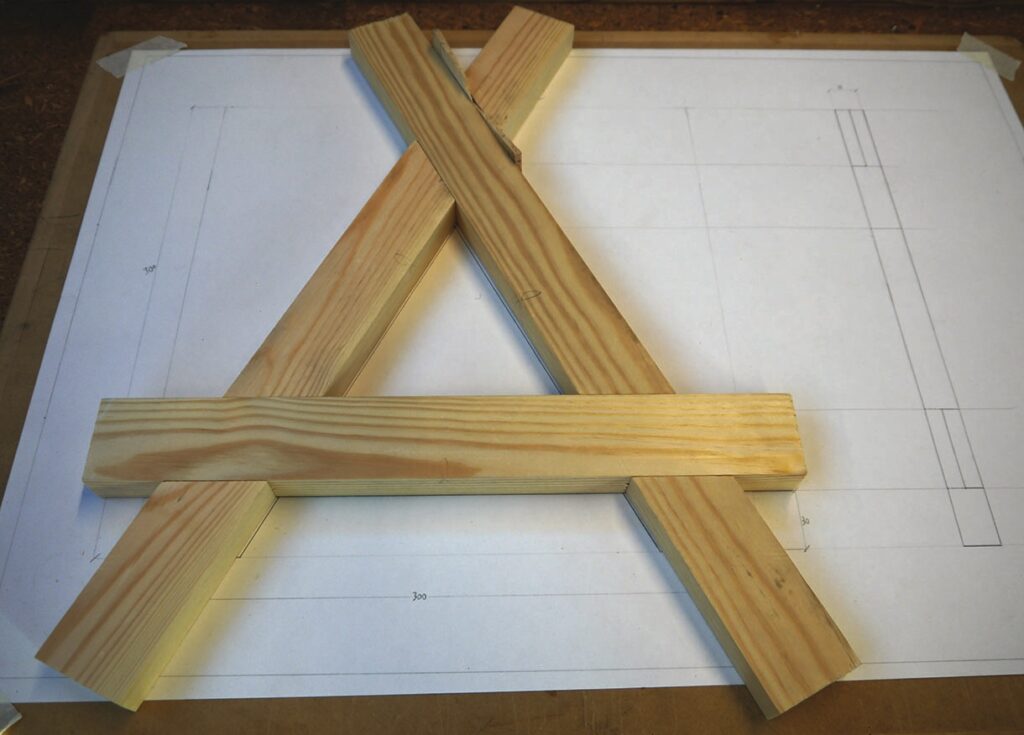
Philip Cooke demonstrates the use of a hand-drawn rod and hand tool skills to create a simple A-frame
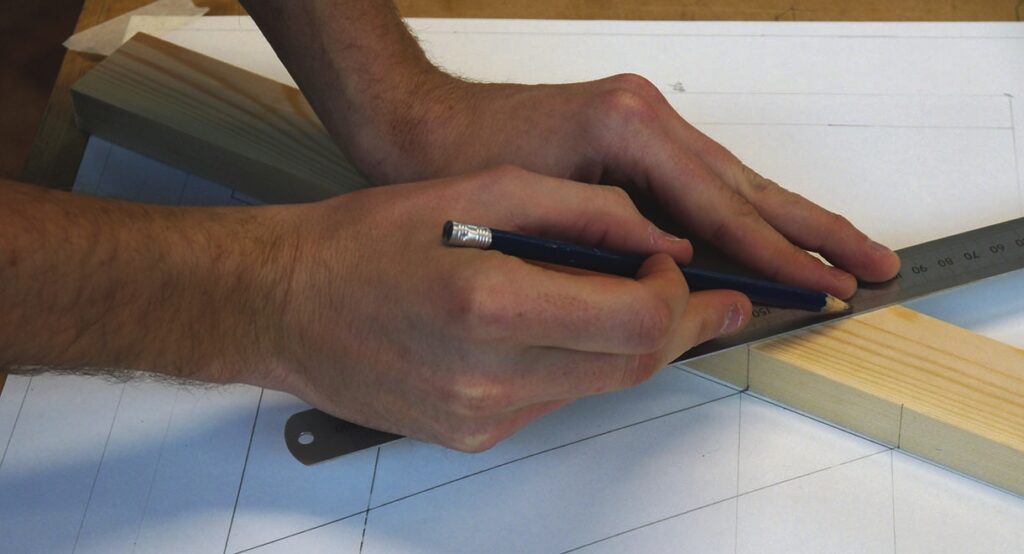
As a beginner to the world of woodworking, undertaking the Furniture Crafts course at Royal Leamington Spa College is a great way to learn a vast array of skills under the tuition of some fantastic craftsmen. The A-frame is an introductory project intended to practise the use of hand tools while learning to work from a full scale drawing called a rod – something that I was unfamiliar with up until a few months ago. It’s a process that removes the need to calculate angles or take measurements while you are making as you effectively produce components that match those shown on the drawing, thus eliminating some of the complexity of the process. However, as you’ll discover that doesn’t mean that mistakes are completely unavoidable. To begin with I suggest you either draw your rod onto a piece of flat sheet material such as 6mm MDF or tape a paper drawing onto a suitable board.
The team at the College offer various techniques for different aspects of woodworking and those demonstrated here may be a hybrid of techniques you’re familiar with. This is what I believe to be one of the best things about learning from a few different tutors: exposure to a variety of different methods allows you to develop a range of skills that work best for you.
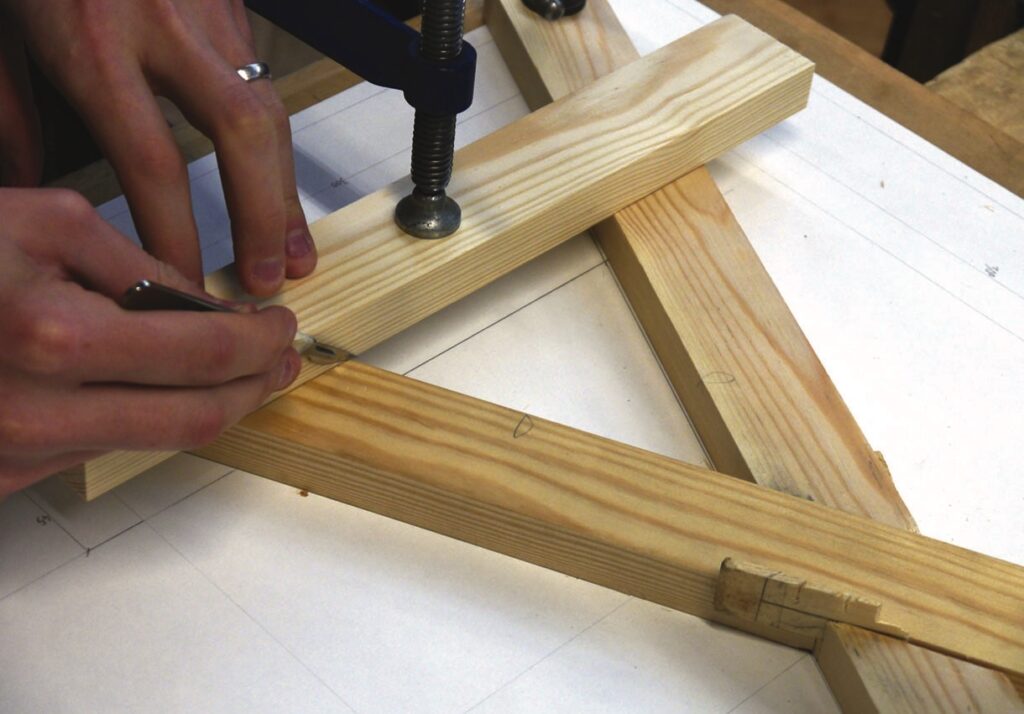
Marking the cross-halving joints
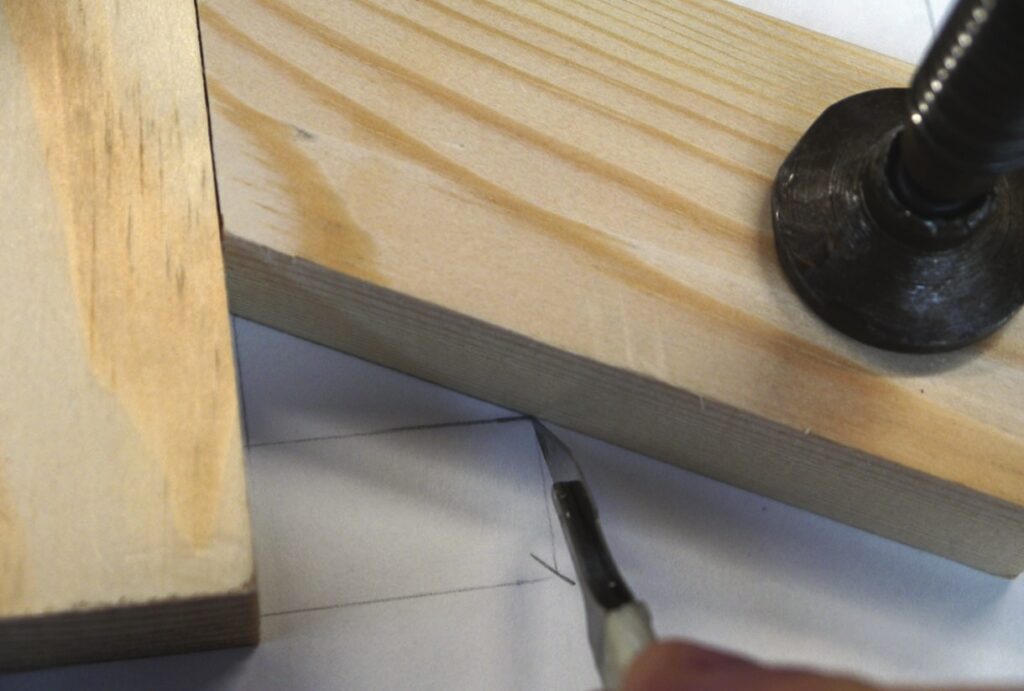
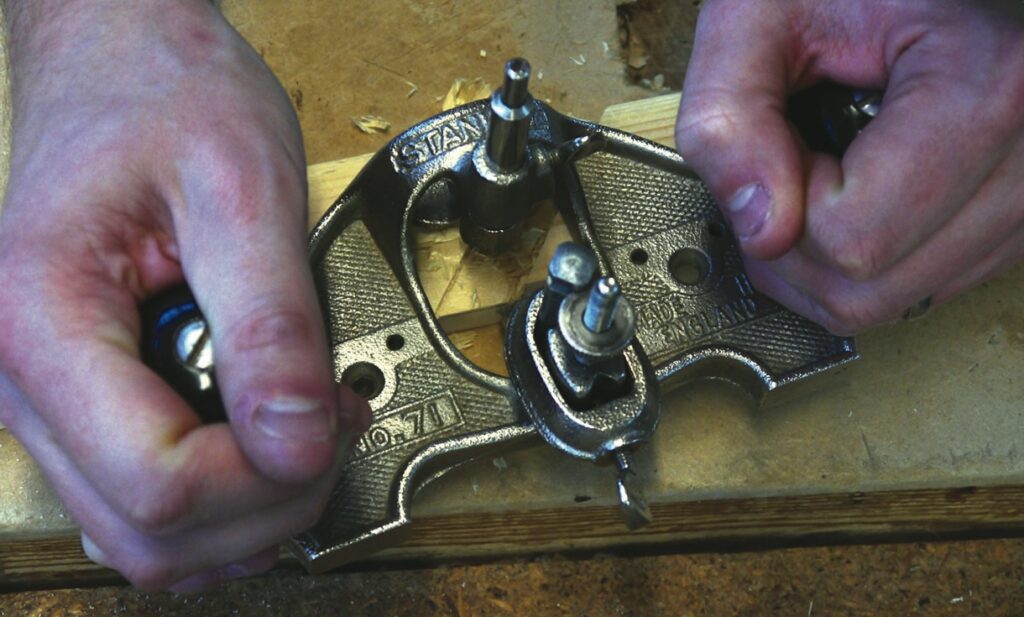
The frame consists of only three components and three cross-halving joints and all are marked on the timber using the rod as the guide. Beginning with the joint at the apex of the frame, small marks are made with a pencil on the edges of the timber by placing the components directly onto the rod. These marks are then extended, before running them around the reverse-side of the timber – to show where the joint will be cut. Using a marking gauge set to half the thickness of the timber, set out the depth of the joint on both edges of the first piece of the frame. Repeat this process with the other upright, only making marks on the oposite face of the timber to identify where the joint will be cut.
Drawing
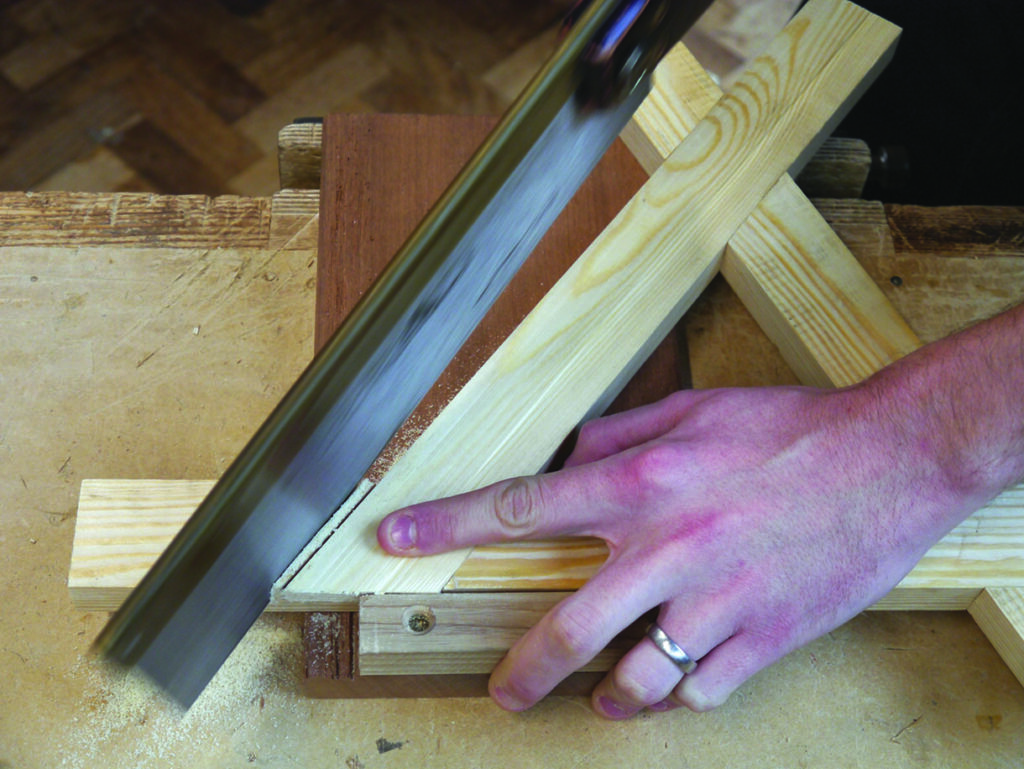
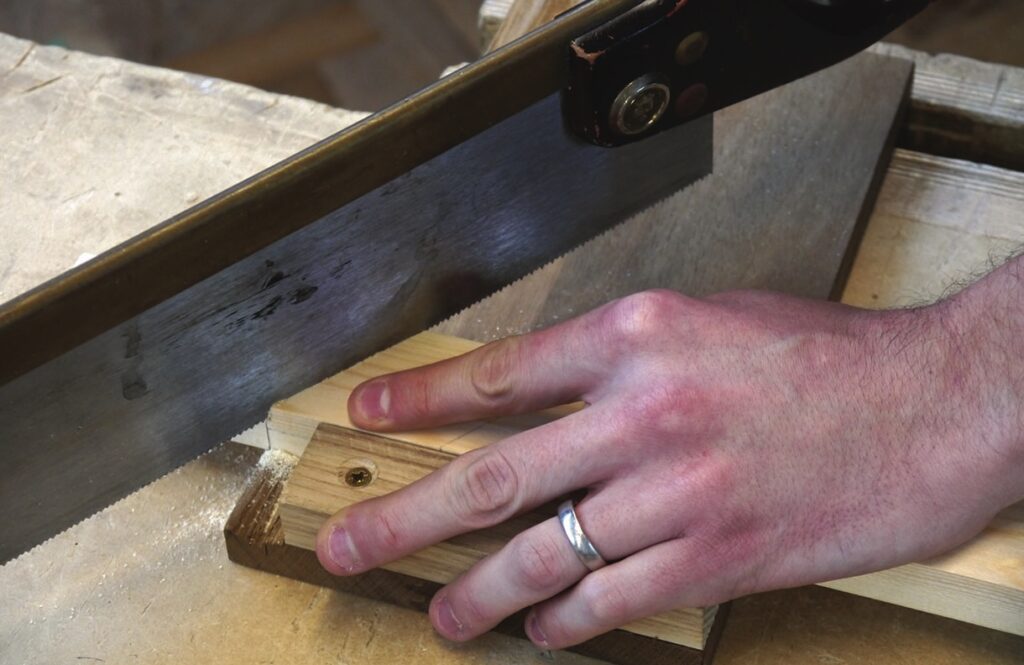
Cutting the joints
Depending on how close you cut to your marks with a saw you can ignore the latter part of this step, however, if, like me, you’re still developing your sawing skills here’s a technique that may work for you.
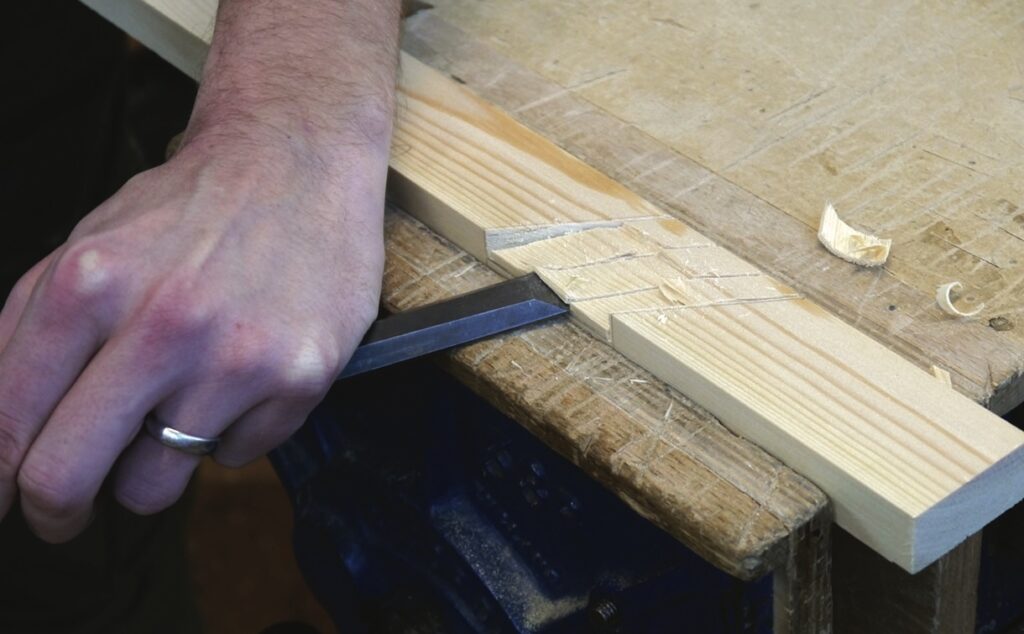
Cut a few millimetres in from your marks and make relief cuts that make chiselling out the waste easier later on. My preference is to use a ¾in bevel-edge chisel and mallet to remove the waste from the joint, leaving a little bit of material at the base. Once you have removed the waste, clamp a piece of scrap timber with a reliably straight edge in line with the mark of your joint in the vice. This creates a reference surface for you to work to when paring the shoulders back to your original marks. If you have a router plane, use it to tidy up the bottom of the joint, but if not you can use a chisel. Whichever method you choose, be careful to avoid rounding the inside edges of your joint and delicate points.

Checking the joint
Interlock the two uprights and place them against your rod to check if they are joined at the correct angle. If not, use the technique described earlier to make small adjustments.
At this stage don’t worry if your joint isn’t a tight fit, the angle is more important than the joint in this instance and the horns extending beyond the joints at the apex will be cut away once the frame is glued. You may however need to make allowances for a loose joint. You can do this by making small wedges to insert into the outer edges of the joint on both faces to push your timbers into the correct position while you continue with the frame.
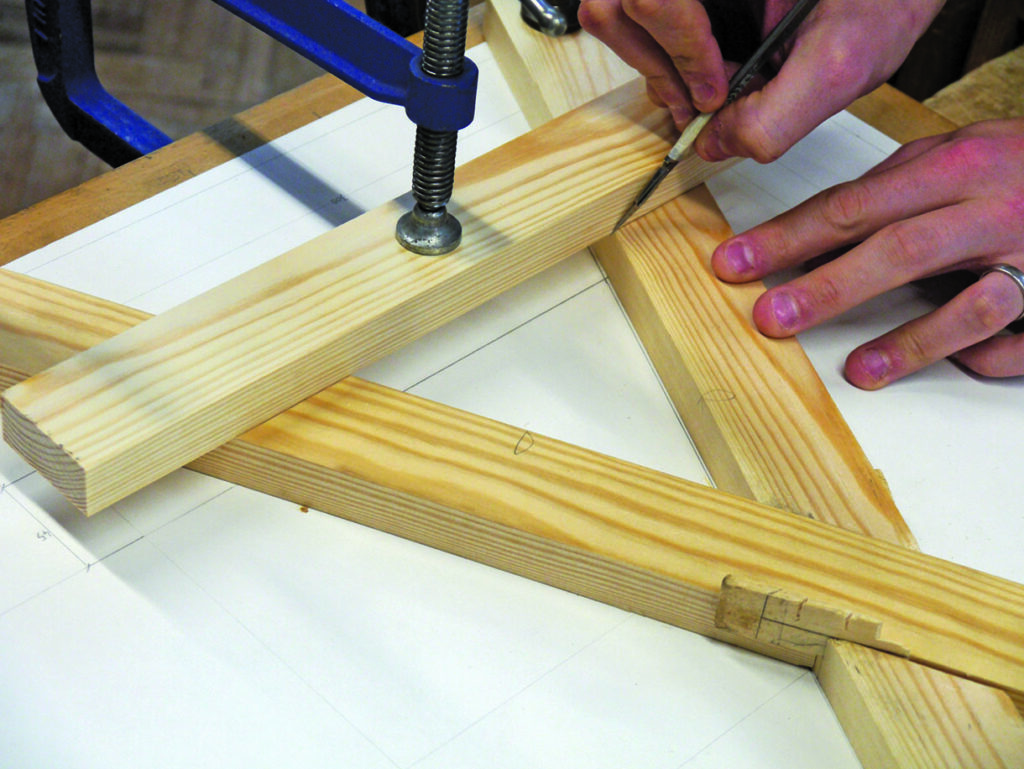
Marking the crosspiece
With your uprights together, clamp them to your rod to prevent them from moving during the next step. Using a marking knife, create marks where your uprights meet the crosspiece on the rod; you’ll end up with eight points. Now use a square to create marks on the edges of the timber in line with the original knife marks.
Next, clamp the crosspiece in position onto the frame using the marks you have just created and extend them across the face of the uprights. Then mark on the reverse side of the crosspiece where it meets the uprights, before removing the clamps to finish marking all the joints. Use the same technique as before to cut and fit these joints.
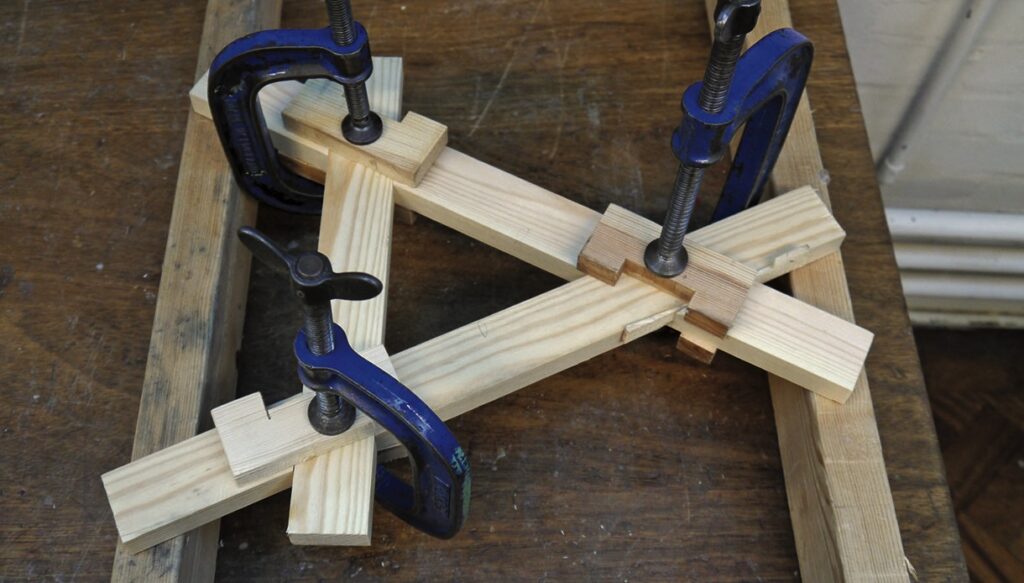
When you’re happy with the fit make a test dry assembly using blocks that span the joints to apply even pressure to both sides of the frame.
Removing the excess timber
Place the frame against the rod and use a marking knife to mark where the ends of the uprights will be. Use a steel rule to connect these and extend the marks all around the timber. Remove the waste allowing a few millimetres to trim later with a plane. Also cut the excess from the top of the frame leaving a little material to trim later.
To do this clamp the frame upside-down and low in the vice and gradually plane down to your marks. Be careful to avoid tear-out by setting your plane to take very fine shavings as you will need to plane the same edge in both directions. Finally, you can use a scraper or plane to remove any remaining marks from your timber, and then your frame is complete.