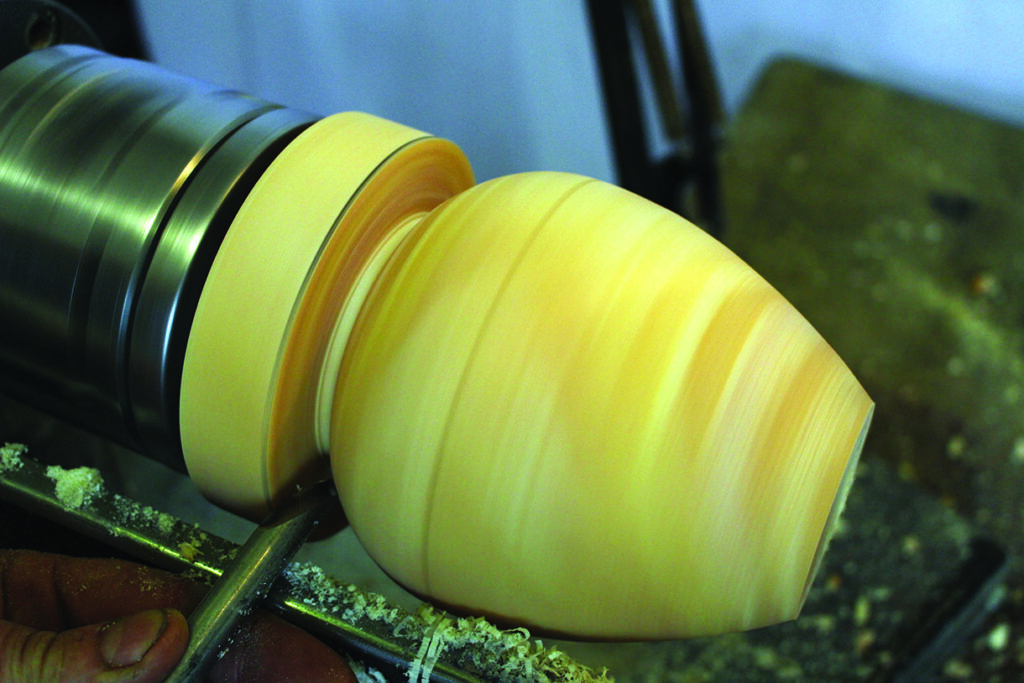
Andy Coates take a look at turning hollow forms, the simplest shape – an egg form
Hollow forms are a relatively new object in the panoply of the turners’ output, gifted to an eager fraternity by David Ellsworth, and have always seemed to be viewed as the ultimate turning project for the novice turner. But what is a hollow form? In the most readily accepted definition it is simply an enclosed form that has an opening of a lesser diameter than the widest part of the form. This factor provides for the attendant difficulty with hollow forms – removing the interior waste wood through a narrow hole.
The novice can be forgiven for thinking that expensive tools are required to make one. There are expensive specialised tools available, but equally there are less expensive tools and, in fact, tools which can be homemade from bright steel and HSS cutters intended for metal lathe work.
My advice to novices wishing to embark on hollow forms is always the same: start small and work up. Deep hollowing is a physically demanding form of woodturning and a day at the lathe can be an exhausting one. By starting small you will reduce the likelihood of mishaps and give yourself a fair chance of finishing the project.
In this article I will introduce the most basic tools and peripheral equipment and go through the basic steps for making a simple endgrain hollow form from a branch or small log.
Basic hollowing tools
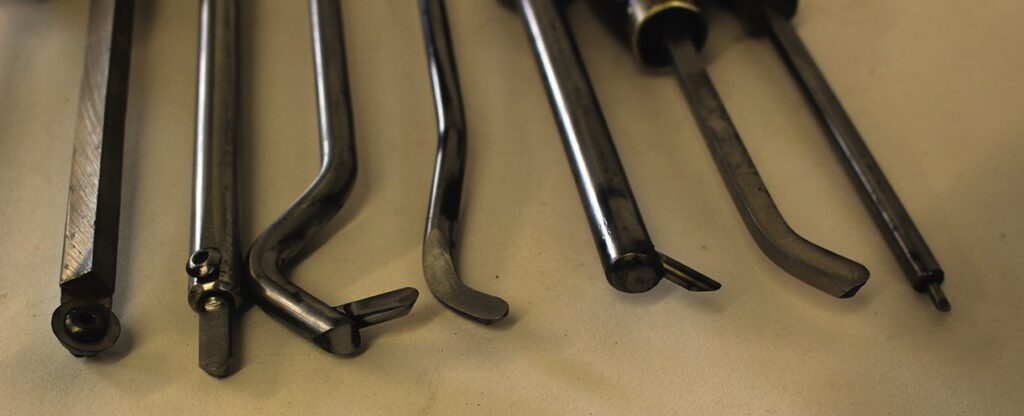
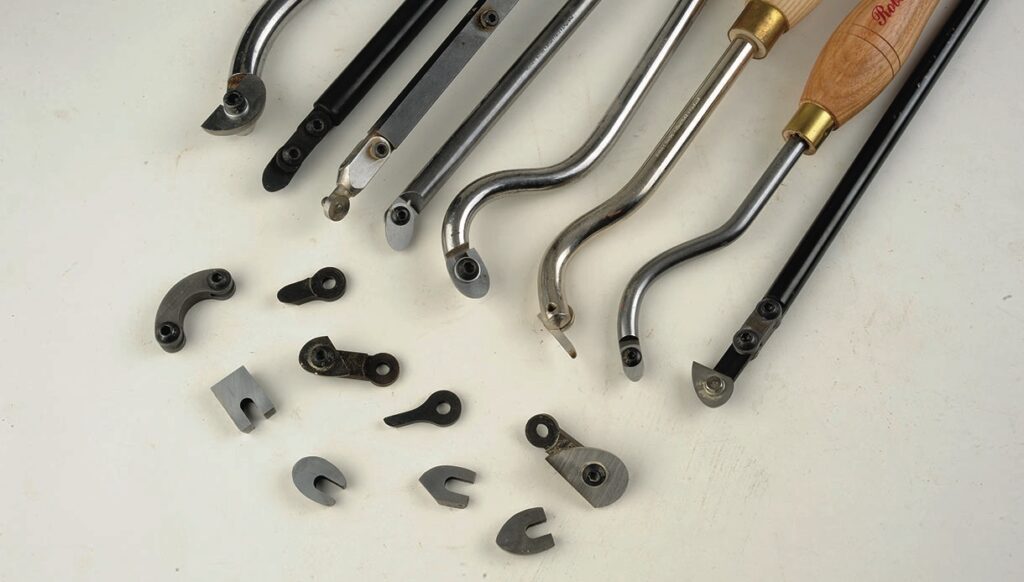
The most basic range of hollowing tools comprises bars which are straight, offset, cranked or swan-neck in shape, on to or into which each will have tips that are fixed in one position or can swivel. The swan-neck and cranked variants we will look at in other articles when we deal with more complex hollow forms with shoulders. In this issue straight-shaft tools with a small toothpick or bullet-shaped tip are what we will use.
This straight-type of tool is ideally suited for the initial hollowing of all hollow forms and, if the forms are either
straight or taper to a wider base, this type of tool can do the whole of the hollowing process.
The temptation is to have a wide range of tools but the reality is that to start one requires very few and I think it is important that you learn to turn a very basic hollow form using simple tools so you fully understand the process before spending money on more complex kit. As with any hobby, we all buy plenty of kit and tools and much of it ends up not being used as often as we thought it would be. So for this simple and straight forward is the best option to get you started.
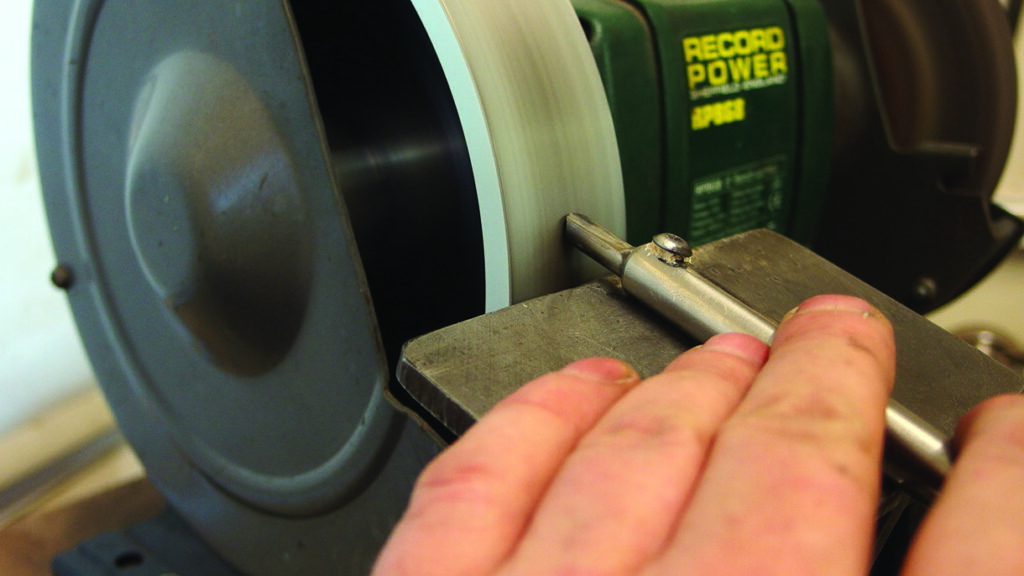
Sharpening
Essentially, each of the scraper-type tipped hollowing tools work in much the same way and the cutting edge on a scraper tip is created on the bench grinder, or with a diamond hone.
Due to the nature of the edge it will not be terribly durable and it will require periodic honing/re-grinding during the turning of any project. These types of tool are simple, effective and reliable, and can either be purchased or fashioned from suitable quality steel by anybody able to use a drill press and a hacksaw. Bright steel is best for shafts, and modified HSS bits intended for metal working lathes for cutters.
If you have no experience of working tool steel the safest option is to buy a commercial variant of the toothpick tool of your choice. There is a wide choice commercially, with variants available from Sorby Crown, Hamlet, Henry Taylor, Kelton, Ashley Iles and other manufacturers who can provide fixed tip or swivel tip variants.
Simple guidelines for you to remember
• The smaller tips remove wood fast but leave a bad finish. But there is less downward pressure on the tip so are they stable in use.
• The further the overhang of the tool blade/shaft over the rest, the more vibration or flexing on the tool shaft one will encounter, so you need a larger-diameter blade to counter the flex.
• The larger the tip the more downward pressure there is on the tool shaft. Rotating the tip so it cuts in shear cutting mode will reduce the pressure and give a finer finish than that of a small tip used in scraping mode – but this cut is best when using a larger round or heart/tear-drop shaped tip for refining the surface after the small tips have removed the bulk of the waste.
• Always cut on or above centre, never below, but never have the tip higher than the tool handle.
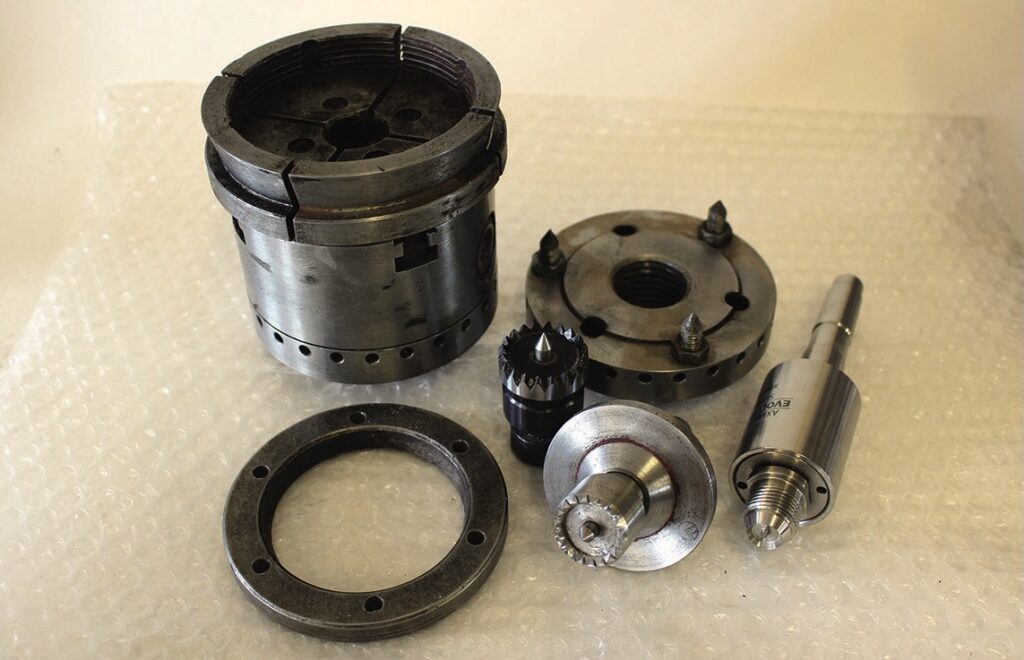
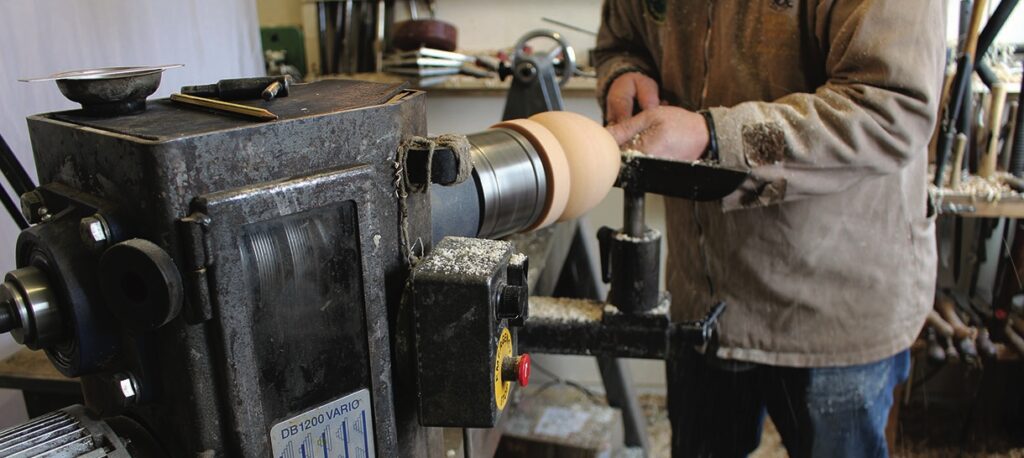
Holding work securely
How you mount the blank on lathe is vitally important – it should be safe and secure. In order to achieve this a few essentials will be required.
Initial mounting is usually between centres, and a serrated-edge drive and revolving ring centre provide possibly the most secure option. A faceplate drive, a ring or flat plate with pointed screws that impale the end grain can also be safely adopted, and commercial varieties are at long last available. These are driven into the end grain then mounted either directly on to the spindle nose, or held in the dovetail jaws on a scroll chuck. At the tailstock end either a serrated-edge revolving centre or a revolving ring centre are best suited to the task.
For secondary mounting, a four-jaw scroll chuck should be regarded as a bare minimum. As most hollow vessels are produced from end-grain material, a screw chuck is unsuitable for initial mounting and completely out of the question for secondary mounting, and, while a faceplate or faceplate ring may be utilised, they should be avoided if at all possible. Screwing into end grain can seldom be considered a satisfactory, or wholly safe, holding method. By far the safest option is to use a scroll chuck with gripper jaws, although dovetail jaws are perfectly safe if care is given to producing the tenon.
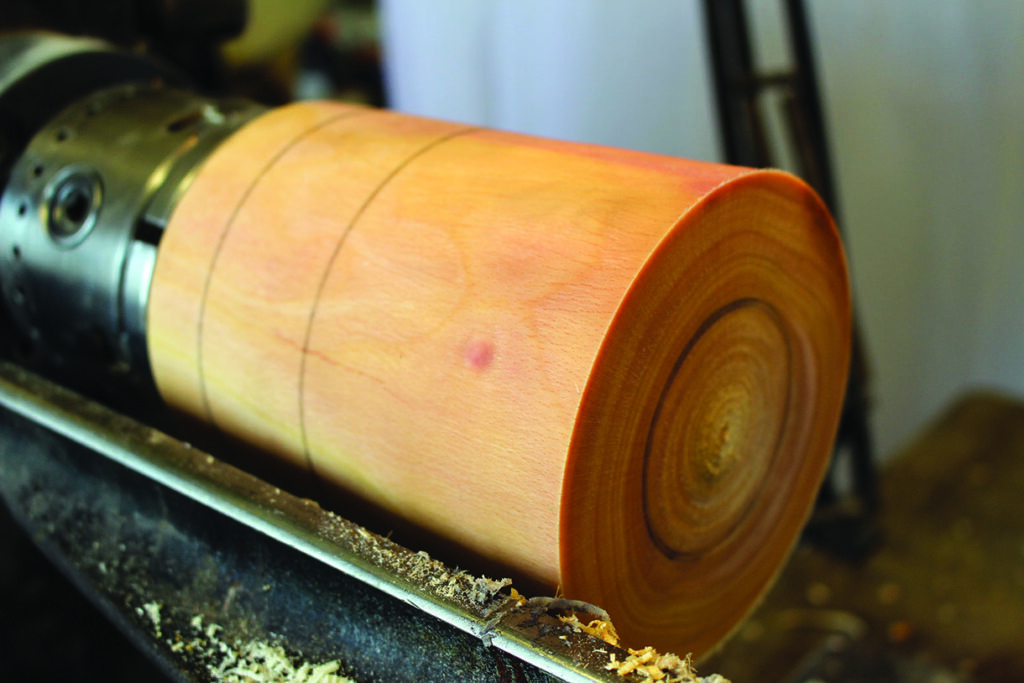
As a general process, the blank, often a section of branch wood or small log, is mounted between centres and roughed down to a clean cylinder, checking for faults which may lead to potential danger later on. Once the blank is running true a tenon can be turned to suit either gripper/toothed chuck jaws or dovetail chuck jaws. Ensure that the dimensions are precisely as prescribed in the handbook for your particular chuck.
Preparing stock and mounting
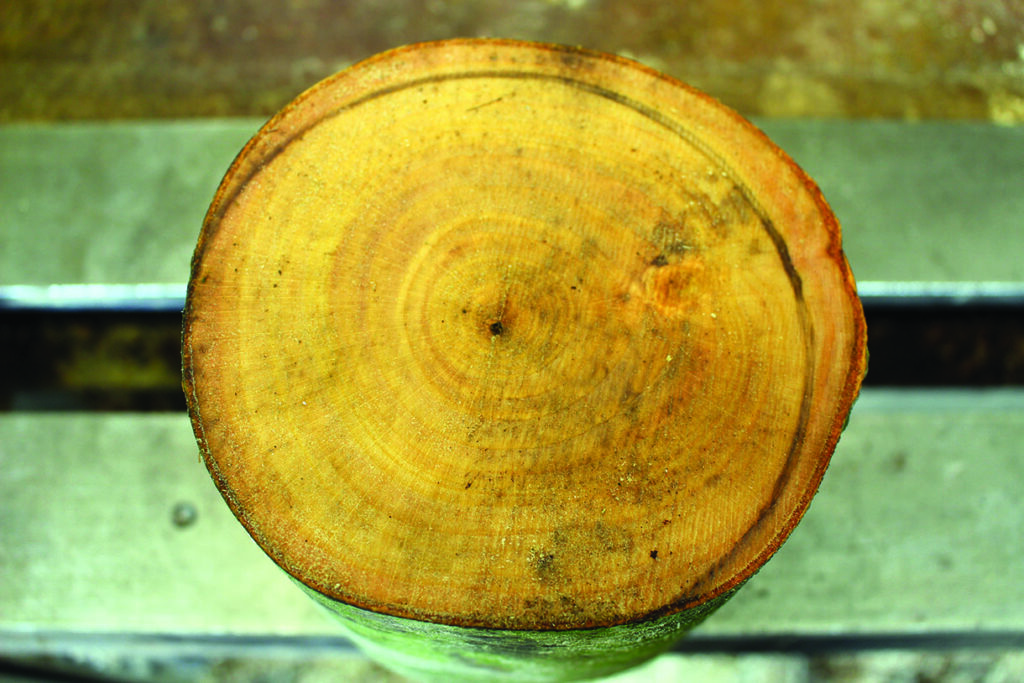
The ideal situation when creating hollow forms is for the pith to run through the middle of the form. While this may not always be possible, it is sensible to take advantage when it is. Splits and cracks can begin at the heart (pith) during drying, and keeping the heart central spreads the stress out uniformly rather than favouring one side or another, which may help to reduce the likelihood of them occurring. Scribing the largest possible circle about the pith as centre provides a useful mounting centre.
Any out-of-balance material will be obvious – note the hatched out section on the top of the branch picture – and will need to be removed during initial roughing out. The image of the bottom of the branch shows the same size circle is not possible at the opposite end, but is scribed nonetheless. These two markings will ensure the pith runs directly through the centre of the piece as closely as possible.
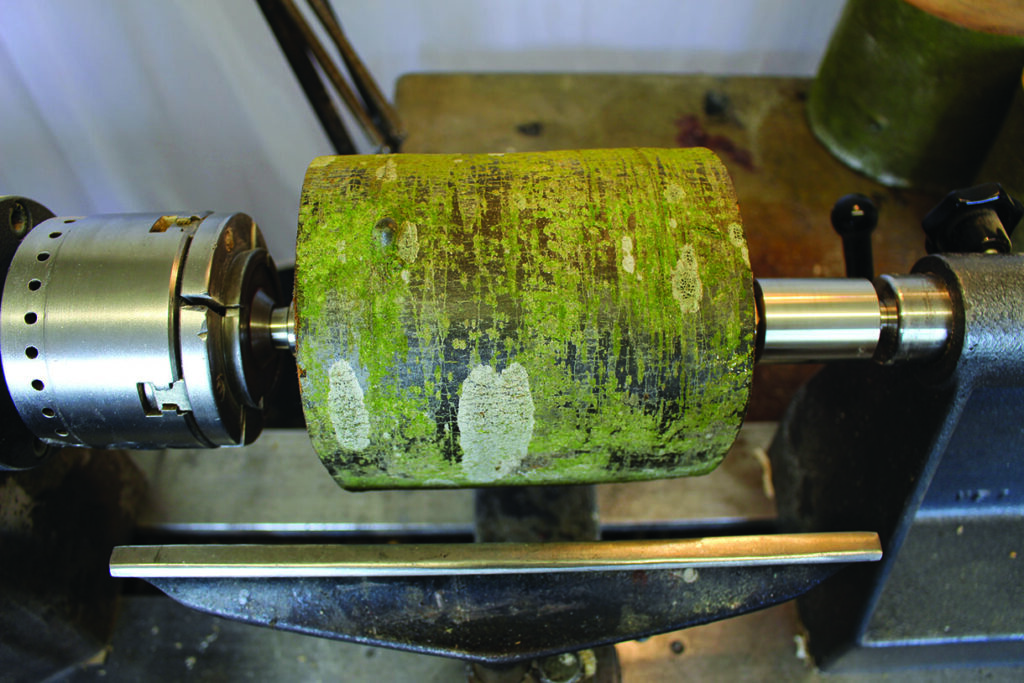
Using a serrated-edge drive centre and the revolving ring centre ensures the workpiece will be mounted securely. Tailstock pressure should be sufficient to drive the serrated teeth of the drive into the wood. It is important to ensure tailstock, quill and tool rest are securely locked down, and that the workpiece is mounted in a way that the off-centre portion does not foul the tool rest when rotated by hand. Initial lathe speeds for roughing down are always low, 500-900rpm, according to material, size, and any out-of-balance to be considered. Once the workpiece is running in a balanced manner the speed can be increased slightly to aid cleaner cutting.

Top tip
When first venturing into turning hollow forms it is best to avoid wood with faults such as cracks, fissures, voids or burred timber. While these features may be considered attractive they present a number of potential safety issues for the inexperienced turner that are best avoided until more experience has been gained.
Preparing for success
Hollow forms require perfect support and holding in order that the process is as safe and stress free as possible. When forming your tenon you need to ensure that its dimensions are absolutely accurate for the chuck and jaw set you are using. Contrary to common misconception your chuck will have a very small range of acceptable dimensions and it is vital that you discover what this range is, understand the relevance, and adhere to the guidance.
Decide early on what the design is going to be, maybe even sketch a shape out prior to starting. Once you have a clear idea of what the shape will be you can transfer such dimensions as are appropriate – base, widest point, entry hole diameter – on to the workpiece to
help you achieve a successful outcome.
Remember that you need to leave some of the exterior base of the hollow form unturned. The extra material will provide much needed support during hollowing. Once the hollowing is completed you can return to finish the exterior shape.
Boring the central hole
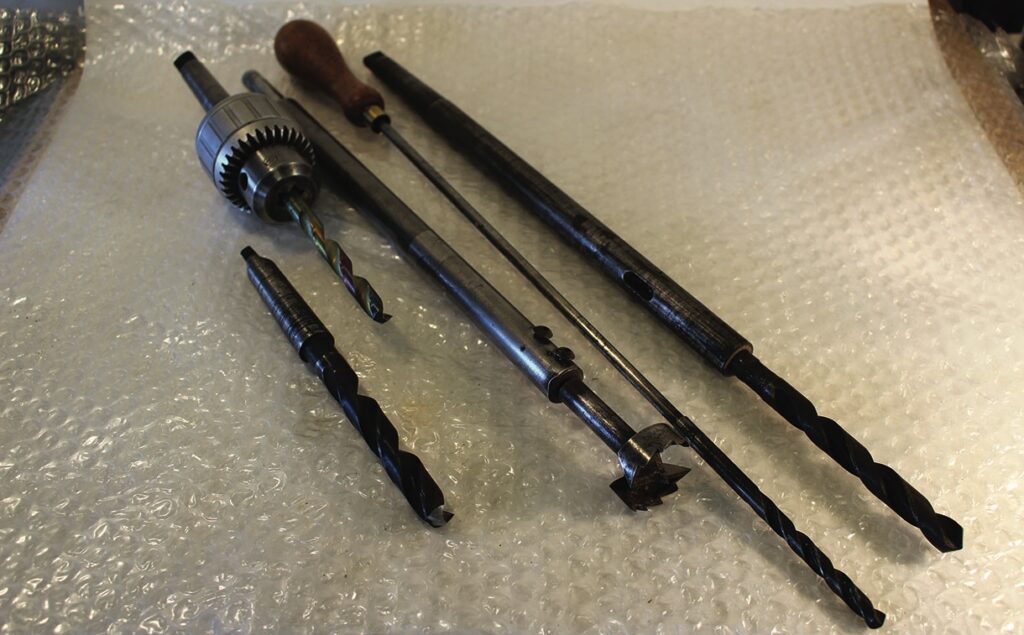
There are numerous accessories that will help with creating an initial hole on the wood – known as boring the central core – that removes some initial waste that will make hollowing out the form easier.
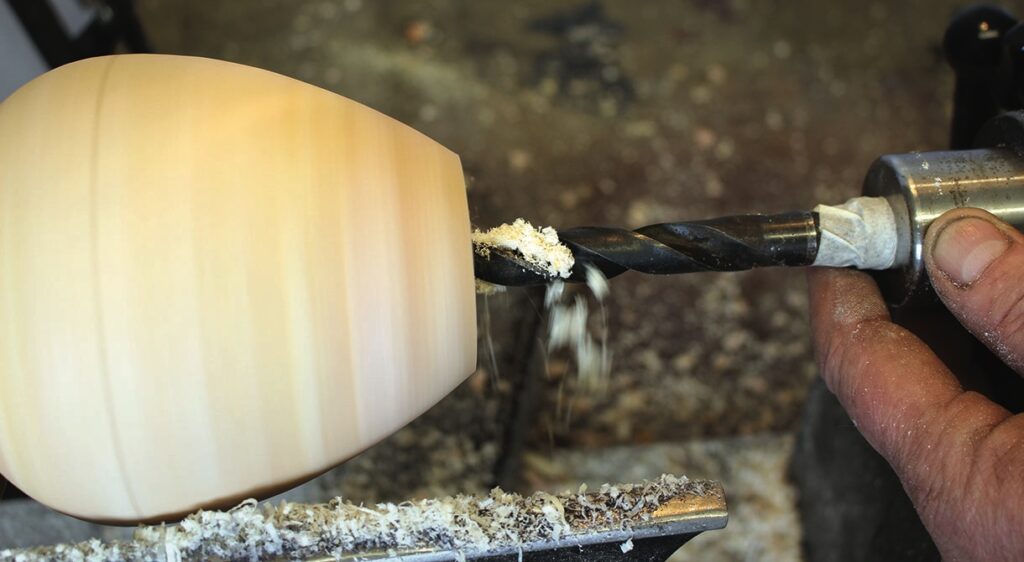
Typically you would drill out waste with a twist drill or Forstner bit, on a Morse taper or held in a Jacobs chuck, or a twist drill on a long shaft and handle. The central core runs slower than the surrounding wood, and removing it not only provides an edge to work against, but also removes what is often the most difficult area of wood to turn away.
The central core, through the pith if you have positioned your blank well, is the slowest-running area of wood to be removed, and as such can be a difficult area to turn. Coring out the centre, using a twist drill on a Morse taper or held securely in a Jacobs chuck mounted in the tailstock quill, is probably the easiest and safest method. You can also drill to slightly less depth than the anticipated depth of the finished piece, which will show you the depth to stop hollowing.
If you do not have a Jacobs chuck you can core the centre using an ordinary 10mm spindle gouge. This works better with a gouge with a fingernail grind, but a conventional ground tool will also serve. The gouge is presented to the centre of the blank with the flute facing up and left as in the image. The tool is pushed forwards, and the handle pushed away, making a short sweep. The lower wing of the tool will cut and the forward pressure leads the gouge to act like a drill bit. Withdraw and clear swarf regularly to prevent binding.

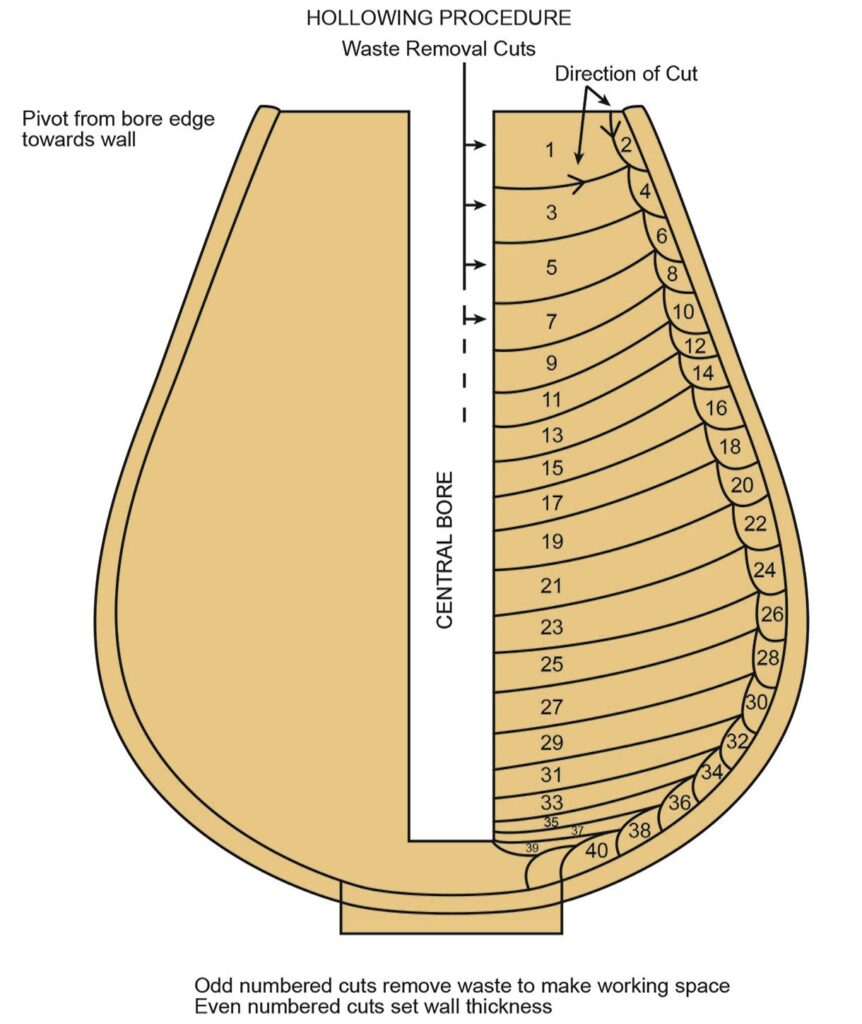
Sequence for hollowing
This diagram can be used as a guide for the hollowing process. Working from the edge of the central bore hole clear waste towards the wall. The next cuts set the wall thickness to the depth of the clearance hole, then the process is repeated, increasing the depth with each increment. In this manner an even wall thickness can be achieved with little trouble. Callipers may be used to assist in this process.
Top tip
End-grain freshly felled, unseasoned (or green) wood is far easier to turn in general, but for hollow forms even more so. Even small, 150mm diameter branch wood can provide useful material for hollow forms. Green wood can be ‘rough turned’ to slightly over size, left to season and then finish turned later. Or, if the walls are turned thin enough (3-4mm), then they can be completed in one session. Any warping that occurs would be considered part of the design.
If you cannot complete a hollow form in one session, and especially if you are using green wood, wrap the unfinished form in a plastic bag filled with damp shavings to reduce the risk of the form cracking, splitting or warping during the down time. Remember to keep the base of your hollow forms the same thickness as the walls. A thicker base is more likely to lead to splits from the pith.
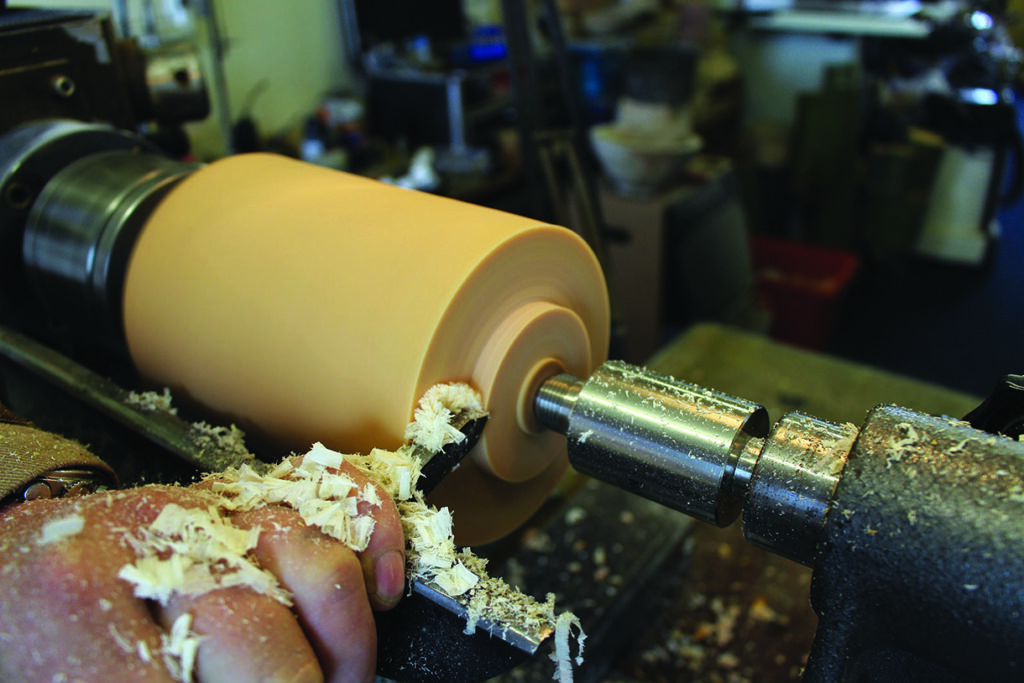
Hollowing using a straight toothpick-type tool

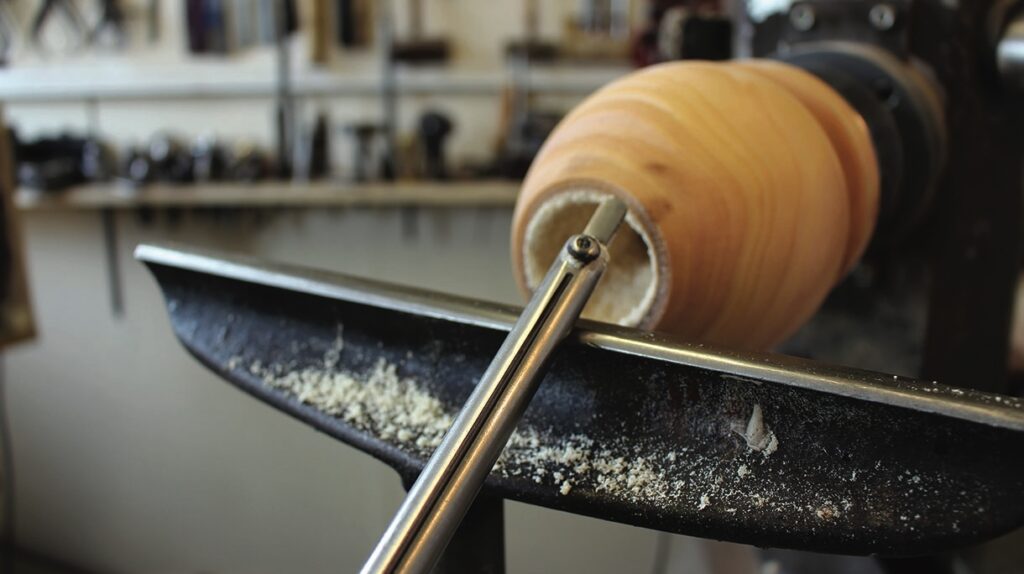
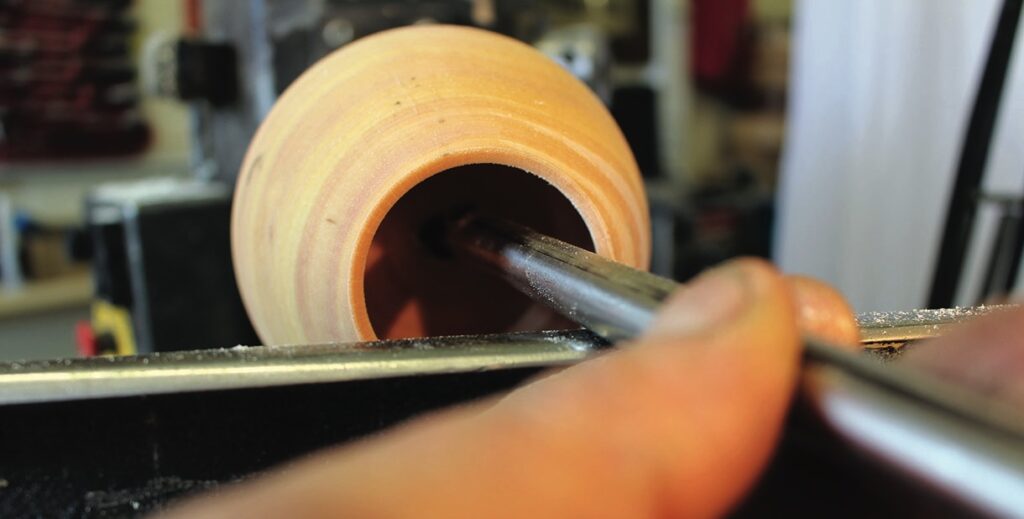
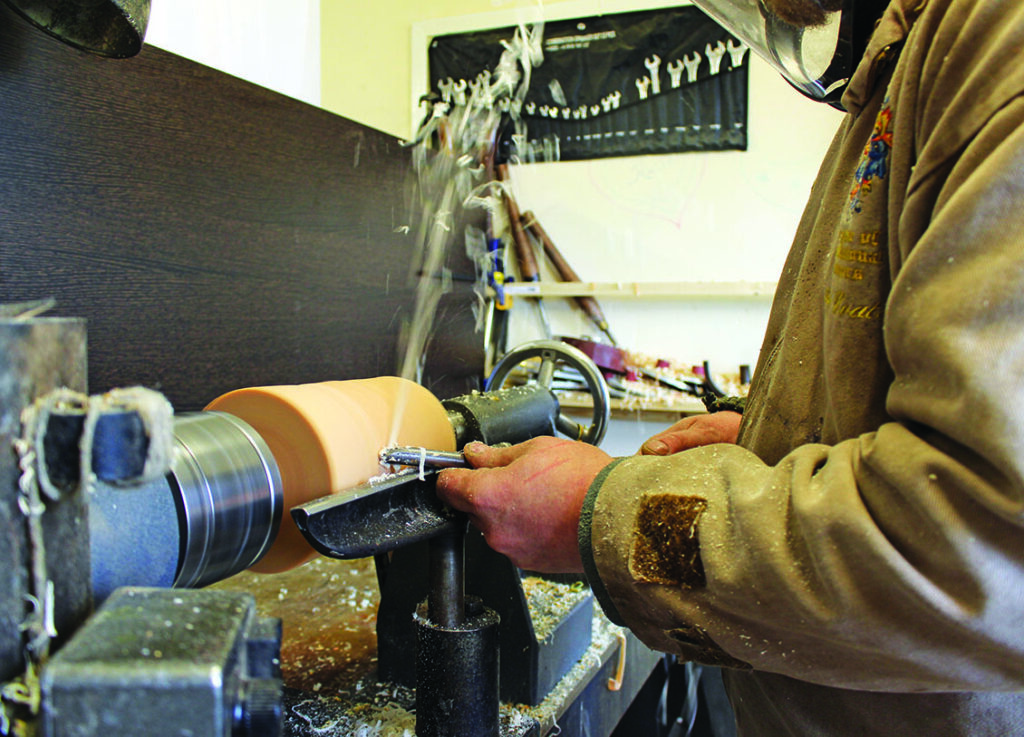
Stance and position
If you have the facility to rotate the headstock you will find it helps enormously. You will be able to stand directly in front of the workpiece and this will not only improve tool position but relieve the stress on the body. Always keep feet at shoulder width apart for a stable stance. Avoid bending to peer inside the workpiece while working as this will very quickly lead to an aching back.
Maintain a good stance and position
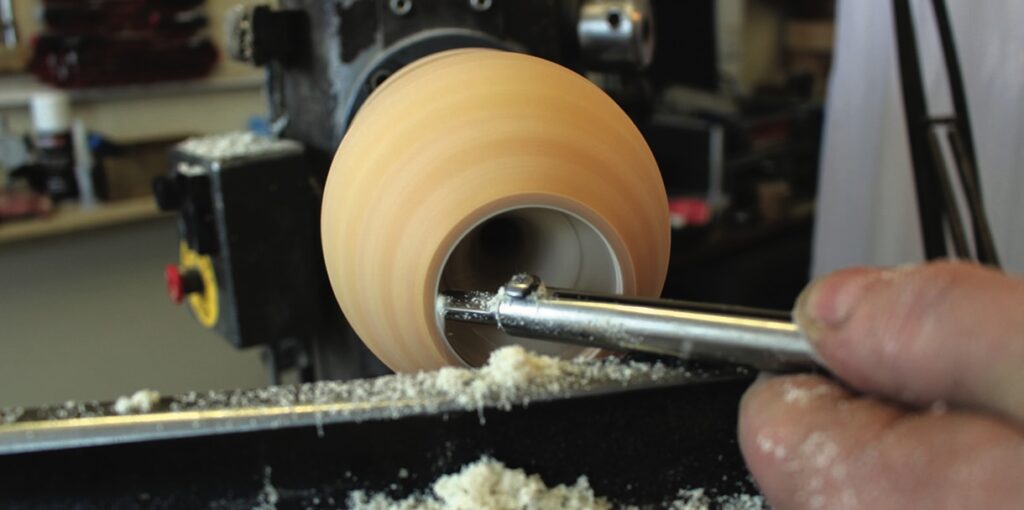
Finishing interiors of hollow vessels
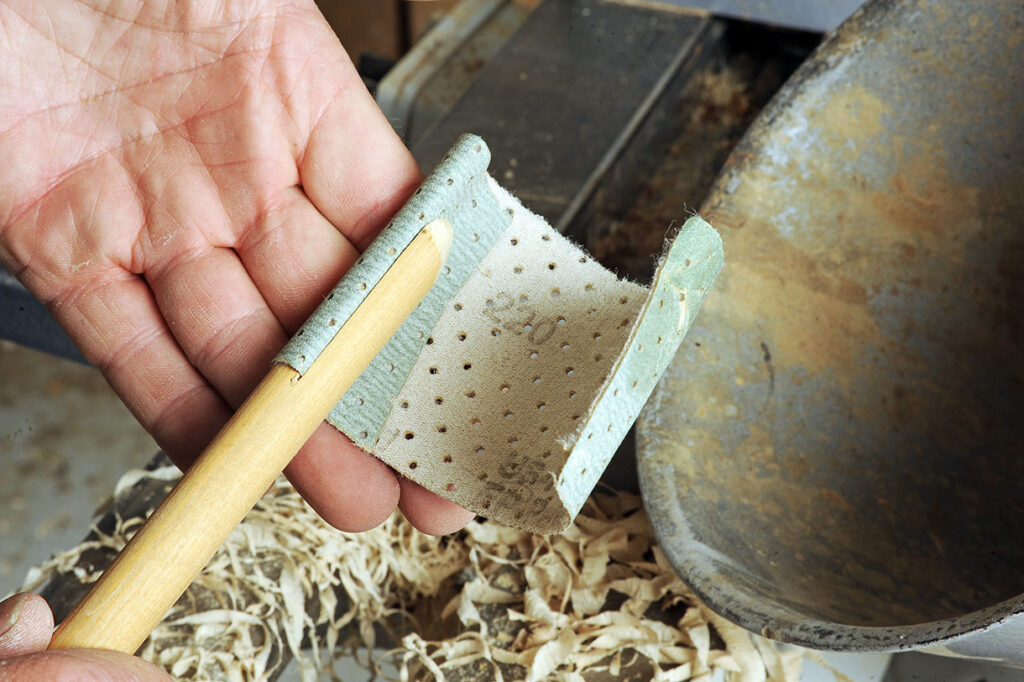
Specialised multi-tipped scrapers used at a shear angle can clean up the interior walls of hollow vessels, but with practice this can often be achieved with the hollowing tool alone. If you wish to abrade the interior this is best achieved with abrasive on the end of a carrier, be that a dedicated long-reach arbor designed for hollow vessel use, a split wooden rod with abrasive wrapped through and around it, or the ball type that holds abrasive by hook and loop material and Velcro-backed abrasive.
You should never put your hand or fingers inside a vessel with the lathe running – the risk of breaking fingers is very real. Abrade gently and take care, remembering that while the dust may not be as apparent as when abrading the outside of a vessel, it is still being produced but is captured inside the form. Extraction by vacuum is ideal here.