Jan Lennon deconstructs the creation of the curved and angled legs on her Meala table

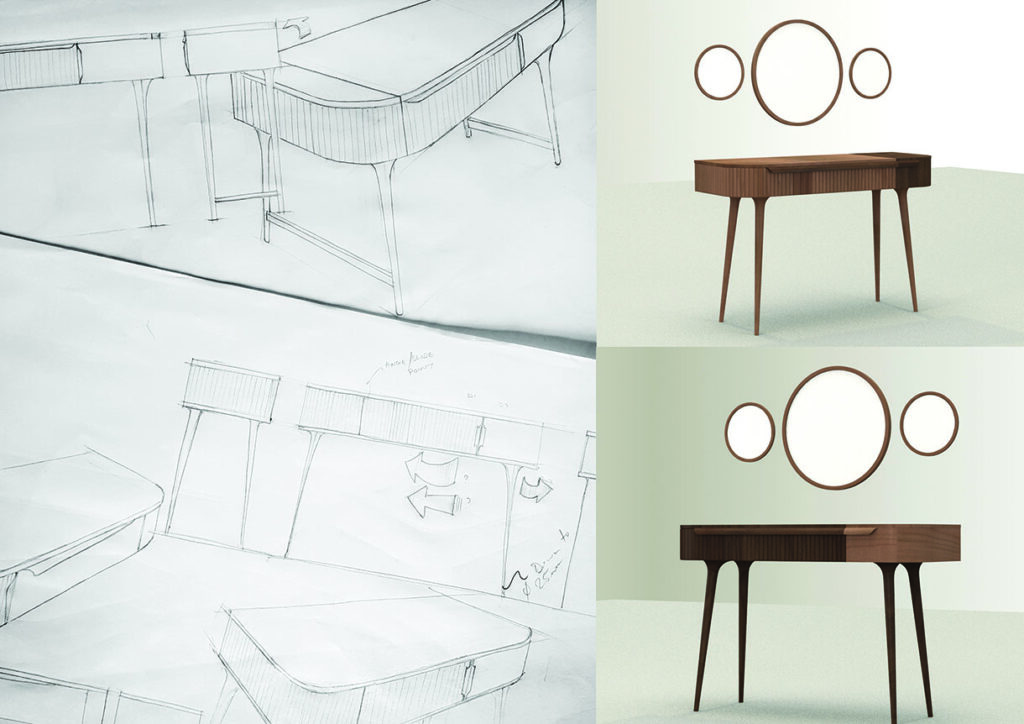
Starting a new project can be pretty daunting and I sometimes find myself wondering where to begin. But invariably, my first move is to grab a pencil, open my sketchbook and start scribbling. It’s cheaper and quicker than other methods and allows me to get all preliminary thoughts and ideas out of my head and into the real world where I can take stock of them. The good ones I keep and the unhelpful ones are discarded.
Once I know the general requirements of the piece I try to fill as many pages as I can with different concepts. Then I pick one and fill another raft of pages developing that concept and solving as many design problems as I can on paper. It can be pretty arduous, but an afternoon or two spent doing this can save weeks in the workshop trying to fix a faulty design. This sometimes means, however, that I end up designing something with lots of fun-to- draw curves that I fall in love with and am then left figuring out how to make. This was certainly the case with the Meala table. But since this was a speculative piece and not under strict budget constraints, I decided to forge ahead and learn as much as I could along the way.
There were many different aspects to building the Meala table and in this article I will be revisiting two of them – making the curved apron sides and the double splayed legs.


Creating the curved apron
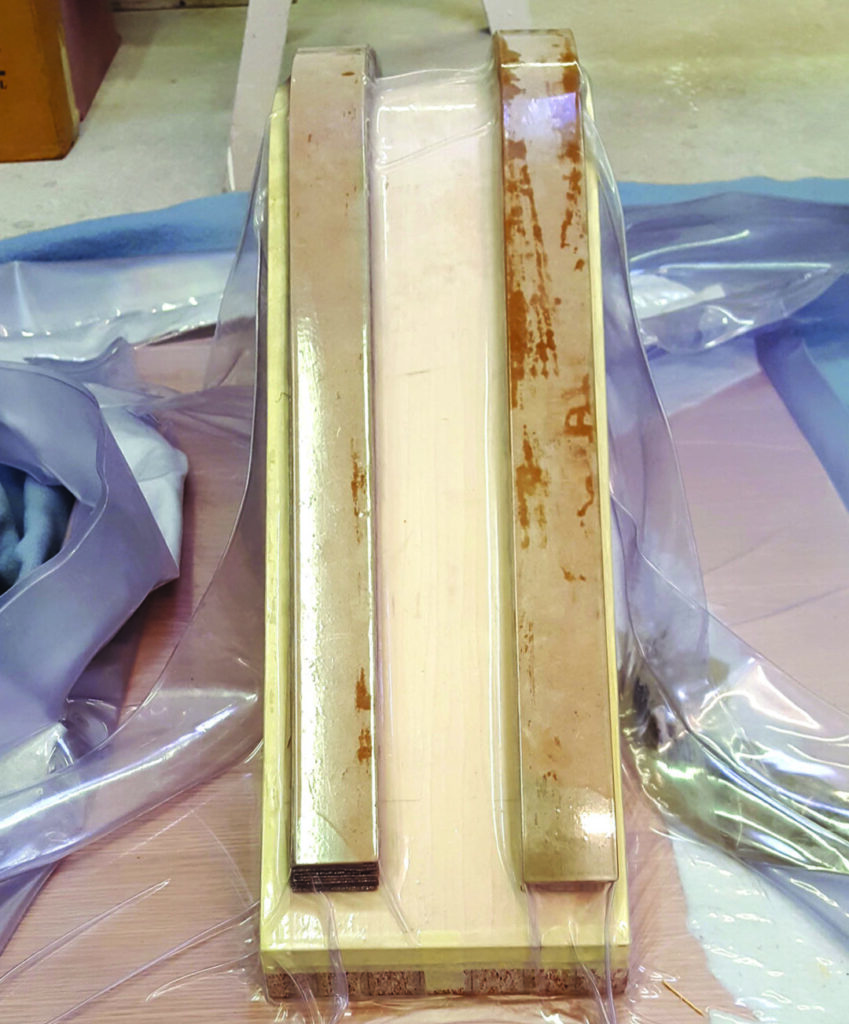
In order to create an identical and predictable curve for both sides, the apron is laminated in a vacuum bag using flexiply and veneer. The first task is to make a former from layers of chipboard and skin it with decorative veneer to create a smooth surface. This is then covered with a layer of polythene, several layers of flexiply glued with polyurethane glue to make up most of the width of the apron (minus the final decorative veneer), another sheet of polythene and a layer of 2mm MDF. All of this goes into the vacuum bag overnight and the following day is transferred and strapped onto a lighter former to rest for a week while the corresponding side is made.
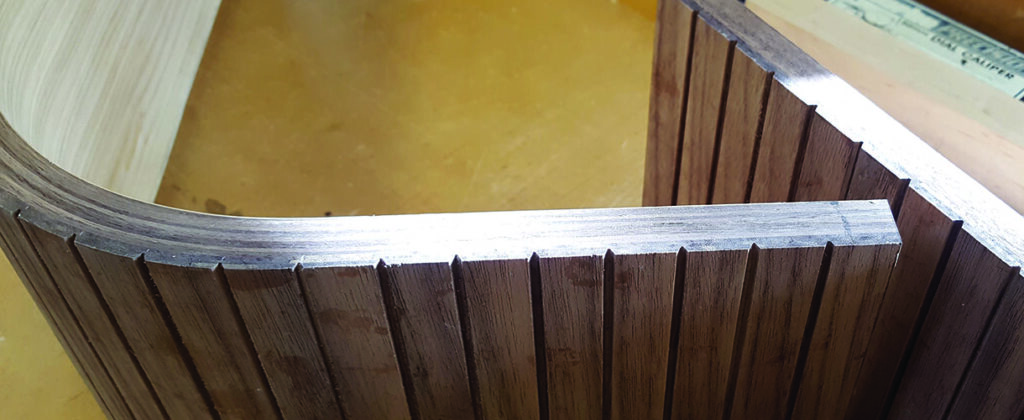
For the side with the tamboured detail, an extra step is involved. Fewer layers of flexiply are initially shaped and the difference is made up with layers of constructional walnut veneer in a second forming operation. This is so that, when routing into the side to create the tambour effect detail, more walnut is revealed to give the effect of solid wood.
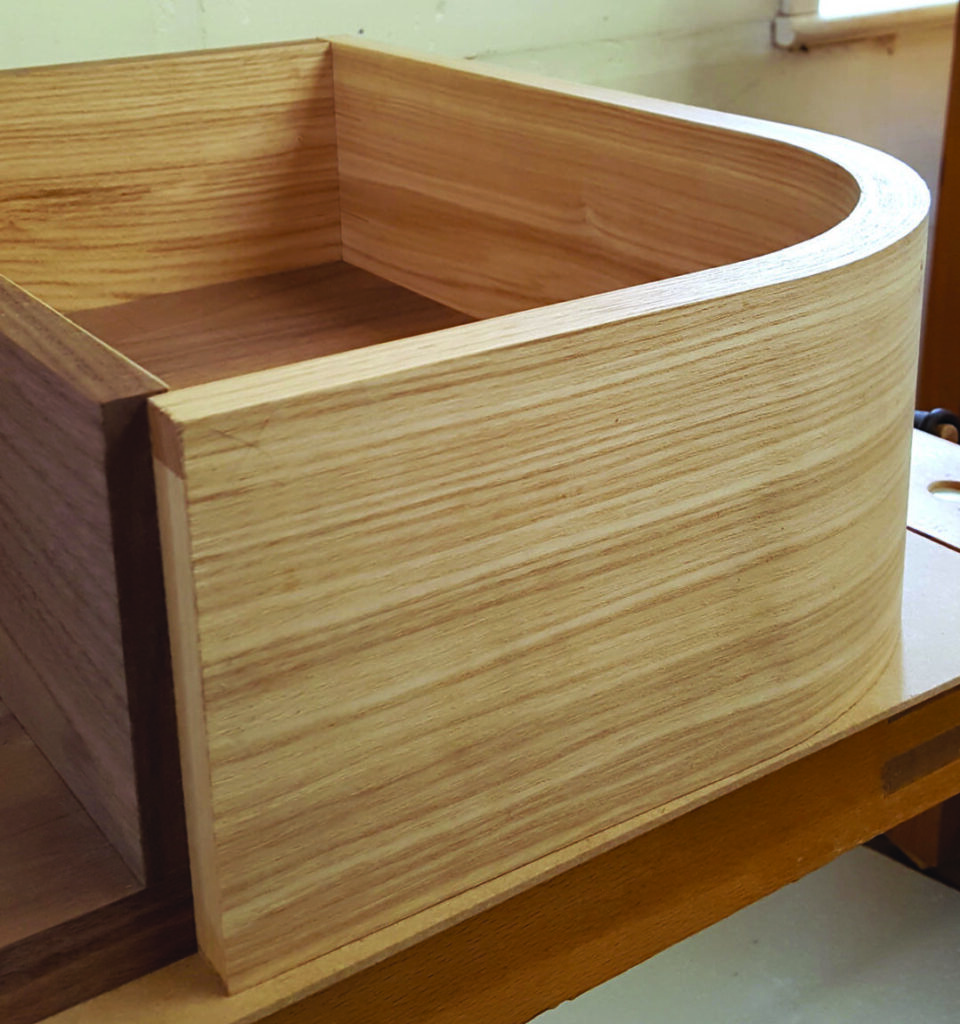
Additional to this, layers of veneer are laminated on the formers to create lippings for both sides. With the lippings glued on and blocks of solid wood inset to allow for routing the handle seating. This is a good opportunity to check the sides for bulges and highpoints and plane where necessary. Then you can place them back on the former with the final outer layers of decorative veneer and put in the vacuum bag one more time.
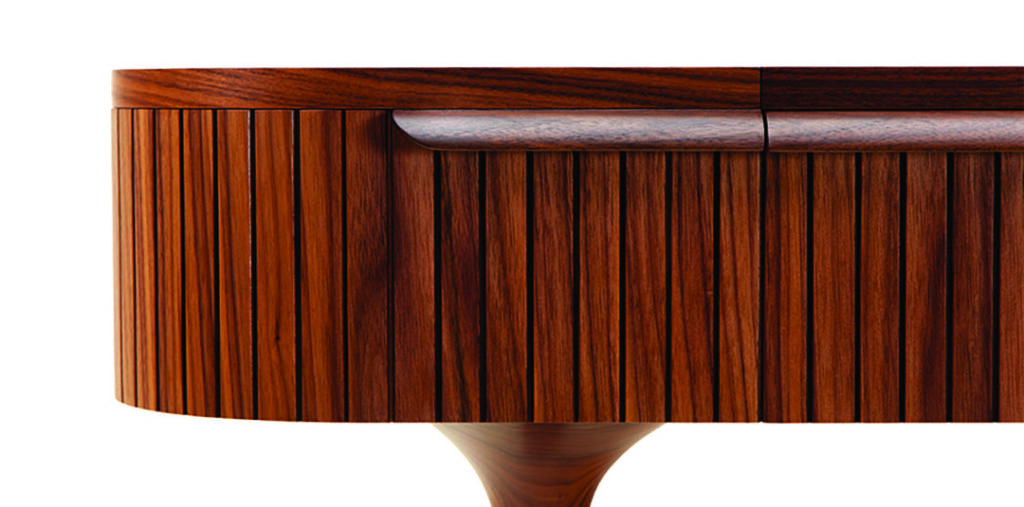
Both sides are subsequently fixed to the base and back board using tongue-and-groove and biscuits, correspondingly. The process is intricate and lengthy but results in two very stable apron sides with an identical curvature and thickness.


Making the legs
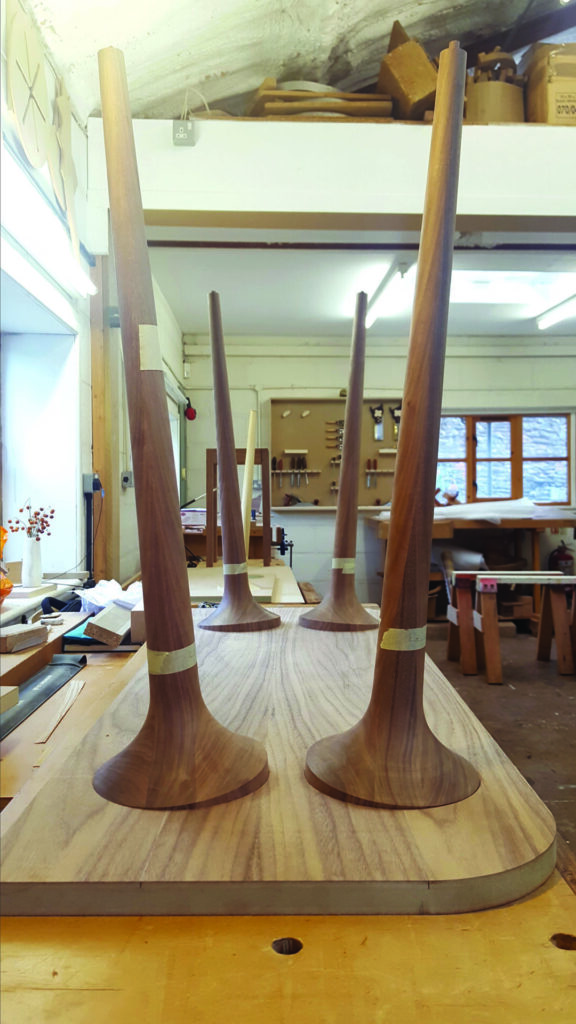
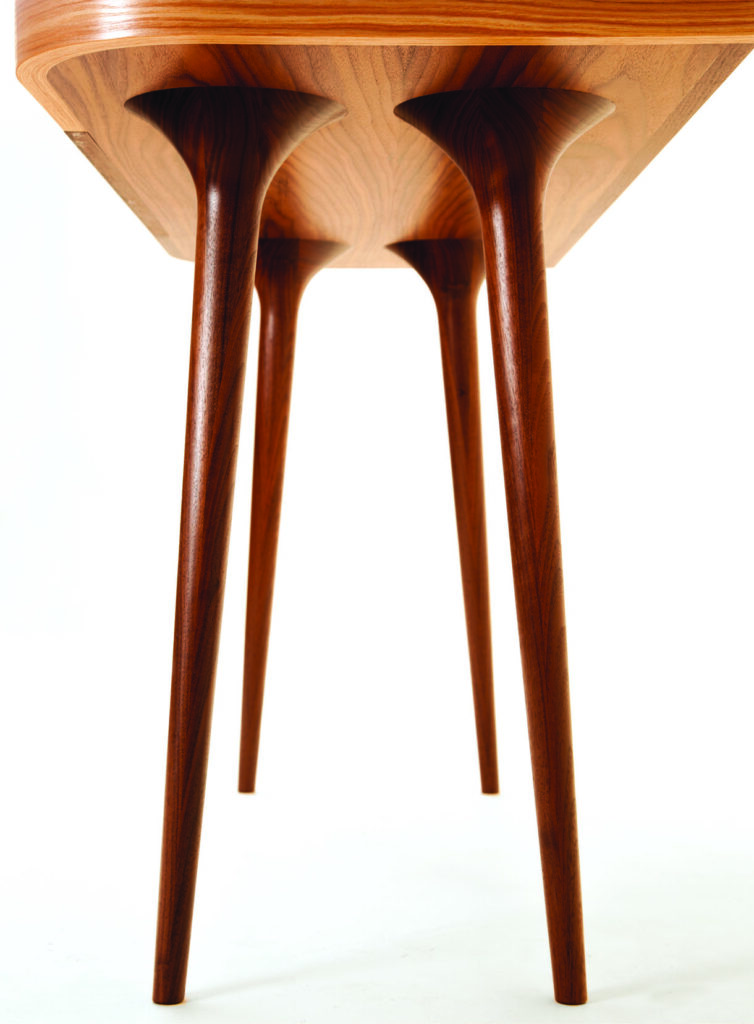
Making the legs for the Meala table was probably the lengthiest part of the build. As they are attached with a splay of 5° in both directions and shaped flush to the surface of the table, figuring out how to get the best result was going to be tricky. I consulted with Williams and Cleal tutors Jane Cleal and James Ralph for this and the technique we fixed upon was to turn the legs, rout a socket in the base of the table to receive them and reshape the parts of the curve that stand proud of the surface.
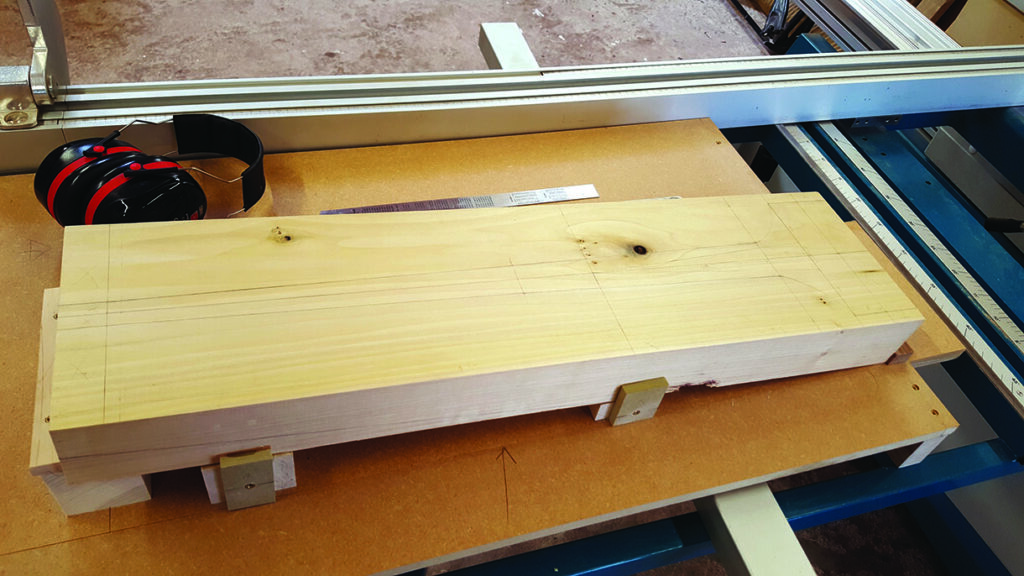
The first job to achieve this is to block up the blanks for turning the legs. The traditional way to do this would be to plane down a blank to the basic width of the leg and then add blocks near the top that would accommodate the curve and larger diameter at the top of the legs. This, however, results in a series of join lines around the top of the leg which give a segmented look and are not consistent with the design of the piece. A different technique is employed instead. Two larger blanks are created from a 2in board with a width exceeding the largest diameter of the leg. A section is planed off at an angle and then a wedge inserted into the gap created between the two board blanks. Cascamite with a colour additive is used to glue up the blank as the longer open time gives a bit of leeway in cramping wedge-shaped pieces that naturally slide a lot. Be careful to make sure that the grain is running in the same direction for all pieces. This will make turning and shaping the legs a lot easier.
When faced with the task of repeatedly turning a consistent curve on a long piece that may be prone to whipping, a practice piece or two in a cheaper timber is advisable. After some consultation on technique with woodturner and very patient advisor, Brendan Hogg,
it was decided that roughing an oversized shape and turning the
leg in sections produces an accurate and consistent result with minimal whipping.
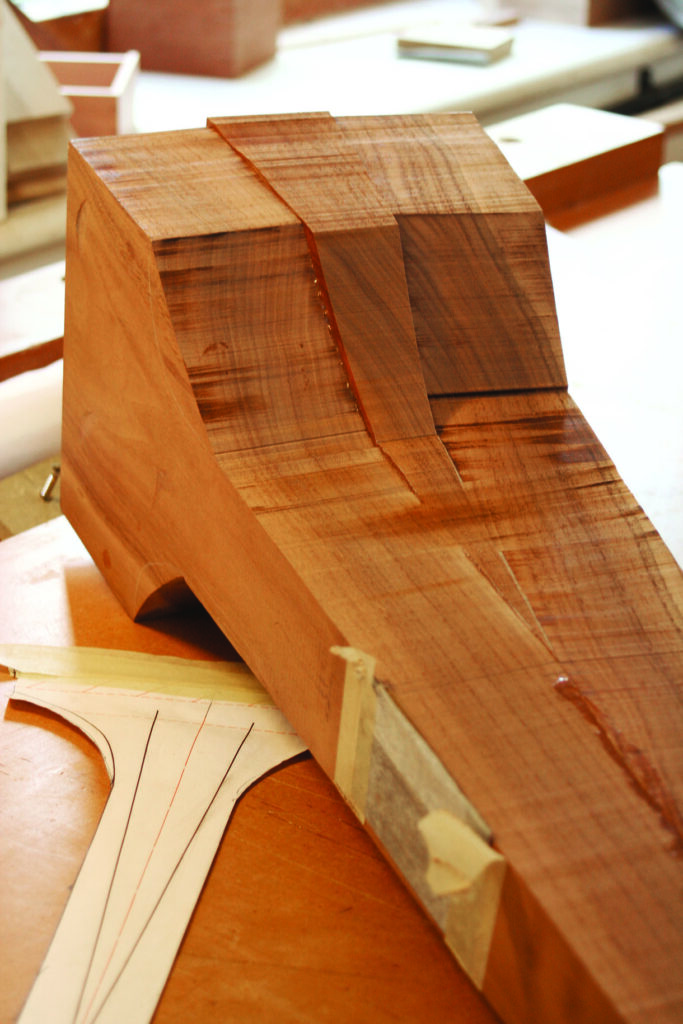
In shaping the curve, the half inch and quarter inch gouges are your friends. The only advice I can offer here is to sharpen regularly and keep the bevel rubbing at all times. Pay particular attention to keeping the diameter of the top of the leg as close as possible to the plan. This will be crucial at the fitting stage. Admittedly, this is difficult when turning by hand so, if you can’t get it spot on, a deviation of 1–2mm oversized is acceptable. The spigots on the top of the leg should be identical so that they all fit neatly into the base.
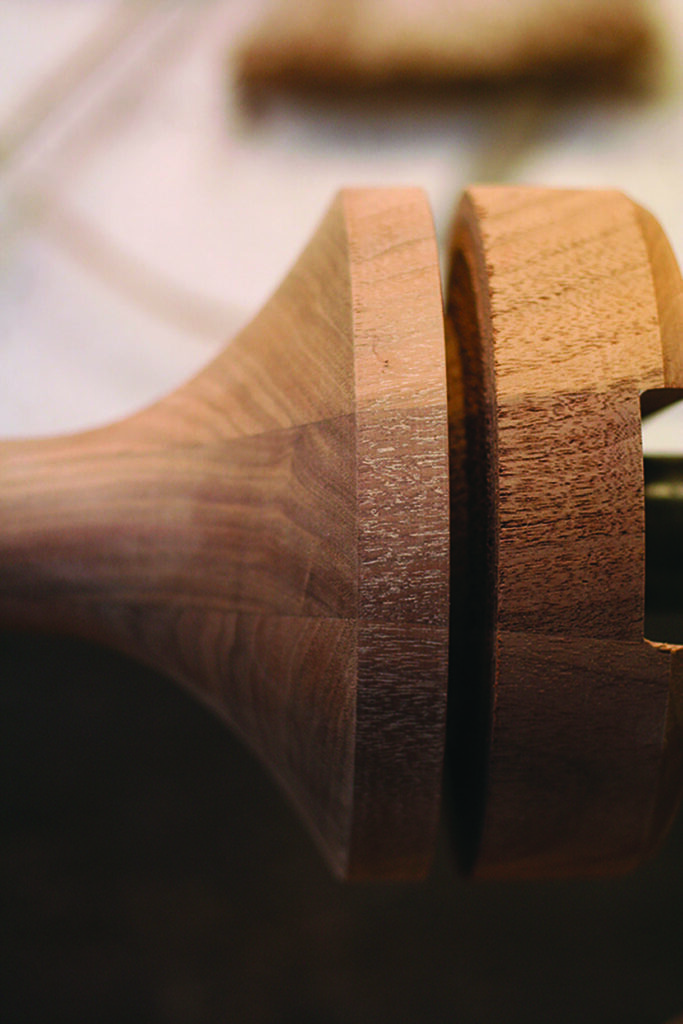
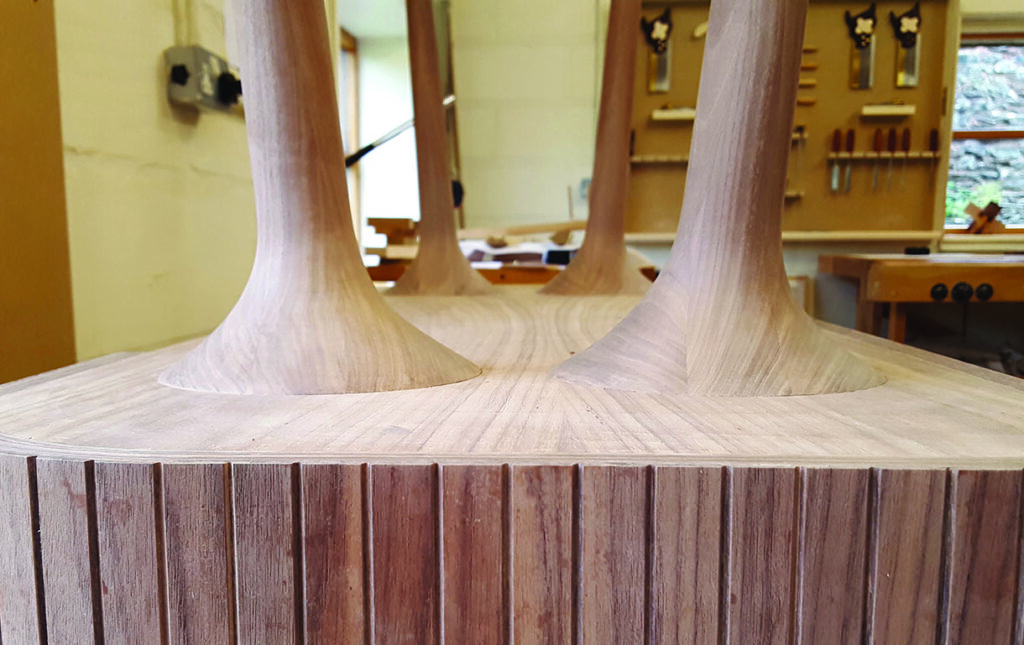
The finished leg has a consistent grain and no join lines from front viewing and an attractive arrow-shaped join from the side view.

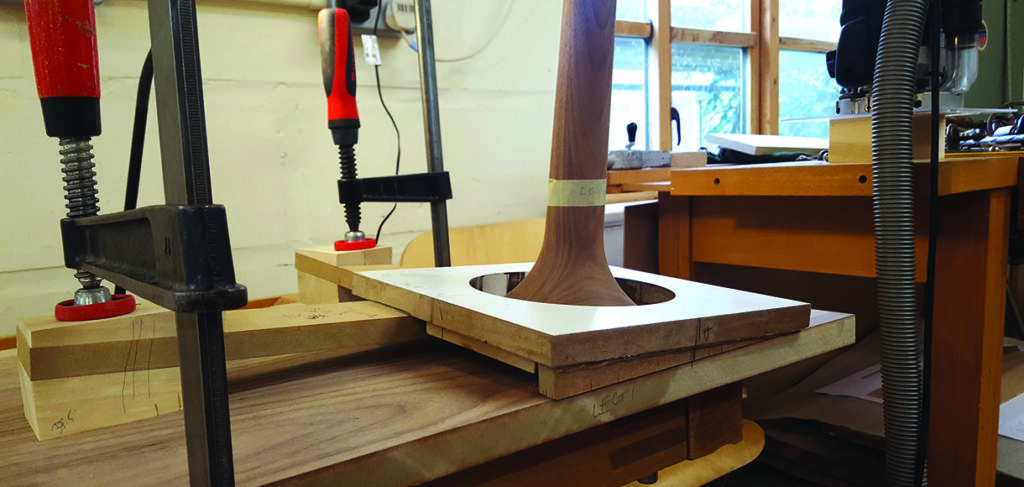
Preparing the base
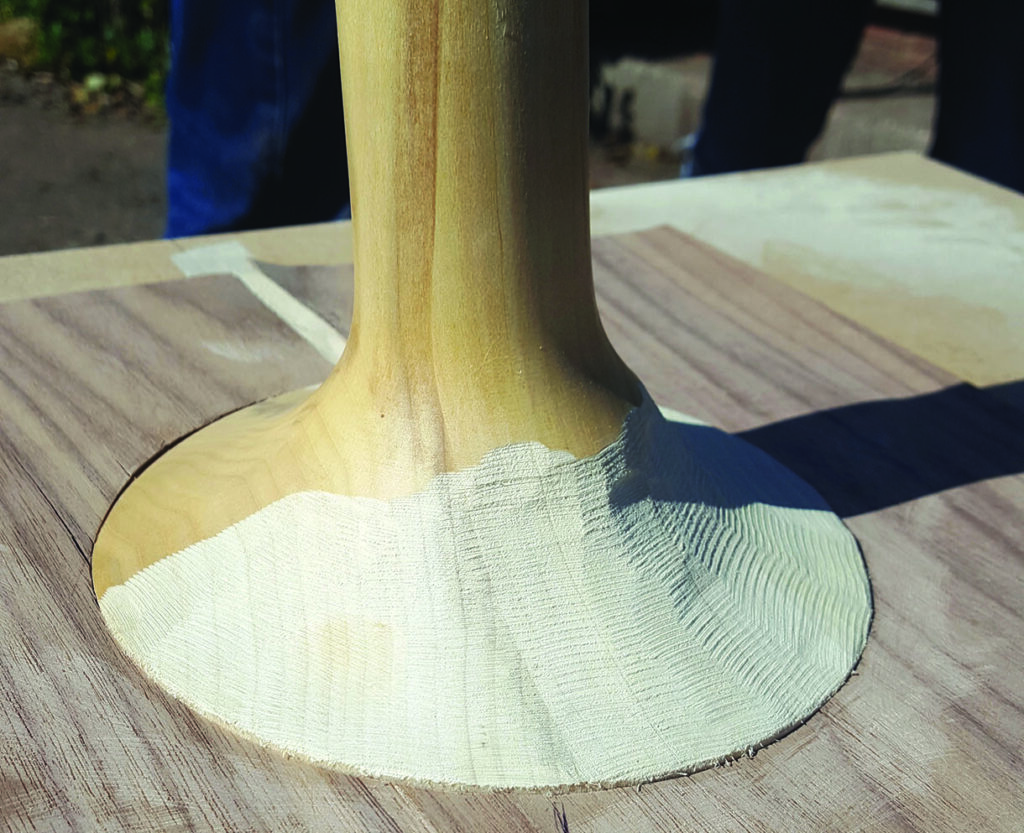
This project may look like it’s all about curves, but it’s really all about angles. Setting the legs in to splay 5° from both side and front views requires routing a socket in the base that slopes at these two angles. To do this a jig is created consisting of a base with a circle cut out that is the diameter of the top of the leg which is then raised on two sides with 5° wedges. Identical angles on the wedges is of paramount importance as any deviation will result in an uneven splay to the legs.
This jig can be cramped to the base and used with a follow cutter to rout an angled socket for the leg to fit into. The deepest part of the socket is routed to match the size of the spigot and the leg will then fit flush to the surface at this point. This part of the curve will not be altered during the shaping process.
Shaping the legs
Using the socket jig, create a socket in a spare piece of MDF that can be used in shaping the legs to avoid damaging the base. A corresponding circle of MDF which fits snugly into this jig can also be created to
trim the tops of any oversized diameter legs.
In turn, each leg is placed into a socket and screwed with a single long screw through the base. Using an angle grinder, the parts of the spigot that are proud of the base are roughly removed. This needs to be done by eye so make sure to keep the other legs nearby for comparison as you proceed. I’d recommend practising this first on the spare leg created during the turning process.
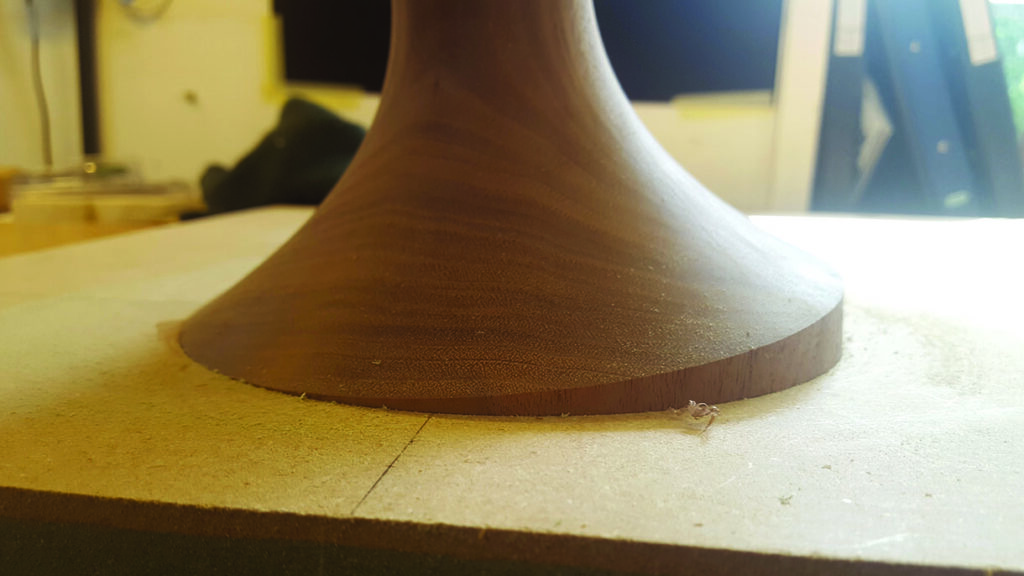
The final shaping of the leg is done using a curved spokeshave and cabinet scraper. Pay attention to the grain direction here as it can make a world of difference to the quality of finish achieved. The consistency of the curve will be dependent on handwork so patience and perseverance will be necessary. Go slowly, using touch to check the smoothness and uniformity of the curve. Finished or near finished legs can be dry fit into the base to check consistency with the other legs.
Fixing the legs
In comparison with shaping the legs, fixing the legs is a relatively easy job. Markings are made on the leg and base to mark position and the leg and base pre-drilled with the leg in position. Cascamite, coloured as before, is applied to the base and top and spigot of the leg. Then the leg is simply screwed on and pulled up into the base. Once dry, the foot of the leg is planed off at an angle and balanced with the other legs. The increased diameter at the top of the leg and the depth of the leg into the base combine to create a very strong and sturdy joint with no racking or wobble.
Choosing materials
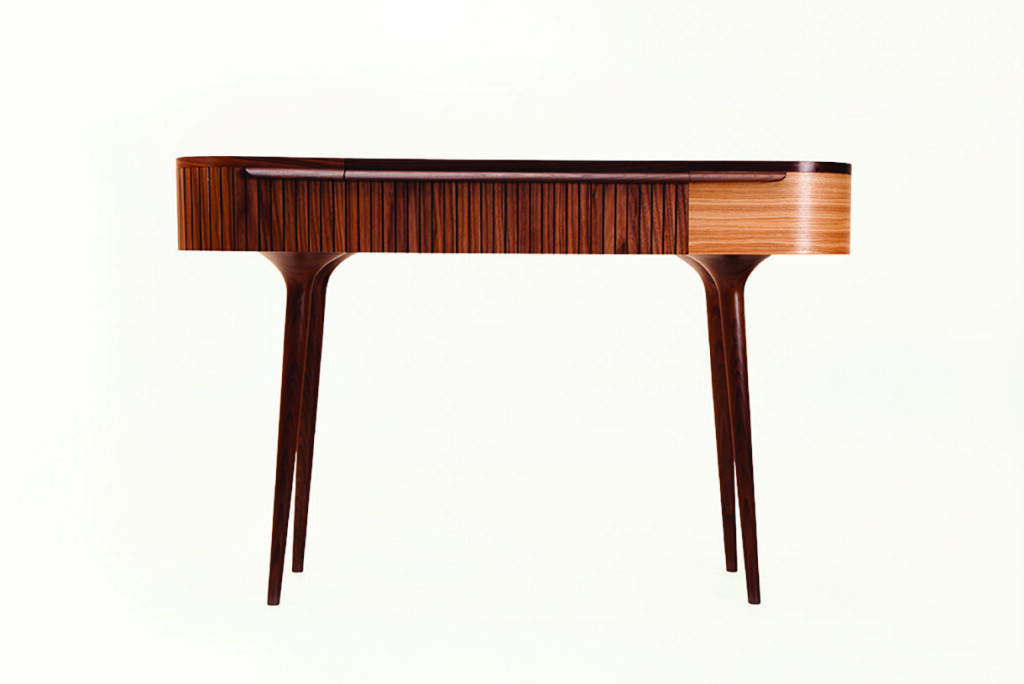
By balancing the use of materials on the Meala table I was able to introduce an element of asymmetry to an otherwise largely symmetrical design. Walnut was chosen for its strong colour and character. The olive ash was chosen as both a complement and a contrast to the walnut. The light tone of the ash creates a visual break from that of the darker walnut with the dark lines of the olive figuring tempering that break and drawing the walnut tones across the piece. The extension of walnut across the table by way of the handle helps the visual continuity.
The honey-coloured tones of the ash and liquid-like figure also give the table its name, with Meala meaning ‘of honey’ in Irish and making up part of my Tipperary hometown’s name, Cluain Meala ‘the Vale of Honey’.