Vic Tesolin makes a simple bench with rock-solid joinery that won’t cause you to lose your head
As you look at furniture throughout the ages, you start to realise that the joinery and overall construction remains the same. What does change over the years, however, is the styling and aesthetics. This Tudor-inspired bench is a fine example. This piece uses some simple, rock-solid joinery that you would expect to find on a bench of this type but what sets it apart is the styling. Don’t be afraid to experiment with the shapes and curves – it’s not like you have to worry about losing your head over it.
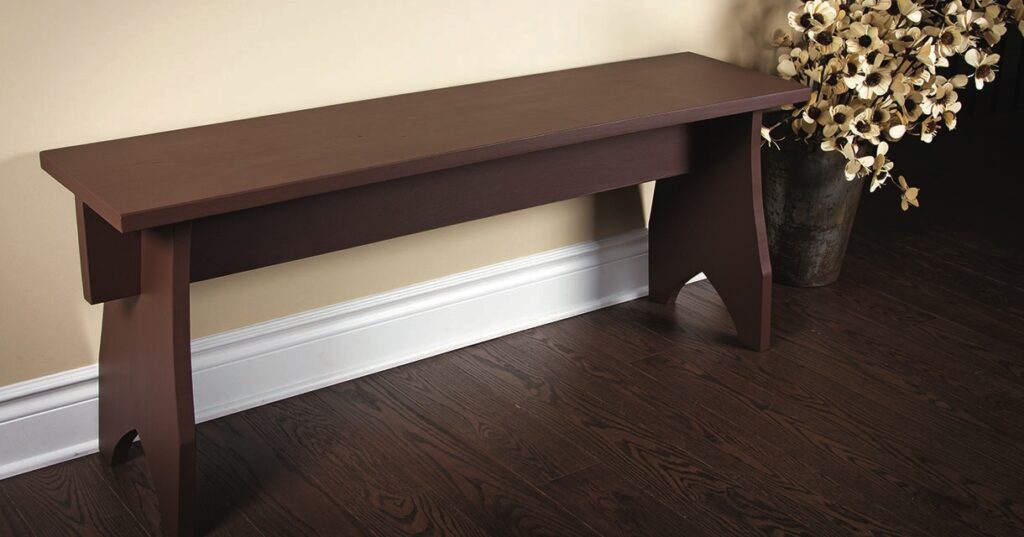
I chose to use tulipwood for this build because my plan is to finish the bench with paint. The original would likely have been done in oak but I have exercised my poetic licence and opted for a different look. That’s one of the best things about being a woodworker, you can make things how you want them.
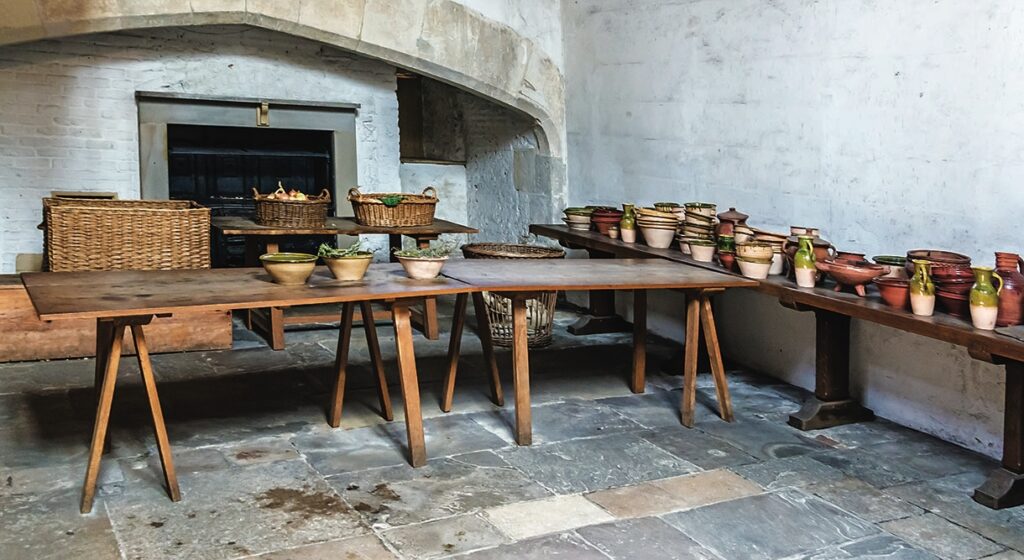
Table of contents
Timber cut list
(Length x width x thickness in mm)
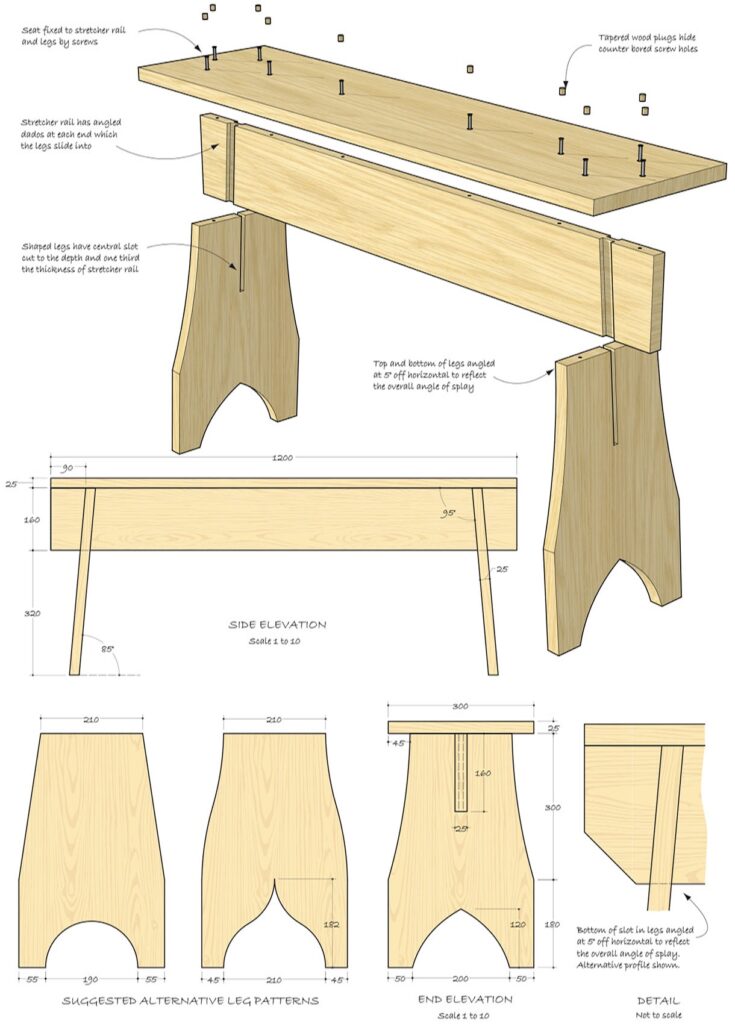
Legs: 480 x 300 x 25
Seat: 1200 x 300 x 25
Stretcher: 1200 x 160 x 25
Drawing
Break out
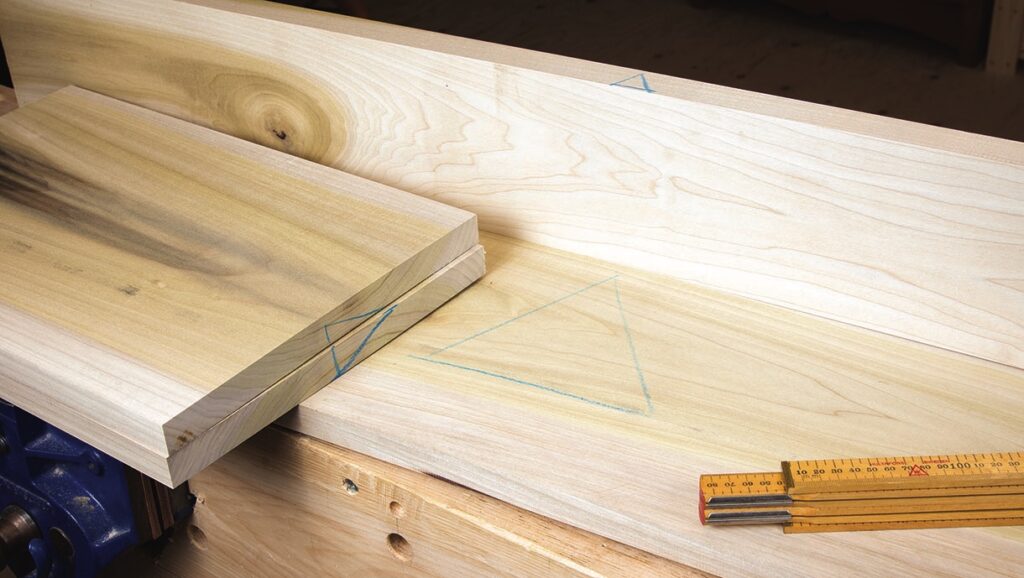
Start with breaking out your lumber according to the cut list provided. One of the nice things about this build is that you can dimension all of the components ahead of time and then cut the joinery. Be patient and wait to cut all the curves after you have cut the joinery because the parts will be easier to hold on to if you leave them square. Mark all of your components with a cabinetmaker’s triangle so you can keep track of them. You really can’t go wrong using this method to mark your work because your pieces will always be in the right orientation as long as they form the triangle. This will be important for later steps because each joint will be cut and fit individually. Putting the left leg into the right leg’s position may not work, so take the time to mark your components.
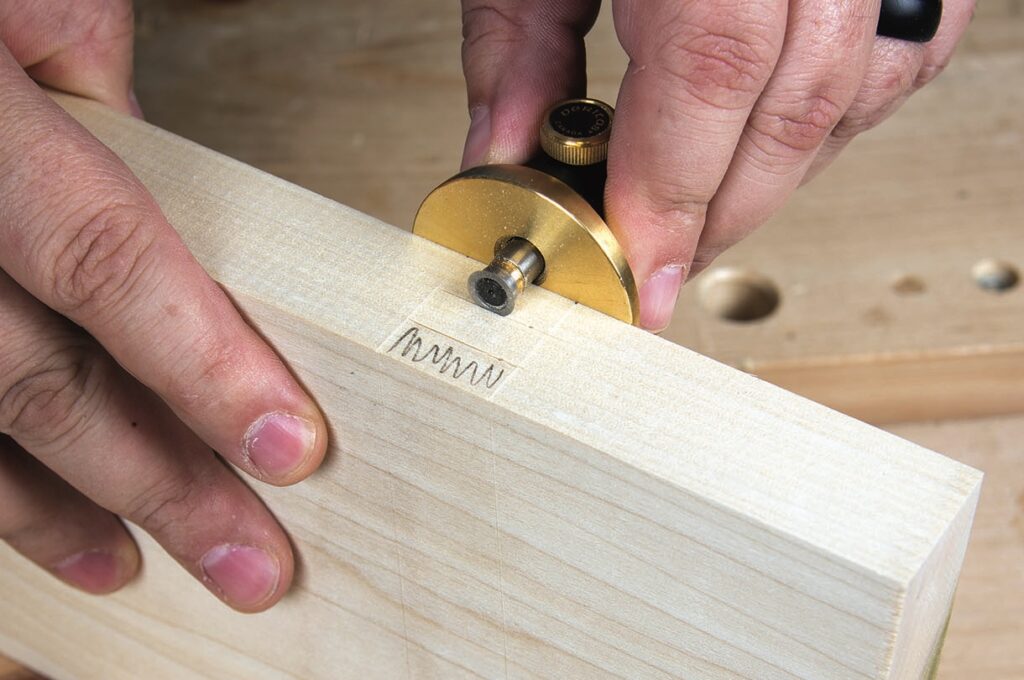
The bench gets its strength from the dados the legs will slide into. The legs will sit at a slight angle, in this case 5° of outward splay. Let’s start with laying out the angled dado on the stretcher. Locate the two inside shoulders of the dados according to the drawings. Set your bevel gauge to 95° and place it on these marks and strike a knife line.
Place your leg parts up against the knife line you struck and make another mark denoting the thickness of the leg. Some people would measure and transfer this mark but this technique will fail if your leg dimensions are off by even a small amount. It is safer to use referential methods for this step – in fact, I use referential techniques as often as I can in woodworking. Place your knife into this mark, bring your bevel gauge to the knife and strike a knife line parallel to the first. Carry these lines onto the other side of the stretcher and the edges to complete the angle layouts. Leave the bevel gauge set to 95°, you will need this setting again in a later step.

The dados
The dados are going to be 1/3 of the thickness of the stretcher. Again, don’t worry about the maths here, simply use a small divider to step off the thirds then set a marking gauge to the mark and you’re ready to go. Mark your depths and then mark your waste with a pencil so that there is no confusion about what material needs to come away.
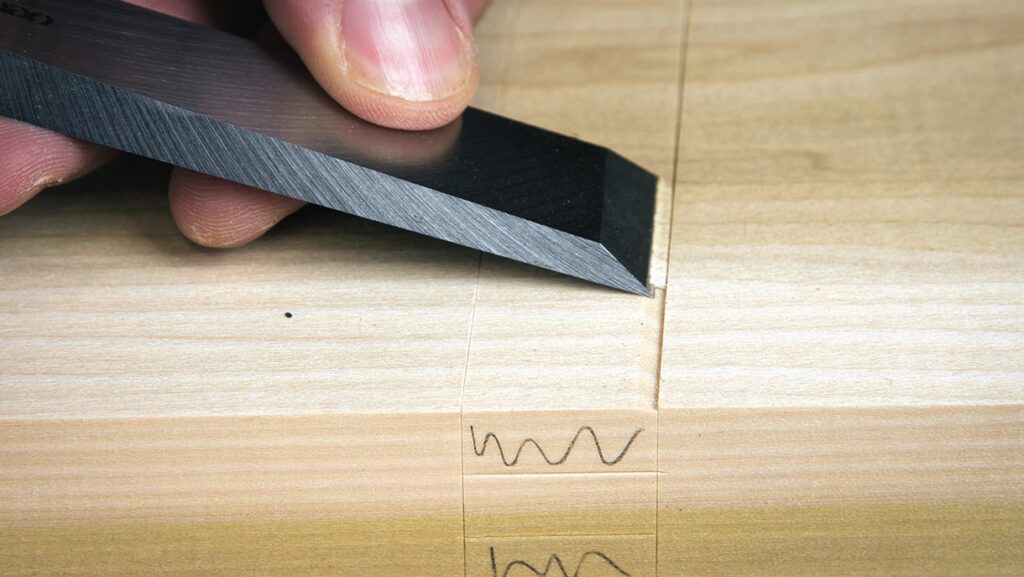
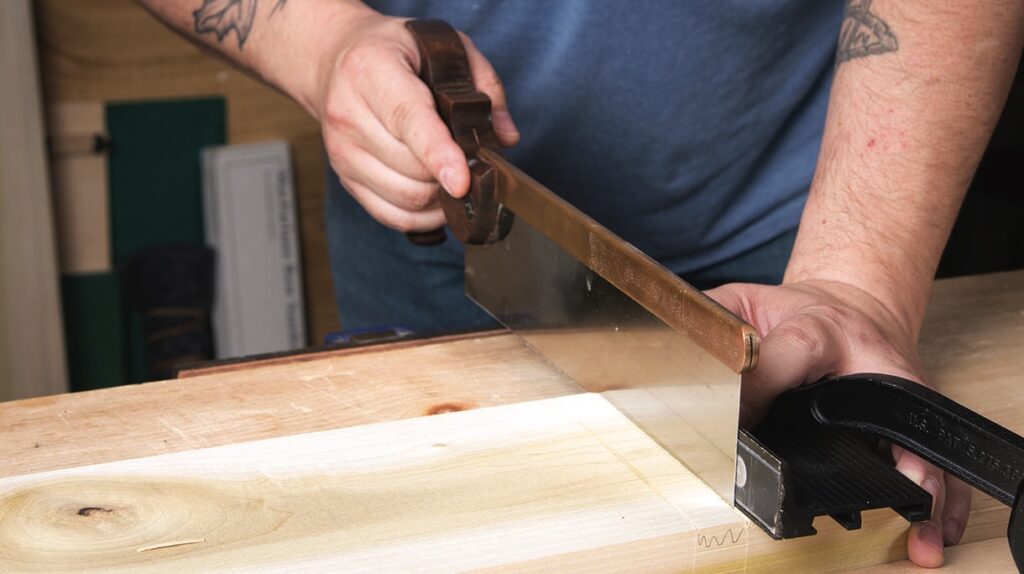
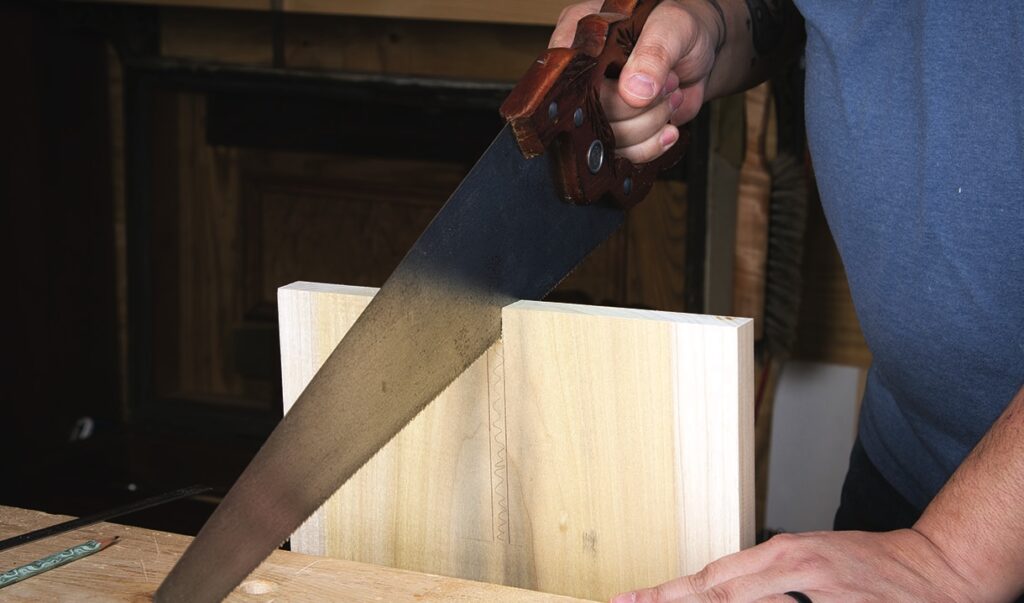
To cut the dado, start by creating a knife wall with the lines that you struck. Now place your backsaw into the groove you created and saw to depth. If you are worried about sawing straight, there is no shame in using a jig to ensure that your cuts are perpendicular to the surface. Keep an eye on those depth lines so that you don’t cut past them and weaken the joint.
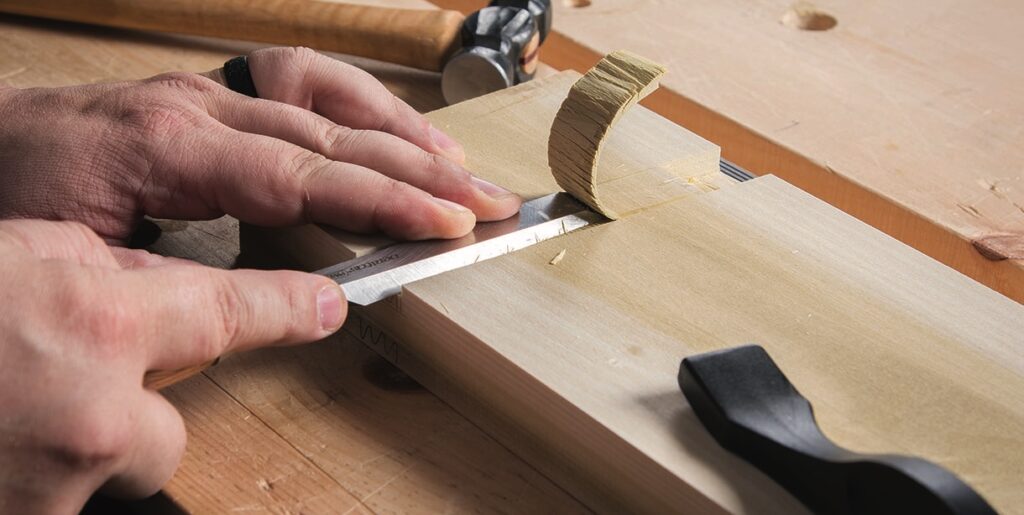
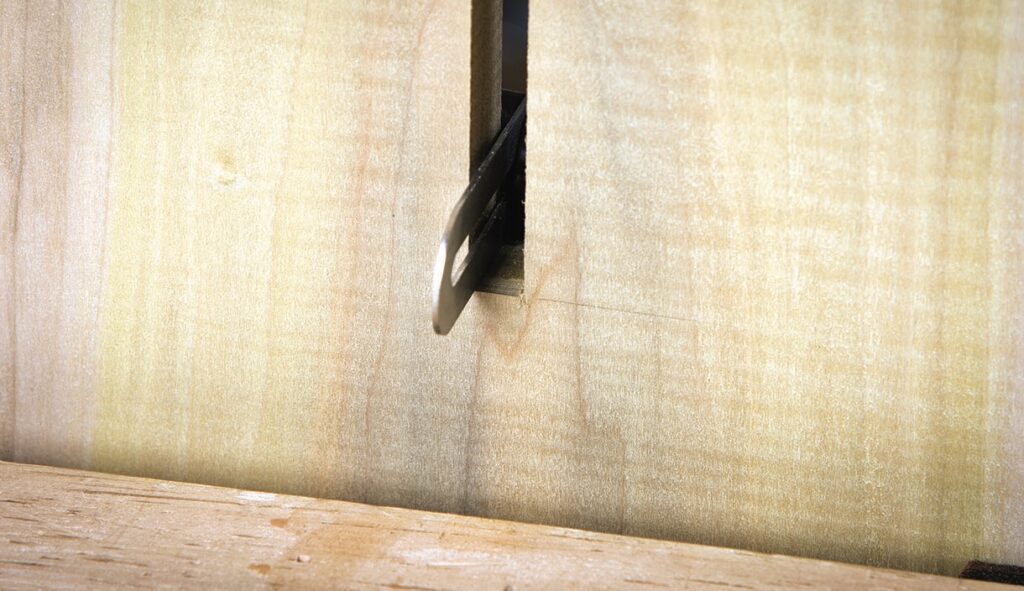
Pick a bench chisel that is slightly narrower than your dado and start removing the bulk of the waste. The goal is to leave about 1mm of waste to remove with a router plane so don’t get too carried away. Be sure to not simply drive the chisel out the back end of the dado. Doing this will lead to spelching on the other side making a mess of the joint. Always work inwards from both sides to avoid the dreaded spelch.
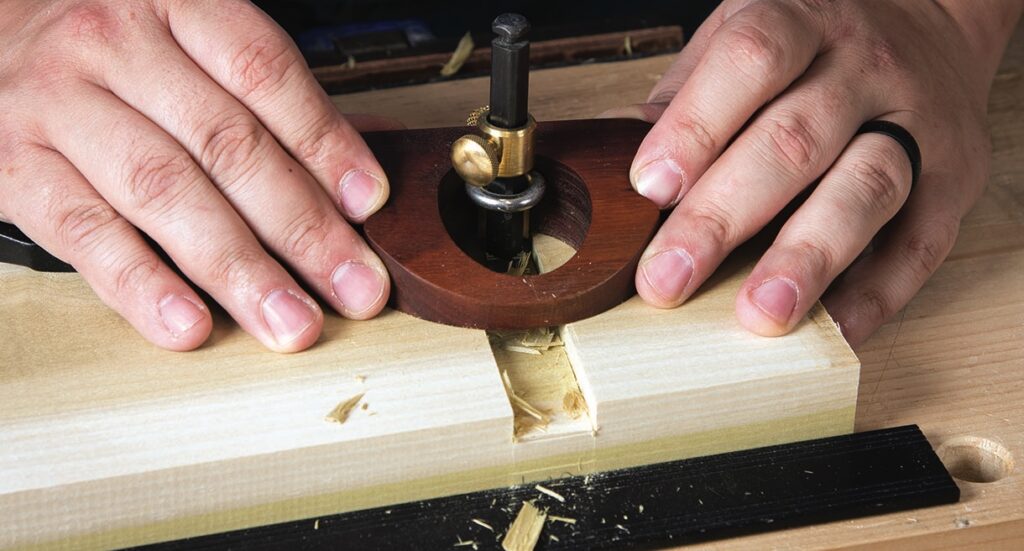
With the bulk of the waste removed, set up a router plane to the final depth of your dados and set a stop if your router is equipped with one. Bring the router blade up to where you left off with the chisel and begin nibbling away the remainder of the waste.
The legs
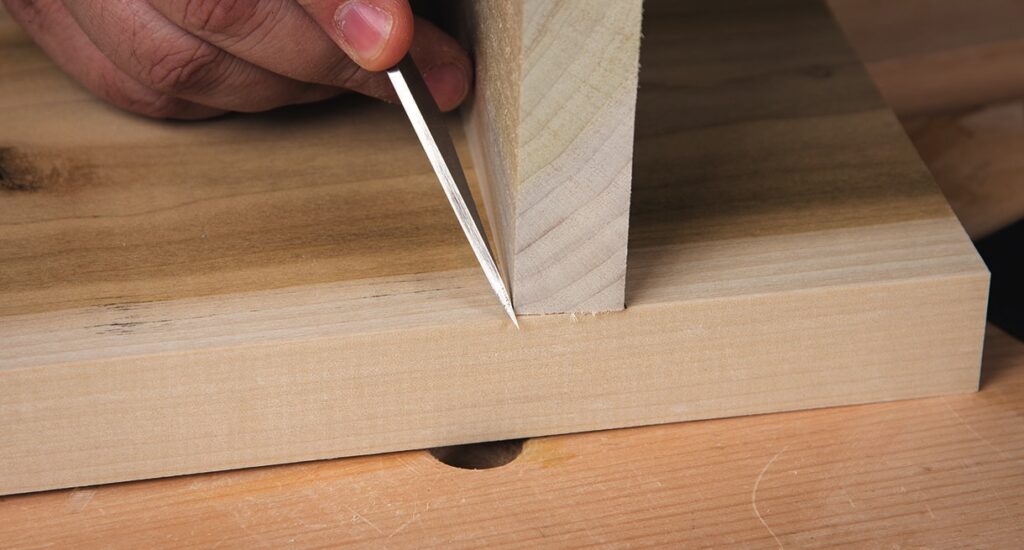
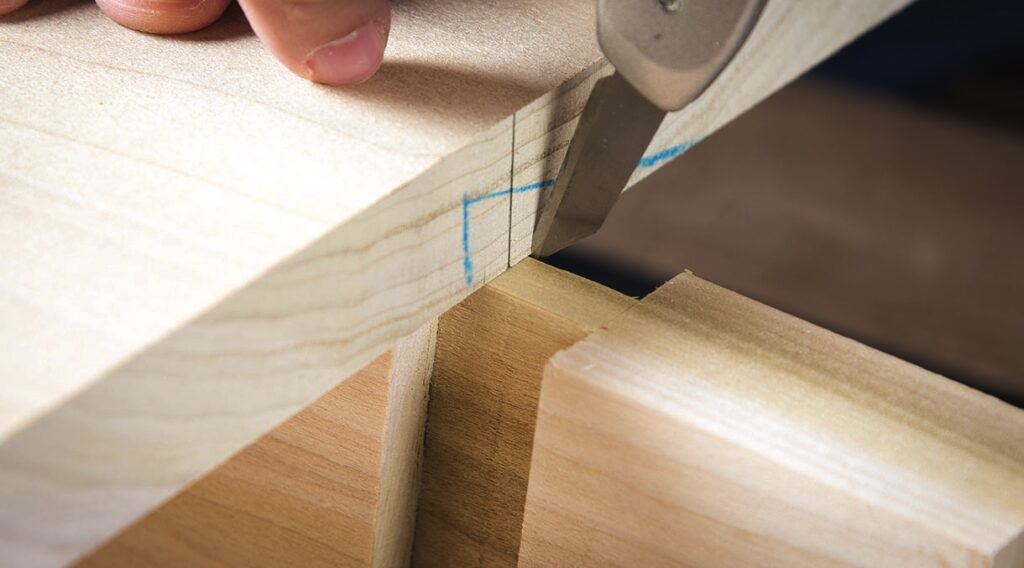
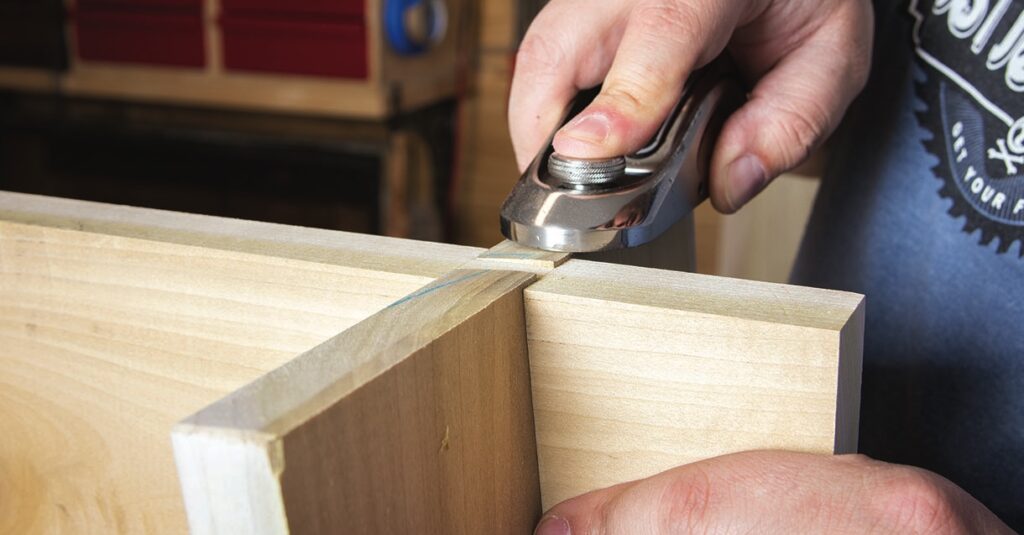
Lightly mark a centre line with pencil on the top of the leg parts. Centre the leg on the stretcher and mark the web of material onto the leg. These marks will be the amount of material you need to remove in order to slide the legs into the stretcher. Use the stretcher’s width to set the depth of cut you will make into the leg with the saw and use a square and knife to carry the lines down to this depth. Feel free to darken the knife lines with some pencil graphite to make them easier to see.
Use a panel saw to saw out the waste being mindful of your layout lines. Remove the filet of waste by chiselling down from both sides of the leg until it comes free. In order to get the leg to sit properly, you have to make the bottom of this groove 95° to match the angle of the dado. The bottom of the groove needs to be angled downwards going from the inside to the outside of the leg. Start to angle the bottom and use the still set bevel gauge to monitor your progress.
Dry fit the legs to the stretcher to make sure everything is fitting. The legs should slide in with moderate hand pressure. If there are any tight spots, remove a bit of material from the sides of the groove, not the dados on the stretcher. Another potential hang-up can be the thickness of the leg not fitting into the dado. In this case, simply hand plane a small amount of material adjacent to the groove to thin it down slightly. You will also have to plane a 5° bevel on the top of the legs to bring them coplanar to the stretcher.

Shaping and assembling
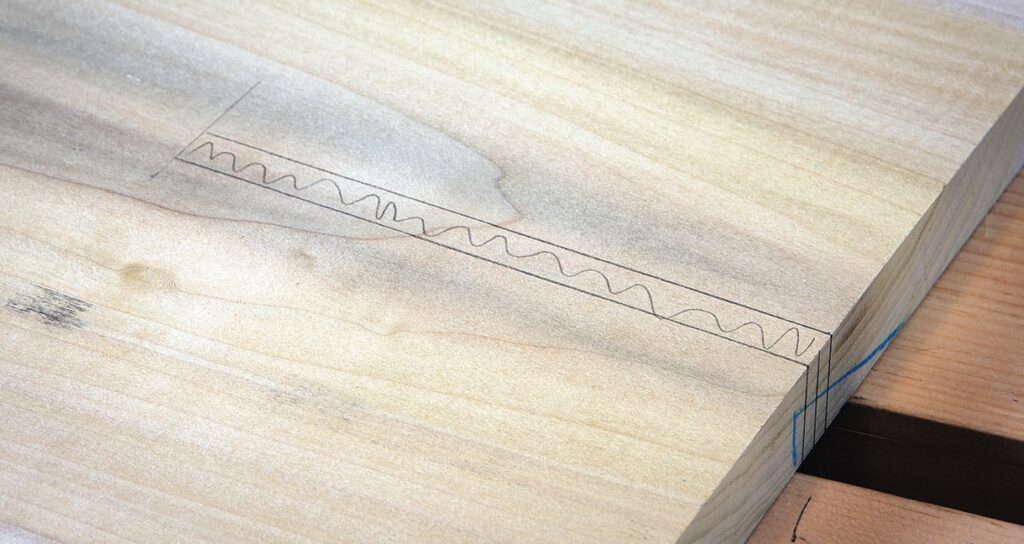
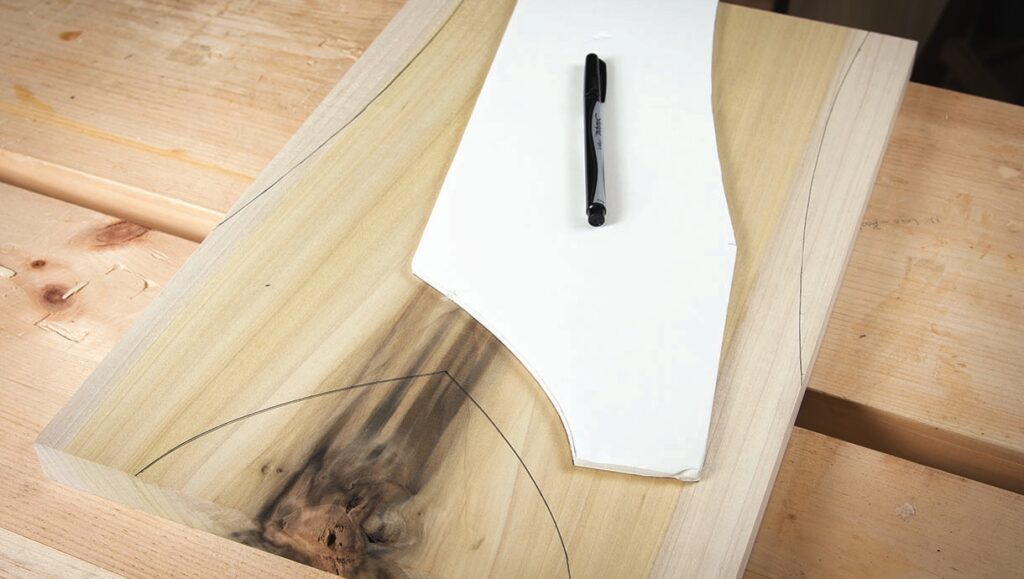
Now for the fun part: the shaping of the legs and stretcher. You can use the provided drawings or you can come up with your own shapes that you find pleasing. I find making a half template makes it easy to ensure that your parts are symmetrical. Make your marks and saw them out with a bow or coping saw then refine the cuts using rasps/files and spokeshaves.
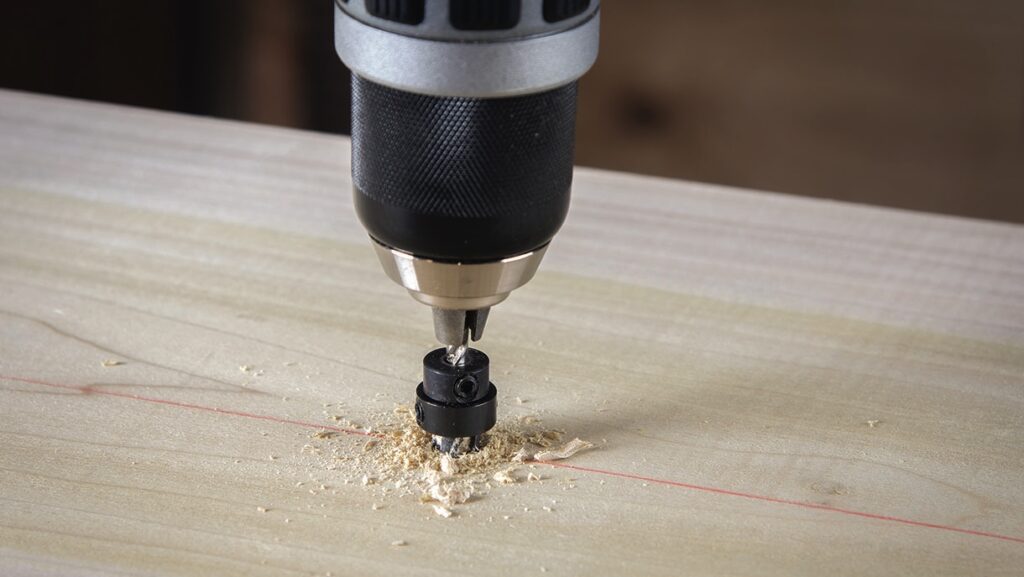
Assemble the legs to the stretcher using glue, remembering that glue is not a lubricant so the joint may need a bit more pressure to come together. Put glue on all the surfaces of the dado to help lock things up. While the glue dries, prepare the seat by carefully marking out the centre line and the leg locations on the top. These lines will guide your fastener locations. Traditionally this bench seat would have been attached with nails or wooden pegs. I have chosen a more modern approach to counter bore holes to receive screws and then finished off with tapered plugs to hide the fasteners. There is no need to use glue when attaching the seat, the screws on their own will be just fine. As for spacing, don’t drive any screws closer than 50mm from the edges to prevent cracking. You can also use a divider to mark off the locations of the screws along the length. Doing this will give you a nicely spaced set of plugs and it’s just good practice.
Finishing
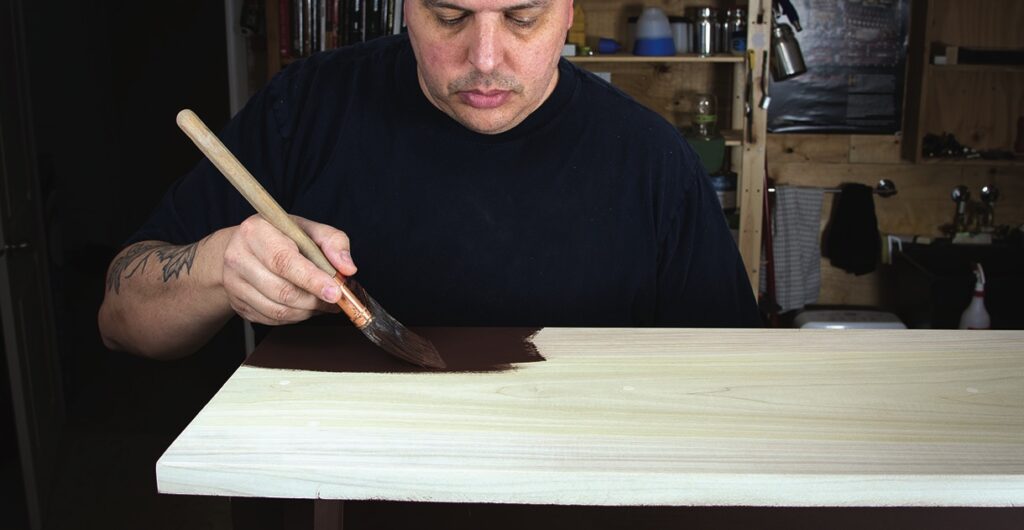
Once the bench is assembled, go around it with a small plane and remove any sharp arrises and round-over the top of the seat so it is comfortable. A simple oil finish would do this project well if you want to see the wood. In my case, I decided to go with a dark brown paint that I think will age well with the piece. Don’t get too hung up on the type of paint to use. In this case I went with a high-quality, matte-finish, interior house paint. This particular brand has primers in the paint so two coats were all I needed.

There are many lessons we can learn from studying furniture of the past but don’t feel that you have to mimic the aesthetics. For me, the learning came from the joint construction but I wanted a more modern look. Don’t be afraid to flex your design muscle in the ’shop, you’ll be pleasantly surprised when you do.