Richard Findley explores the causes of catches on endgrain work and how to avoid them
I previously looked at the most common spindle turning catches, this time I’m going to continue on the theme and take a look at the catches that can happen when cutting endgrain.
The main thing that became apparent in last month’s article was that sharp tools and good tool presentation are key to avoiding the dreaded catch. The catches that occur when cutting endgrain are no different, and what I show here will hopefully clarify and reinforce the messages from the previous article.
As with most spindle turning, a skew or spindle gouge can be used for the job – or even a bowl gouge if you prefer – and, as with most types of catches, both tools are susceptible to catches, although as you might expect, the skew is much more dramatic about the whole thing when a catch does occur.
Without wishing to sound like a stuck record, I can’t emphasise enough the importance of sharp tools. Sharp tools slice the fibres of the wood with ease, making the tool easier to control and so safer and less likely to catch. Dull tools will fight against the cut, leaving a rough and torn surface and having greatly reduced control. The exact profile you choose for your tools is up to you, but some shapes will certainly work better than others.
Types of catches
Catches when cutting endgrain can loosely be grouped into two different types:
• Entry catches: where the tool skids to one side just as the cut begins
• Run back: where the tool is thrown back as the cut progresses
Both skew chisels and spindle gouges can suffer from both types of catches, but there are a number of tips I can offer to greatly reduce or completely eliminate the chances of them happening.
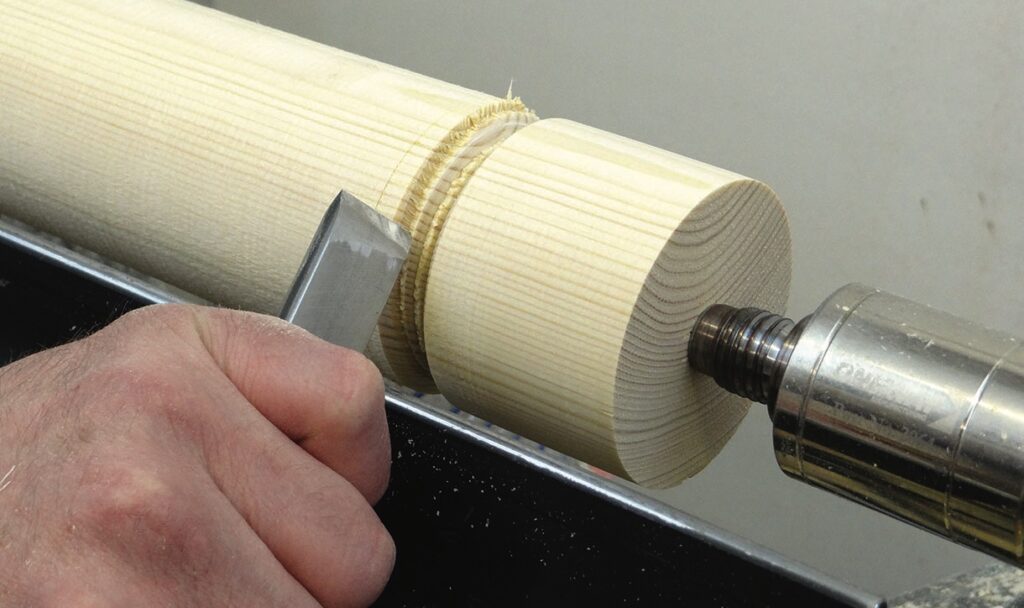
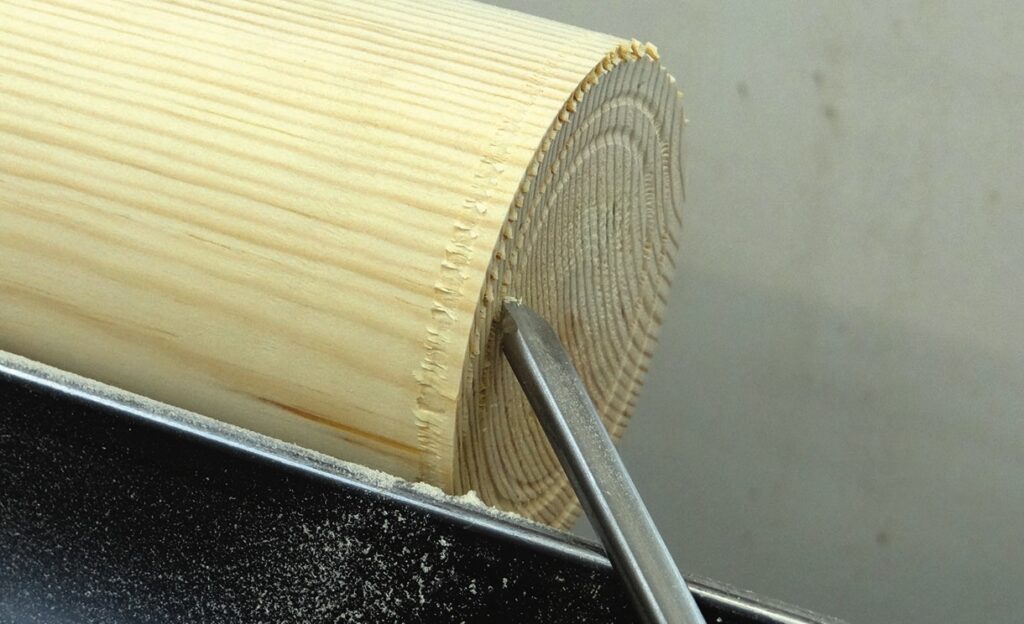
Catch 1: Entry catch
Catch 2: Skew run back
Catch 3: Gouge run back
Slicing solution
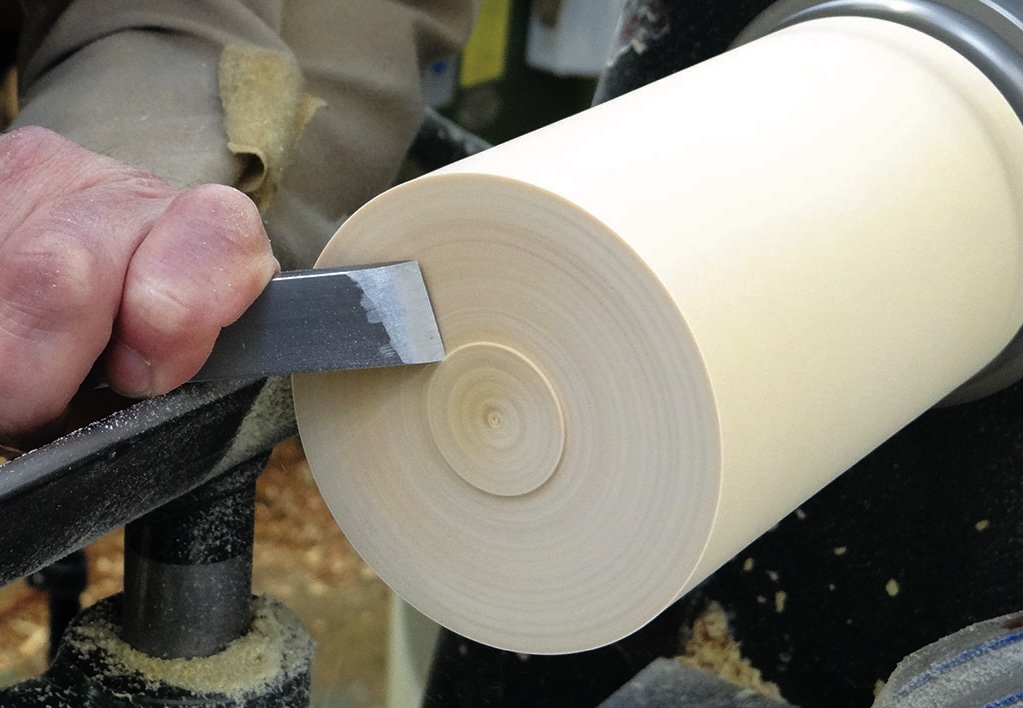
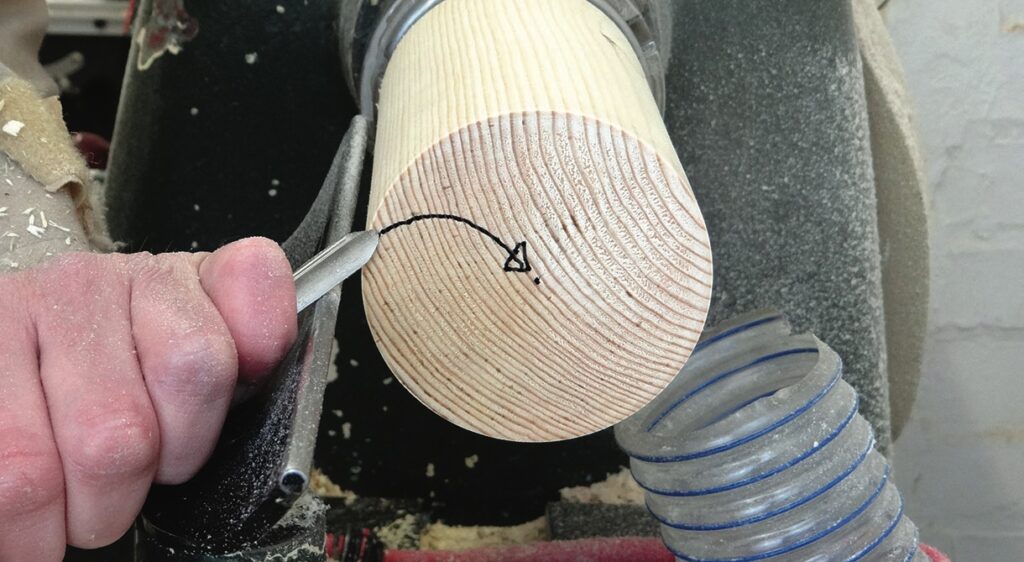
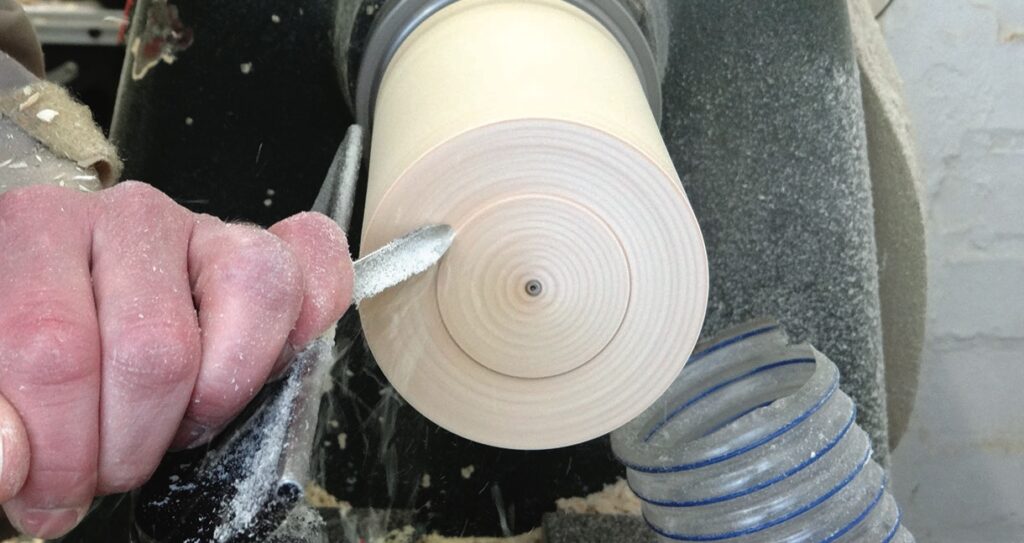
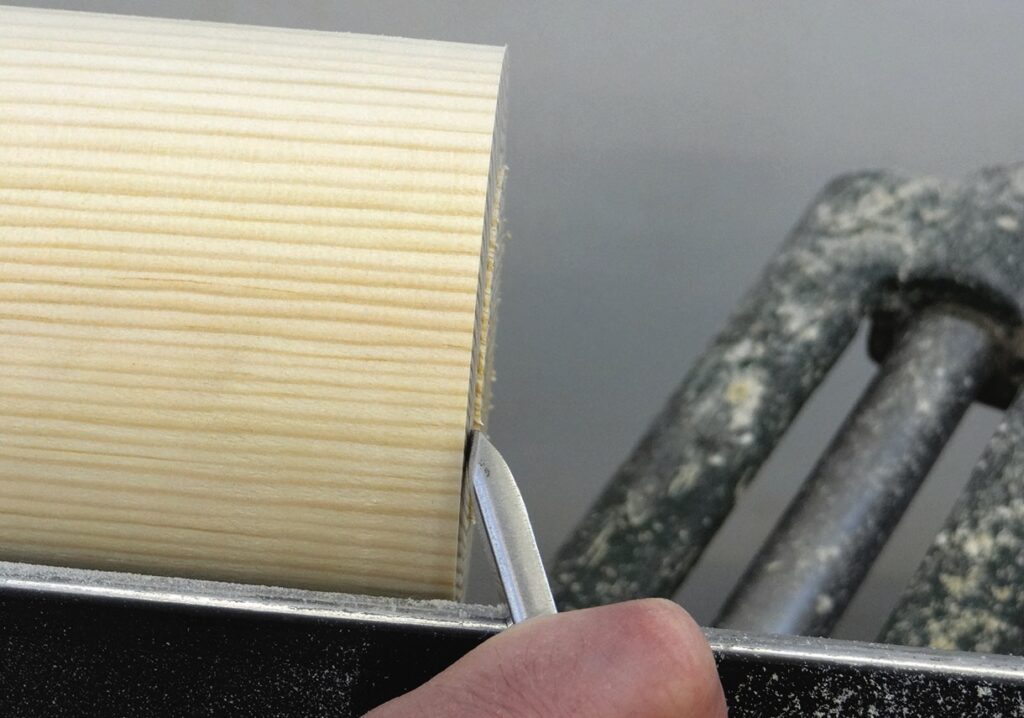
Last time I looked at each catch in turn, but this time there is one main key solution which will vastly increase the chances of success, and once this is understood, the other tips I will give become secondary. The key to success when making a cut such as this is to ensure the cut moves in a slicing action rather than just being pushed straight through the wood. The pictures below show this better than any explanation I can give, but I will try to explain too.

Movement
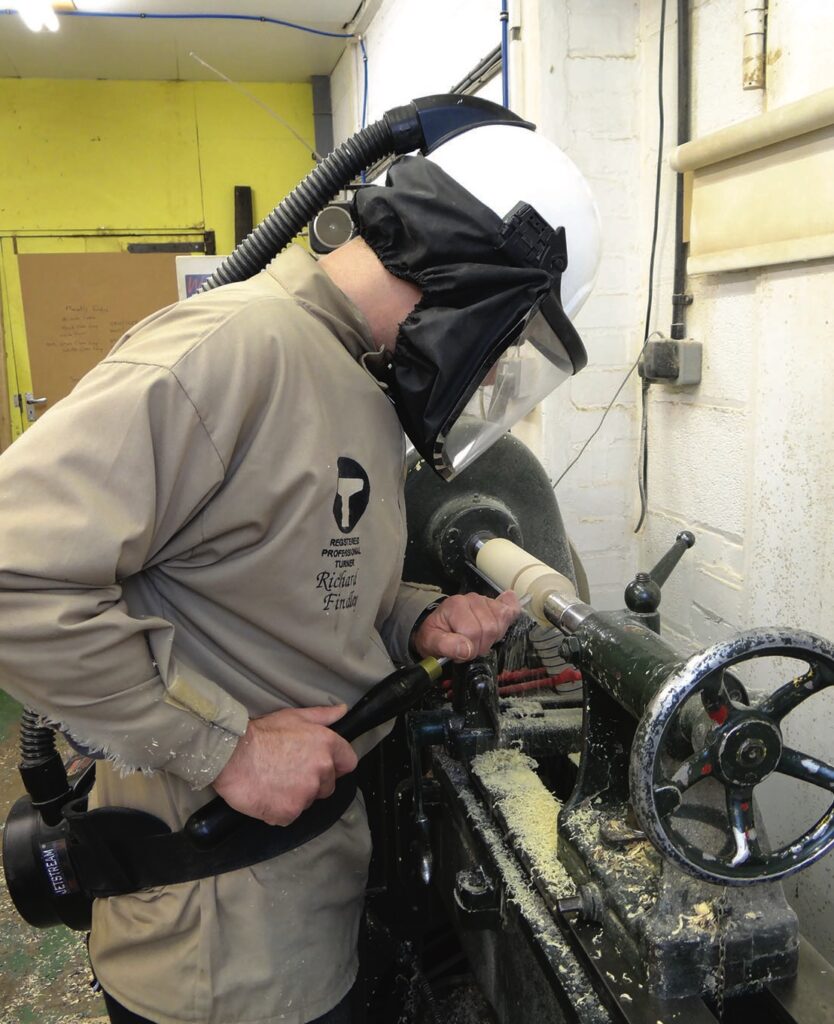
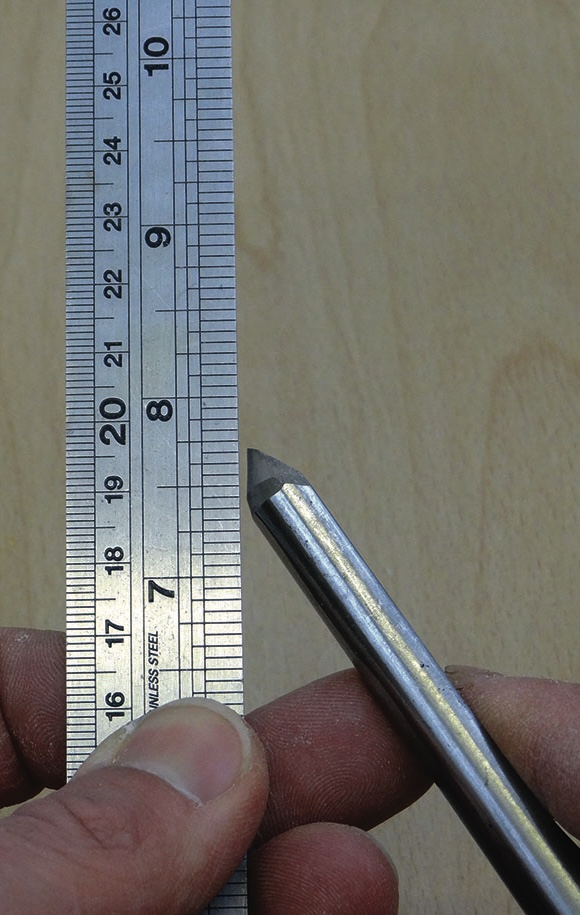
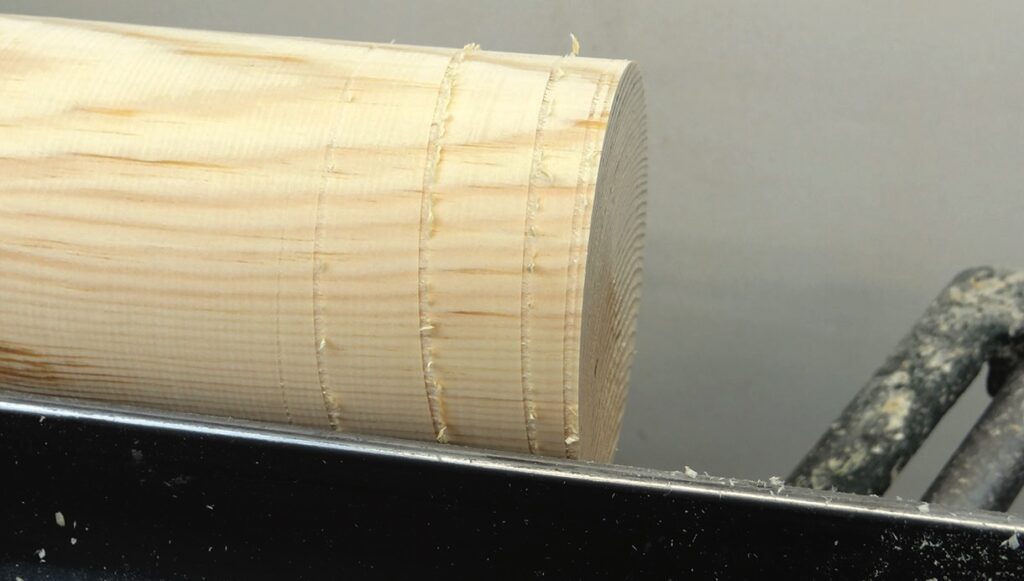
Woodturning is often thought of as a fairly sedentary pastime, but there is far more movement involved in successful turning than people realise. Sometimes the movement is side to side, sometimes it’s lifting or lowering. Sometimes these movements are quite subtle, at other time they need to be bold, sweeping movements. In this case, the tip of the tool needs to move forwards in a slicing, arcing motion towards the centre of the wood. To achieve this the tool handle needs to be lifted as it is pushed forwards. The pictures below show just how much movement is needed to achieve this. The wood I’m using is 100mm diameter softwood, so the movement is exaggerated, but no matter the size of the work, the movement is there to some degree. The pictures at the top of page 19 show the described cut in action, at around the halfway point, with a spindle gouge and a skew, to show this cut in action.

‘Poking and praying’
Confidence is important in turning. I often joke that the tools can smell fear. If your approach is to poke and jab at the work at arms’ length, the chances of success are slim.
I call this approach ‘poking and praying’ because you are really hoping things will work out for the best – perhaps hoping for divine inspiration – without taking control of the situation yourself. The best results are achieved with confident and controlled movements.

Bevel direction
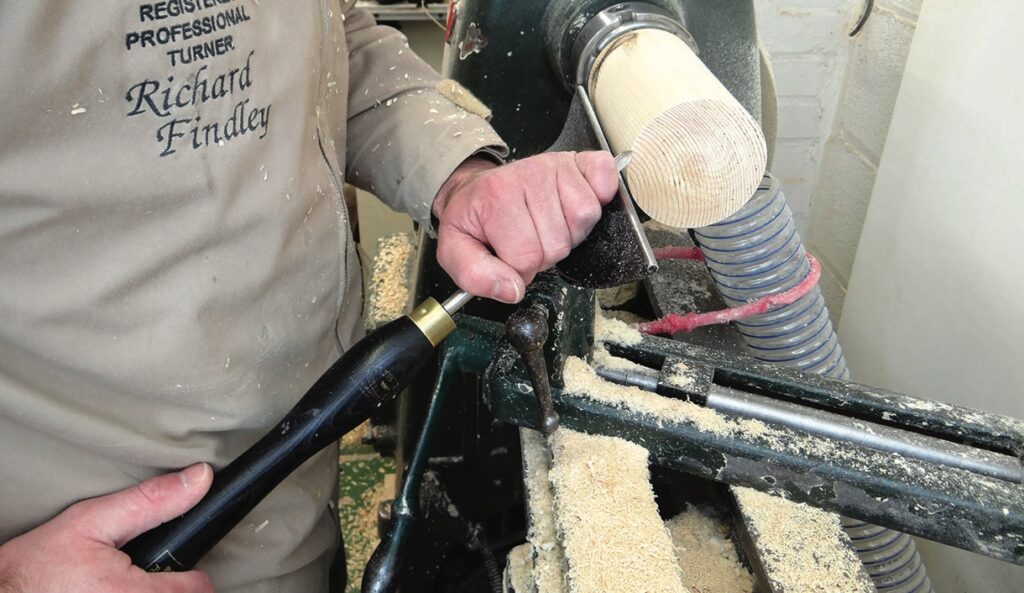
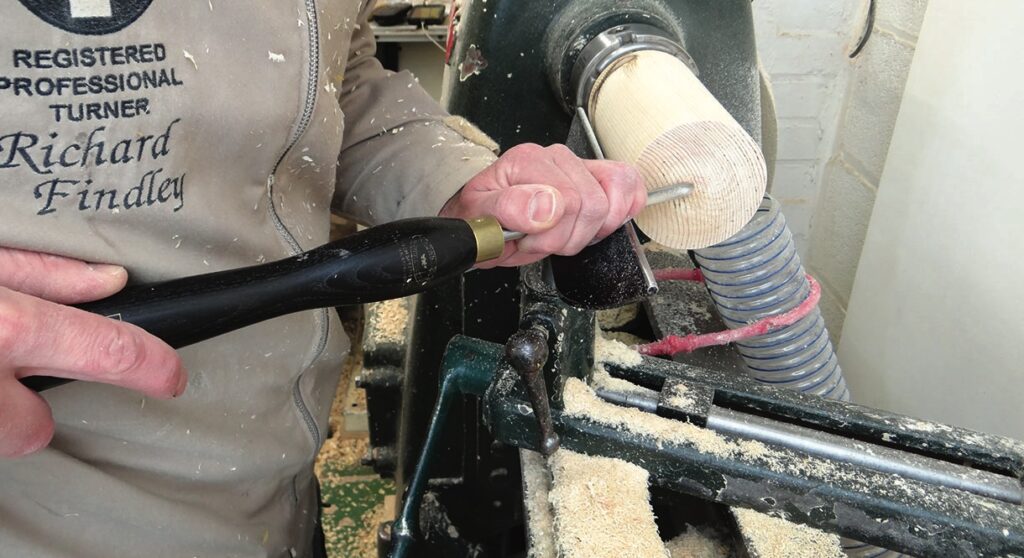
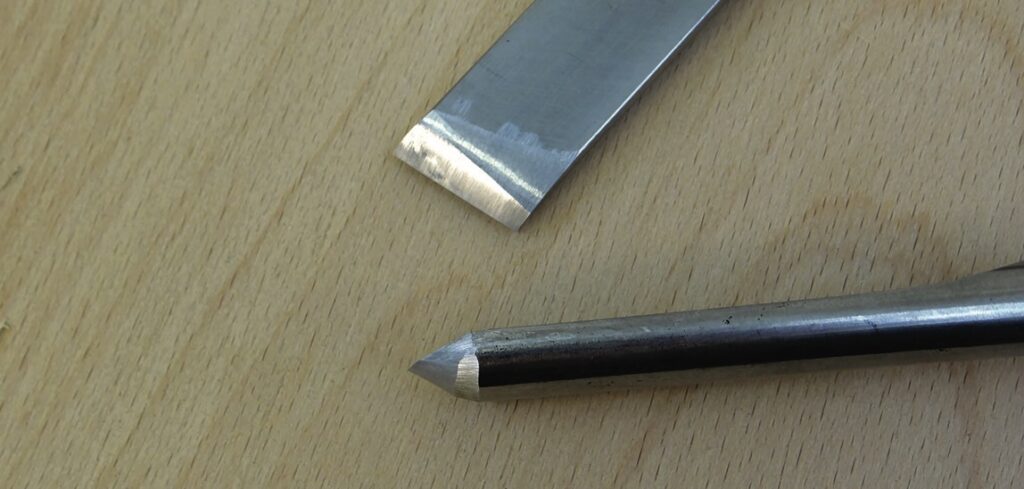
Once the arcing motion of the cut is understood, the whole process is likely to become more straightforward, but there other important aspects to understand, one of which is the bevel of the tool.
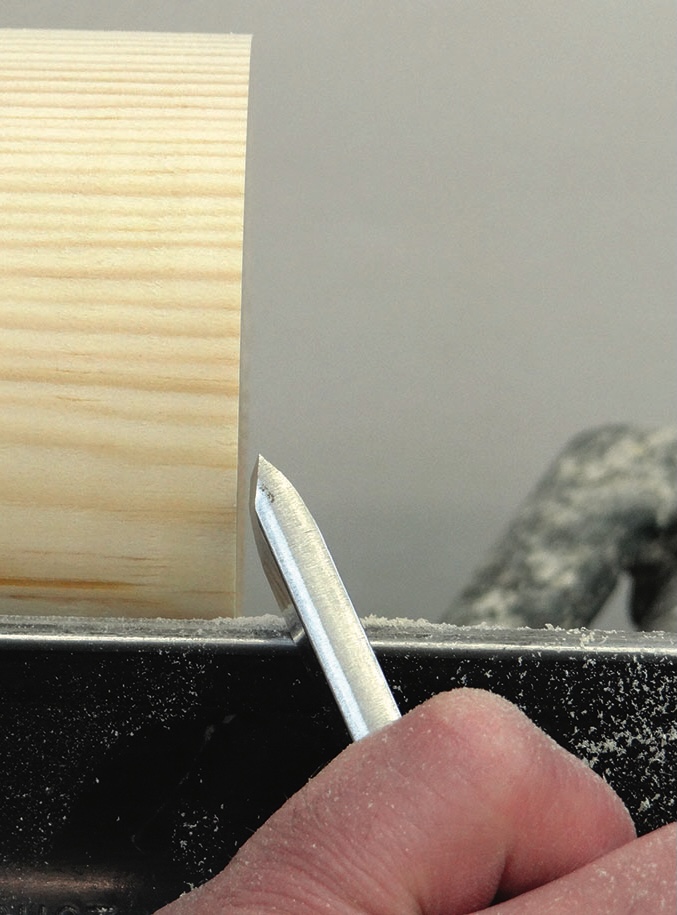
To achieve a dead straight cut the bevel needs to point in the direction of the cut. This means that the tool handle is positioned in what may seem to be a slightly odd and awkward place. Depending on the angle that you grind your tools, this may be more or less than is shown here – my gouges have around a 35° bevel and my skews around 25° on each face. In this case, if the bevel is angled away from the wood toward the tailstock, the result will be a conical cut. If it is pointed more toward the headstock, it will be slightly hollow across the endgrain.
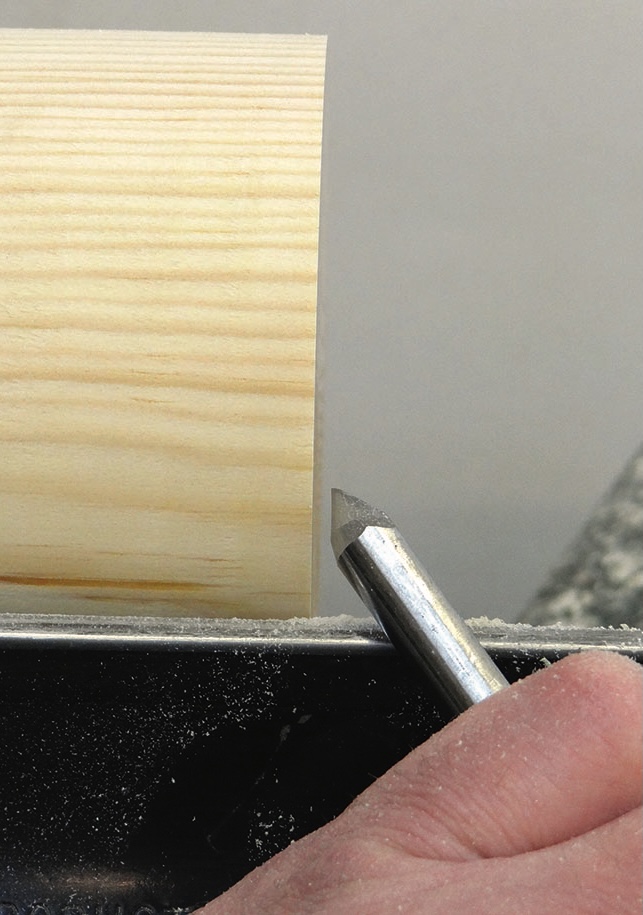
bevel pointing straight across
the endgrain
a straight cut
that the bevel is pointing, emphasising my point
Smooth cuts
While not directly related to catches, the ability to produce these cuts smoothly seems relevant here and I use a simple trick to help me. Vibration usually stems from applying too much pressure to the wood with the tool, so a light touch is key. Softening the heel of the bevel on gouges and skews makes the contact between the wood and the tool considerably more gentle and so reduces vibration and produces a cleaner cut. I simply round over the heel on skews and form a secondary clearance bevel on gouges on my bench grinder while sharpening to achieve this.
Run back
If the bevel of the gouge comes away from the wood as the slicing cut progresses, it can run back. Trying to make this happen for the article I had to not only lift the bevel well away from the work but also rotate it so the cut was coming from a good way to the left of the tip of the tool. This rather suggests it should be difficult to get this catch to happen, but it can and does happen, so paying attention to the bevel position and making sure it lightly rubs – or glides – behind the cut is important.
With a skew, on the other hand, the most likely reason for a run back catch is that the cut is coming from too high on the edge. Ideally the slicing cut should come solely from the long point of the tool and nowhere else. This means that finding the perfect presentation for the skew is a little more difficult as the bevel needs to point in the direction of the cut but needs to be very slightly tilted to ensure the rest of the edge doesn’t come into contact with the wood. You will notice that my skew is ground with less skew than might be commonly seen, this suits me but may not suit everyone. It is still the long point I’m using throughout these slicing cuts.
Entry catches
One catch which can happen with either tool is on the entry to the cut. This is almost exactly the same as an entry cut into a cove, which I described last month. Employing the slicing action as described above will help greatly in successfully entering the cut. The other aspect to understand is that, at the point of contact, the cutting edge needs to be vertical. If it is angled one way or the other, the tool will pull in that direction. This is just a case of getting used to how your tools should be presented and, once you become familiar with this and combine it with the arcing and slicing action previously described, these catches should become a lot less frequent if not entirely a thing of the past.
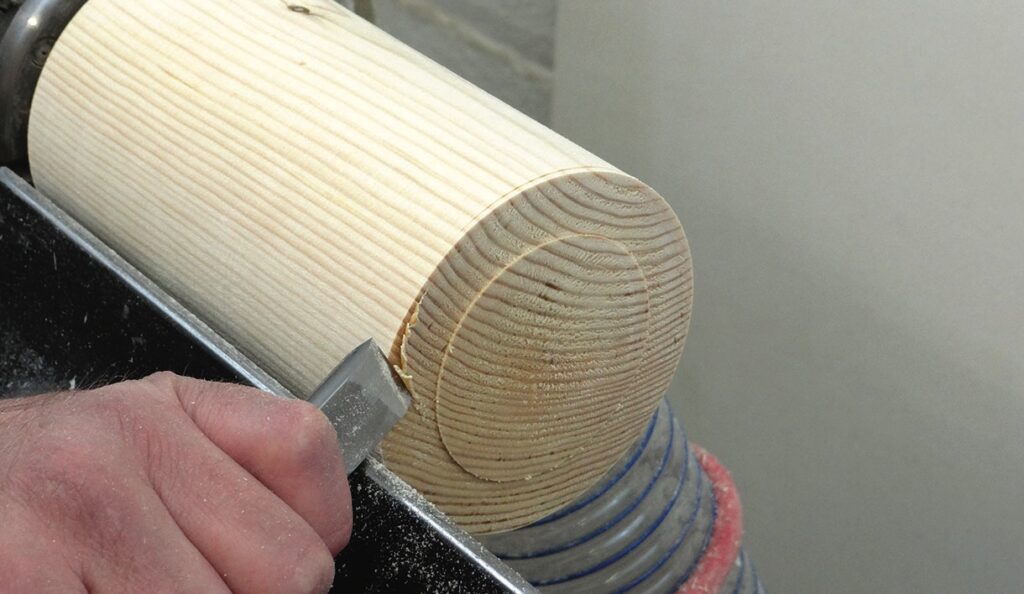
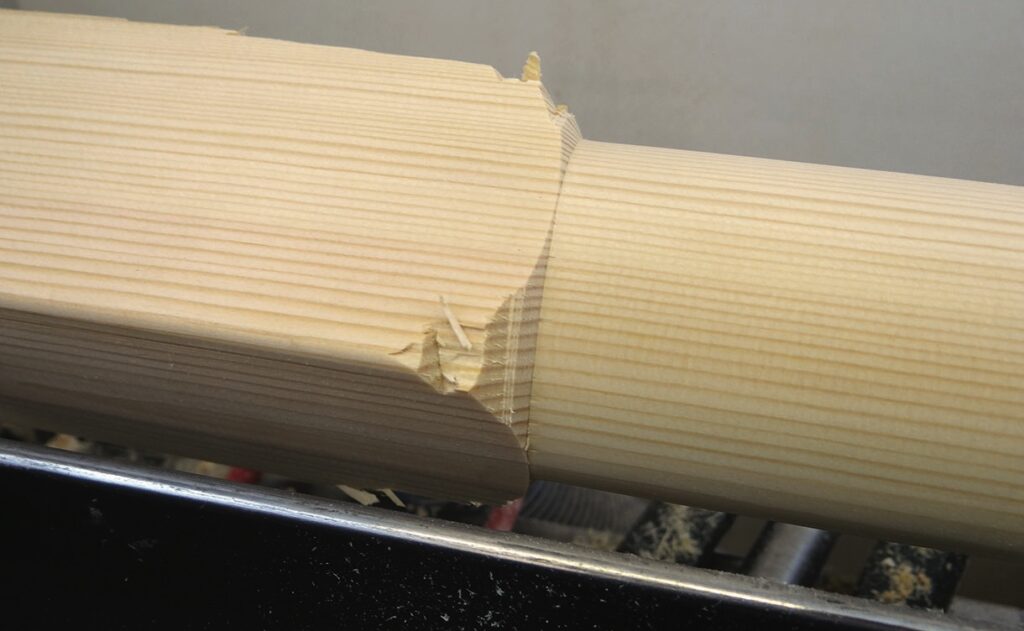
Pommels
Cutting pommels, which are the transition from square to round on items such as table legs, can be done with either a skew or spindle gouge. Forming these pommels is exactly the same cutting action as I showed earlier when slicing across the endgrain – the corners that are revealed when a pommel is cut are, after all, endgrain. All of the catches I mentioned are possible to achieve while cutting pommels. With the entry cut I have found that, because the cut is not into solid wood but into the shadow of the four spinning corners, there is less chance of this happening – although it is still perfectly possible. Run back usually happens when using a skew. The reasons for both the entry catch and the run back are exactly as I noted for slicing end grain and, as such, the solutions are the same: cutting with sharp tools using the arcing and slicing motion and carefully using just the tip of the skew.
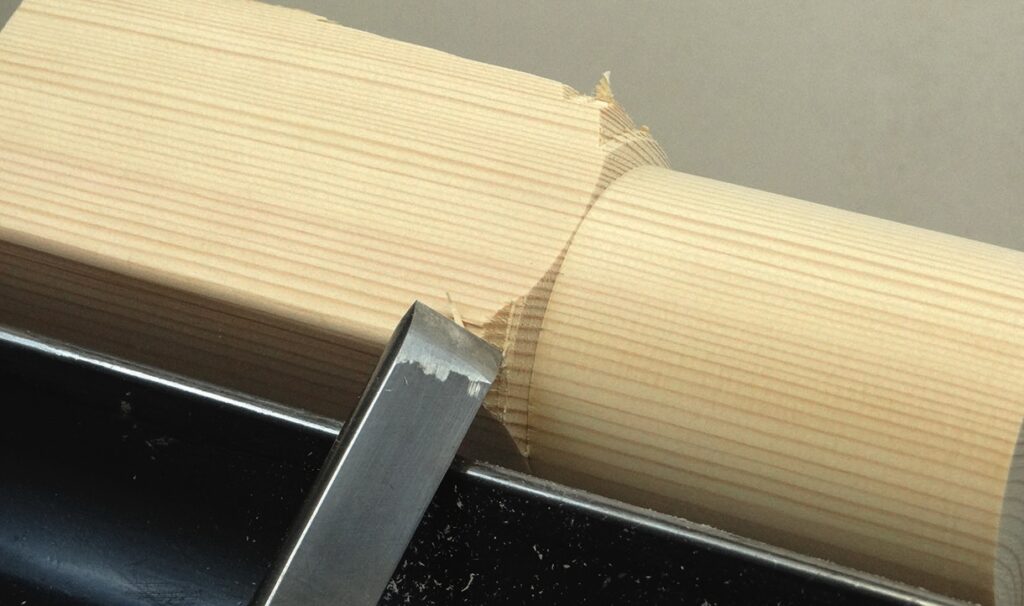
Broken pommels
The frustrating thing with cutting pommels is that if a catch occurs it is usually dramatic and disastrous for the piece of work on the lathe, because once the corners are broken it is easier to start again, unless the wood is expensive or the last piece you have. In this case the broken corners can often be carefully glued back on and held in place while the glue dries with masking tape, as the break is usually with the grain. Careful sanding and a cleanly re-cut pommel usually leaves the repair invisible. If it is too bad to repair you can either pare away the damage with a chisel and carefully patch it with a grain-matched off cut or turn the damaged pommel into a round tenon and glue on a whole new square pommel. Over the years I must confess to having done all of the above at some point.
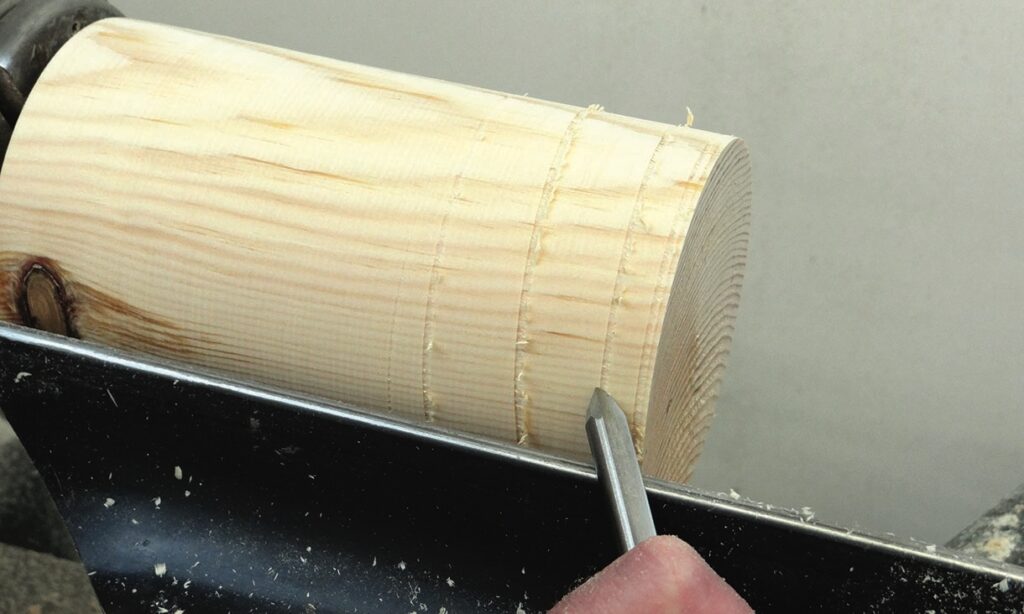
V cuts
V cuts are a fairly simple detail to form, especially compared to everything already covered in this article, but I distinctly remember struggling with them when I was starting out. Just like the previous details, V cuts can suffer from entry cut catches and run back catches with both gouge and skew. Again I struggled to force a catch but remember the difficulty I had with them some years before. The key, just like the other actions is to employ sharp tools – sorry to repeat myself again – with the slicing and arcing cut and the tip of the tool. I did manage to get a catch with the skew but again it was only by forcing it to cut well away from the tip.