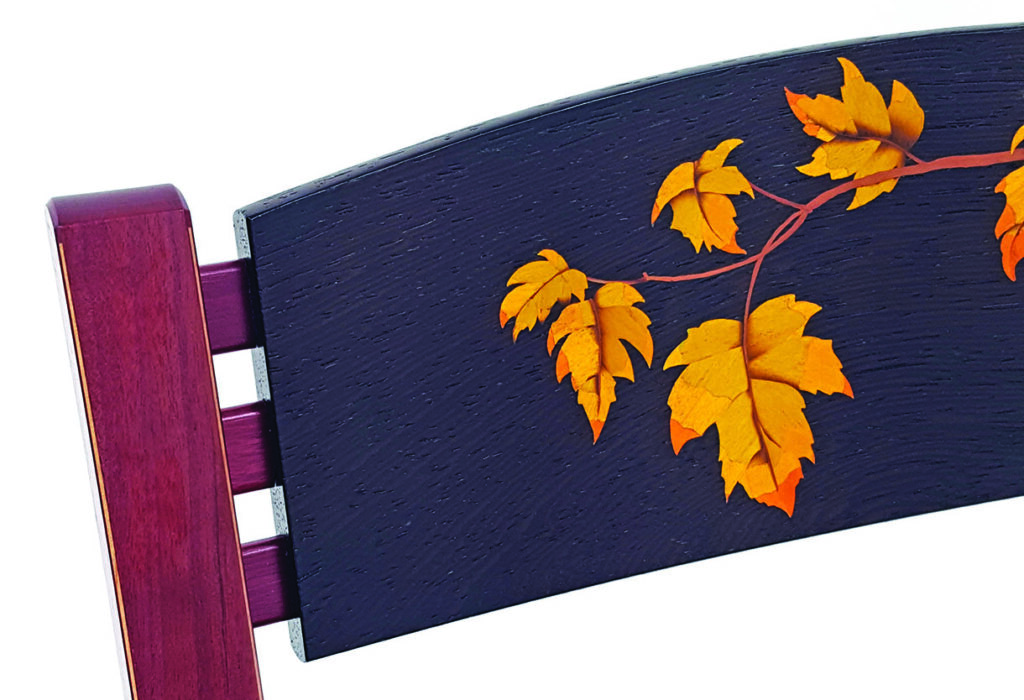
Ramon Valdez has a solution for making quick, accurate veneers
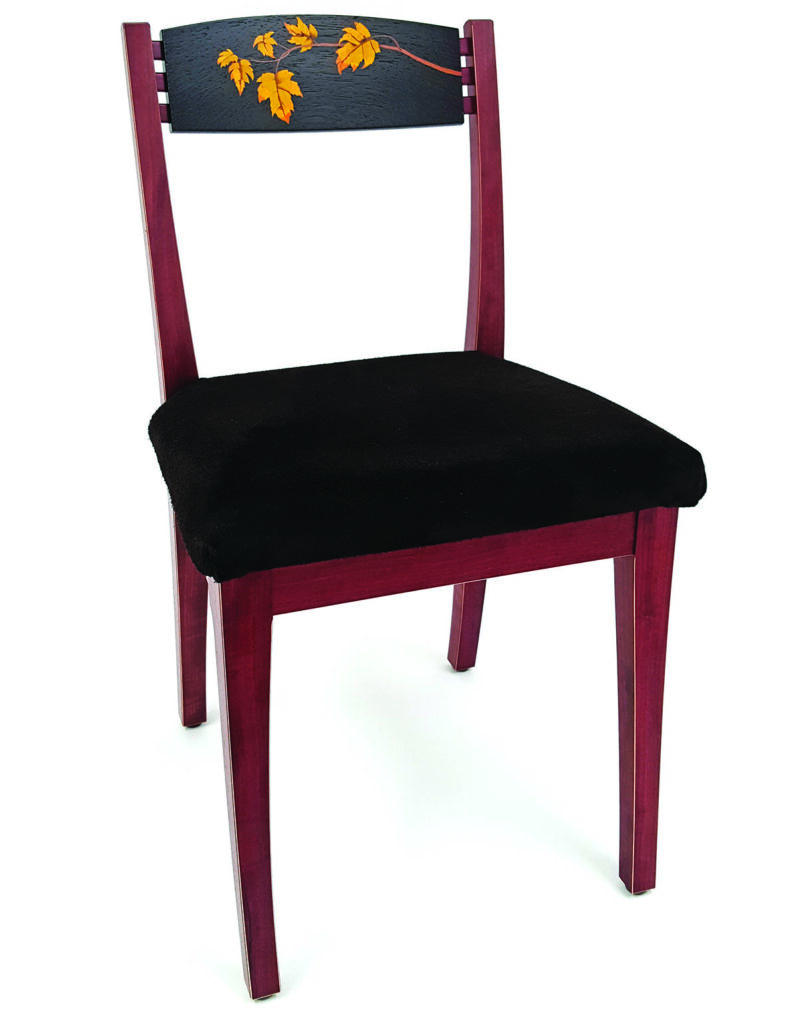
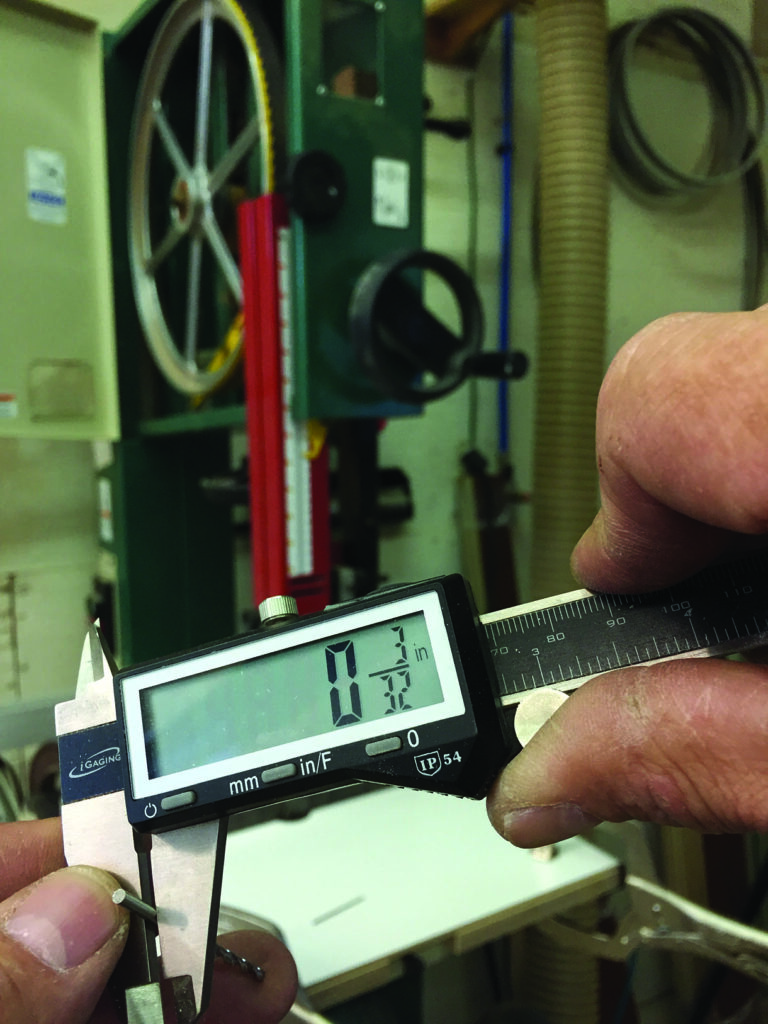
I love my bandsaws: I have a small 14in that I use for general work and a larger 18in that I use primarily for re-sawing timber to be used for inlay work and marquetry. The thickness (or thinness) of the slices that I cut is sometimes dictated by the size of the coloured veneers I use in my marquetry motifs. I recently built a set of chairs with marquetry on the crest rails and I used dyed veneers for their vivid, bold and colourfast palette. I purchased the thickest dyed or coloured veneers that I could find, around 0.9mm or maybe a tad over 1/32in. Then, I matched that thickness with the veneers that I’d be cutting on my bandsaw. I wanted a way to set up my bandsaw to make these veneers and it needed to be quick, accurate and repeatable. Here was my solution …
Making the set-up jig
First off, I must mention that in order for this ‘bandsaw set-up jig’ to perform properly, you must eliminate bandsaw blade drift. I employ Michael Fortune’s technique of adjusting the tracking knob to accomplish this. A well-tuned bandsaw is such a pleasure to use and I love being able to use my factory fence and leave it parallel to the edge of the table (I use a 2 tpi x 1in wide carbide blade). You can easily Google ‘eliminating bandsaw blade drift’ and find a lot of good information on that subject. Once your bandsaw tracks straight and true, cutting parallel to the fence, we can begin!
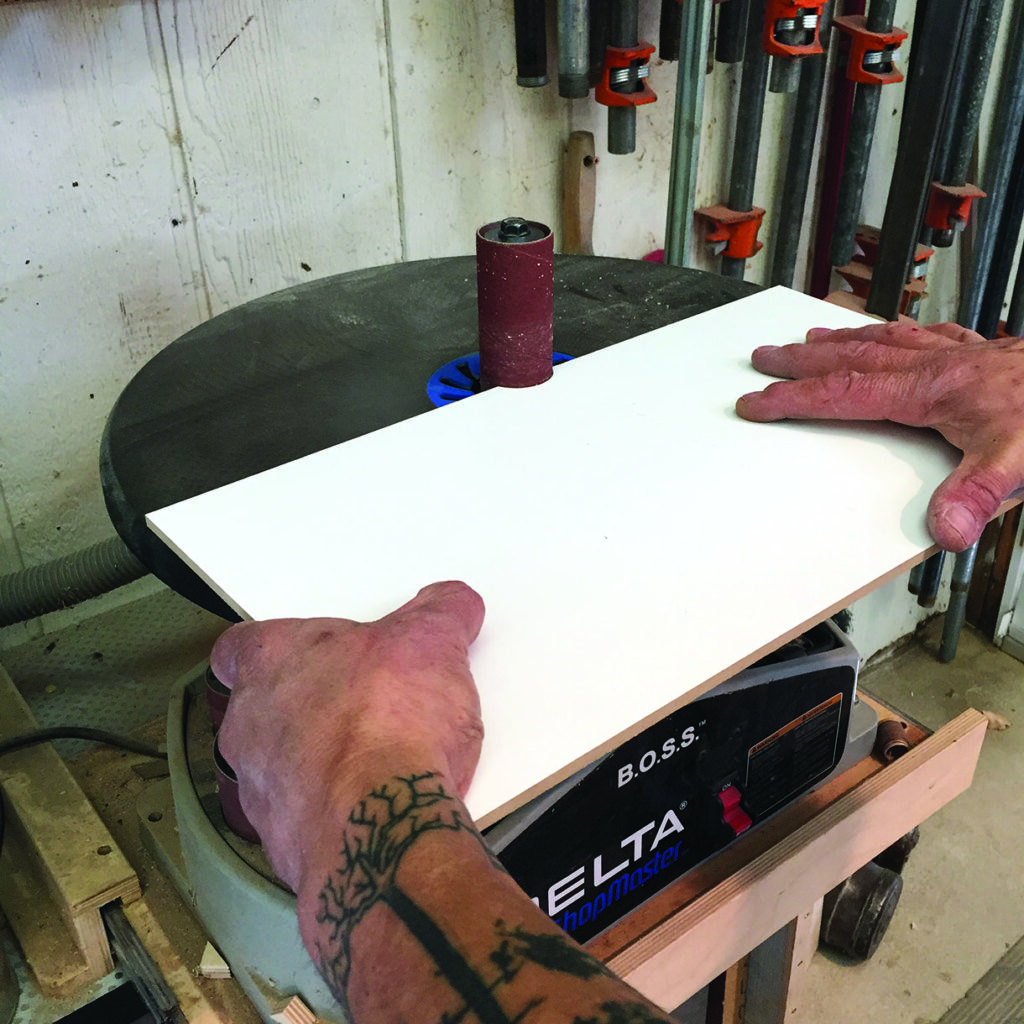
Start with a scrap of material (I used ¼in MDF with white ‘cold roll’ material on one side) and size it about the depth of your bandsaw table, leaving it about 25–40mm (1–1½in) wider than the distance from
the blade to the outside edge of the table. A cleat will go here … but now I’m getting ahead of myself! I cut a clearance notch to allow for the blade and sanded it smooth at my oscillating drum sander. After unplugging the saw, carefully bring the fence over to the left side of the blade until it nearly kisses
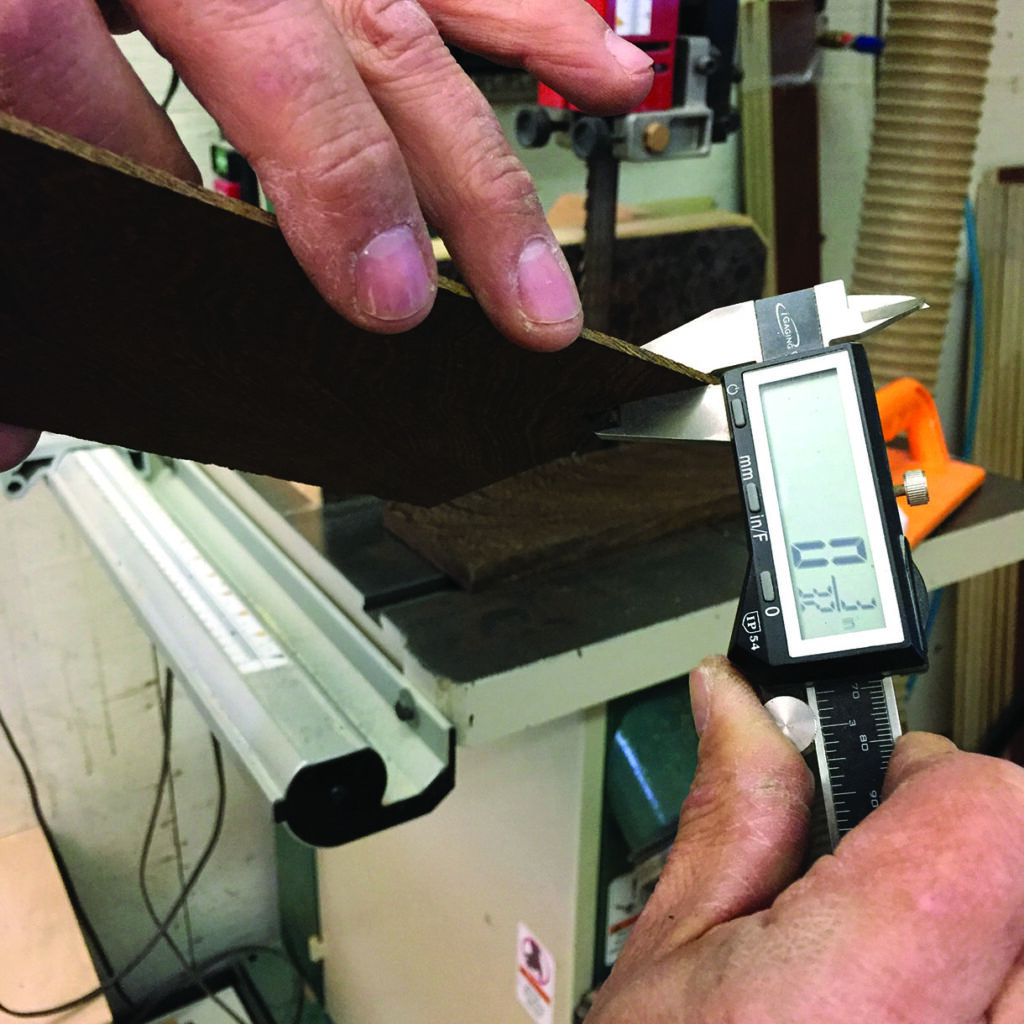
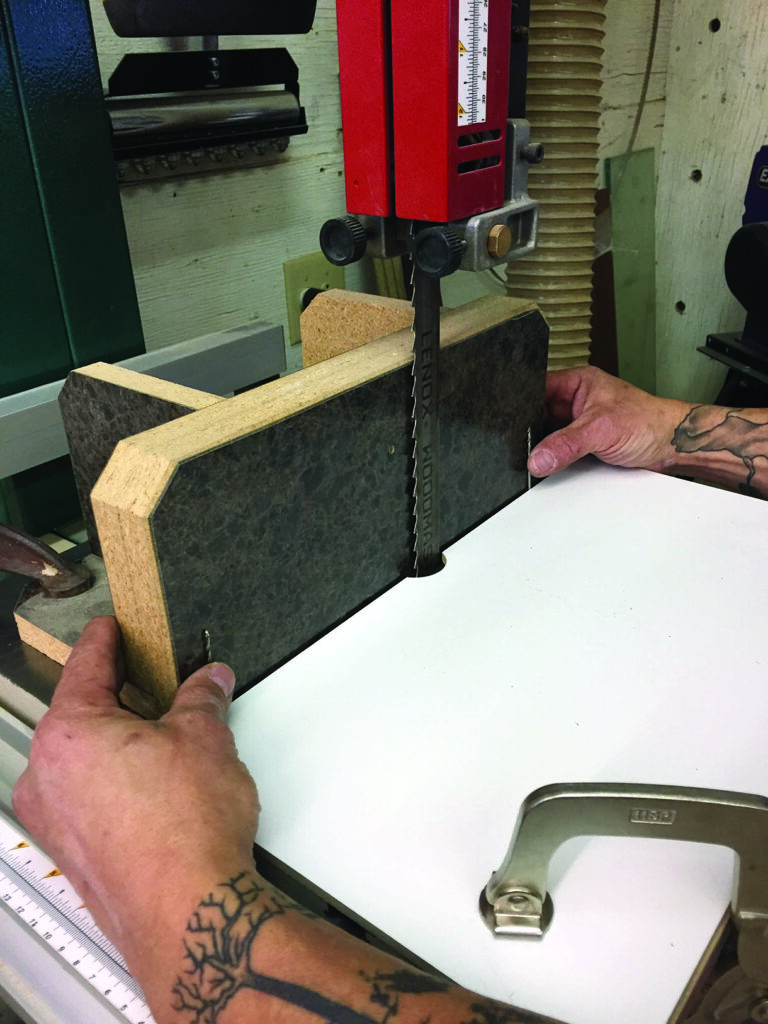
it. I shined a light behind the blade to view this better. The fence must not make contact with or bend the blade, just be right up to it. We’re wanting to establish ‘ground zero’ or zero inches (or mm) to the left of the blade. By opening the top cover of the bandsaw, I was able to rotate the upper wheel backwards and listen for any contact with the aluminium fence. Once I was satisfied with this ‘zero’ distance, I locked down the factory fence. Place the ¼in jig material, with the notch surrounding but clearing the blade and tight against the fence. Make sure that it doesn’t slide in any direction and clamp it down tight. Most bandsaws will have a tapered pin at the slot used for blade removal/installation. The pin helps align and level the cast-iron table, since it has this slot. And here are where the cleats go. One cleat on each side of the alignment pin, pushed tight against the table. I added a bit of glue and clamped these cleats in place. Then I added a few headless pin nails. Stables or screws would work as well.
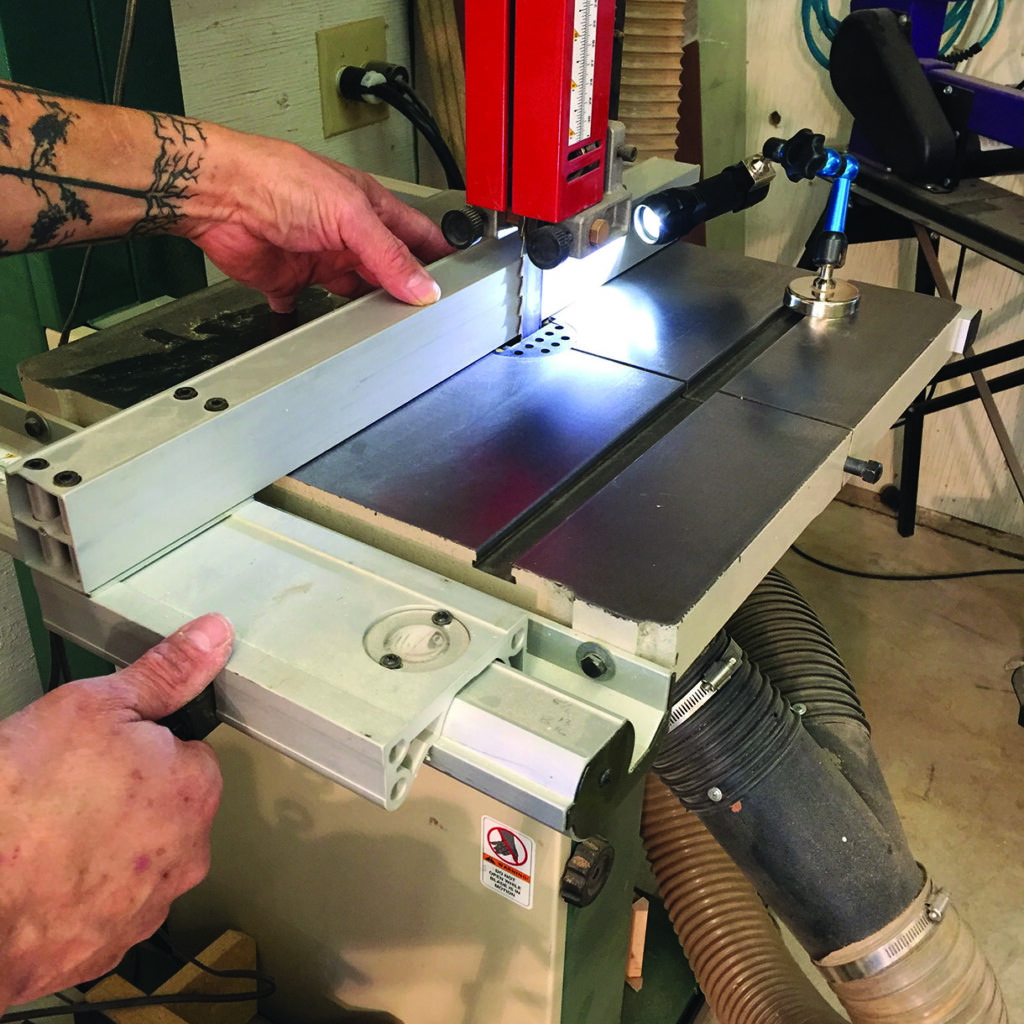
it secure


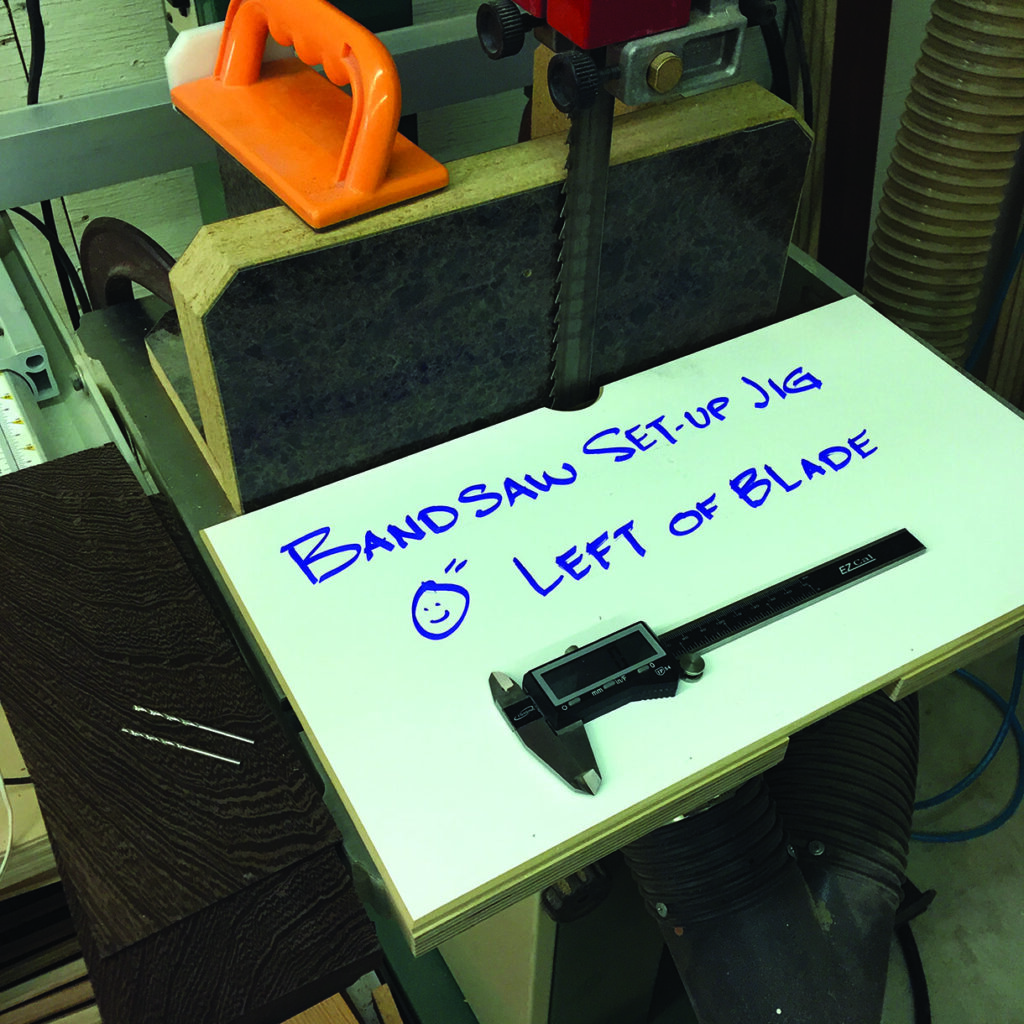
Using the jig
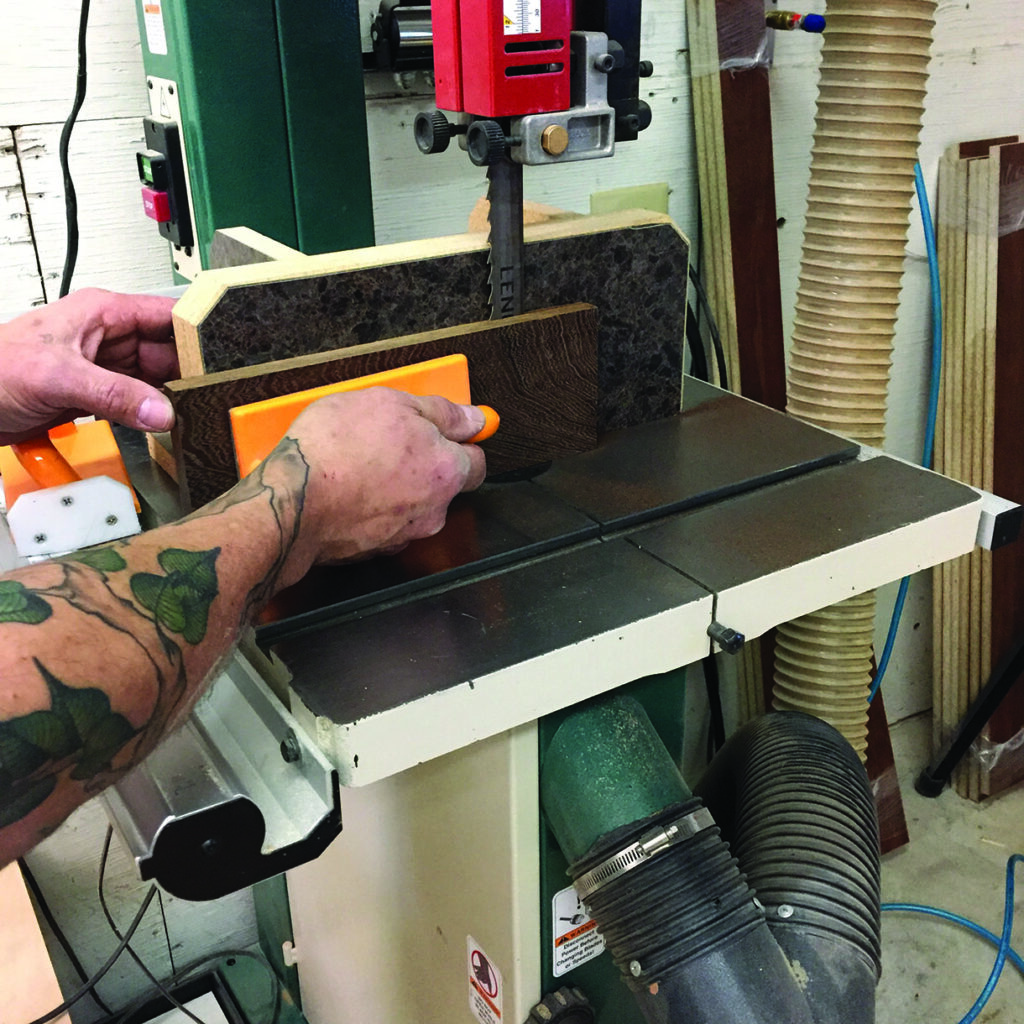
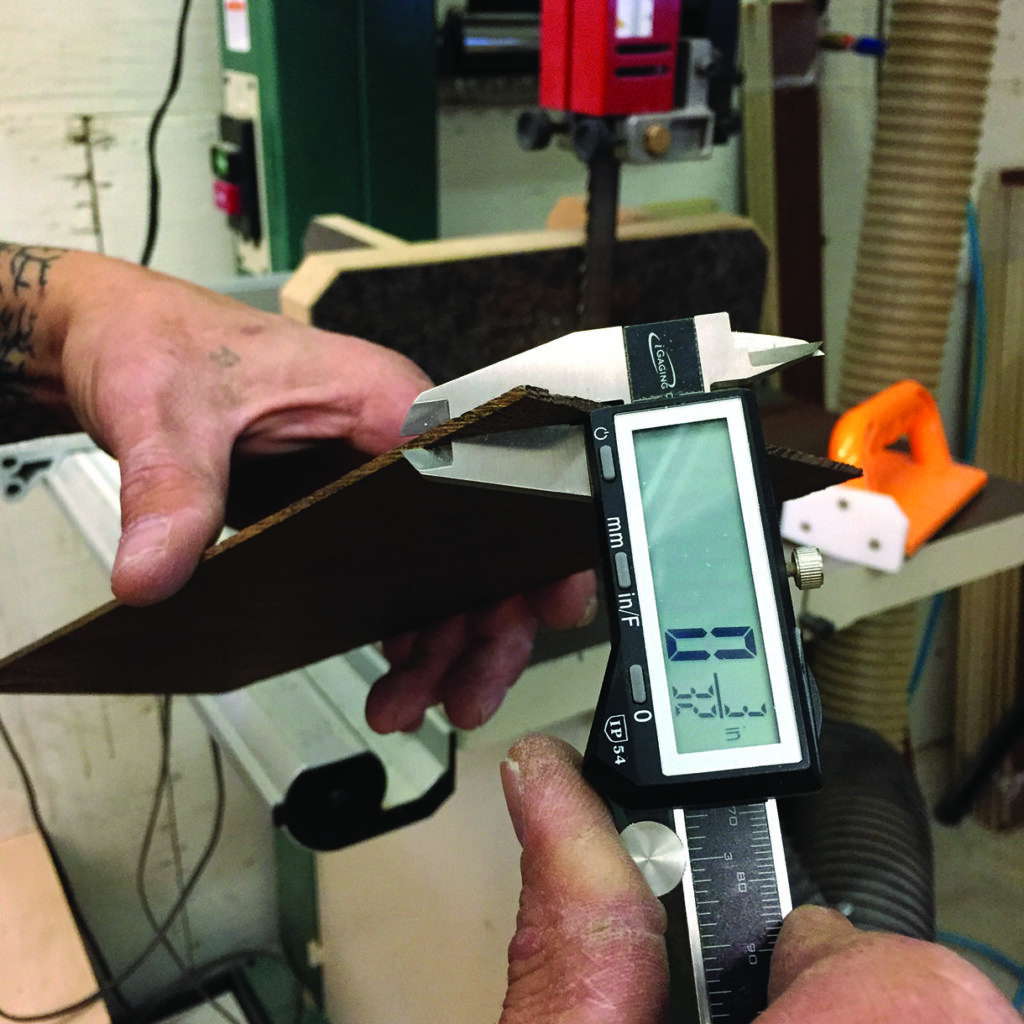
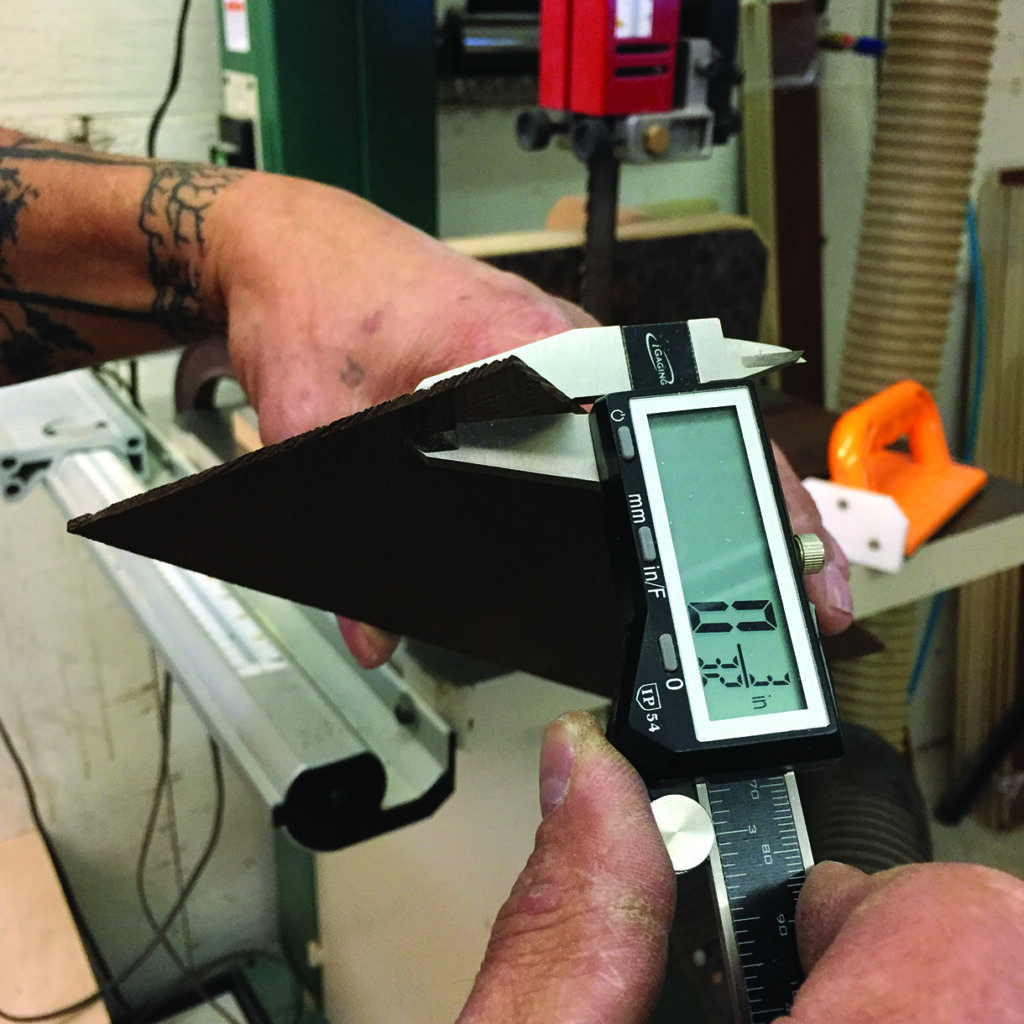
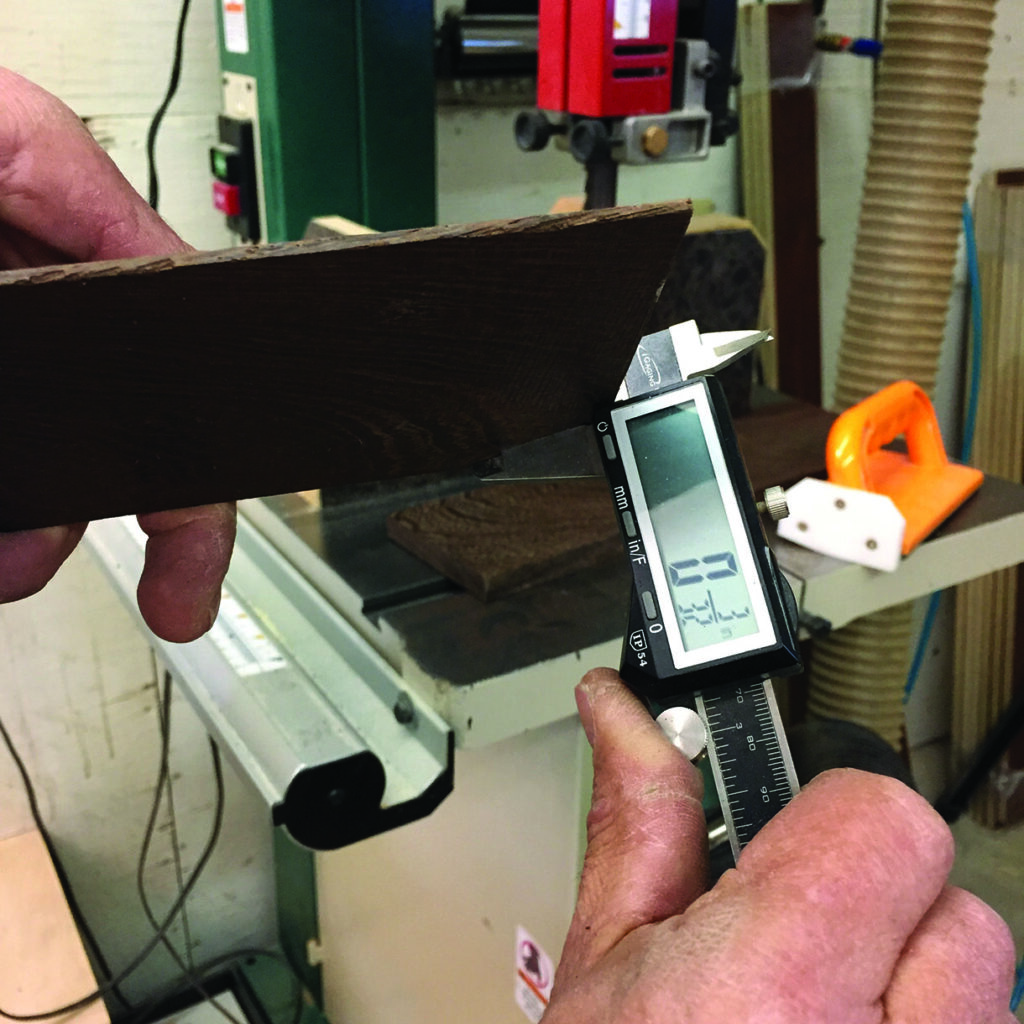
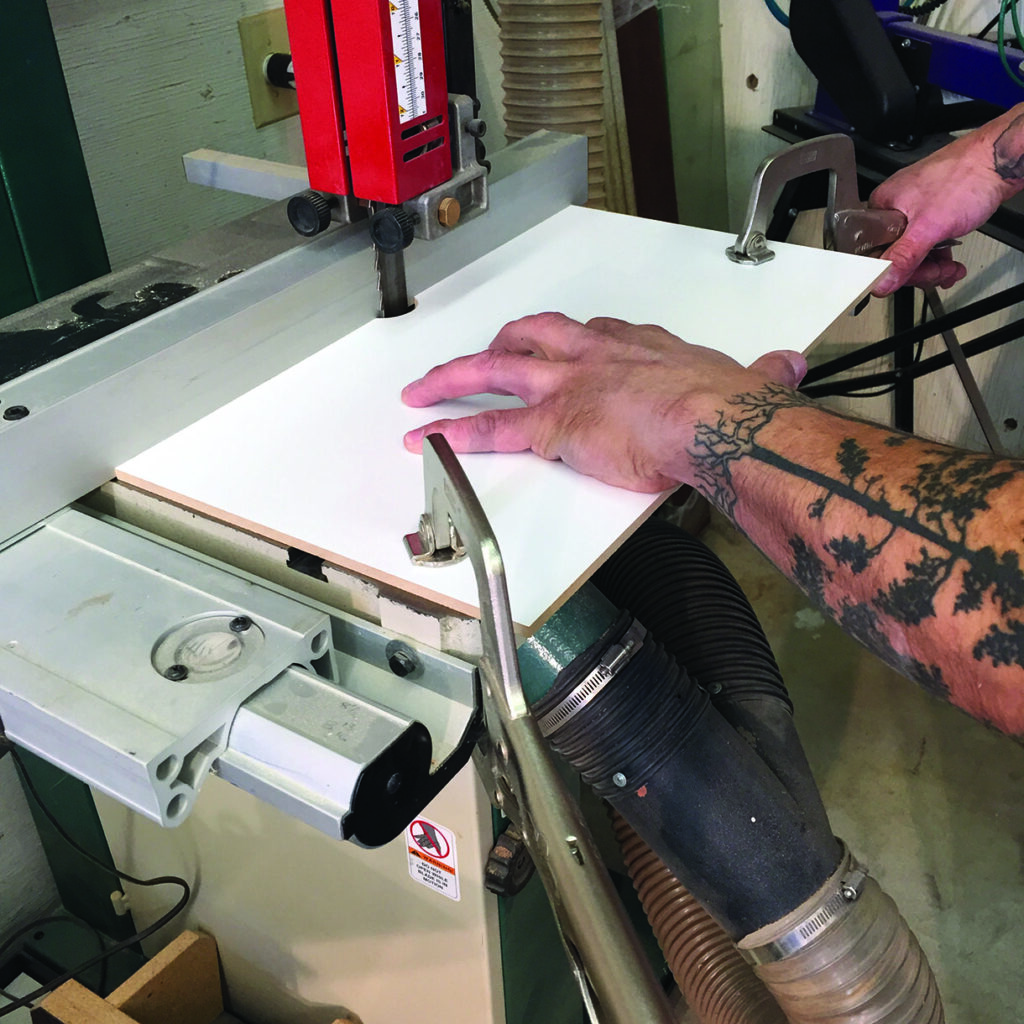
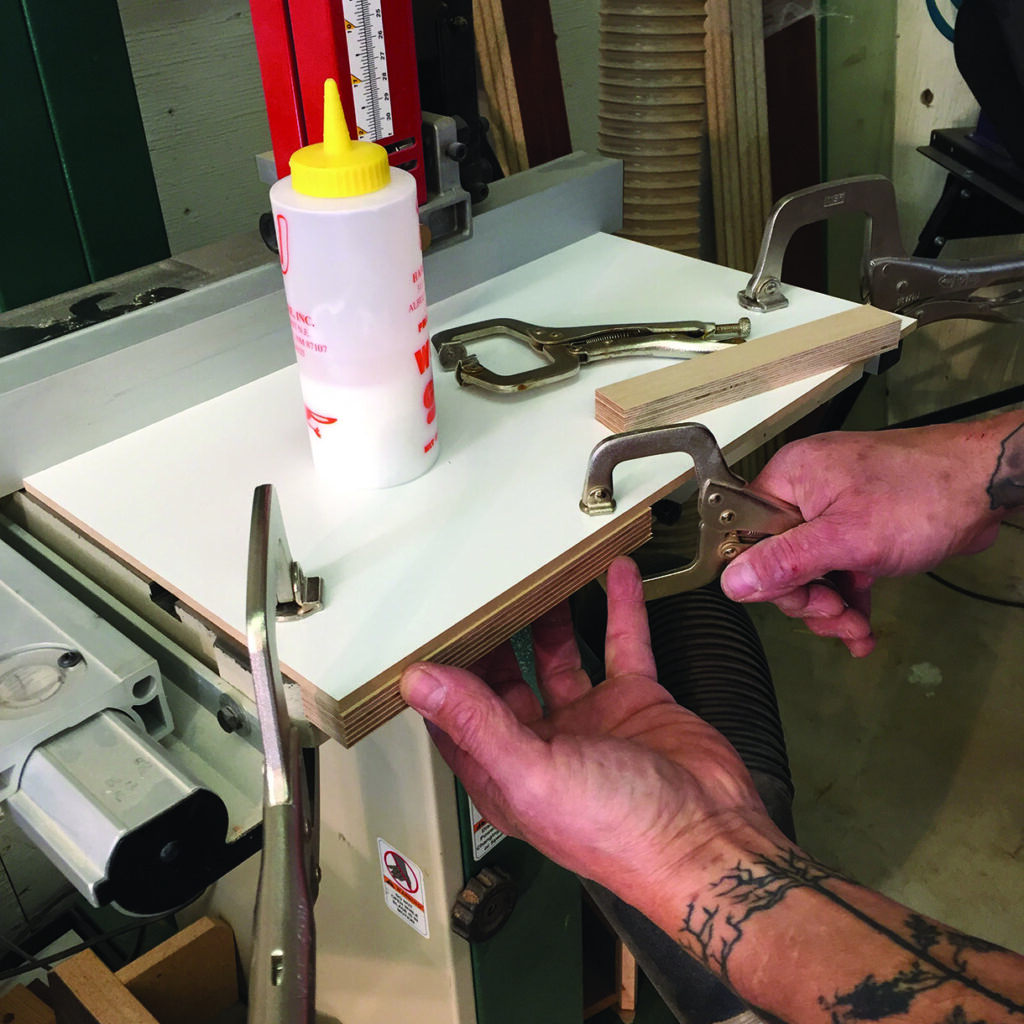
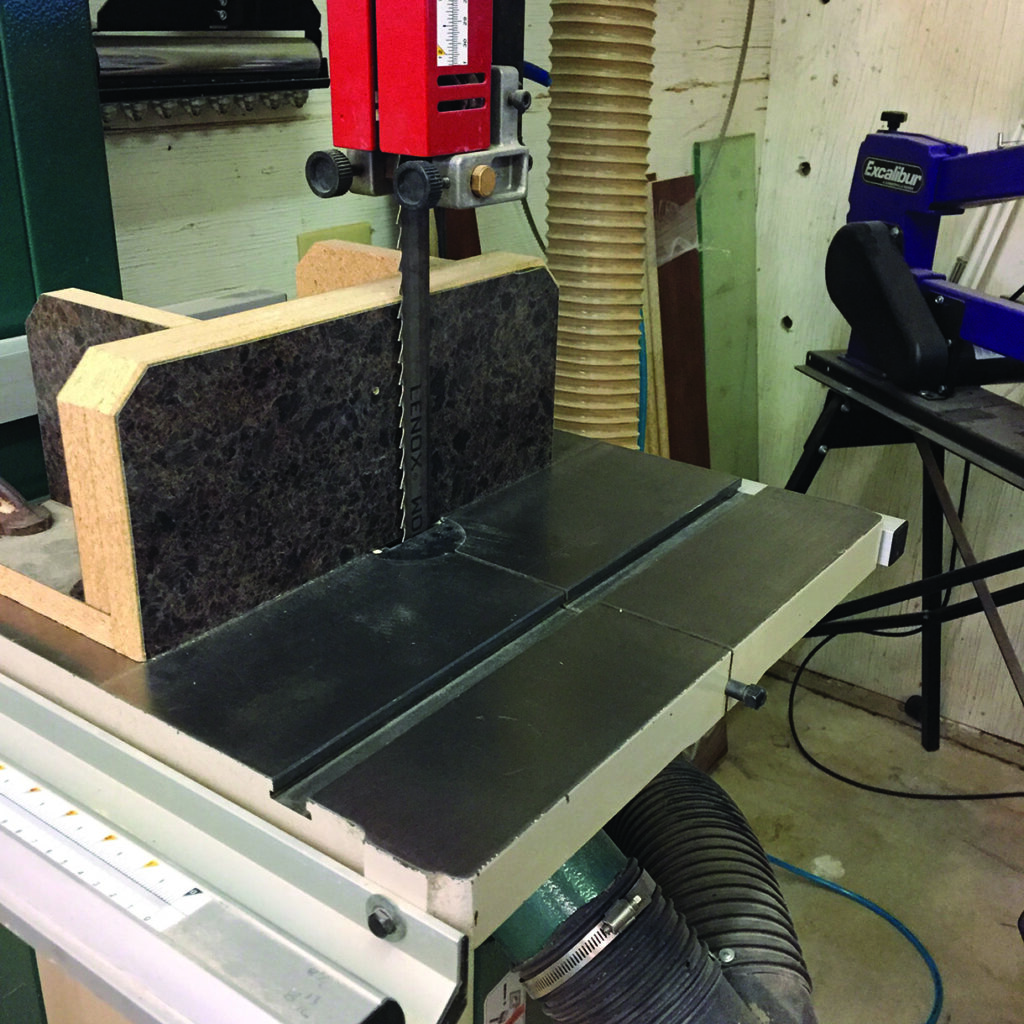
In use, this jig is simple, yet very effective. Here’s how it works: remove the factory fence if you’re going to re-saw anything taller than it is. I have a ’shop-made auxiliary fence that I clamp to the cast-iron table. But first, clamp the bandsaw set-up jig to the table, taking care that the cleats are tight to the table edge and the clearance slot that you created doesn’t interfere with the blade. For this article, I wanted some wenge veneers that would be 3/32in, so I grabbed two 3/32in drill bits. Place these bits to the left edge of the jig, one in front of the blade and one towards the back of the blade. Then, bring your tall re-saw fence right up to the drill bits, essentially creating a 3/32in space between the tall fence and the left side of the blade. Now you can clamp the tall auxiliary fence in place. You would now be able to cut veneers 3/32in thick, and this would be repeatable even if you moved the fence and used your saw for a different task. Sure, I could just use the cursor on the factory fence but I like using a taller auxiliary fence specifically for slicing wider timber into veneers. Plus, reading the tiny increments and numbers on the scale and using the factory cursor is just going to get you close. I like dead-on when cutting veneers which allows for minimal sanding to create veneers of the same thickness. Right off the bandsaw, on the very first slice I had beautiful and consistent results. From corner to corner and from one end to the other, I had slices of wenge veneer that were dead-on 3/32in thick.
Of course, you could use any size drill bits you like, as long as you have two of them. The jig can be used for more than just slicing veneers. The drill bits provide the consistent accuracy, the jig makes it easily repeatable and together they make ’shop time more productive and, yes, even more fun!