Andy Coates looks at turning hollow forms with a modest shoulder
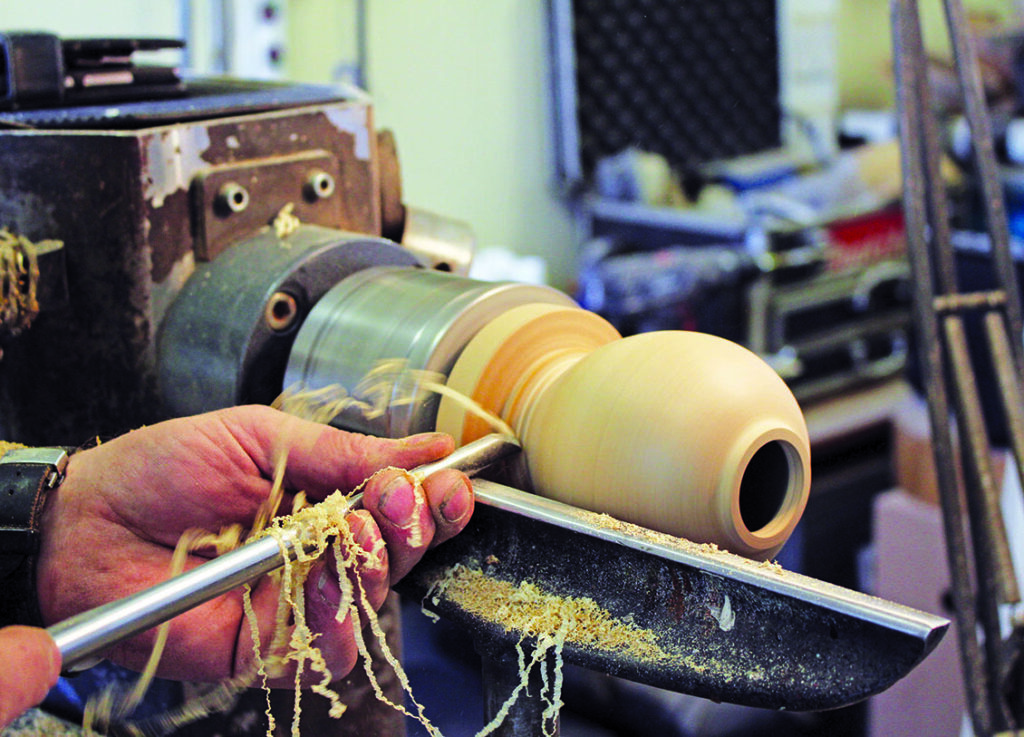
In the first part of this series we looked at a relatively open-type form with a large access hole and a gently increasing internal diameter that could be hollowed using only a simple straight toothpick style tool. In this article we will look at vessels with a modest undercut shoulder. For this article I have reduced the blank size somewhat. We will begin with a blank of 150mm length and 100mm diameter of spindle-grain oriented wood. The physical stresses of deep hollowing ought not to be underestimated as they can lead to muscle strain and aching when the body isn’t used to them. Most standard-size hollowing tools of about 13mm shaft diameter are only really suitable for forms up to 150mm in depth, and in my opinion 100mm, which is quite achievable with a hollowing tool with a 10mm shaft, is quite deep enough for a novice to attempt.
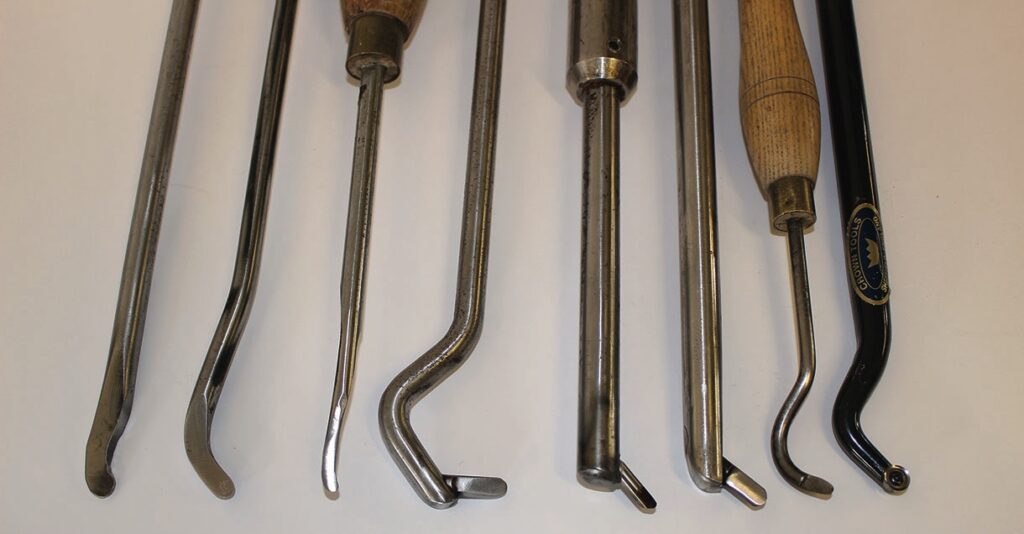
In order to remove the waste under a shoulder you will need a hollowing tool with a curve on the tool blade, an offset tip or an articulated tip. All of these types have a place on the tool rack, and in time you may purchase several of each, but in the first instance a curved tool may be the cheaper option, though keep in mind that
the articulated tools offer greater flexibility so may be cost effective in the long term.
Basic tools and equipment
Hollowing tools with a shaped shaft come in a bewildering variety of shapes and forms – almost every manufacturer has some types of hollowing tool. For this type of project with modest shoulders a tool with a gentle curve in the blade is probably best to begin your hollowing practice with. The more aggressively curved blades have a place but are often the most difficult to master in use. The curved tools allow for access on an undercut, or shoulder, where a straight tool would foul on the right-hand edge of the access opening. The cutting edge should be as close to the centreline of the shaft as possible to reduce the possibility of the tool kicking down due to the significant downward force of the rotating wood. For this reason I believe it is best to avoid tools with angled turns and I prefer tools with a curve.
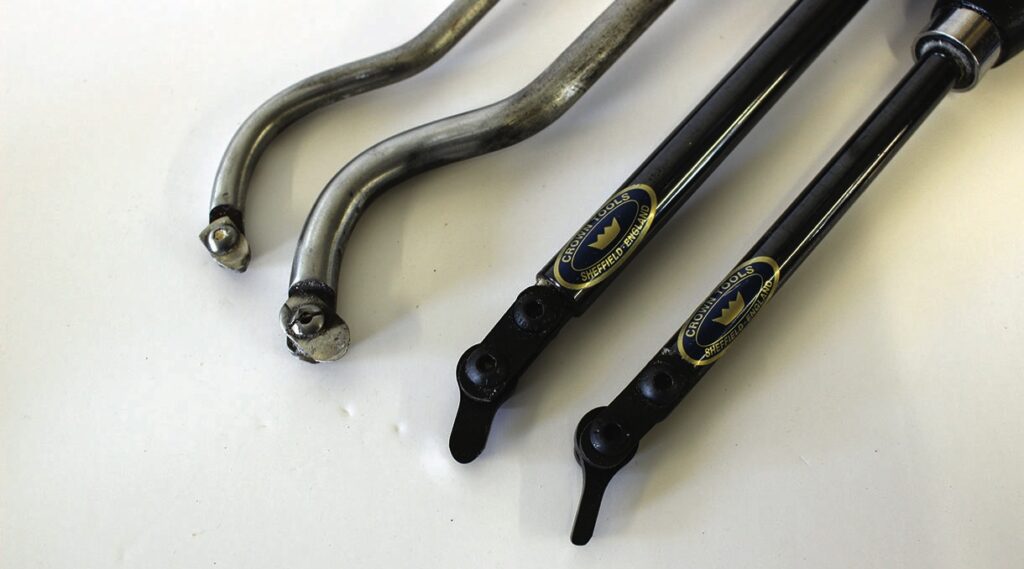
Articulated-tip tools offer greater versatility in use as they can use as a straight tool or articulate the head to be able to shoulder in hollow forms. Depending on the severity of the shoulder shape a tool that has a tip that can be swivelled may well suit your needs. Some tools are supplied with both a hollowing cutter and a wider scraper/shear cutting tip for finishing or have various cutter options available to buy. While initially a more expensive option, an articulated unit may be a more cost-effective option for the long term. In truth, I use all types and find having them an advantage for different circumstances, wood species and wood conditions and shapes. A simple shop-made shavings removal tool is also a distinct advantage.
Starting the process
The blank is mounted and roughed down, a tenon is cut, the blank is remounted on it in scroll chuck and a central hole is bored with a twist drill or Forstner bit in a Jacobs chuck to the finished depth of the form.
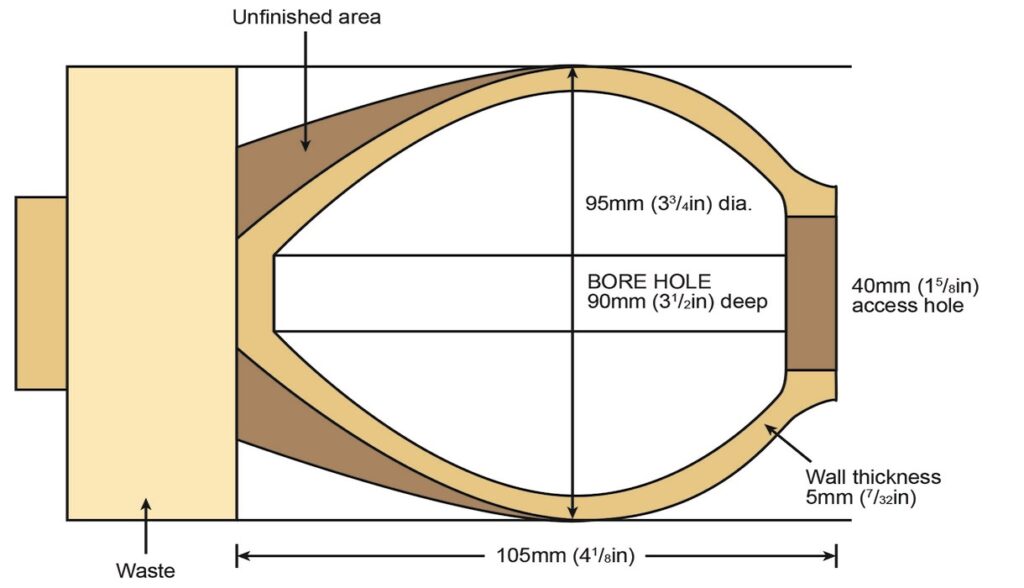
Initial shaping should be as per the diagram, but for the top two-thirds of the form only. The shaded area in the diagram above is the unfinished area. Here the form is left oversized to provide support for the hollowing process. This will be returned to later, once the hollowing is completed.
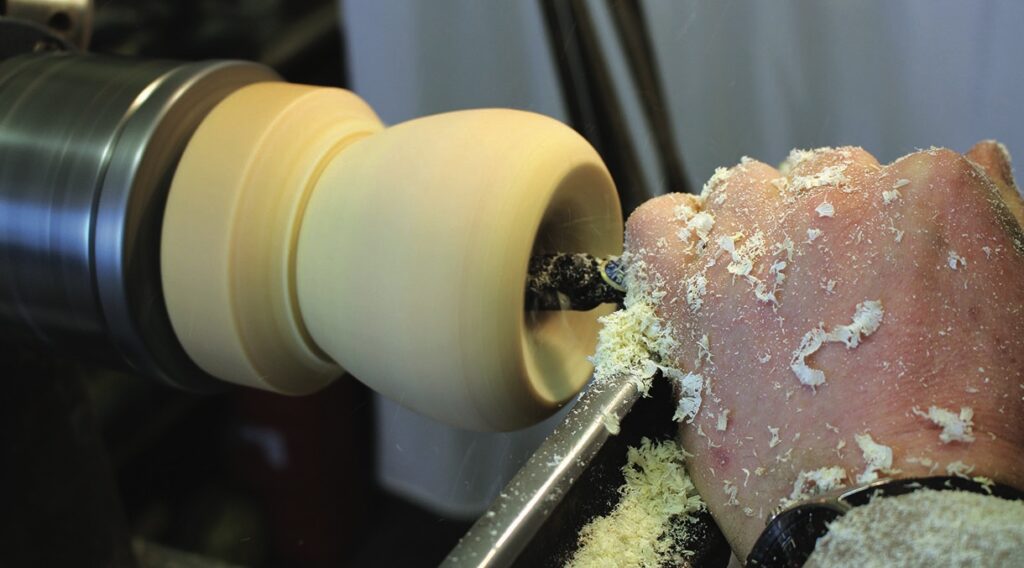
One starts by boring a hole and then cleaning the rim top with a spindle gouge prior to beginning hollowing. This is followed by opening up the neck area with an articulated hollowing cutter. Setting the rim/wall thickness at this point is important as it will be your guide throughout the hollowing process. Cuts should be undertaken in the same sequence as those as detailed in the hollowing procedure diagram in Part 1 – waste removal to create working space, then sizing/finishing cuts. The cuts run from the edge of the bore hole left towards the interior vessel wall. The lathe should be regularly stopped and shavings removed manually or with a vacuum cleaner.
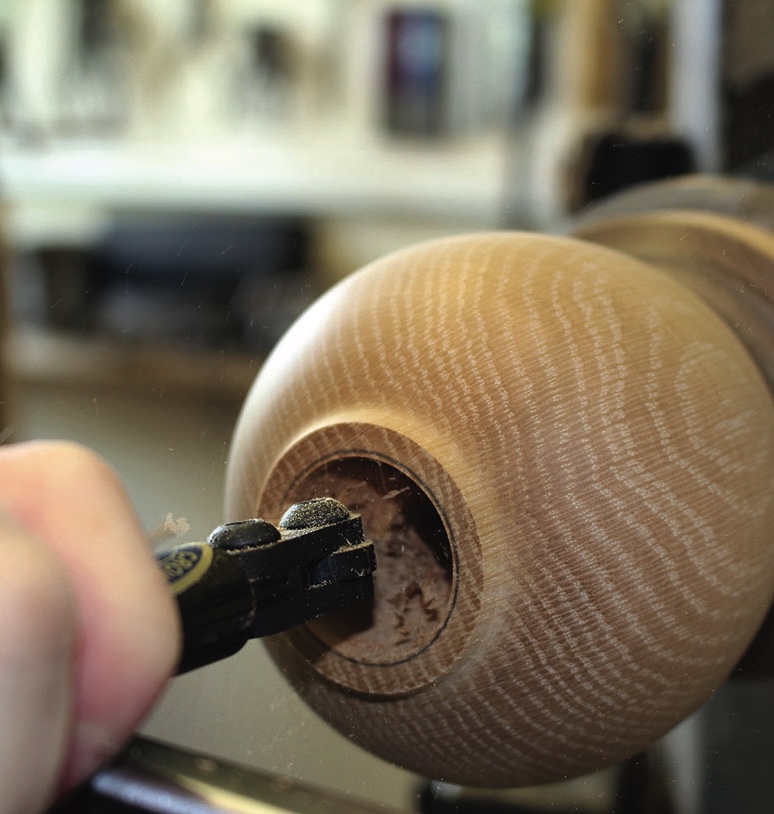
Beginning to hollow
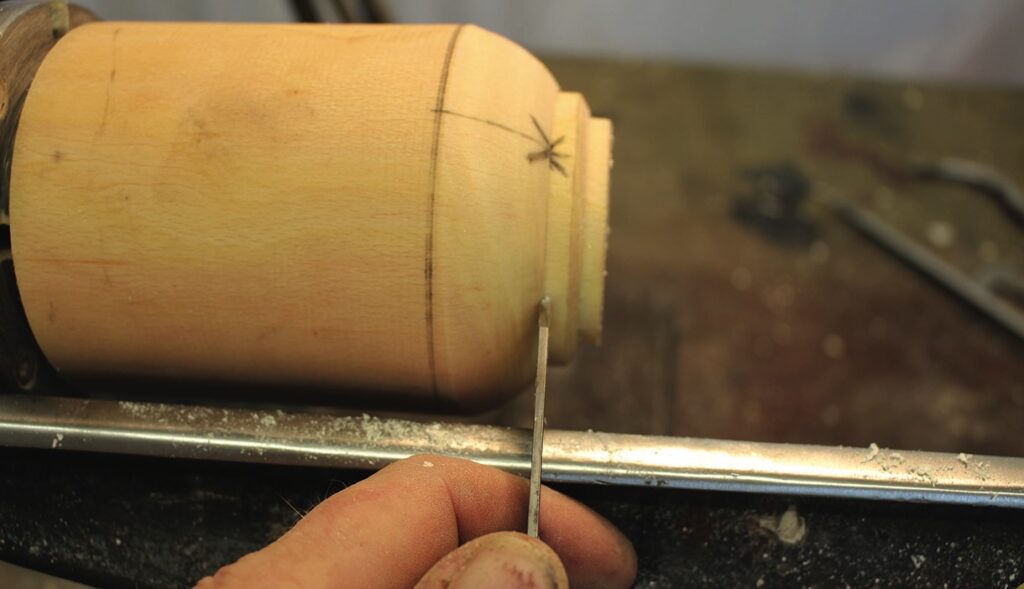
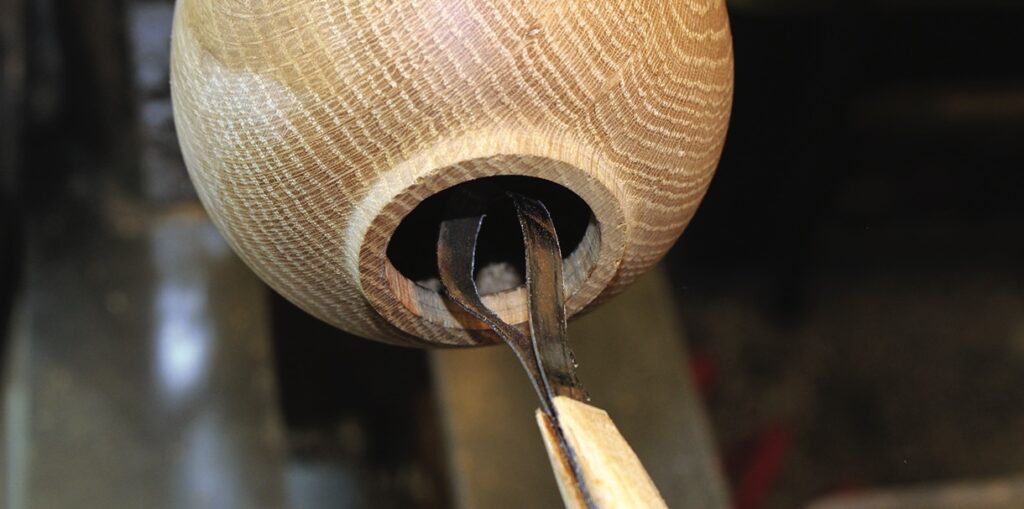
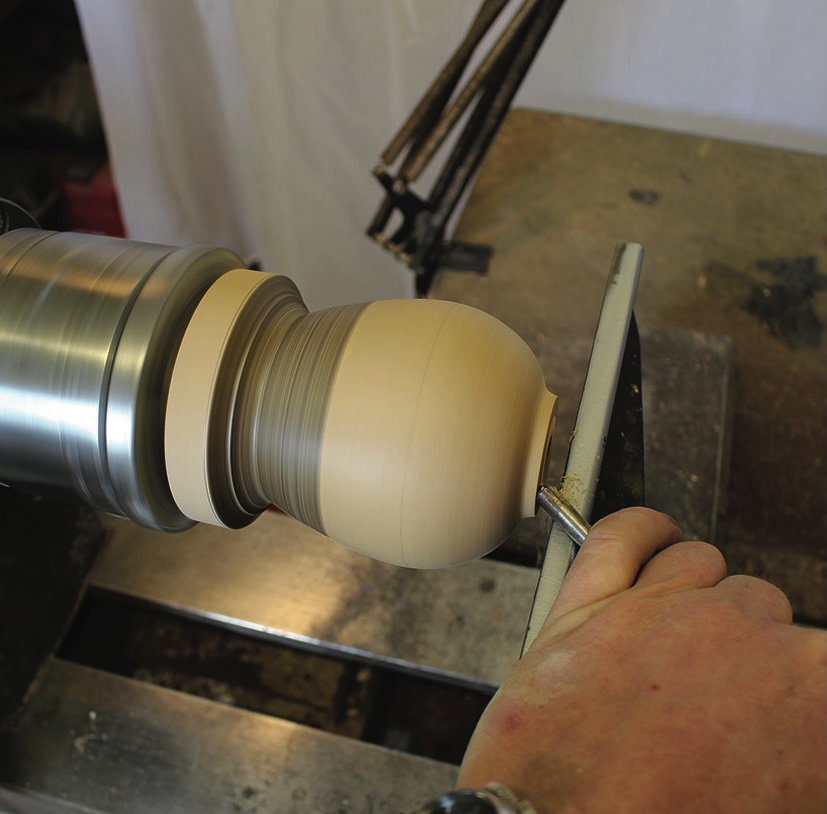
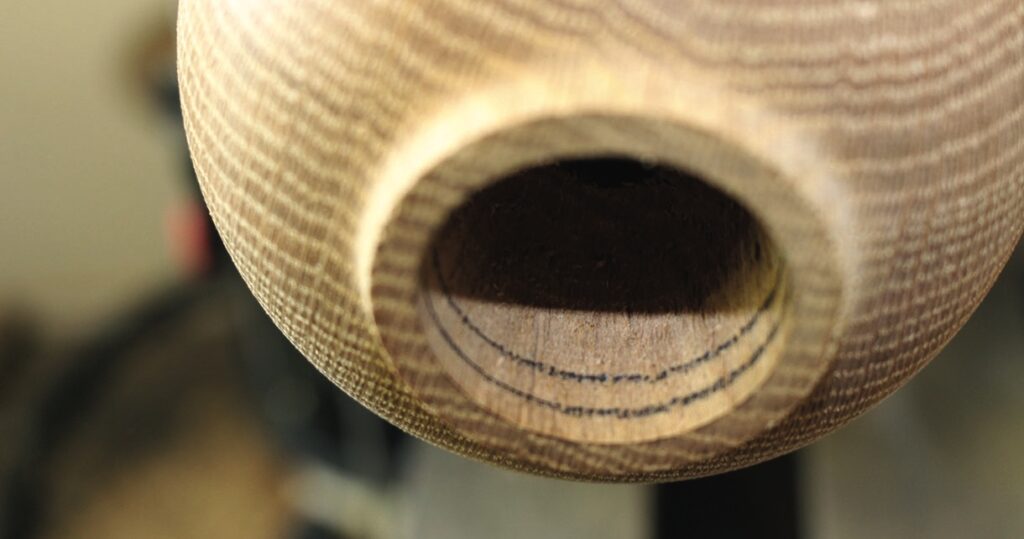
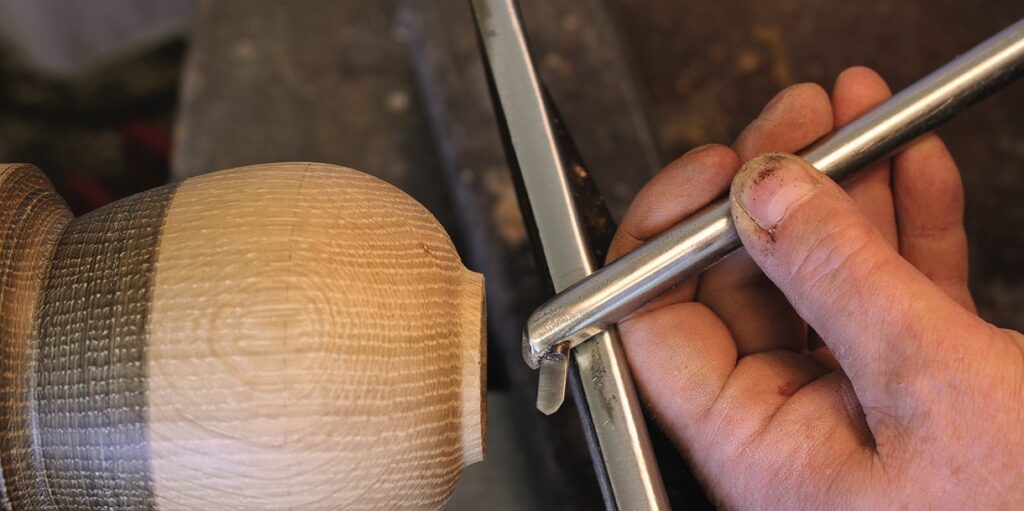
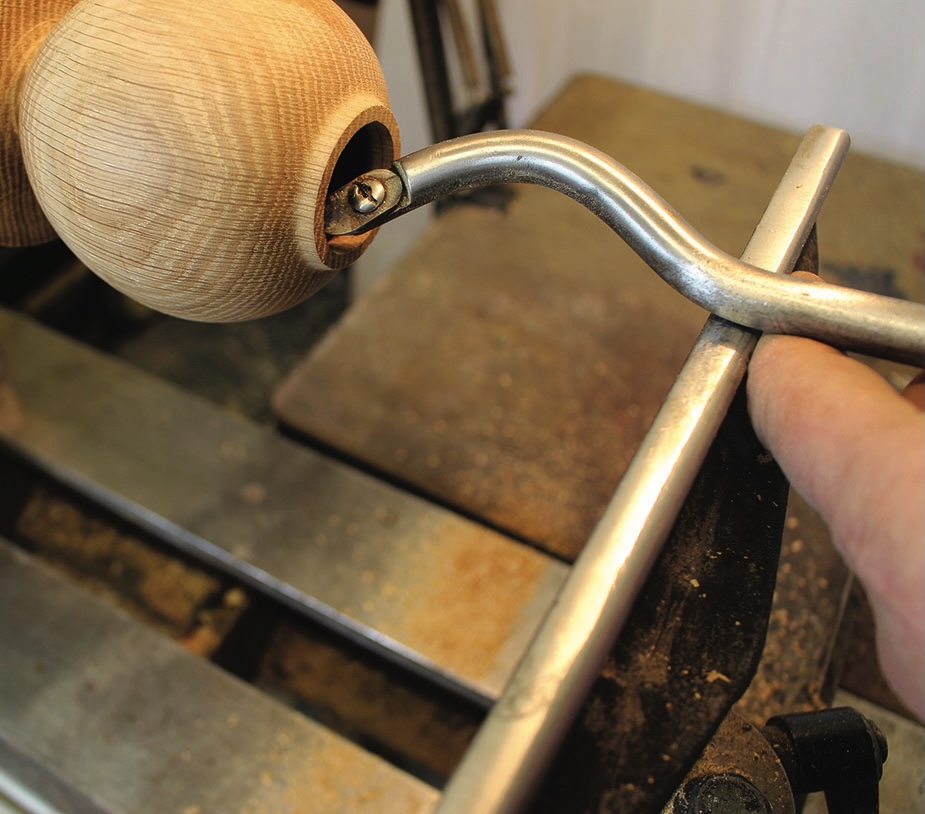
In order to set the wall thickness and provide a constant reference it can be helpful to mark the inner rim of the upstanding portion. The first mark is the depth of the rim, and the second mark is the thickness of the rim. The initial cuts will be made behind the second mark. In order to begin undercutting, a tool with an angled tip is chosen. This provides for cutting without fouling the shaft of the tool on the right-hand rim of the vessel. The tool tip is carefully fed into the access hole and gently brought to the wood. To cut around the corner the tool handle is pushed towards the right-hand rim edge. Be wary of catching the rim. If the tool still will not cut around the shoulder a curved tool may be required. Feed the tool in carefully and withdraw the same way.
Twisting the tool handle slightly to the left lowers the tool tip and presents it at a more shear angle to reduce the pressure on the tool tip and reduce the possibility of a catch or of an aggressive cut. Remember to raise the rest slightly or lower the tool hand for this cut to ensure the cutting tip is on the centreline of the form. Cutting above or bellow the centre can also lead to catches. As you increase in depth this will require constant adjustment of the toolrest height or the handle height to ensure centreline cutting. Deeper forms will also require longer tool handles to counter the increased torque and downward pressure on the tool tip.
Techniques for success
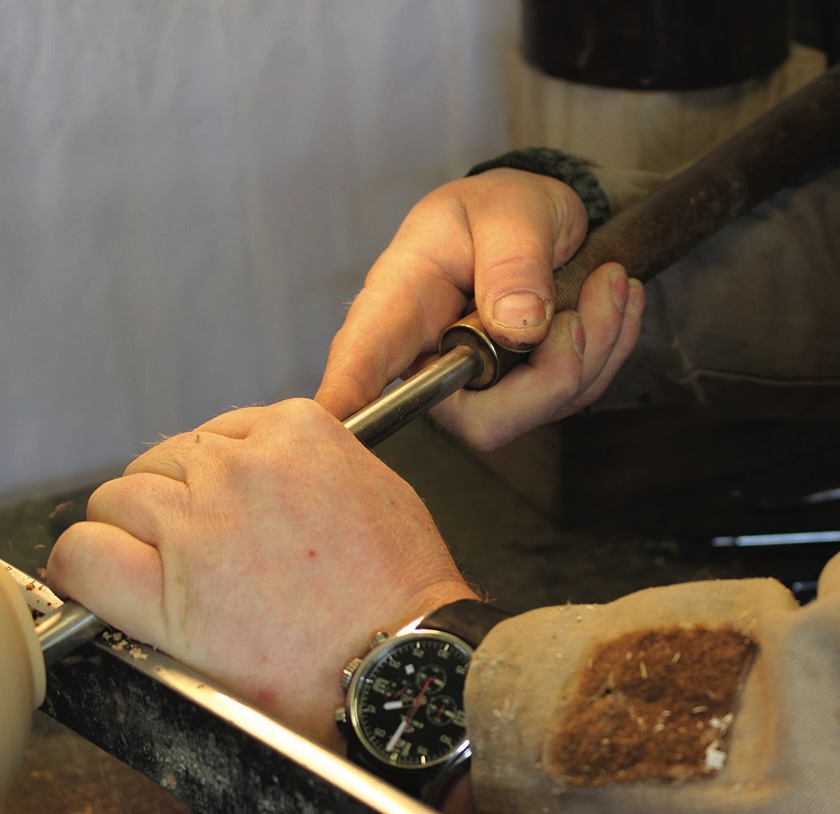
Holding and controlling deep hollowing tools (DHTs) can be problematic. Deep hollowing tools tend to have longer handles, and if you have a small to medium-sized lathe, or if your lathe is sited close to a wall or window, this can present an issue. By leaning slightly over the bed and cupping the tool handle on top of your forearm you can gain increased control of the tool, making the process less physically tiring and improving safety.
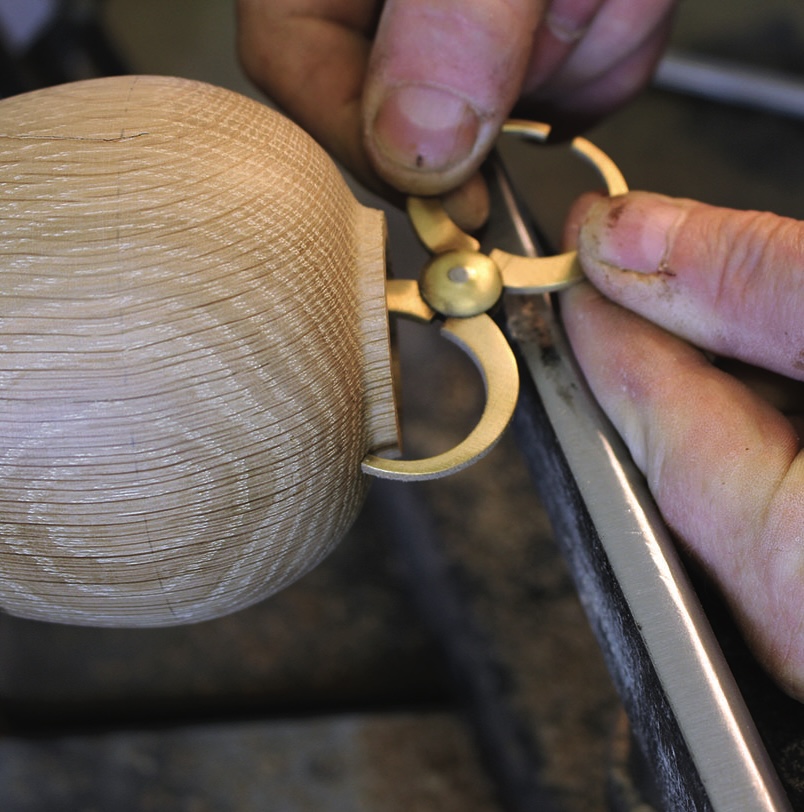
Wall thickness considerations are vital for hollow vessels – not only does an even-walled vessel feel more balanced, but when wet wood is used (if turning to completion rather than roughing out and drying) even walls provide the best chance of the form not splitting during drying. Callipers may seem an avoidable expense but they are a vital tool for checking wall thickness. A range of sizes is helpful. I only ever use these callipers at the rim of small vessels but they are a real boon for an accurate assessment. Once the wall thickness is set here it is your reference for the whole vessel.
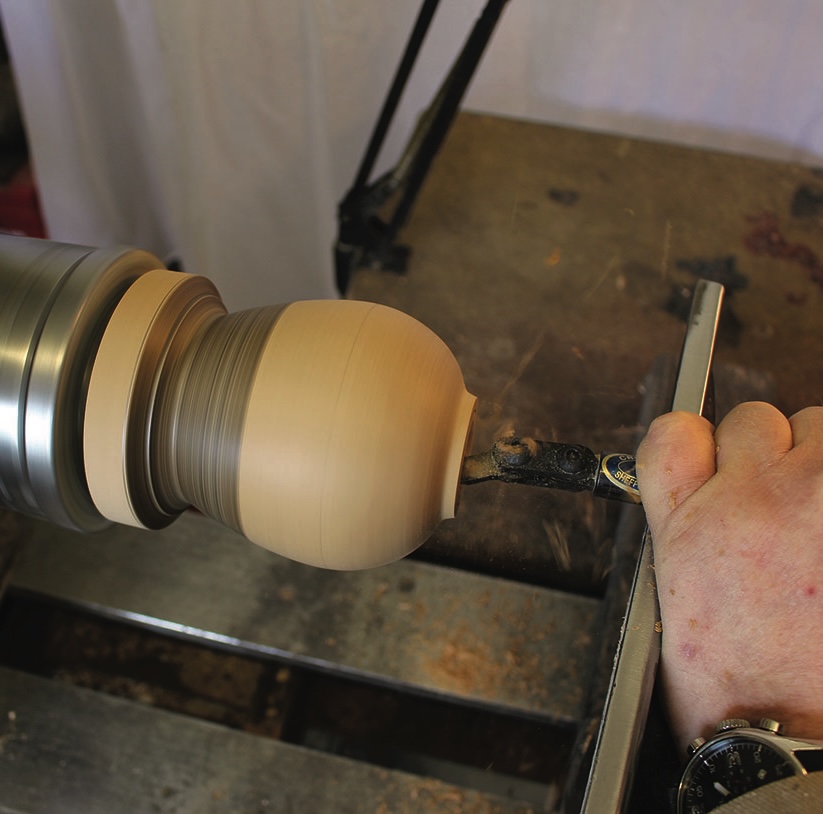
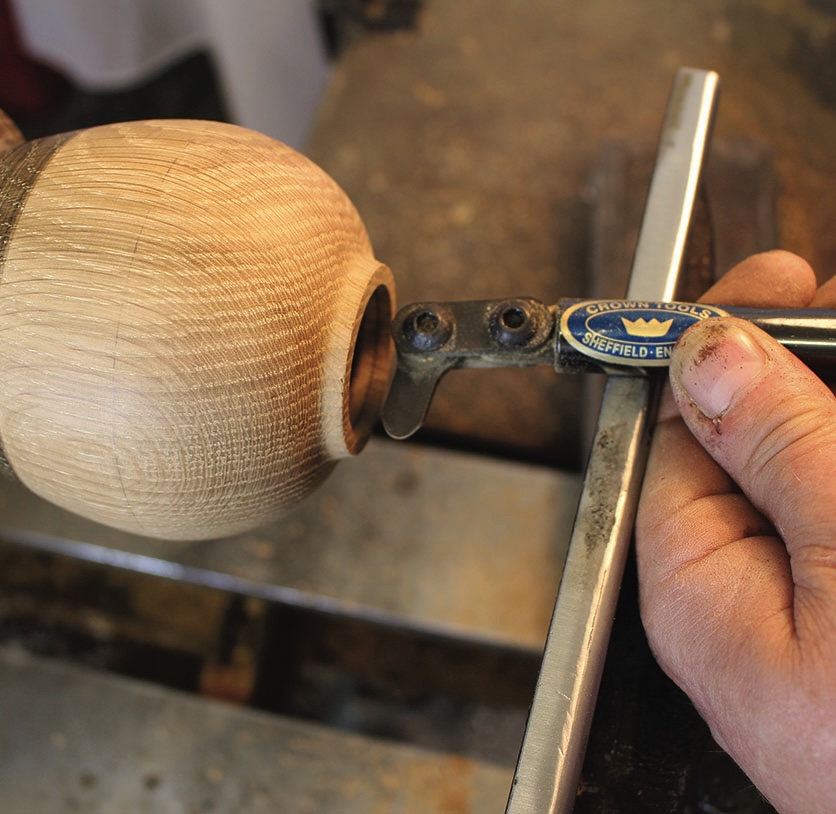
Once the undercut is completed you begin to turn into the widest portion of the form, the equatorial area, and the tool you used for the undercut may need to be swapped or adjusted. The tip here – picture below right – has been set at about 50° to the shaft and will be presented to the wood at about 45° shear. This set-up will take you into the interior of the area shaded on the outside of the form. At this point another tool change/adjustment is required, and you would begin to swing the curve of the wall in towards the base of the borehole. The outer shaded area is then finish-turned to match this internal shape, checking wall thickness constantly.
Tool tips
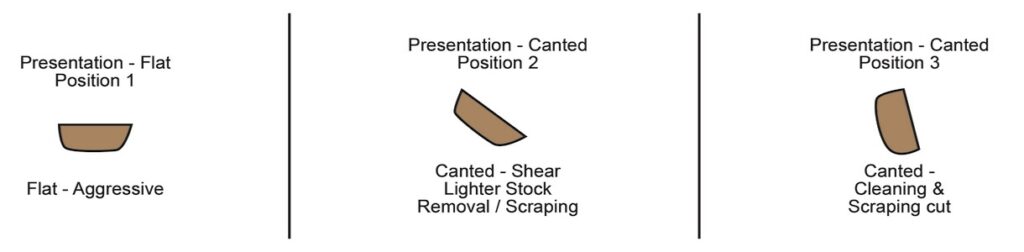
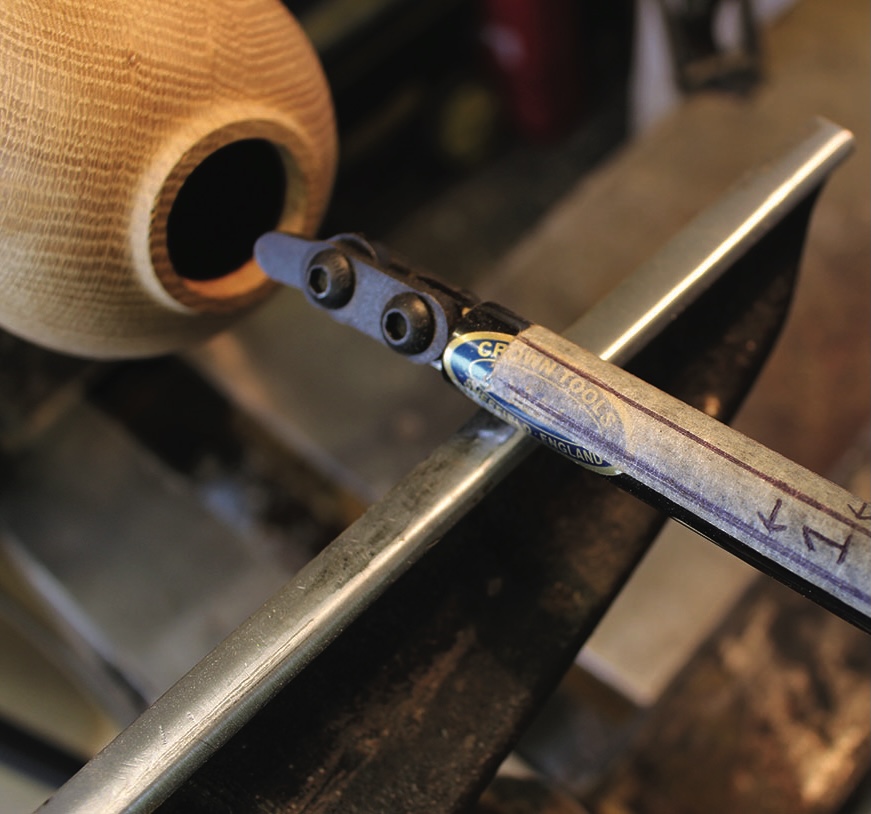
As soon as the tool tip is inside the vessel it can be easy to lose sight of where the tip is and in what attitude it is. Marking the shaft of the tool can be a distinct advantage until familiarity is gained with experience. From the centreline to the left you could mark positions 1, 2 and 3, where 1 is the most aggressive, 2 is shear at 45° and 3 is virtually closed shear, which is ideal for scraping to a finish.
When using deep hollowing tools with a curved or bent shaft, or with an articulated tip, the tool must be supported on the straight portion of the shaft. Failure to adhere to this can result in the tool flipping out of control in your hands.
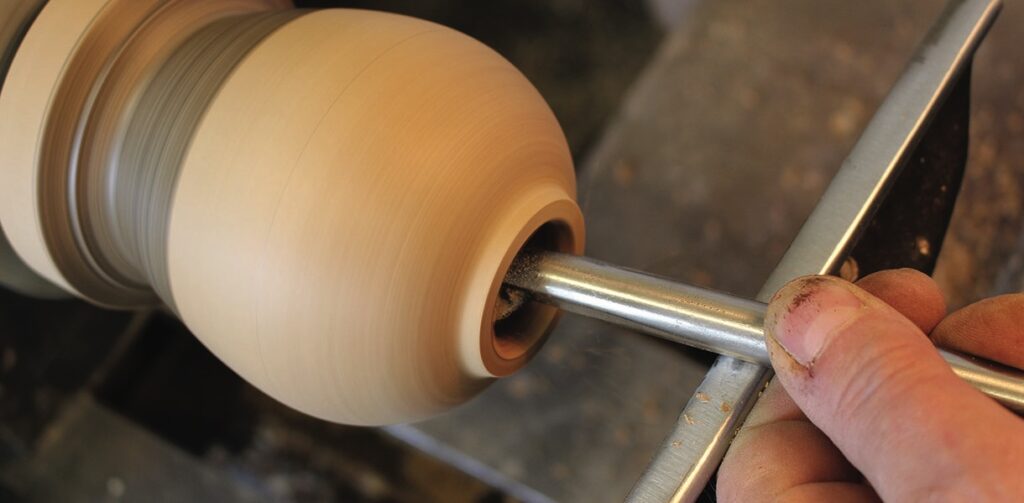
Internal abrading should be achieved using a dedicated deep hollowing arbor on a shaft, abrasive attached to a split rod, or with abrasive held in forceps. NB: Do not put fingers in handle holes. Grip around the forceps. Likewise, never stick your fingers in rotating work. Shavings and debris get thrown to the widest section and fingers can get caught in the rotating debris.
Tool Size and Suitability
Deep hollowing tools tend to be longer than conventional tools, but this can often be misleading, and using them beyond their capabilities is not uncommon. A tool with a 12mm shaft is really only appropriate for a vessel up to 150mm depth, but the tool shaft may give the impression of deeper working capabilities. Check the manufacturer’s specifications and stick to them. Tools with greater working capacity will have thicker shafts, which may result in a wider access hole being required at the rim.
There are also similar considerations for cutting tips provided with multi-tipped tools. Smaller tips are ideal for low-resistance waste removal, wider tips are best suited to finishing cuts and shear scraping.
Alternatives procedure
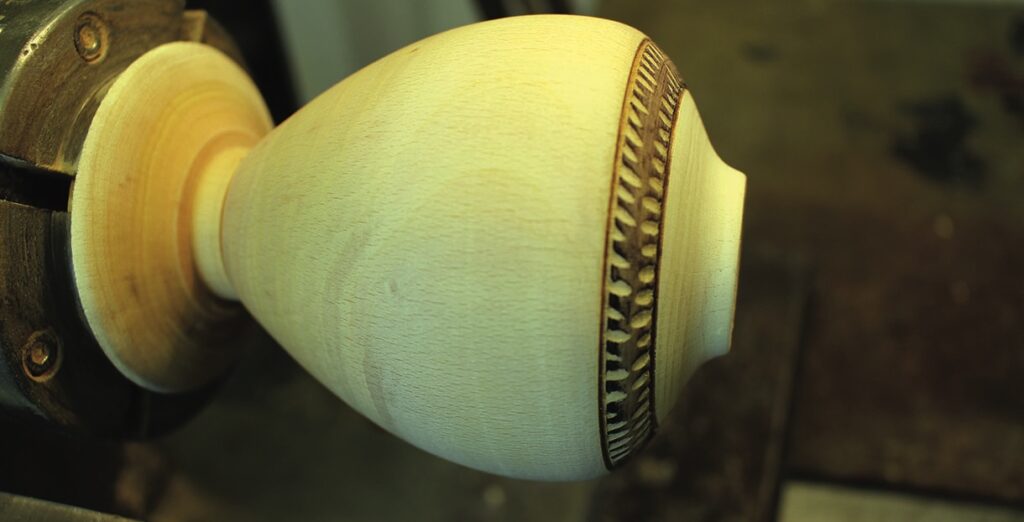
If deep hollowing through a small access hole still seems too daunting, there are other options you could choose. Two-part forms are one. The top section can be parted off allowing enough material for a mating tenon. The base section can then be hollowed as for a more open form, and the top section glued back in to a prepared recess afterwards, aligning the grain as best you can. In order to fully disguise the joint simple decorative techniques can be utilised, such as texturing or carving. This procedure can also be adapted to hollow through the base.
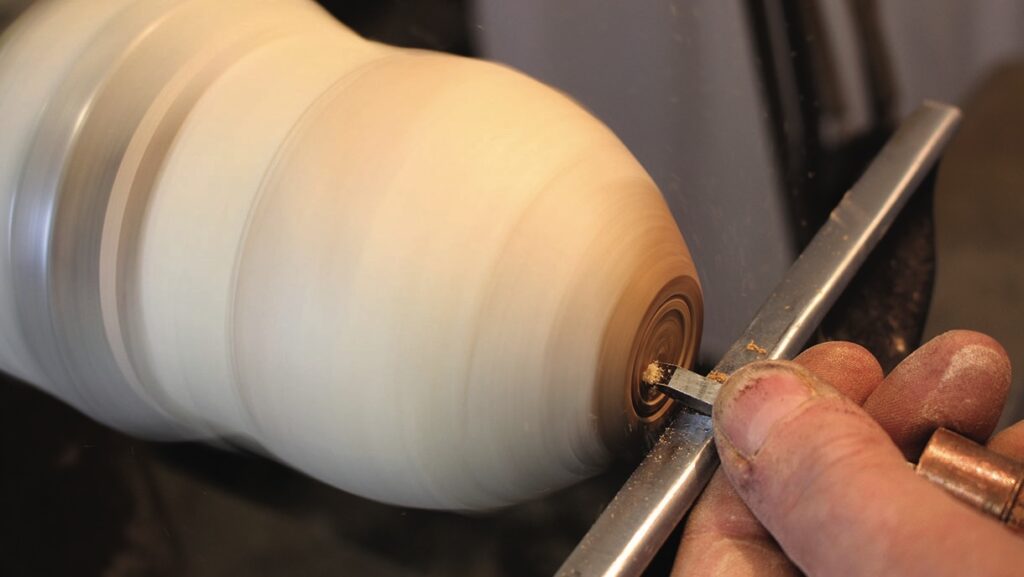
To give a hollow form a clean professional finish it can be remounted on a tight tenon turned from scrap wood and secured with tape to facilitate cleaning the base up and adding some decorative feature. Take very light cuts with a freshly sharpened tool to avoid knocking the form off the jam chuck, then sand to a fine finish.