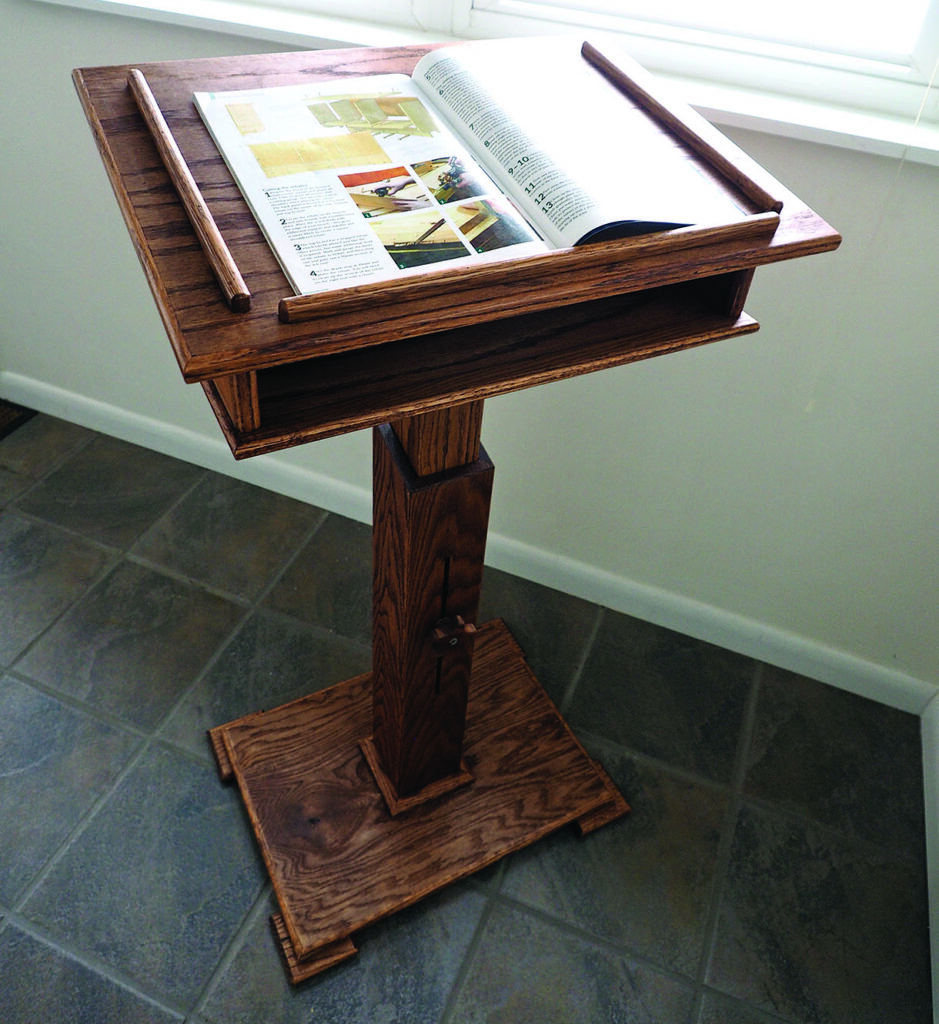
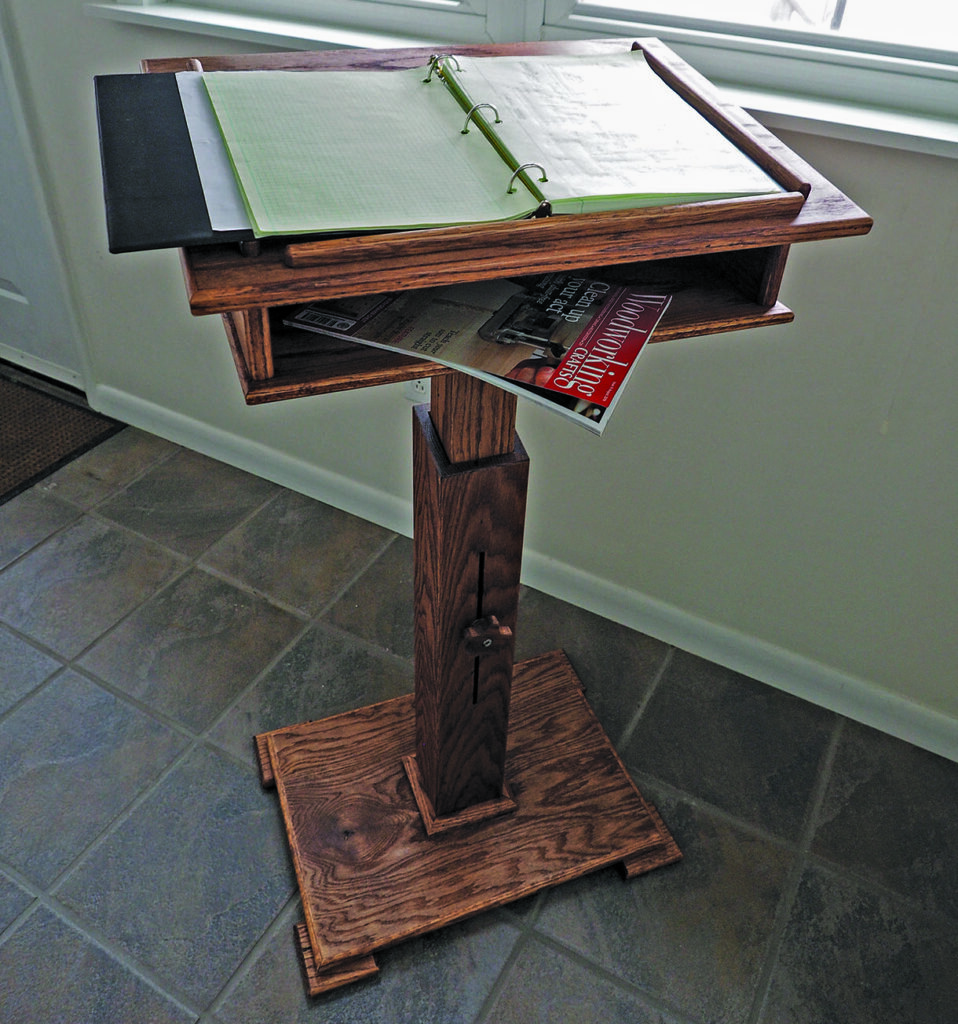
Michael T Collins makes an easily adjustable lectern
Dale Carnegie once said ‘there are always three speeches for every one you actually gave. The one you practised, the one you gave, and the one you wish you gave’. If there’s one thing that I have learned over the years of giving presentations, is that they always sound better from behind a lectern.
I was recently commissioned to create a lectern that could be used by a company’s staff who ranged in height from 1.5m to over 1.8m, so rather than making it a fixed height with an accompanying stool for the shorter staff members, I wanted to make this easily adjustable.
Tools • Tablesaw/means of creating bevels • Router or router table • Jointer, smoothing and block planes • Bandsaw
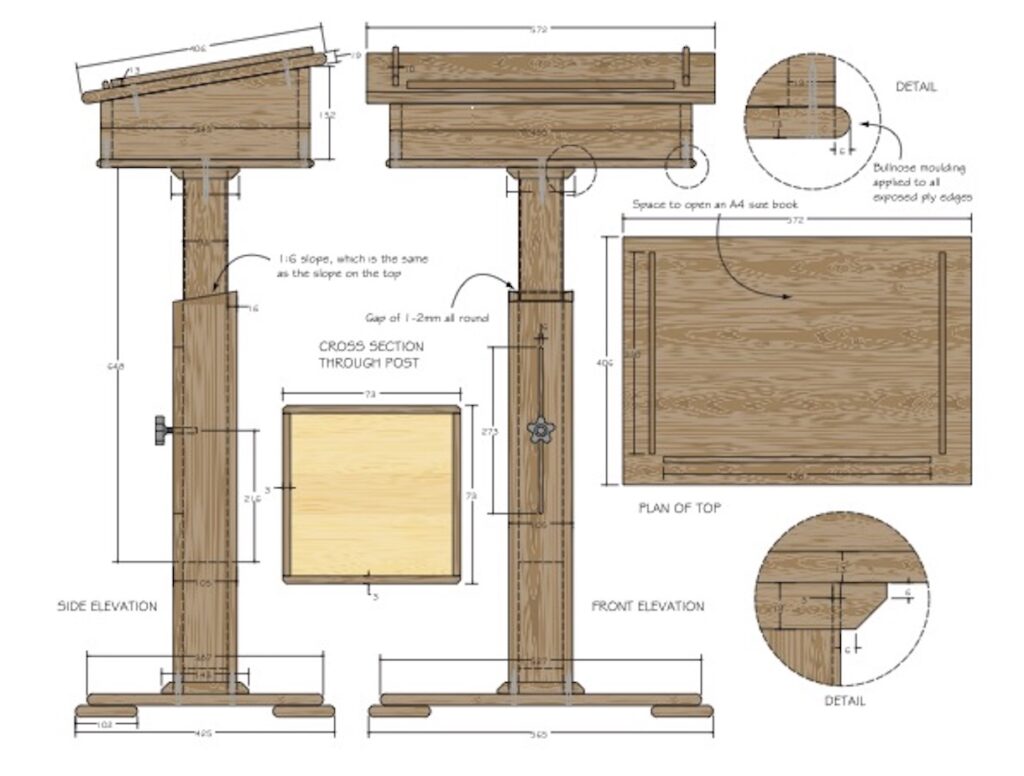
Cutting list Post Internal – 3 @ 75 x 75 x 660mm External (sleeve) – 105 x 16 x 660mm
Veneer 4 @ 90 x 3 x 685mm
Top section Back – 495 x 150mm Sides – 367 x 150mm Top – 546 x 394mm Bottom (shelf) – 495 x 337mm
Base Bottom – 514 x 375mm Feet – 100 x 100mm
Mouldings Top – 20 x 6 x 1880mm Shelf – 12 x 6 x 1676mm Base – 20 x 6 x 1778mm Other trim – 20 x 20 x 1220mm
Stand, outer sleeve and inner post
I wanted to have the richness of red oak (Quercus rubra) without the expense, so I opted to use red oak ply for the panels of the lectern and solid oak for the sleeve, post veneer and trim.
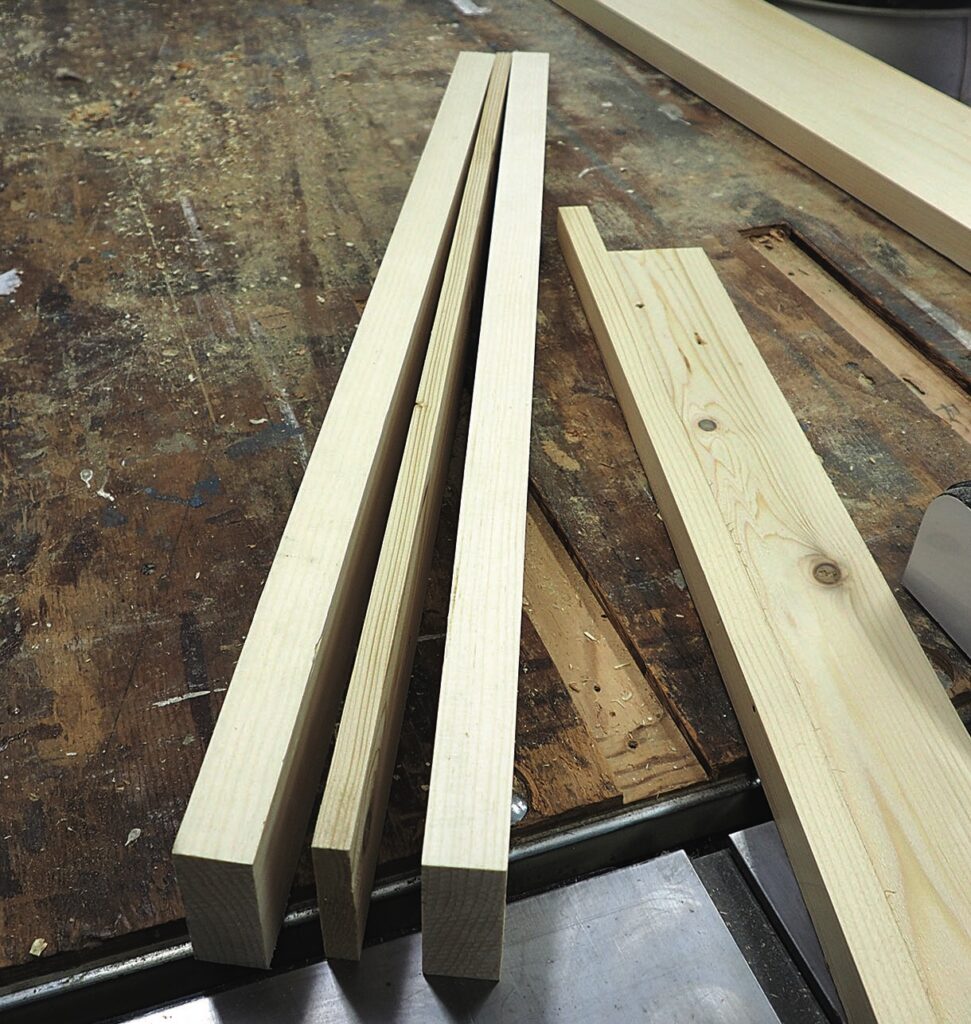
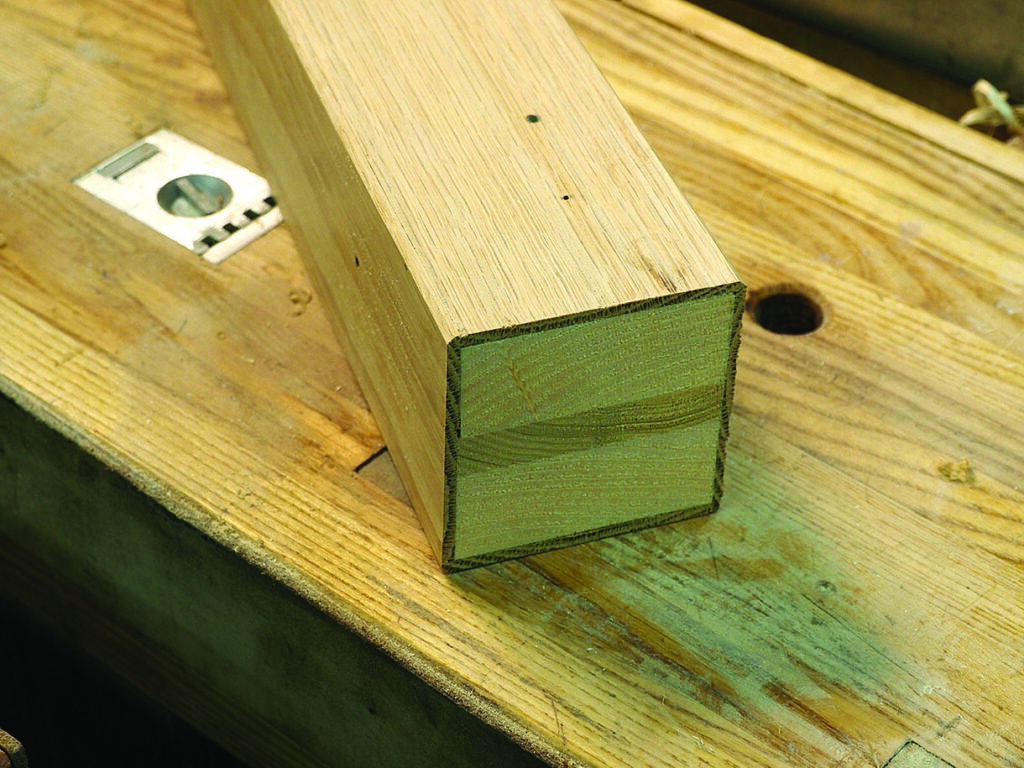
1. Start by ripping three pieces of straight-grained construction lumber into two pieces 65 x 38 x 660mm to form the core of the internal section of the stand. Glue these pieces together and plane to 65mm square. You could sandwich a piece of ply if you want to add additional strength
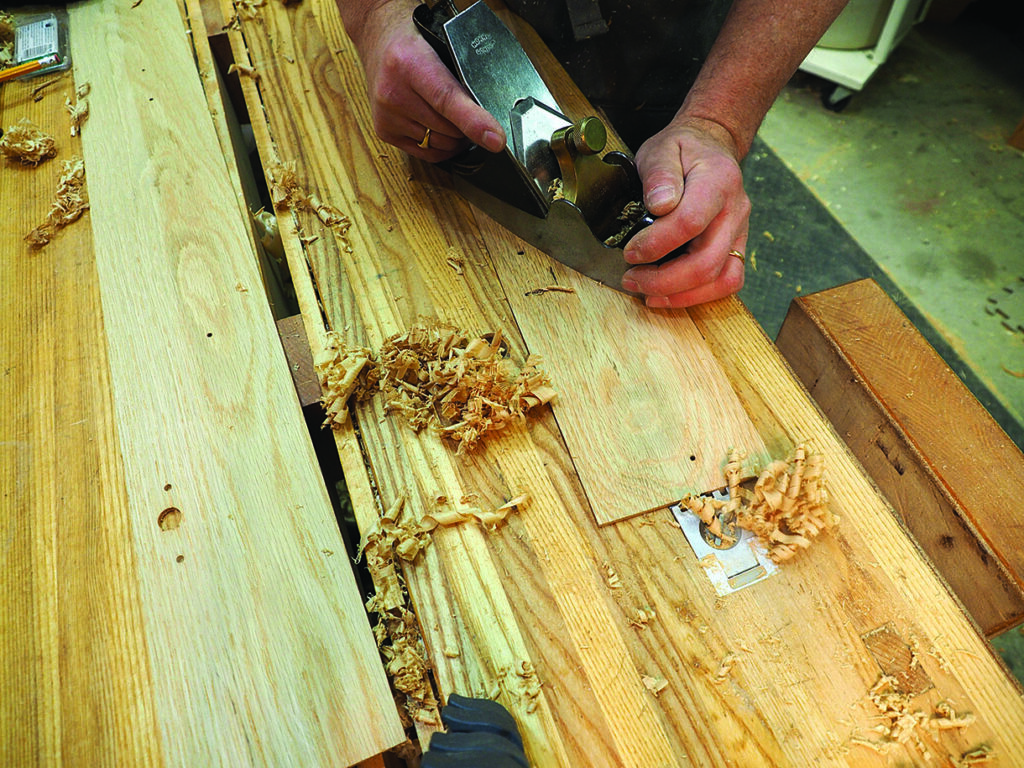
Making your own veneer
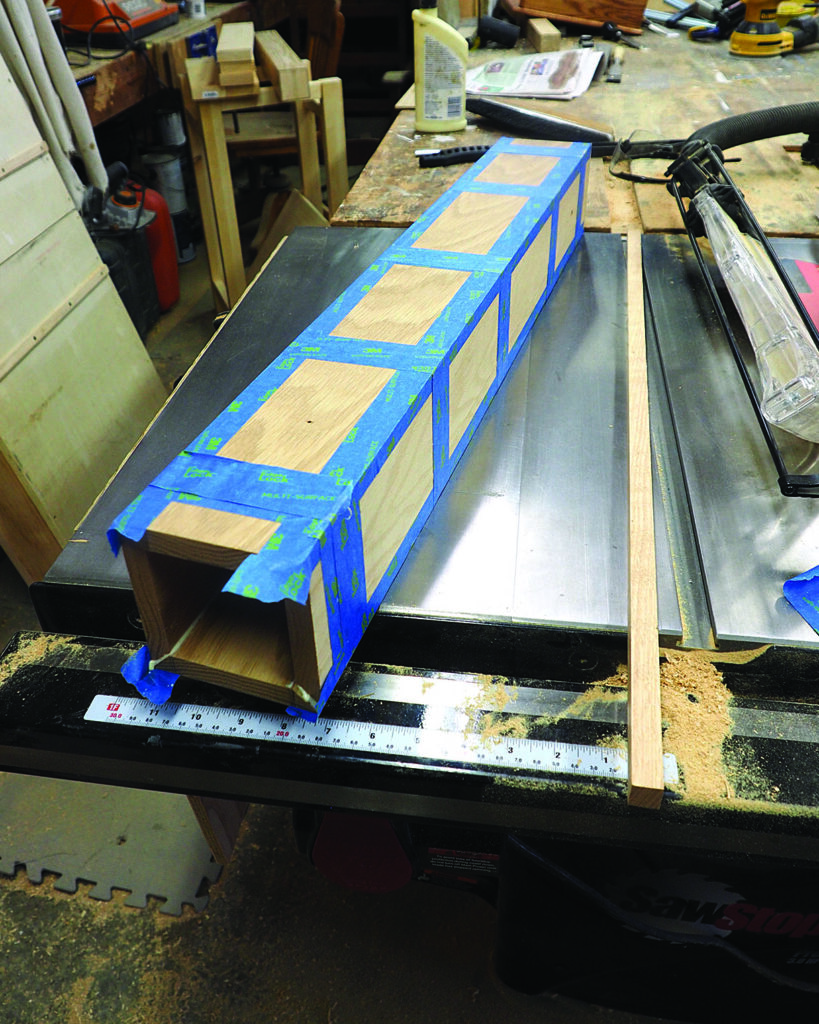
2. Several years ago I acquired some beautiful old growth red oak originally used for heavy doors at Cornell University – it was time to put this to good use. To make the veneer, re-saw a piece into 3 x 685mm strips and wide enough to cover the inner post3. Keep the pieces in the same orientation and order. Plane the pieces to remove saw mark 4. Plane one edge perfectly straight and glue one of the veneer pieces to the laminated core, overlapping the edge by about 6mm – this will be used to butt the next piece against. Apply even clamping pressure; once dry glue the next piece in place5. When this is completely dry, plane off all the overlaps. I added a 3mm chamfer to the edge; this will allow the inner post to move freely inside the sleeve and not be hindered by any glue in the inside corners
The outer ‘sleeve’ section
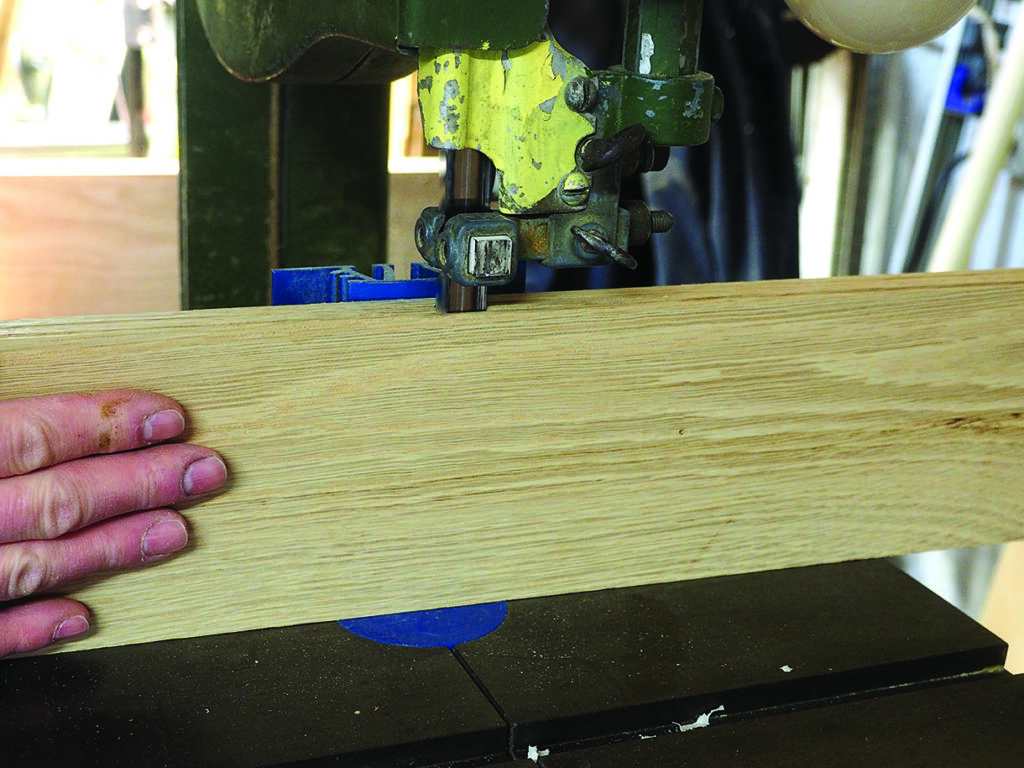
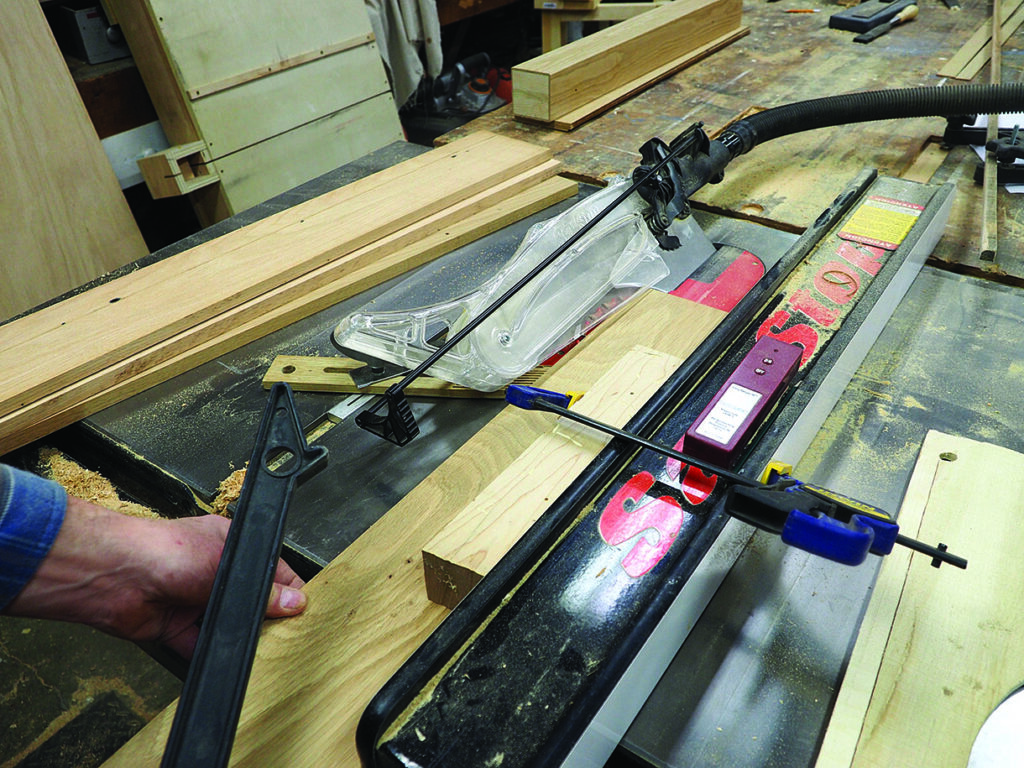
Cut four pieces of wood 16mm thick, and wide enough to allow a bevel on both sides, and an additional 2mm so that the inner core can move freely. By now you will know that I take most of my measurements directly from the item I am making, so take the inner post and lay it in the centre of one piece of the sleeve section. Mark the width of the inner post and add 2mm – this will allow the post to slide up and down inside the sleeve, without being too loose. Now add the amount for the two bevels. Adjust the table saw to 45°.
Top tip
When using power tools test the cuts, because mistakes happen so much faster with power tools. With two scraps of wood, rip the bevel on each and test to ensure they create a 90° joint when put together.
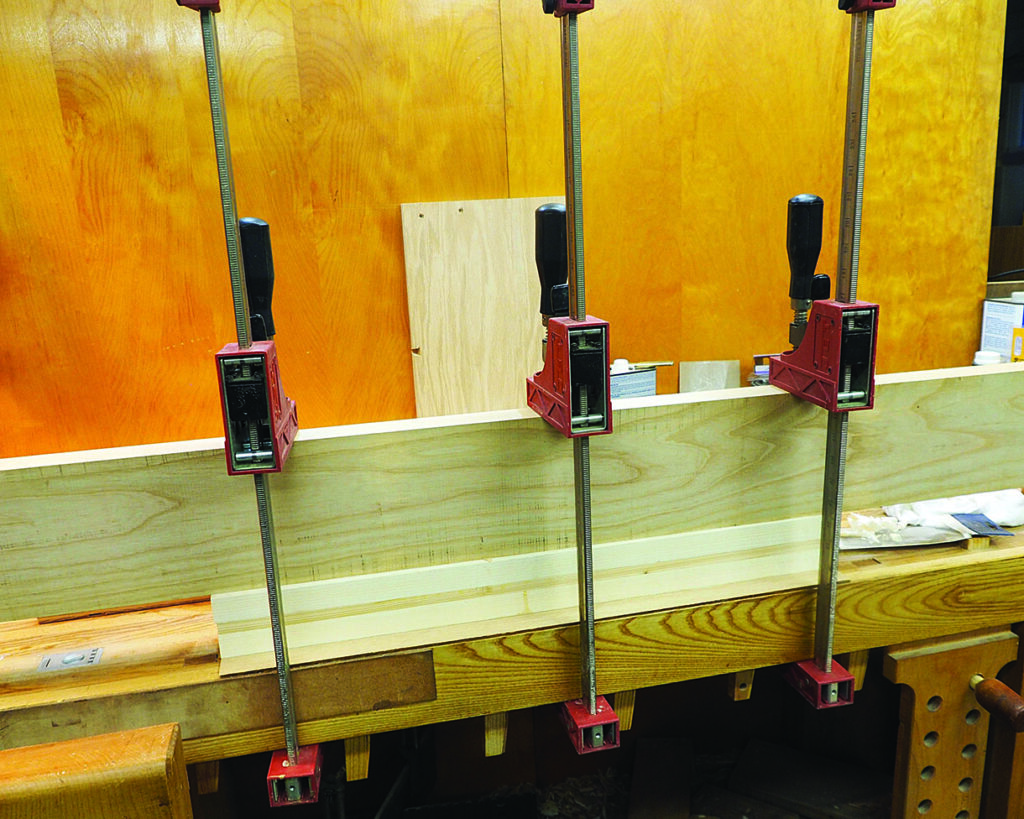
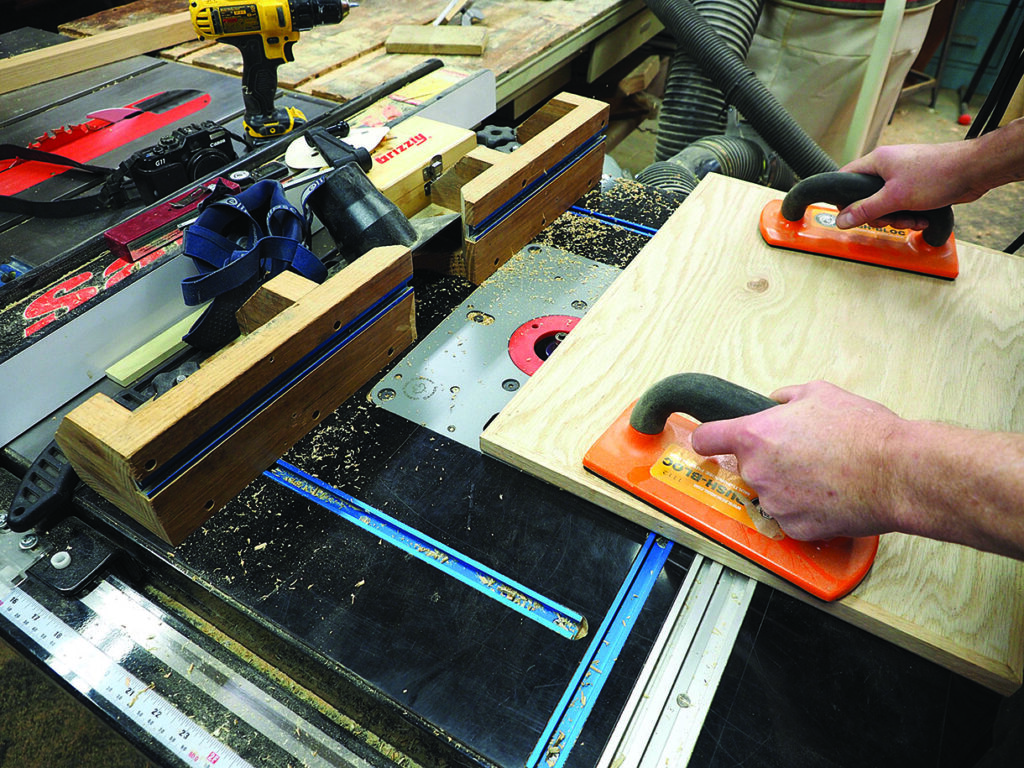
6. When satisfied with the fit, set the fence and rip the bevels on all pieces. It’s a good idea to sneak up on a cut – it’s hard to put wood back on7. Once you are happy with the fit, glue the four sleeve sections together. I use masking tape to get perfect joints and use glue sparingly in the bottom of the bevels valley – excess glue will squeeze out and is difficult to clean out from inside the sleeve. While the glue is drying, turn your attention to the lectern’s top
Tip
When cutting ply on a table saw, always have the sheets face up to avoid tear-out, and be sure to score the cut line with a marking knife. It also helps to have a zero clearance insert and a sharp saw blade.
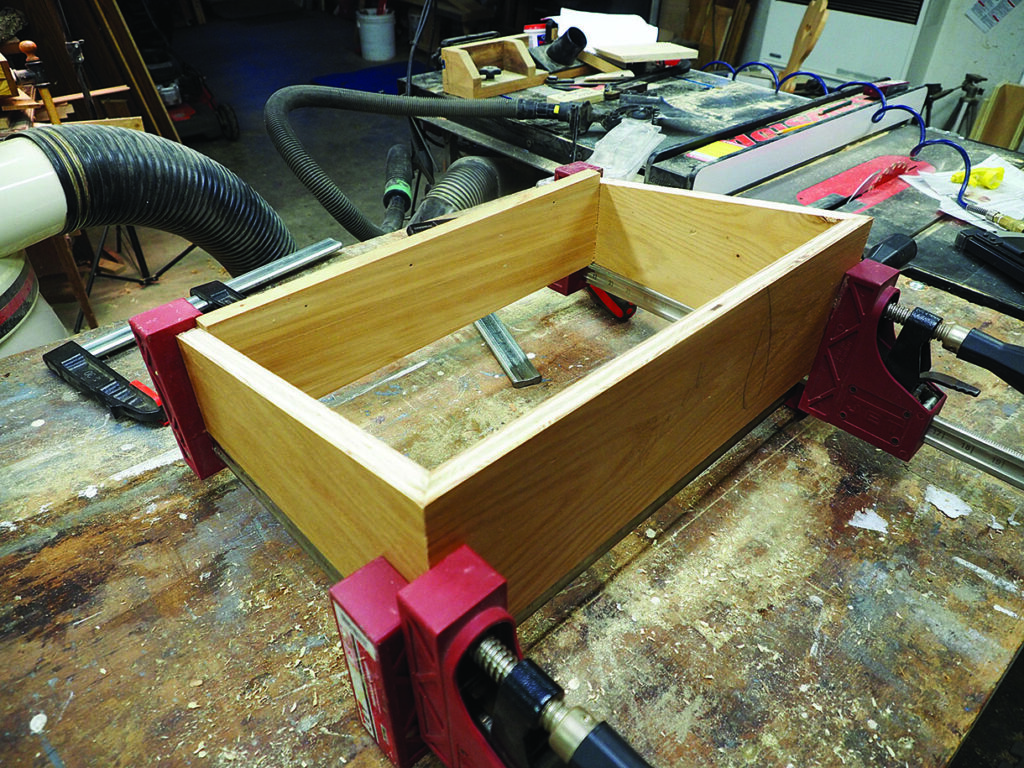
8. The back piece has the same angle ripped along the top edge so that it matches the slope of the sides. The sides and back are mitred at 45° and glued. Plywood has enough long grain to long grain contact to make a strong joint and once the top and bottom are secured, it will be a strong construction9. Glue and clamp the three sides together. Use a spacer to keep the sides parallel – don’t forget to check for squareness
Lectern top and shelf bottom
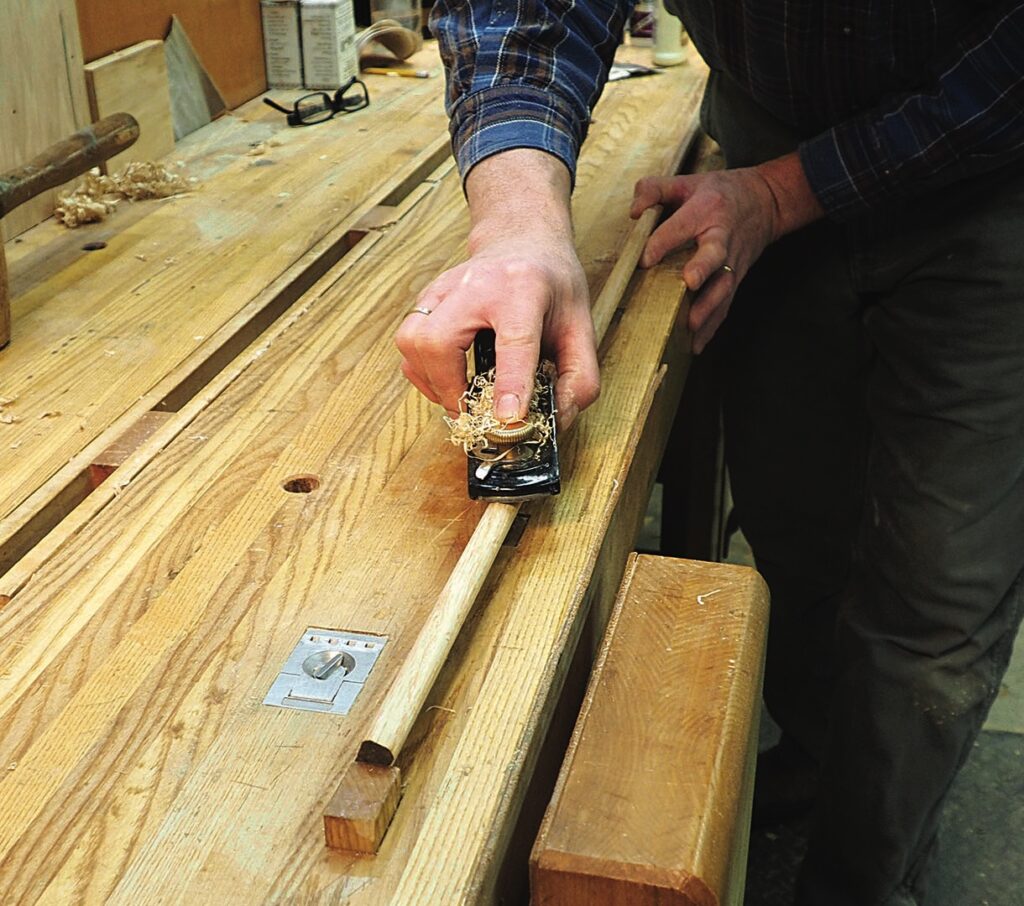
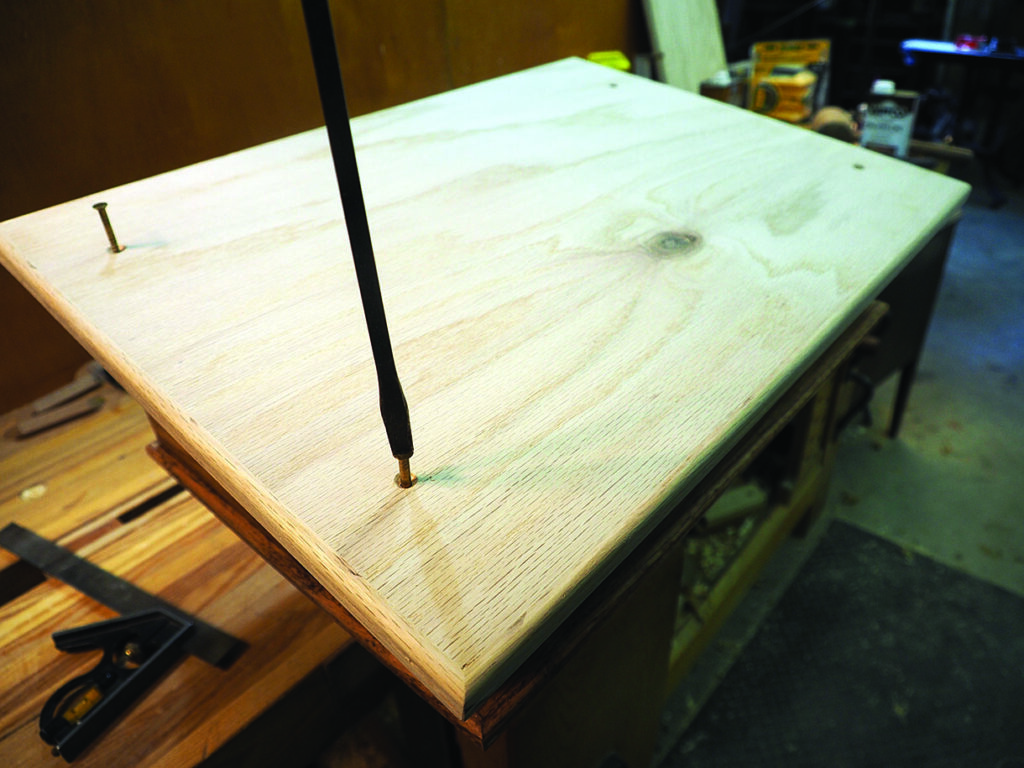
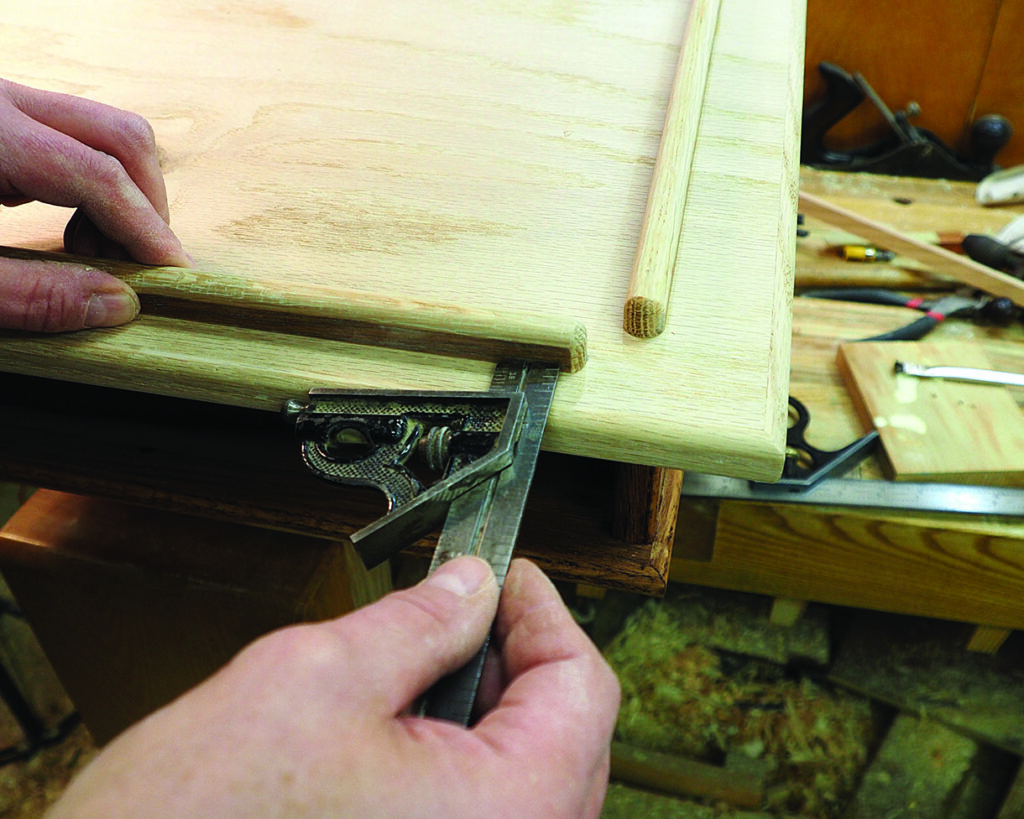
10. The top is made from 20mm ply and is 560 x 393mm. Add the moulding, which gives a 38mm overhang all round (people like to hold onto the edge of lecterns – usually to steady their nerves). Make sure the bottom of the shelf is flush with the sides and apply 12 x 6mm bull-nose moulding. These mouldings hide the ugly ply layers and add a nice finish to the top. They are easily produced using a block plane. Also add the moulding to the front edge of the sides11. An alternative to planing the trim is to use a router or router table to create the moulding. If you opt for this method it is safer to apply the moulding to the panels, then route the edge; you have a larger surface to hold onto12. Assemble the top and bottom using four screws13. Finally, add a 12 x 10mm bead to the top on three sides to stop things sliding off the surface and a space at the corners to clear out the dust. These are positioned over the screw holes
The base
The base is given the same treatment as the reading surface; moulding is applied to all four edges.
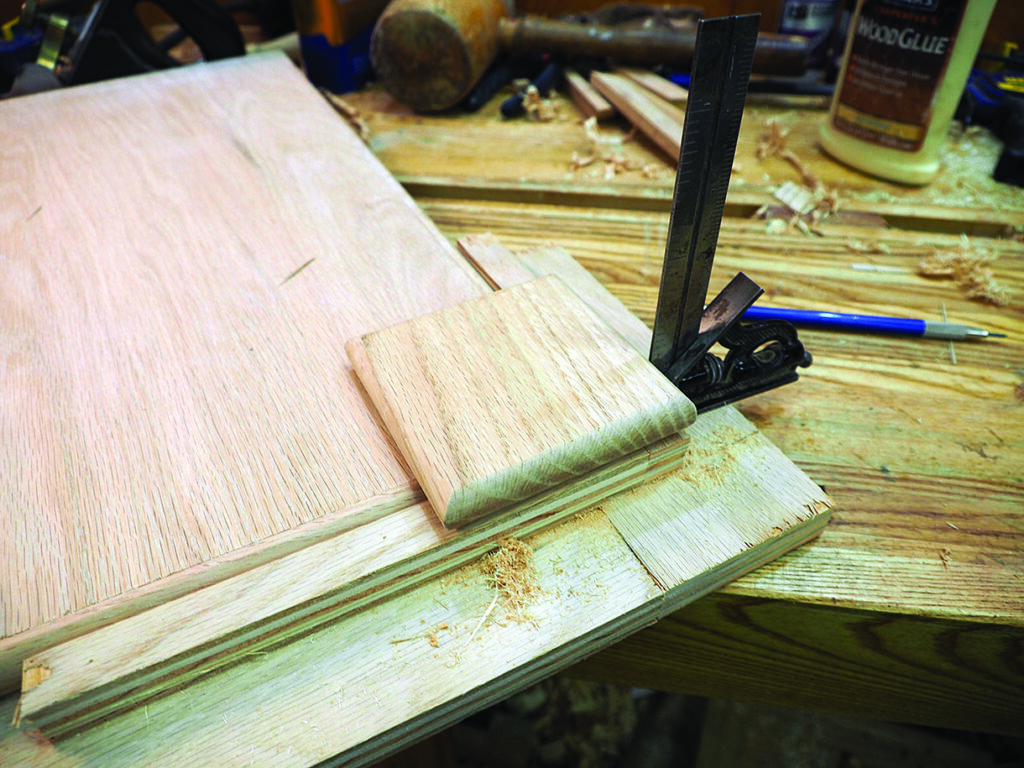
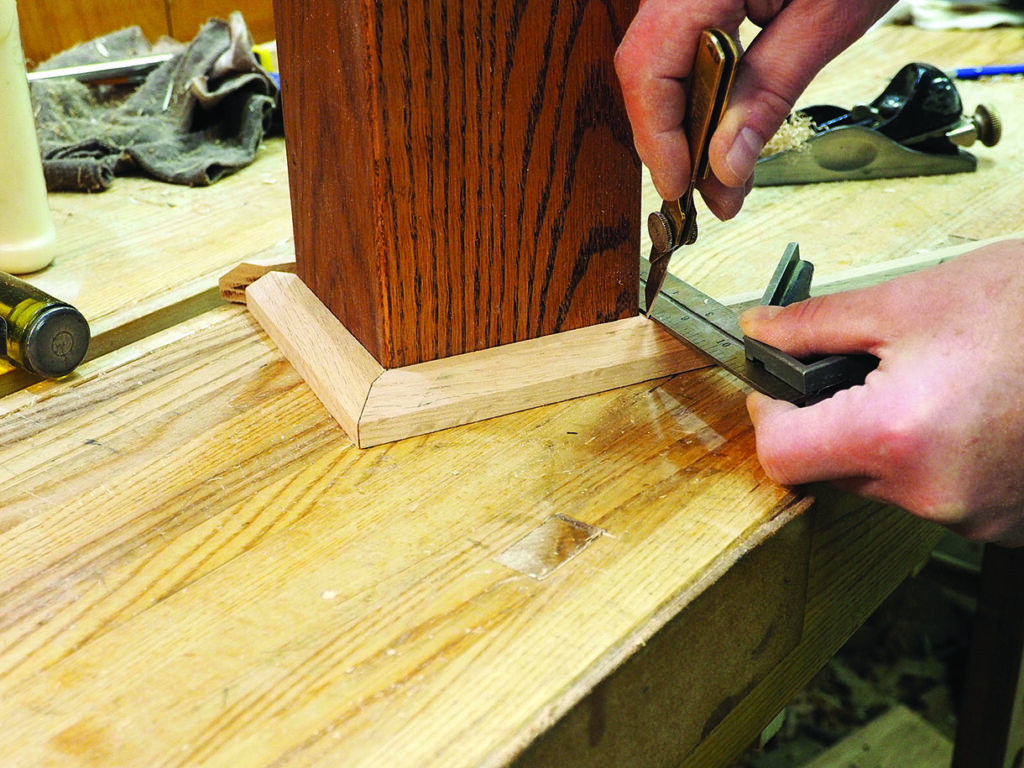
The feet
14. The feet should extend 20mm beyond the base. As the feet are going to take the most ‘abuse’ and are made of solid oak, I made a simple jig to get the feet aligned. Pin nail them in place before screwing
The mechanism
I toyed with many ideas for raising and lowering the lectern, but in the end, opted for the simplest. The inner post is attached through the sleeve to a threaded knob so that when tightened secures the post.
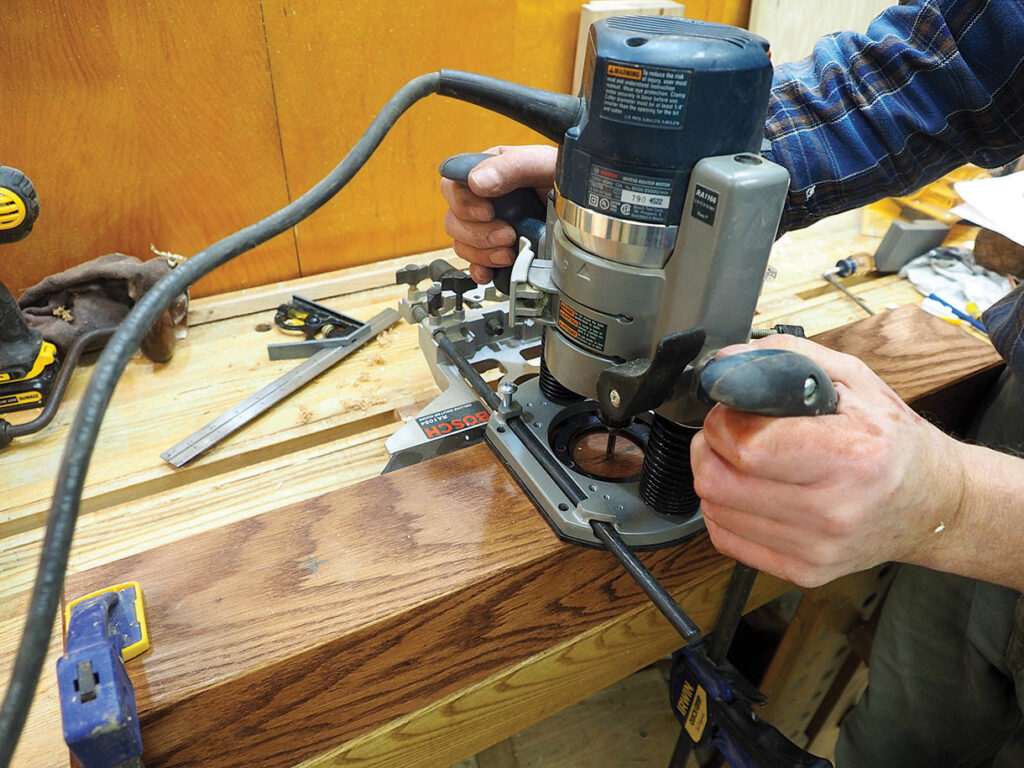
The slot
The placement of the slot is dependent on the range of heights you want to allow the lectern to be adjusted.
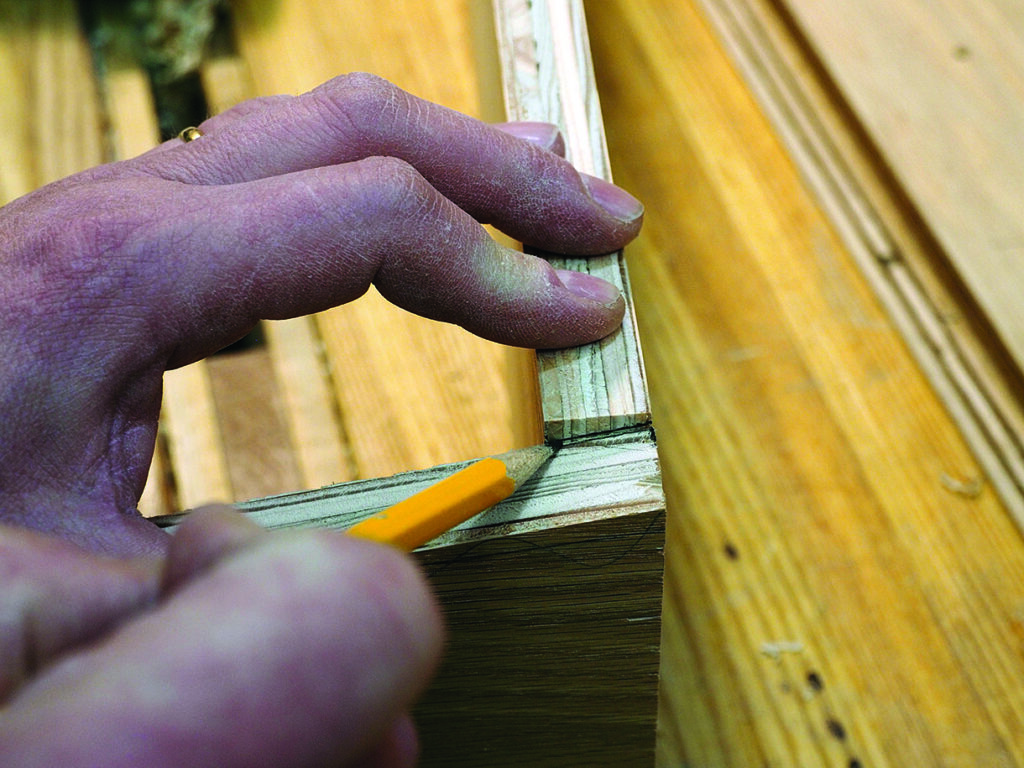
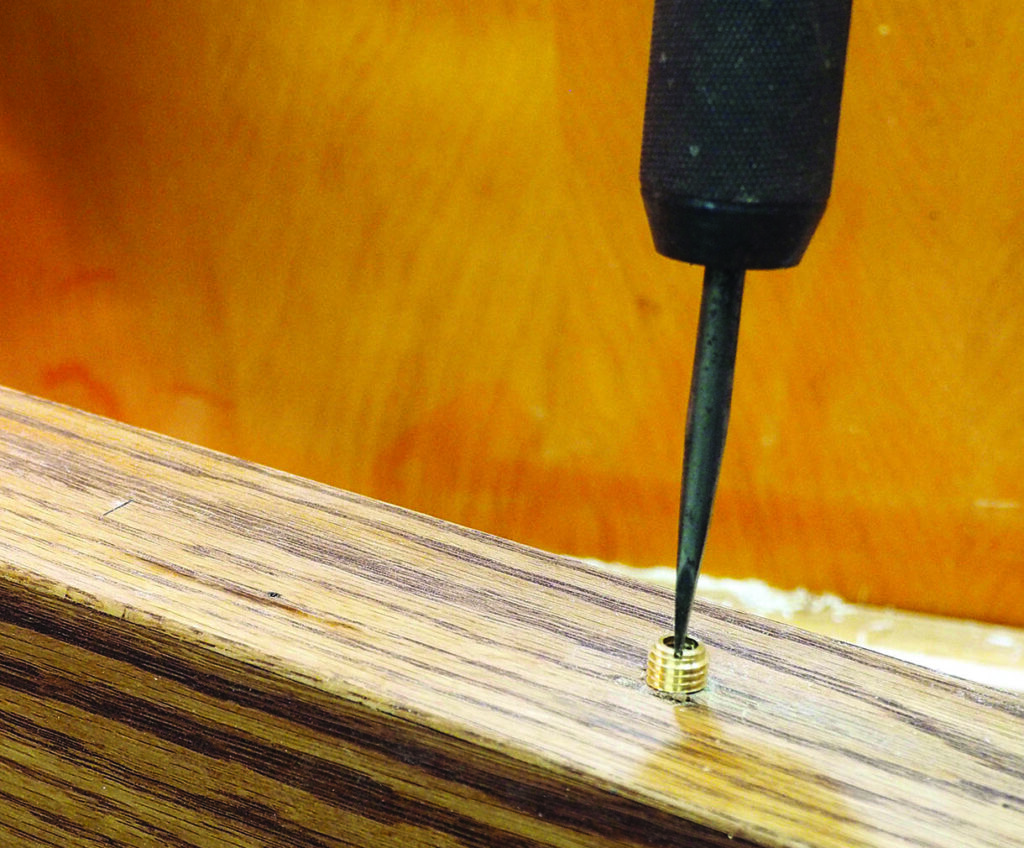
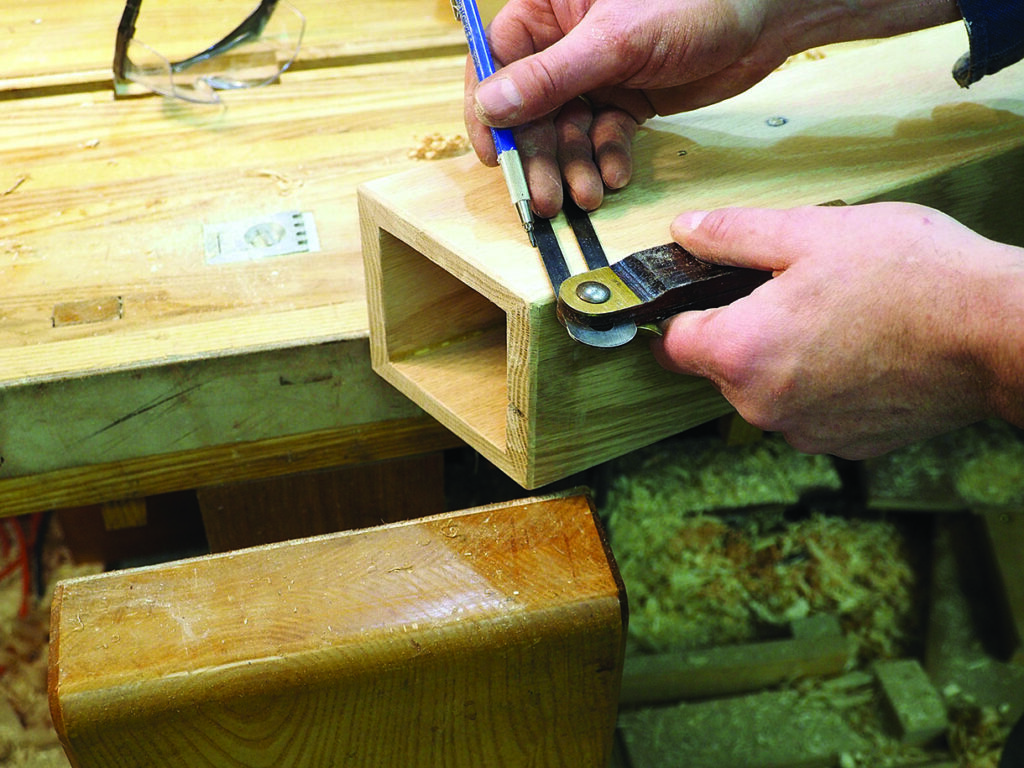
15. Use a plunge router with fence to create the 6 x 273mm slot – I used two clamps to mark the extent of the slot – route this in a couple of passes. Then place the inner core into the sleeve and mark the location, through the slot, where the threaded insert will be16. Drill a 10mm hole about 38mm deep and insert two ¼in x 20 threaded inserts
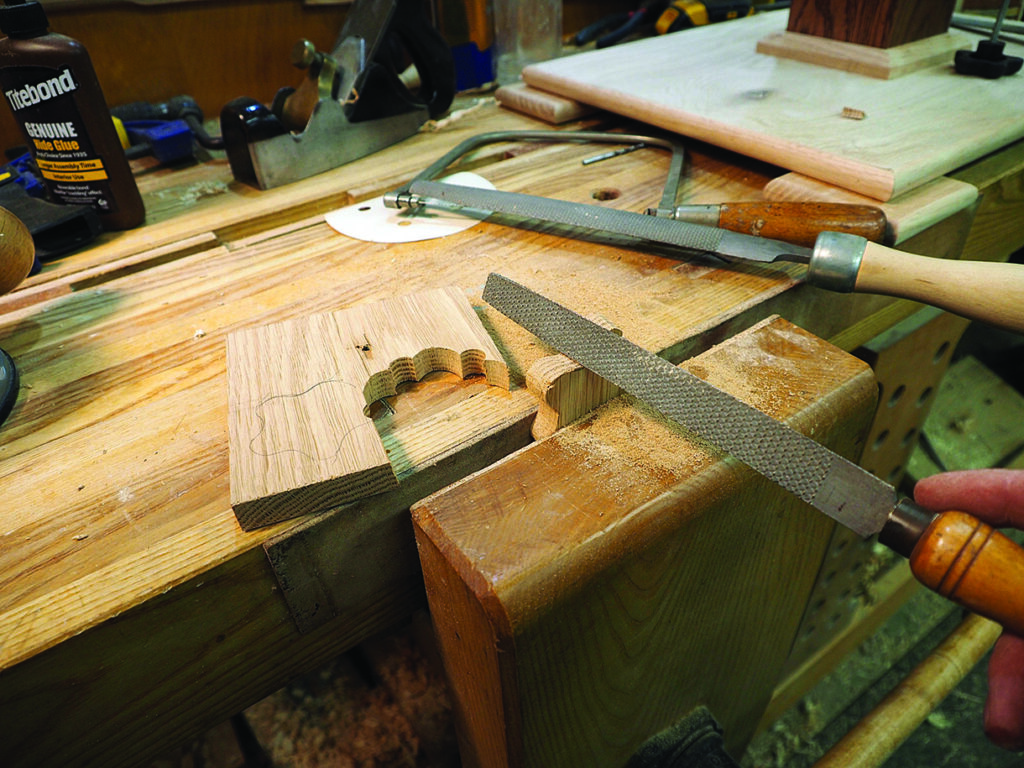
Making the star knob
17. The knob is simply a five- pointed cog; use a Forstner bit to remove the bulk of the waste and then a rasp to finish the shaping. Recess a bolt and glue into the knob and add an oak dowel spacer. Finally, place a brass washer between the dowel and the slot. This arrangement provides more than enough friction to keep the lectern at the desired height
Attaching the sleeve to the base
18. People lean on lecterns, so to add additional holding strength glue a block of oak into the base of the sleeve, then screw to the base19. Finally, add a 20 x 20mm chamfered edging to the top and bottom of the inner and outer sleeve20. To add a bit of visual interest cut a slope on the top of the sleeve to match the top’s angle
The finish
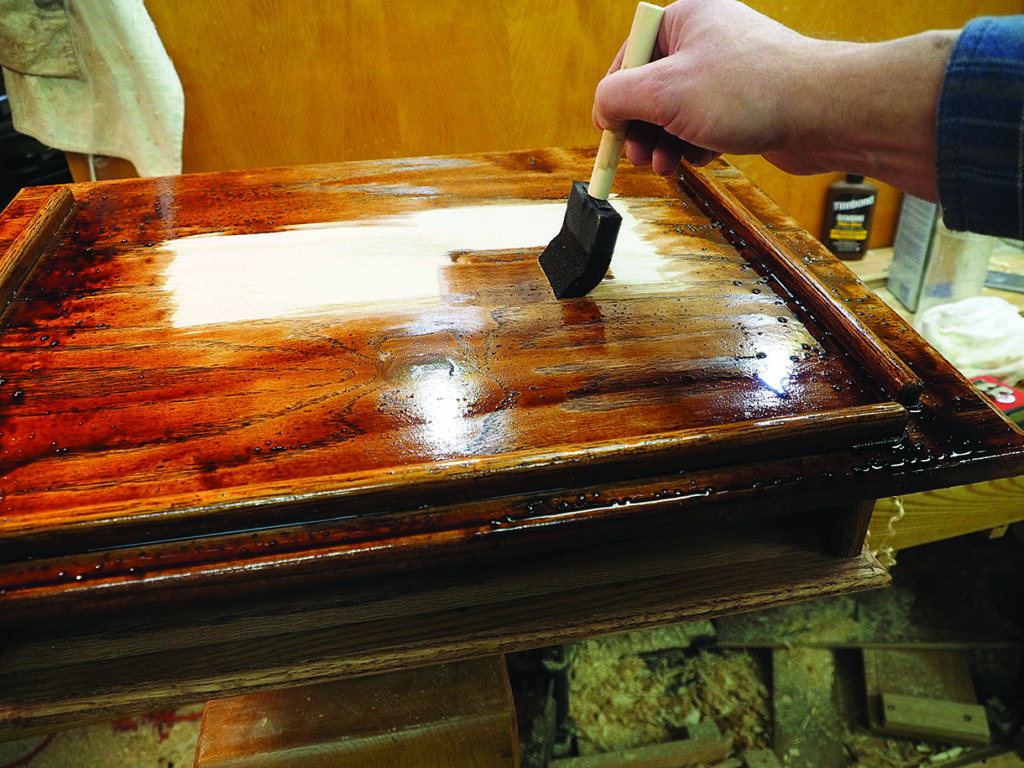
21. As you have seen from the images, I have been pre-finishing parts of the lectern with red oak stain as I have worked through the construction. Mainly because I was eager to see what each piece looked like with stain applied, but also because I wanted to have a richer, darker look to the wood and by applying the stain throughout construction I was able to save time later by only needing to apply one additional coat and lightly sand when dry. Just be sure to avoid areas that need to be glued22. Then apply two coats of clear satin wipe-on polyurethane and then sand with 220 grit between coats. Finally, apply a good quality furniture polish
To provide the best experiences, we use technologies like cookies to store and/or access device information. Consenting to these technologies will allow us to process data such as browsing behaviour or unique IDs on this site. Not consenting or withdrawing consent, may adversely affect certain features and functions.
Functional
Always active
The technical storage or access is strictly necessary for the legitimate purpose of enabling the use of a specific service explicitly requested by the subscriber or user, or for the sole purpose of carrying out the transmission of a communication over an electronic communications network.
Preferences
The technical storage or access is necessary for the legitimate purpose of storing preferences that are not requested by the subscriber or user.
Statistics
The technical storage or access that is used exclusively for statistical purposes.The technical storage or access that is used exclusively for anonymous statistical purposes. Without a subpoena, voluntary compliance on the part of your Internet Service Provider, or additional records from a third party, information stored or retrieved for this purpose alone cannot usually be used to identify you.
Marketing
The technical storage or access is required to create user profiles to send advertising, or to track the user on a website or across several websites for similar marketing purposes.