From tree to finished table – John Bullar describes the complete process of making an apple wood turntable
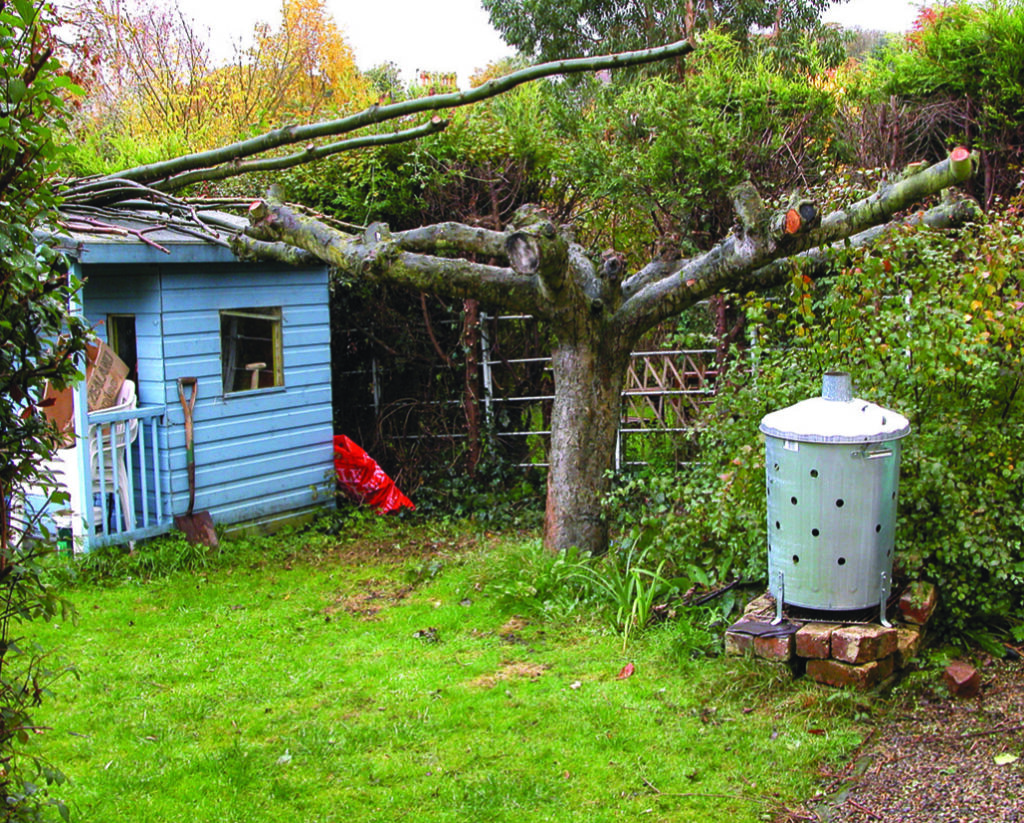
Just before midnight one New Year’s Eve, my sister and her partner announced their engagement to be married. The wedding would not be for another year and a half. I was staying in their home in a beautiful village on the coastal edge of North Yorkshire moors. Exploring the garden of this Victorian home earlier in the day, I had noticed an old but sturdy-looking fruit tree with all its branches lopped short. For those with tree-hugging tendencies, the trunk was small enough to clasp your hands around.
My hosts told me the tree was an old Bramley cooking apple. The previous autumn it had produced just three golf-ball sized apples, besides which it was going to have to be removed to make room for an orchard of traditional-variety English eating apples. I could see the demise of the old Bramley saddened them, but they had reluctantly decided it must happen.
It is amazing what harebrained schemes we conjure up with the aid of festive liquor to lubricate the imagination. In the wee small hours of the morning, with ‘Auld Lang’s Syne’ long since sung, and more sensible sober folk tucked in their beds, I suggested it would be a good idea to convert the old Bramley tree into a piece of furniture, as a wedding present for my sister. The plan was this: on New Year’s day, instead of taking the customary long walk as a penance for indulgences of the night before, we should fell the tree. We would load the trunk onto a borrowed trailer so I could take it across the country to my workshop and a year later, turn it into a table.
Felling the tree
So it was that in the cold light of day, my brother-in-law to be and I set forth with a forester’s axe in hand to do the deed. A chainsaw might seem a more suitable and contemporary tool than an axe for felling a tree of this size, but the project had not been planned and my chainsaw was hundreds of miles away, so we consoled ourselves that the sound of an axe would be more conducive to the tranquillity of this sleepy village awakening with sore heads to the New Year.
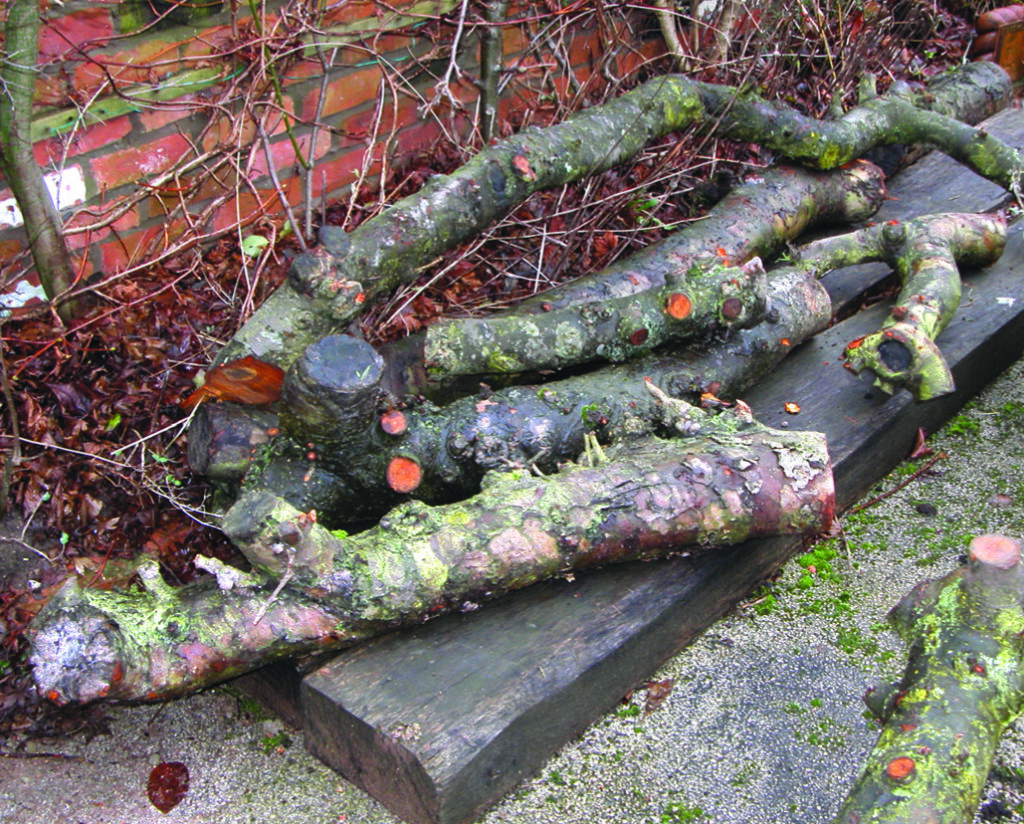
As a warming-up exercise, the main branches needed to be cut back to the trunk using a bow saw. Some of these looked pretty straight from the ground and we hoped we might extract some useful wood from them, but sighting along them now they were at ground level I could see the straight sections were too short, so all the branches were put aside for firewood.
After exposing the top of the root bole with a spade, we took it in turns to build up a sweat using the axe to chop through the side roots. The idea was to produce a cut slightly wider than the blade so it would not jam, by chopping at alternate sides. However, our rather inexpert swinging of the blade on the end of its 1m shaft produced some very wide cuts, making the job harder than it should have been.
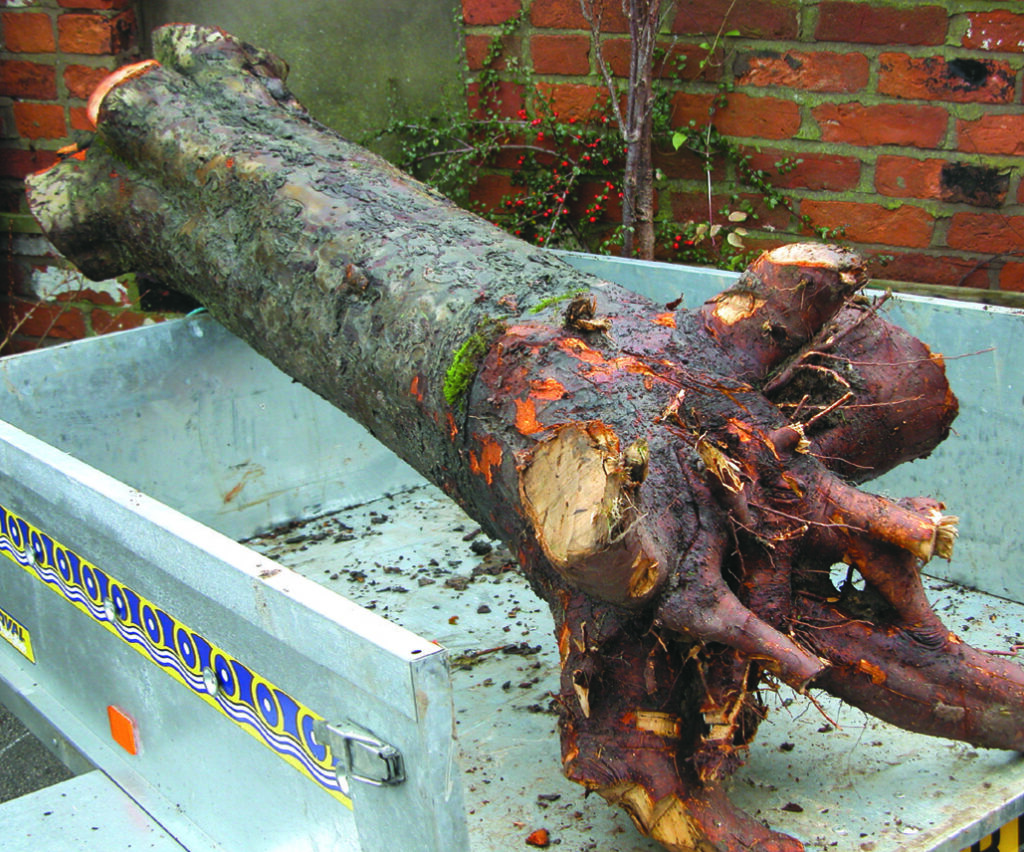
With the last side root cut, the trunk wobbled like a loose tooth, still held in place by a very long taproot. We decided it was time to apply the time-honoured method of tugging the trunk out of the ground, using a four-wheel drive with a rope hooked over the tow bar. With everyone standing well clear in case of a snapped rope, we took up the tension. This might have been easier if the lane outside had not been iced like a skating rink but eventually we got a result. The trunk keeled over, exposing the tap root enough for the axe to do its work.
All this outdoor activity on New Year’s Day attracted a deal of amused interest from villagers passing by. As we adjusted the ropes, a neighbour stopped to watch through an opening in the hedge. He told us that he had planted the tree on behalf of his neighbour during the 1960s and it had been responsible for many excellent apple pies since. When we explained the reasons for its removal as well as the plans for its future reincarnation as a piece of fine furniture, he confirmed his approval.
Green wood
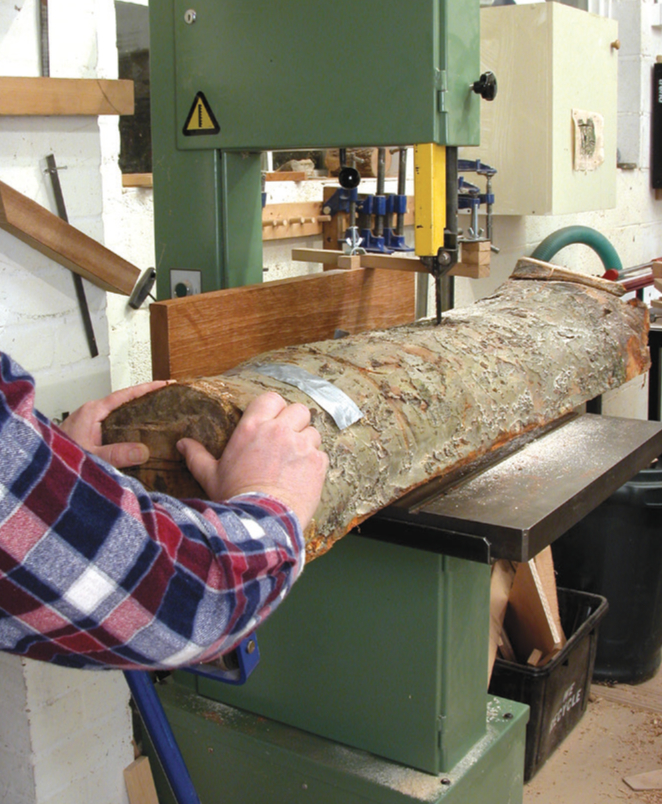
As someone who has not had much to do with green woodworking for decades I needed a project like this to remind me how much water wood carries while it is still alive. It feels like a completely different substance from the timber I normally handle in the workshop. The weight is unbelievable. The short trunk of this stumpy middle-aged tree was giving me a really hard time. In the end I conceded that I was not going to be able to lift it out of the trailer without something breaking, probably me. After much deliberation with a tape measure, I started up the chainsaw and lopped off both the root-bole and the crown. Now the trunk was just about draggable across the yard to my workshop.
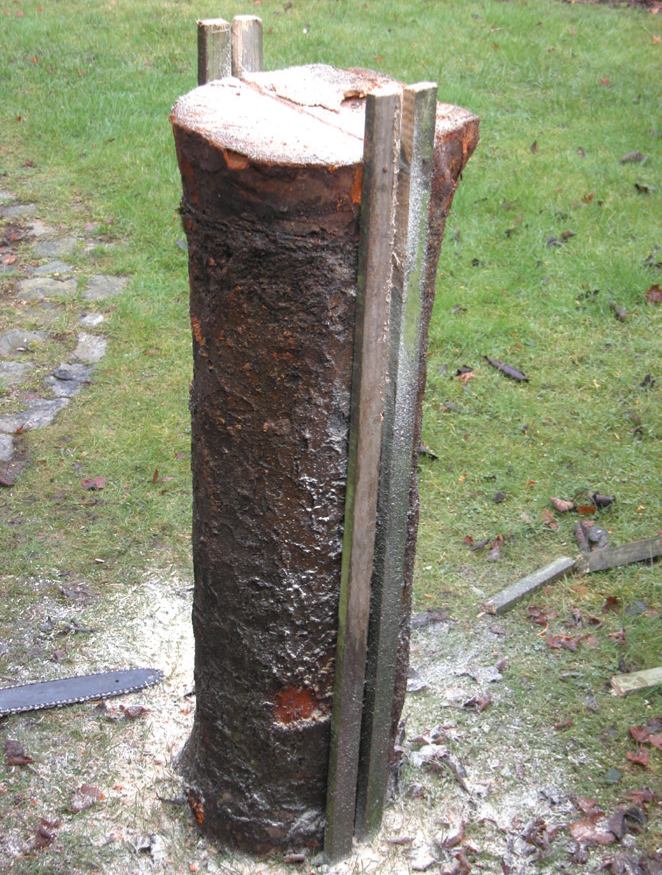
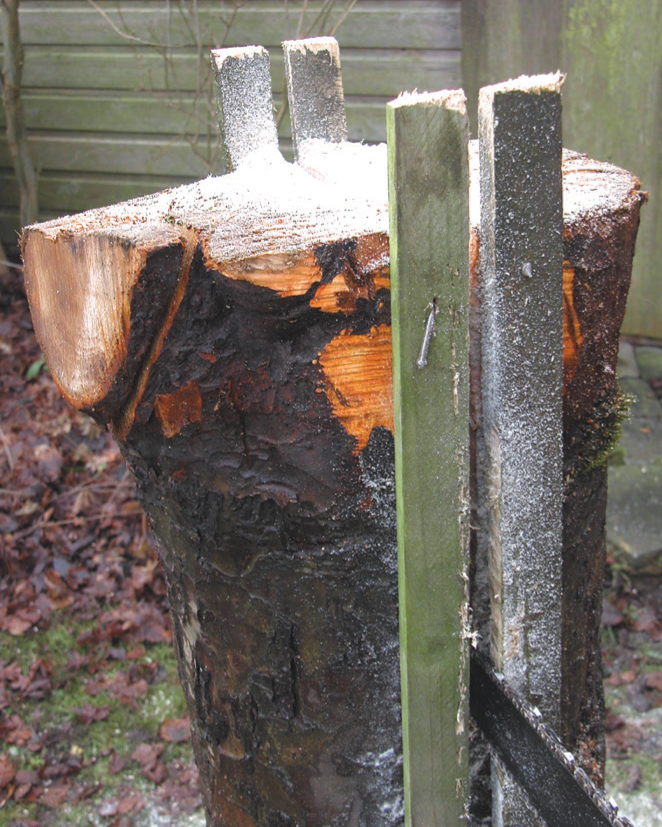
Before taking it inside I decided to halve it long ways using the chainsaw. I stood the trunk to attention on a soft piece of ground as if it was growing again and secured it by knocking four posts in the ground against its sides. I arranged them in closely spaced pairs with a 10mm gap between each pair – more than enough to run a chainsaw through. From bitter experience, I know that chainsaws can be obstinate beasts, especially if the teeth are not freshly sharpened; they tend to go off in their own direction rather than the one you choose. I needed room to manoeuvre so if the saw started to drift towards one of the guide-posts, I could back off a little, give it a little wiggle to widen the cut then advance again on the centre line.
I made the first and deepest cut down the centreline of each half trunk. This needed to be truly vertical to follow the pith line up the centre and each half trunk would be the same thickness.
Quartering
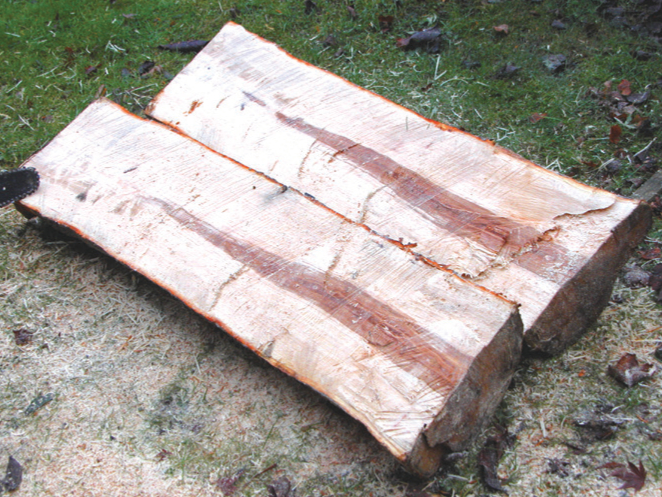
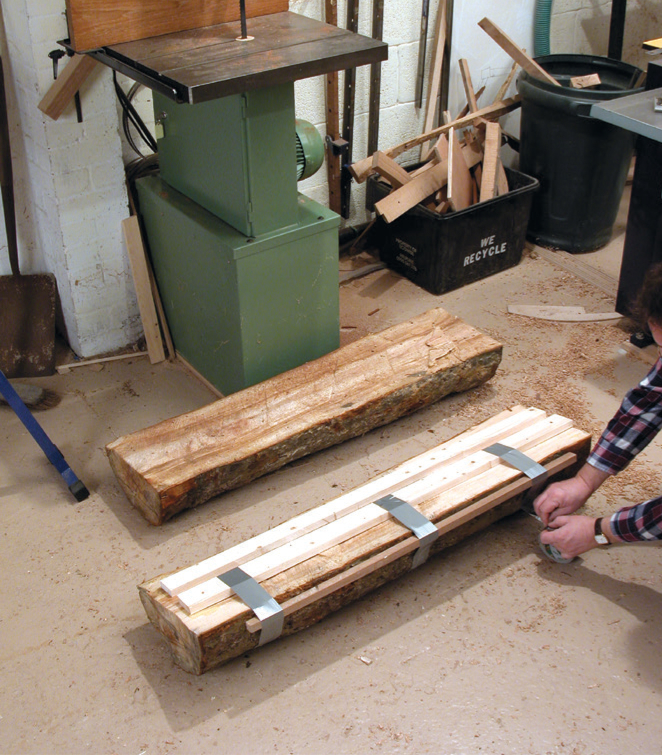
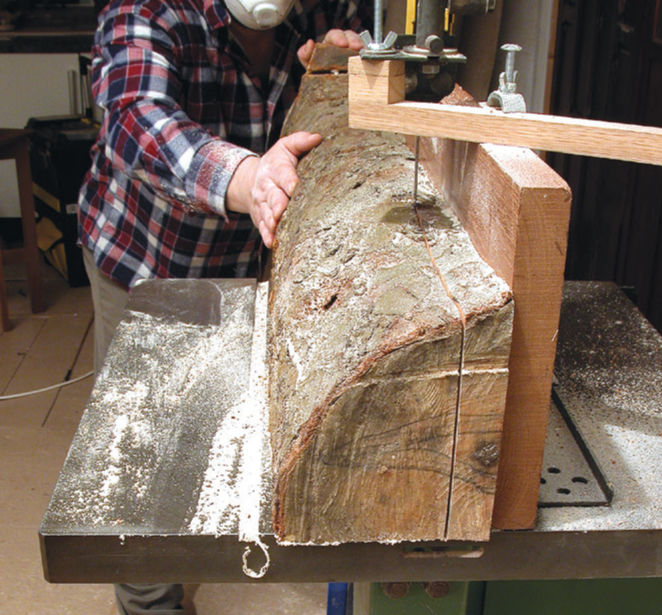
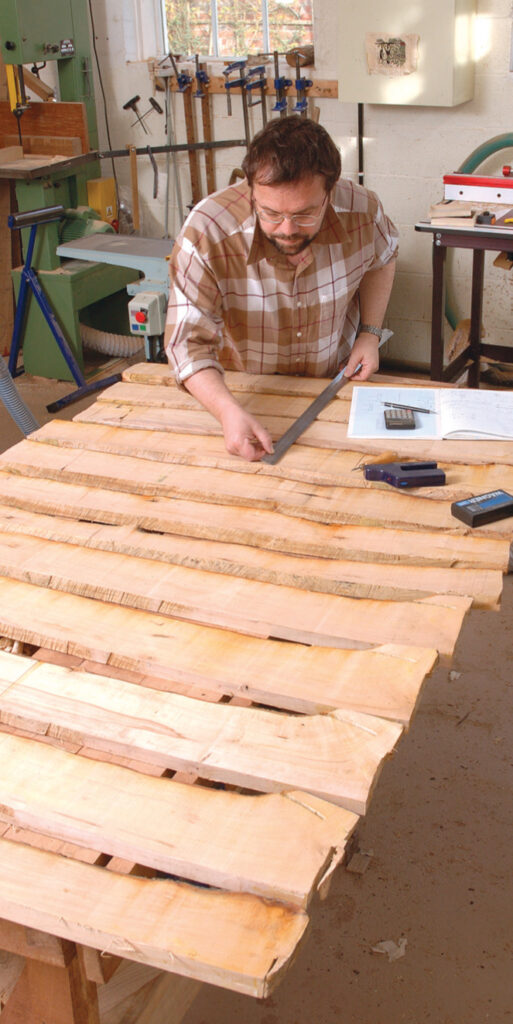
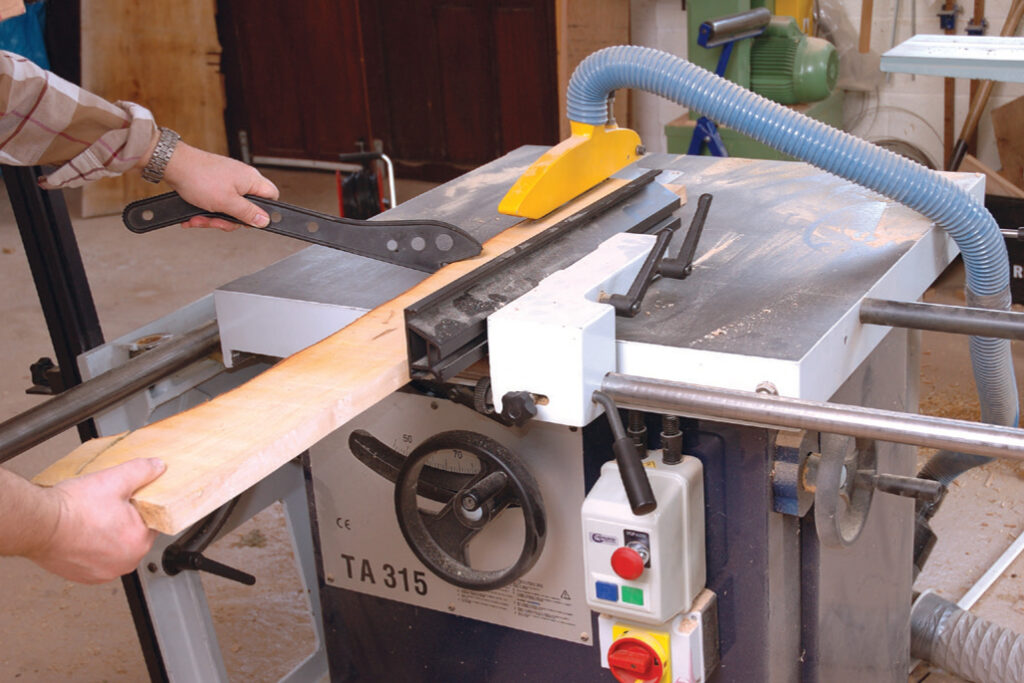
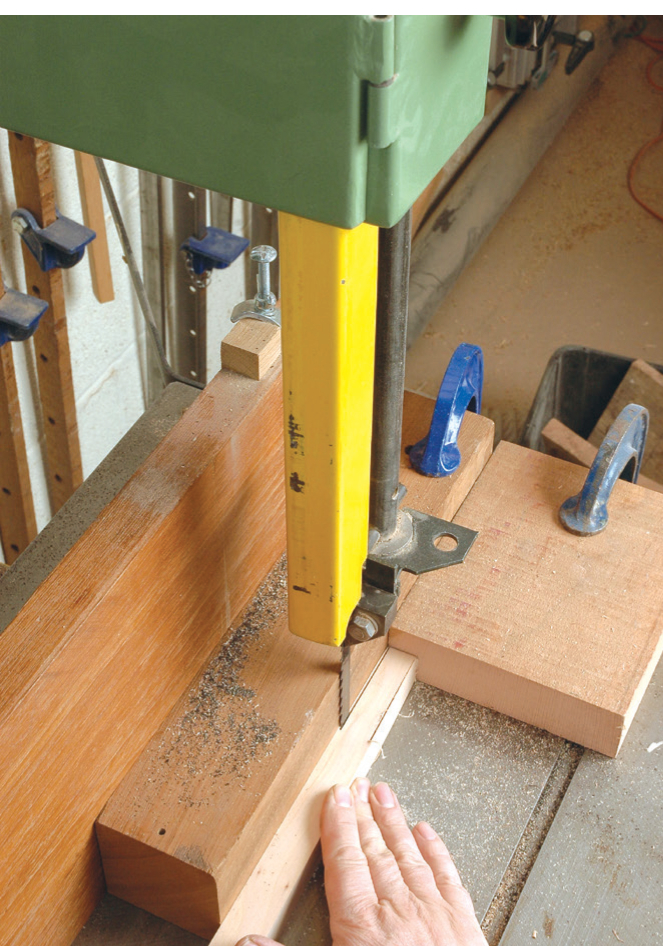
The trunk was to be converted into 25mm-thick boards ready for drying. From the outset it had been clear that this small tree trunk would not produce very wide boards and the table top would need to be built up from a succession of narrow ones. Now the half trunks each had a flat surface, I could feed them across the bandsaw table using batons of planed timber as guides, temporarily taped in place.
The problem again was the weight. Although I was now only dealing with half a trunk at a time, lifting each onto rollers and manoeuvring it across the bandsaw table was quite a struggle. With the trunk in quarters, it now had two flat faces: one to be laid on the bandsaw table and the other to be pressed against the bandsaw fence, so I was ready to start producing straight flat boards.
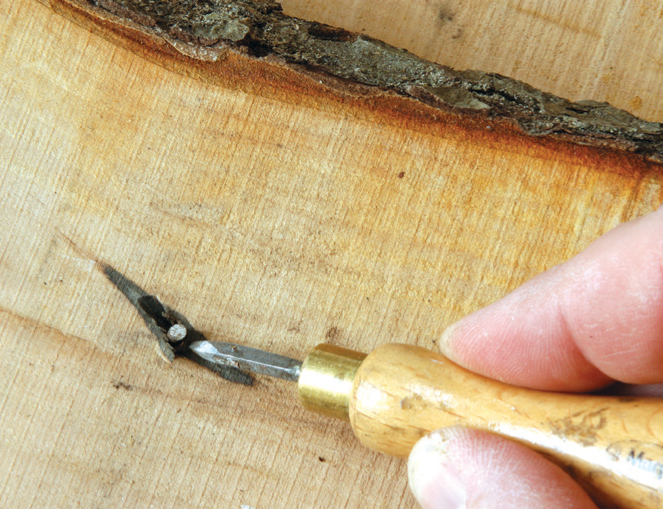
All seemed to be going swimmingly well until the last cut. Maybe I was being greedy trying to extract a plank from a piece that should have been firewood. Anyway, I discovered that there were nails in the tree. To its credit, the old bandsaw merrily chomped its way through them with barely more than a cough and a splutter, then a few seconds later, just short of the end of the last cut, it ground to a halt. The motor was incredibly hot so I turned everything off and took a breather for me and the motor to cool off. An hour later, it was the same story – doom and gloom – had I killed my favourite machine through overwork?
With the power isolated, a little investigation with a screwdriver revealed the entire innards of the switch box were crammed with apple wood residue. It was not the dry powdery sawdust that the extractor usually removes from the lower wheel case, but a claggy cake carried round on the blade and thrown into every nook and cranny in the bandsaw chassis. After a thorough spring-clean with a fine vacuum nozzle and with everything back together, I breathed a sigh of relief as the bandsaw rushed back up to speed. With just a blade to replace, I think I got off lightly.
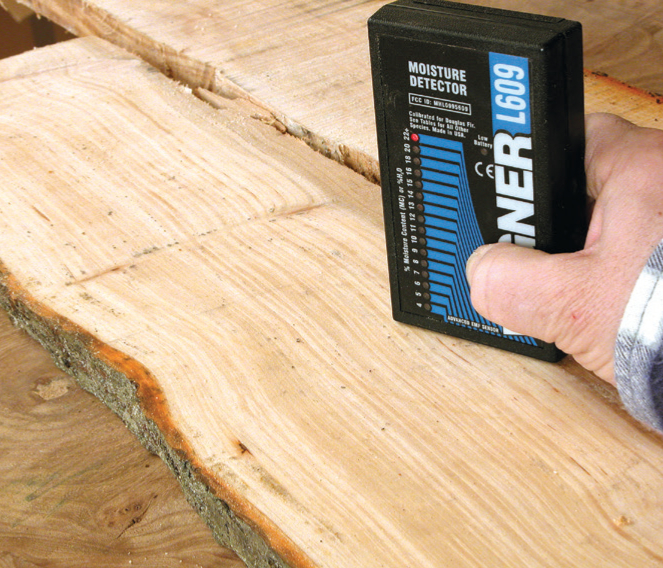
Moisture levels
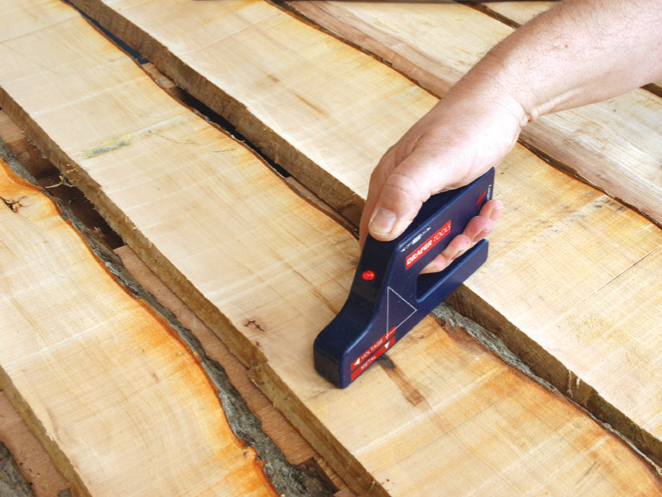
As expected, the moisture content of the boards was off the scale on my meter, which only measures up to 20%. In practice it would probably be closer to 100 % at this stage – meaning the trapped water weighed nearly as much as the wood – whereas for furniture making we need it closer to 12%.
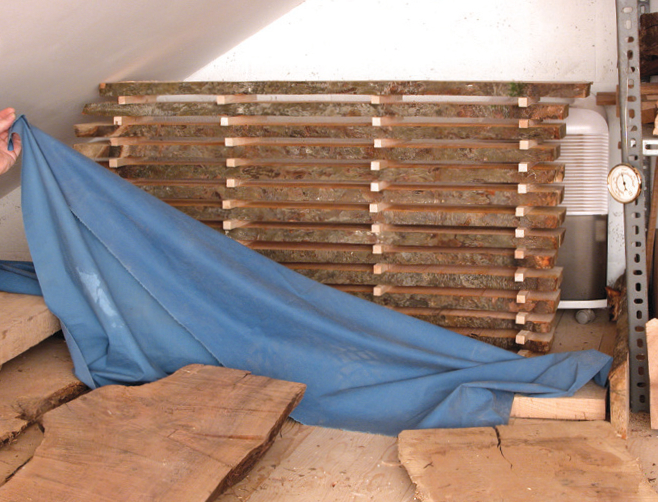
A rule of thumb for air-drying timber is to allow at least one year per 25mm of sawn thickness. Of course, that is based on outdoor drying where the wind helps keep replenishing the board surfaces with new air. However, the humidity of the air in the British Isles varies from moderately damp to sopping wet. Air drying outside may be the natural way to dry wood but on many days the progress will be one step forward and two back – a misty night can easily replace more moisture in the wood than a typical British day removes. The residual humidity (RH) in my workshop loft is usually under 50% due to heating below and a dehumidifier in the loft. Progress there should be much more rapid. I tented off a corner of the loft, not to seal it but just to increase the efficiency of moisture transfer between the Bramley boards and the dehumidifier. The boards were left for one year before the table making could begin.
The table design
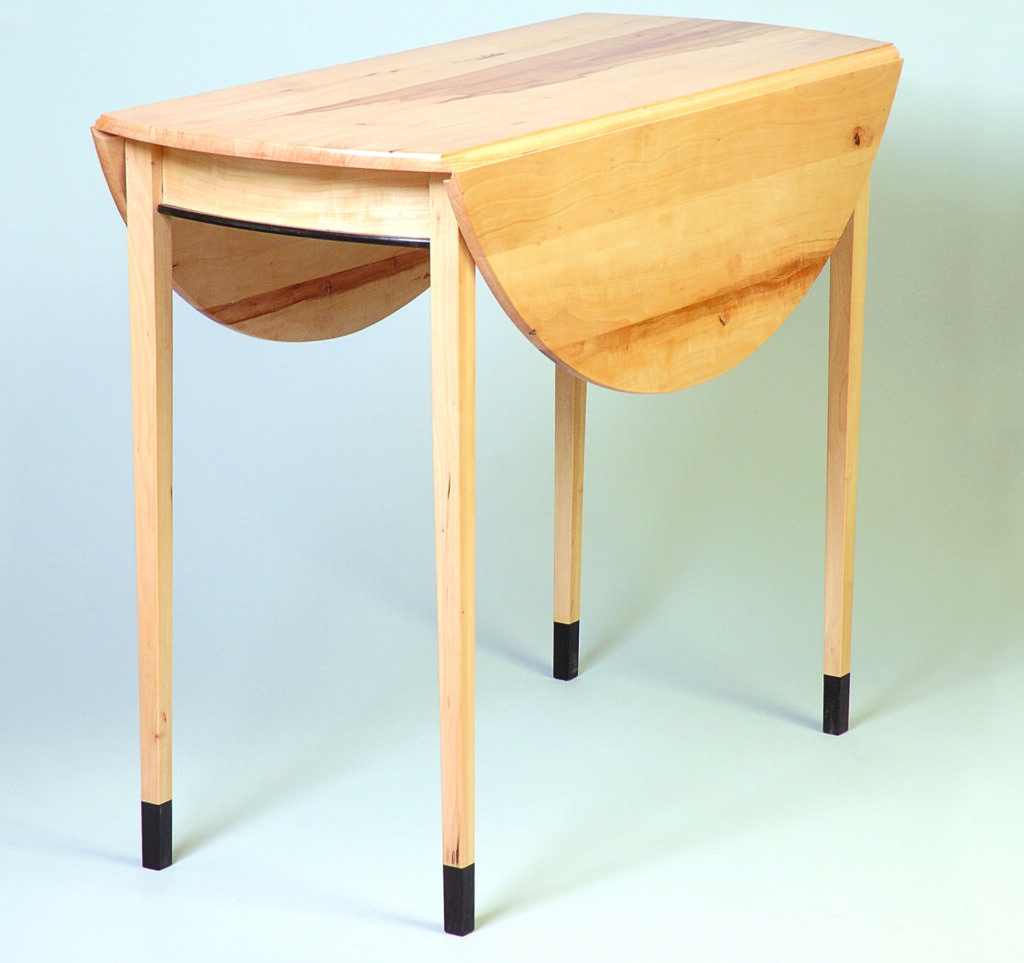
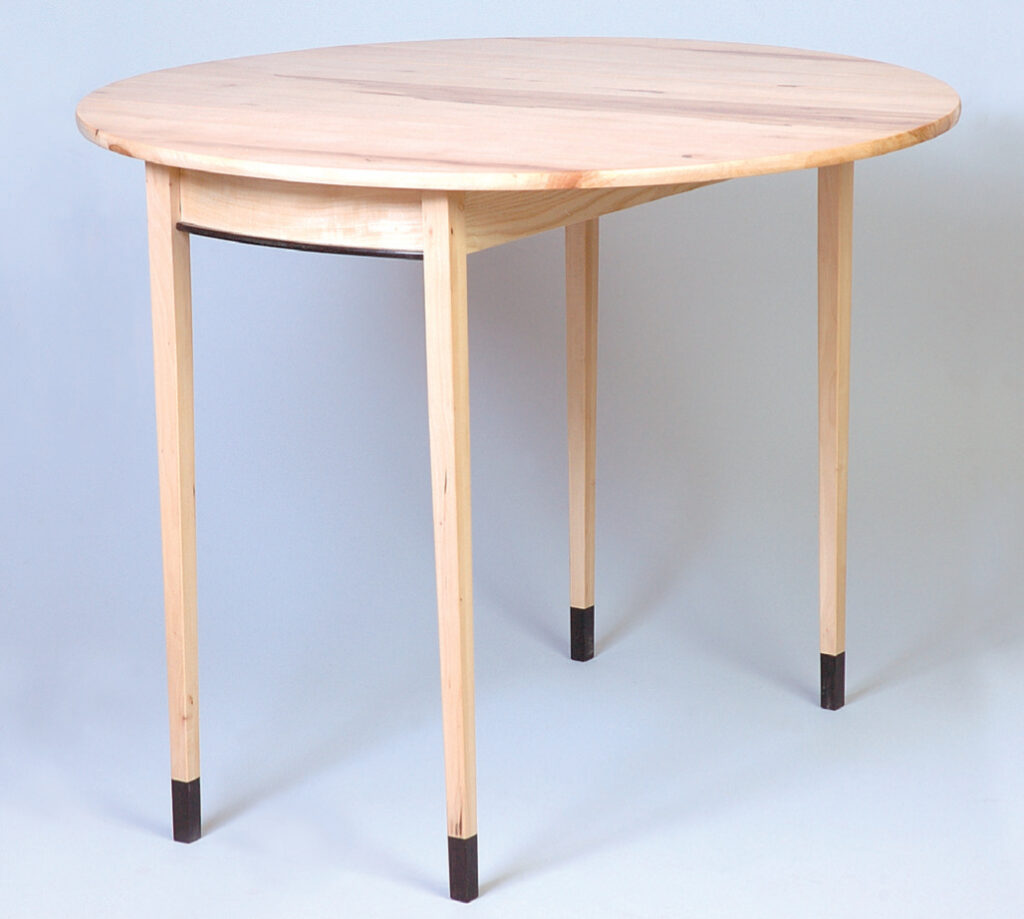
I decided to make a drop-leaf table. This design has no hidden flaps, brackets or gate-legs to support the leaves; you simply rotate the pivoted turntable-top through 90° and the four-legged frame holds the leaves up. Turn the top again and the leaves drop, making the table compact and portable.
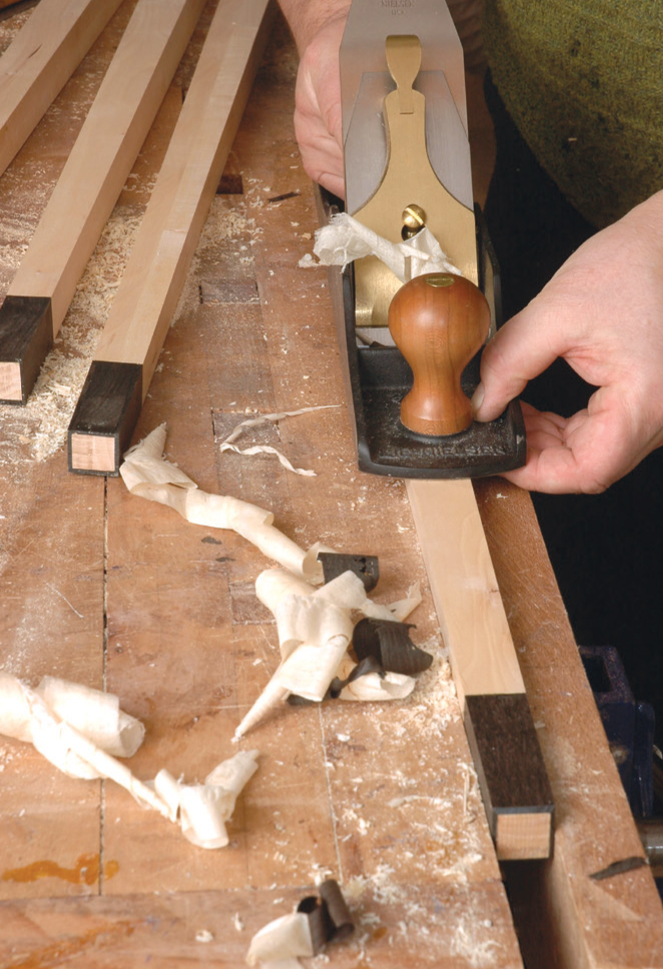
Apple wood is a tough timber to work, being very dense and fine grained, also having changes in grain direction resulting from growing as a lone tree – walnut would be a very much softer and easier wood to work. However, the hardness of apple allows it to be used in small sections and means that it makes a very durable piece of furniture. I had converted all my apple wood to 25mm thickness so that it would dry in a year. This meant that where I needed thicker wood for the legs and rails, I made this up to thickness by butt- jointing planed pieces together.
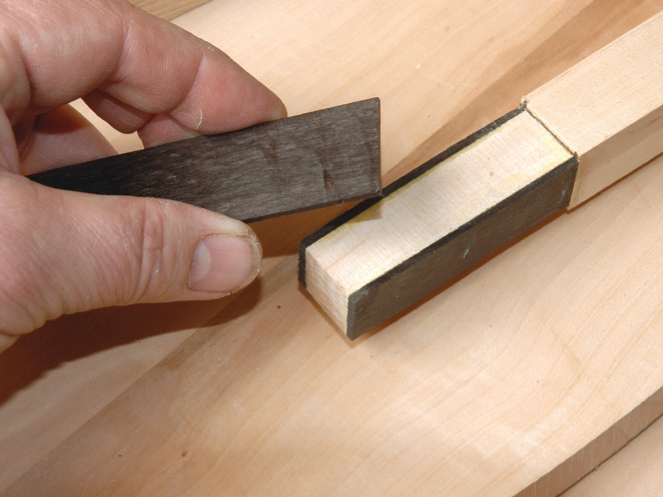
However, this project is perfectly well suited to using commercially produced timber, so long as it has been thoroughly kiln-dried. If apple wood is not available, then other fine-grained fruit woods such as cherry, pear or even walnut will be equally suitable. You will also need small pieces of contrasting fine- grained timber for the feet and under-rails, for which I used ebony.
Flat top
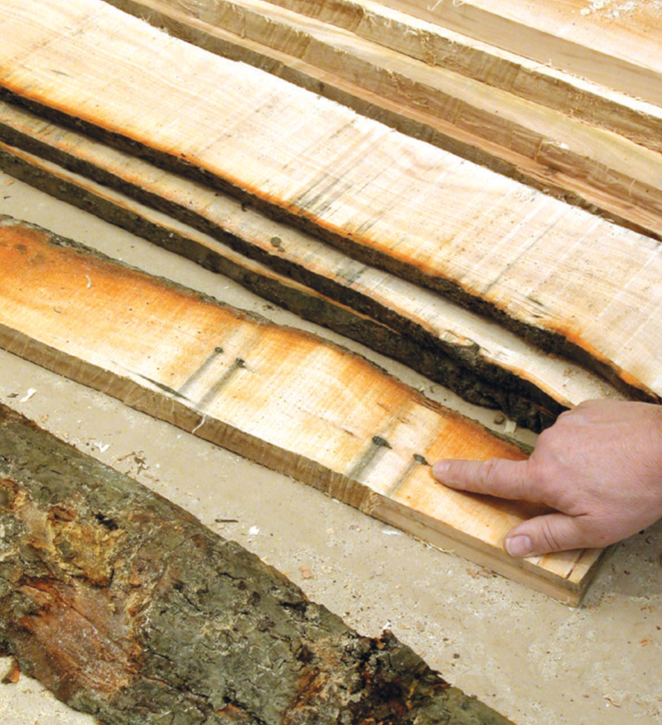
You need to do a bit of playing around with boards before you make them up into a table top. If the wood is plain sawn, each board will have one surface that faces towards the heart of the trunk while the other faces out towards the bark. This will be clear when you look at the end-grain, which has arced growth- ring patterns.
Over the years and with additional drying, these arcs tend to flatten out so the wood cups on the outside face. To counteract this tendency for cupping in a table top it is normal to alternate the growth ring direction between up-facing and down-facing boards. This means the top will remain flat overall, despite ripples formed by cupping of individual boards.
Making and jointing
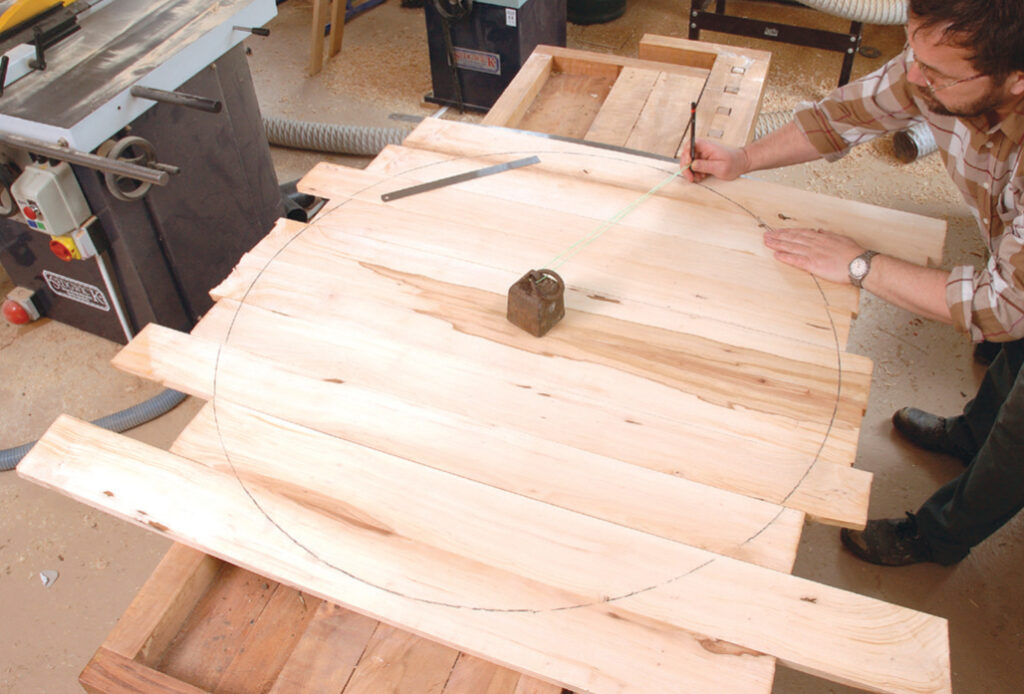
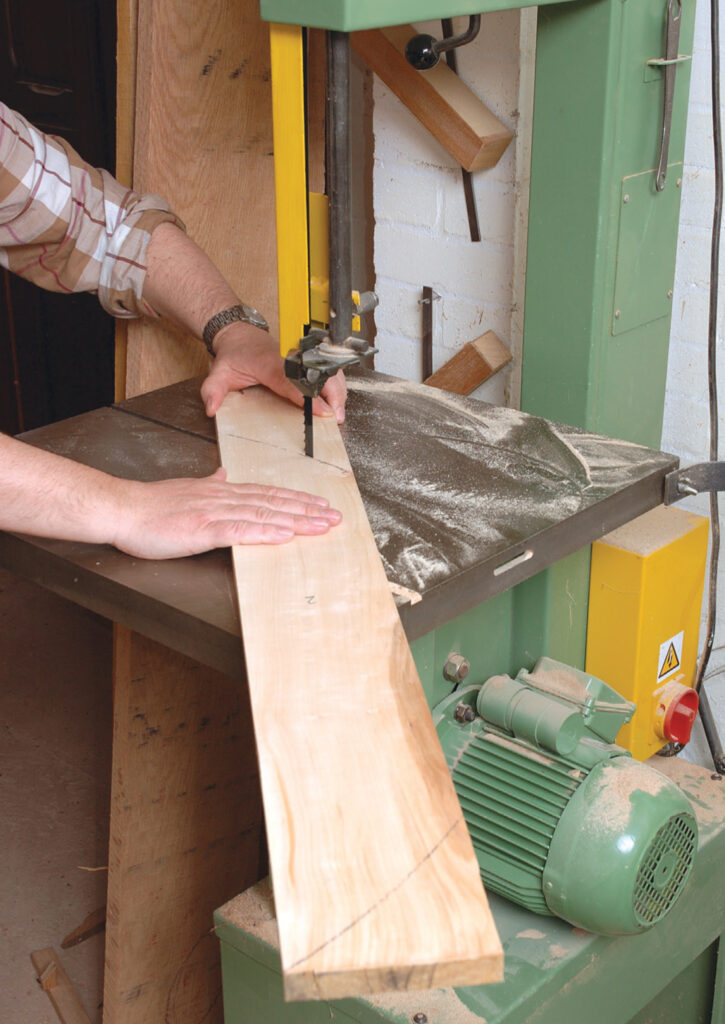
Lay out the boards and mark them with a rough circle, using a weight in the centre and a piece of string as a compass. Decide where the hinged rule joints will be as these should coincide with the edges of boards. The boards are marked in sequence then taken apart, and the curved end sections are cut to shape on the bandsaw.
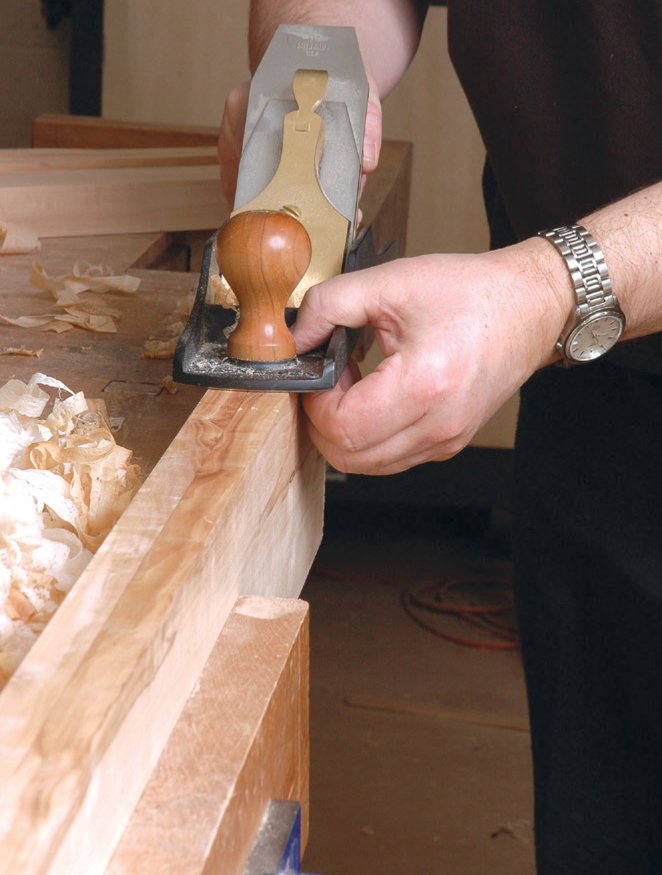


Now you need to joint the boards. Clamp them together in pairs and use a long plane to produce a smooth surface across the pair of edges. The idea is that if the plane tilts to one side or the other – as it inevitably will – it will produce a matching tilt on both boards so the two will still fit correctly together. You may need to have several goes at planing to achieve a good fit.
Remove one of the boards from the vice and place it on top of the other so the freshly planed edges butt together. Now, with a desk-lamp behind the joint, examine carefully to see if there is any chink of light visible. Once you are satisfied that the first pair of boards matches accurately together, repeat the process for each pair of boards making up the table top. Now the boards can be glued up using sash clamps to hold them together.
Rule joints
The table top folds, with a flap on each side. Each flap is fixed to the central section by three hinges. The hinges are a special sort, sold as table top hinges, and they have one flap longer than the other. The purpose of this is to allow the hinge flap to pass under the rule joint, which is the name given to the matching concave and convex edges shaped along the table top flaps. You can shape rule joints using a matching pair of router cutters, the concave cutter producing the convex shaping on the table top centre and the convex cutter producing the concave shaping along the inner edge of each of the flaps.
Table top hinges
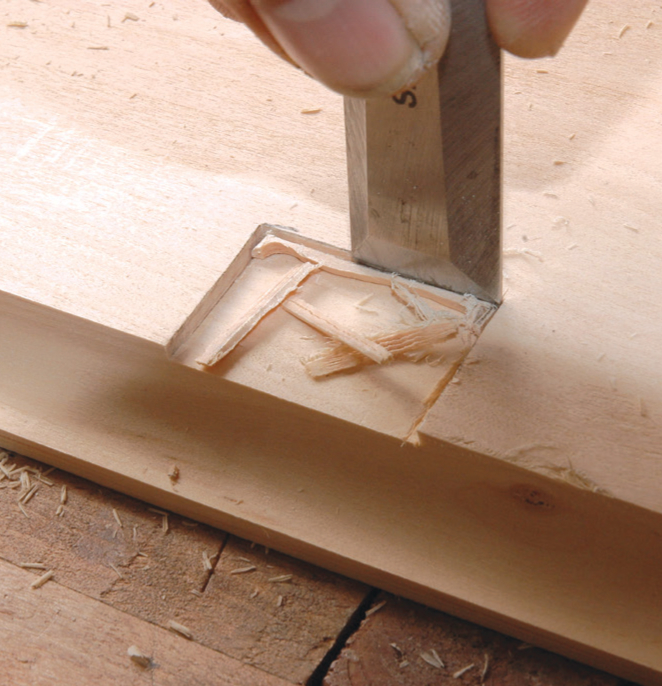
Check each of the rule joints fits neatly together as a pair before attempting to fit the hinges then, when you’re satisfied, position the hinges so the pin of each is centred in the convex section of the rule joint, on the central part of the table top. Mark around each of the hinges using the marking knife, then separate the parts of the table top for adjusting the hinge rebates. To cut out the middle of the rebate, first use a small straight router carefully set to the depth of the hinge flap. Now use a razor-sharp chisel to trim the rebate back to the edges. You need also to gouge out a round-bottomed groove for the barrel of the hinge. Carefully fit the hinges so the gaps on top of the finished rule joints are neat and small, typically one millimetre or less.
Rounding table
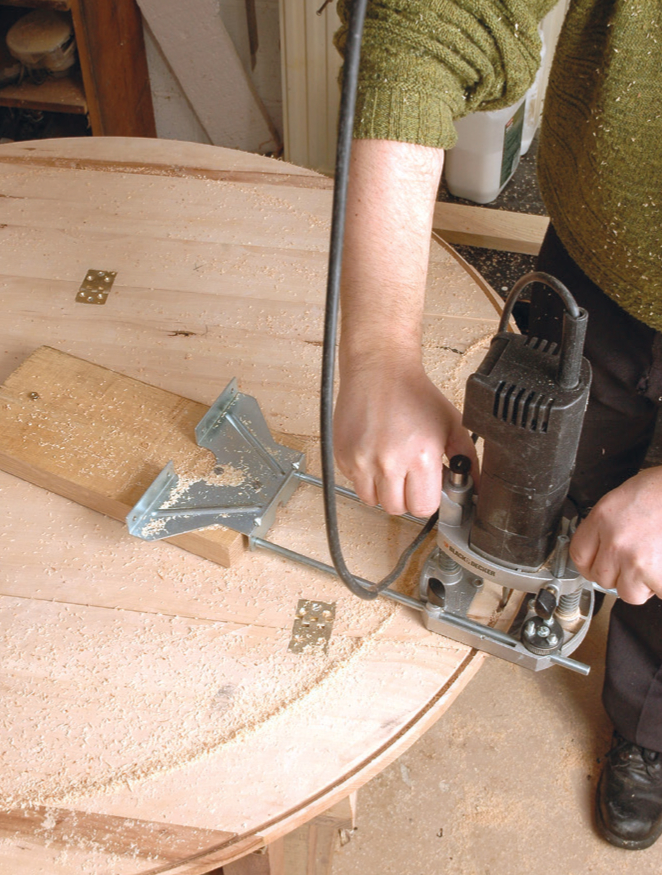
With the table top assembled and held together by its hinges in a rough circle, trim the outside edge, progressively working your way around the circle, such that it forms a precise circle. To do this, use a router mounted on a short trammel arm made from a piece of wood attached to the standard router sliding fence. When satisfied with this, you may shape the table top edge with bearing-guided cutters to produce a barrelled edge or some other pattern. The table top is glued in careful alignment. However, once the glue has set there will inevitably be small steps in the surface at the edges of individual boards which will need planing away.
The grain direction between adjacent boards will not be aligned and so there is a severe risk of grain being torn under a sharp plane blade. Use the plane to slice across the grain with the body of the plane angled to the direction of motion. This will remove the step marks without severe scoring, but it will not leave a very smooth surface because of the cross-cutting action of the plane. Finish planing the surface by using a scraping plane or a handheld scraper blade. This will work against the grain without producing a torn surface.
Turning Table
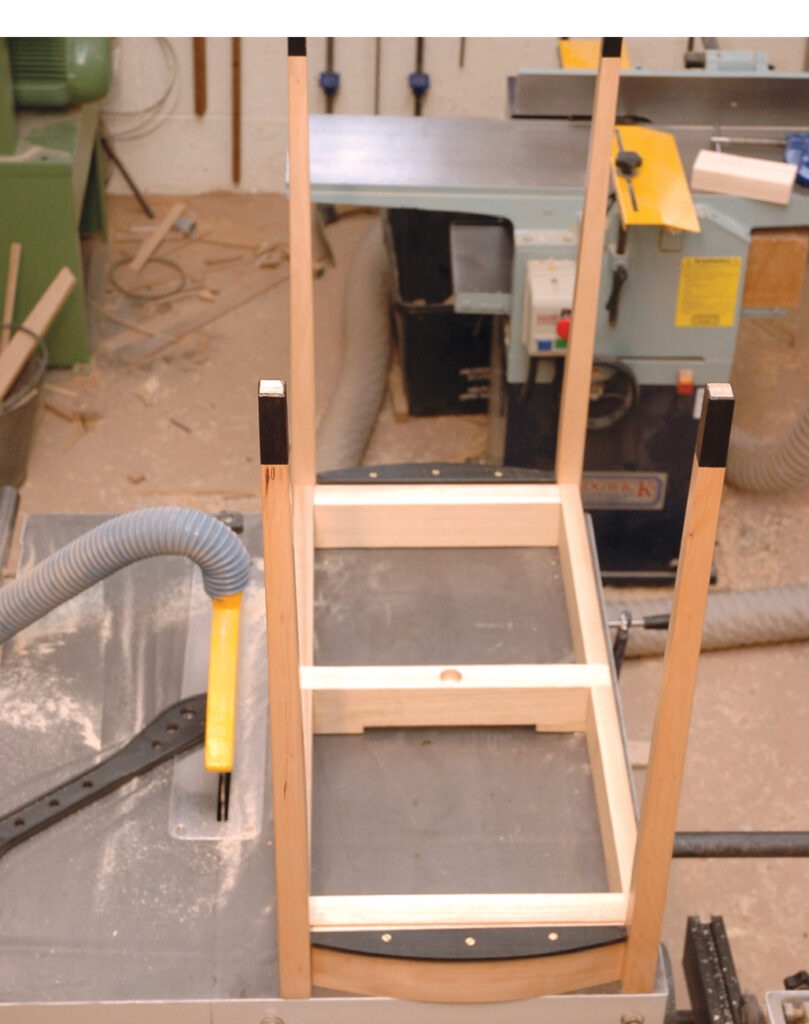
The frame consists of two side rails and two end rails, a central rail which carries the turntable and four legs. The table top is attached to the frame by a central pivot joint, allowing it to rotate between one position where the flaps are down, or another position at 90° where the flaps are raised. The pivot also incorporates an indexing system consisting of a pair of ball catches fitted into the centre rail of the table frame, pressing into small detents or craters made in the underside of the rotating plywood disc. The pivot for the table top is made from a 10mm bolt attached to the disc, which in turn is screwed to the underside of the table top.
Black feet
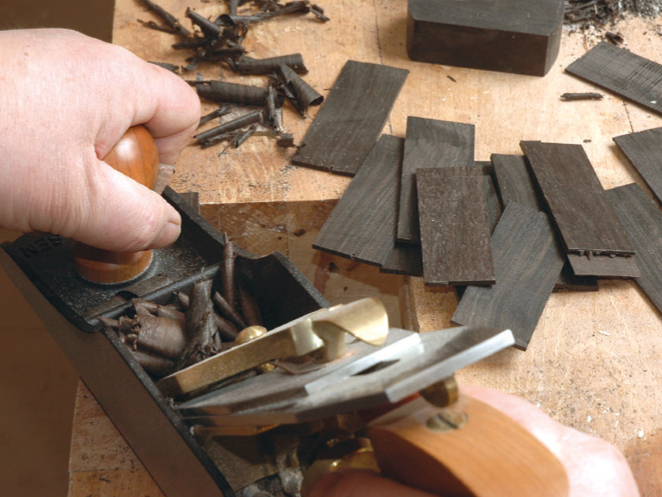
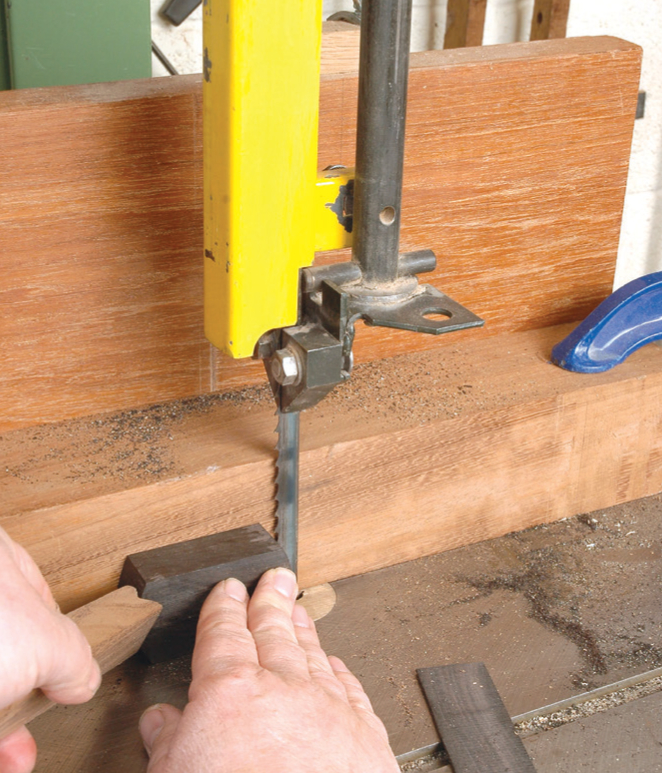
The legs need to be shaped and the feet fitted and surfaced before the table frame is assembled. Taper the legs by progressively planing them, using longer and longer strokes each time. The feet of this table are fitted with wooden shoes or ‘sabots’ made by gluing ebony lippings in rebates on the ends of the legs. The lippings are bandsawn from a block. Cut the lippings by slicing the pieces of ebony off a block and planing the block between each slicing operation. Cut the ebony to a thickness of 3mm. The bandsaw is also used to cut 3mm-deep rebates in the end of the legs for the feet. Fit the ebony lippings in pairs, gluing and clamping them in place before planing down and finishing a pair once the glue has set.
Framework
At each end of the table a rail holds the legs together with mortise-and-tenon joints. The rail is a composite component made from three pieces of applewood glued together, the outside surface being curved to match the curvature of the table top. Beneath each end rail is an ebony sub-rail to lift the table up by. This is screwed in place after the frame has been assembled. The central rail is also a composite piece of applewood and has a cutaway to house the rotating plywood disc on the underside of the table top.
The table frame, comprising the legs and rails, is glued up and tested for true squareness on a flat surface. It is particularly important to produce a flat top on the frame, consisting of the rails and the top ends of the legs. These are the surfaces that the table top will bear on as it turns.


Finish
Smooth the table top, legs, rails and feet with a random orbital sander, working through the grades of paper from coarse to fine. Apply white polish as a sanding sealer then sand again with fine paper to de-nib the surface. The underside of the table top is well waxed on bare wood, as is the upper side of the frame. This soaks in and provides long- term lubrication to help keep the top turning smoothly.
Colour change
The finished apple wood table was pinkish in colour with olive coloration in the oldest heartwood. However, with exposure to the light over the months this darkened, while the brown central hardwood lightened. As a result of these changes, after one year’s exposure to light, standing in a bay window, the colour of the table top was an even warm-brown.