Howard Butler uses hand cut dovetails for a traditional joint with contemporary appeal
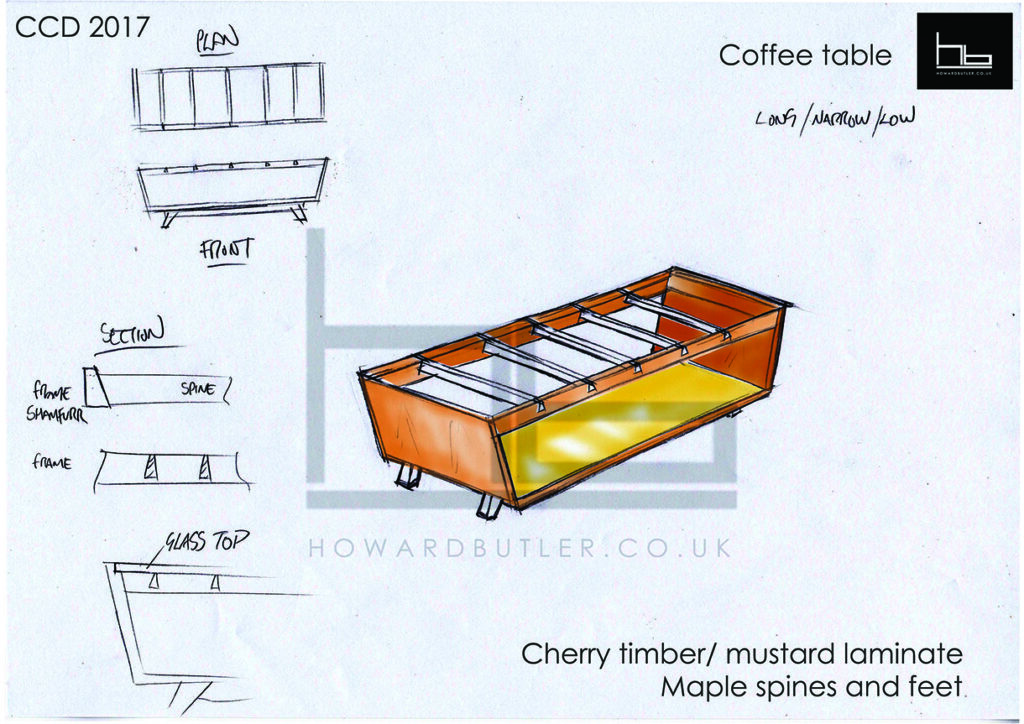
My inspiration for this project came from mid-century furniture, I love the style from this era and the attitude some designers had towards the functionality of pieces. As clever and aesthetically pleasing as these pieces were, they were often mass-produced or made in large batches so often lacked quality in the making. I wanted to capture that style and combine it with traditional cabinetmaking techniques in a design that might appeal to
a contemporary audience.
Design
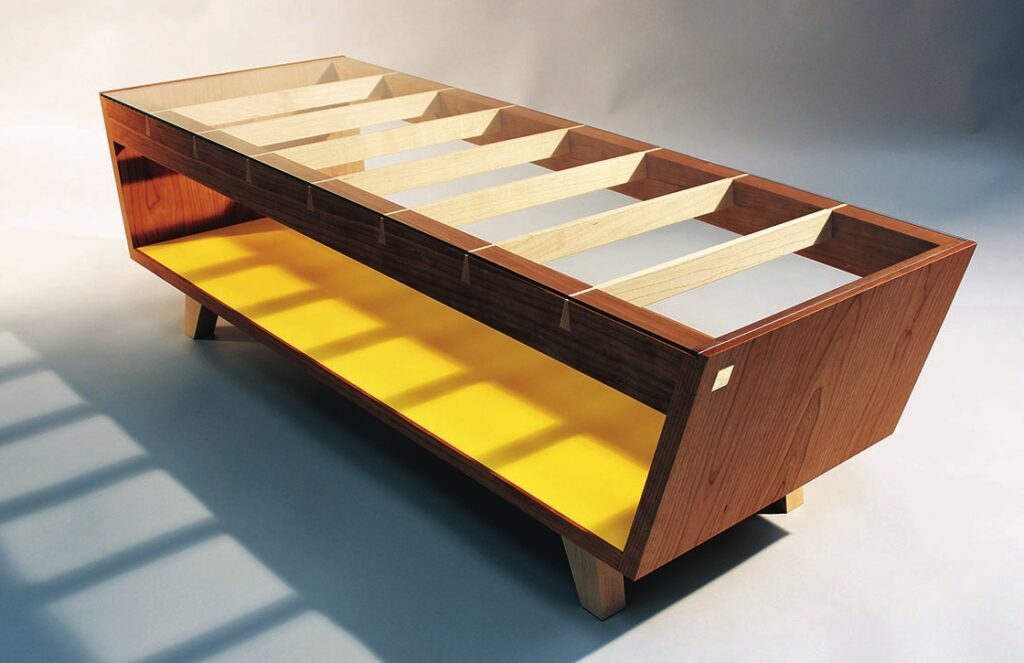
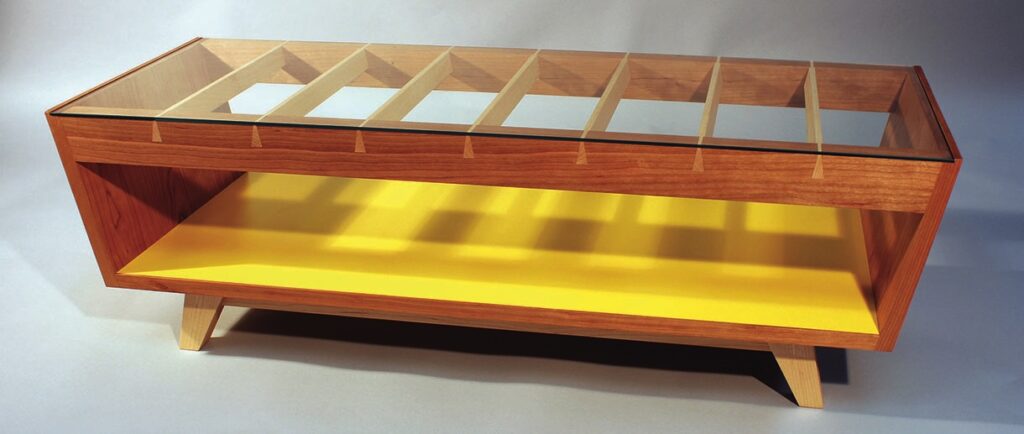
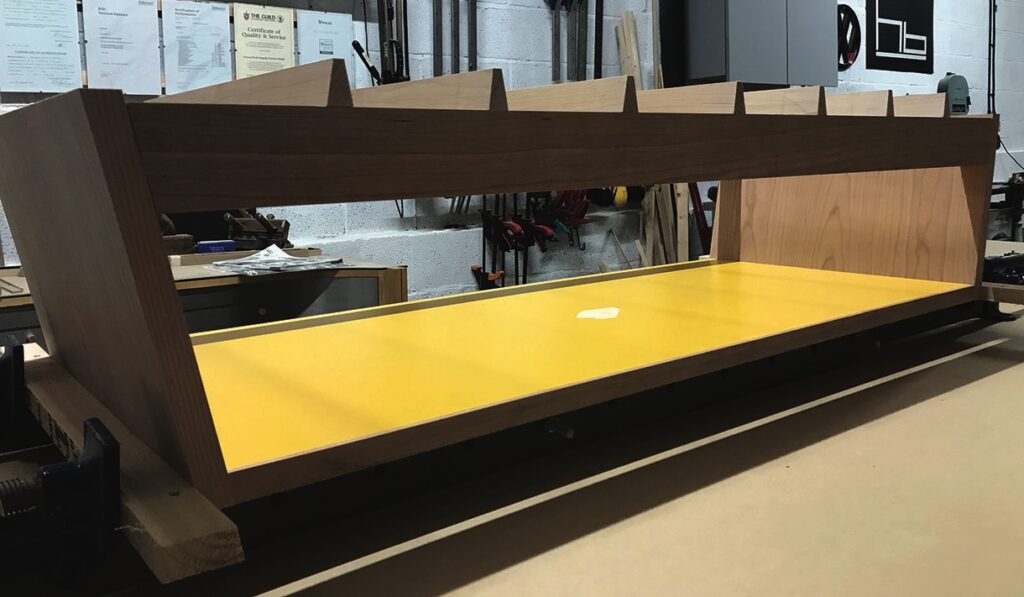
The design stems from my fascination with hand-cut dovetails, which I chose to connect the spines that run across the table to the long sides; these were highlighted by using contrasting timbers: cherry and maple. The spines are not there just for show, they are an integral part of the construction and give some much needed support for the glass. After a few rounds of conceptual drawings I arrived at a design that I felt was ready for laying out in full scale onto an 8×4 sheet of 6mm MDF. I find that drawing each elevation in full scale helps to iron out issues like proportion and should I ever need a template, I have something to refer back to.
I chose cherry for its initial warm tone, knowing it will mature into a much deeper colour over time and contrast even more with the maple spines. I also knew this combination would draw attention to my hand-cut dovetails. The flash of colour on the bottom complements the cherry as it ages and when viewed from an angle creates strong lines against the inside walls of the ends. The maple feet are also angled, adding another layer of interest.
Dimensions
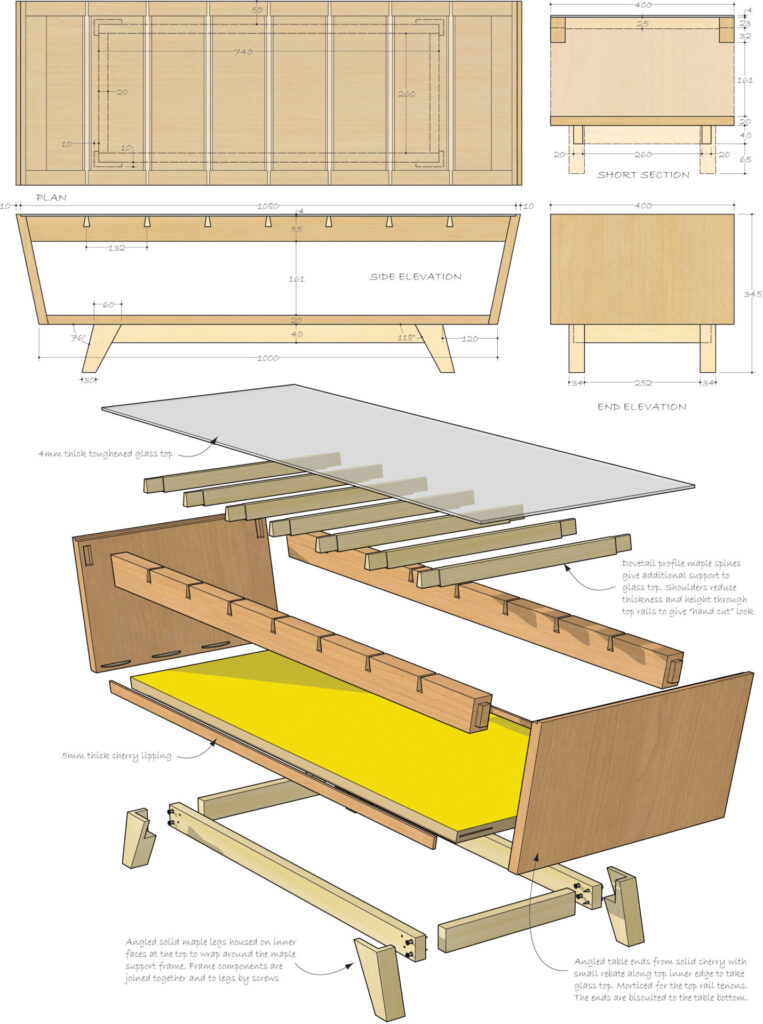
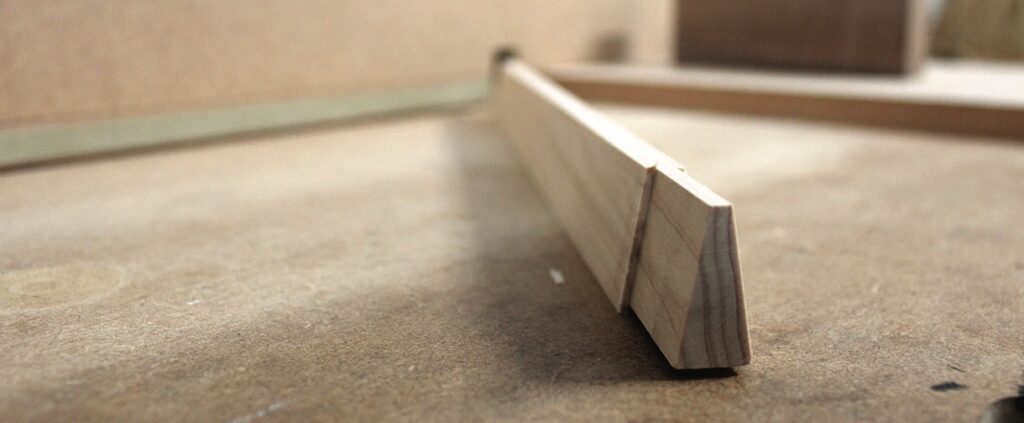
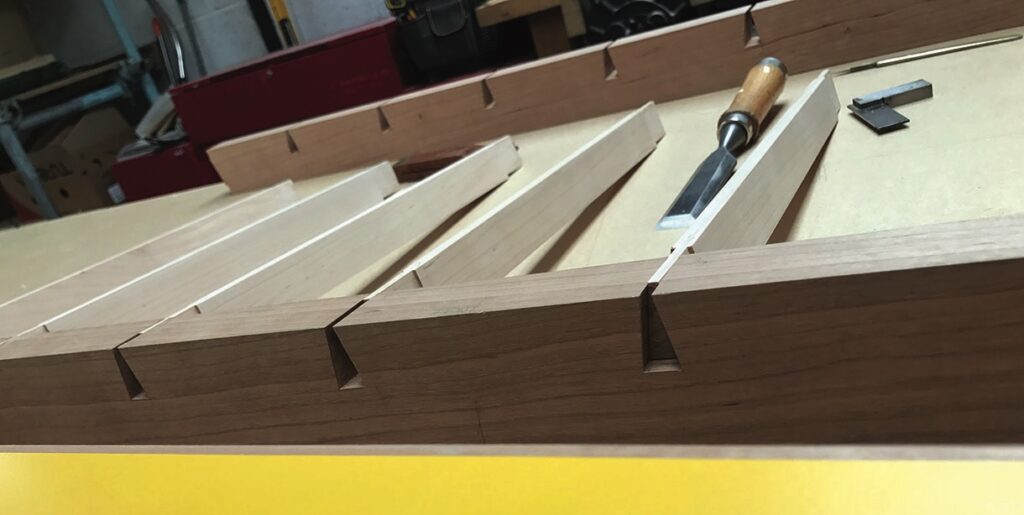
Dovetail spines
With the only detail on the table being the dovetail spines, getting them spaced evenly was essential. I dry assembled the table and placed the spines on the top rails to be sure that what looked good on my drawing and full size rod also looked right in practice. It was important to gauge whether items such as magazines or books, when placed on the bottom, would still be visible. Conversely, I also wanted the spines to impact against the yellow background should the owner prefer not to have items on display.
Process
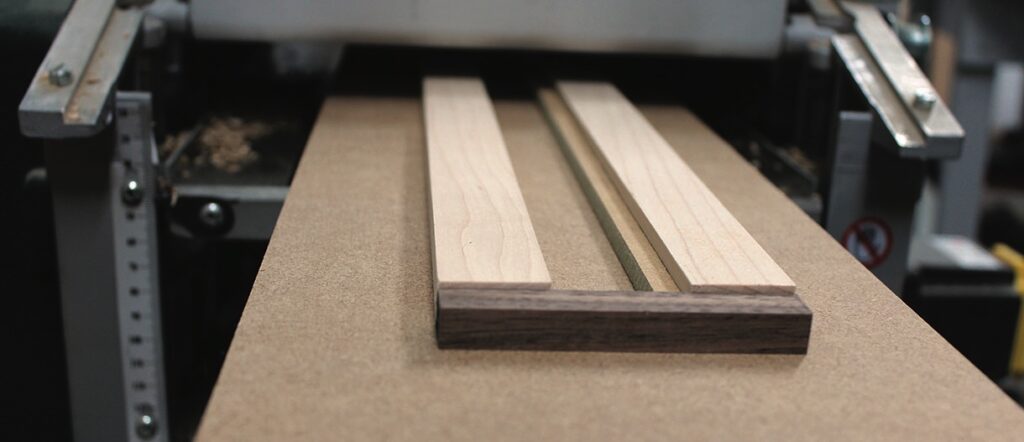
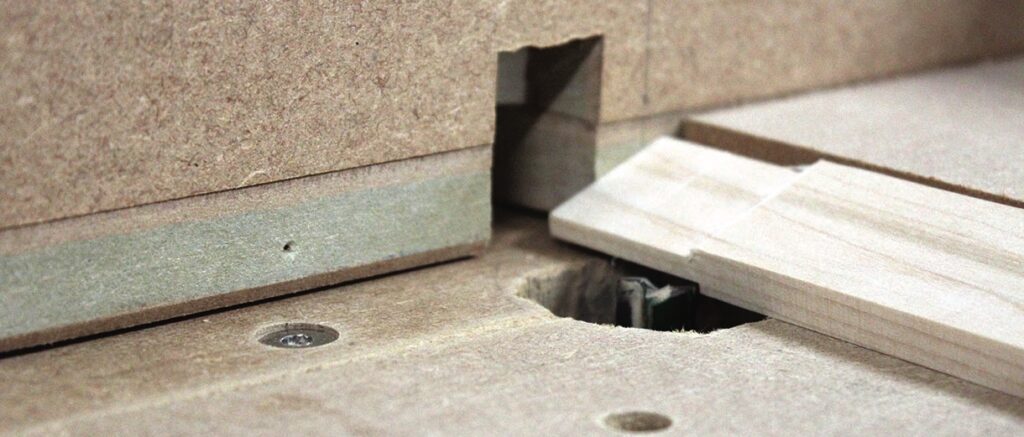
I machined the maple into square sections first then concentrated on making a jig in the form of a sled to run through my thicknesser to convert them into a dovetail shape. I created a cradle for the spines to sit inside, with tight fitting lateral supports down each side and stops at each end. The spines were all cut to the same length.
The components need to fit tight within the frame to prevent them from moving. The benefits are two-fold; to maintain a consistent angle and to leave as few machine marks as possible to remove by hand afterwards. Shims were machined to different heights and placed inside the cradle to raise the spine along one edge as it passes through the machine. One set are required for the first angle and another for the opposite side. It was important to make sure the dovetail was symmetrical.
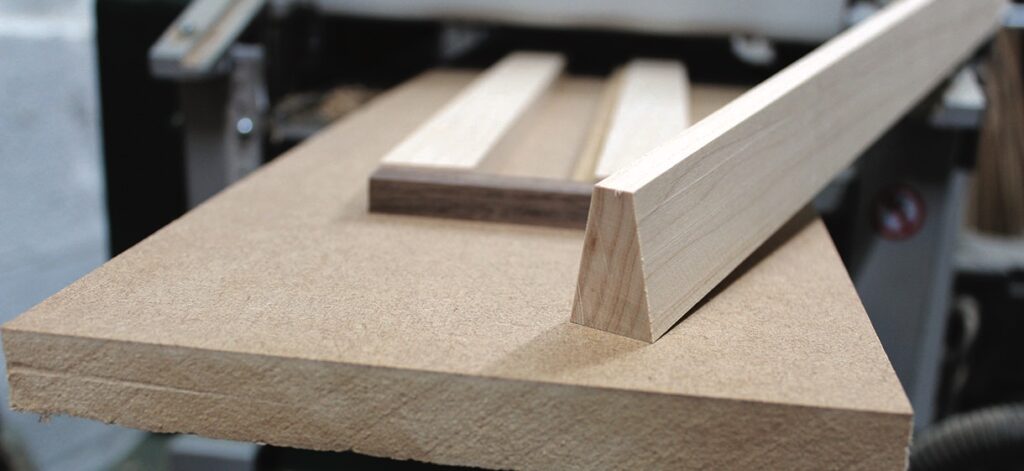
The last thing to do to the spines was to add a shoulder to the same depth as the top rails of the table. I used a router table for this operation passing the components over the cutter with a 90° cross cut block; the length of shoulder determined by the main fence. The cross cut block does not need to run in a slot if it is cut at 90°. For accurate results make them as long as you can within reason and consider clamping the workpiece to the block. The shoulders on the spines have a dual role in that they add support to the joint and aid assembly, but more importantly they reduce the proportions of the dovetail so they have the appearance of a hand cut dovetail.
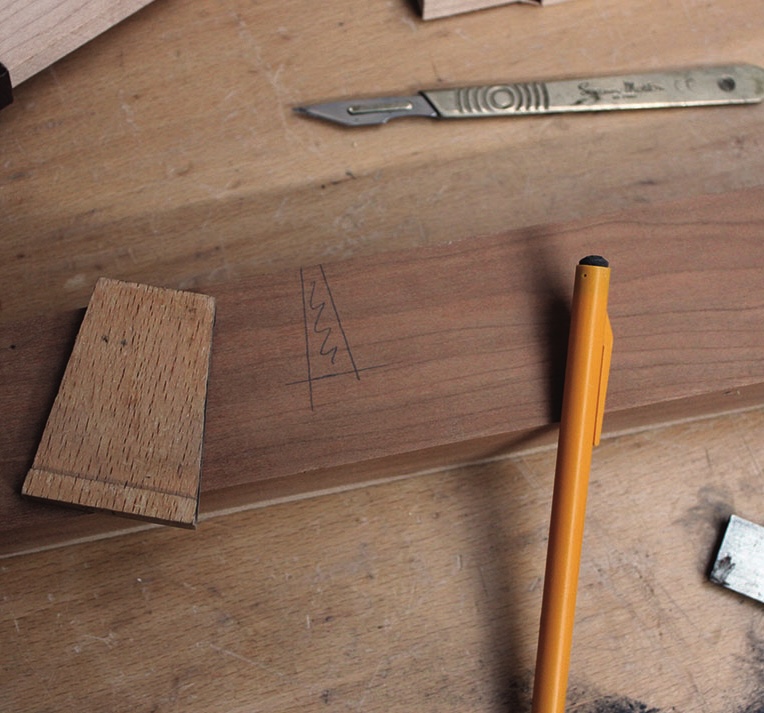
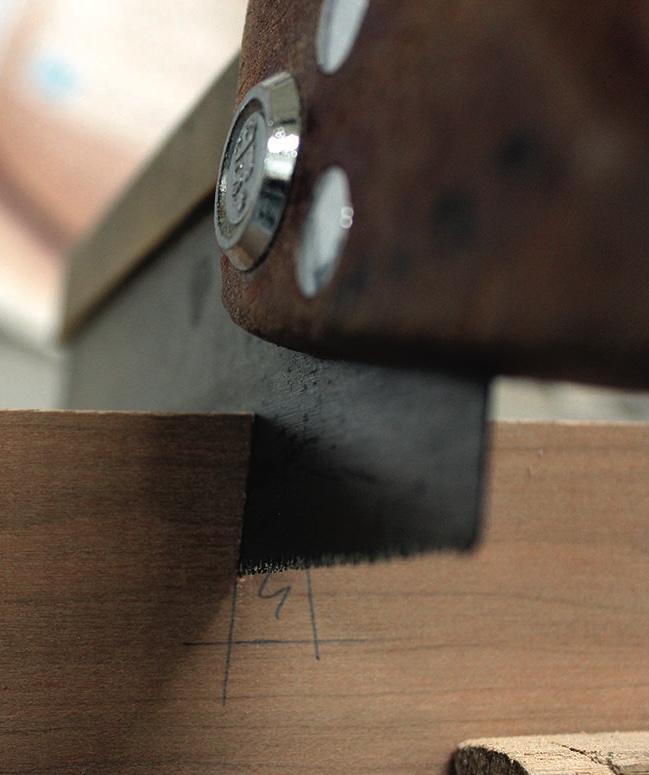
Hand cut
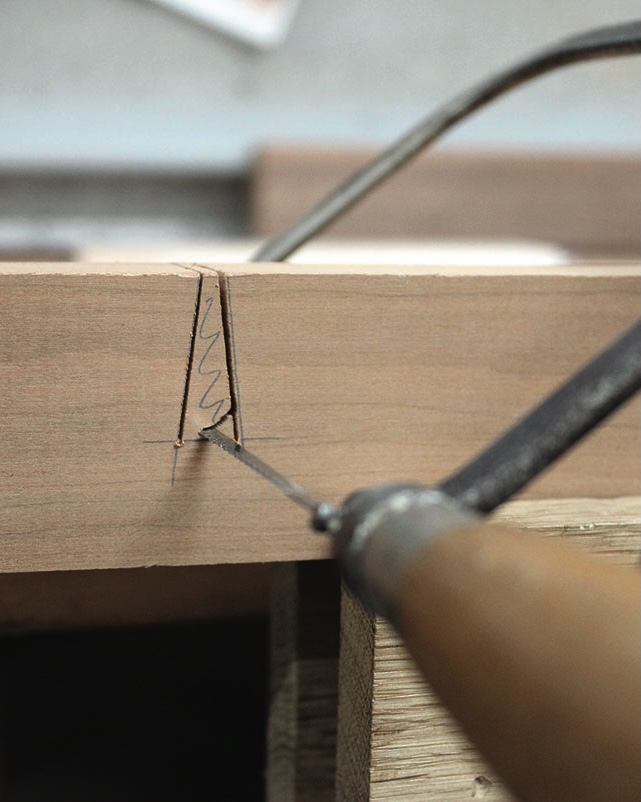
I placed the spines on end and drew round them with a scalpel before highlighting the lines with a pencil. Now the part I enjoy, I get out my dovetail saw which fits my hand like a glove after 22 years of use, obviously it has been sharpened a few times. After sawing the sides of the tail I then use my coping saw to cut out the waste then give the socket a quick clean up with a sharp chisel. I never attempt a complete assembly of the dovetails before glueing up. The more times you try them the looser they become and you run the risk of rounding over any crisp edges.
Details

The table is supported on a separate base comprised of a frame and legs made from maple. The angle of the legs reflect the sloping sides and ground the piece visibly to the floor without it looking blocky. The last step in the build before finishing was to add my maker’s mark; an engraved brass nameplate.
The maker’s mark on an engraved
brass nameplate