Vic Tesolin explains how a few extra steps will guarantee centuries of strength
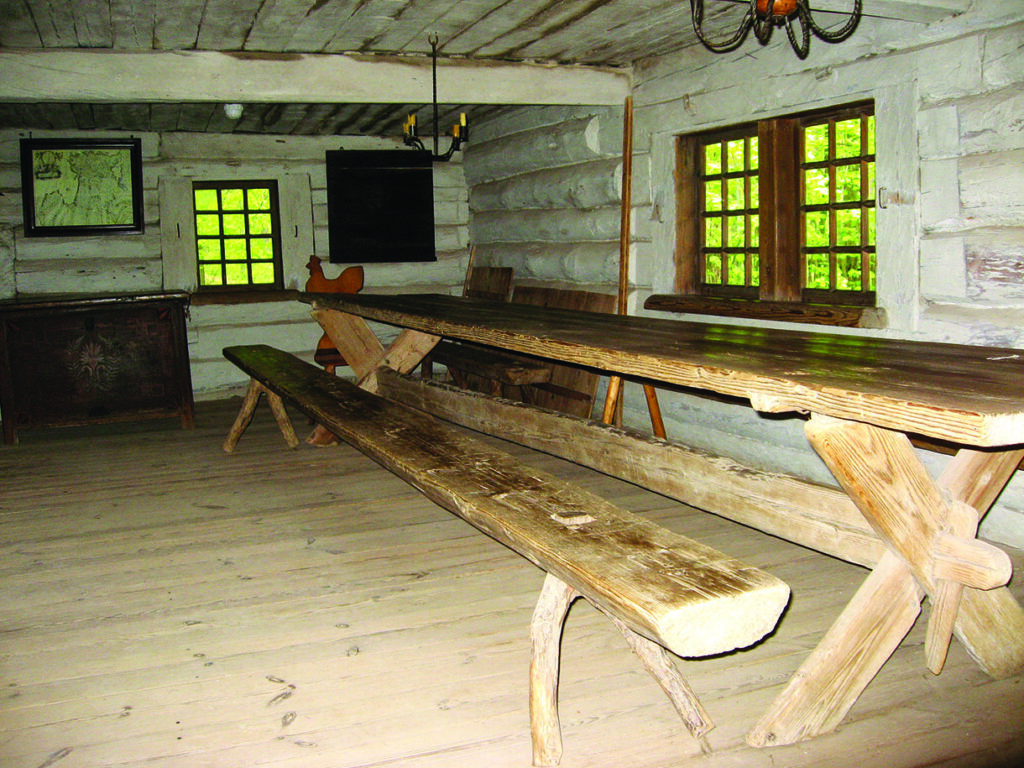
In medieval times, it wasn’t uncommon to see the trestle table. This simple design is strong, sturdy and easily adorned with carving or other embellishments. The secret behind this rock-solid design is the always present mortise and tenon joint. Specifically, the drawbore M&T is a joint that will stand the test of time because the mechanics of the pin intersecting the joint provides centuries of strength. Drawboring a joint is not a difficult skill to master so let’s dive right in.
There are only a few extra steps to drawboring a M&T joint. The first step is to get a good fitting M&T. It’s true that the drawbore technique will hold together a sloppy fitting joint, but there is no need to intentionally do shoddy work. Also, don’t rely on this technique to correct the reveal of this joint. Sort out your shoulders first and test fit the joint prior to drawboring. A proper M&T joint should only require moderate hand pressure to close and there should be no gaps where the tenon shoulder meets the mortised part.
Mark the mortises…

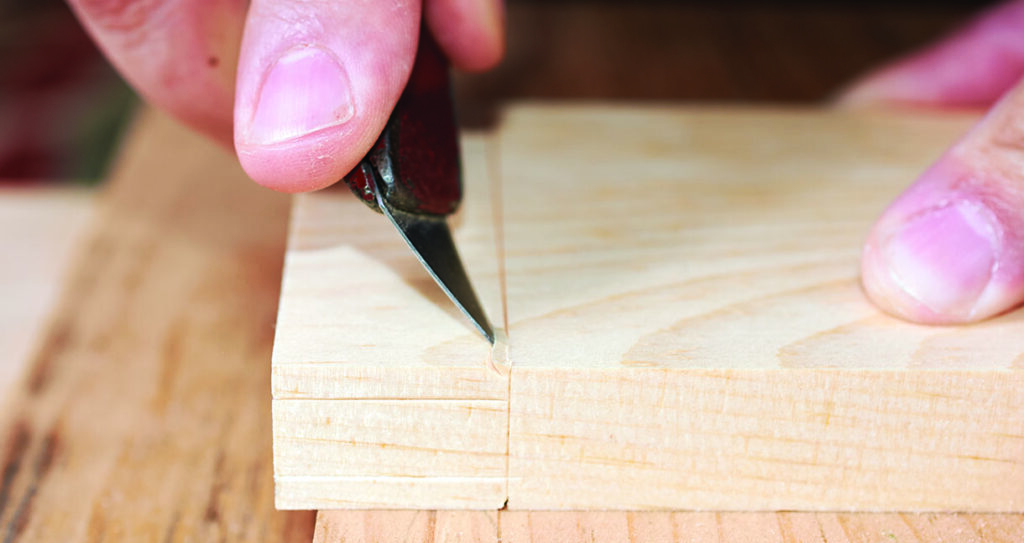
The secret to success for most joinery is the step before cutting it – marking. Knife-in the left and right lines that will define the width of the mortise as well as the top and the bottom. I find the most reliable way to do this is with a mortise gauge. Take time to get the layout right, sloppy work here will come back to haunt you for the rest of the build.
Personally, I’m a fan of using a drill press to muck out the waste but you can use any technique that you prefer. I use a wide chisel to remove any waste left behind by the drill press. I also like to leave the mortise round at the ends because it is much quicker to shape the tenon to fit than it is to square the holes. Don’t get lost in the minutiae of differing techniques, the key is to respect your layout lines.
…and now the tenon
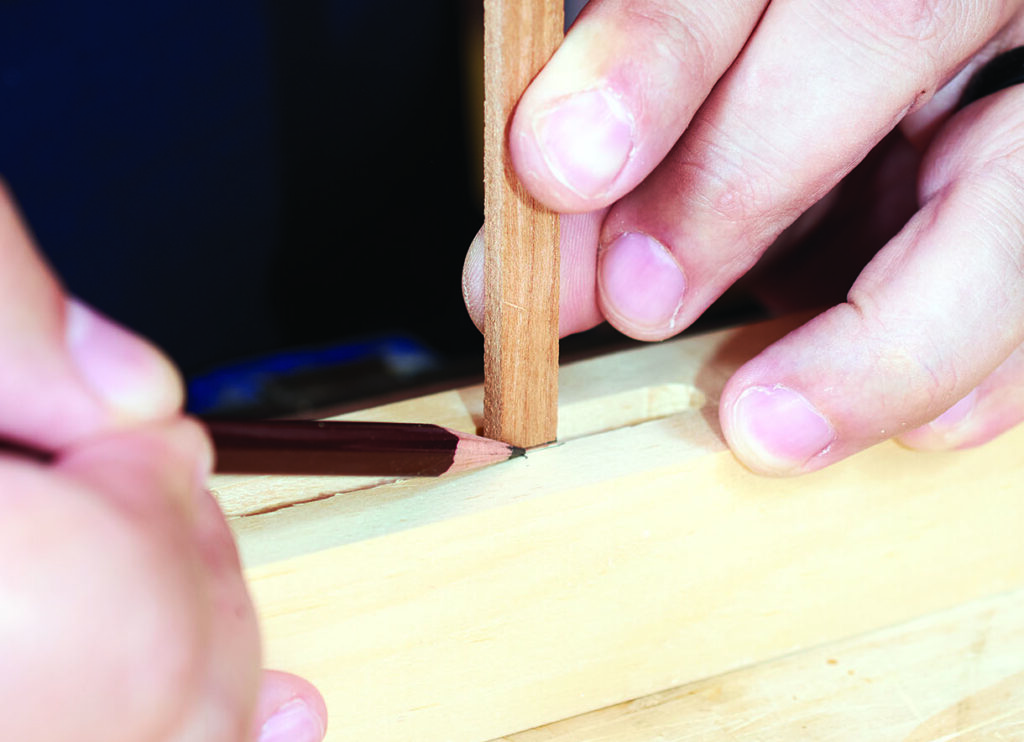
Locate your tenon shoulder by inserting a small stick into the mortise to gauge the depth. It’s good practice to make the tenon slightly shorter than the mortise is deep to prevent an overly long tenon from hanging up the joint; 2mm shorter is a good number though I usually just gauge this by eye. Use the gauge stick to set a second marking gauge for the shoulder and carry the line all around the board. In the case of an angled shoulder, use a sliding bevel and square to lay out the shoulders. Using the same gauge you used for the mortises, simply change the fence setting to accommodate the tenon board and strike your lines. Be sure to maintain the spacing between the gauge cutters as you used for the mortise.
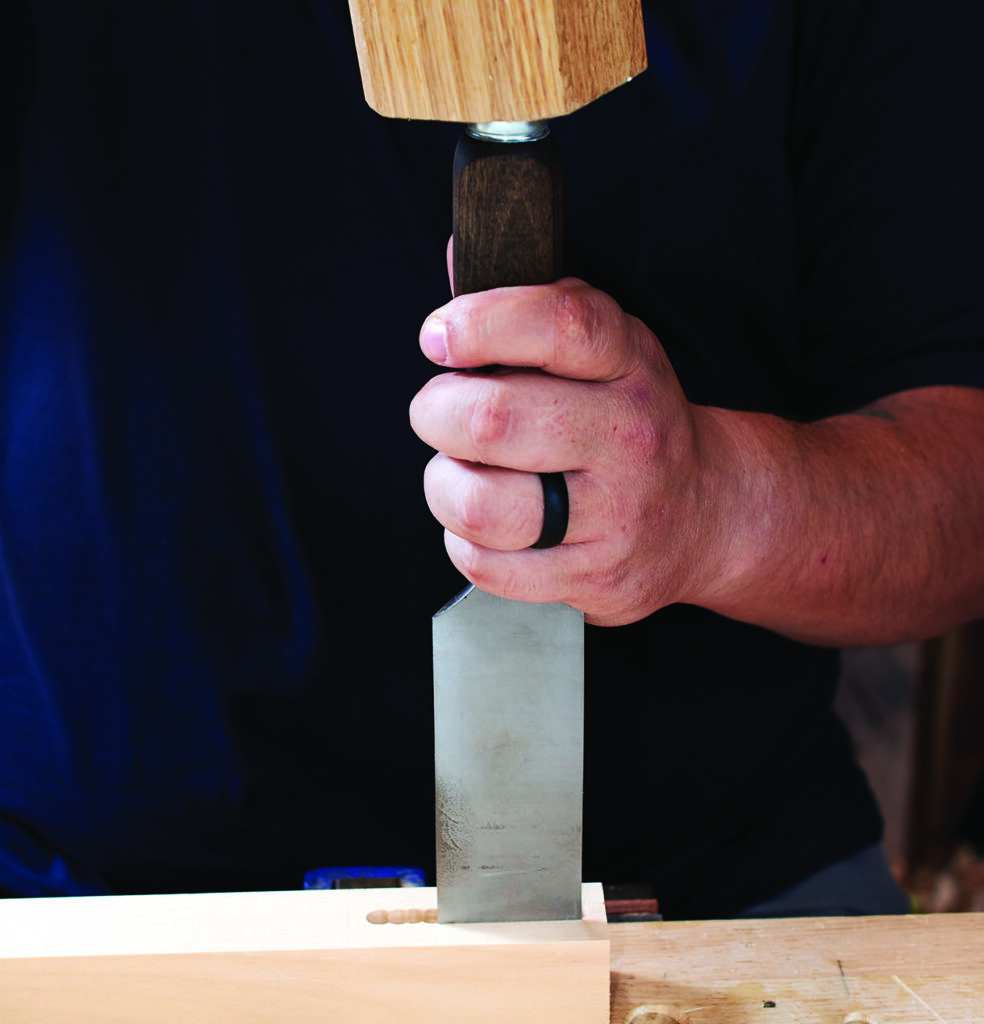
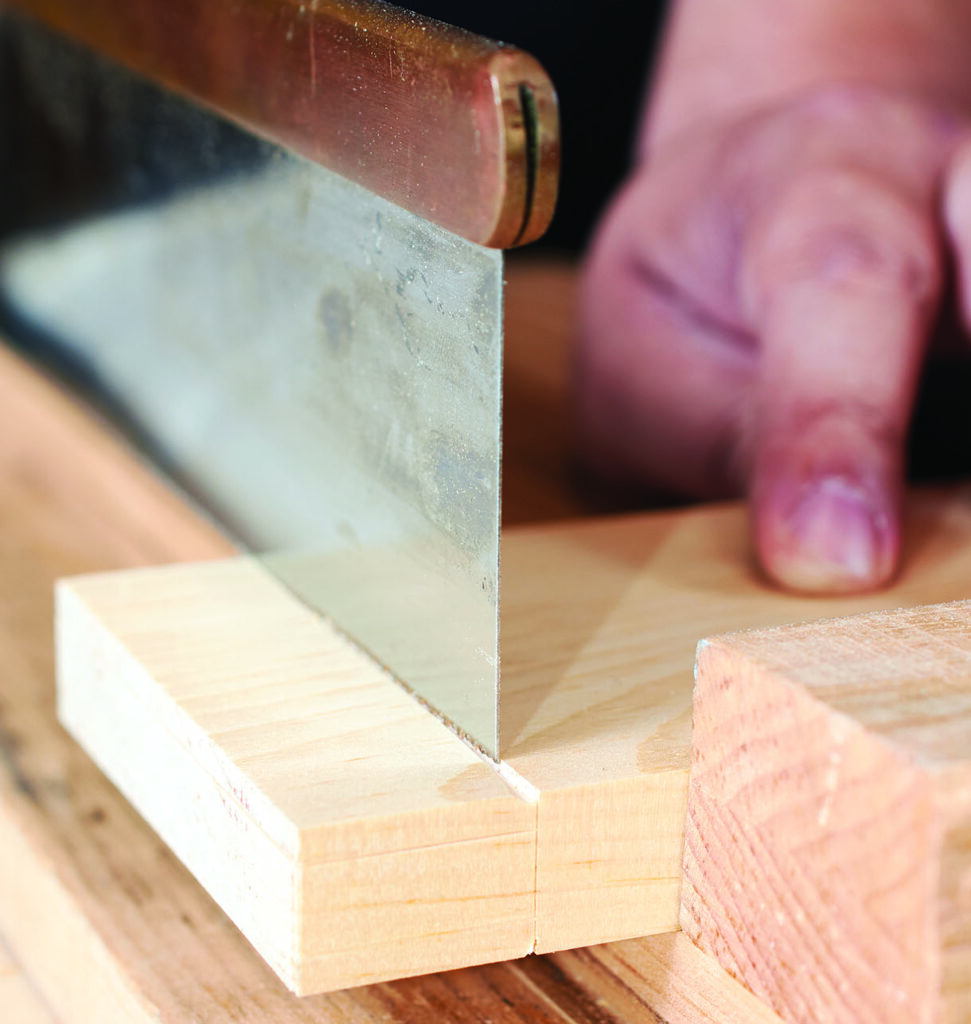
With a chisel, cut an angled groove into the knife line on the waste side to create a reference point for your saw. Now you can drop your backsaw blade into the groove and saw the shoulder to depth. The goal is to get the shoulder fitting right off the saw but in all probability you will need to do a bit of tweaking with a shoulder plane.
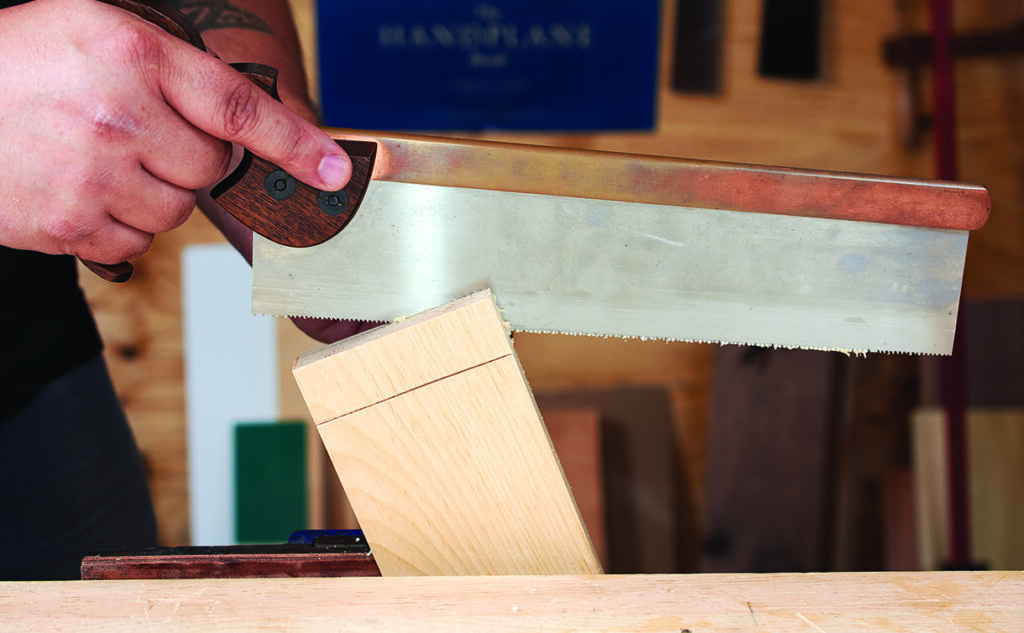
Clamp your board securely in your vice to saw your tenon cheeks. Saw as close to your lines as you dare but keep in mind that if you go past the line you will have a sloppy fit. It’s always good to cut the tenon a bit fat and pare it down for a great fit. To get a straight cut, start by angling the board towards you and making the first cut down to the shoulder line ensuring you reach the halfway point. Then reverse the angle and do this for the other side. Finally, drop the saw into the kerf and saw straight down until the waste falls away at the shoulder line.
Test fit the joint and make sure that the shoulder meets nicely with the mortise board. If the tenon needs to be thinned down, do this now. I like using a rebate block plane for this task but you could also use files or joinery floats for the task. The key is to keep the tenon cheeks flat and true. Also, be sure to remove material equally from both sides of the tenon cheek to ensure that your offset doesn’t change. A good rule of thumb is whatever you do to one side, do to the other.

Locate the holes
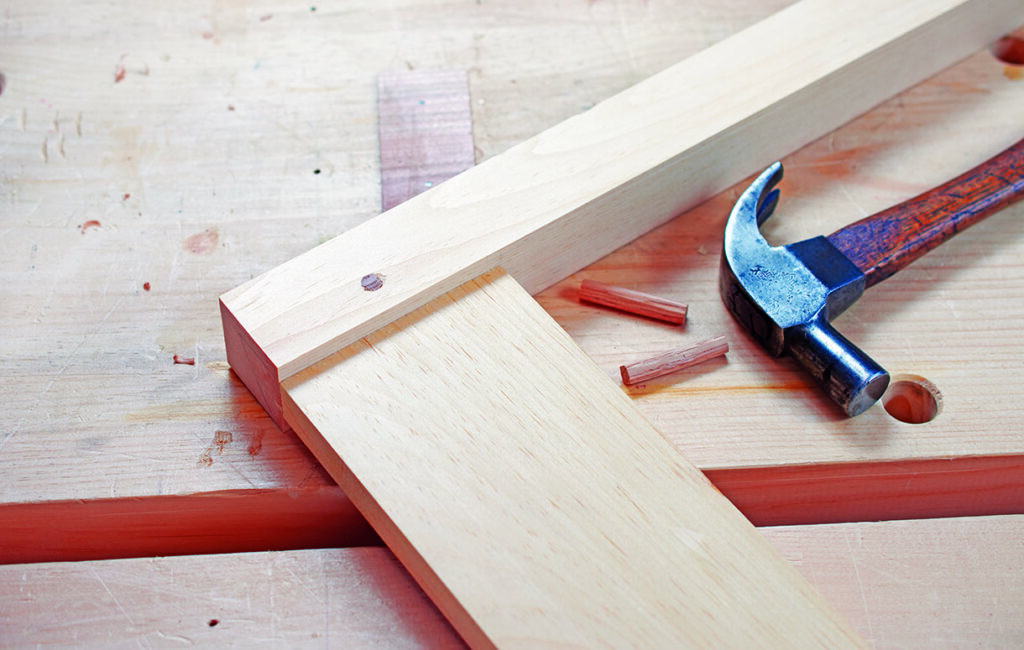
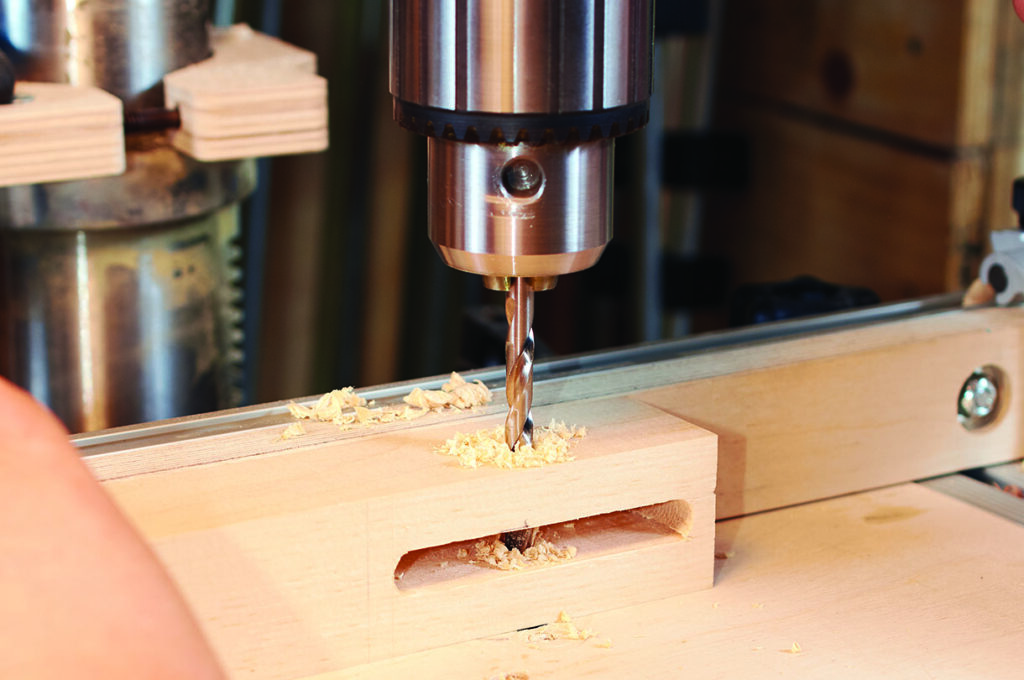
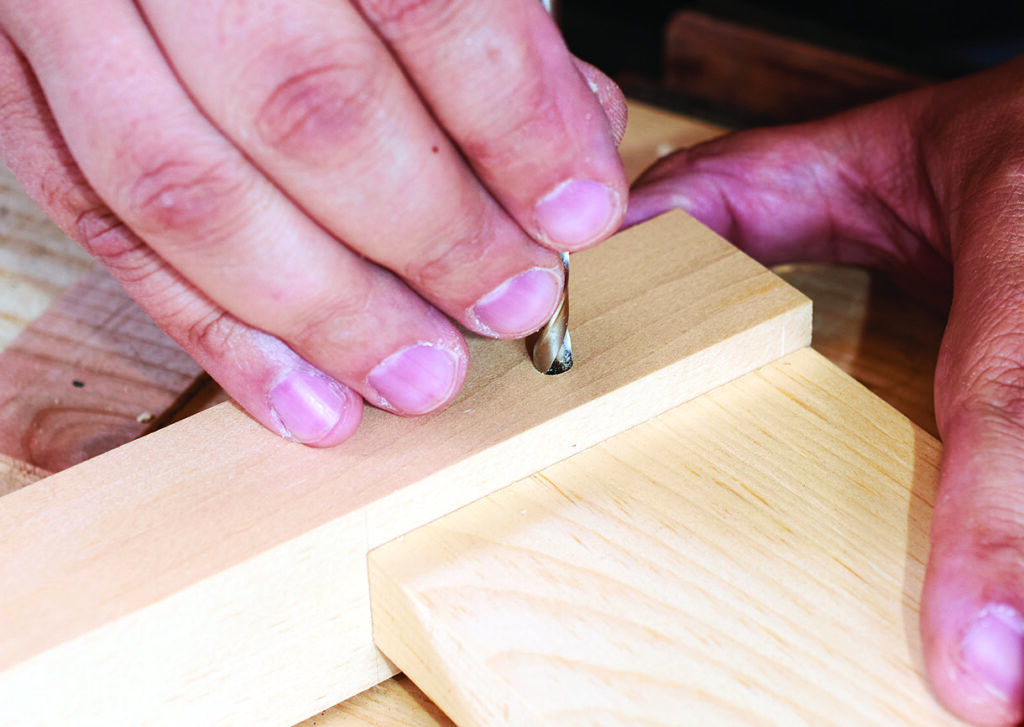
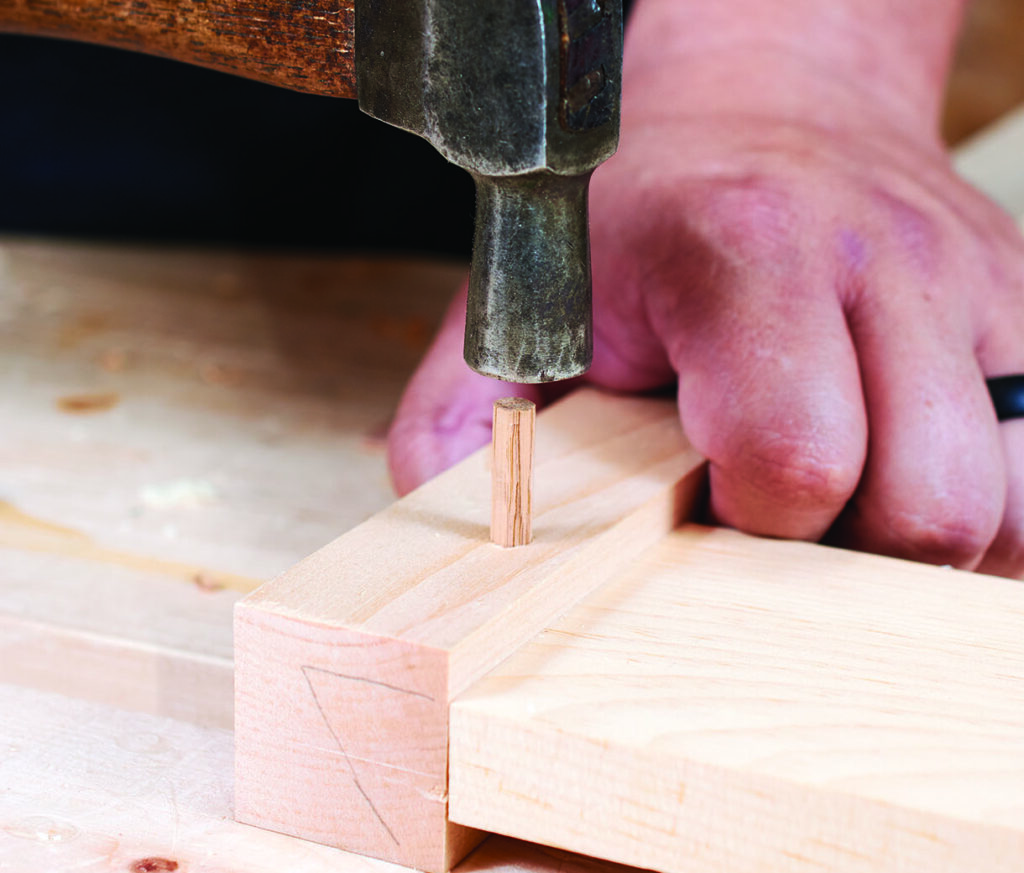
Once you have a good fit, it is time to draw the joint. The drawbore hole should be about 10mm away from the edge of the mortise. This not only looks pleasing to the eye but it also keeps the hole that will be created in the tenon far enough away from the edge so it doesn’t split the end of the tenon. Bore the 6mm hole into the mortised component, stopping short of coming through the other end. A flag of tape acts as a great depth indicator – as soon as the flag clears the shaving on the surface, you know you are at depth.
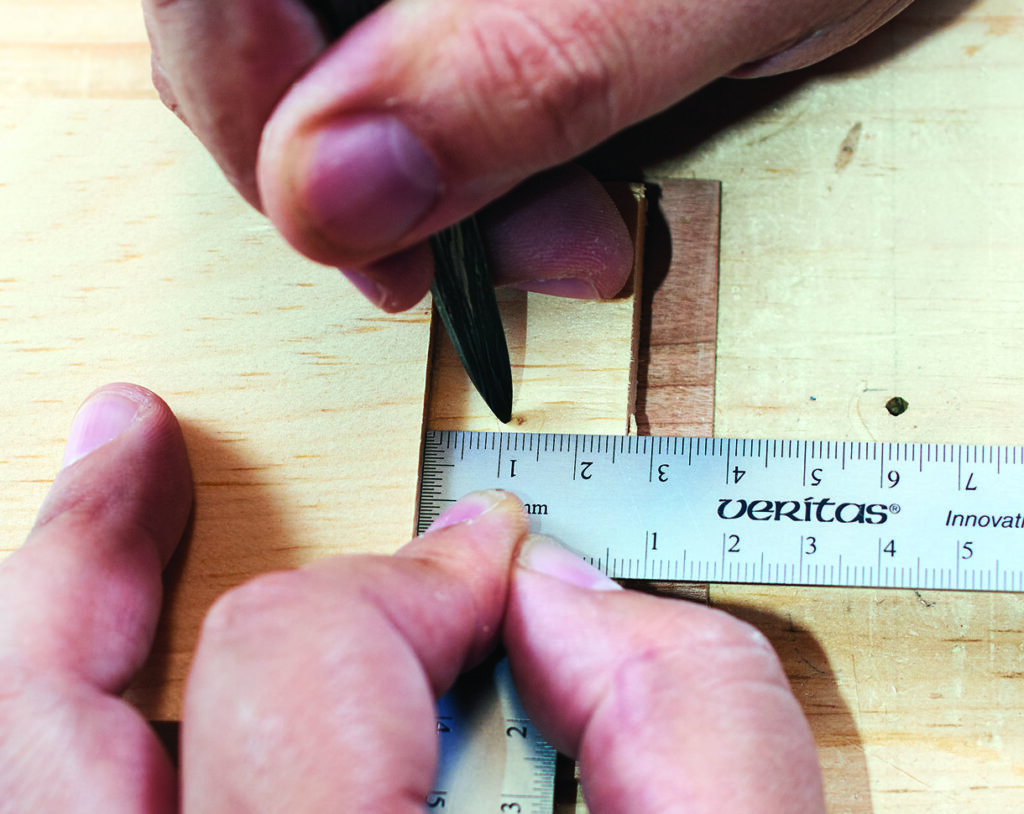
Insert the tenon into the mortise and ensure that it is fully home. Use the 6mm drill bit to lightly prick the hole location, then disassemble the joint. The location marked is your starting point. Measure 2mm towards the shoulder and prick another mark. This offset is a good general measurement but it never hurts to do a test joint with the wood species you are working with to be sure. Be advised, as little as 0.5mm of change one
way or the other can have dramatic changes to how the joint goes together. Drill the hole through the tenon with the same 6mm drill.
Reassemble the joint and test the fit using a drawbore pin. Gently twist the pin into the holes and observe how the joint comes together. If you get a solid, gap-free fit then you are ready for the wooden pins.

It’s all about the pins
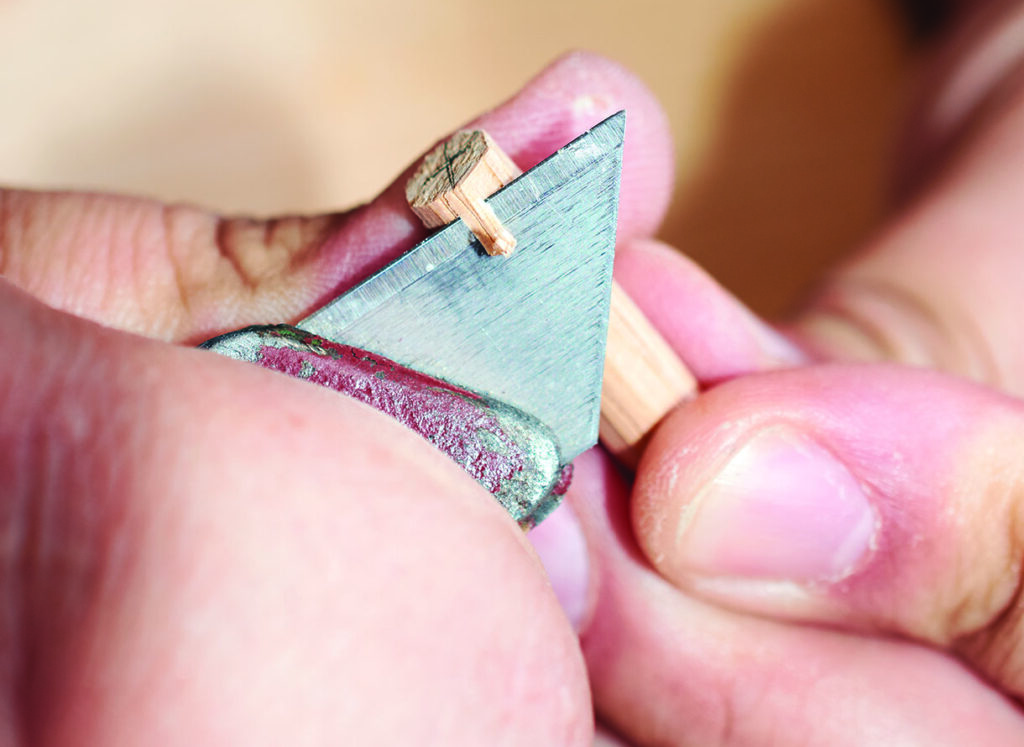
It seems that historically, pins for most furniture construction were ¼in (6mm) in diameter, bigger for larger work. The pins should be riven for maximum strength so that there is no grain run-out on the pin. You are asking a lot from this small oak pin so make them as strong as you can. Start with some straight oak stock and rive (split) it out so that you end up with a slightly oversized pin. Using a block plane and a knife, whittle the pin to an octagon shape and taper the leading end to allow the pin to pass without interference at the start. As before, don’t get lost in the minutiae of differing techniques, the key is to respect your layout lines.
To glue or not to glue
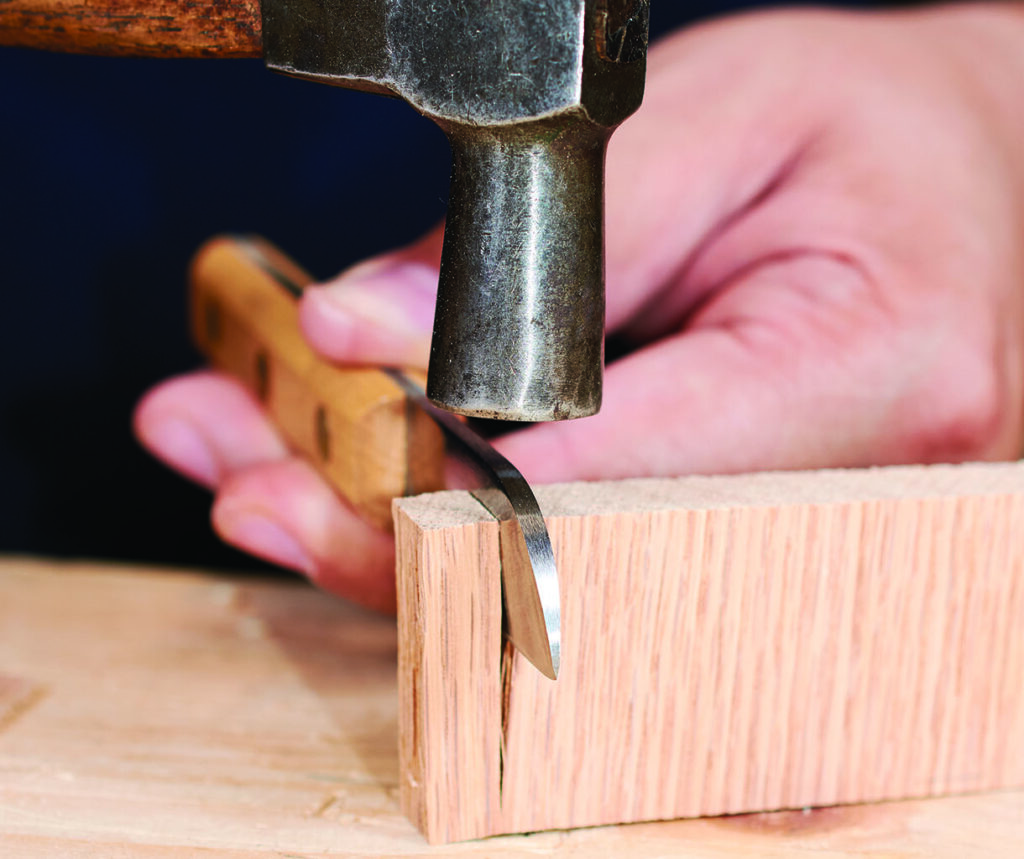
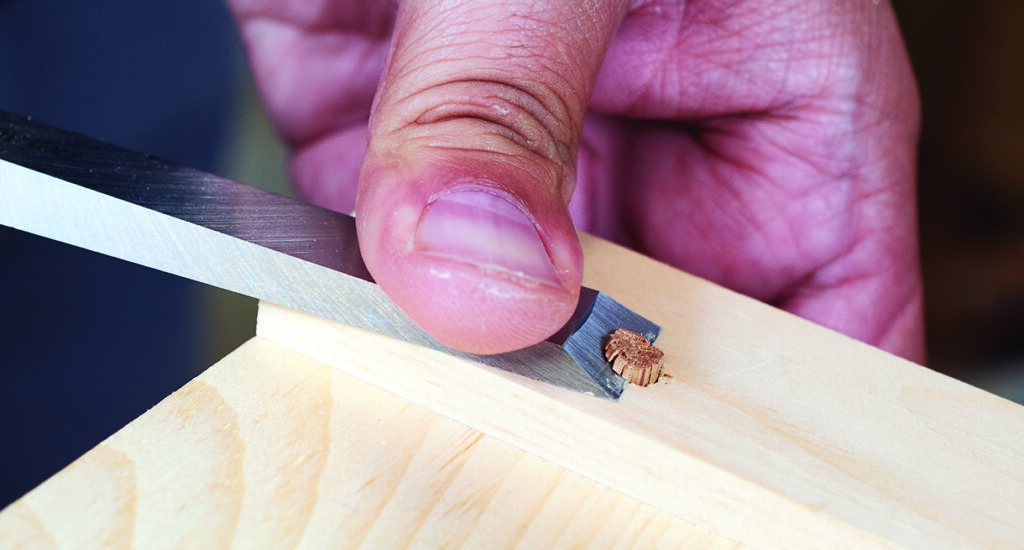
There are plenty of examples in antiquity that show these joints going together, and staying together, without glue. Being a belt and braces kind of guy, I add glue to the joint just to be on the safe side. Apply glue to the mortise and bring the joint together. Apply some glue to the pin hole and drive the pin in with firm blows using a mallet. The best part about this system is you don’t need to clamp up while the glue cures. Once the pin is fully home, trim the pin almost flush and pare to the surface with a sharp chisel.
While steeped in history, the drawbore tenon is a great way to assemble this ubiquitous joint. With only a few extra steps you can add some insurance to an already resilient connection. Give this technique a try the next time you have some mortises and tenons to cut.