It’s amazing what you can achieve with a lathe. Intricate dishes for jewellery, to ornate Vases for the table. Perhaps a bowling ball pin – or an elaborate medieval gauntlet for your oak timbered feasting hall… These magnificent machines give rein to the imagination. To get a real idea of the variety of creativity possible, it is worth looking at the sometimes wacky turning concepts brought to life on YouTube clips and other social media sites.
Decorating using a lathe
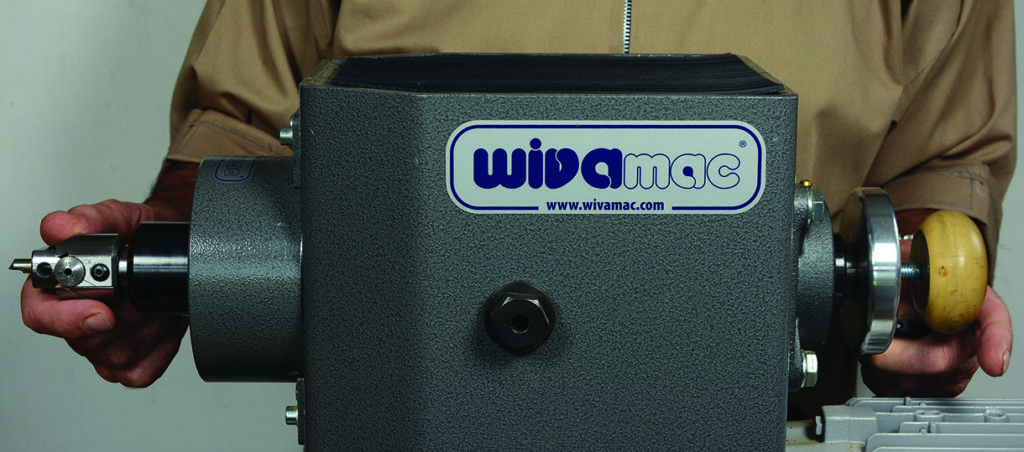
What you don’t see demonstrated so frequently is the lathe’s ability to achieve wonderfully intricate details that lend a grace and charm. The rotating motion naturally lends itself to repetition and accuracy, and this is another feature of the lathe’s arsenal. In this article, Chris Hart focuses on setting up his system to demonstrate a series of box lid decorations. N.B. There is a lot of technical detail relating to setup, so it’s best to refer to the pictures to aid clarity.
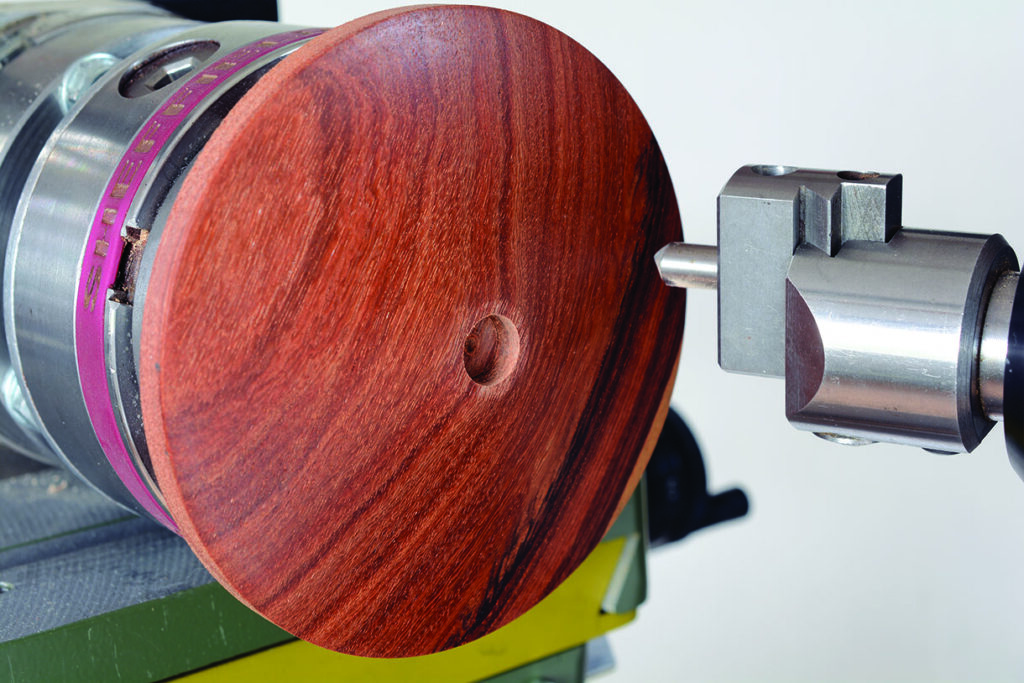
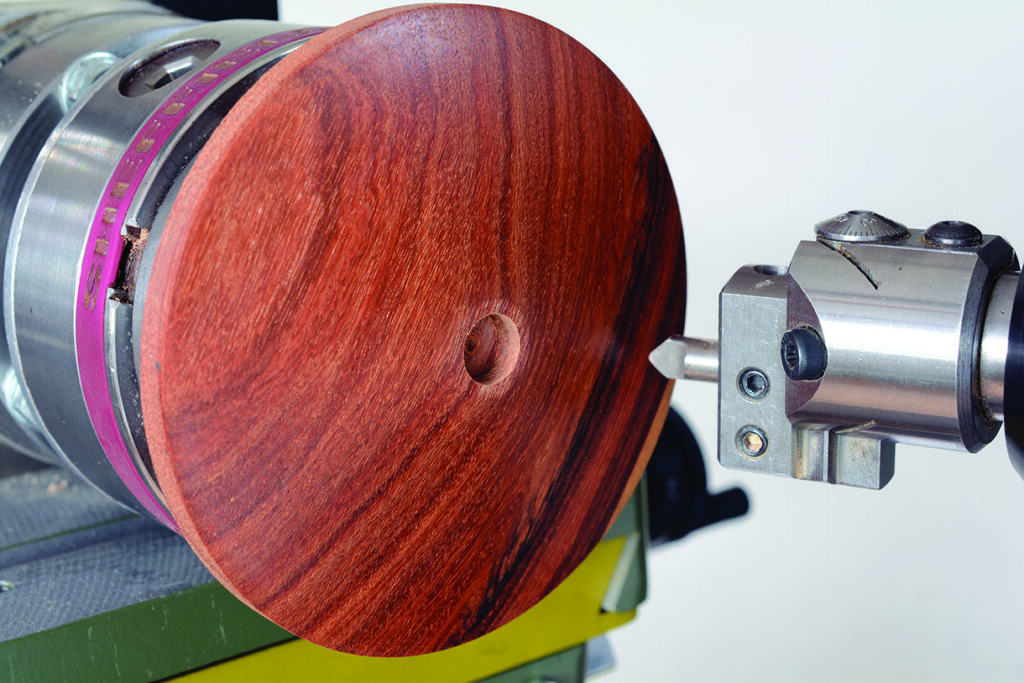
The turning required for this month’s project is pretty straightforward. However, as shown in the above image, we are going to be diving into the mechanical detail of turning, so this will require both thought and concentration. I hope to provide one percent of the inspiration. Therefore, I rely on you, the reader, to supply 99 percent of perseverance and concentration. If either of these lapses, the results will bear all! More on this later.
How to decorate a box lid
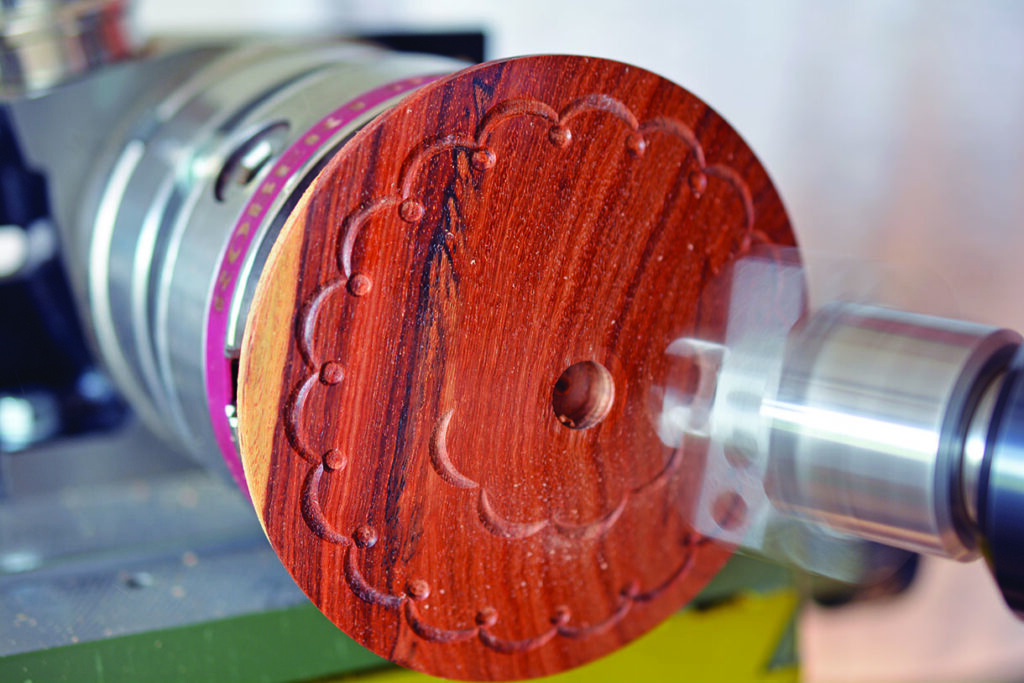
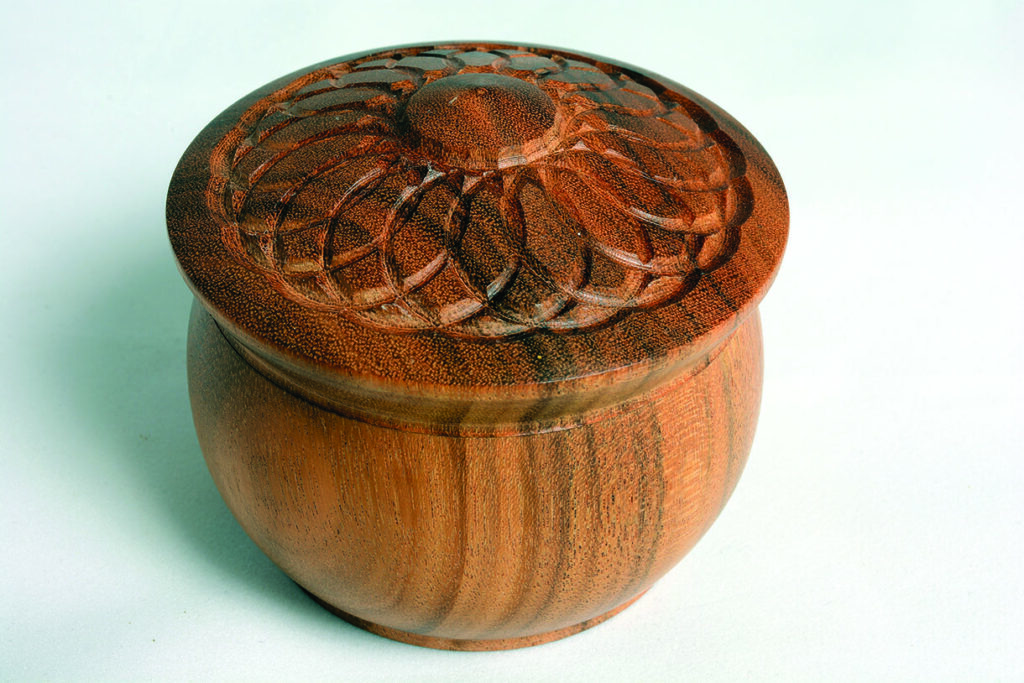
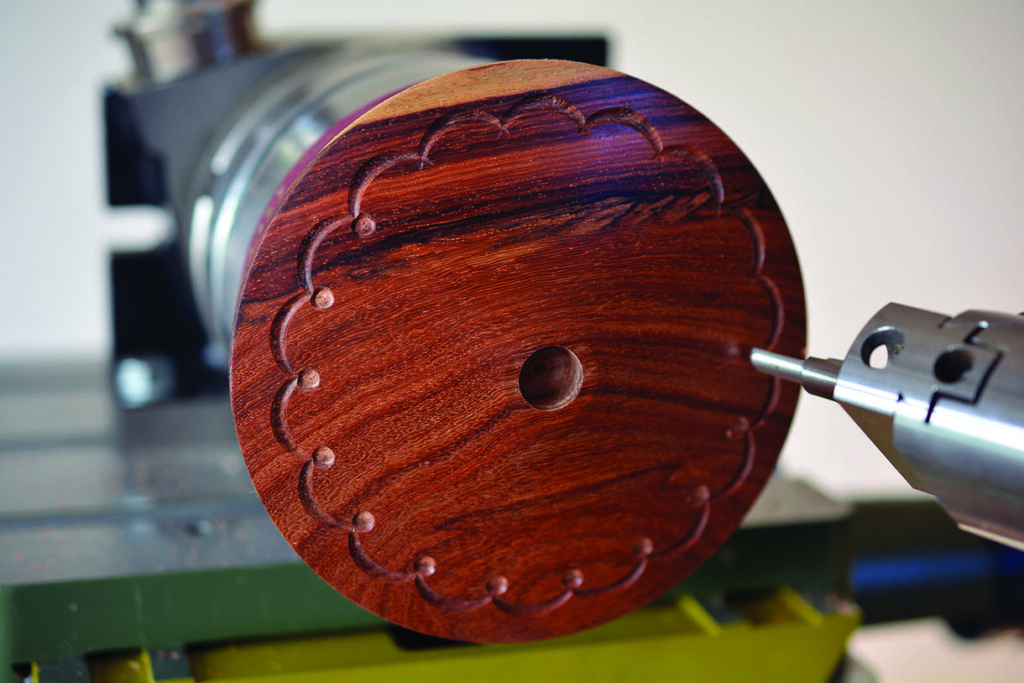
The first project is a box lid in curupay (Anadenthera culbrina). Having finished the base and inside the lid, reverse the lid into a jam chuck. The shape of the lid is a sloping hut roof style, and great care must be taken to achieve this profile.
The objective is to achieve a continuous, straight slope.
Setting up the lathe
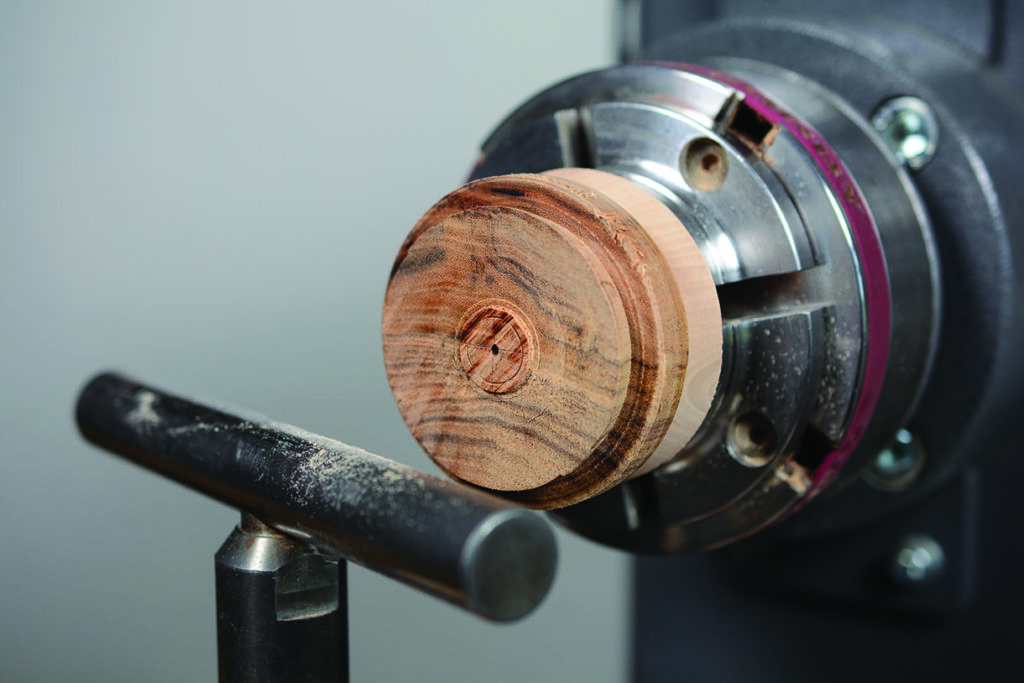
Having finished the preparation of the lid, the tailstock and banjo are removed and replaced with the baseboard and compound table. Securing onto the bed bars of the lathe, mount the rotary table and ensure it sits square on the compound table by using an engineer’s set square.
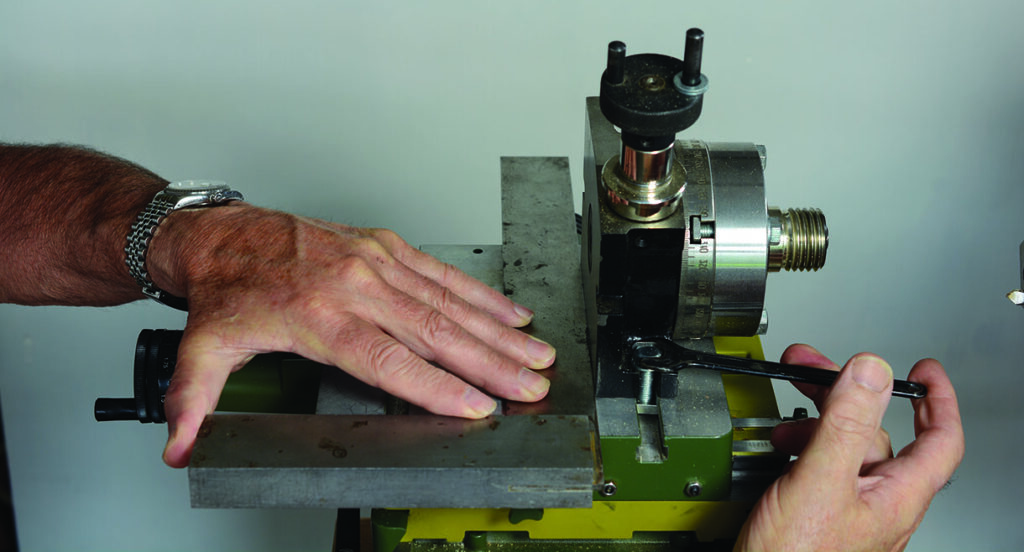
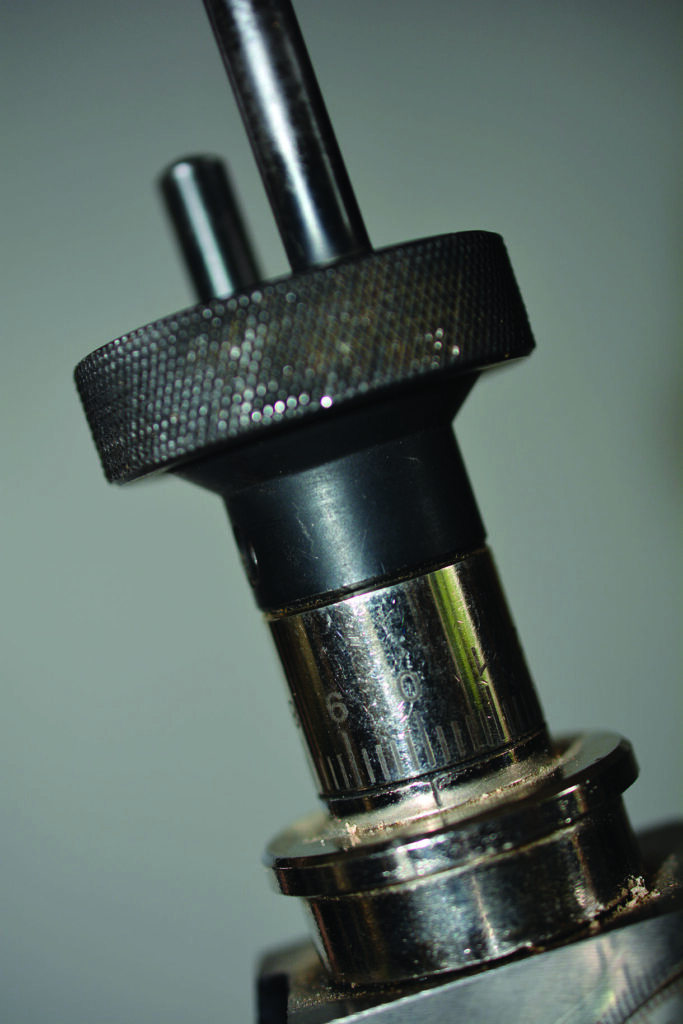
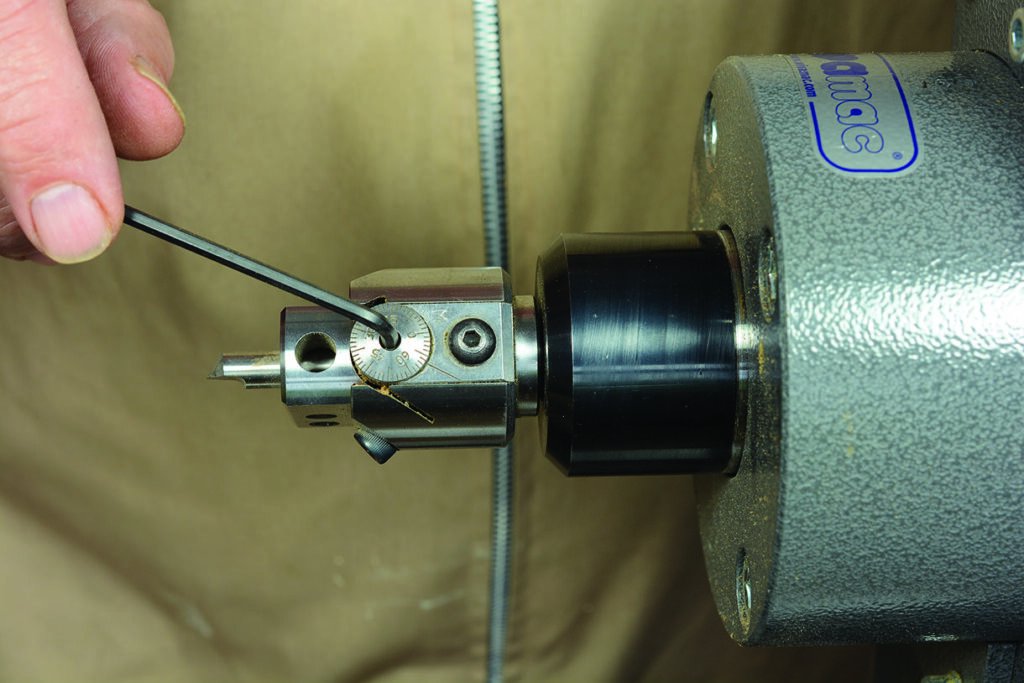
The rotation is activated by the handle on the top with a locking screw. Two scales are provided – one on the circumference, graduated in 1° increments, and the other on the handle, which is a Vernier scale in tenths. It is this scale that is used to make final adjustments.
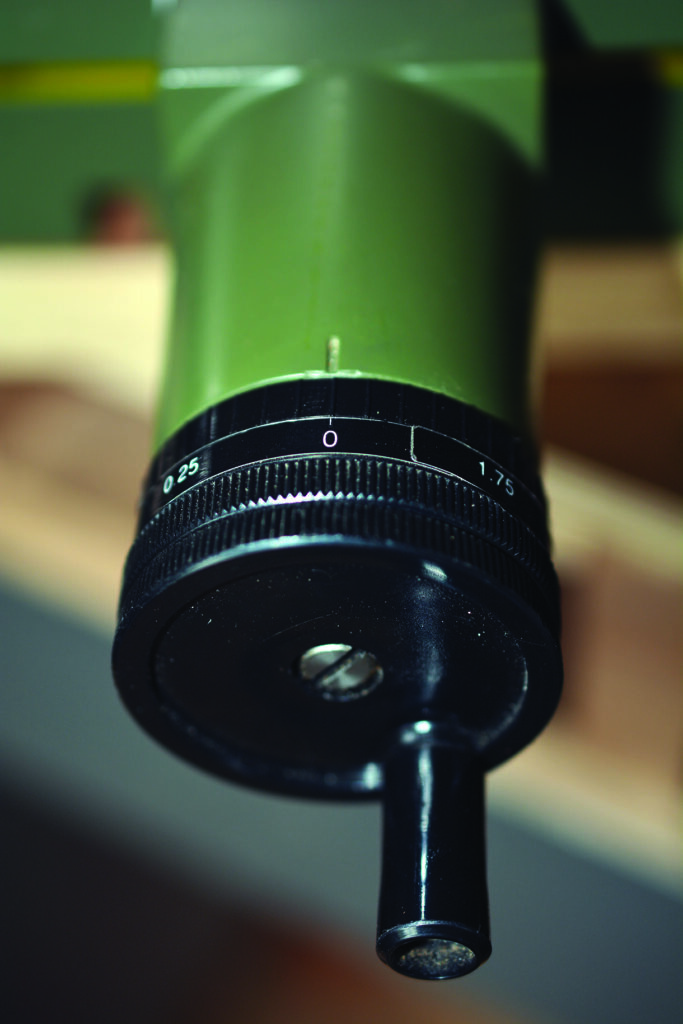
The fore and aft (X and Y) movement of the compound table is controlled by two handles – one full turn is 2mm. The graduations are 0.05mm. Locking screws for the slides are also provided.
Setting up a Barleycorn pattern
Now mount the chuck on to the rotary table with the lid still attached. We’ll apply the Barleycorn pattern, which requires a flat surface because the cut is a full circle – therefore the surface needs to be aligned at 90° to the cutter. This is achieved by slacking the bolt on the mounting board and swinging the whole unit. To make sure I get perfect alignment, I use a straight edge mounted on to a chuck to align the work, along with the white sheet of paper trick.
I have found this method to be the most accurate and versatile. While a long straight edge can be a little ungainly for small items, it comes into its own when aligning a large bowl or platter. Alternate methods are to use the surface of a faceplate, or fix a wooden straight edge to the faceplate.
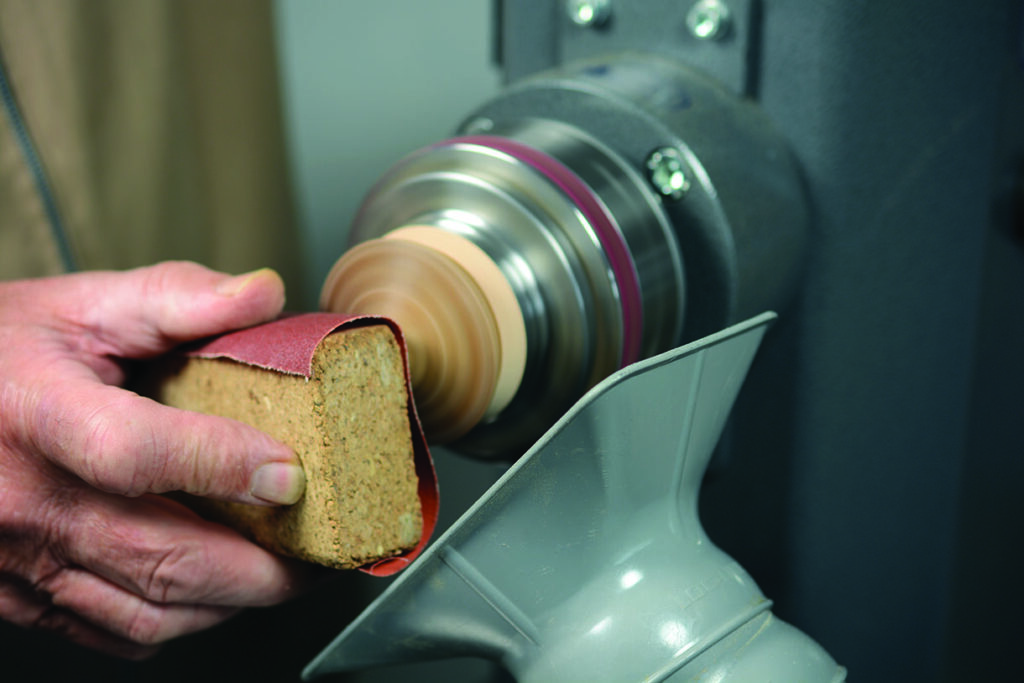
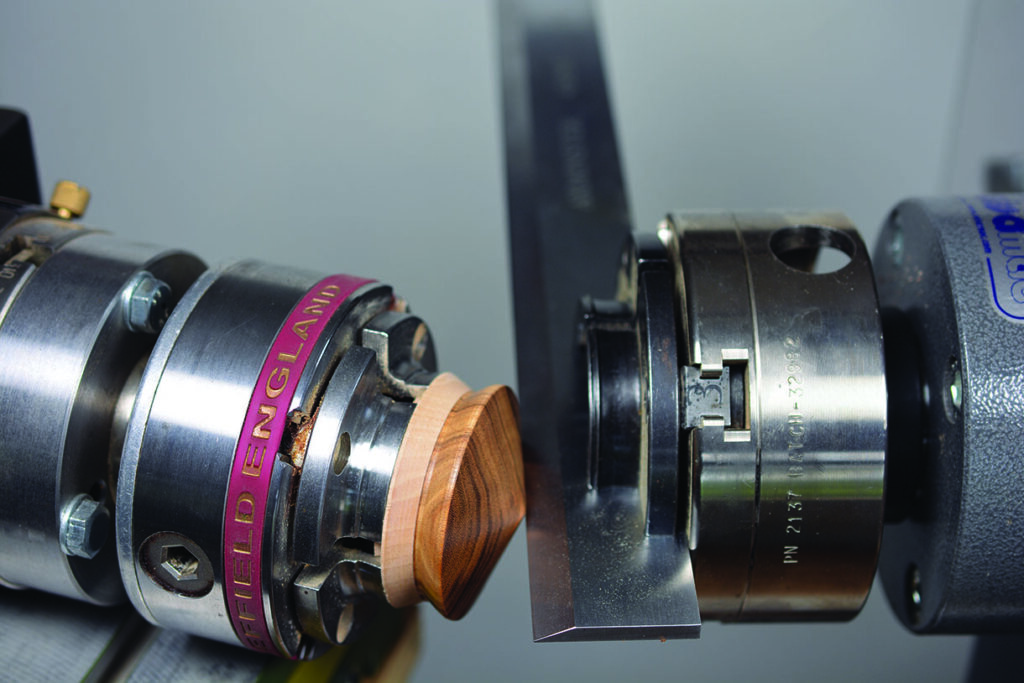
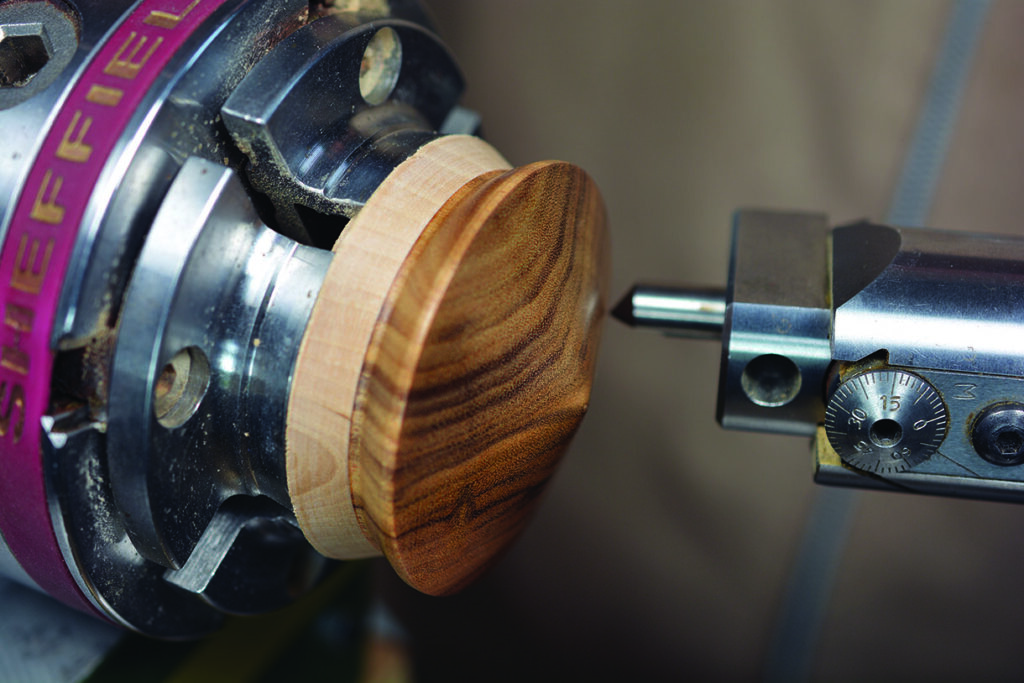
Setting up the bore head
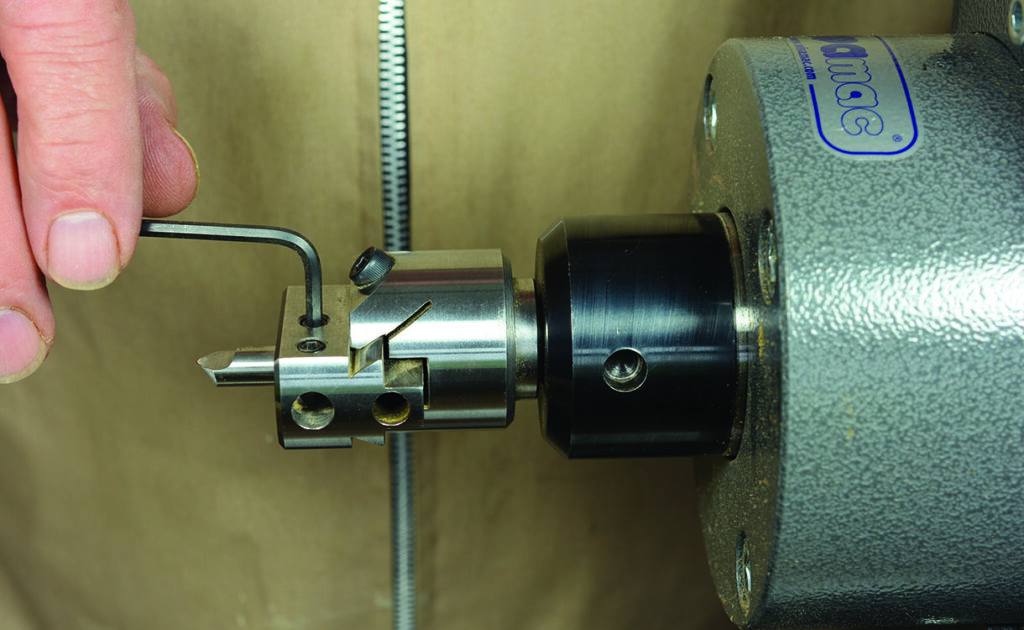
Setting up the boring head is the next task. Start by inserting the boring head via the Morse taper into the spindle and secure with the drawbar. Insert the cutter into the middle slot on the head and secure with the retaining screw. The cutting edge must point upwards if the direction of travel is anticlockwise – the normal lathe direction. If the direction is reversed, turn the tool bit 180°. The swing of the head is adjusted by an Allen key inserted into the Vernier scale on the head and locking off with the screw on top.
The workpiece should now be in the chuck and correctly aligned, together with the boring bar securely installed, complete with cutter. Determining the size of the decoration together with the pattern is the next step. The pattern is Barleycorn, although you will have seen various examples in previous parts. Barleycorn is the basis of most other patterns, and it takes on various aesthetics.
Take your time
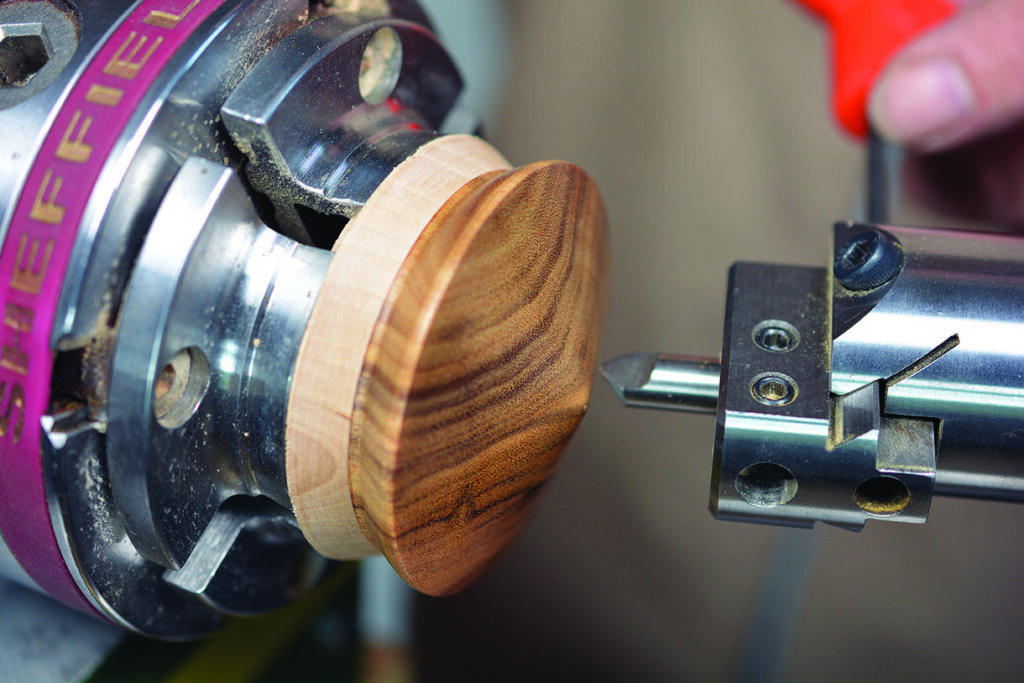
It is important that this pattern is mastered before moving on to others. Most skills and experience are built up by repetition, and so it is with ornamental turning. By varying the increments, depth of cut and shape of work through experimenting, not only will you be surprised by the patterns produced – it will all add to your skill set, and build confidence and experience. This includes an understanding of how all the elements combine to make pleasing results. In short, what works, and what doesn’t! First, start by sliding and securing the compound unit to the cutter, making the fine adjustments with the X or Y knobs to advance the lid to almost, but not quite touching the cutter.
Size of the cut
Now to determine the diameter of the cut together with the position of the circle. The diameter is achieved by adjusting the dovetail slide with the adjusting screw located in the Vernier scale. The cut diameter must be considered in relation to the position it occupies, achieving a pleasing balance.
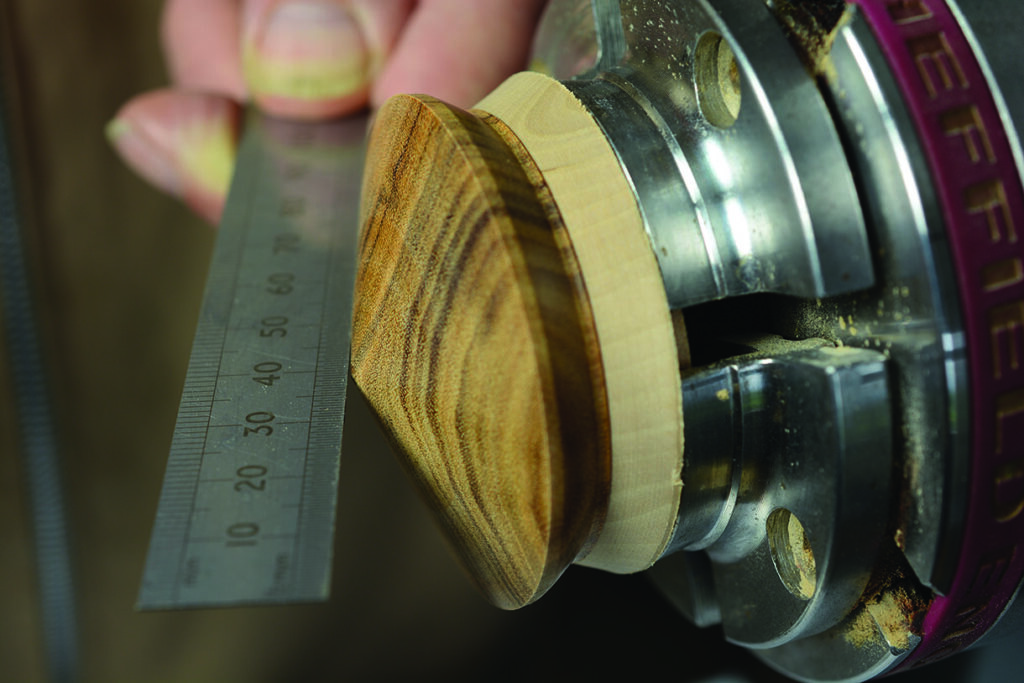
In this case, I have positioned the cut (20mm diameter), just short of midway between the bottom edge and the top, leaving, about 5mm at the bottom edge and about 7.5mm per side at the top. This will make a nice crown at 15mm overall. The overall diameter is 60mm, because of the angle, each side measures 35mm.
The measurements are only to give the reader some idea of scale. I think it is best achieved by eye by rotating the cutter and observing the positions on the lid.
Number of circles
Having decided the pattern, size and position, all that remains is to select the number of circles. The more circles the finer the pattern. However, some detail will be lost because of overlapping cuts. Fewer circles achieve a coarse pattern which can look unbalanced on a small box lid. On this occasion I have chosen 18, because when a full 360° circle is divided by 18 it equates to a spacing of 20°. This will give a nicely balanced pattern with lots of fine detail in the extremities. We are now ready to begin cutting. In the interests of health and safety, please carry out the safety checks prior to starting the lathe.
Safety
- Boring bar is secured with drawbar.
- Tool and sliding dovetail screws are secure.
- Lathe spindle revolves freely without fouling.
- The unit is secured to bed bars.
- Workpiece is secure in chuck.
- Rotary table is secured to compound table.
- Cutter guard is in place.
- Lathe set at lowest speed.
- Rotary table locking screw is secure.
- Dust extraction is in place.
Once completed, check that the rotary table is in the zero position – both on the main and Vernier scales. Secure the locking screw. The compound table lateral or Y adjustment is not needed, so lock off with retaining screw. Though it’s a good idea to mark its position (in case it is accidentally moved). The scale on the knob is spring loaded. Push the scale in and turn until zero is aligned with the mark.
Beginning the cut
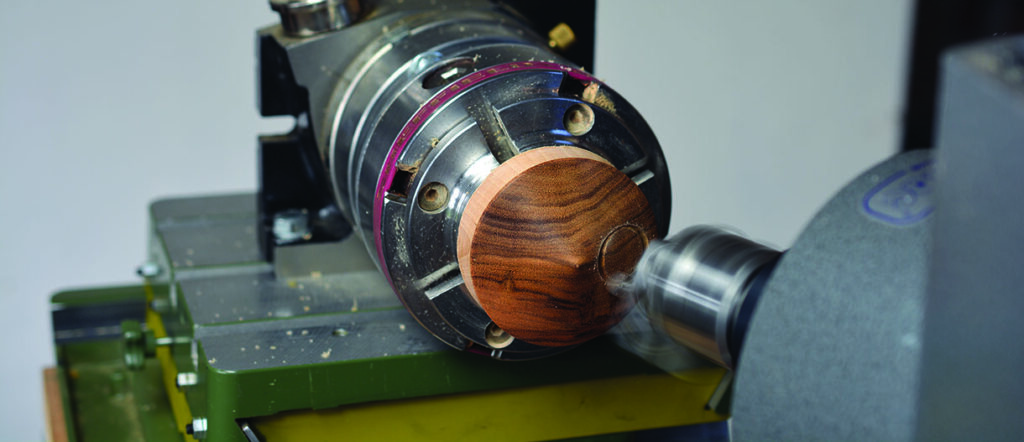
Advance the cutter towards the workpiece, commencing cutting until the required depth of cut is reached. Set the X scale back to zero when completed. Reverse the cut until well clear of the workpiece, advancing the rotary table by 20° via the handle on top. Using the Vernier scale as reference, (the most accurate), ensure the locking screw is tightened after each advance. Recommence cutting until the zero mark is reached, repeating the whole process until complete.
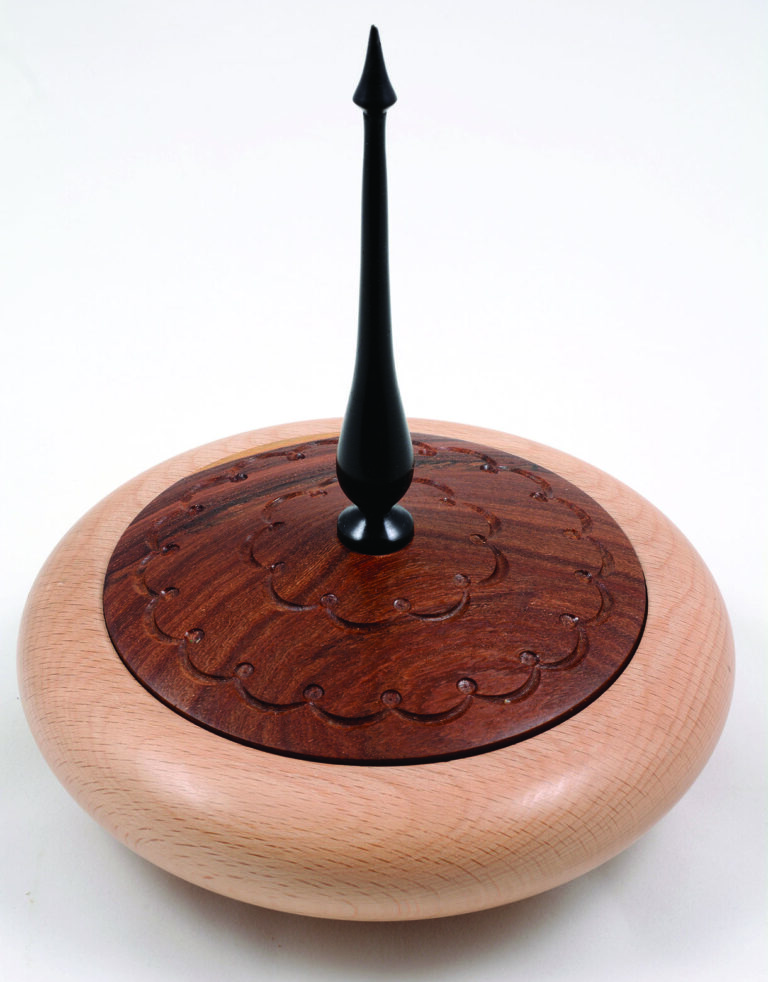
Decorating a finial box
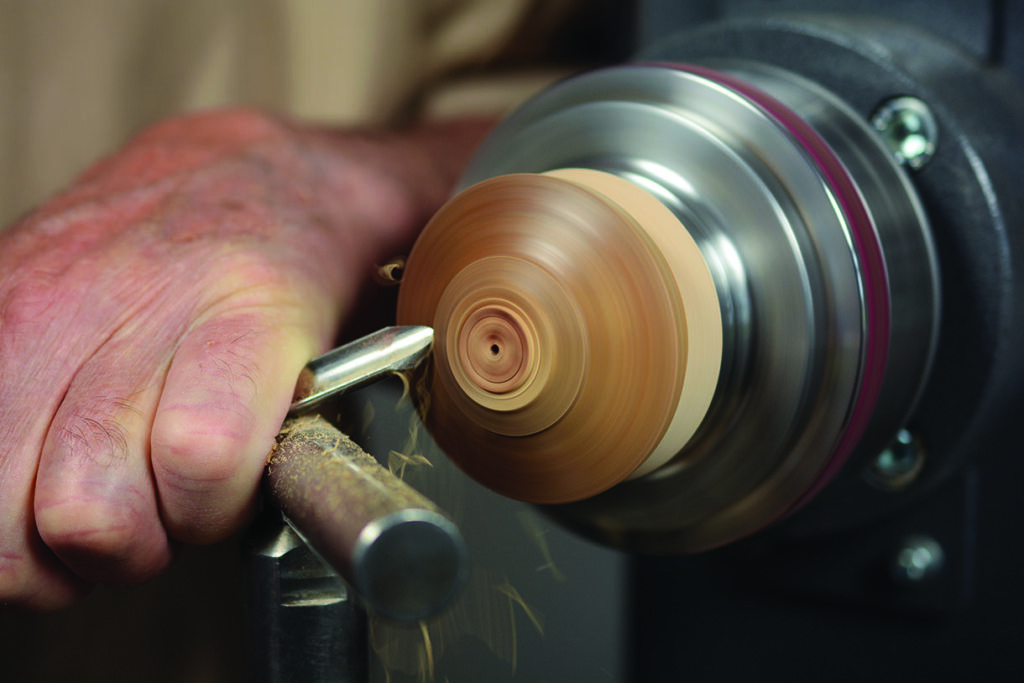
The second project is a trinket box lid inspired by my favourite and constant inspiration woodturning book Turned Boxes 50 Designs by Chris Stott. The woods used are beech (Fagus sylvatica) for the base, and for the lid, West African pao rosa (Swartzia fistoloides) topped with an ebony (Dispyrus crassiflora) finial. I turned, sanded and finished the lid exactly the same as the first project. I also drilled a 12mm hole to house the finial, which also doubles as a ‘jam chuck’, enabling the underside to be completed.
Setting up the cutter
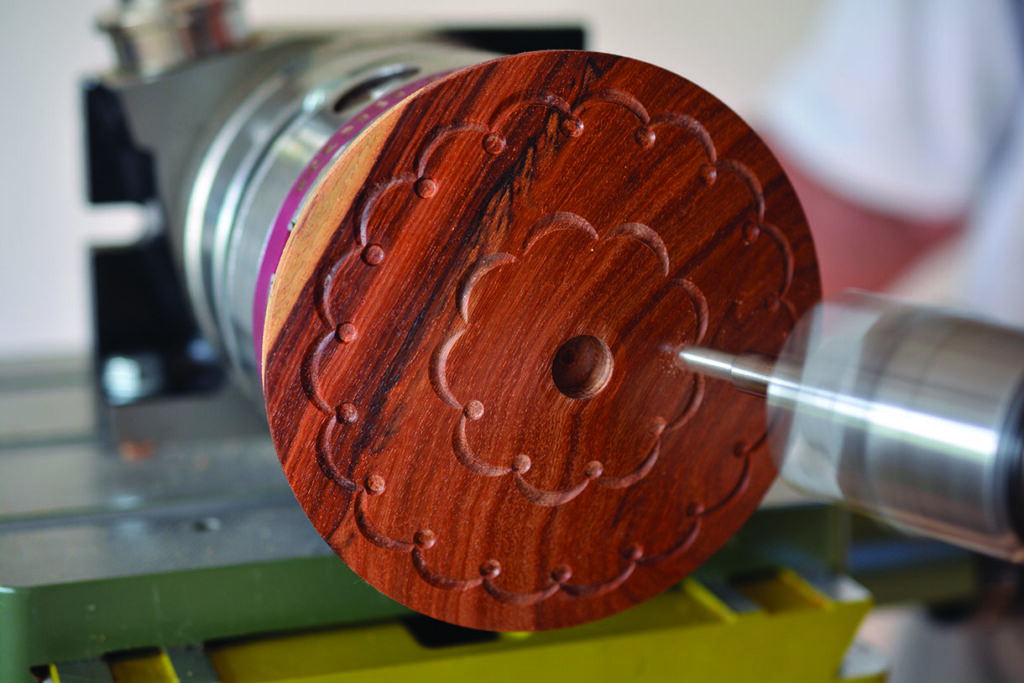
The pattern is two rows of crescent shaped semicircles, with a dot detail at the point of each intersection. The bottom row is 20° spacing, making 18 cuts. The upper row is half that amount, with 40° intervals totalling nine. The dot detail is the same spacing as the main cuts. However, to centre the dots in the middle of the intersection, the first cut starts at 10° instead of zero – therefore the scale marking starts at 10°, continuing 30°, 50° and so on. The 20° spacing is maintained only the start point had changed. The dots are cut with a single flute router bit with 8mm shaft to fit the toolholder.
Setting up for this pattern varies from the Barleycorn, because only part circles are to be cut. While absolute flatness of the workpiece is still required, it is not necessary to present the cutter at 90° to the work. Indeed, an amount of offset is required to enable the part circle to be cut. Rotating the compound table in a clockwise direction will provide this relief.
Outer rim cuts
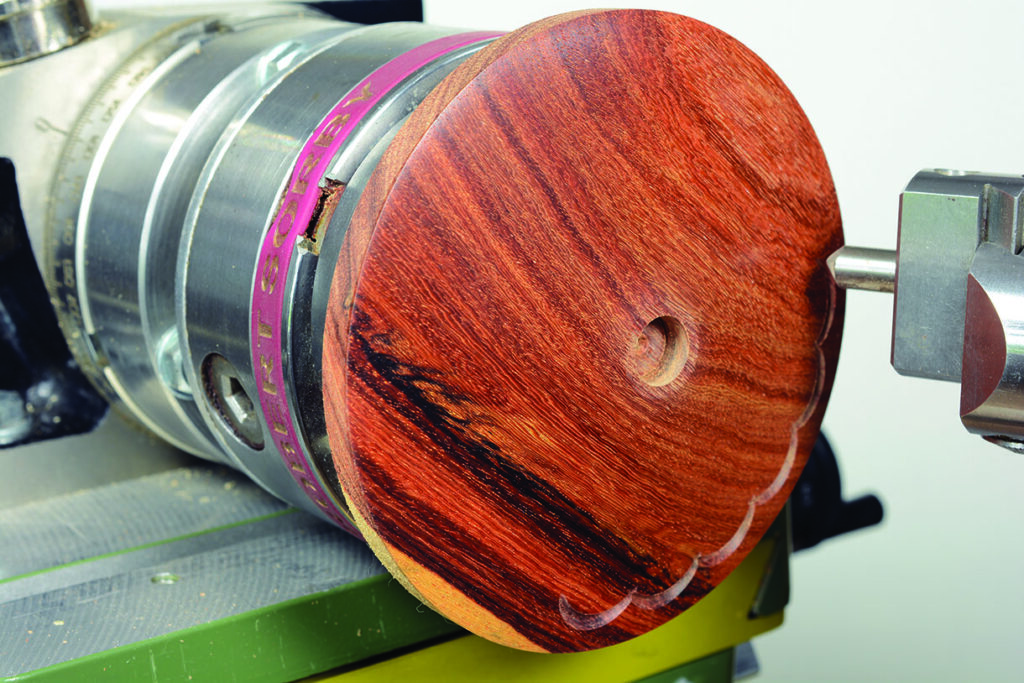
Now we must adjust the machinery to set up the outer rim cuts. This involves rotating the compound table clockwise to obtain a suitable amount of offset. Set the cutter in relation to the edge, together with the length of the crescent. Be aware that all these adjustments are interrelated, therefore one change will affect all other elements. After turning the unit clockwise, rotate the cutter so the point of the cutter is facing the edge of the lid, winding the Y axis until the correct distance from the edge is achieved. Now swing the cutter in an arc to determine the length of the cut – adjustment is made on the sliding dovetail. The photographs show the top and bottom of the cut. Put a pencil mark at the top of the arc. Now rotate the table with the cutter at the bottom of the arc until it reaches the pencil mark. This is the length of the crescent, also illustrating the increment to repeat the sequence in degrees.
Making the cut
To make the process a little easier, I like to use the increments in multiples of 10. Continue to adjust until you are happy with the proposed cut. Secure all the components. Carry out the safety checks, then make the first light cut. This will give you an indication of the shape, from which you can make fine adjustments – a full cut will then cover the initial one. Now continue completing the cut. Once the outer crescents are completed, it’s time to cut the dots and wind the work away from the cutter. Remove the cutter, and replace with a straight fluted router cutter. Now centralise the dovetail slide using the zero on the Vernier scale for fine adjustment. The cutter should now run true.
To align the cutter, turn the rotary table to 10°, then adjust the compound table, placing the tip of the cutter where the crescents intersect. Making a very light cut will indicate the accuracy of the position, allowing final adjustment prior to cutting. To complete the inner crescents, including dots, repeat the process, making allowances for a smaller diameter and shorter crescents. To finish the lid, reverse the finial recess into a jam chuck, enabling the chuck spigot to be removed. Complete the inside of the lid, and finally glue the finial in place.
Top tip
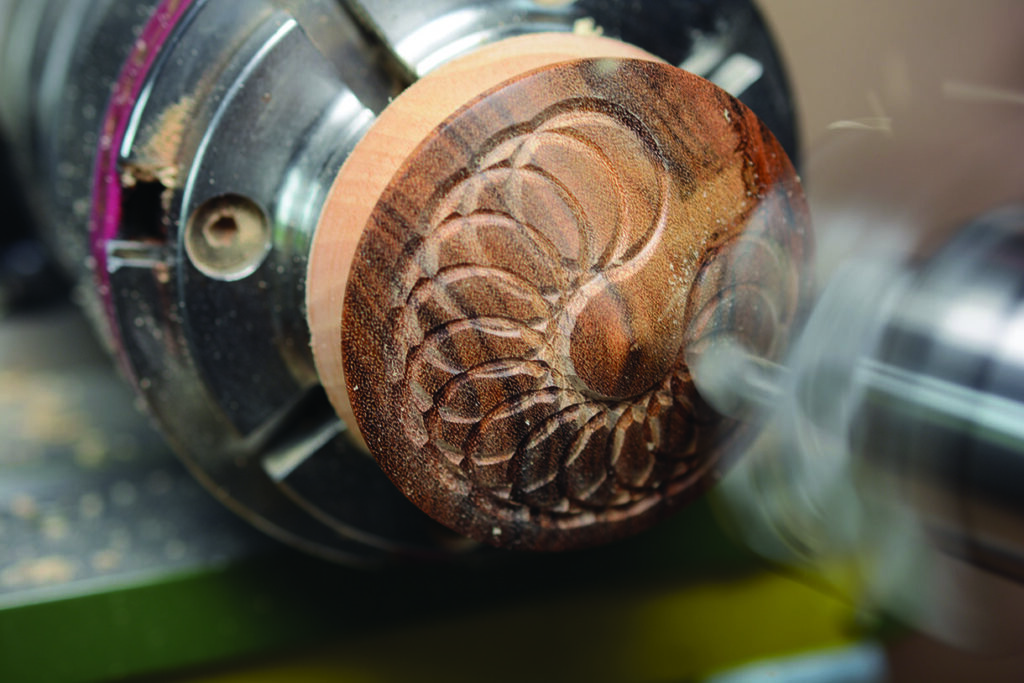
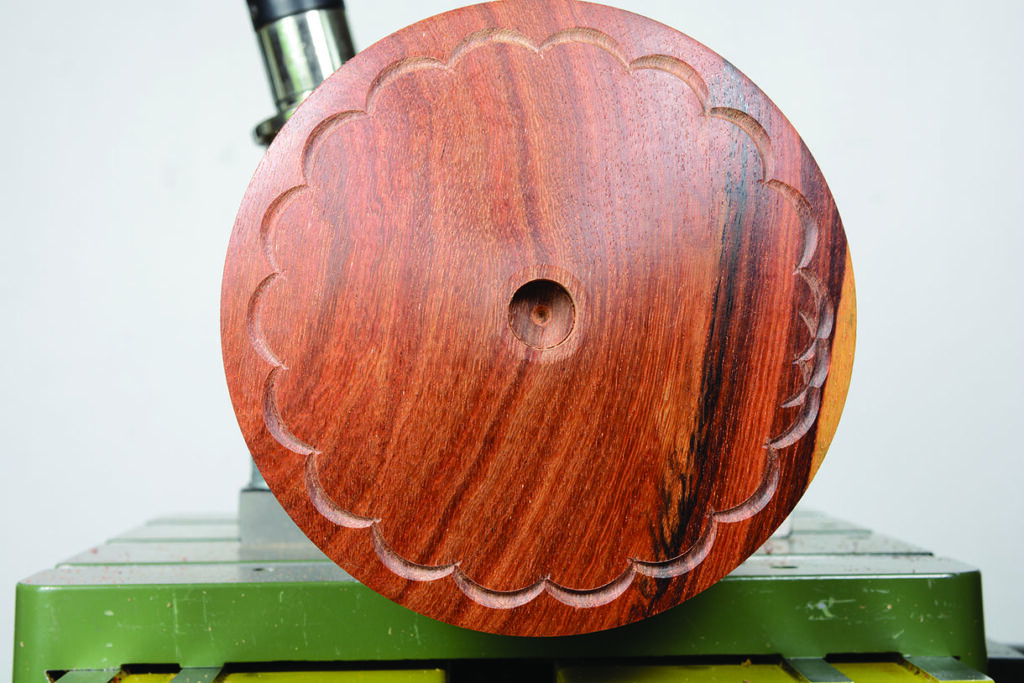
The very essence of the process (once the setup is complete) is repetition. Sometimes our concentration can wonder – this happened to me while I was demonstrating the process at my club. I completely ‘lost the plot’ halfway through, and I found this most embarrassing.
While making the lid for this article, with two cuts left on the outer circle, I failed to rotate the table to the correct mark – the result can be seen in the photograph above. I was then faced with the decision to change the pattern or start again. Fortunately, the piece was thick enough to skim.
The lesson: although I had recognised the issue early on, I failed to follow my plan. I devised simple sheets with the sequenced increments, crossing off each division as they were completed. And although I had a spreadsheet detailing all the information needed to plan a sequence, I had failed to use them.
So, develop a plan and stick to it!
Lathe speed
As a rule, the faster the speed of the cutter, the better the cut. However, most cuts will be with the sliding dovetail extended, which will induce vibration. The best way to reach optimum speed is to start at the slowest speed, increasing until vibration is reached. Do not stop here. The chances are this will be eliminated as speed increases. The best place to feel vibration is on top of the rotary table. While some vibration may be tolerated it can cause tool chatter. Router cutters are designed to run at high speed, and should only be run true in the centre without offset.
Summary
Using a lathe to create attractive patterns is a great exercise for woodworkers interested in the more nuanced side of turning. The key is to take your time, develop a plan of what you are going to do, imagine the effects of any adjustments, and give it a go. I recommend reading this article again to glean any salient points that you may wish to record for easy reference. For a more detailed recollection, you can reference the technicalities and photos as and when required. Fundamental to any learning process is not to be afraid of making mistakes – they are invaluable sources of progression. So, again, just give it a go. Oversized engineering will provide allowances that enable you to begin anew, as demonstrated by my first attempt mishap. Once setup to your desired pattern, you’ll be amazed at the accuracy that can be achieved by a seemingly elementary machine.
One Response
Hi a bit random but im trying to contact Ann hart who makes cards, im presuming Chris Hart is a relative if you have anyway contacting Chris and giving Ann my details it will be appreciated. I bought some cards off her at a church in York and want to buy some more.
Kind Regards
Karen