Frustrated with the lack of inexpensive options, yet with a pressing need to have a vacuum chamber, the author pursued his own design and construction – with impressive results.
In this article, he shares his experience on how to build a vacuum chamber with readily available materials and components, and easy-to-follow instructions.
- What is a vacuum chamber?
- Why do you need a vacuum chamber?
- Chemicals for stabilising wood
- Equipment used for making a vacuum chamber
- The chamber
- Connectors
- Pressure cooker lid
- Fitting the attachment to the lid
- Assembling the other components
- Time to test!
- First run
- How to run the vacuum chamber
- Summary
- Further reading
What is a vacuum chamber?
A vacuum chamber is a unit that removes the air within an airtight space. It’s essentially a form of pressure treatment, whereby wood can be saturated liquid-state treatments. If, in our example, a porous material is submerged in a liquid, the low pressure forces the liquid into the porous material top replace the removed air. Then the liquid sets within to add strength and density to the material.
Why do you need a vacuum chamber?
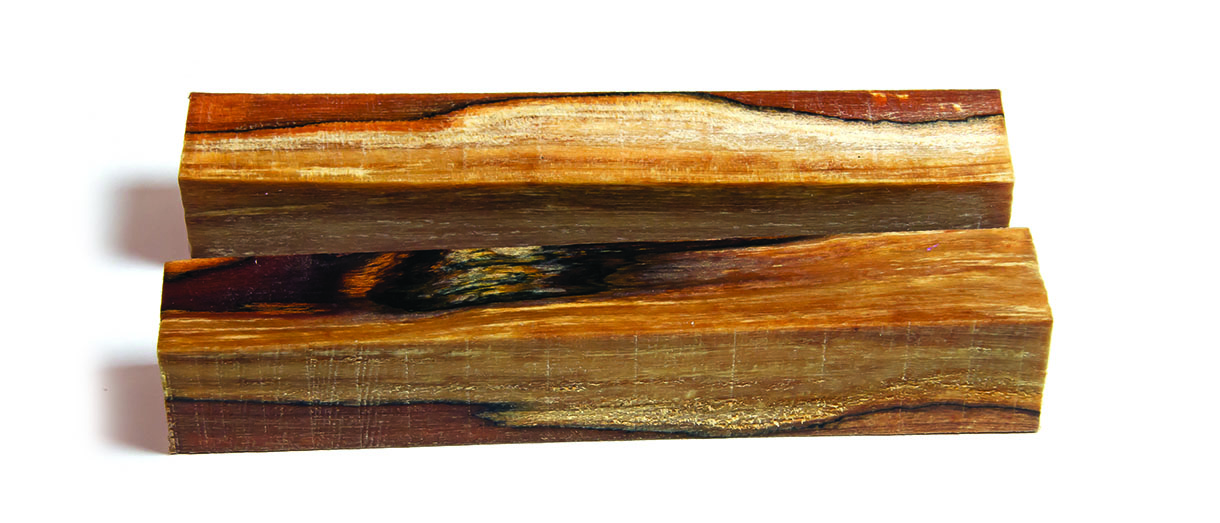
For those unfamiliar with the concept of stabilising wood, or perhaps why we might want to do so, a brief explanation is in order. Often as pen makers or woodturners, we may come across an attractively figured or spalted piece of wood that would make a beautiful pen or other turned item. Often the problem is that the wood is so soft that it is difficult to turn and finish. Stabilising the wood with resin hardens it up so that it can be turned successfully.
Chemicals for stabilising wood
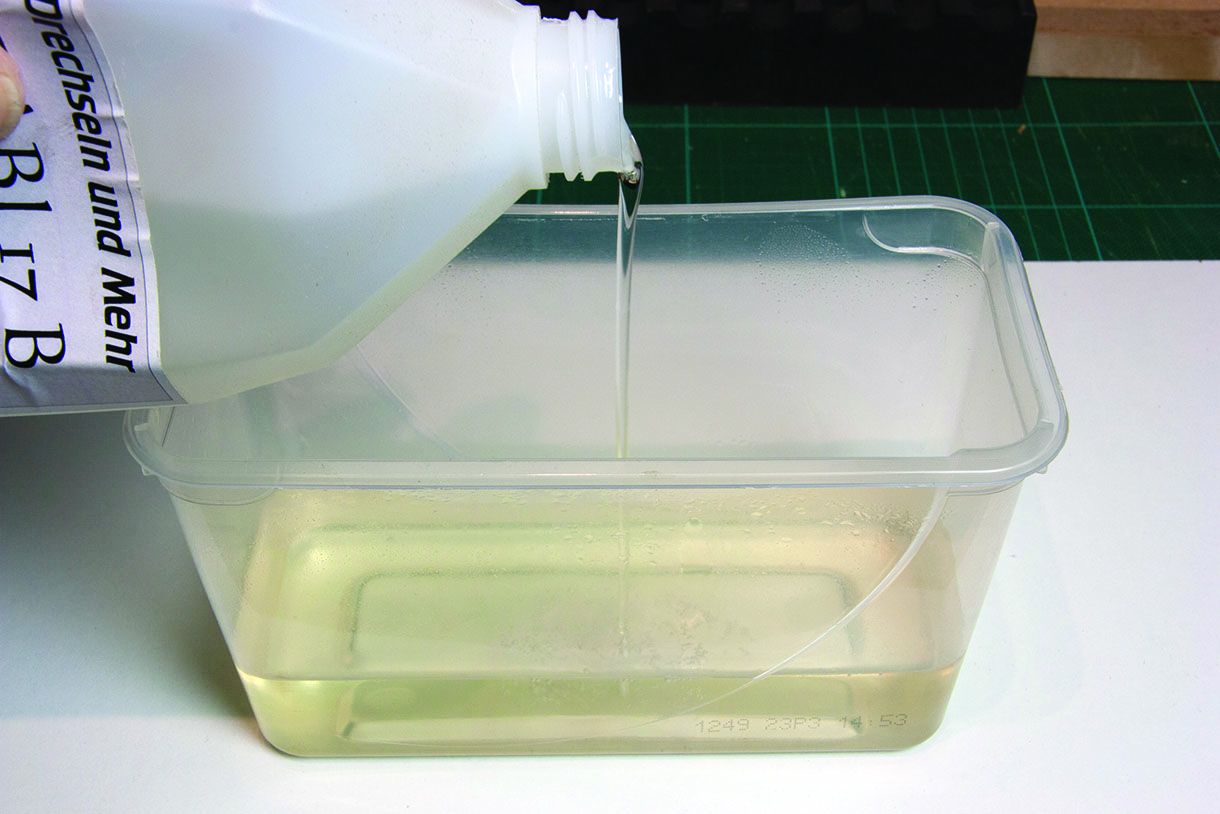
Various chemicals are available for this purpose. Some need to be mixed with a catalyst before use, and heat treated after vacuuming. Others come ready mixed, and require only a drying out period to prepare them for use. Detailed instructions for this process are typically supplied with the products. Further extensive advice is often available on suppliers’ websites. To test my vacuum pot, I used Drechseln und Mehr Stabi 17 B Vakuumharz (Vacuum resin). It does not require heat treatment after vacuuming.
Full instructions for use are available on the website – www.drechselnundmehr.de – but you will need to translate them from German using an online translator such as Google Translate.
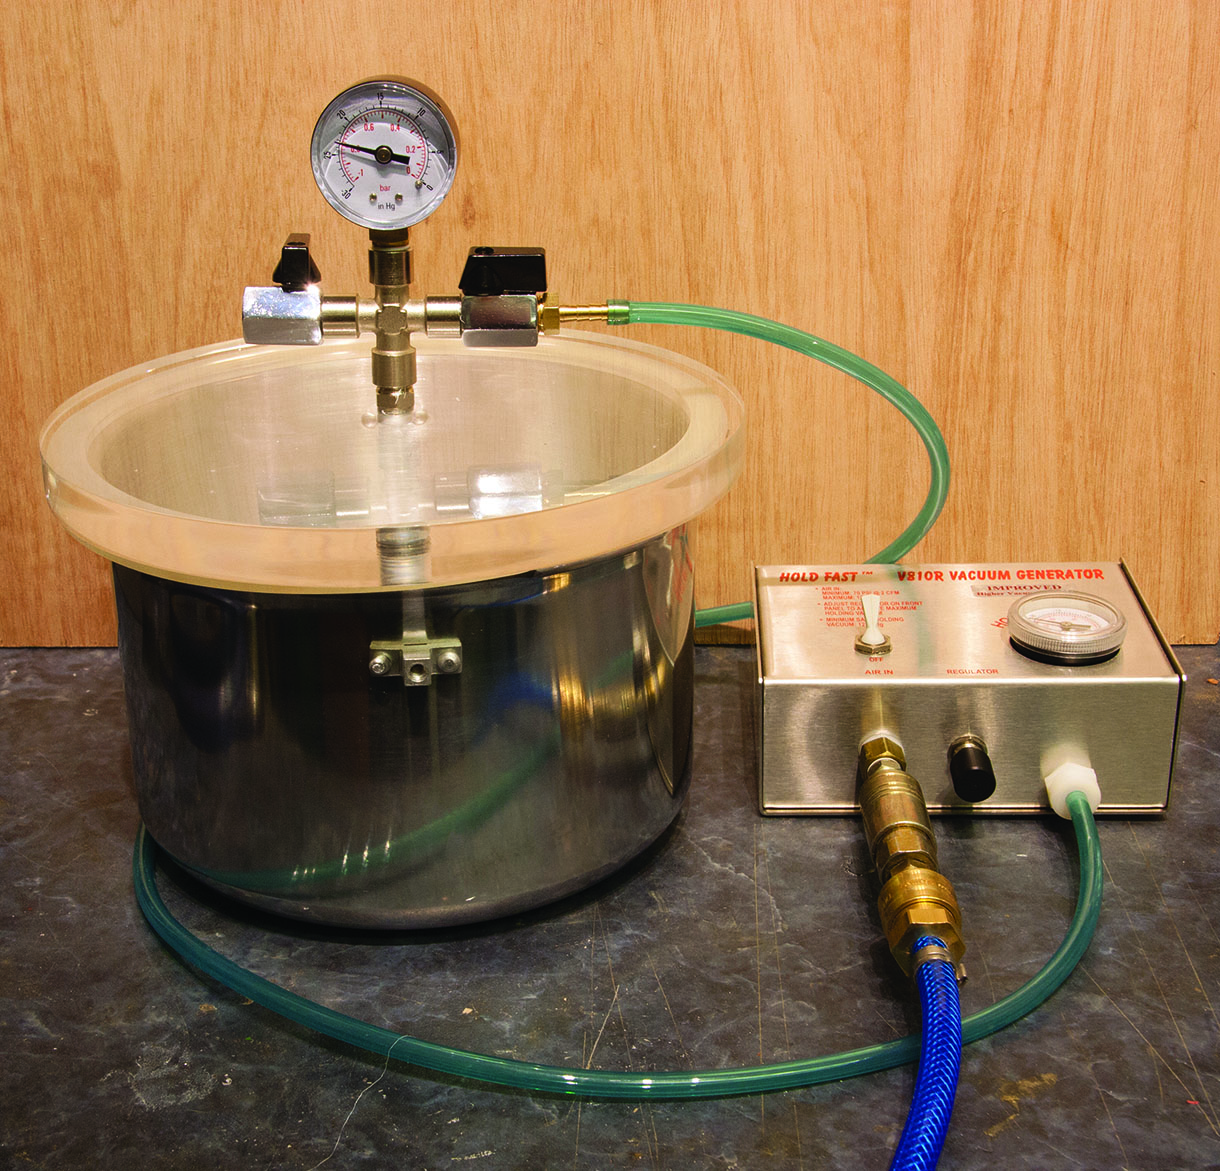
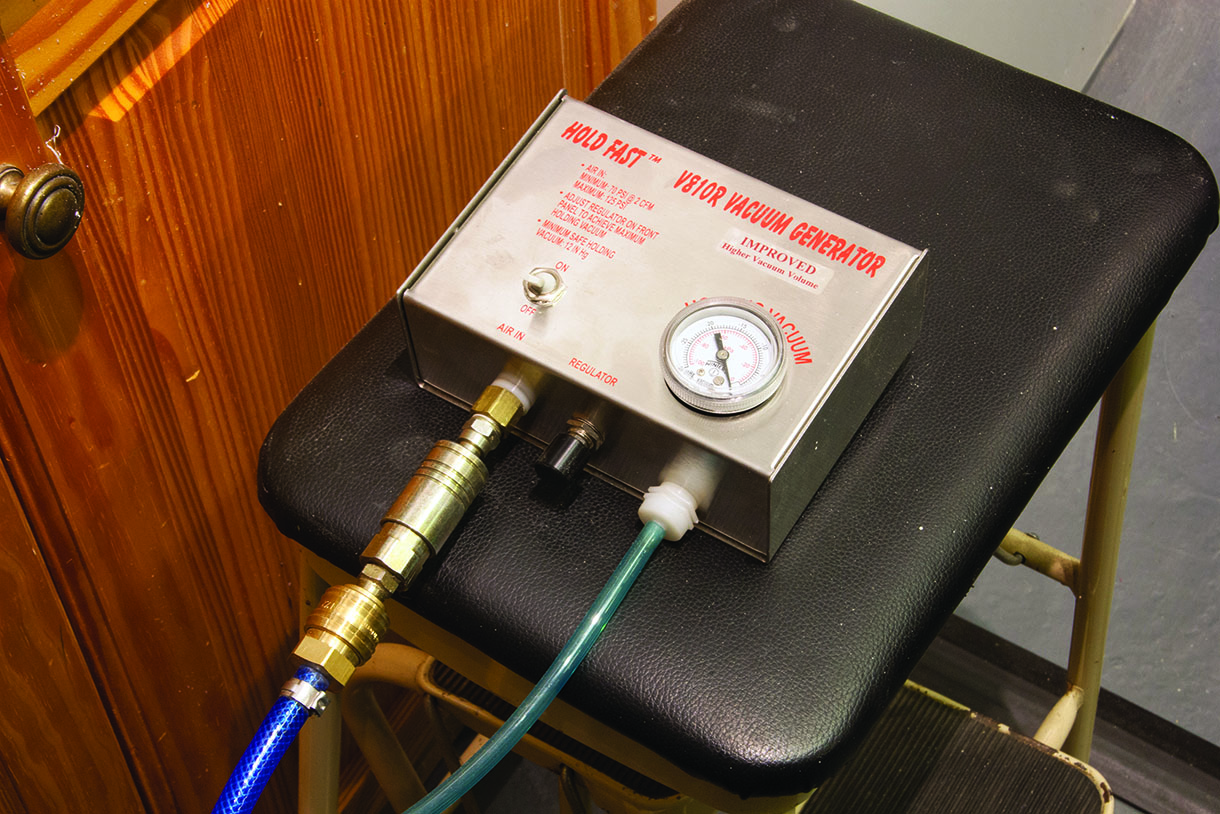
I have so far avoided this process because of the high setup costs of a pressure chamber and a suitable vacuum generator, or pump. To reduce the costs, I built my own chamber based upon a retired domestic pressure cooker. This will be large enough for me to stabilise several pen blanks at a time, and even to stabilise small bowl blanks. The vacuum is provided by a HoldFast vacuum generator. This is intended for vacuum chucks. It will eventually be replaced by a vacuum pump, which will enable a more complete vacuum to be achieved.
Useful advice on the selection of a vacuum pump is available on the Turntex Woodworks website – www.turntex.com – who are the suppliers of Cactus Juice stabilising resin.
Equipment used for making a vacuum chamber
Components
- Pressure cooker
- Vacuum supply fittings: vacuum gauge, valves, four-way connector, straight connector, adaptor
- 20mm-thick sheet of Perspex
- Pair of dividers
- Pillar drill with 3.5mm drill bit
- Bandsaw with a narrow blade
- 3.5mm woodscrew
Abrasives
- Polishing compounds
- 11.8mm drill
- ¼in BSP tap in a tap wrench
- PTFE tape
Materials
- Sheet of plywood for a jig
- Pen blanks for testing
- Resin
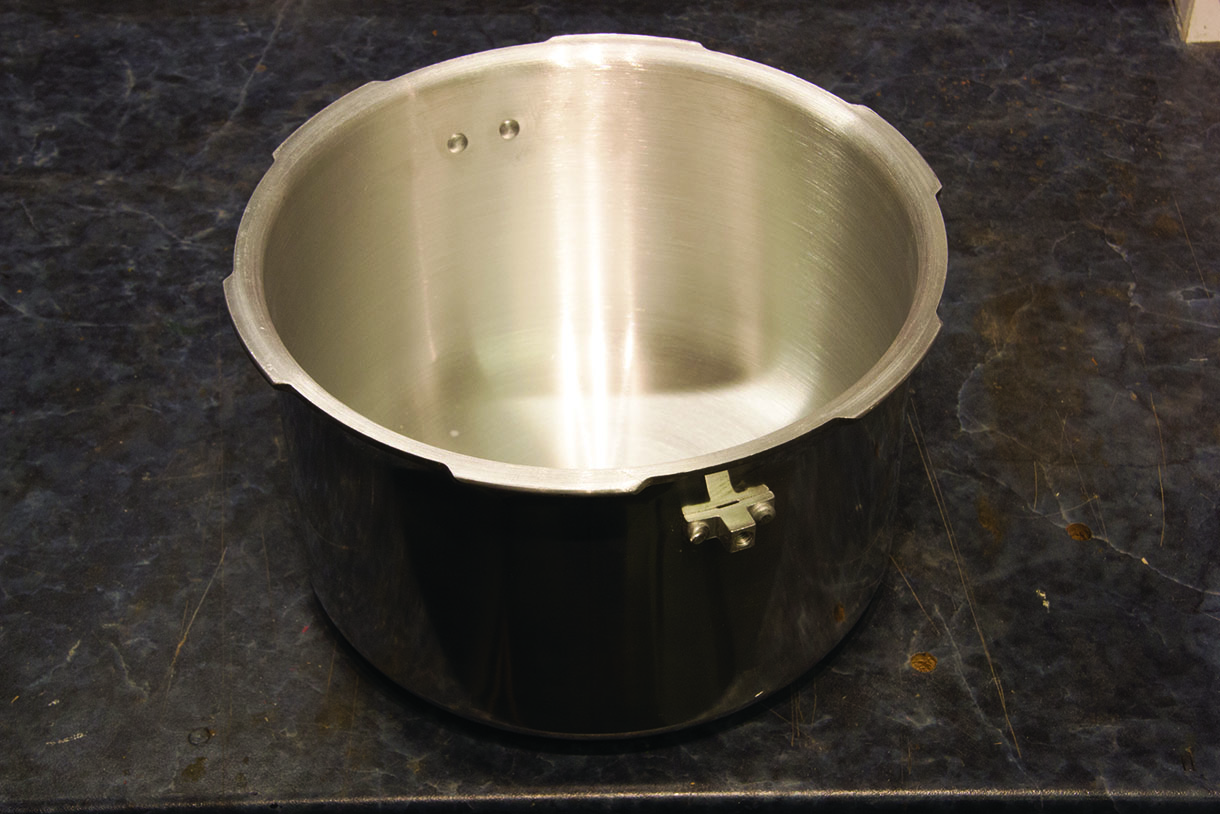
The chamber
I removed the lid and handles from a domestic pressure cooker and used the cooker’s body as the basis for my chamber. Do not use ordinary cooking pots as they are not strong enough to withstand the vacuum – they may deform or implode. While this is unlikely to cause any danger, it will not result in a working chamber – so don’t waste time going down this route.
Don’t ask how I know this!
Connectors
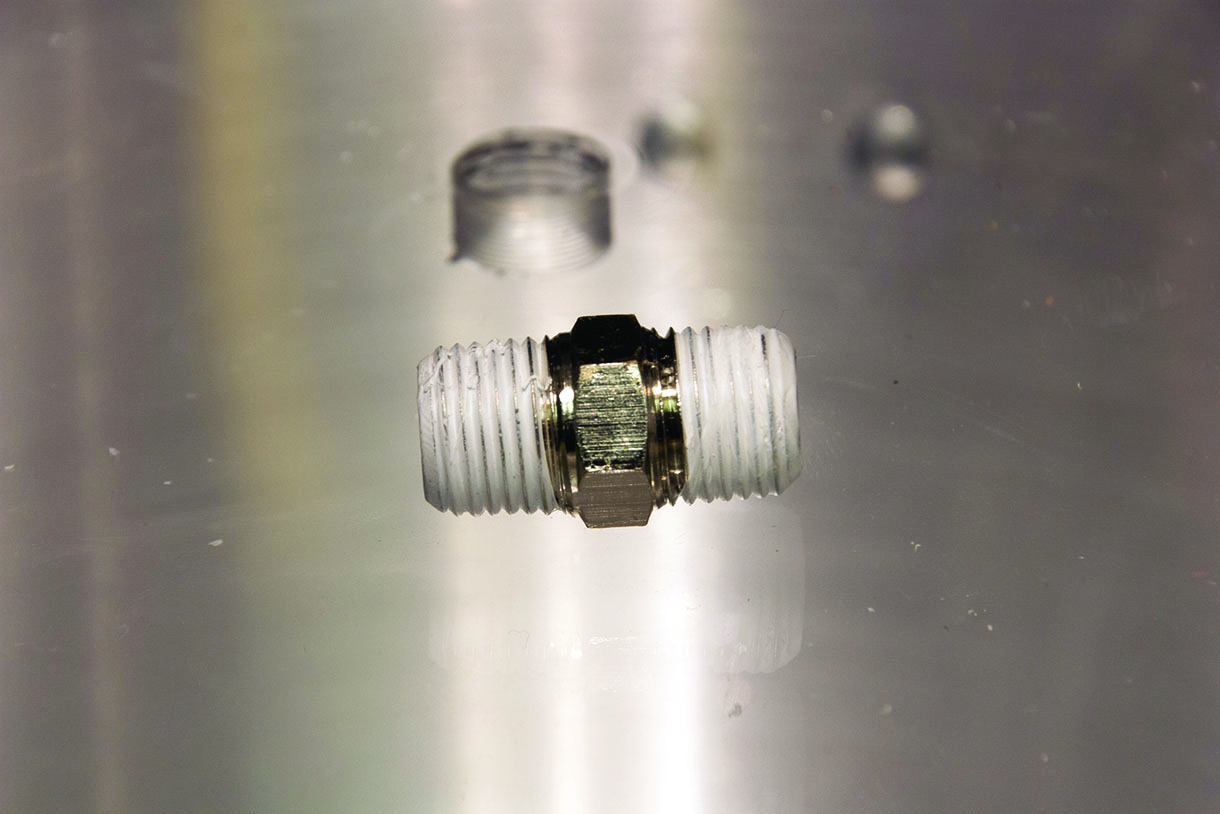
The fittings for connection and control of the vacuum supply are all ¼in BSP components. These are readily available online or from specialist vacuum, plumbing or hydraulics suppliers. They consist of a vacuum gauge, two valves, a four-way connector, a straight connector and an adaptor to fit the inlet hose from the vacuum supply.

Pressure cooker lid
The lid of the pressure cooker must be replaced with a sheet of thick, clear Perspex or similar clear acrylic material. Then we can see what is happening inside the chamber. I recommend a minimum thickness of 20mm. I tried some 12mm material at first. While this worked, it deflected rather too much under vacuum, so I upgraded to 20mm.
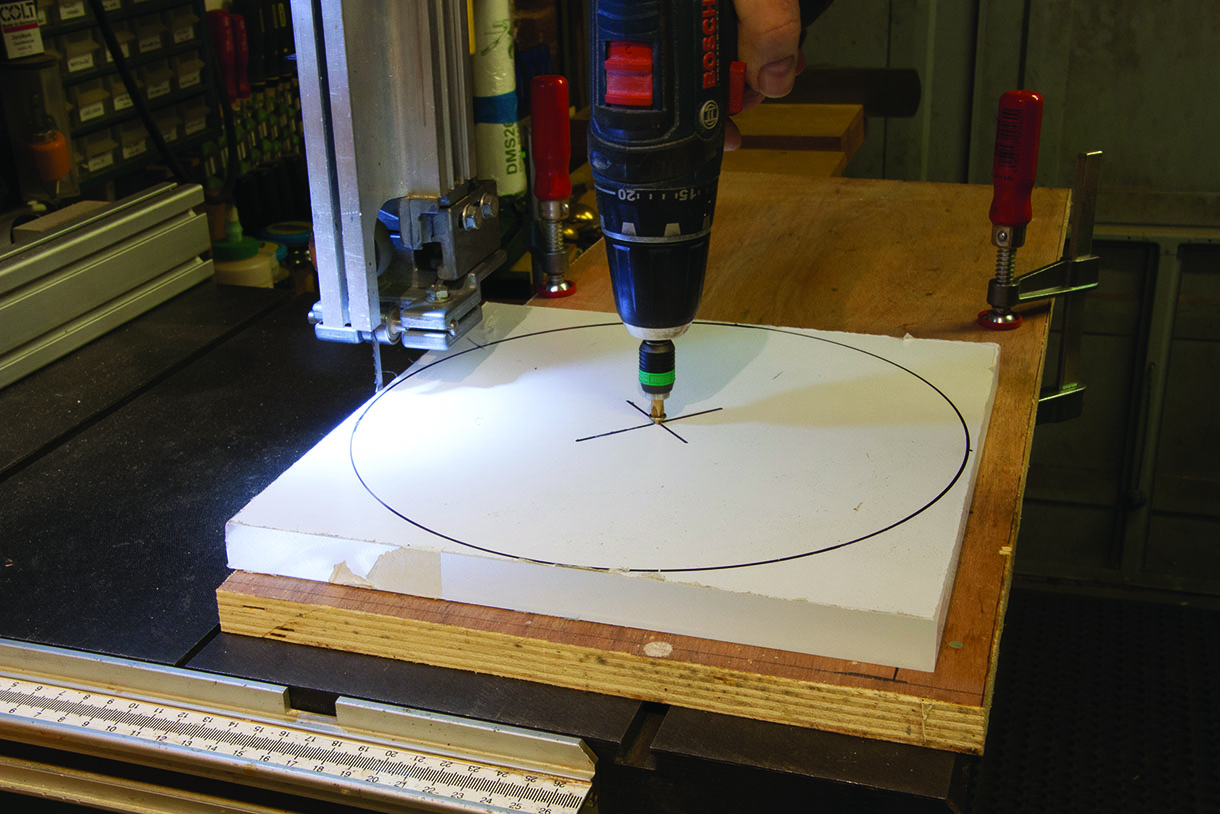
A local sign maker or plastics supplier may be able to provide you with an inexpensive offcut. I could have left it square, but opted to turn it down to a more attractive circular shape. After finding the centre, mark out the shape with a marker pen taped to a pair of dividers.
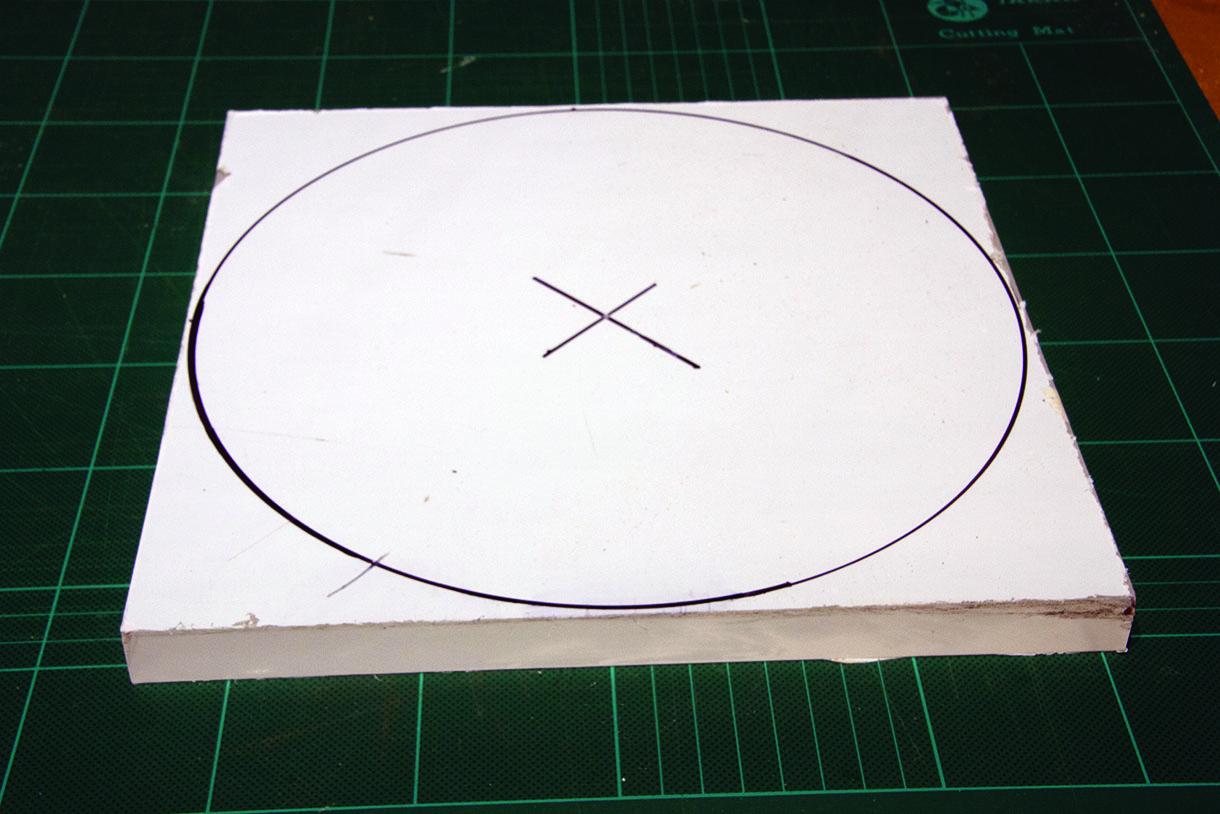
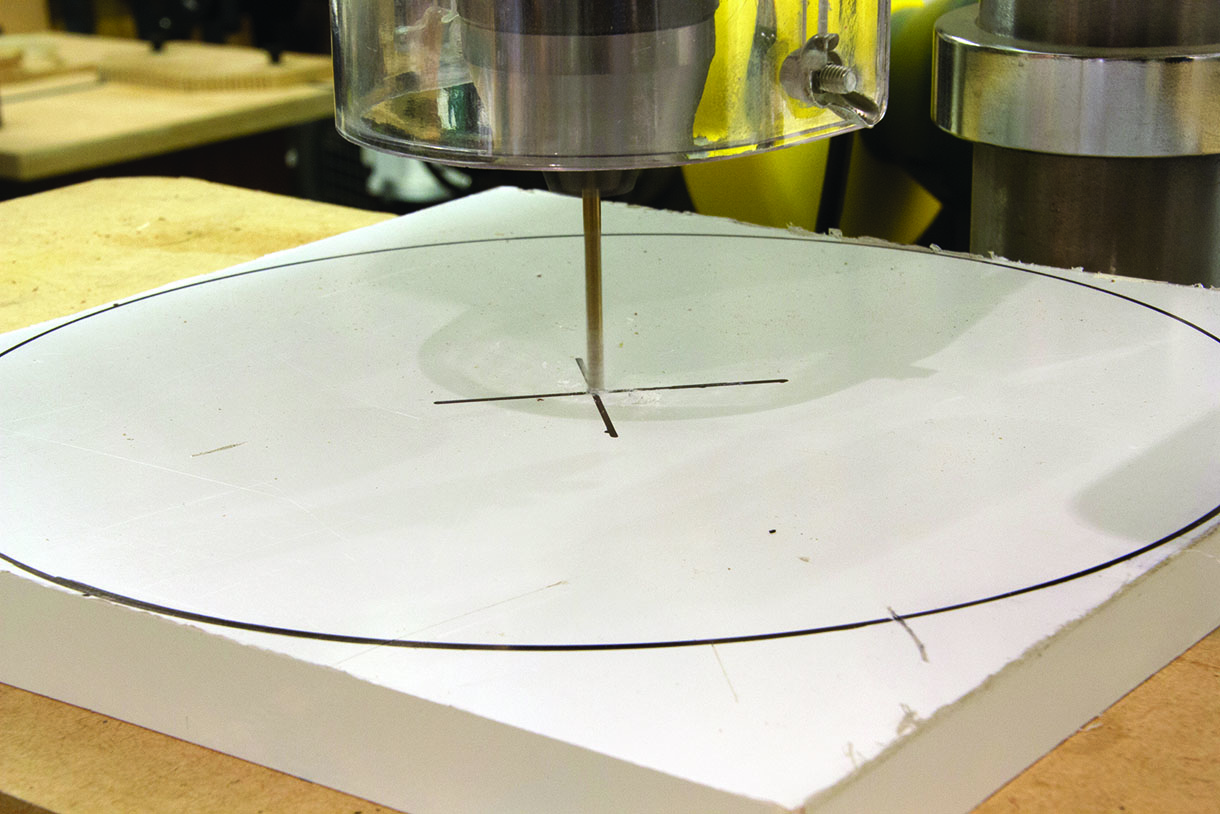
Using a 3.5mm drill bit in a pillar drill, bore a hole in the centre of the workpiece so that it can be attached to a jig on the bandsaw to be cut to shape. A narrow blade is needed in the saw to follow the curve without bending.
You could follow the line freehand, but setting up a jig ensures much greater accuracy. This simple arrangement consisted of a sheet of plywood clamped to the bandsaw table. I was then able to screw the workpiece using a 3.5mm woodscrew through the hole pre-drilled in the centre. Careful alignment with the blade is required.
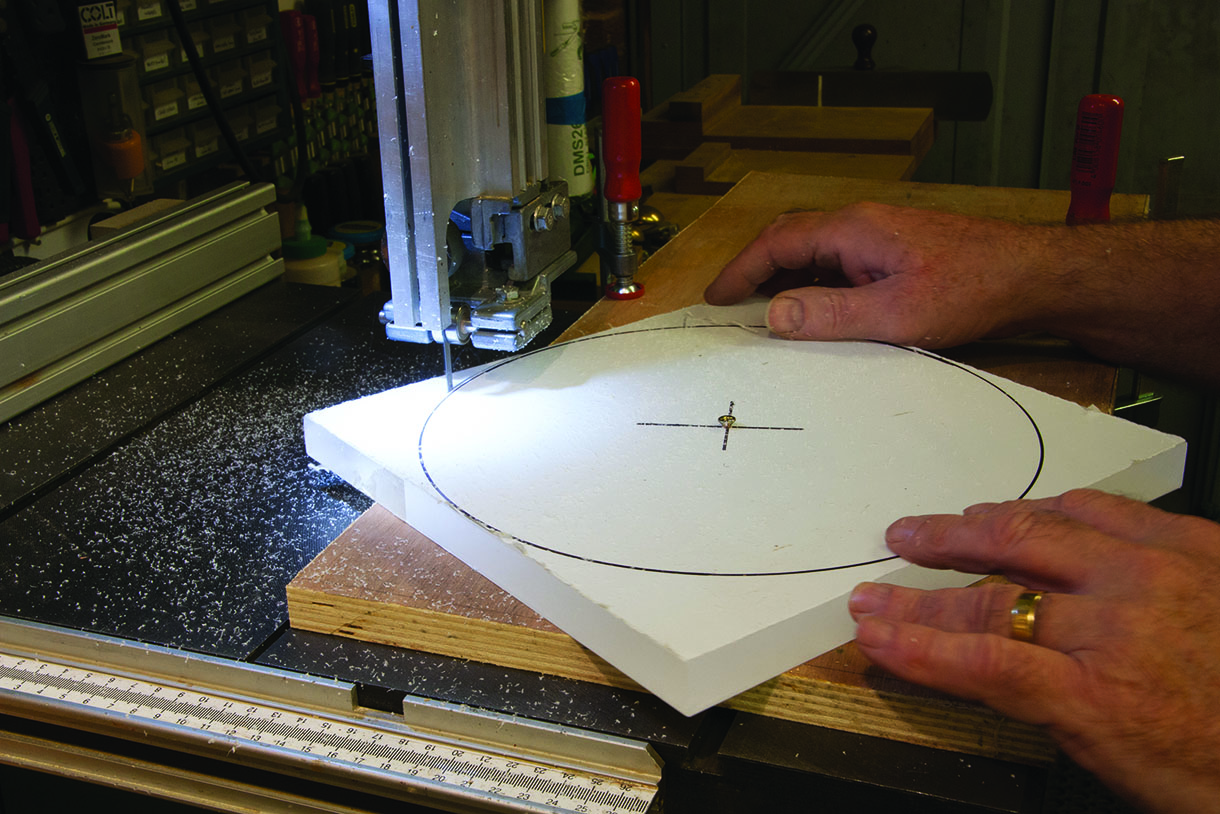
With the workpiece secured to the jig, turn on the saw and slowly turn the work into the blade to cut a perfect circle. Take care to keep your fingers well clear, turning the work by holding it at the side furthest from the blade.
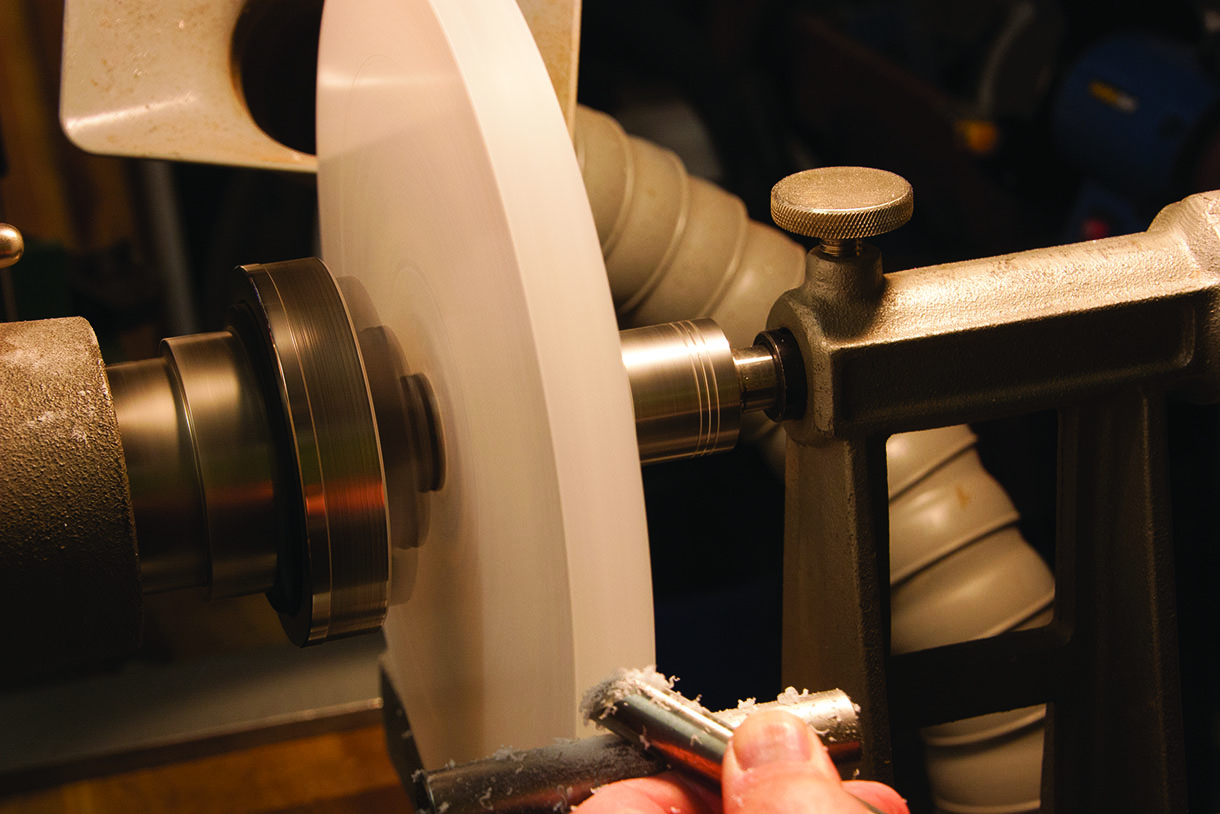
After completing the cut and removing the work from the saw, mount the Perspex on the lathe. I used the 3.5mm woodscrew as a mounting mandrel in a set of engineer’s jaws. These were fitted to a scroll chuck, and supported by a revolving cone centre in the tailstock. You can then tidy up the sawn edges with the wing of a bowl gouge, or whichever tool you prefer.
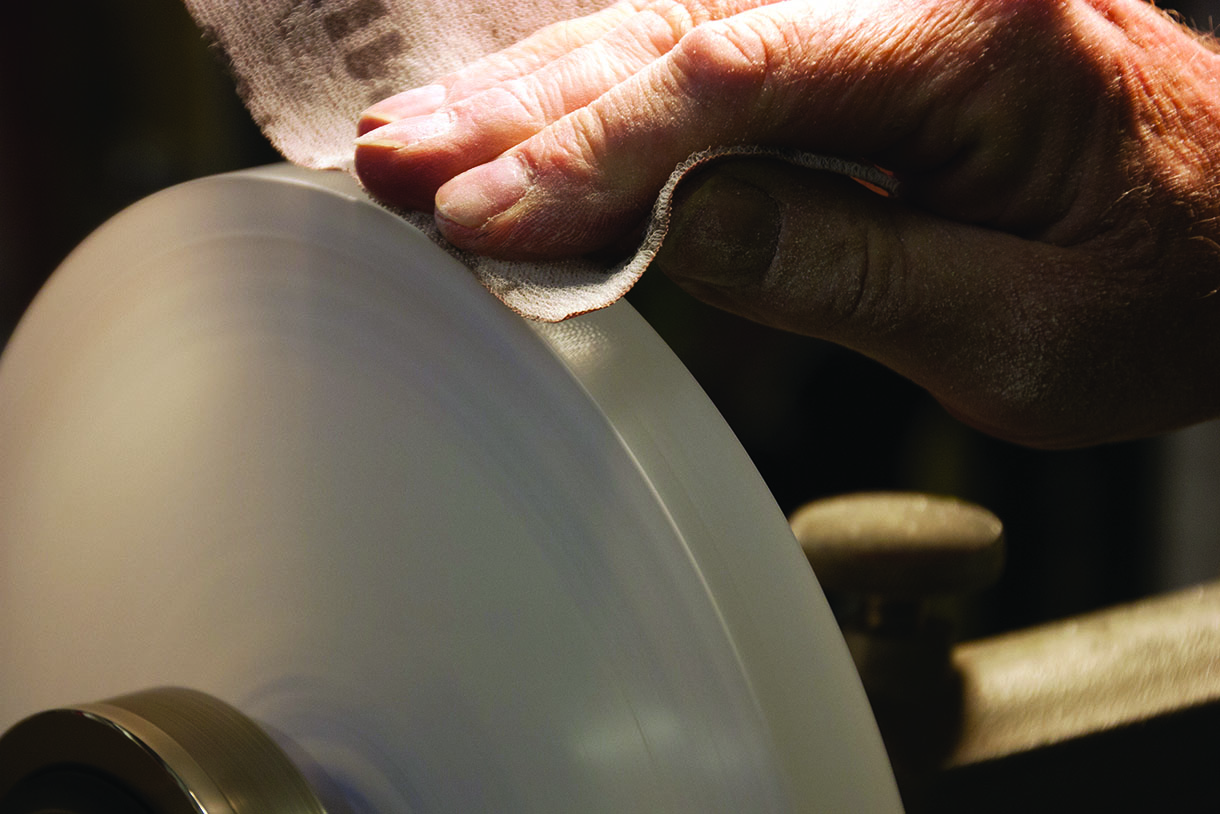
Sand the edge through the grits from 240 to 600. I used Abranet, but any good quality abrasive will do. The sharp edges can be rounded off too at this stage.
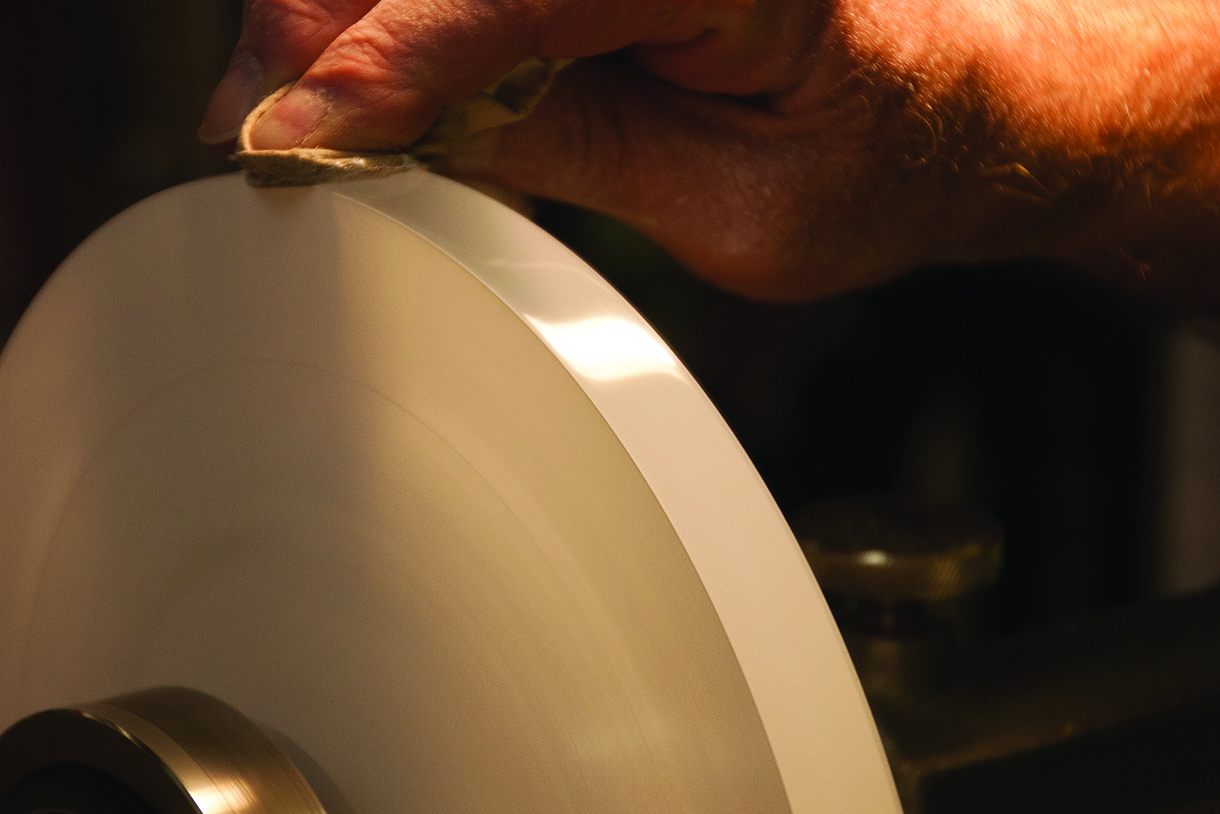
You could leave the edge with a matte finish from the sanding, but I decided to go for a more professional polished look. I brought the Perspex to a clear, glass like finish, with Farecla 300 and 500 polishing compounds.
Fitting the attachment to the lid
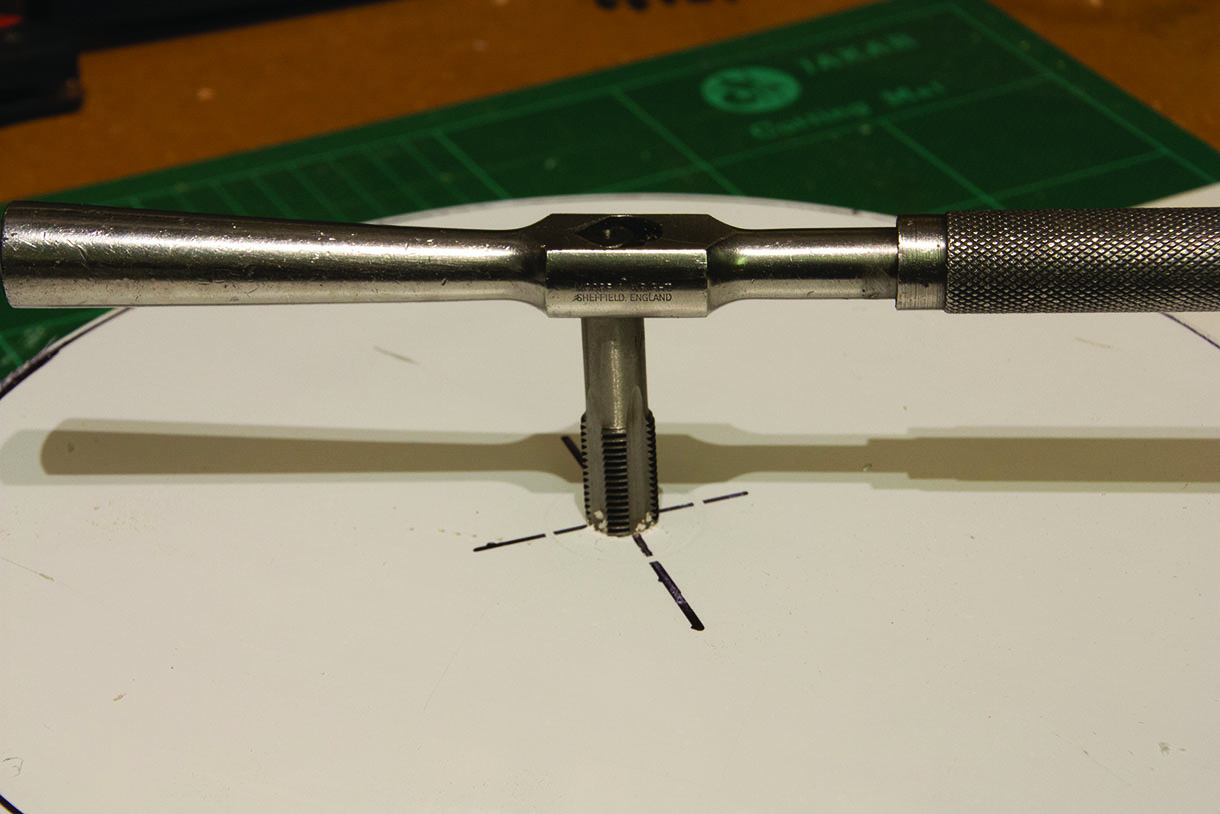
Remove the workpiece from the lathe and return it to the pillar drill. It can now be drilled out to 11.8mm, then tapped by hand using a ¼in BSP tap in a suitable tap wrench.
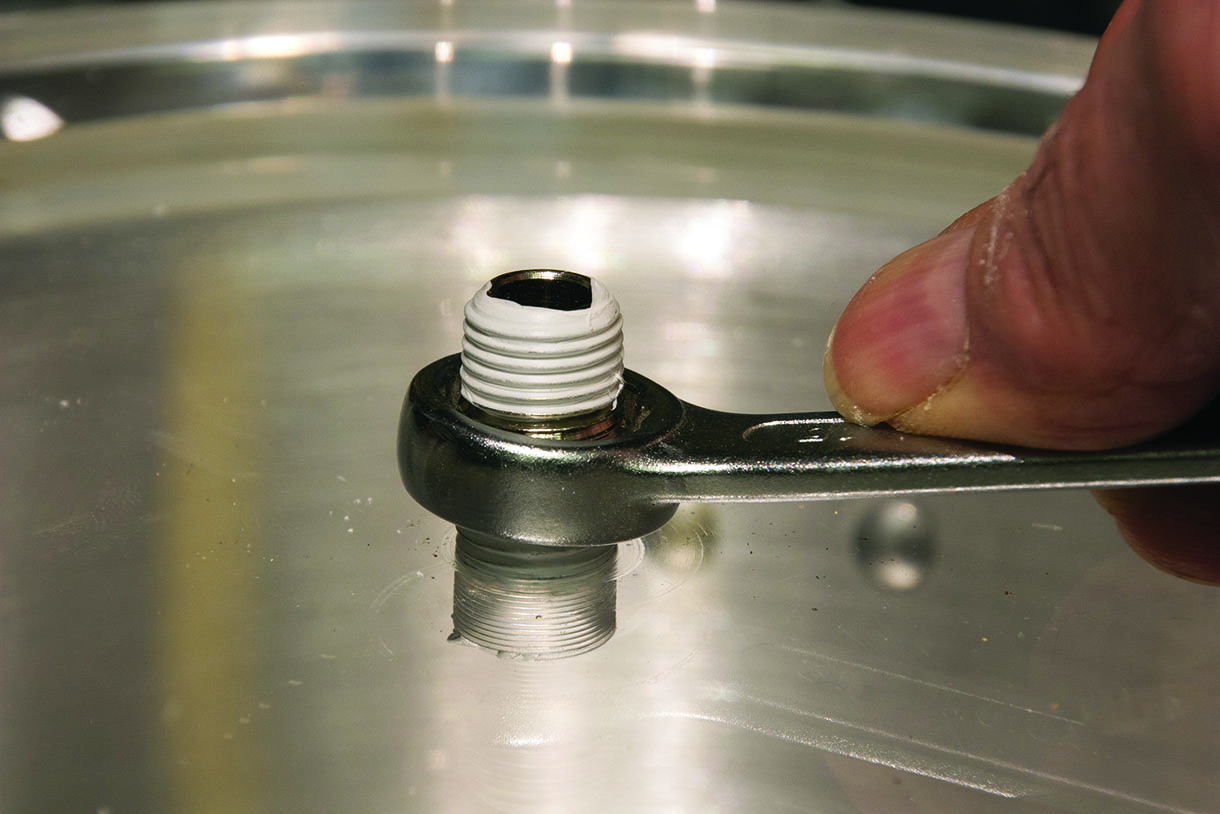
Begin the assembly by threading the straight connector into the tapped hole in the Perspex lid. Tighten it with a spanner sufficiently to ensure an airtight seal. Be careful not to over-tighten.
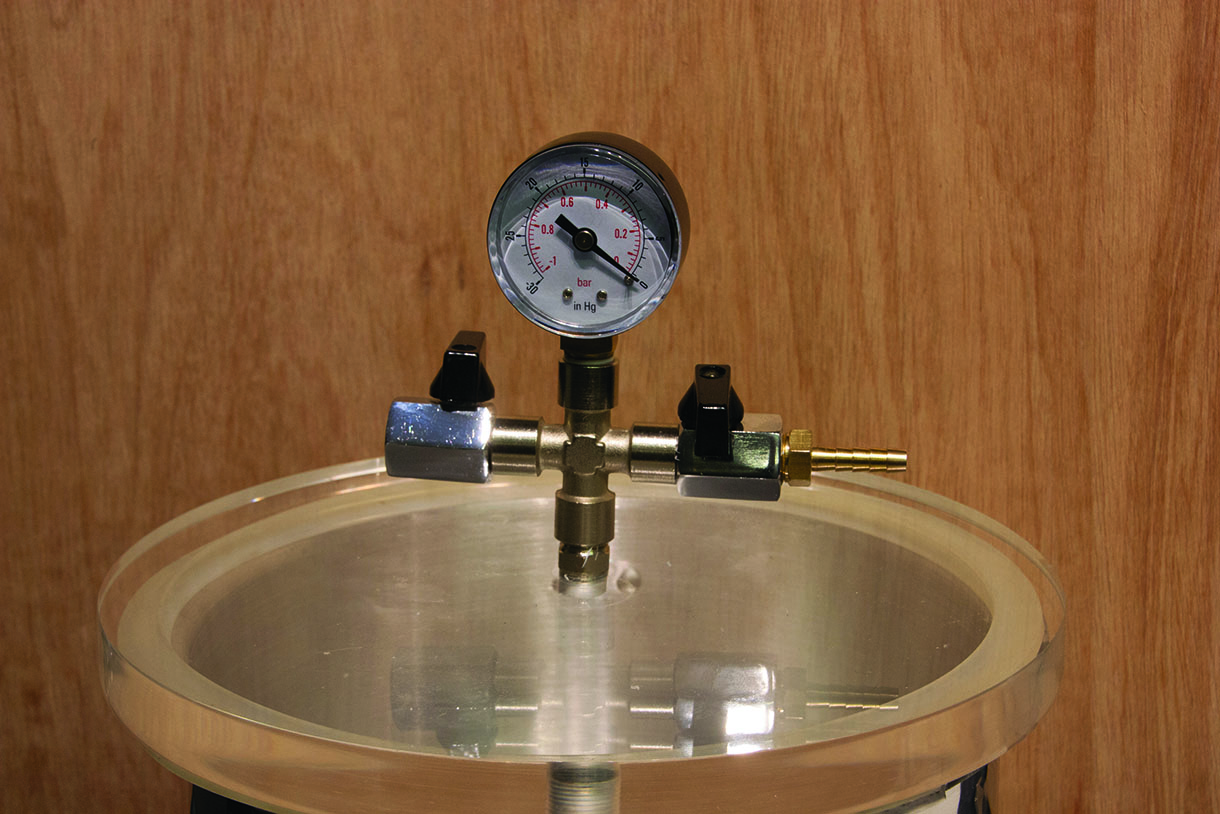
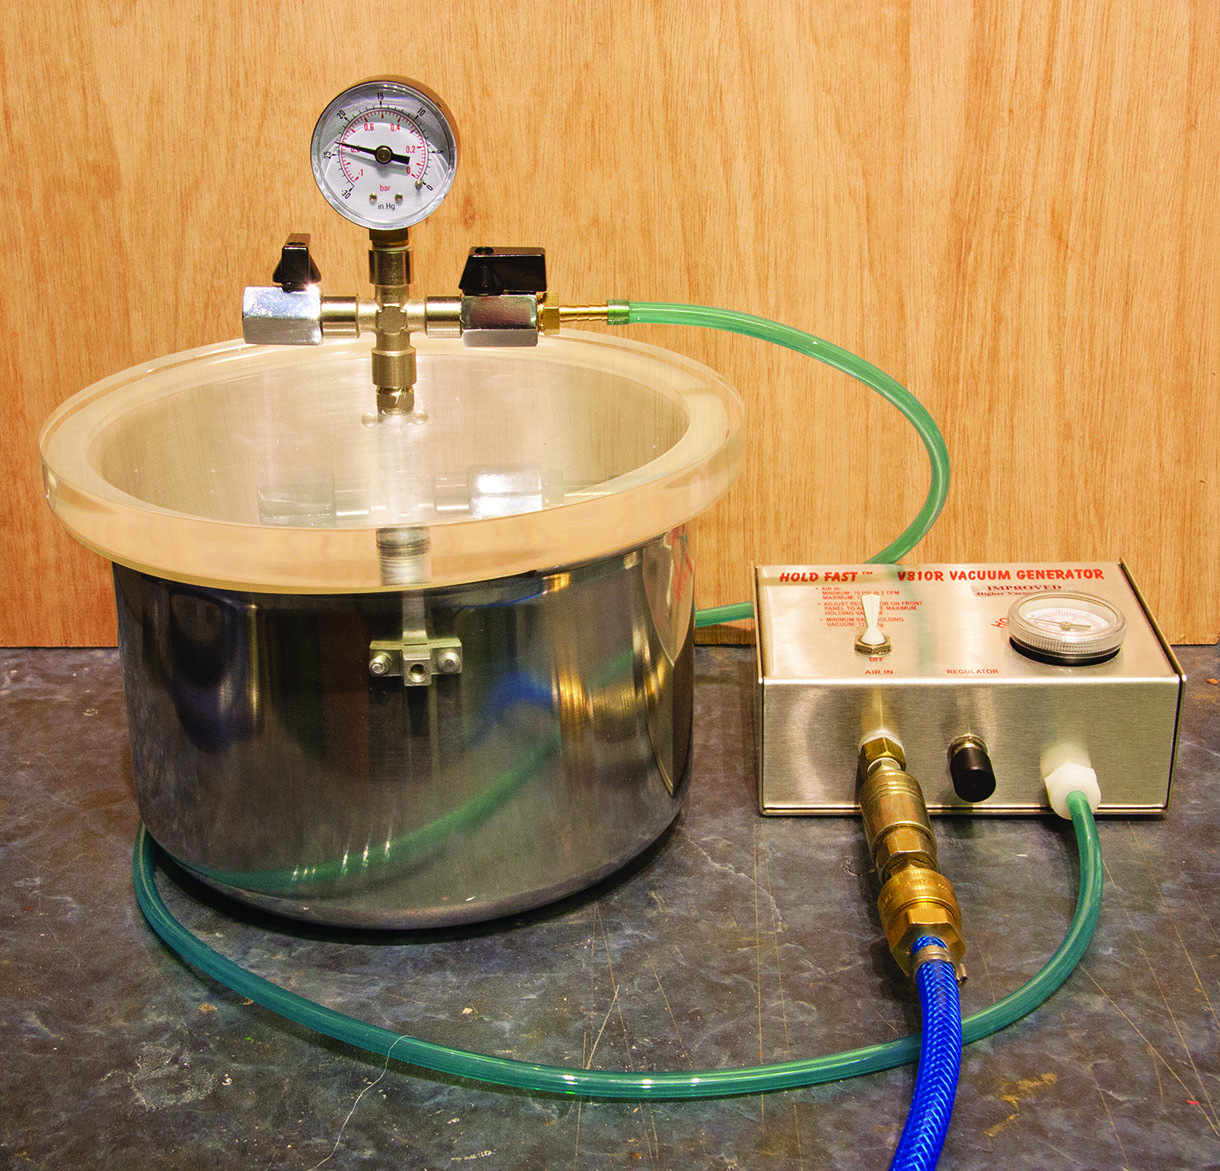
Assembling the other components
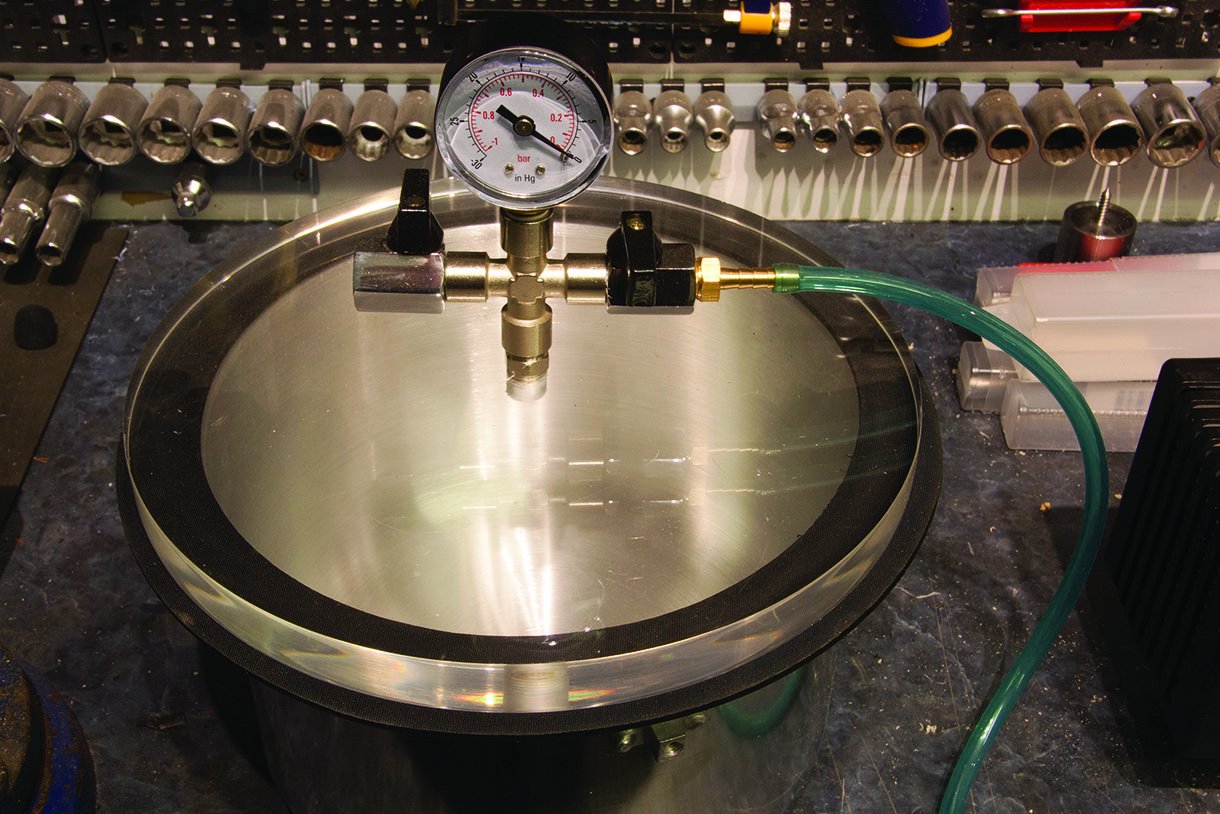
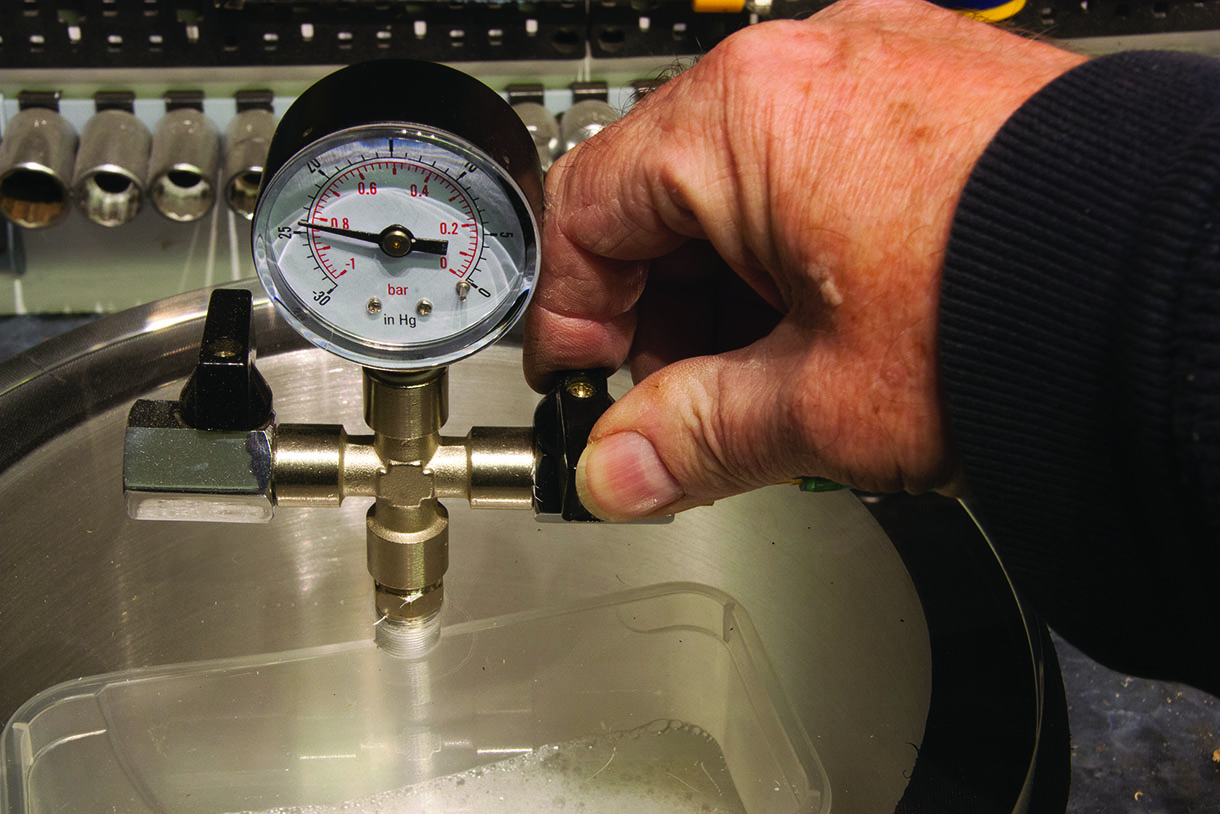
The remaining components are then assembled as shown in the photograph. It is easier to assemble the components to the cross piece first, and then attach the completed assembly to the connector already fitted to the Perspex lid. The lid is then fitted using the original seal from the pressure cooker as a gasket.
Time to test!
Connect the vacuum supply, and run up to its maximum to test the completed chamber. Then close the inlet valve, turn off the air supply to the vacuum generator and leave the assembly to stand to see if the vacuum holds up.
After 24 hours, the vacuum in my chamber had dropped from 25inHg to about 10inHg. In order to achieve a better seal, I replaced the original seal with a flat rubber sealing washer – typically used for industrial pipework. These are readily available in a wide range of sizes from specialist suppliers. You can omit this step if the original seal on your chamber is good enough.
First run
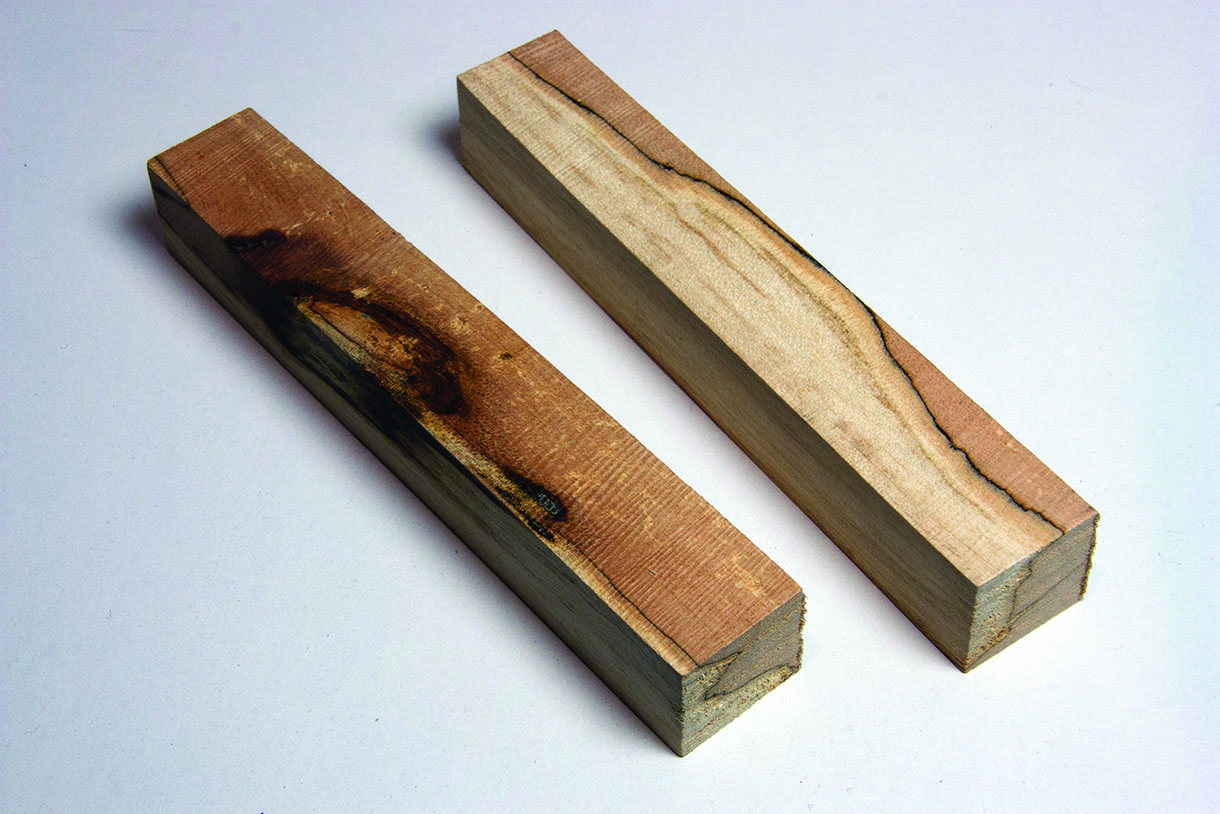
I decided to use a couple of pen blanks that had been cut from some soft horse chestnut (Aesculus hippocastanum), which was quite crumbly to turn.
Handy hints
1. Always read any instructions when using equipment. High pressure and chemicals make for a potentially nasty mix if things go wrong. Double check everything too.
2. Softer timbers, not dense close-grained ones – will yield the best stabilising results.
For larger pieces, such as bowl blanks, you could put the resin directly into the body of the chamber. For pen blanks, I use a plastic container to hold the resin. This reduces the amount needed, and makes cleaning up less of a chore. You only need sufficient resin to cover the blanks. Too much and it may overflow from the container under vacuum.
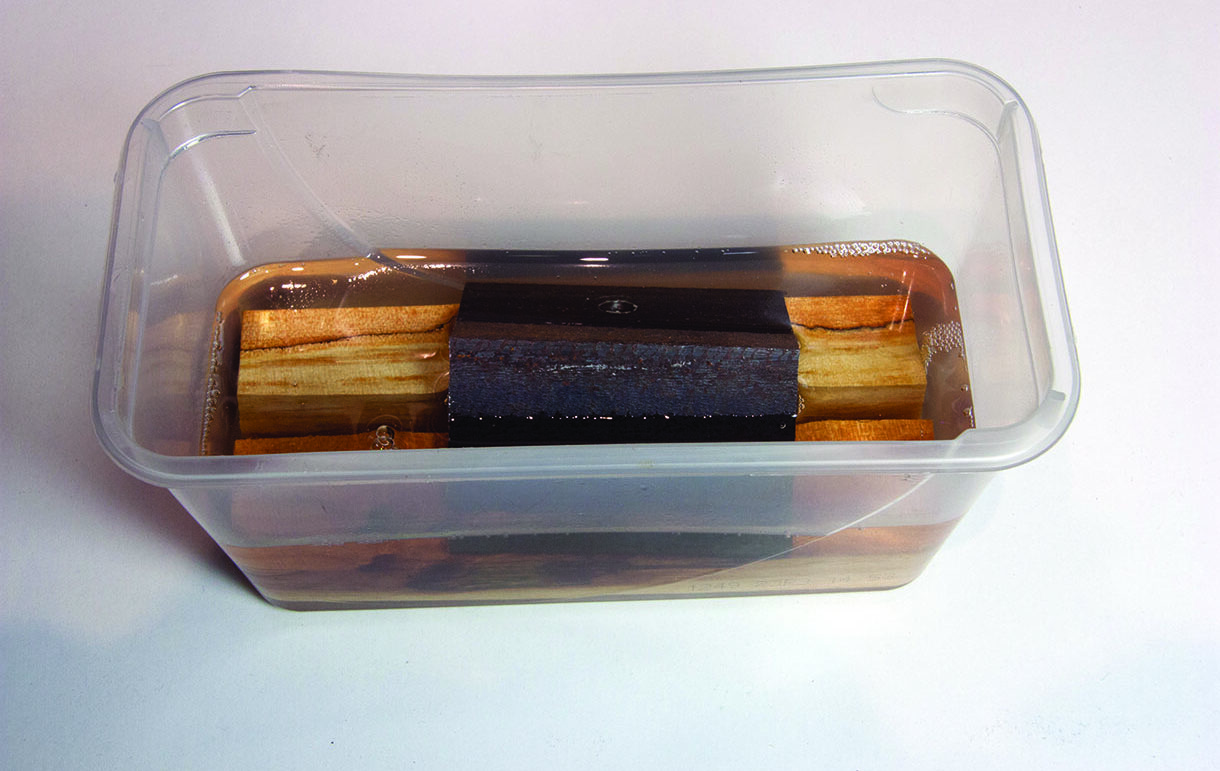
The container is then placed into the chamber, the lid is replaced and we are ready to apply the vacuum.
How to run the vacuum chamber
With both valves on the vacuum chamber closed, the airline and vacuum pipes are connected to the vacuum generator and the generator is turned on.
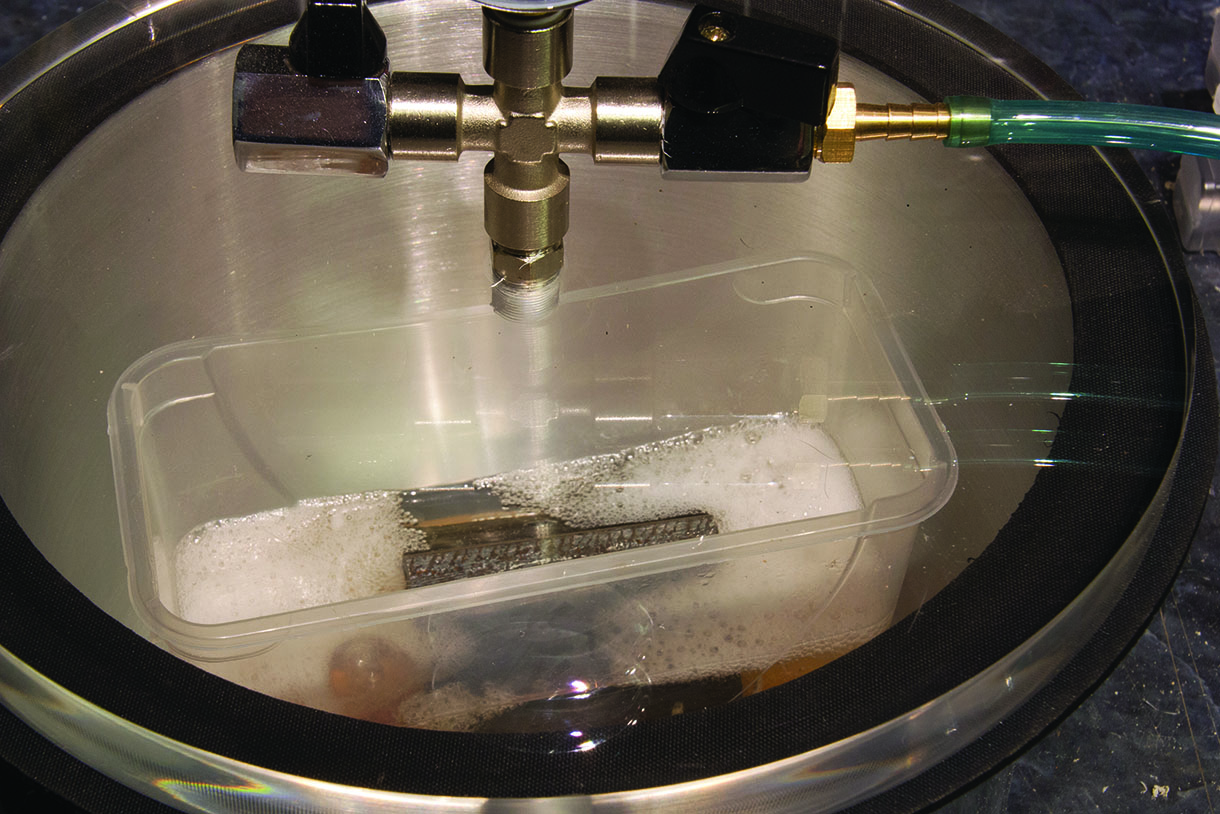
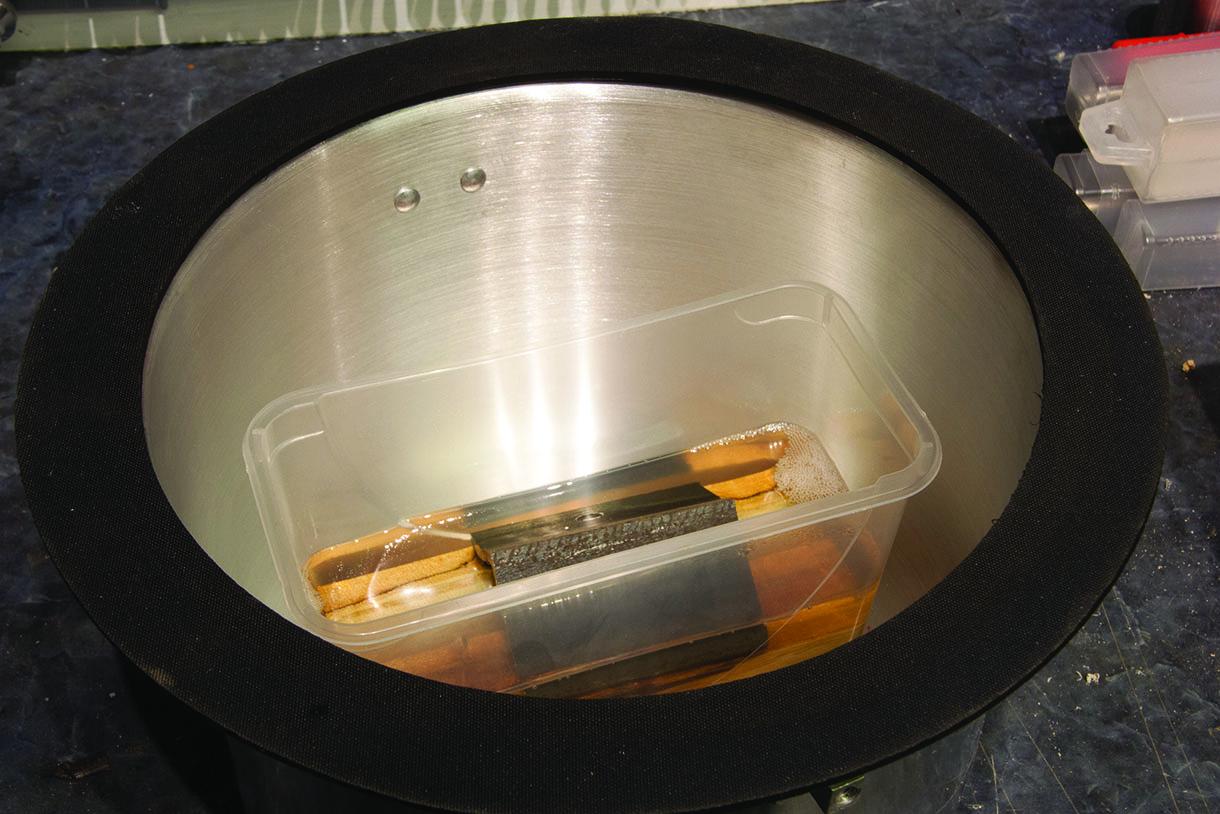
The inlet valve can now be gradually opened to allow the vacuum to evacuate any air from the timber and replace it with resin. This is done by adjusting the inlet valve gradually until full vacuum is achieved. You will see air bubbles coming from the blanks. I have opened the valve fully in the photograph so the bubbles can be seen more clearly, but gradually increasing the vacuum will avoid excessive foaming.
Once the maximum vacuum has been achieved, the inlet valve may be closed and the blanks left in the vacuum for the time specified by the manufacturer of the resin you are using. The vacuum generator can be turned off, but left connected in case the vacuum needs to be topped up. After the specified time the vacuum is released by opening the outlet valve, the wood can then be removed and treated in accordance with the instructions for your stabilising product.
Summary
A home built vacuum chamber is a great way to make your soft woods stronger, more stable and easier to work. Market ready versions are available, though not at an insignificant cost. If, like me, you like to have fun making things (typical of woodworkers), then this vacuum chamber is a great choice. It’ll keep your costs low, and enable you to customise your model to your own spec – especially useful for those testing the waters of this interesting corner of woodworking. So, give it a go for a weekend project. They are very useful gadgets indeed.
Further reading
Words: Walter Hall
One Response
Thank you for posting this!! I’ve been thinking of making my own vacuum chamber. I appreciate the details of how you went about it.