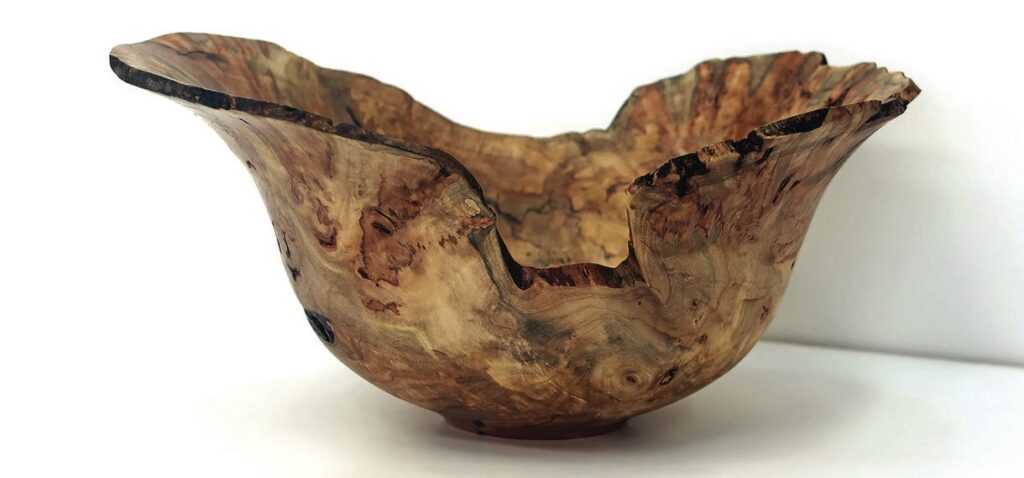
Alan Wasserman on working with less-than-perfect timber, using faults to your advantage
It can be said that turning the inside of a bowl is the easiest step. In fact, it is something that requires just as much care and attention as turning the outside, but also how we can use the imperfections to our advantage or at the very least, how to make them work to our advantage as far as filling, accentuating or disguising them.
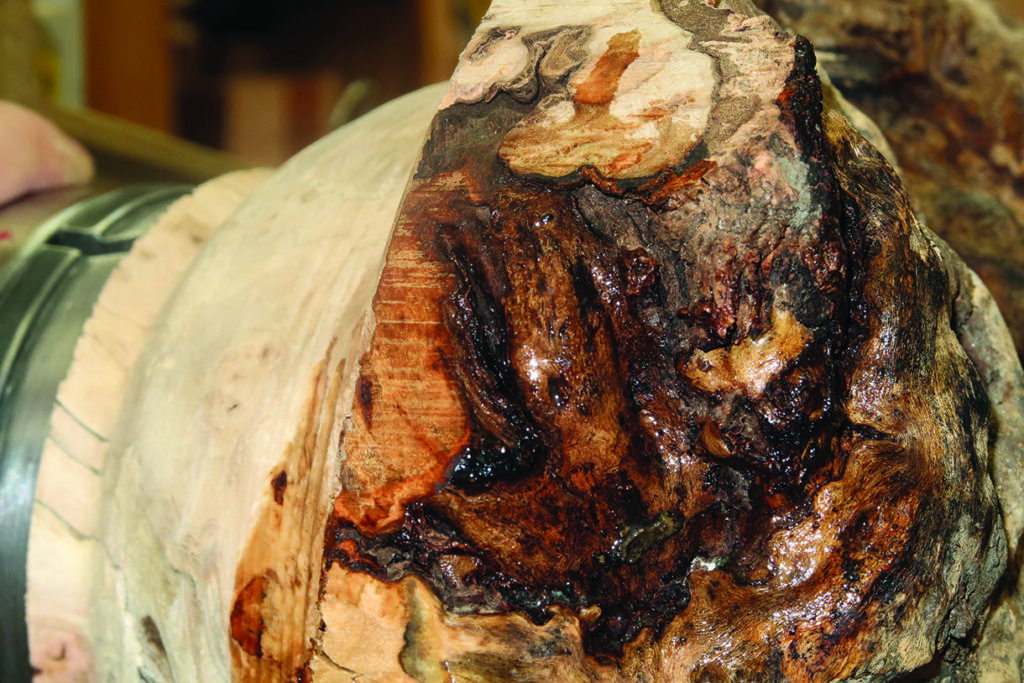
When one starts turning the inside, the full extent of the flaws and faults may be more serious than we thought. The internal timber which has supported the timber up until now is removed and these imperfections become a challenge. I am going to show you what to look out for and how to minimise the risk of things going wrong with your flawed wood.
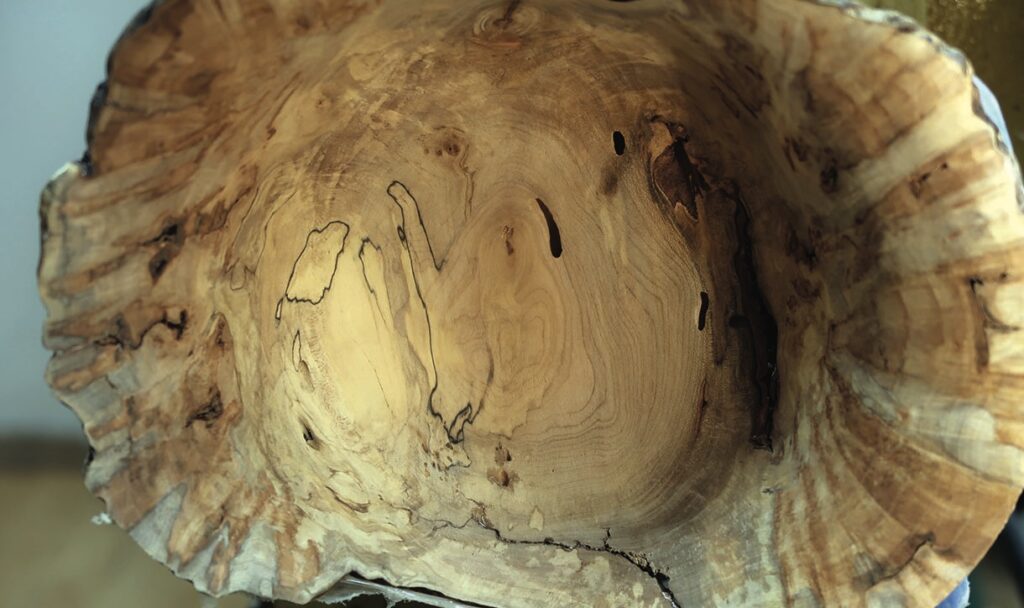
Since most bowls are made from face grain boards (end grain is not as structurally sound), it is such orientation that will be presumed and I will work with a burr. We all know that when turning burrs we are never quite sure what they will yield, so let’s explore this one and deal with what we find.
Safety first
• Always wear appropriately rated full-impact, full-face shield and dust mask as a minimum.
• Check the timber before working on it to see the degree of faults and make an honest call as to whether it is worth turning. If you decide it is, assess what measures you have to put in place to minimise the risk of something going wrong.
• Keep your fingers behind the toolrest at all times.
• Maintain constant pressure on the toolrest.
• Assure your holding option for the wood is secure and tight.
• Stay out of the line of fire (rotation) of the wood in case anything – bark chips, or other debris – flies off, or Heaven forbid, the bowl comes off.
• Always rotate the work to check it is clear of the rest prior to starting up the lathe.
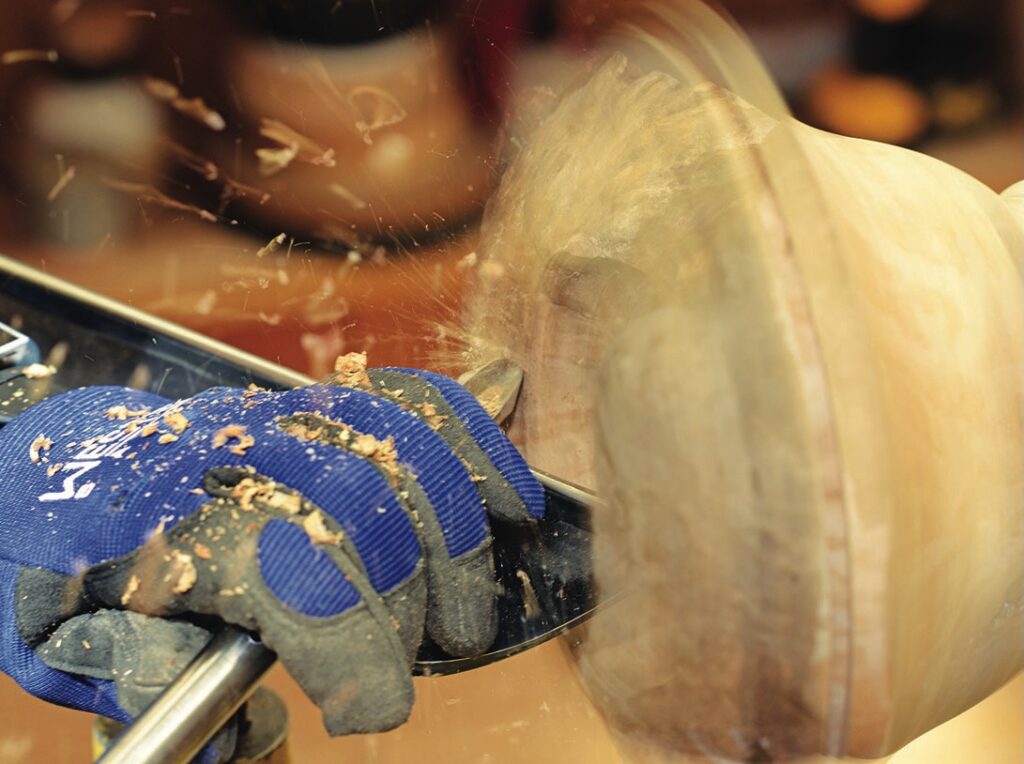
• It is controversial for some, but wearing a tight-fitting glove on the hand with the tool blade nearest to the work can protect the hand from debris, chippings and the heat generated when cutting a dry piece when turning. This hand is not going to come into contact with the work, so there are no safety issues, but it can save cut fingers or sore hands when rough shaping.
• Stop the lathe regularly and check the progress of the work, and also inspect the wood for faults.
• Listen to the work. We all know that we can hear sound changes as the wood is cut. If something sounds different, stop the lathe and check what is happening.
• The recommended speed charts for turning work are all well and good as guidelines, but when working with timber that is flawed, slower is better.
Tools
I prefer a swept back grind 16mm bowl gouge for most of the hollowing process. If the imperfections are drastic, I go down to a 13mm or 10mm bowl gouge. Switching to a conventionally ground gouge with a shorter bevel for the lower sections of the bowl which will help at the transition down to the centre cut. A heavy negative rake round or curved nose scraper is useful in blending in the stepped stages of your turning to remove any small anomalies prior to sanding.
Holding your work
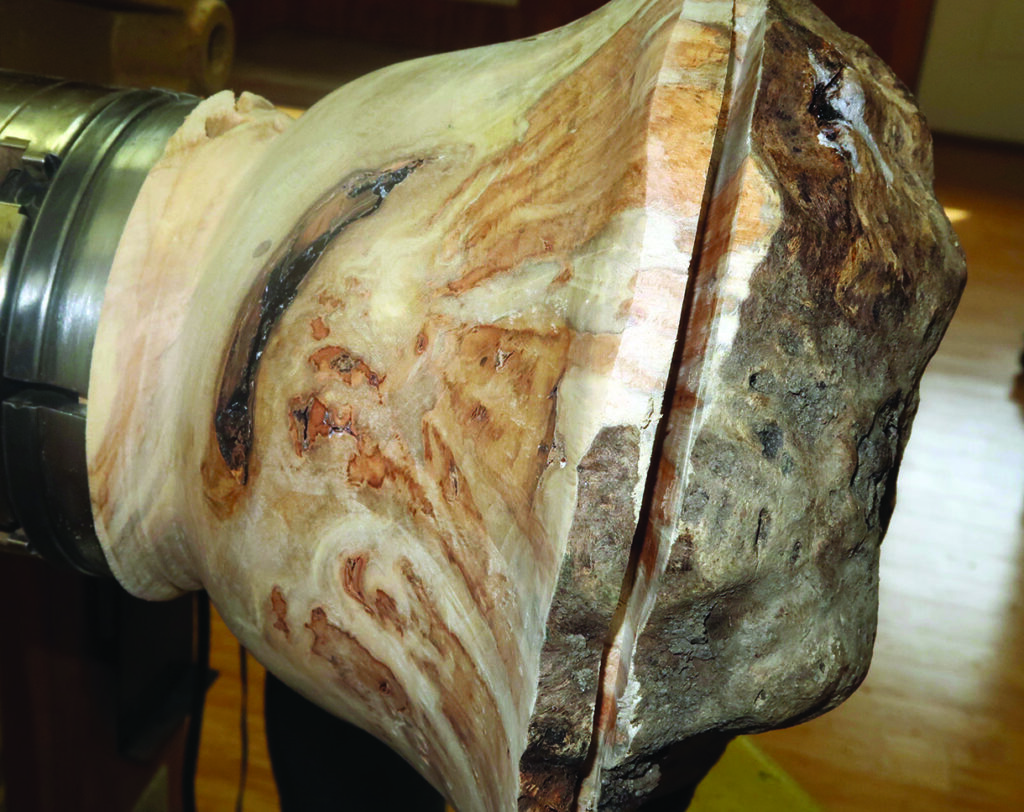
Thoroughly inspect your selected piece of timber for condition. You can get an idea, but not wholly know what will be finally revealed. Check all over to see if there are any immediately evident faults or even hints of them. Also, work out what part to cut or how to orientate it to get the best shape or timber from it.
If you are working with a pre-dimensioned blank it will be easier to see faults than working with the burr section I am here. You need to work out what shape you wish to create or what shape you can create from the wood you are working with. You also have to work out the wall thickness you want. Experience has taught me that the only people interested in really thin work (say 3mm or less) are turners. The buying public usually pick up a piece and if it feels right weight-wise and is fit for the purpose they intend to use it for, then it is right.
In the case of burrs and utilitarian work, a thicker wall thickness is often preferred. Of course, the more imperfect the work, the better it is to err on the side of having a thicker wall.
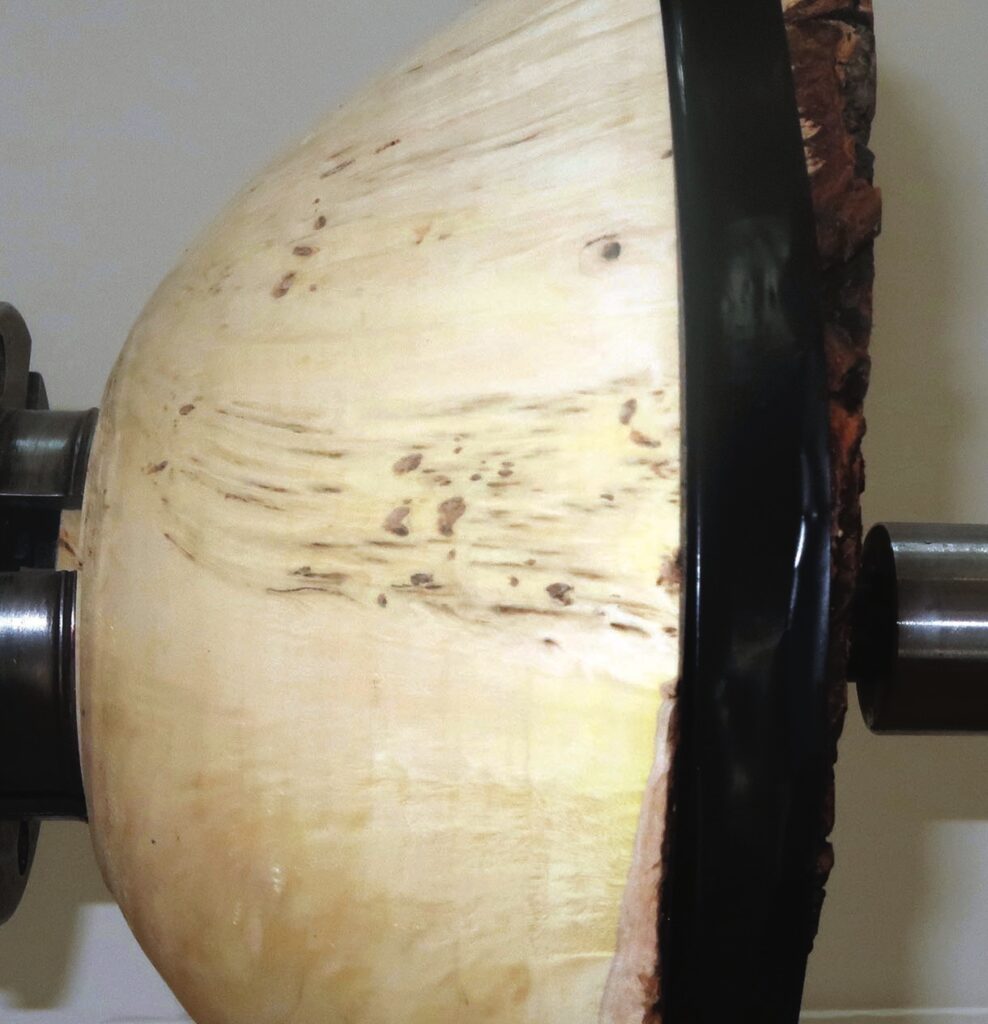
Once you have a rough idea of what you want to do with the timber, you need to work out the best holding method to use. You can use faceplates, screwchucks and the between centre-holding method – like on spindle turning – to initially hold work when shaping the outside.
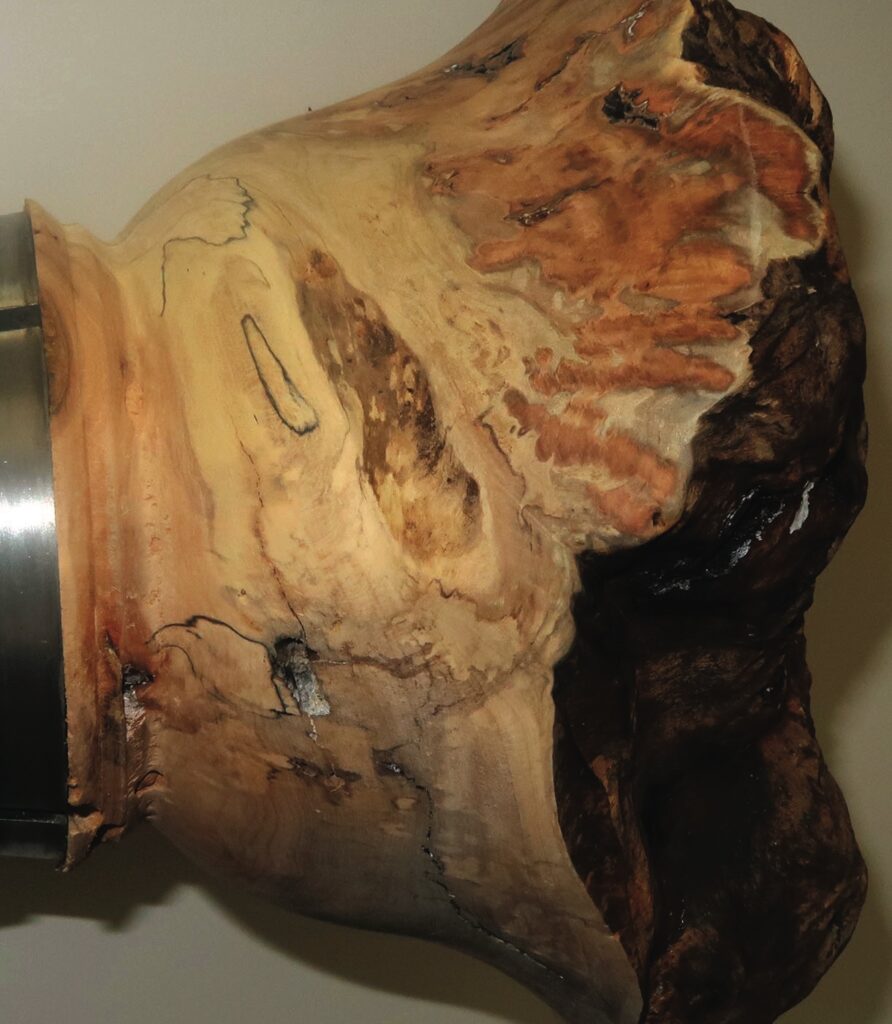
The faceplate method of holding the lower section of the blank while turning the inside is effective, but more wasteful on timber. I prefer to hold work in a chuck so turned this burr between centres and created a spigot to suit my chuck that is large enough to provide support without any lateral movement in the work. While you turn, learn about how the wood is cutting as well as observing it. Note whether it is soft in some areas, has cross grain that is prone to pull out, and what faults appear.


The outside
Knowing the faults and problems encountered when turning the outside can indicate some of the potential problems with turning the inside section. A 13mm or 16mm bowl gouge will work well for the initial shaping of the bowl.

Defining the rim section
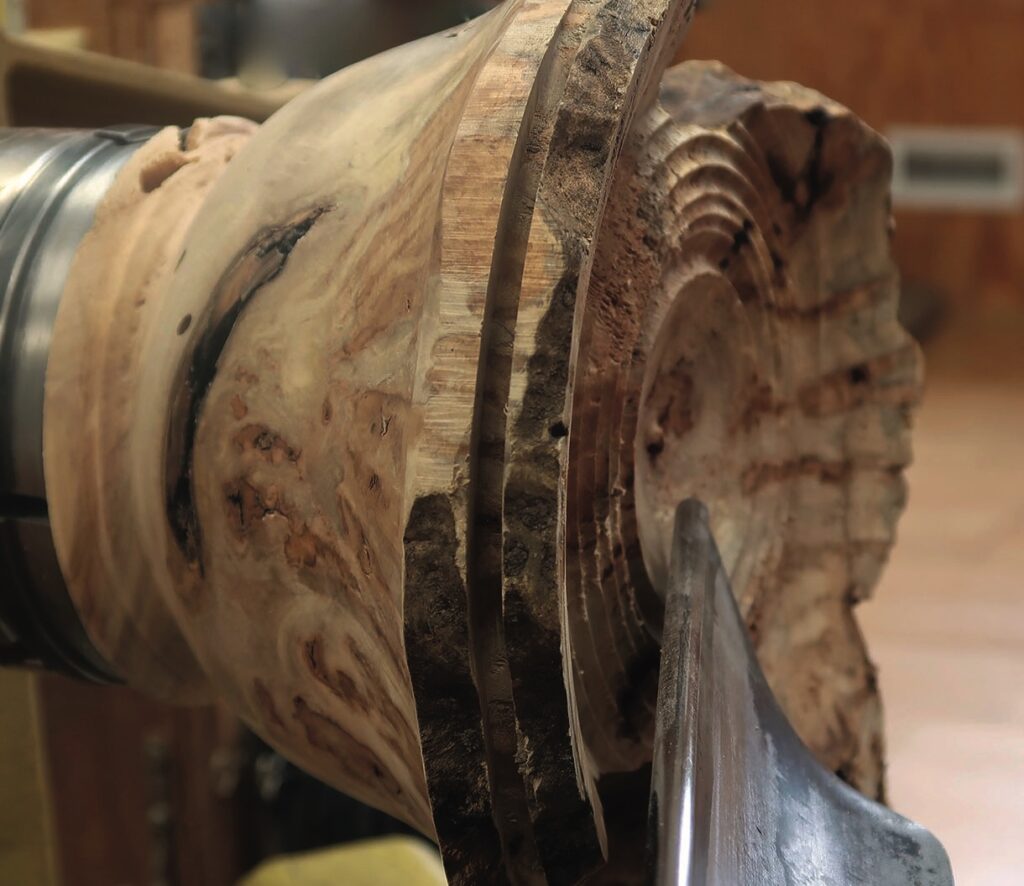
With any bowl, the rim section is defined and turned first when one starts tackling the inside of a bowl. Trying to do this after the bulk of the wood has been removed will result in movement of the wood and more vibration than working down in sections will. This is particularly true with inperfect or natural-edge work.
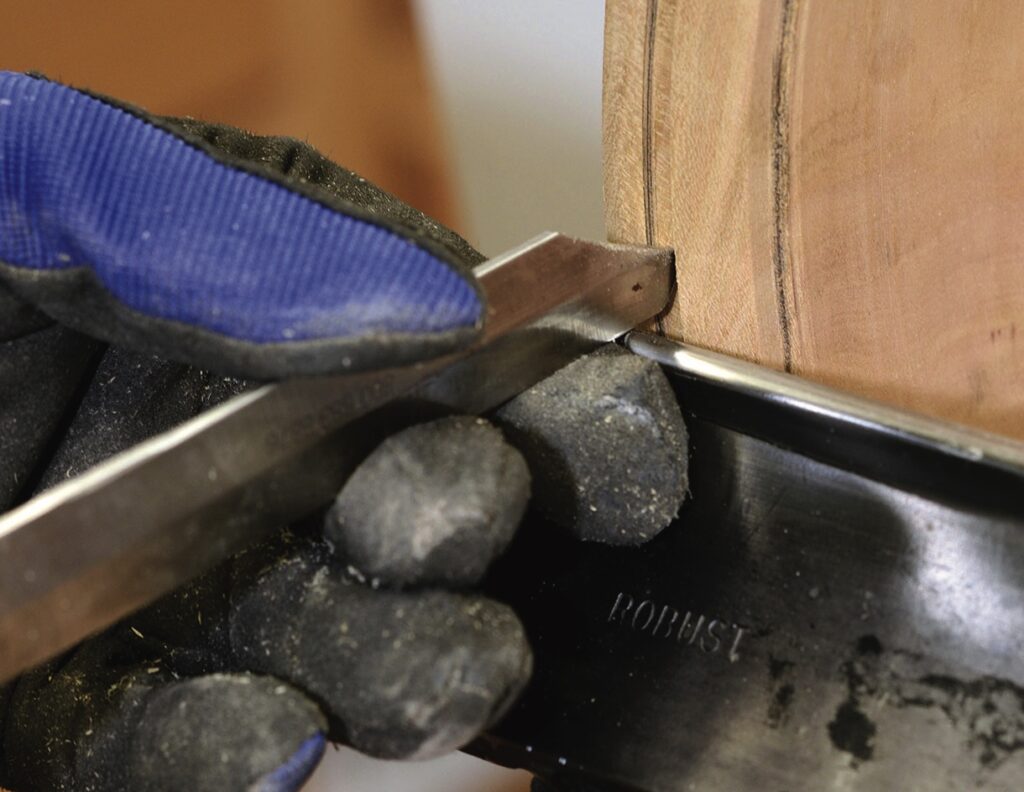
During your initial hollowing – removal of a small section of the middle of the wood – and as you get closer to the rim, you must have complete control of your entry cut or the tool will run off the side of your work and deface your rim. The solution to this problem is simple and can either be achieved with a safety cut with a parting tool or by using your thumb, preventing the tool from sliding.


Supporting work
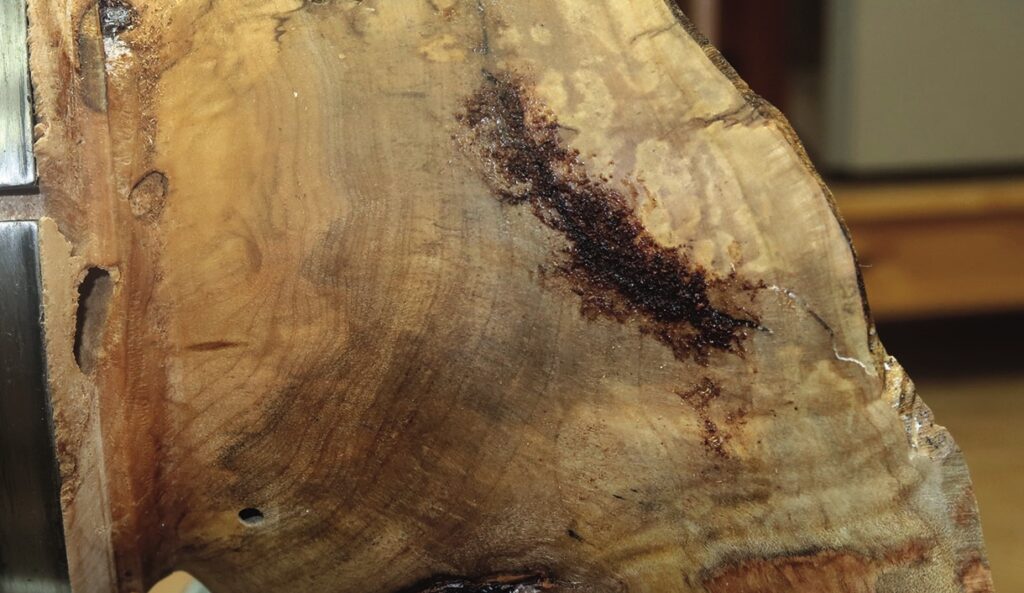
Depending on the imperfections of your bowl, you may need to implement a procedure or two to support the bowl while turning the inside. We have already established there are cracks, fissures and voids in this piece but as we turn further inside the bowl, the side wall has no support and can move or, if the voids or cracks are major, can come apart while turning. This is something no one wants to see happen but we can minimise the risk of this occurring.
NB: whatever method you use from the list below, or even those similar in nature, never try to gauge the wall thickness with measuring equipment, fingers or by slowing down the work with hands while the work is running. You will get grabbed or dragged down from the postal wrap, caught in wire, hurt from glue blobs and so on.
You have various options to secure or stabilise the wood while turning the inside. Here are a few options to think about that will give support – to varying degrees – while turning the inside.
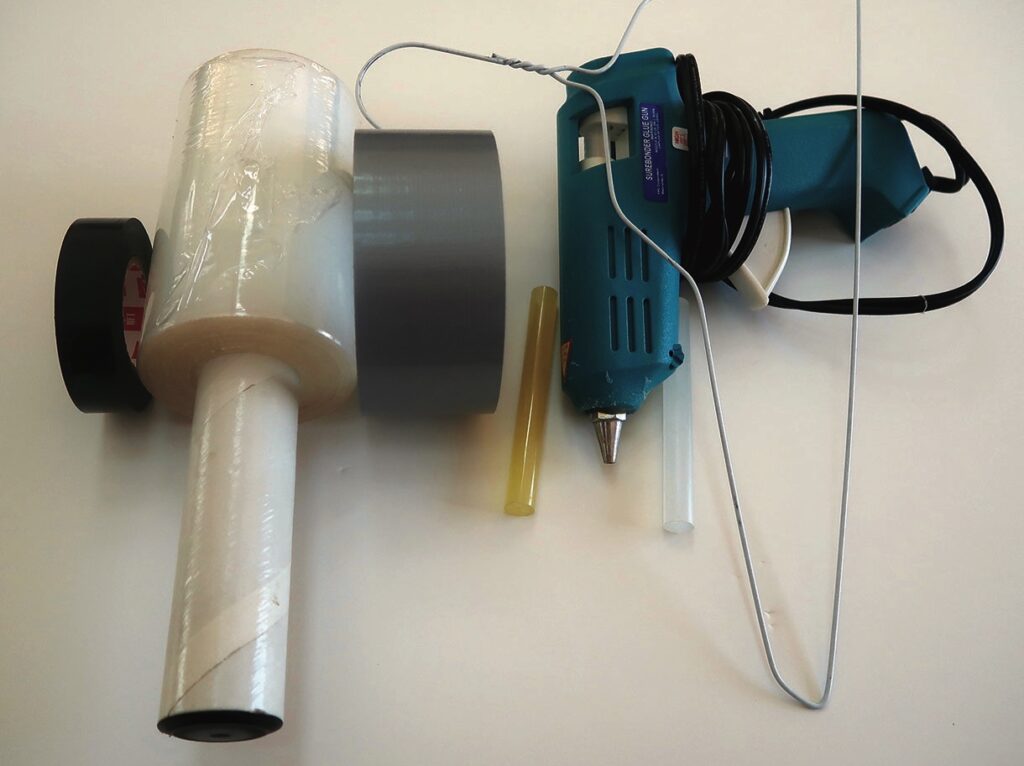
• Electrical tape: this has elasticity that will allow the tape to stick around curves in most situations
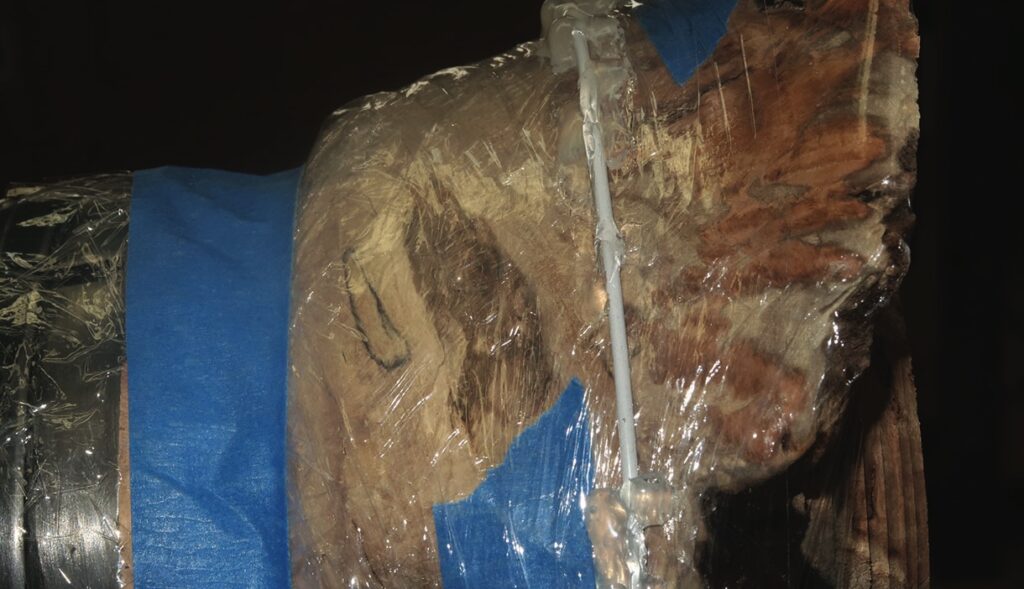
• Postal wrap: this is a self-bonding material that can be wrapped around turnings. It acts as a binding that supports the work while you turn it. So, if a crack opens up the piece is supported and unlikely to fly apart. It is important to ensure that you wrap in the opposite direction of rotation of the lathe so it cannot unwind, and also make sure the wrap does not overlap the rim. It is advisable to secure the wrap with painter’s tape along the top side, especially towards the rim as you wrap, otherwise it will not stay in place when turning
• Wire: simple coat-hanger wire can be wrapped and twisted tight around the outside near the rim or on the main body. You will need to hook it together, but there is a risk of the wire not staying in place. Use hot-melt glue spots to hold it in place and tape over the wire with electrical tape to shield the wire join and also help hold it in place and postal wrap across the piece too.
Once everything is secure, turn the inside as one would any bowl, but stop frequently to check the hold of the supports and see what faults become evident, in case you need to introduce more support. To minimise tear out and damage, use a smaller gouge with a light gentle cut. Slow and gentle is the order of the day with such timber. Whether you use a scraper after gouges is up to you.

Dealing with faults
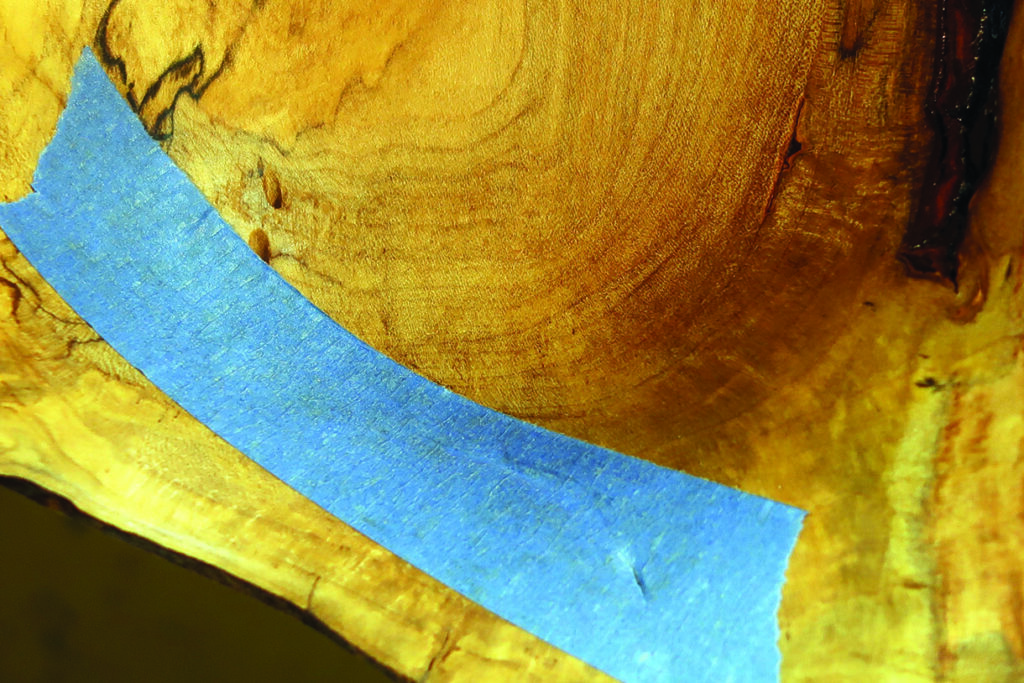
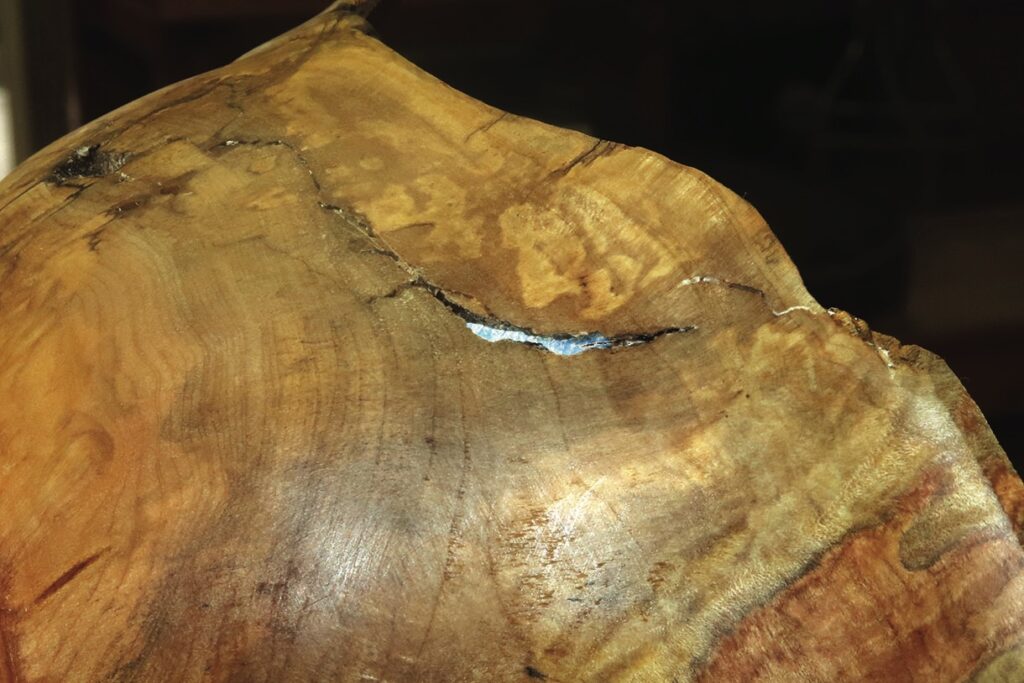
The inside surface showed some minor faults of a few cracks. These can be tackled using using the methods shown in the last issue. In this case, tape was placed on the inside face and the outside filled and then once set, the inside section was filled. Once cured, the piece was sanded on the inside and then removed off the chuck, remounted between centres. The tenon was turned off and the work sanded. After this, the chucking tenon was shaped to create a foot. Once everything was clean and sanded it was finished with a low-lustre oil.


Conclusion
There are many methods of turning the inside of the bowl and, as we discovered in the last issue, various ways of dealing with cracks and anomalies. The main thing to remember is to support your work as much as you can and work as safely as possible if you are using less-than-perfect timber. It can be great fun and very rewarding, but it is fraught with problems that need dealing with effectively, so that you can be both safe and successful.