You can buy Routing for only £20/ $28 (+P&P)! Usual RRP £25 / $35
🇬🇧 For UK readers, visit giftstome.co.uk and use offer code R5969
🇺🇸 For US readers, visit IndiePubs.com and use offer code IPP4017
Offer ends 1st December 2025
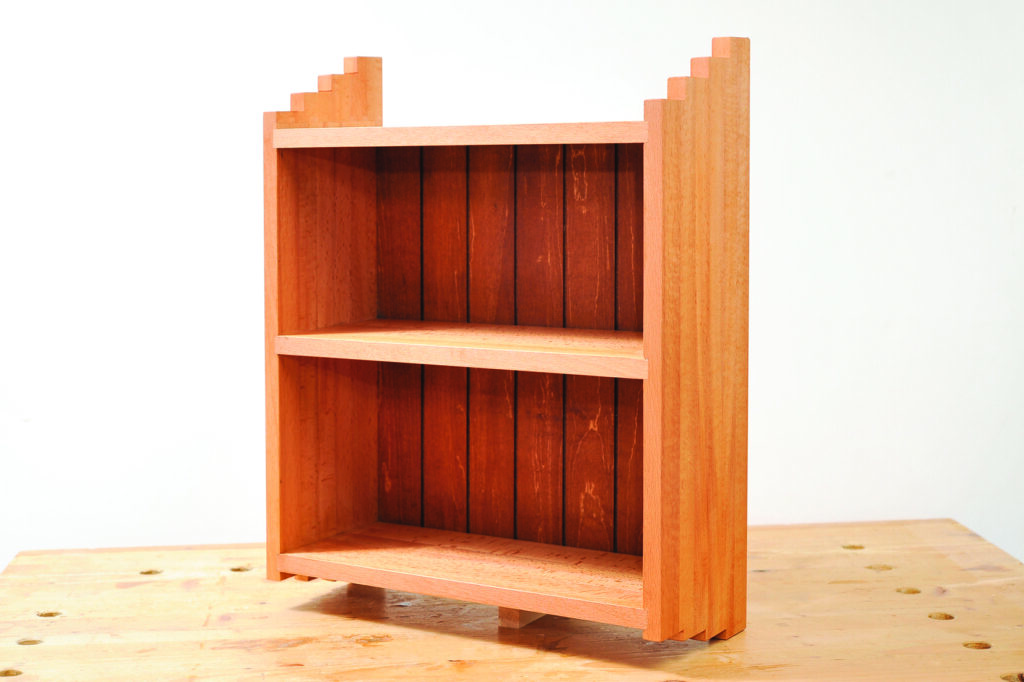
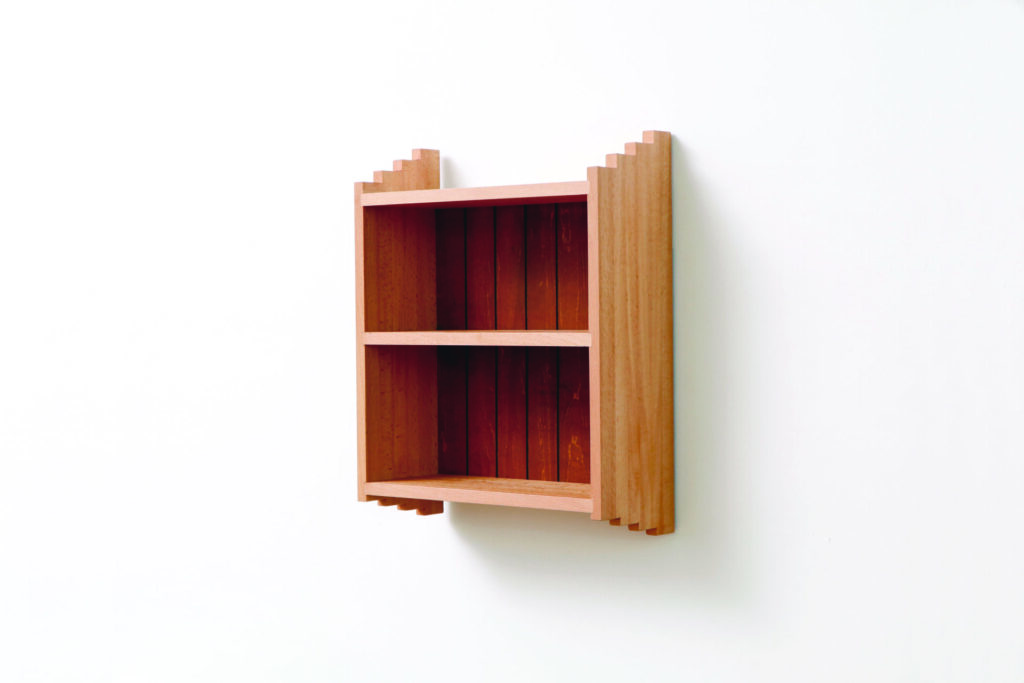
In an extract from his book Routing, Toyohisa Sugita uses half-blind rabbet joints to build a box that can be used as a shelf
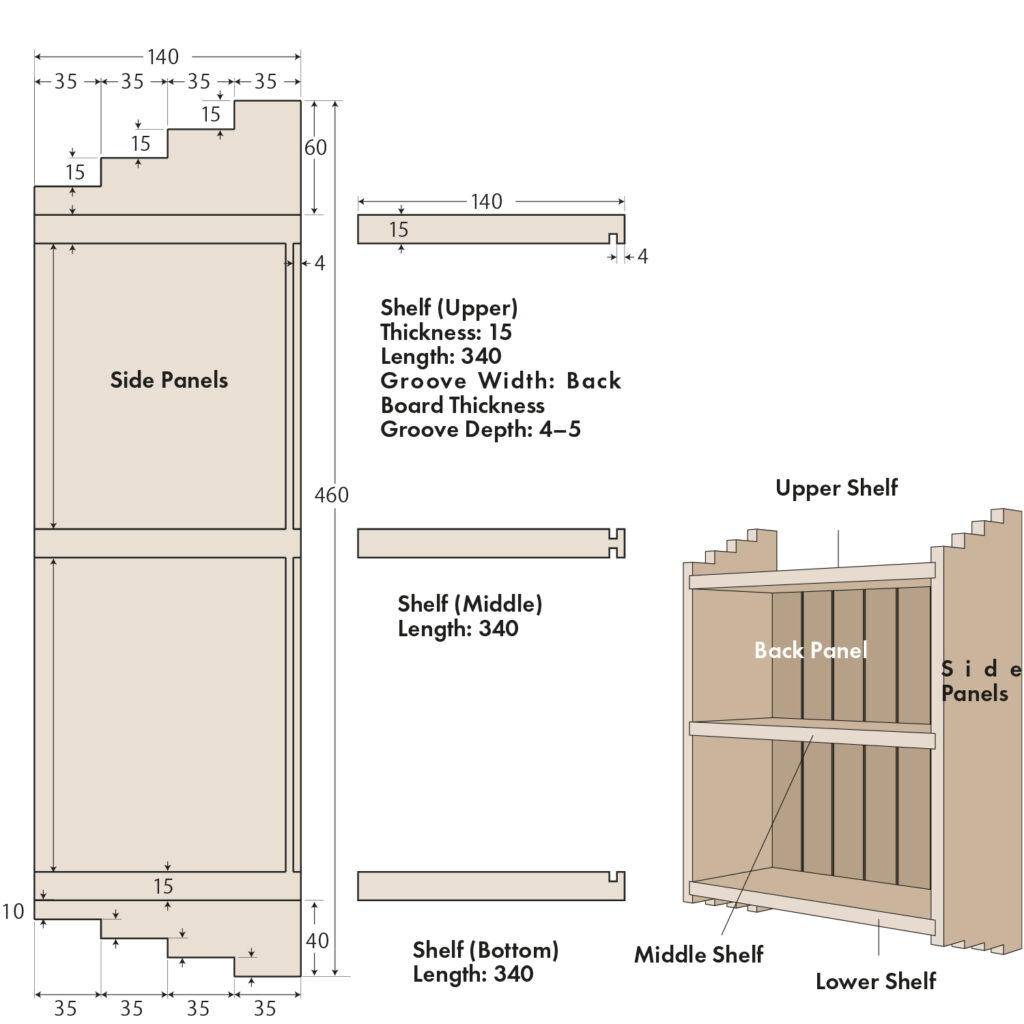
- Wall-mounted shelf dimensions
- Setting sliding fence to shelf board thickness
- Processing dado grooves/setting bit depth
- Cutting side panels
- Dry fit
- Correcting grooves
- Adjusting a shelf if it doesn’t fit
- Processing the back panel groove
- Setting the trimmer bit depth
- Back panel
- Colouring the back panel
- Decorative side treatment
- Gluing
- Finishing
- Painting
- Further reading
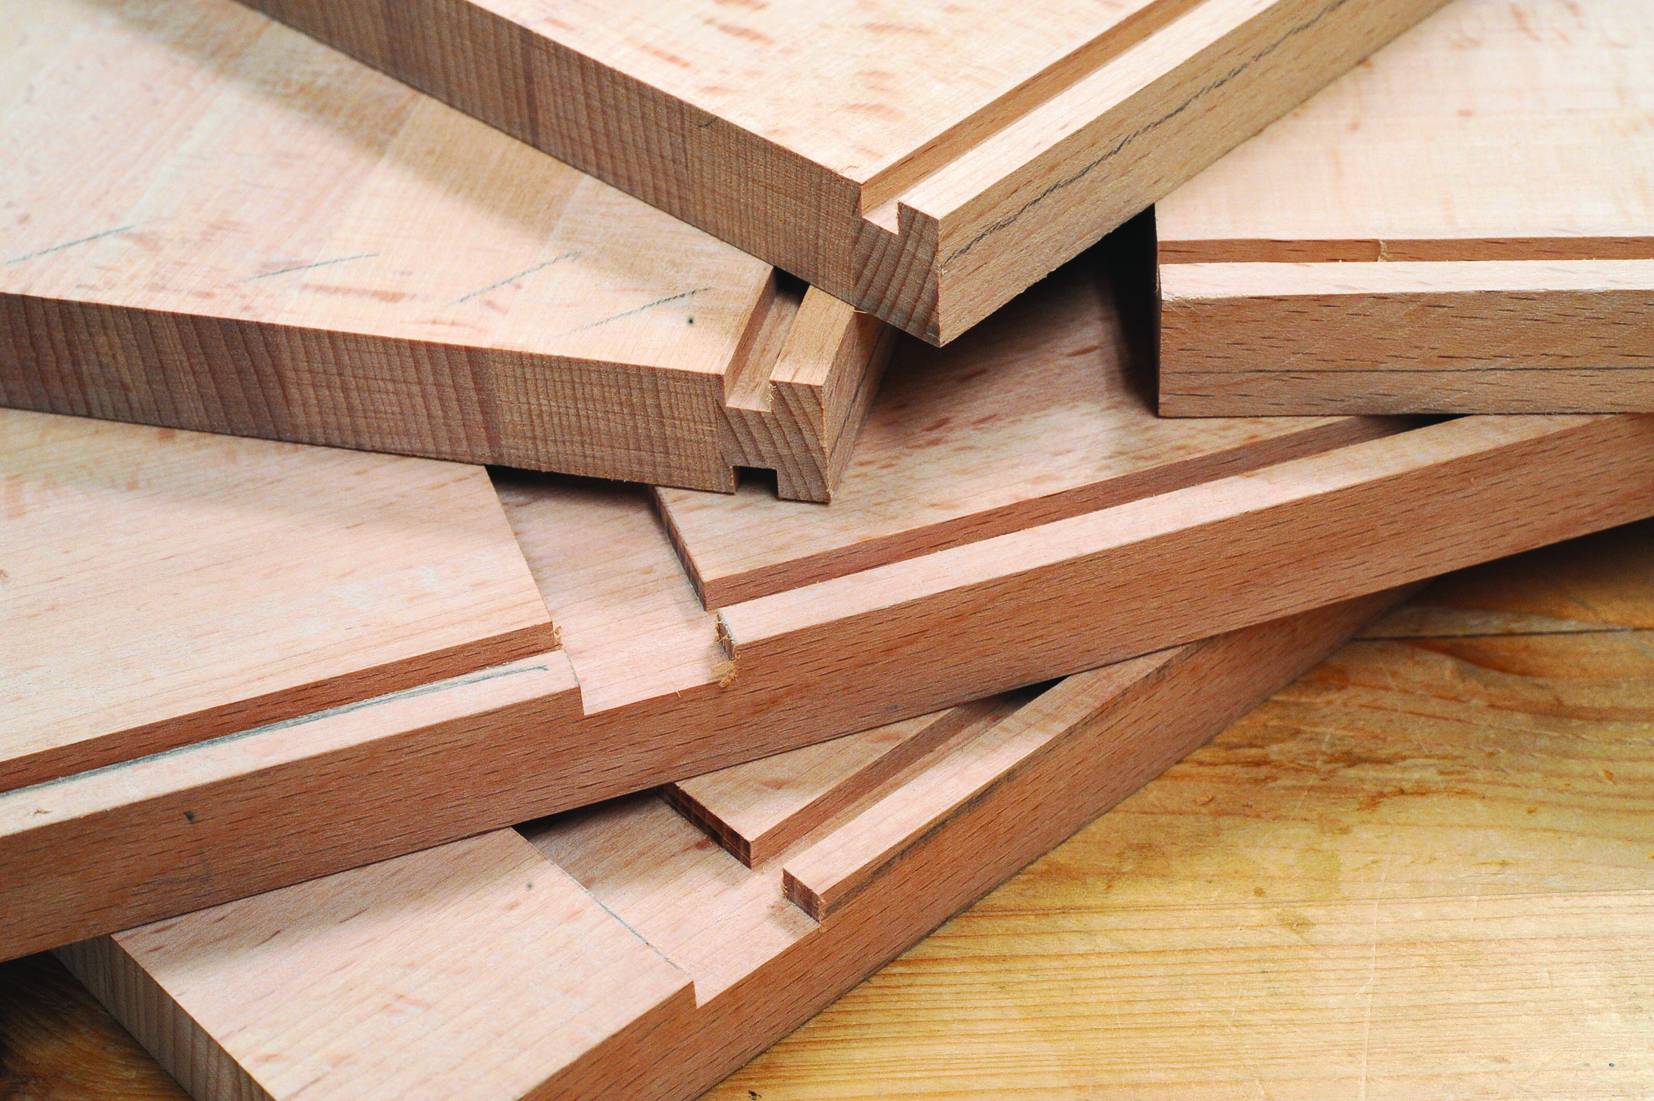
Let’s create a box with a half-blind rabbet joint as a way to practise rabbets and groove processing. We will process rabbets for this joint on the end panels and create grooves for the base plate. The side panels will only have grooves for the bottom panel.
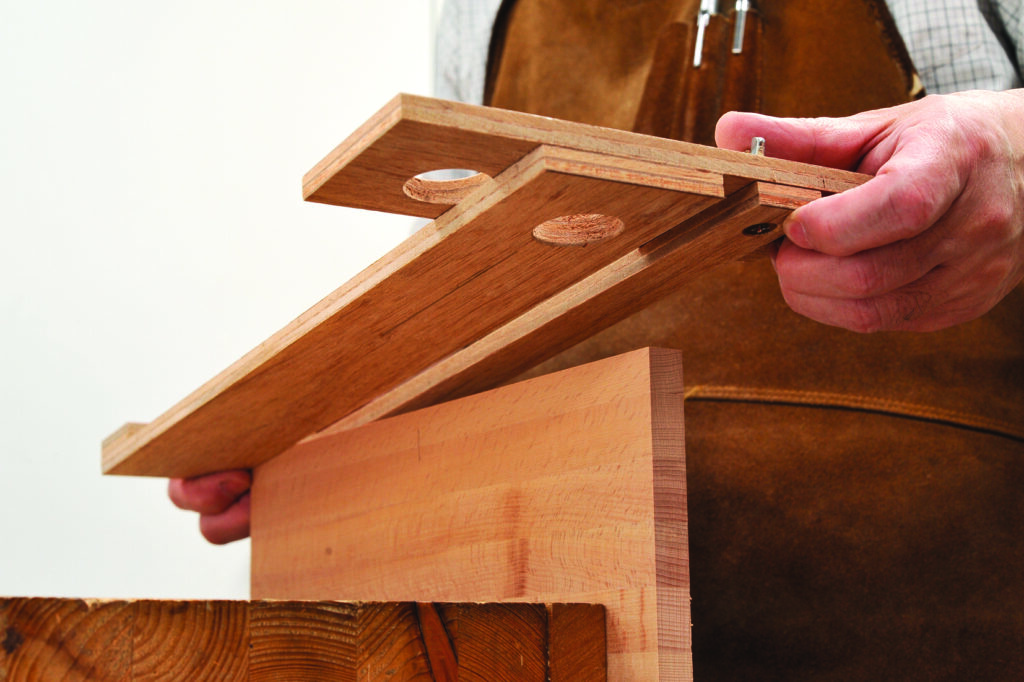
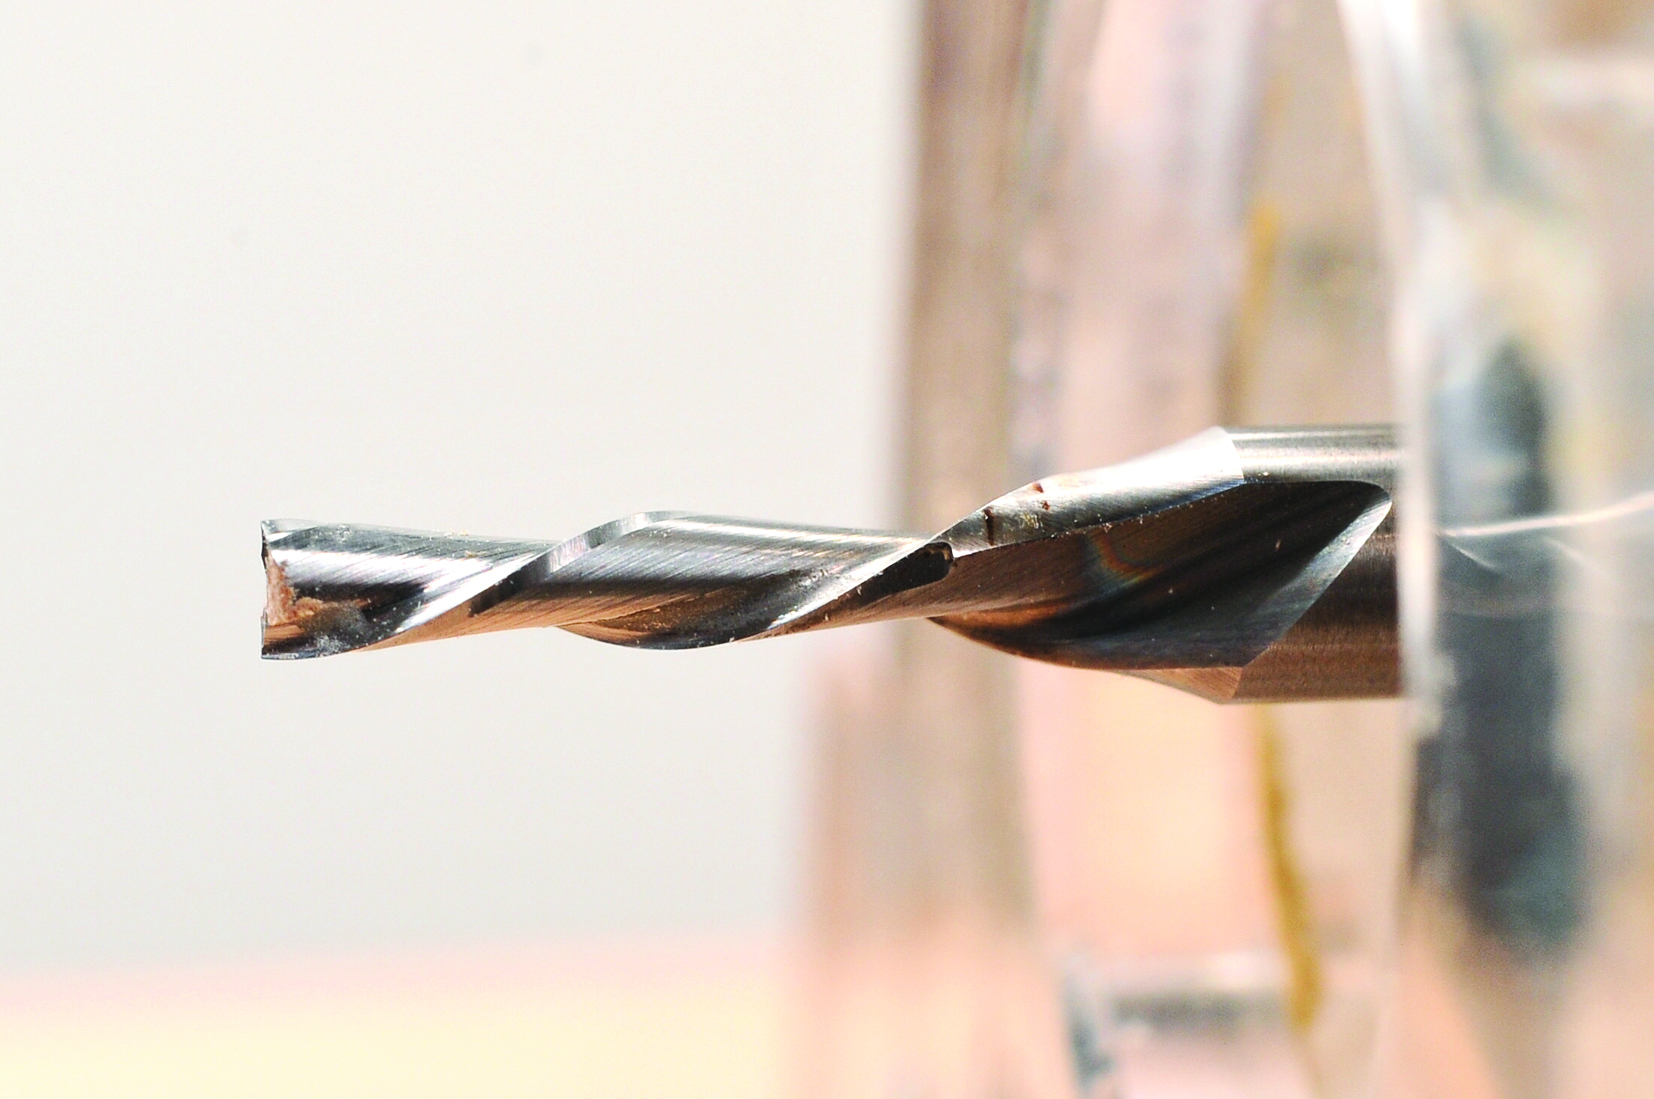
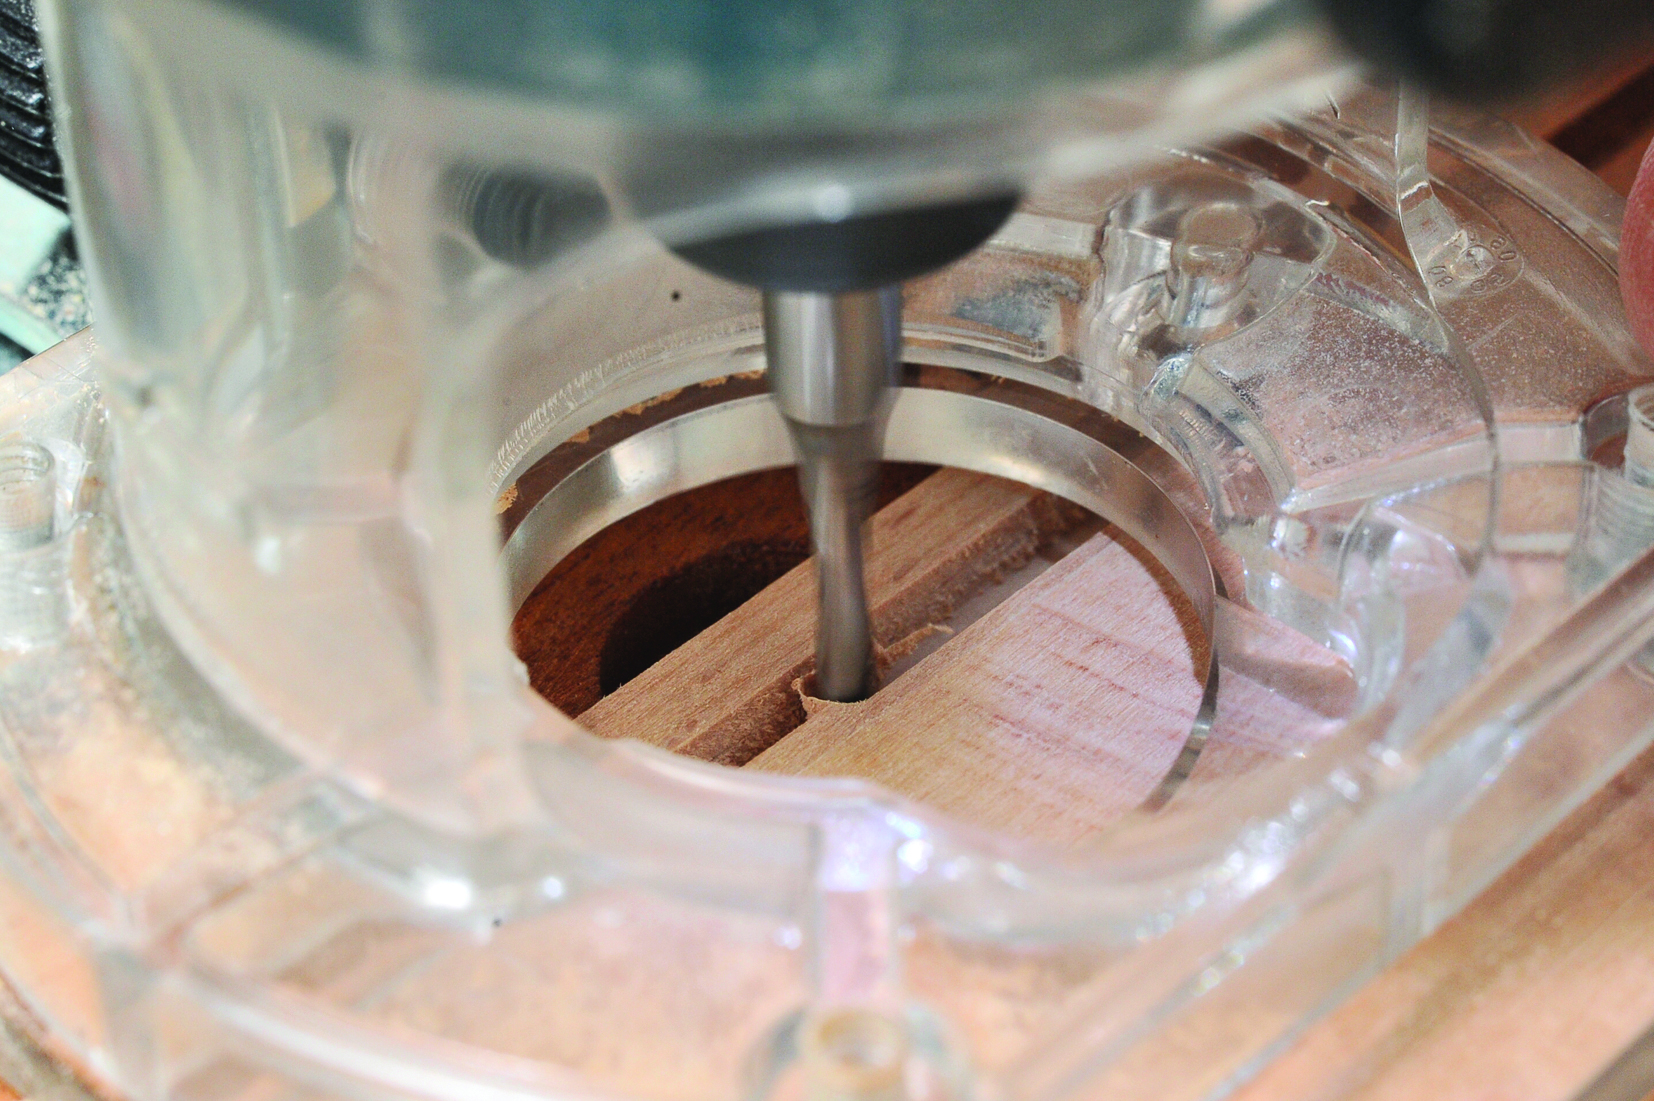
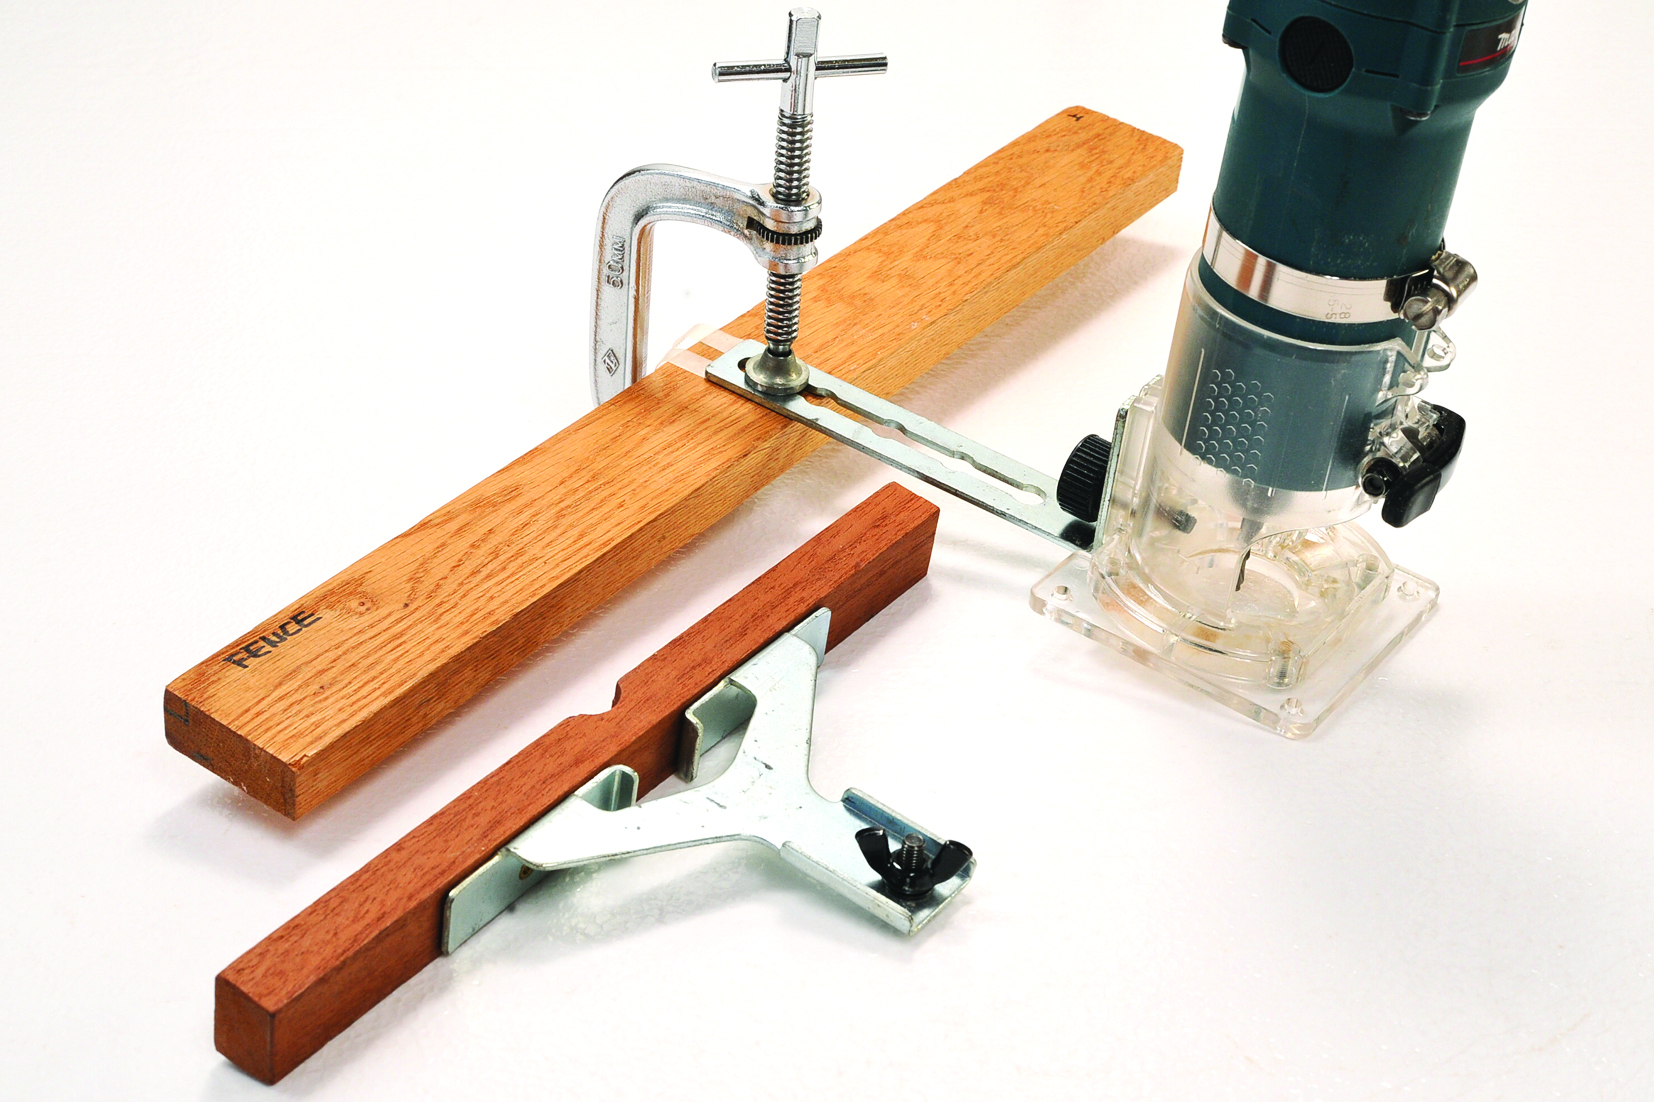
Process the dado joint grooves while the material is still in one long piece, meaning before it’s cut into two side panels. This makes it easier to clamp the sliding fence to the material and secure the material to the workbench. Of course, you can also do this after cutting the material into two pieces. The bit used for this dado joint is a bearing-guided pattern bit, shown in the picture below. A shorter bit is ideal for this task.
Wall-mounted shelf dimensions
Back panel: Measure and cut after main structure is complete
Units: mm
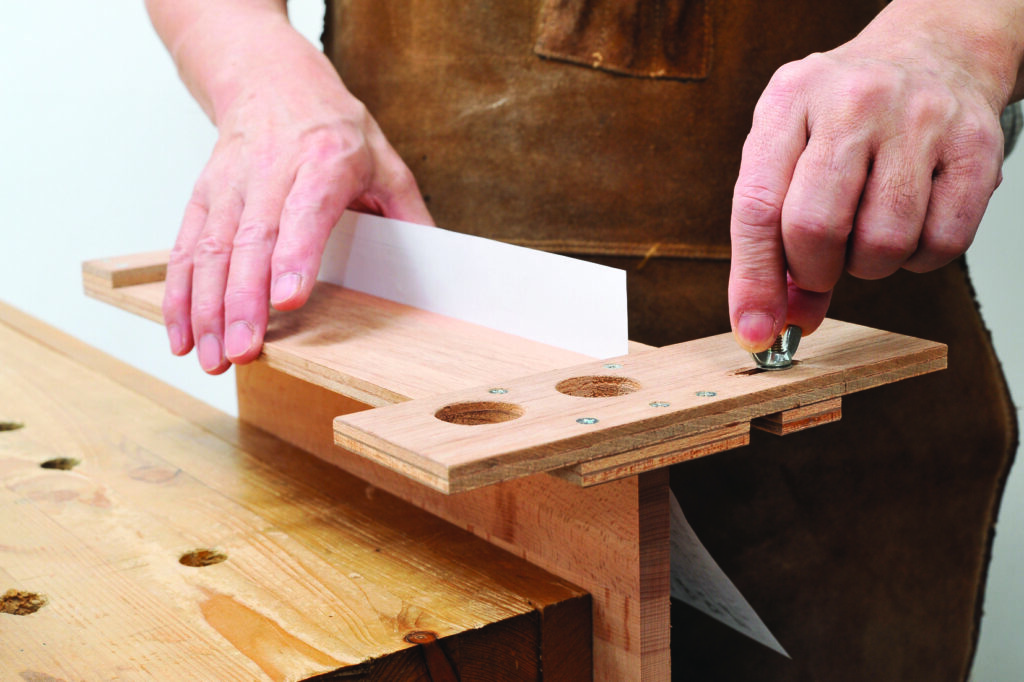
Setting sliding fence to shelf board thickness
1. First, clamp the shelf board with the sliding fence and perform a test cut. If the fit is too tight and the shelf board cannot be inserted into the groove, adjust using the following method.

2. Insert a thin piece of paper, such as copy paper, along with the shelf board when setting up the sliding fence. This will slightly widen the groove.
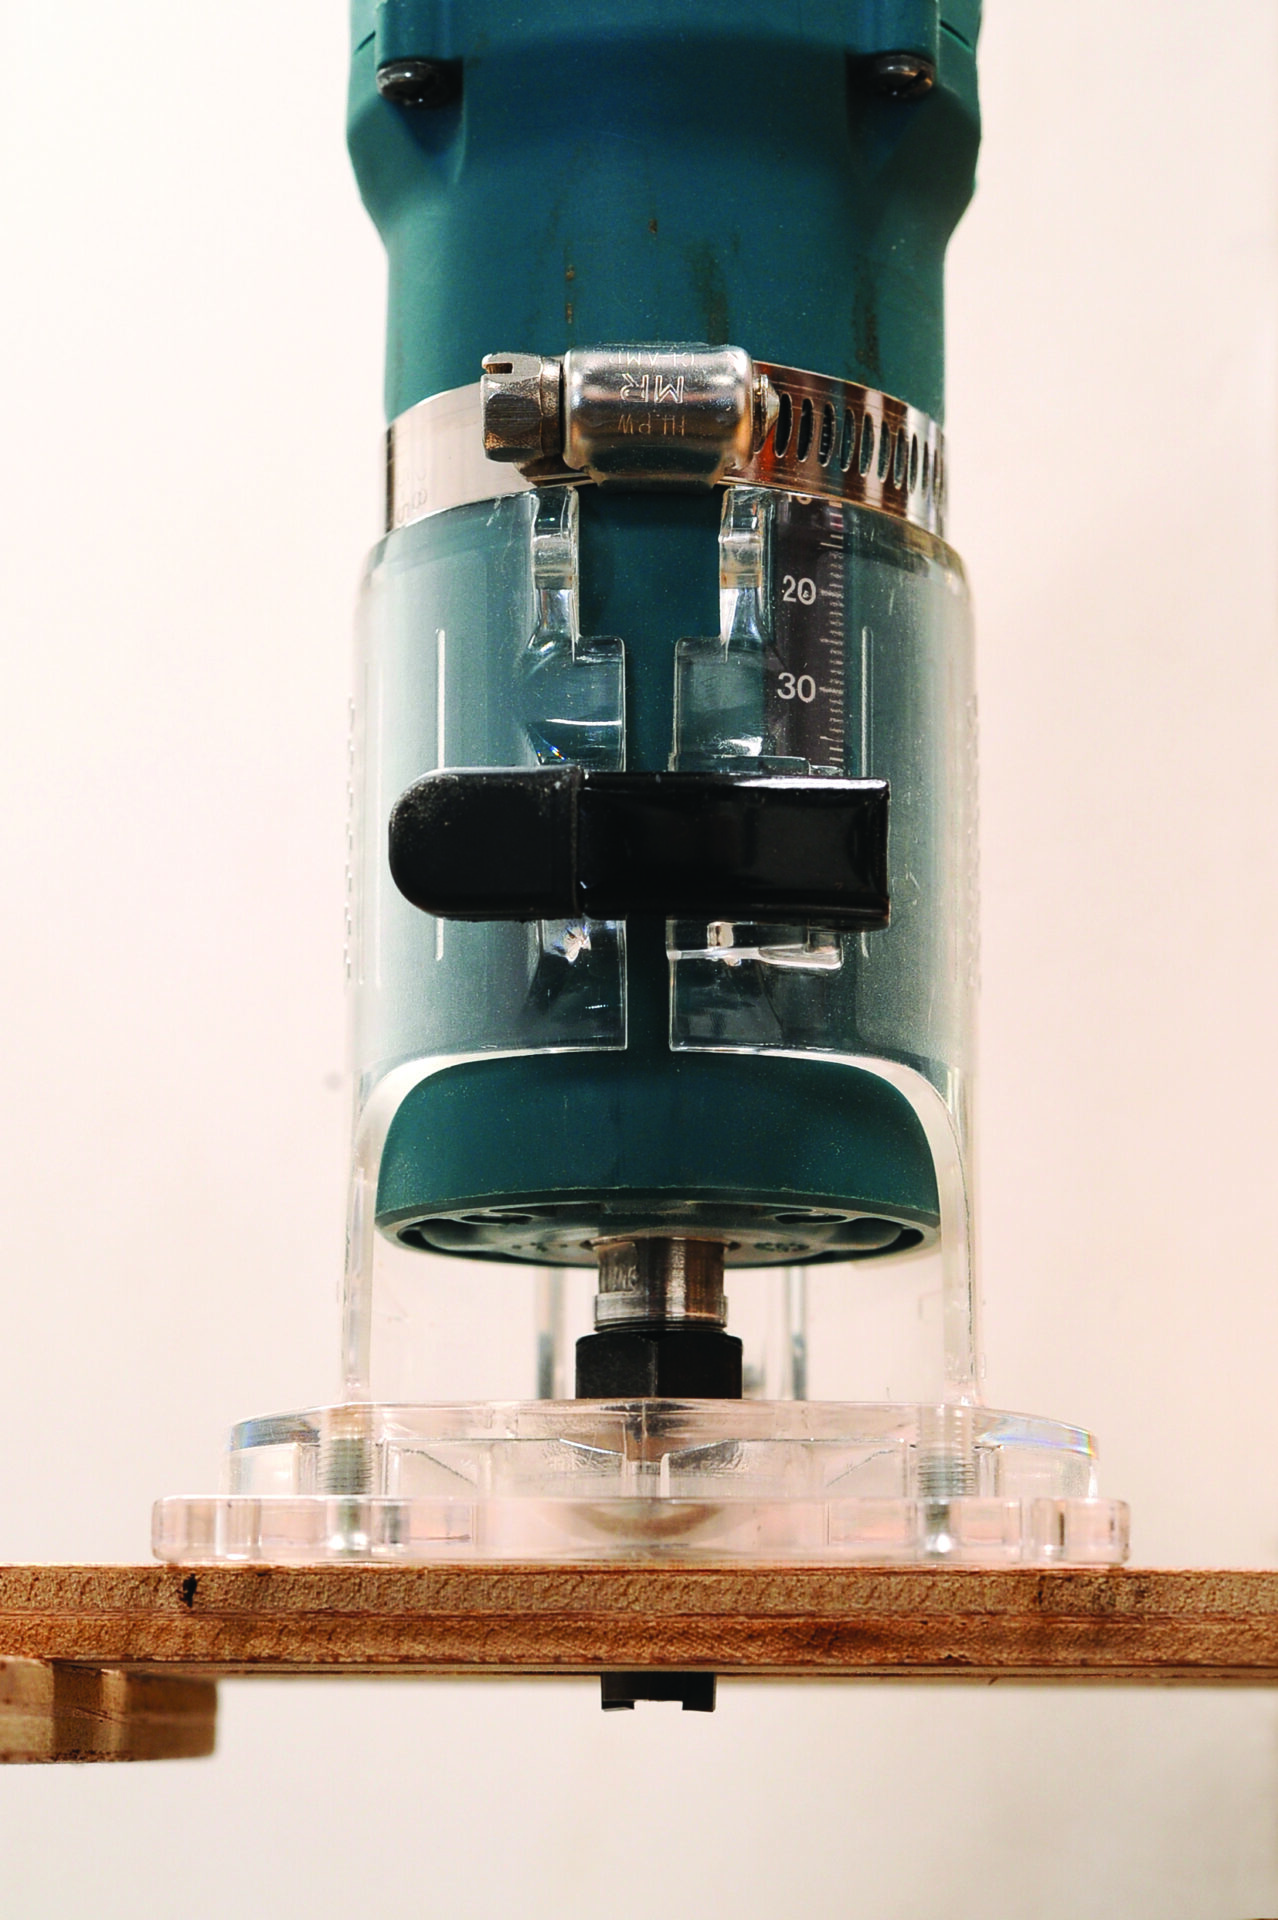
Processing dado grooves/setting bit depth
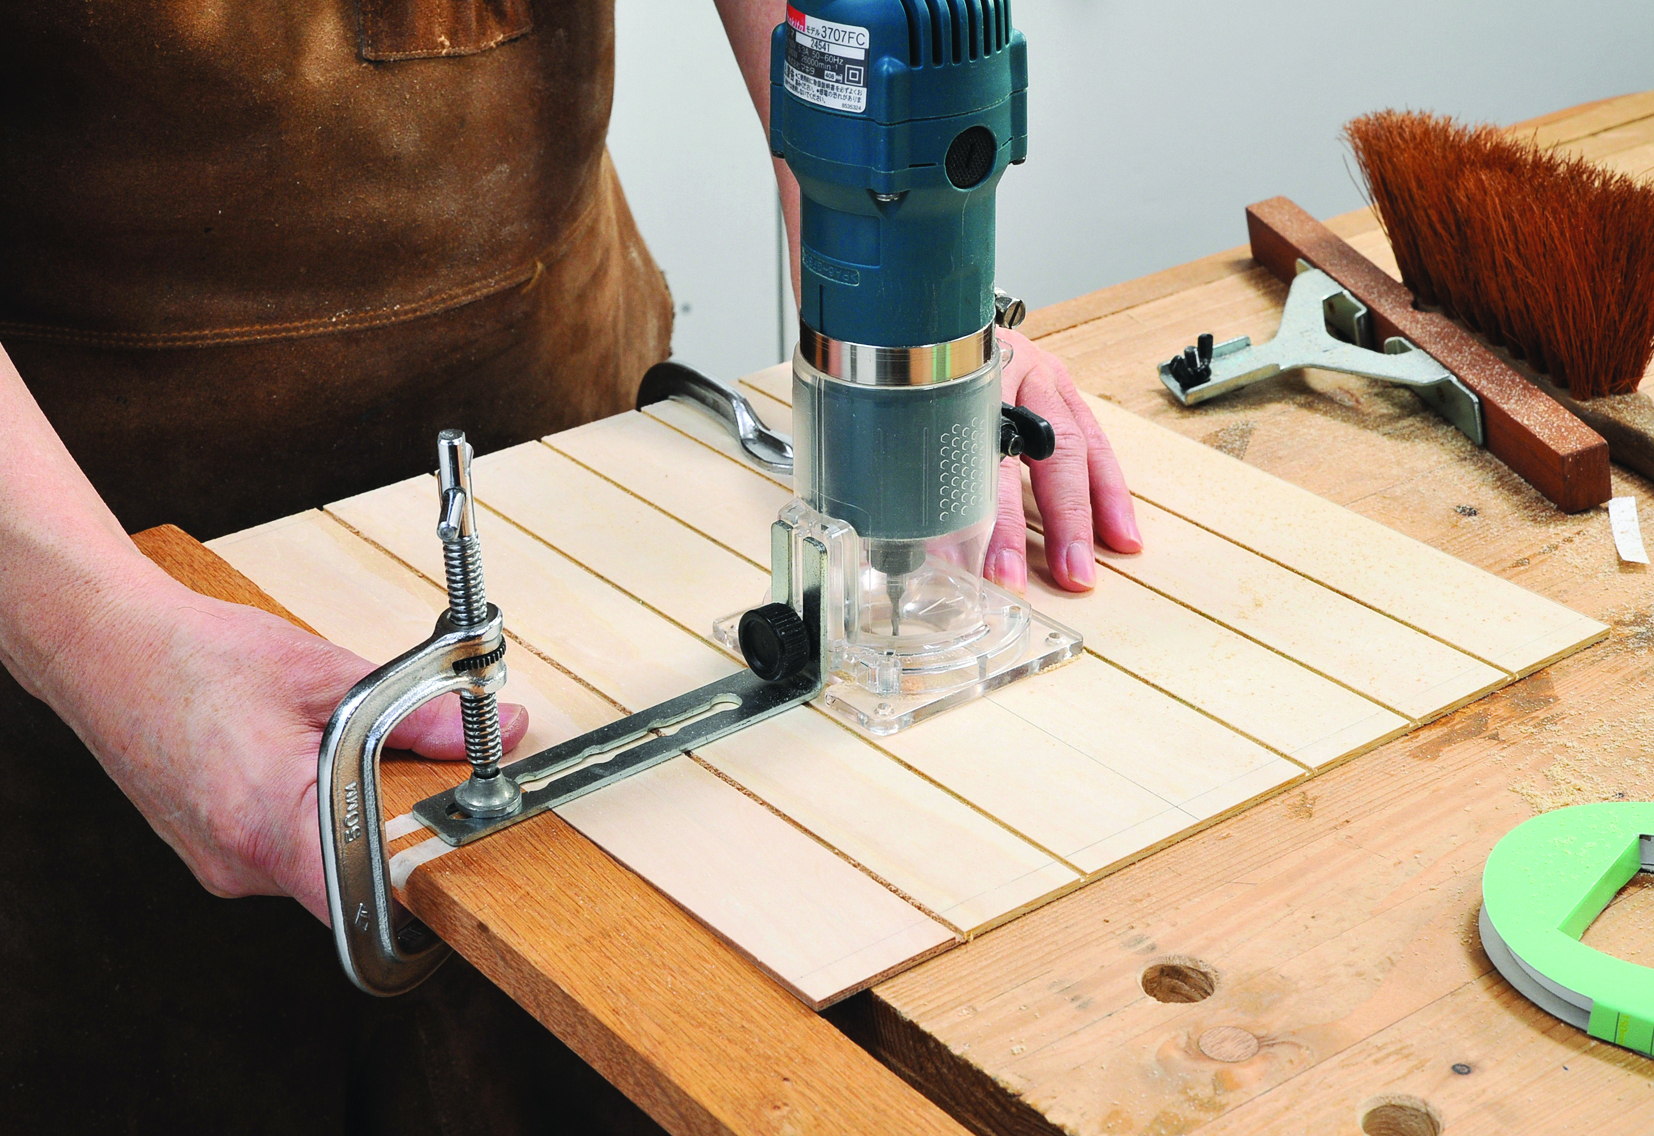
3. Lower the trimmer bit to 4–5mm below the sliding fence bottom to set the groove depth. Secure by lowering the hose clamp until it touches the transparent housing. Cut the groove in two passes.
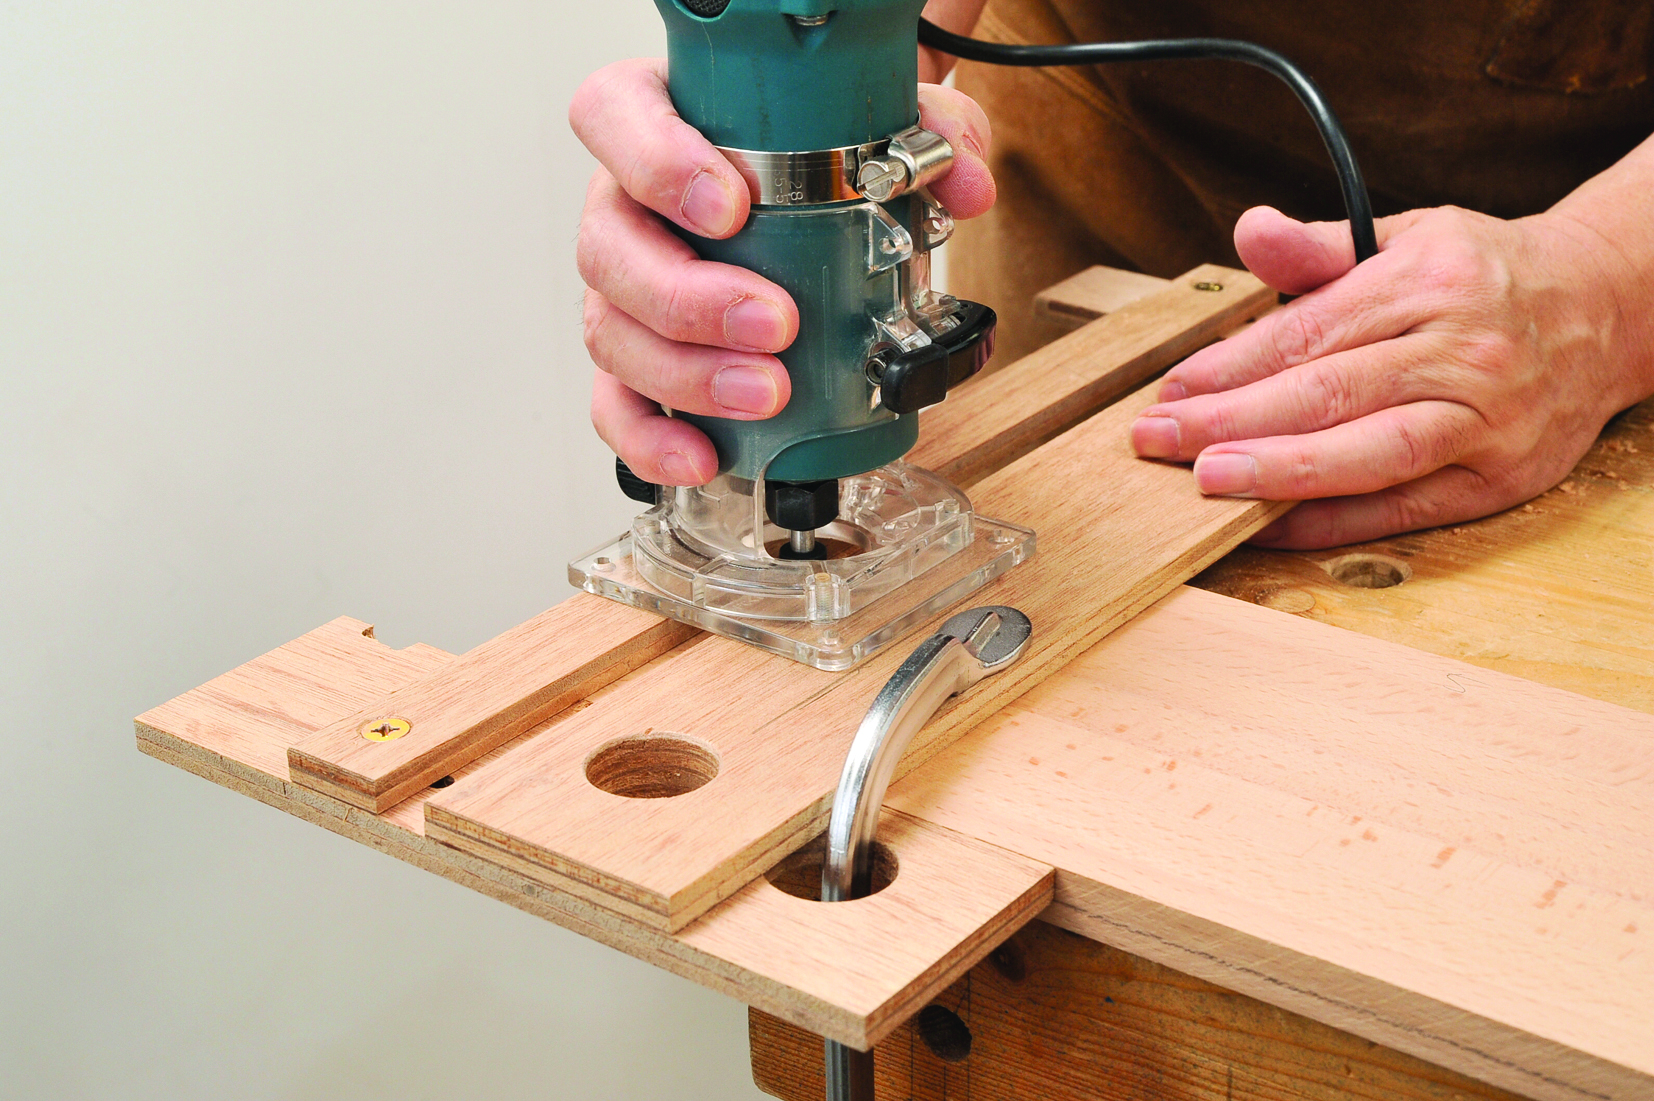
4. Clamp the sliding fence and cut the groove into side panels. Be mindful of the cutting direction to avoid climb cutting. Remember the trimmer tends to ‘curve left’, so guide it along the left side of the fence.
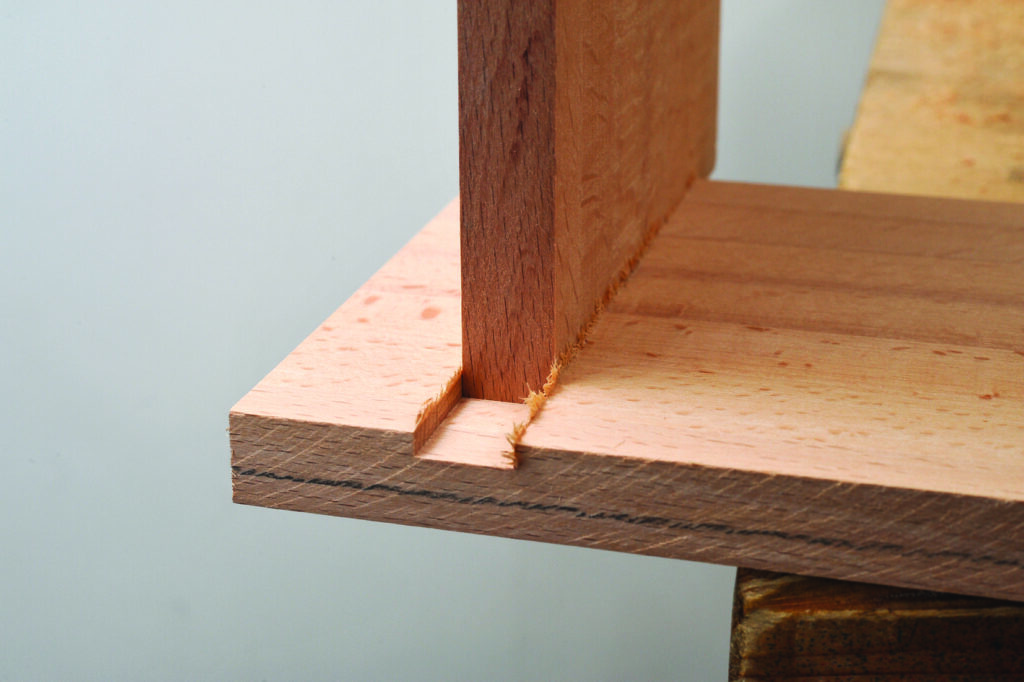
5. The dado groove is now complete. Use this method to cut all the grooves.
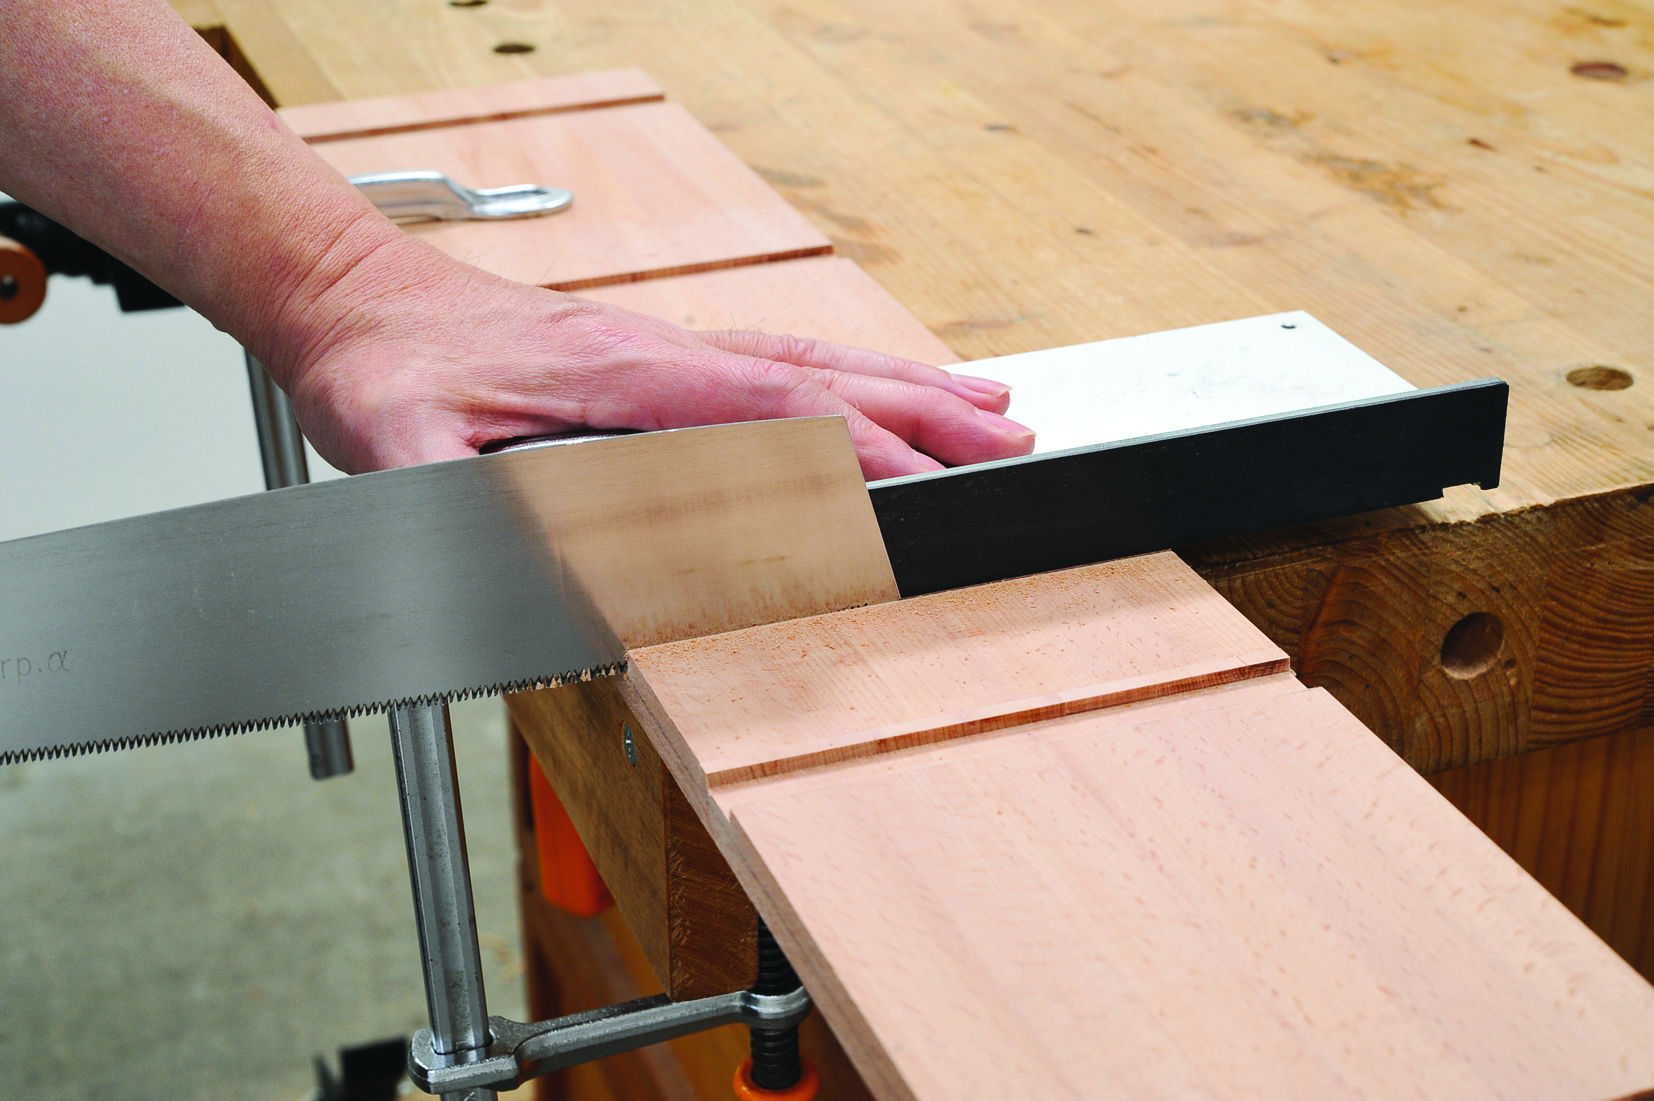
6. After finishing all the groove cuts, it’s time to divide the side panels into two pieces.
Cutting side panels
7. Cut the side panels into two pieces.
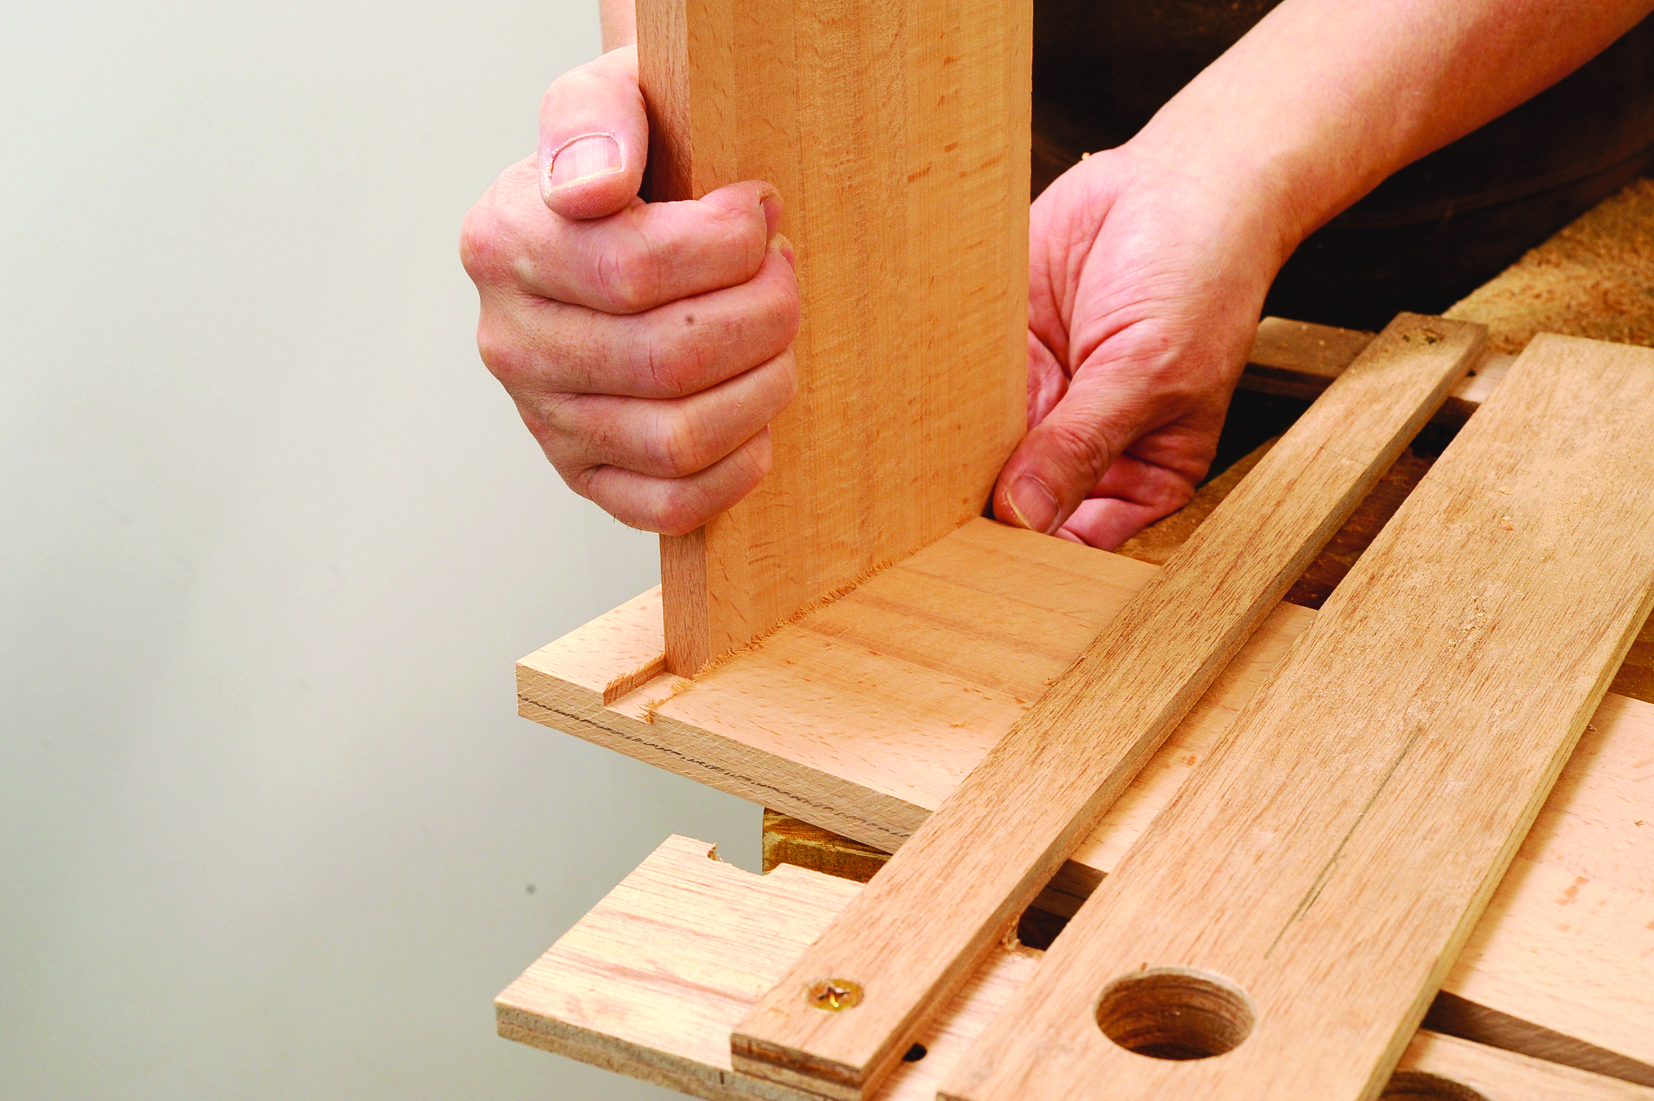
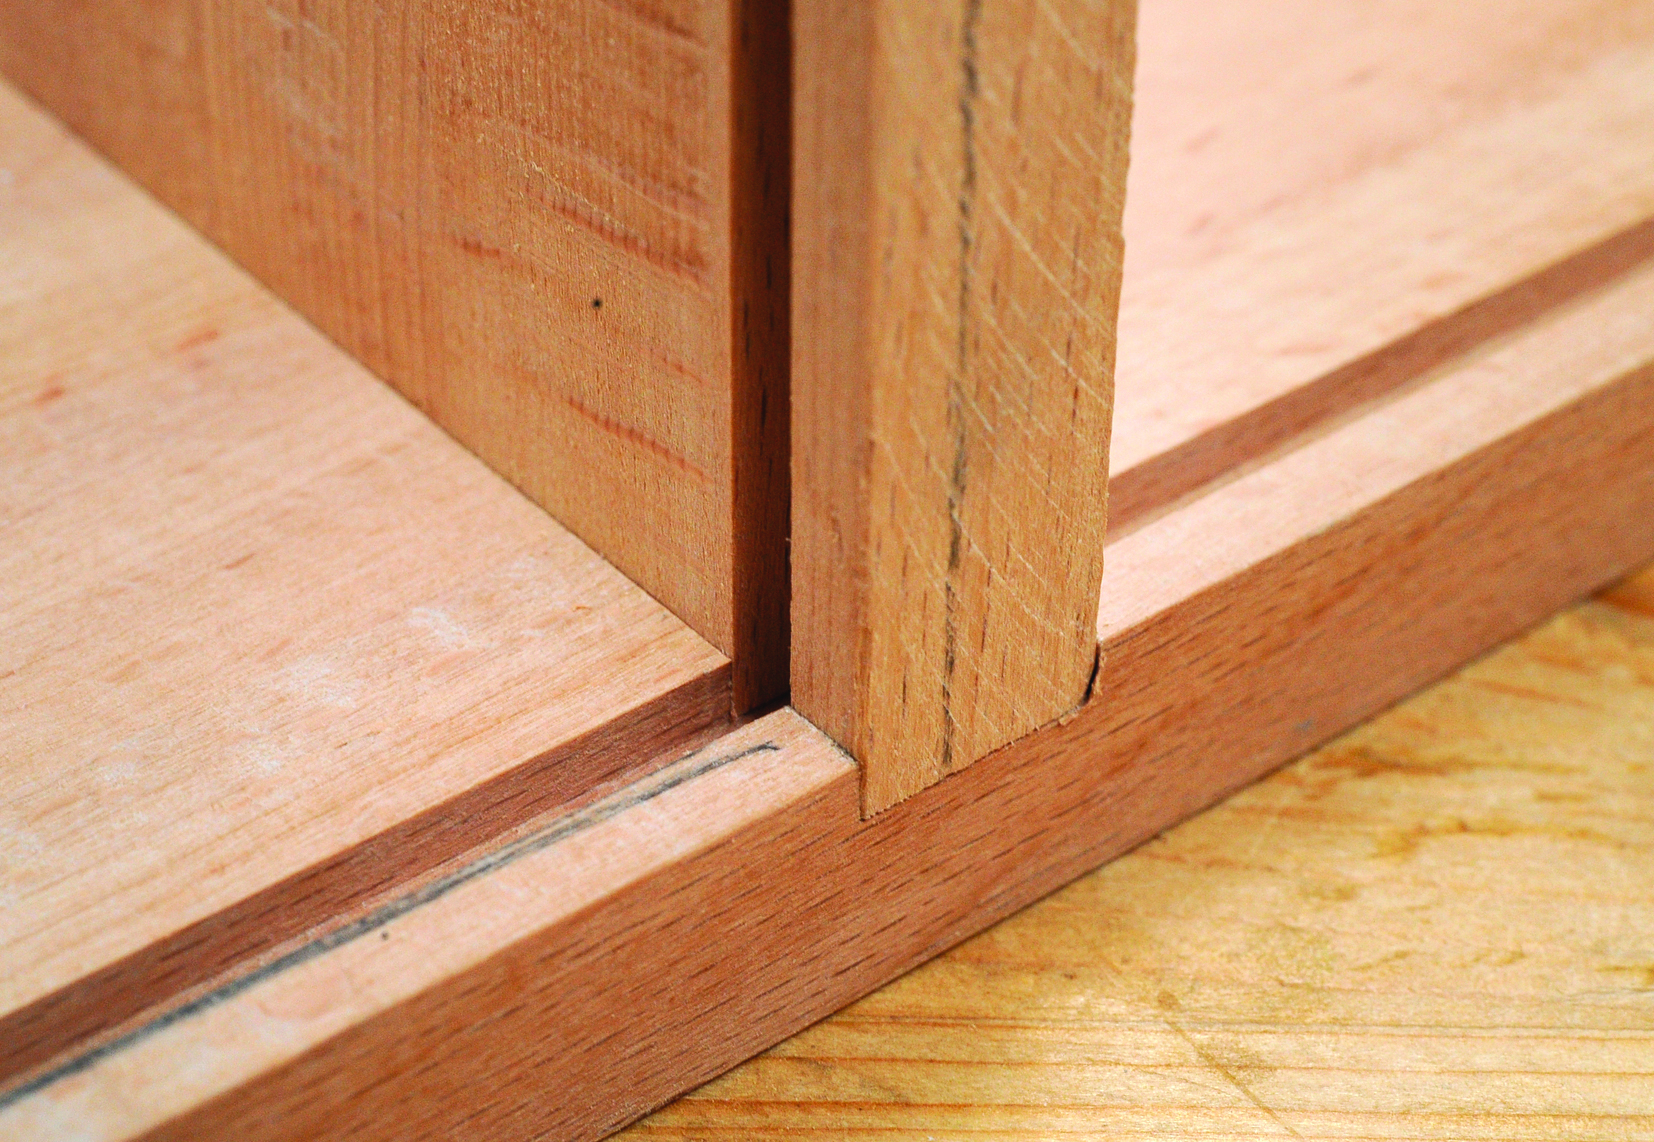
Dry fit
8. Perform a dry fit to check the alignment and fit of all parts.
Correcting grooves
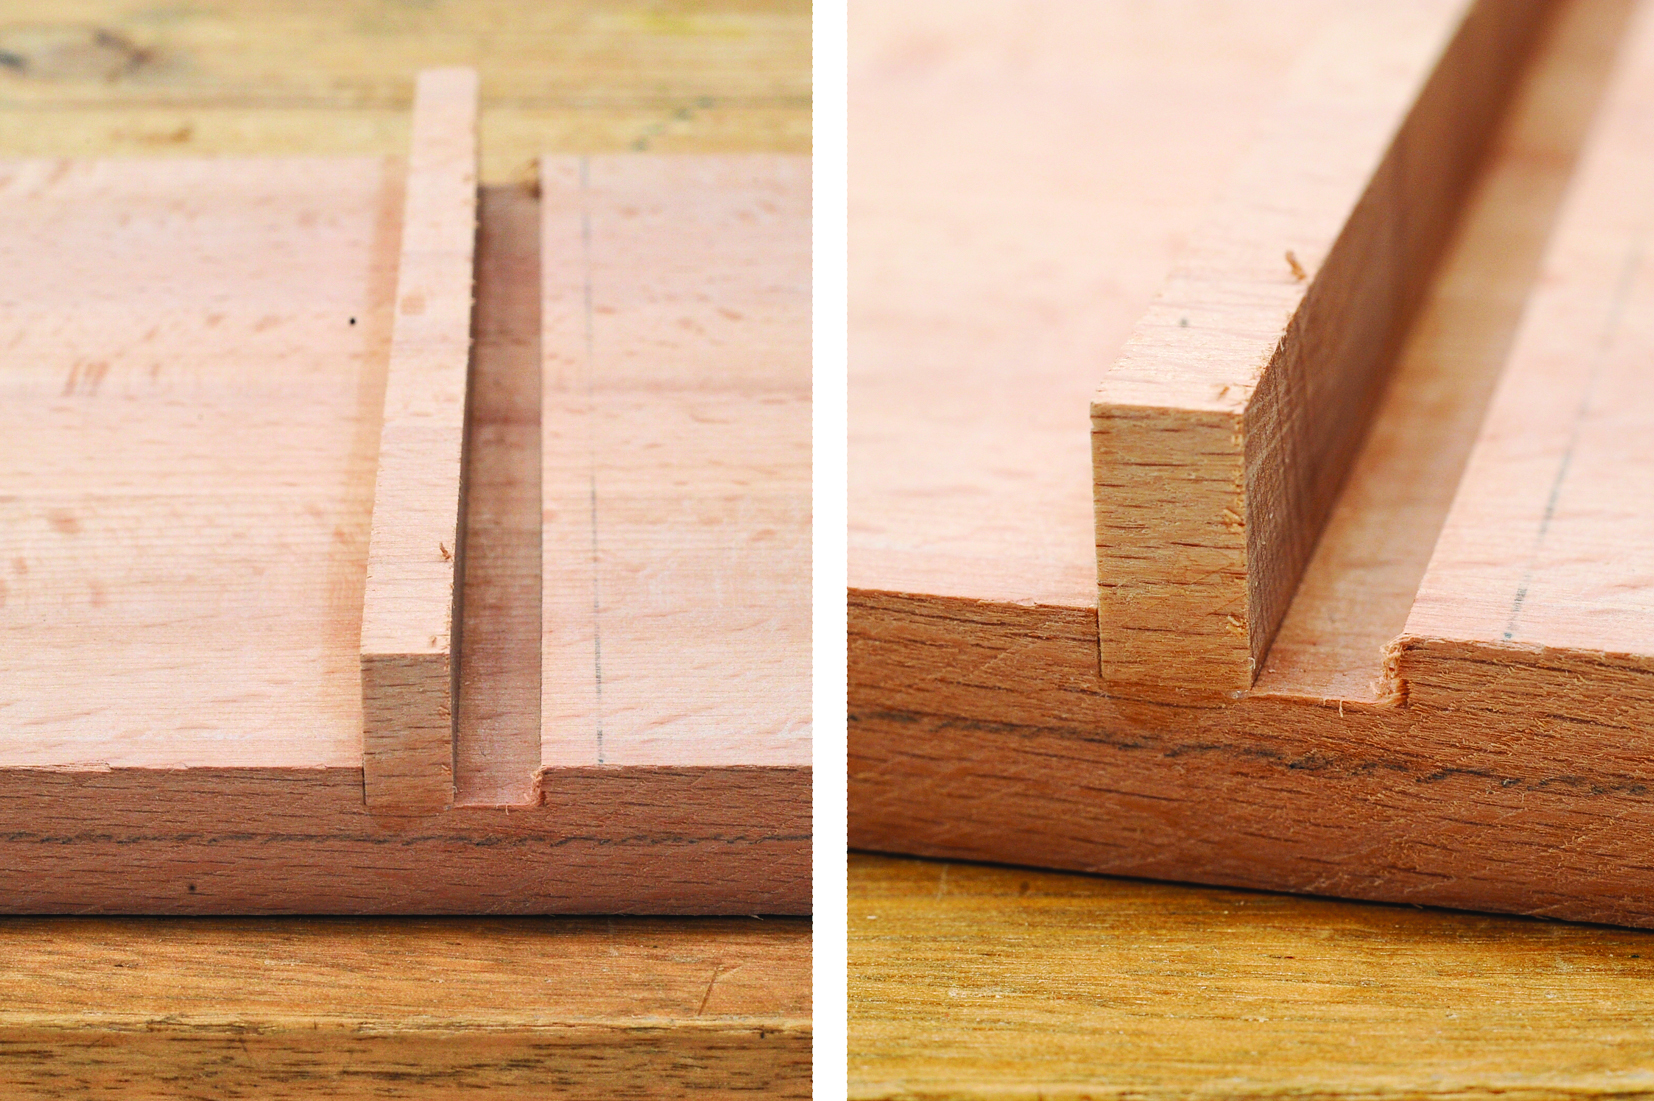
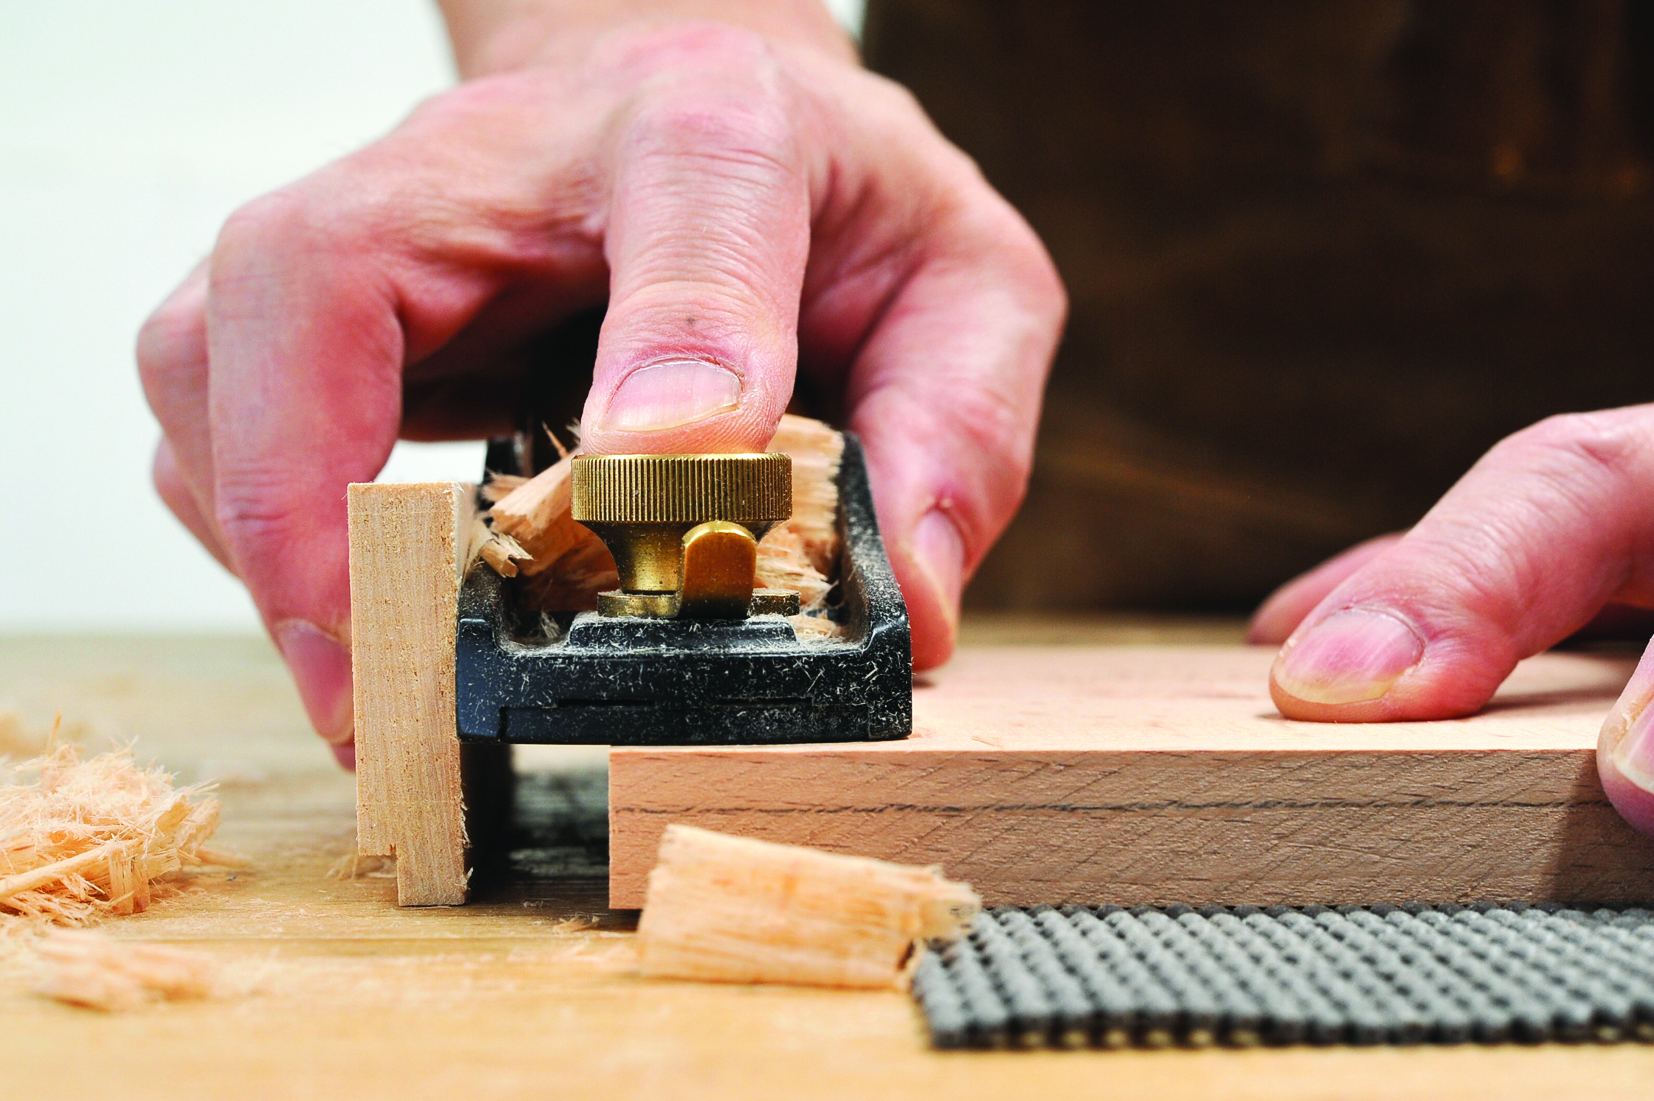
9. If a groove is cut wrong, it can be a hassle to buy new material and begin the process again. Instead, as shown in the picture, you can cut a short piece of scrap wood and glue it to one side of the already cut groove. Be sure to align the scrap grain direction with the main piece.
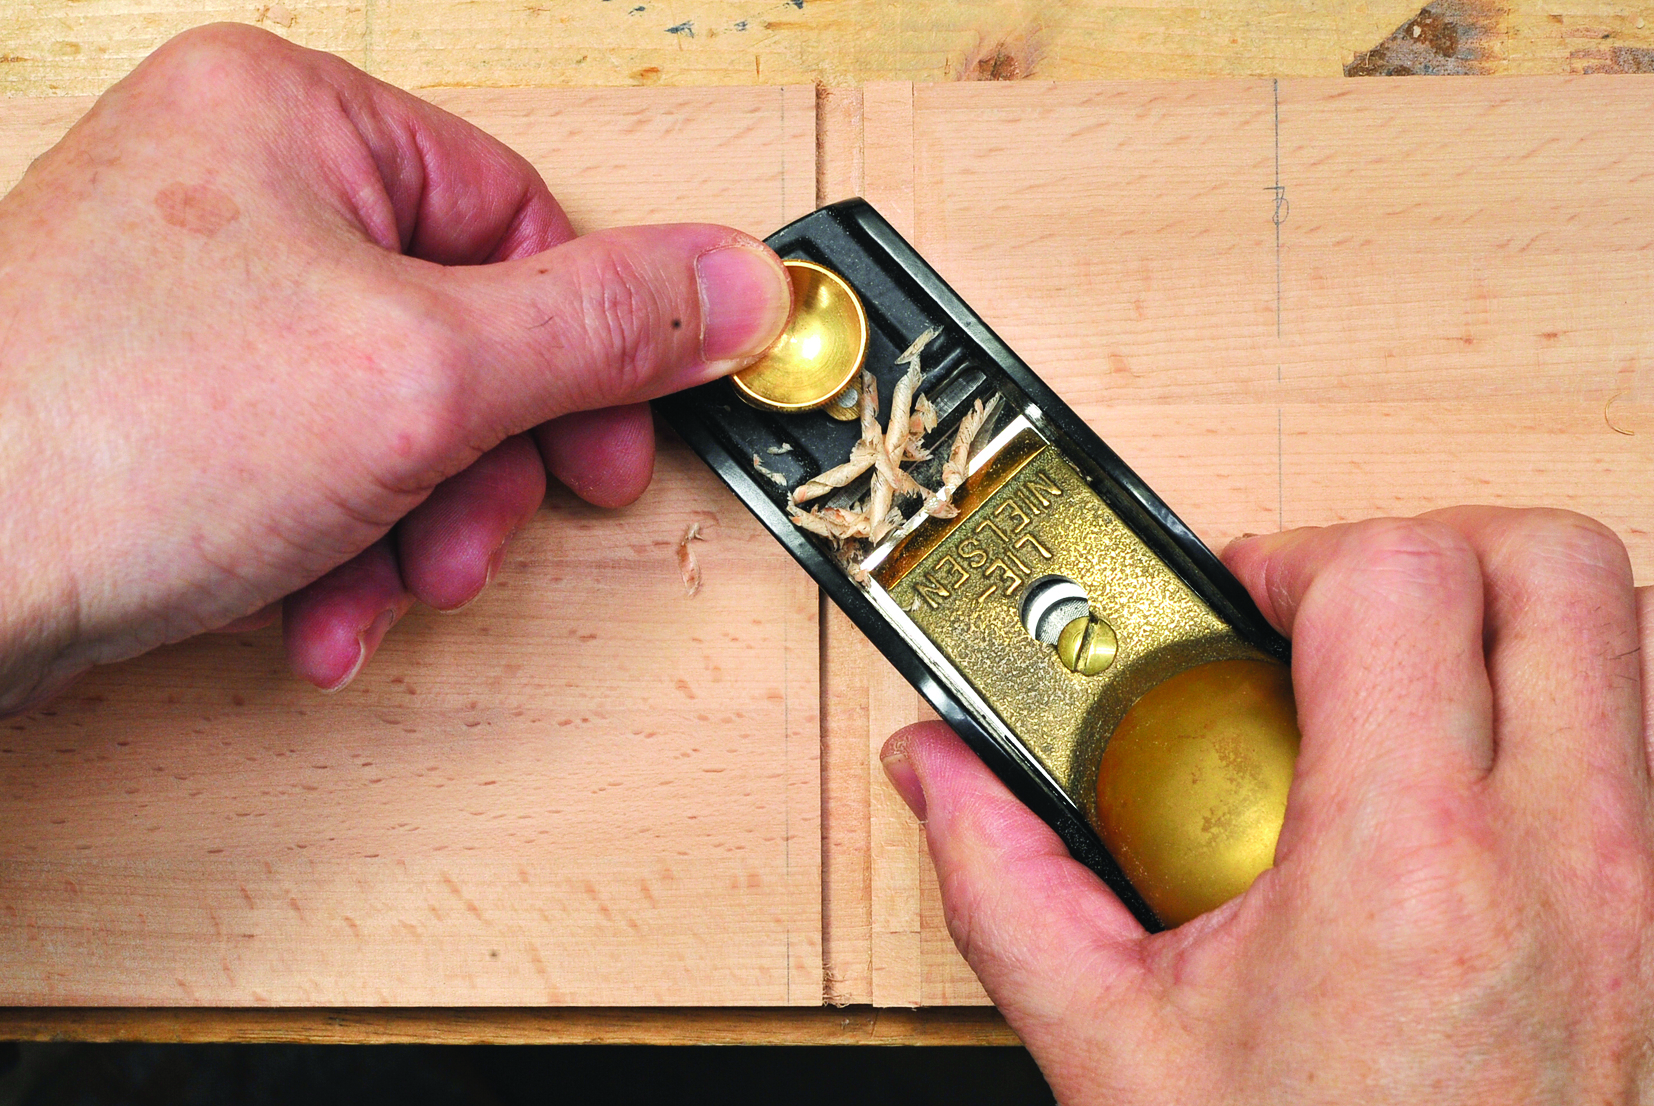
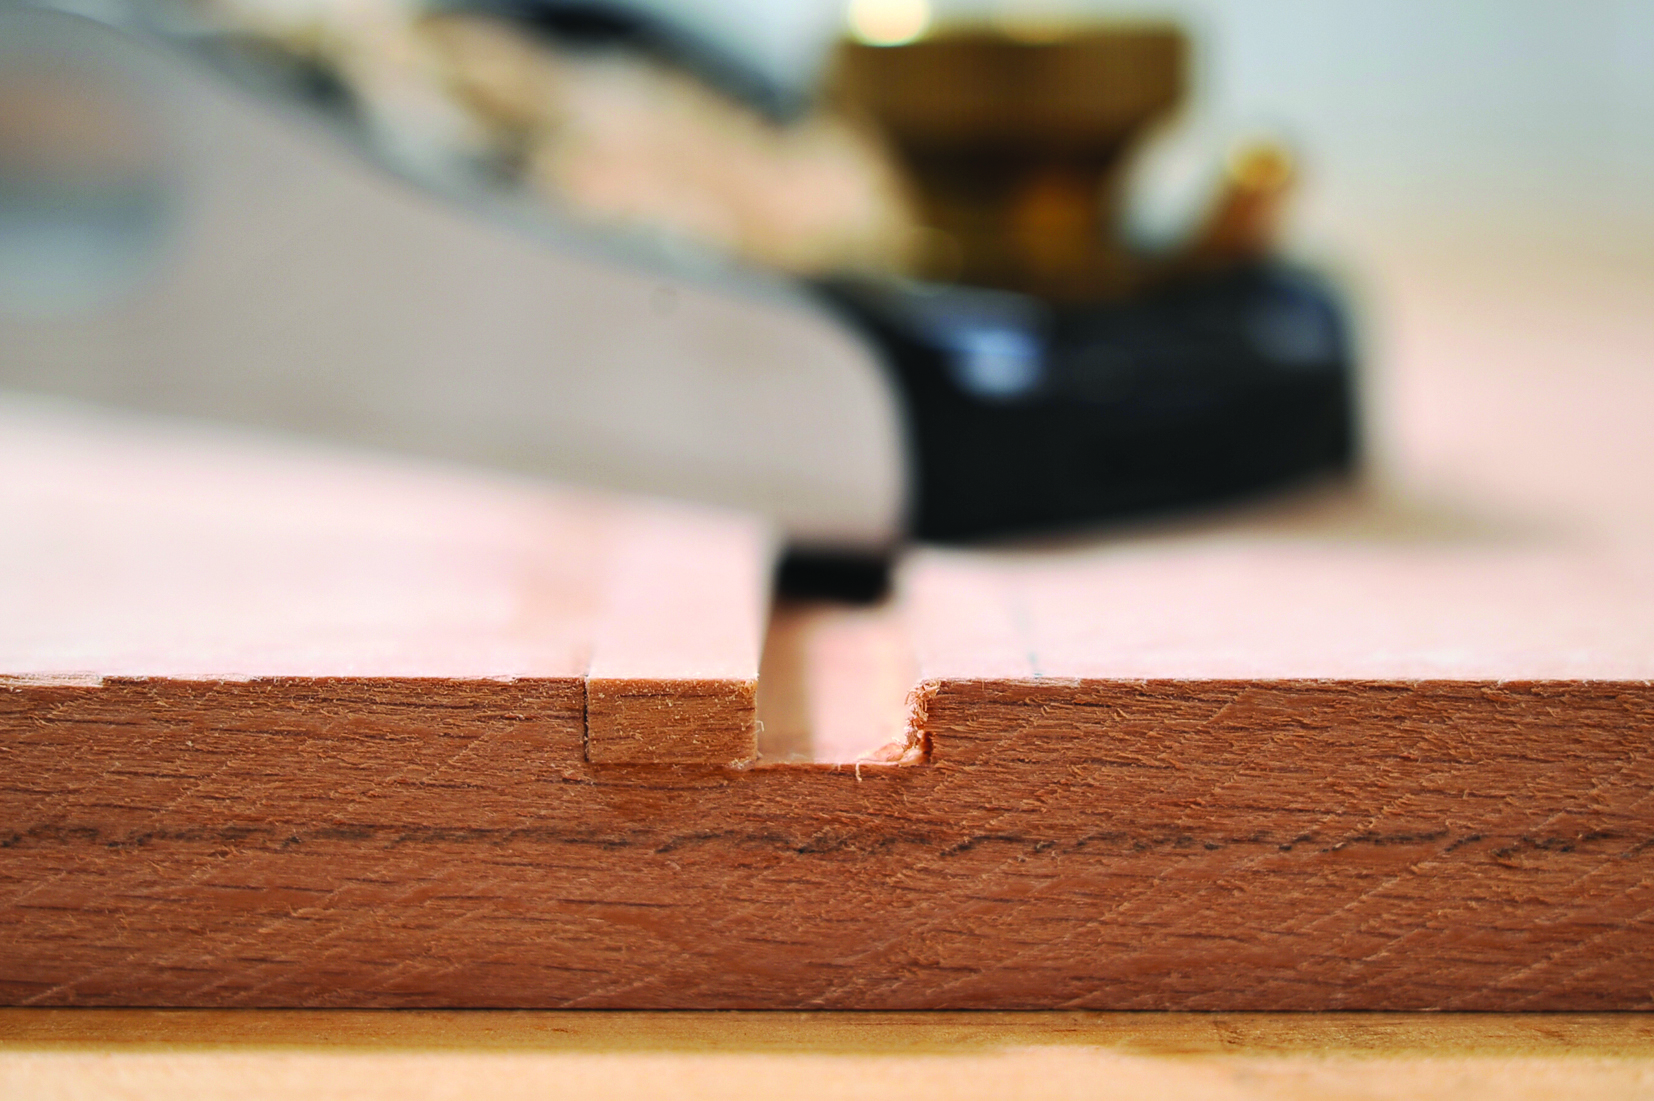
10. Trim any excess glued scrap with a saw. Then, use a plane or sandpaper to smooth it flat.
11. Continue smoothing until the surface is seamless to the touch. Edge grain (thickness part) will be corrected later.
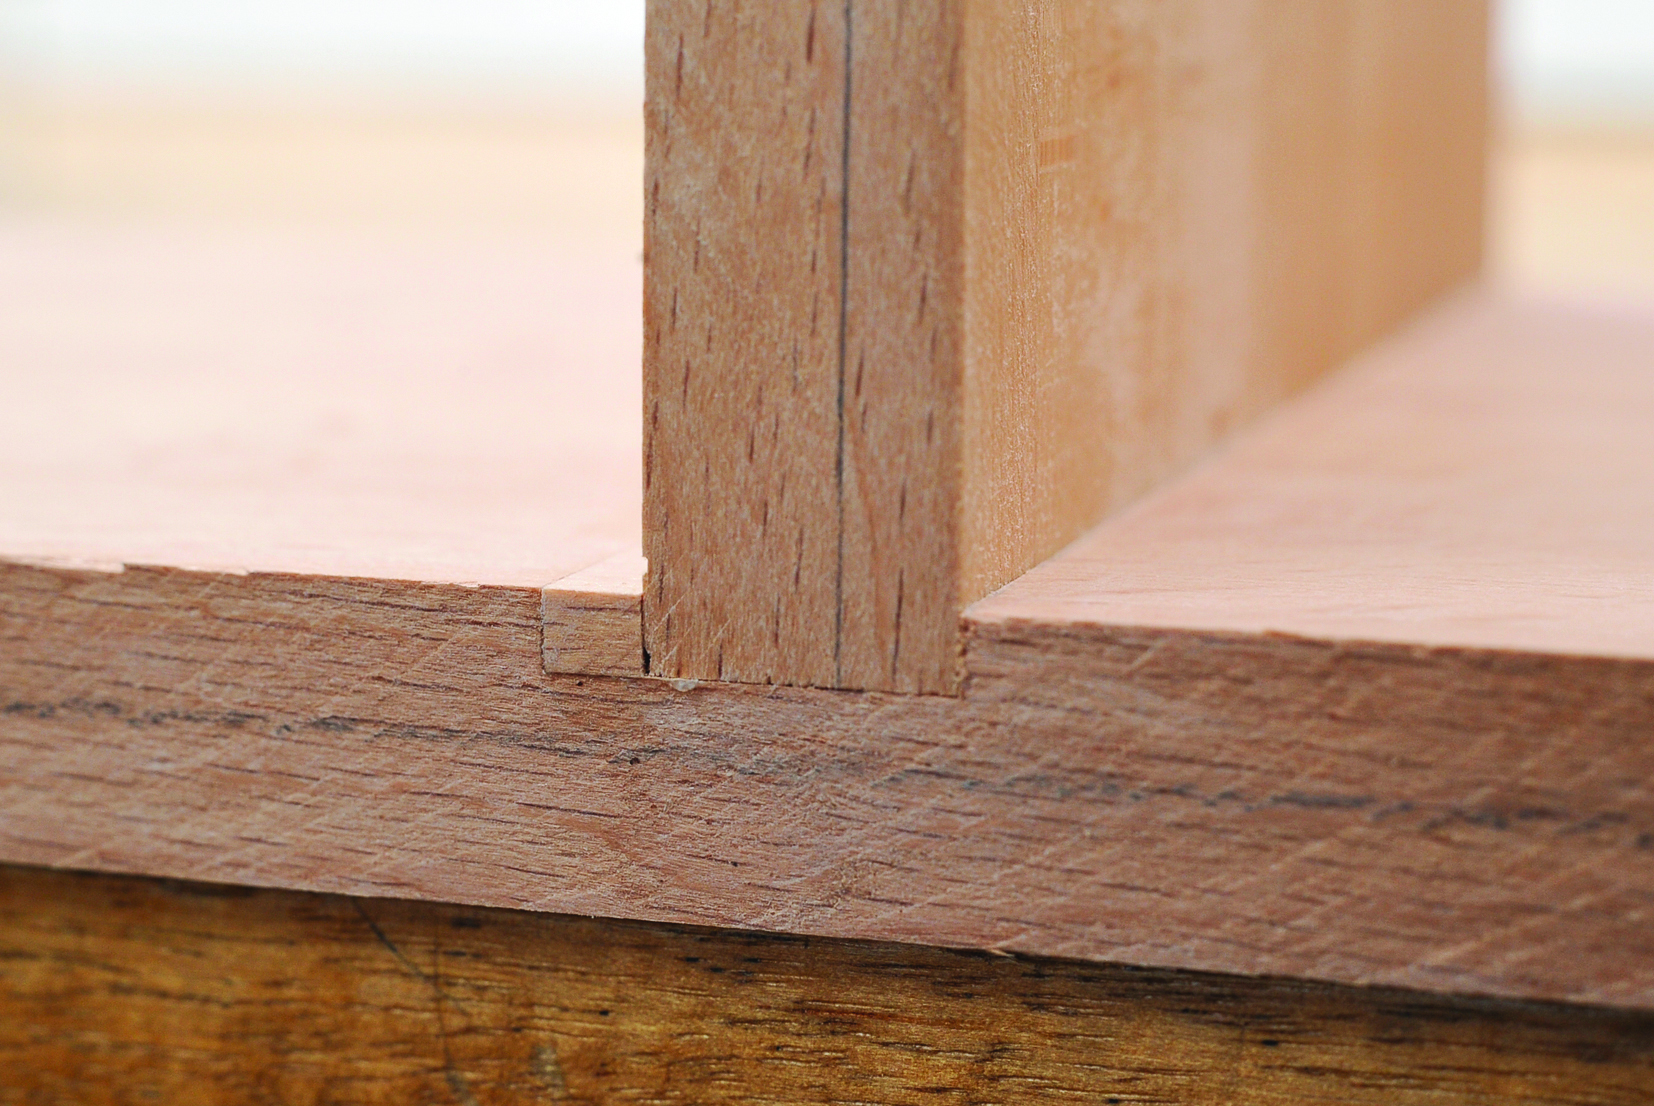
12. Once the surface is smooth, re-cut the groove in the correct position. The repair is complete.
Adjusting a shelf if it doesn’t fit
13. If, during dry assembly, the shelf board doesn’t fit into the groove, slightly shave the shelf’s edge. Even if the fit seemed perfect during test cuts, it may be too tight during final assembly. This issue may seem like a problem with groove precision, but it’s often caused by slight differences in board thickness before cutting. To correct this, attach a temporary fence to one side of the plane with double-sided tape and shave a taper of 20–30mm. Adjust the height so that the temporary fence tilts the plane slightly to the left. However, the tilt is only about the thickness of a few sheets of paper, so the taper won’t be noticeable to the naked eye.
Processing the back panel groove
14. When dry fitting, mark the exact locations of the grooves with a pencil. The top and bottom shelves have grooves on one side only, while the middle shelf will have grooves on both sides (see the dimensional drawing).

15. The back panel is made of 4mm Japanese linden plywood. The bit diameter is 3.2mm. One pass won’t make the groove wide enough, you’ll need to cut twice. A down-cut spiral bit is used. This helps minimise groove burrs.
Setting the trimmer bit depth
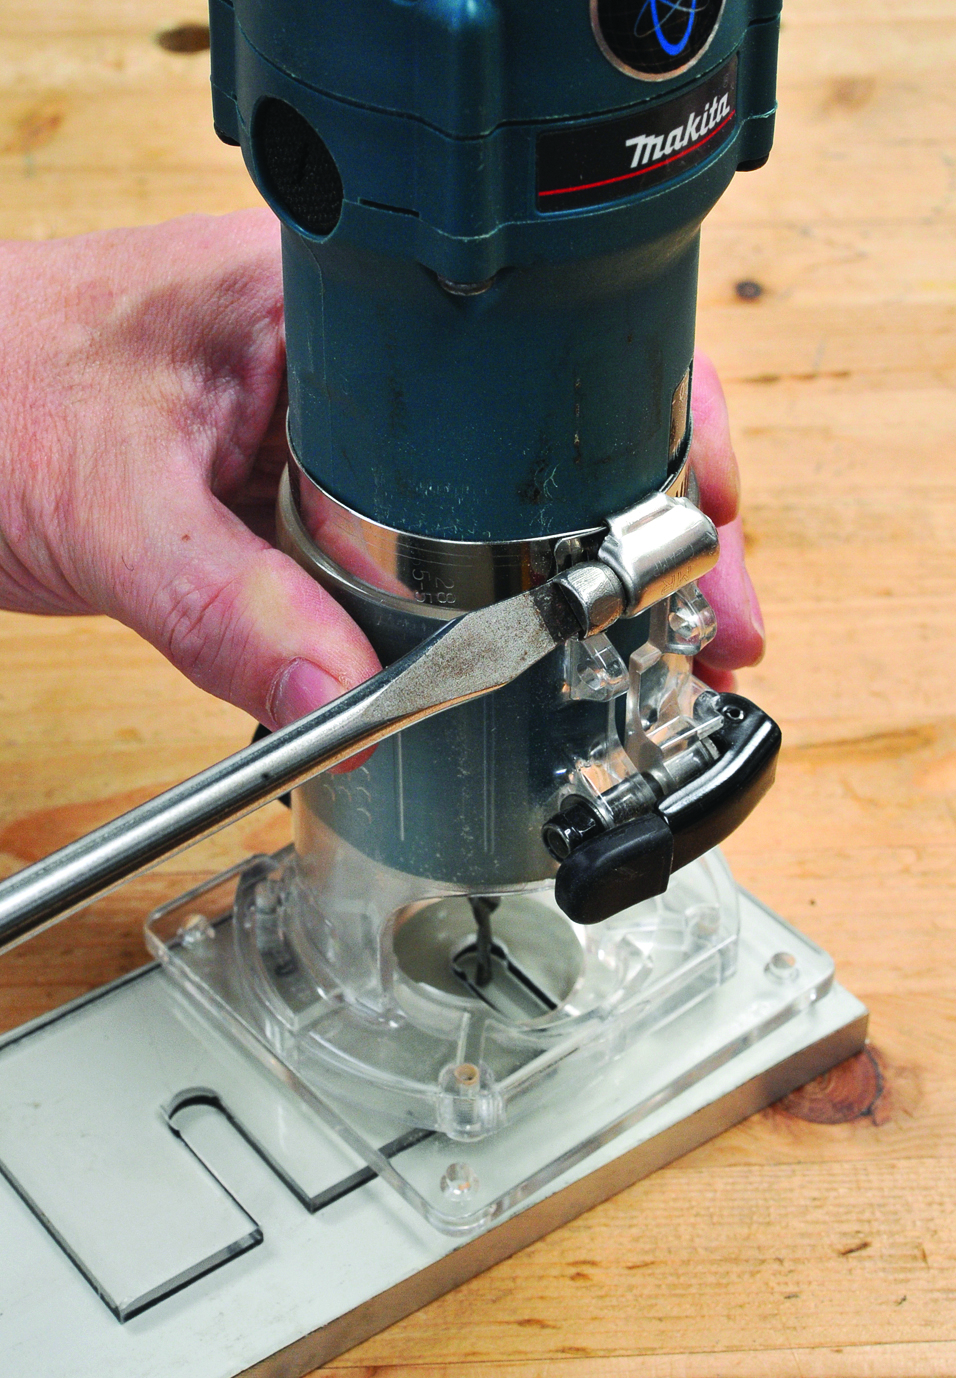
16. Place a transparent spacer on top of the base material and set the trimmer on top. This spacer determines the bit cutting depth. Once the depth is set using the black lever, lower the hose clamp to lock it in place and use it as a stopper.
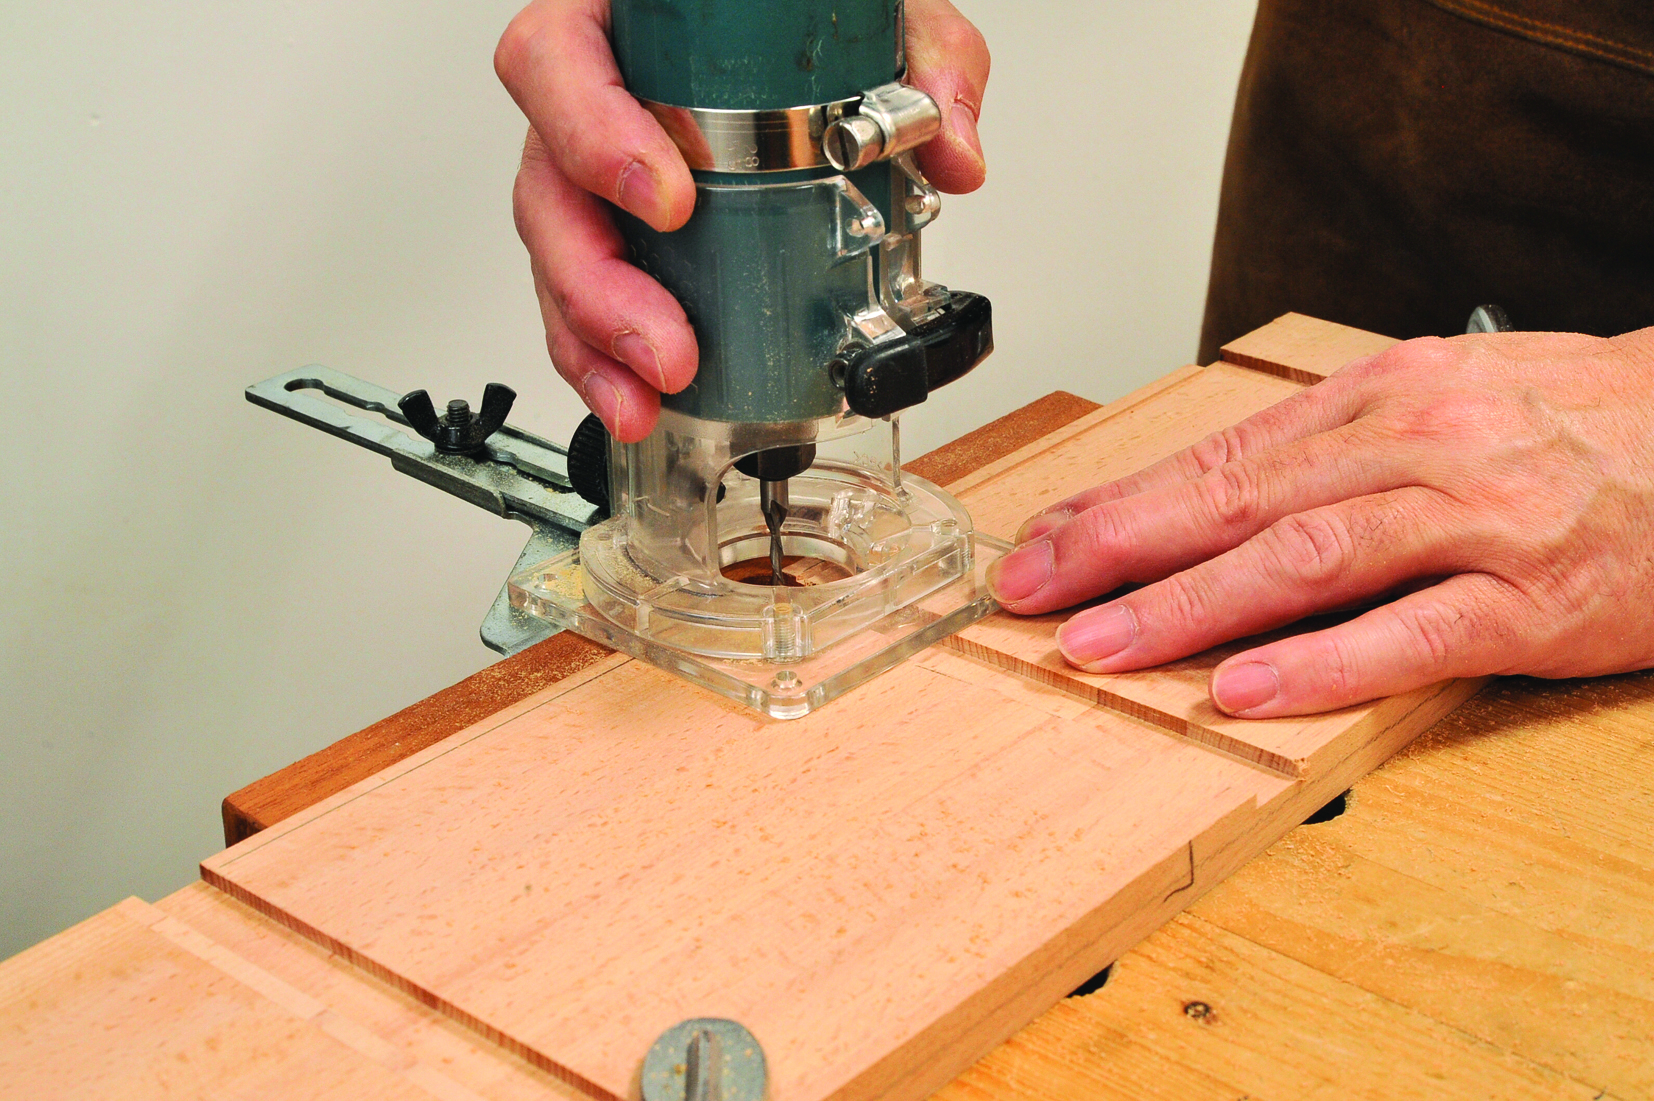
17. Attach a straight guide to the trimmer and, once the position is set, cut the groove. Also, cut a groove in a piece of scrap wood now, to use later for test cuts when widening the groove.
18. Use scrap wood to determine how much to adjust the groove width. Then, proceed with the final cuts. You’ll notice a slight widening of the groove.
19. All grooves are cut. Examine the dado intersections and the back panel grooves to identify where they cross.
20. Dry assemble to ensure the groove positions align correctly.
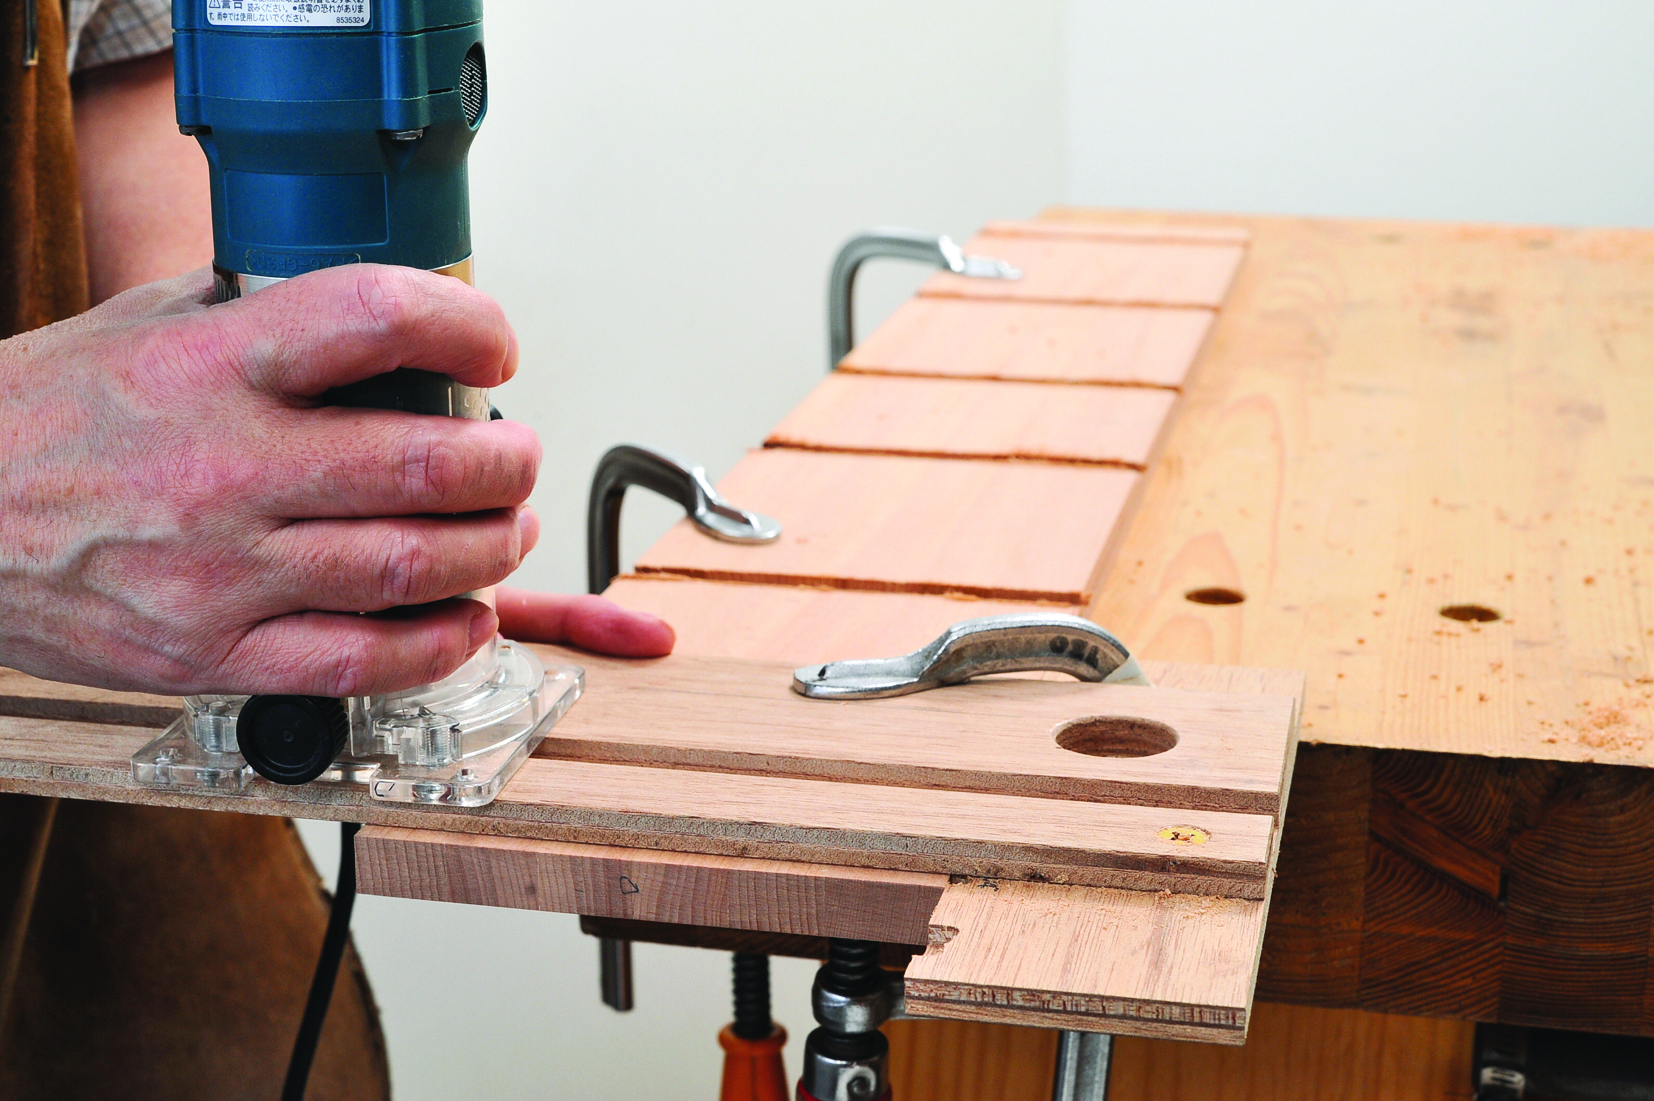
Back panel
21. The back panel is cut from 4mm plywood that has thin vertical grooves to give the appearance of planks. A straight guide is attached to the trimmer for this process. As shown in the picture, it is efficient to cut grooves on both sides with the same setup.
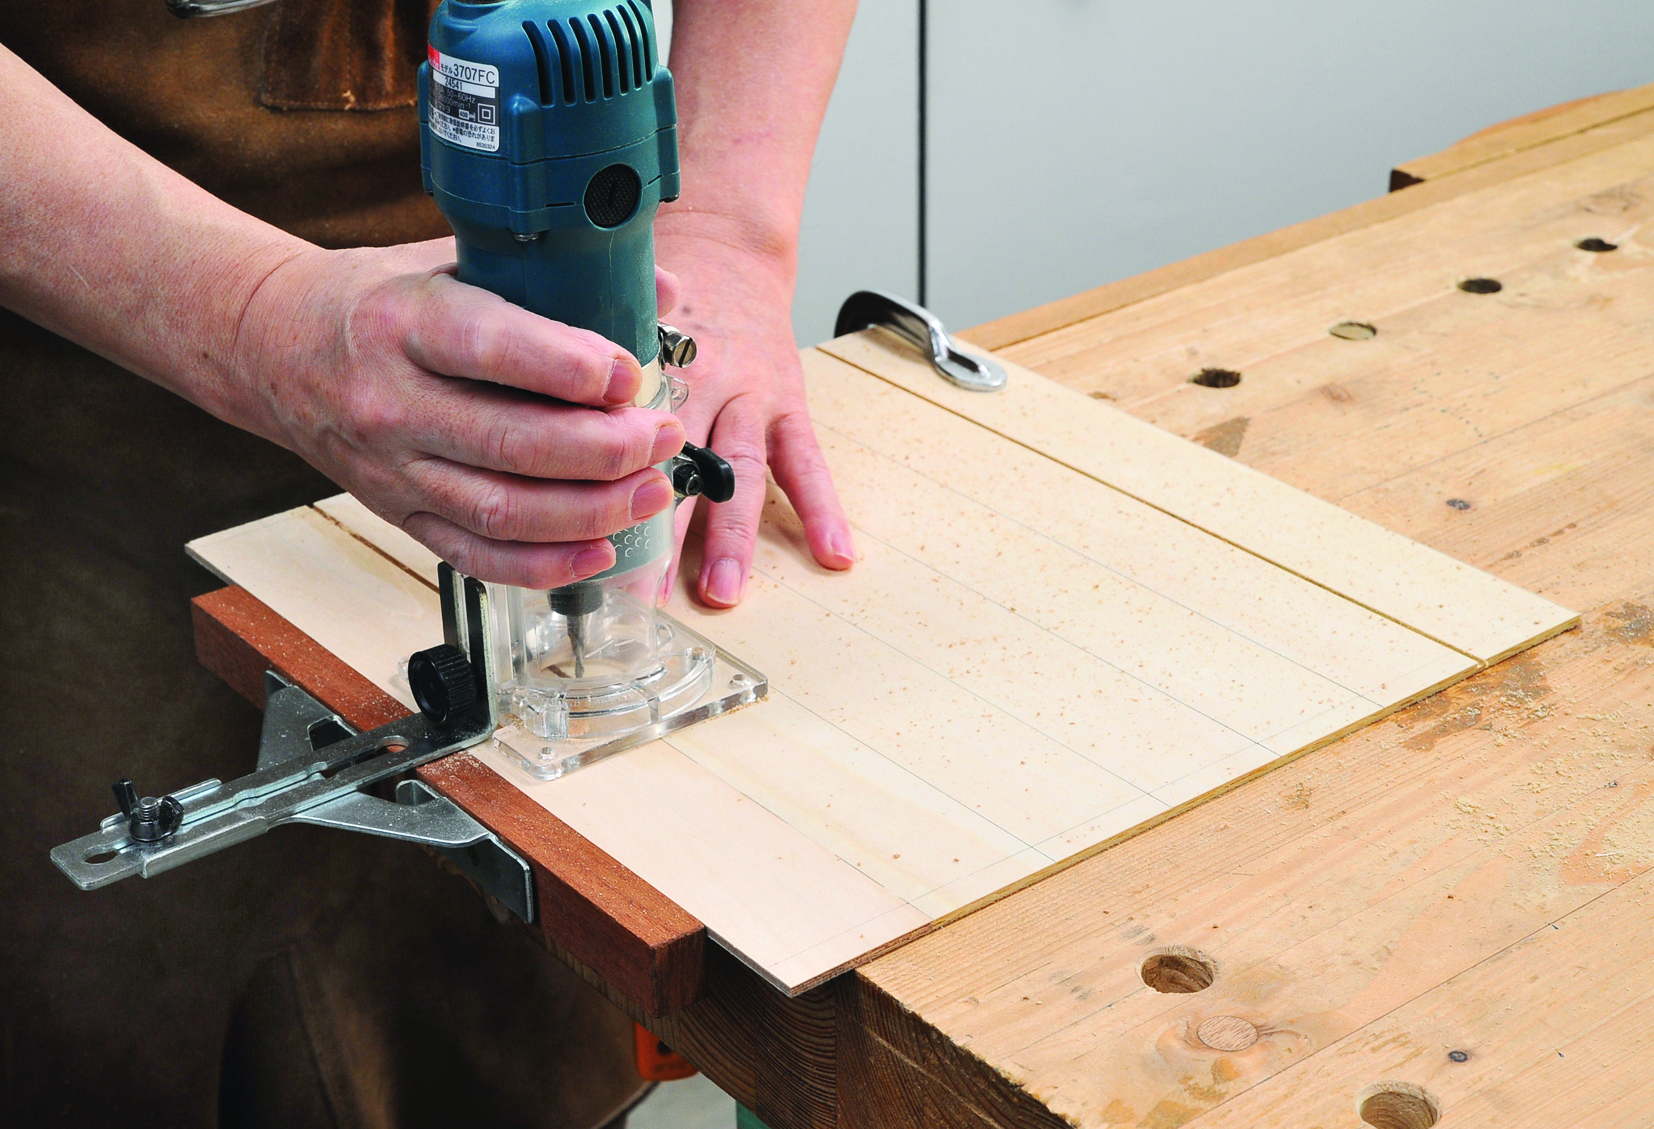
22. As you move towards the back panel’s centre, you’ll need to extend the straight guide arm. However, there’s a limit to how far it can reach. To address this, remove the straight guide, leaving only the arm. Then, clamp a piece of scrap wood to it as a temporary fence. This will help gain the necessary distance to cutting the second groove.

23. Apply double-sided tape for additional security while the temporary fence is still attached.
24. These are the last groove cuts. Even with the temporary fence, this is the maximum distance it can reach.
Colouring the back panel
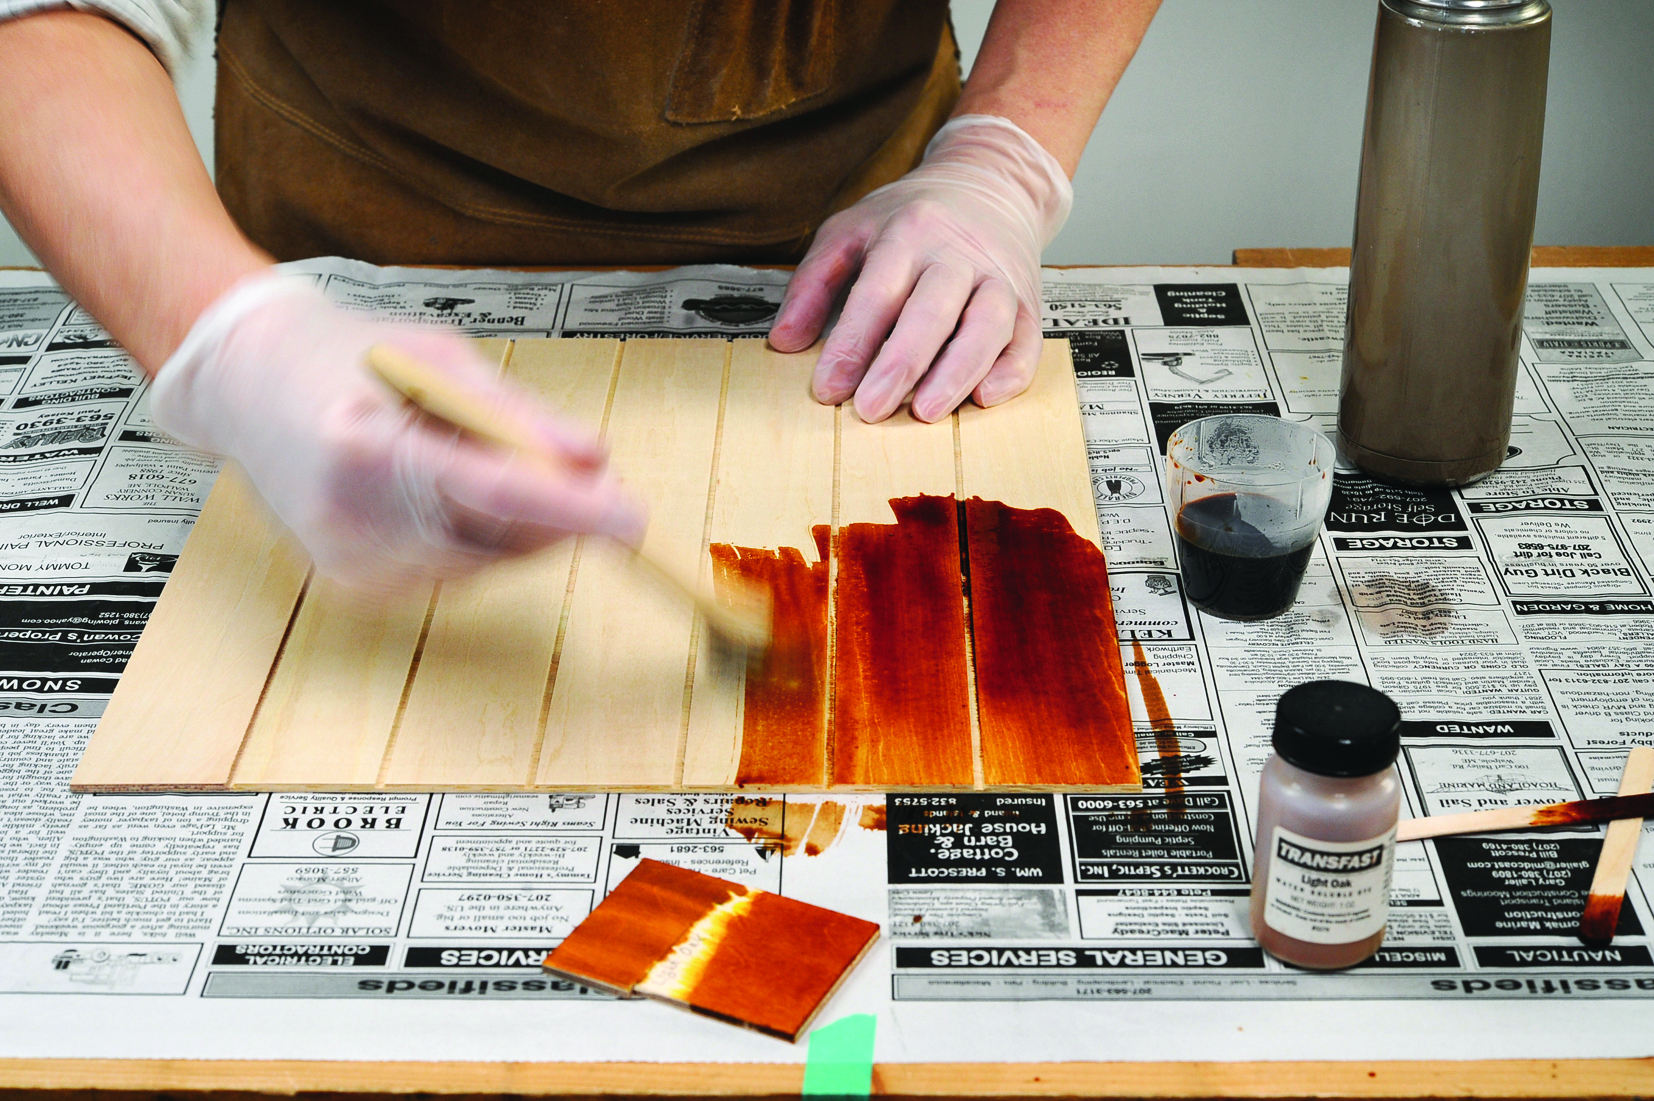
25. The main body is finished with clear lacquer. The colour is expected to deepen, so we’ll apply a dye to the light-coloured birch plywood to match it. It’s a powder type that dissolves in hot water, purchased from an international online store. Once dry, the back panel is cut into two pieces, one for the top and one for the bottom.
Decorative side treatment
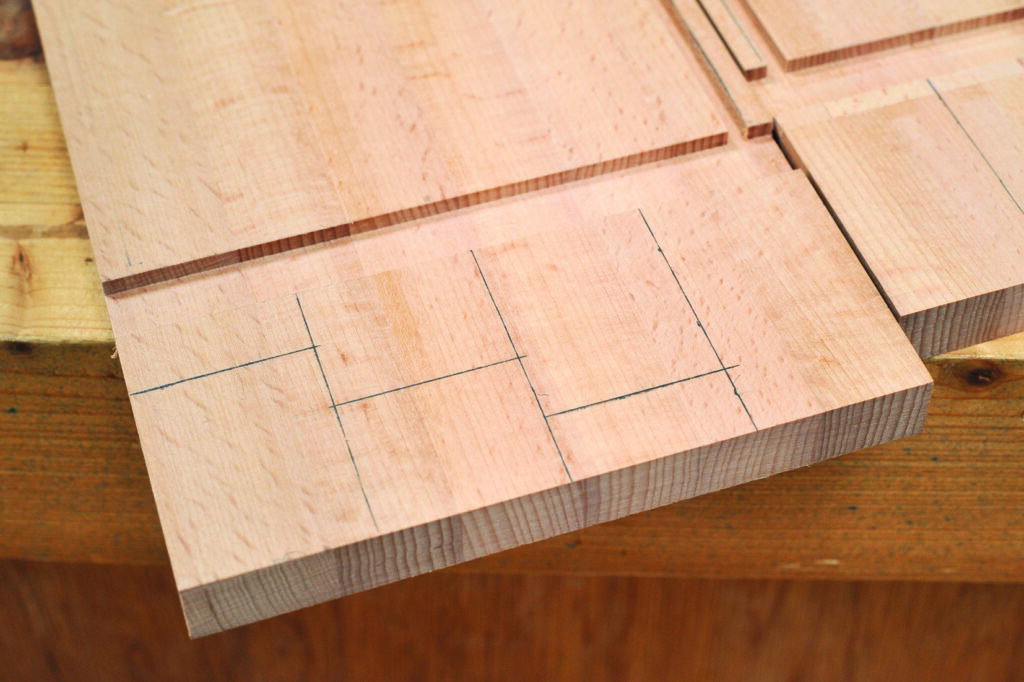
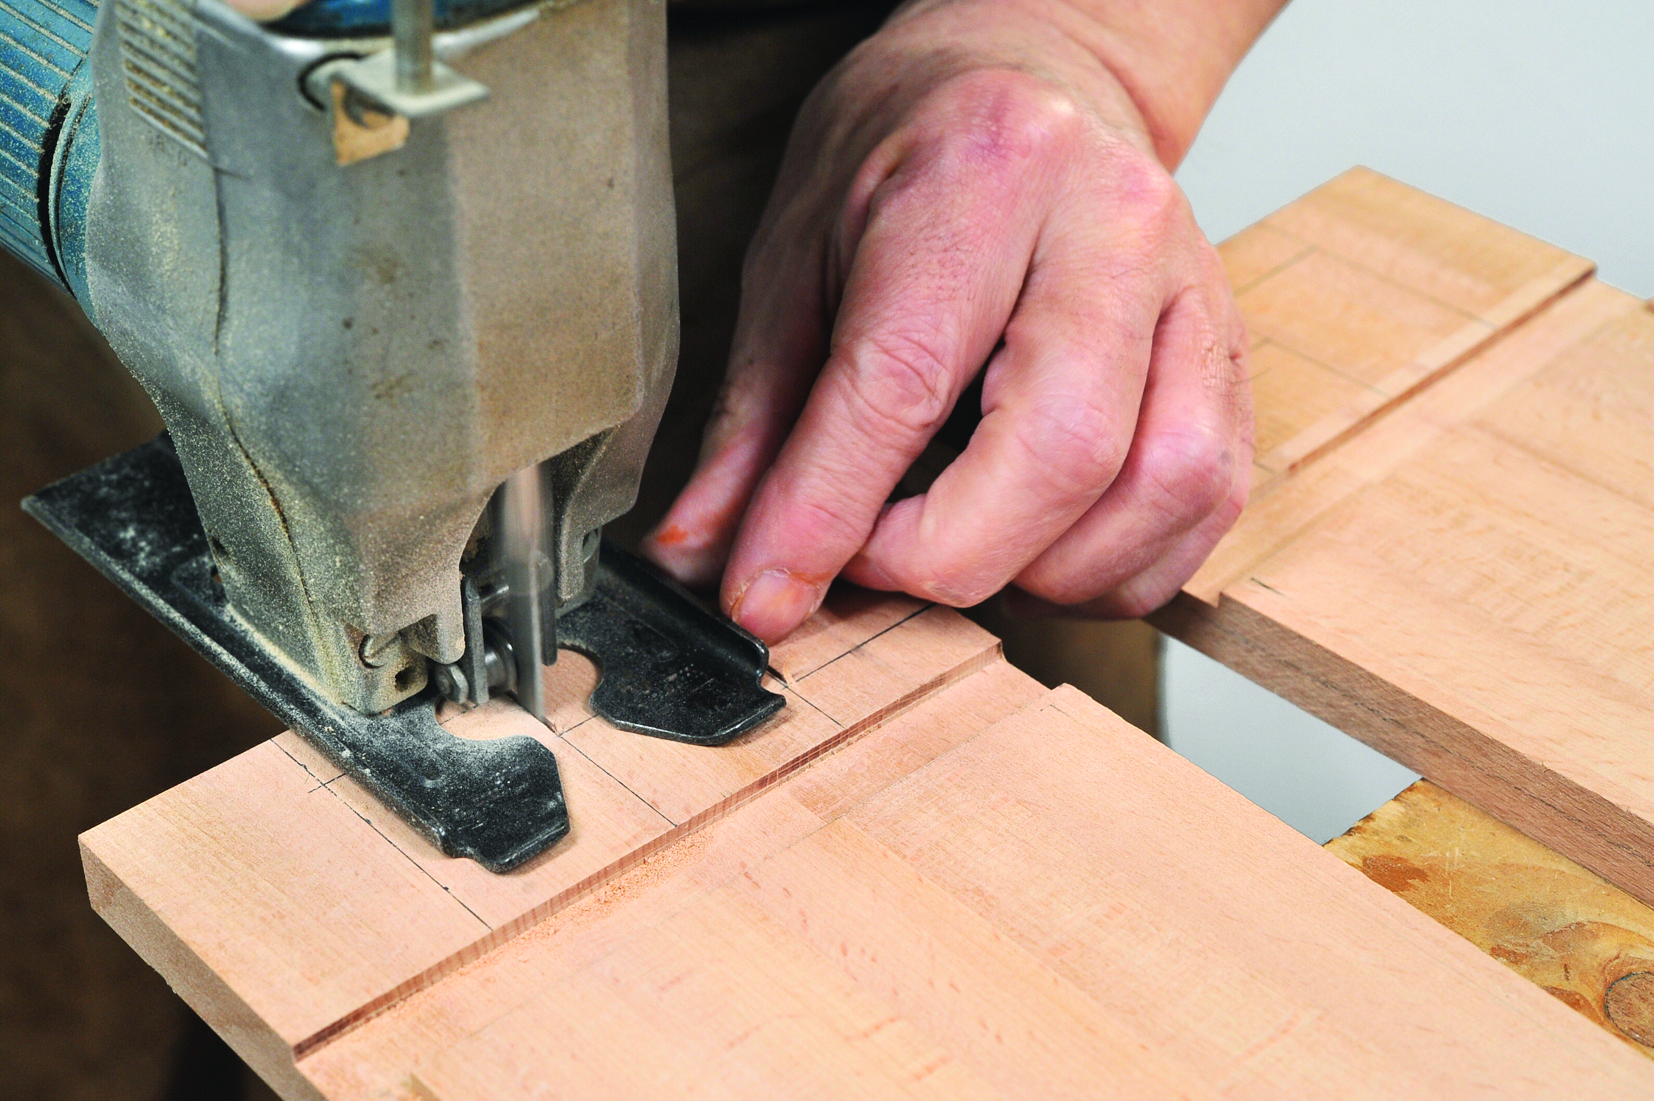
26. Draw pencil lines for step cutting the top and bottom panels.
27. Make vertical cuts with a jigsaw.
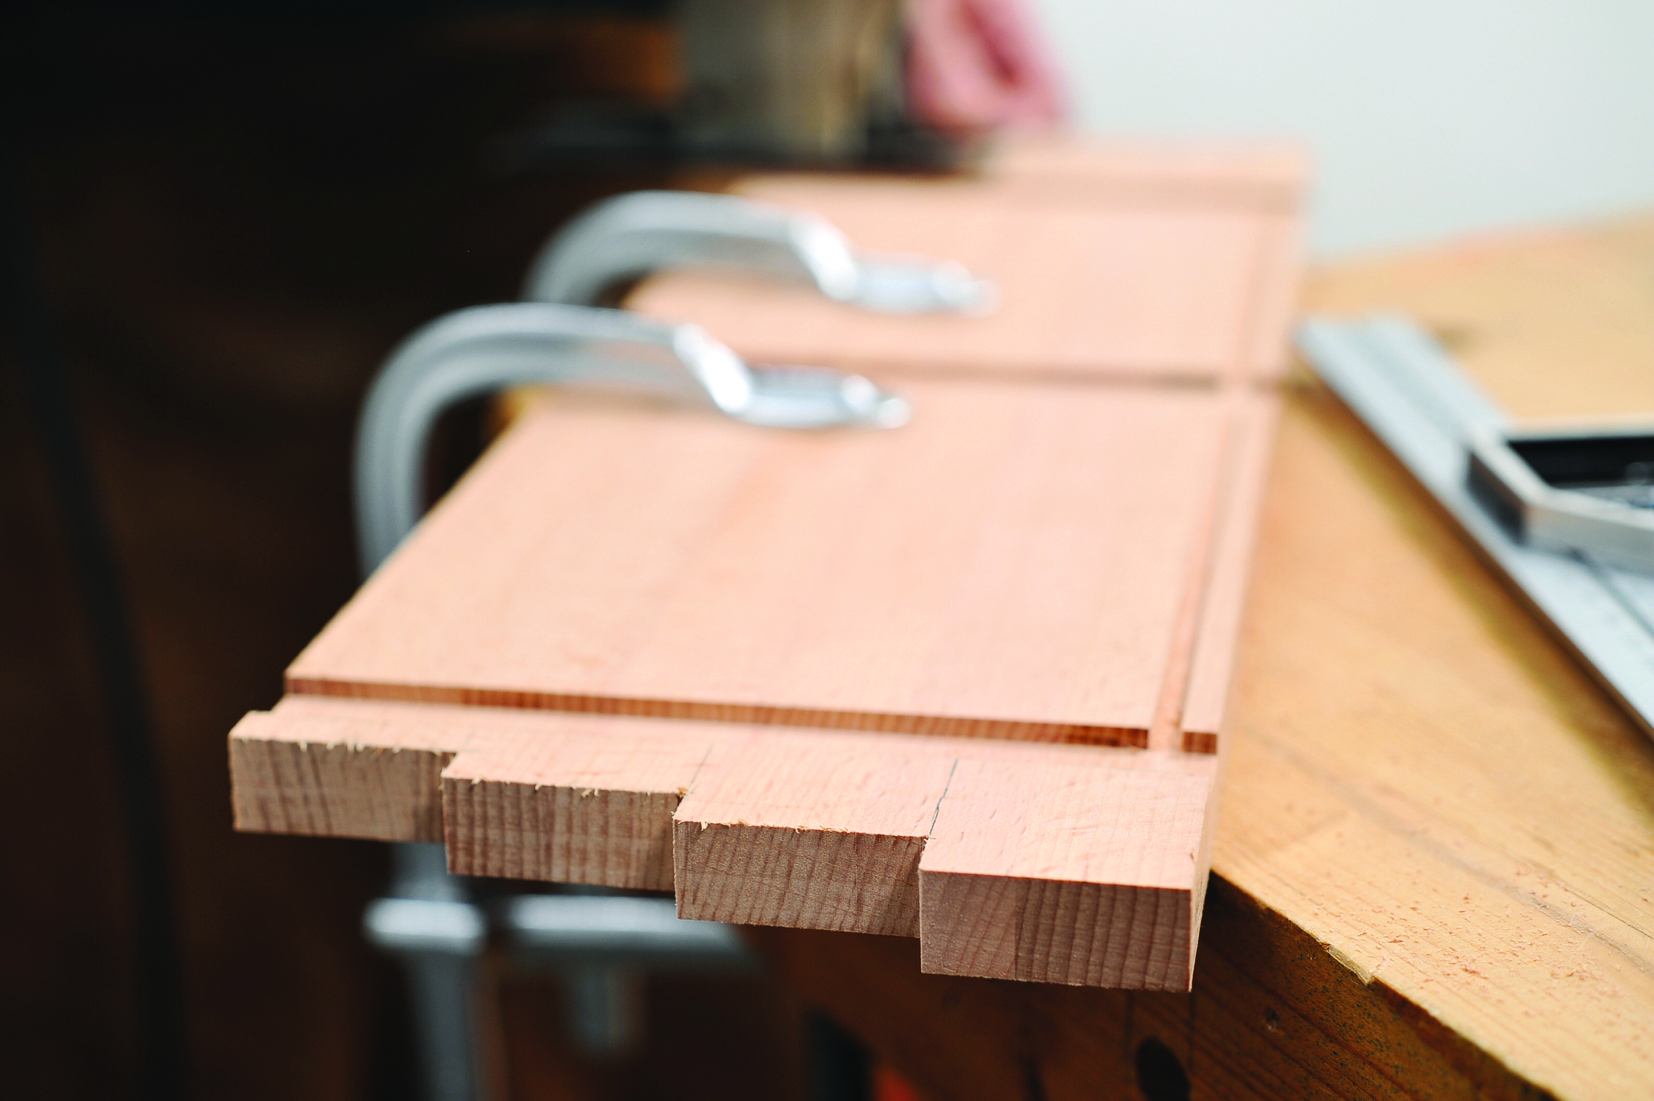
28. Next, make horizontal cuts to create the stepped shape.
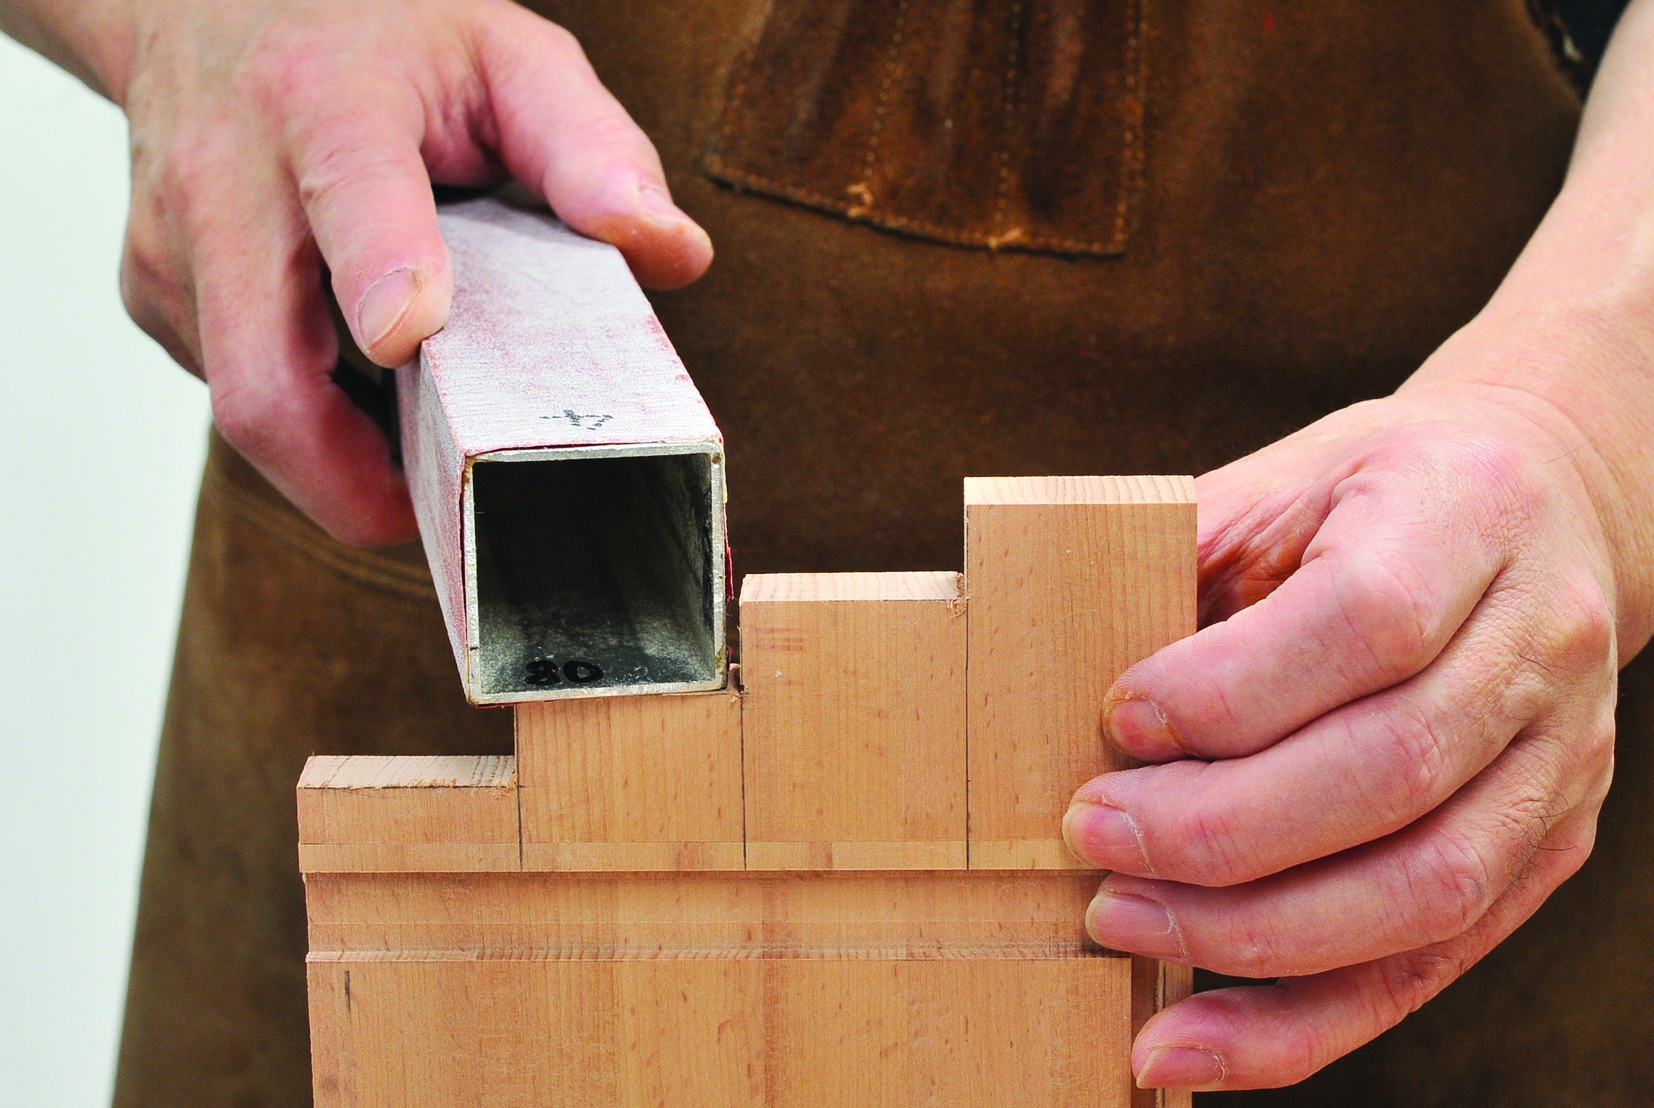
29. Sandpaper off any burrs. I’m using a sanding block of aluminium square pipe with sandpaper wrapped around it and double-sided taped. It’s handy because all four sides can be used. This idea came from a member of a woodworking club.
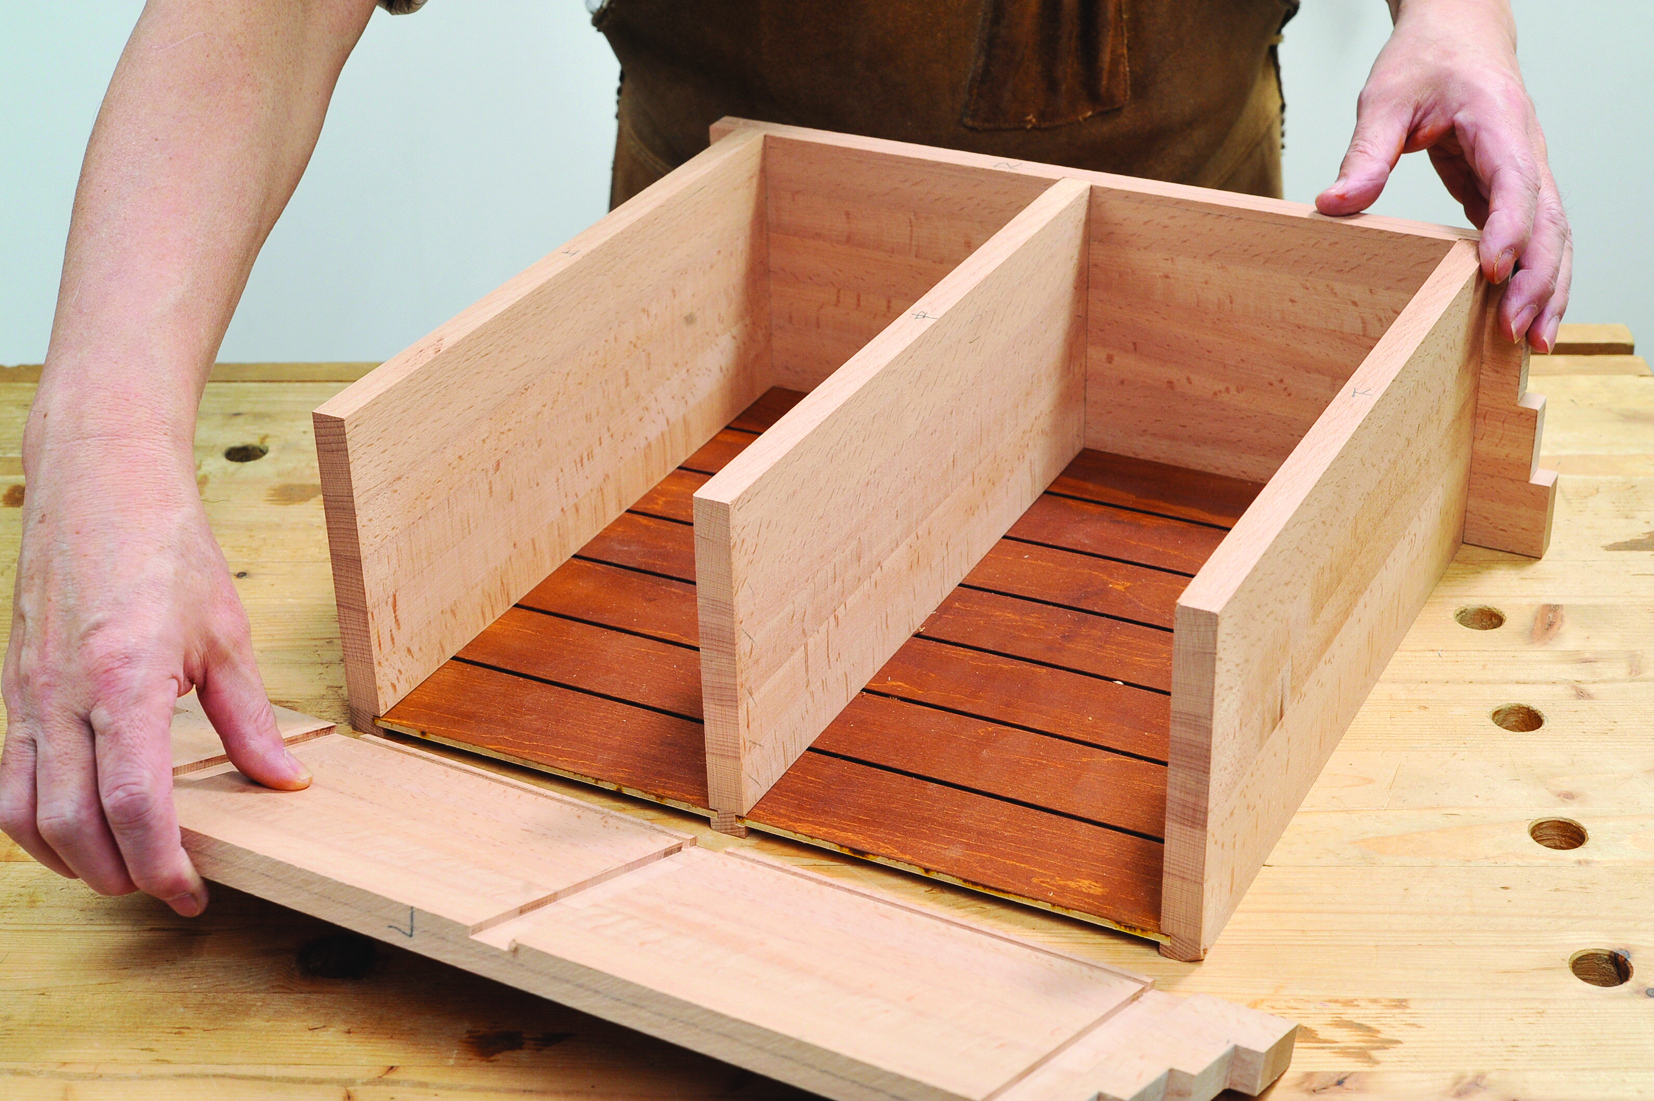
30. Insert two back panels and dry fit.
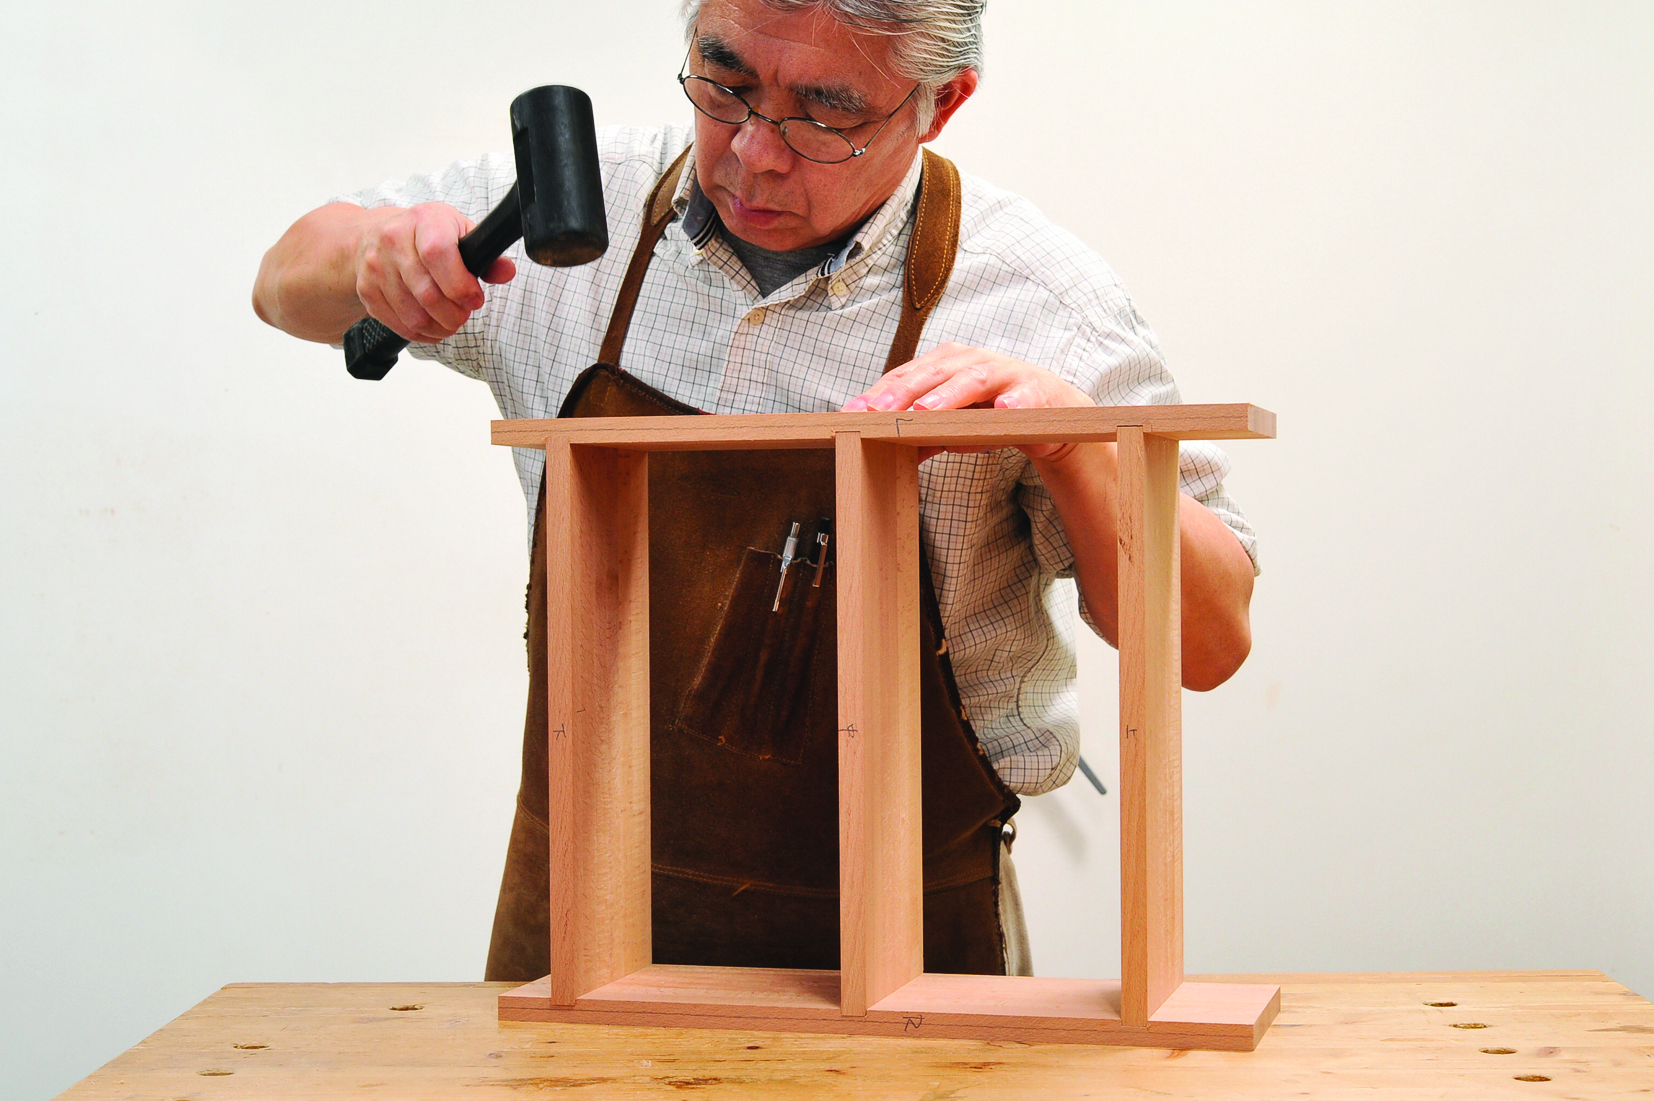
Gluing
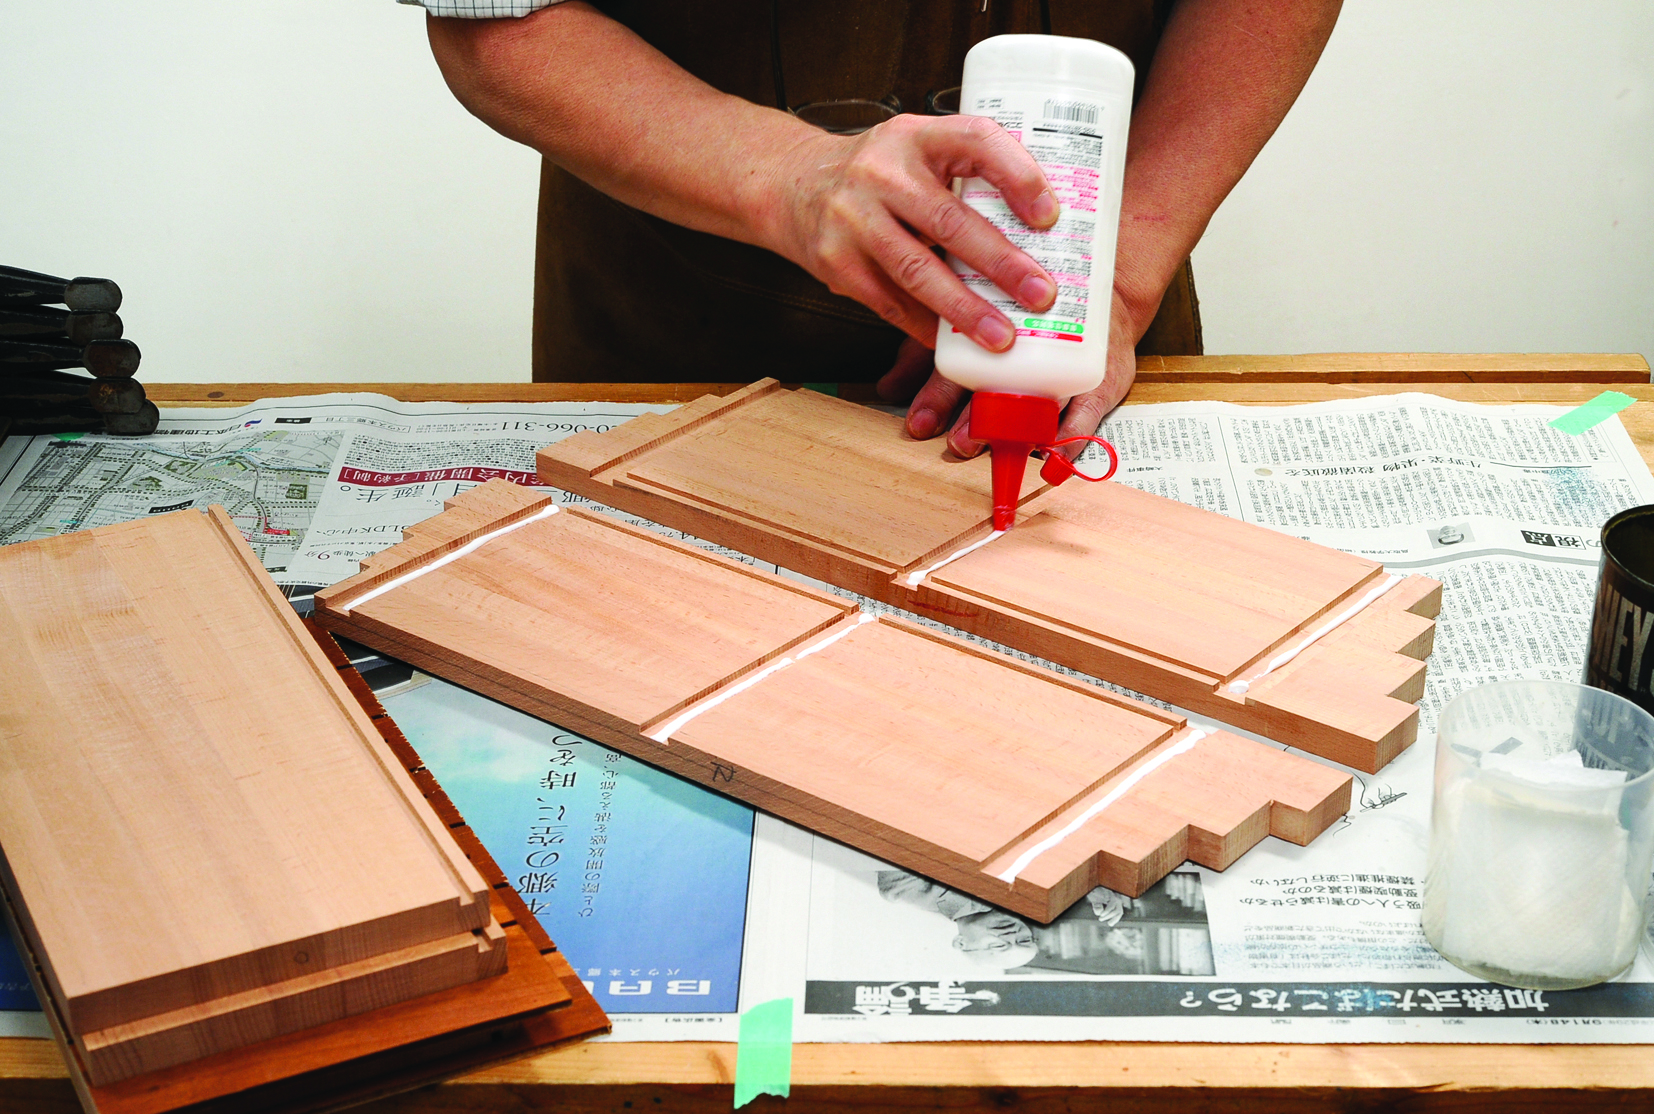
31. Apply glue to the dado grooves and assemble the entire piece.
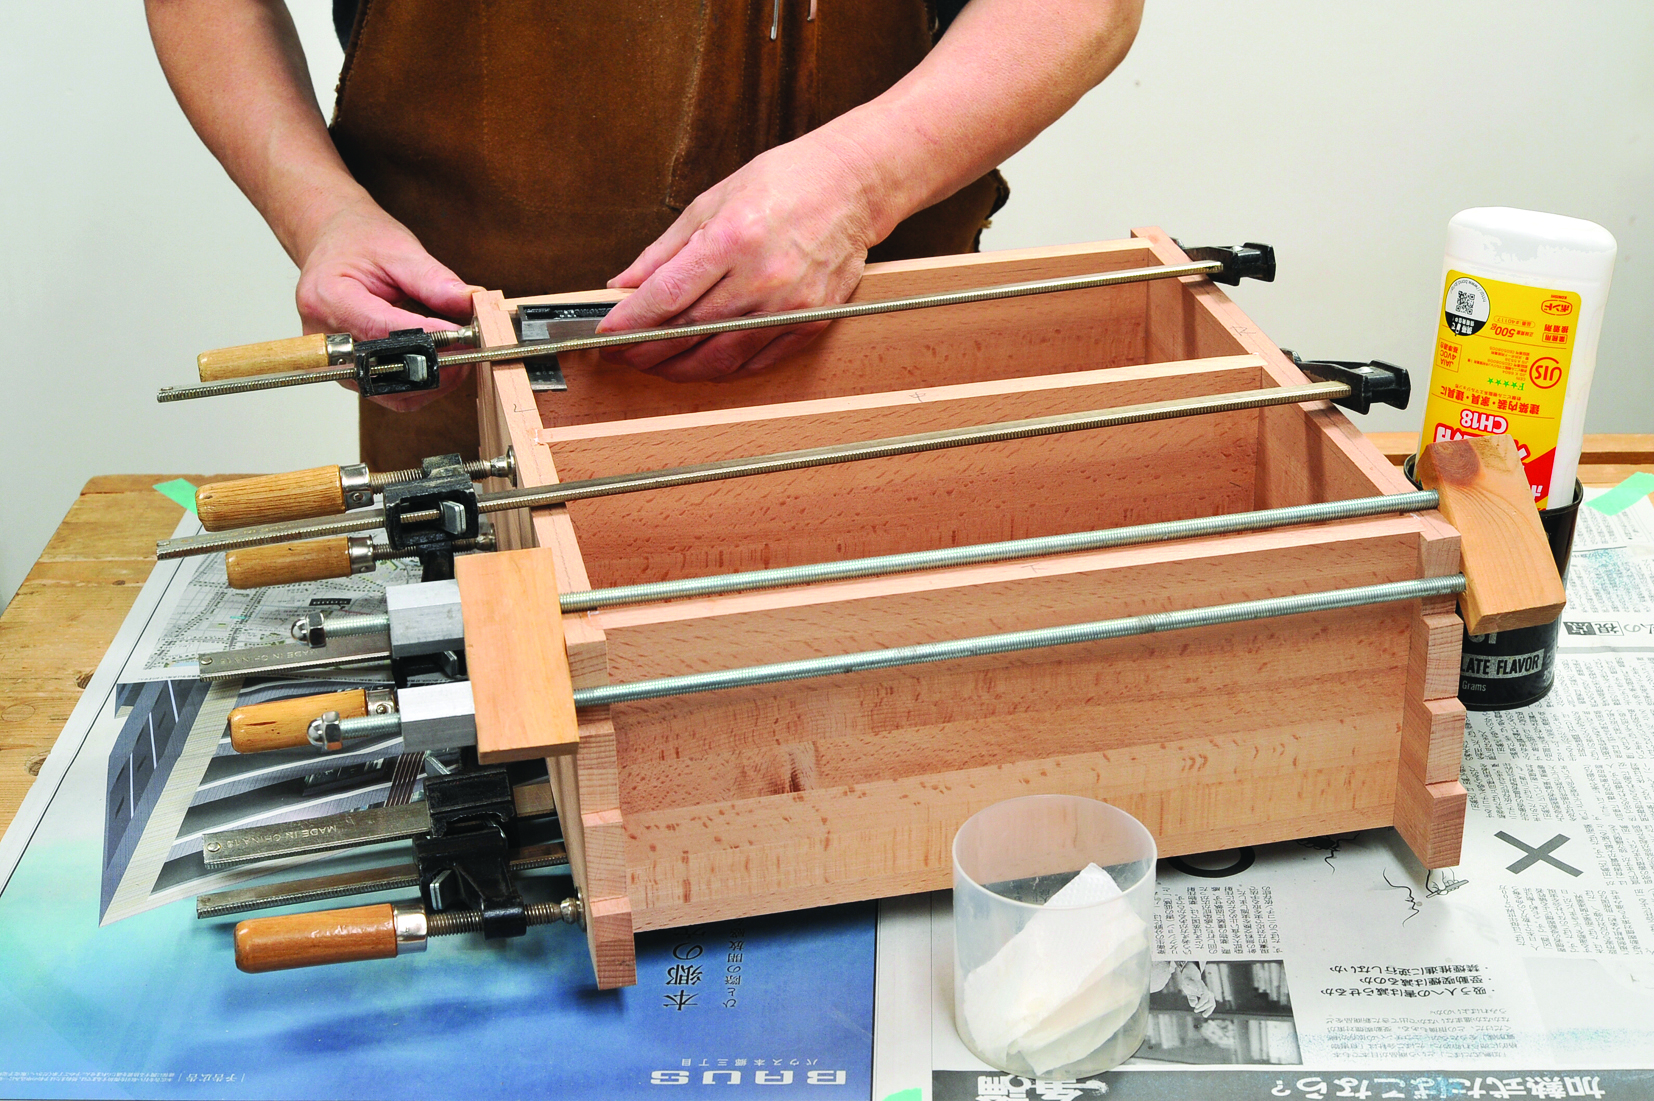
32. Tighten the clamps on each shelf, one at each end. Wipe off any excess glue. Use a square to check the interior. If it’s not square, adjust by applying diagonal pressure with a clamp.
Finishing
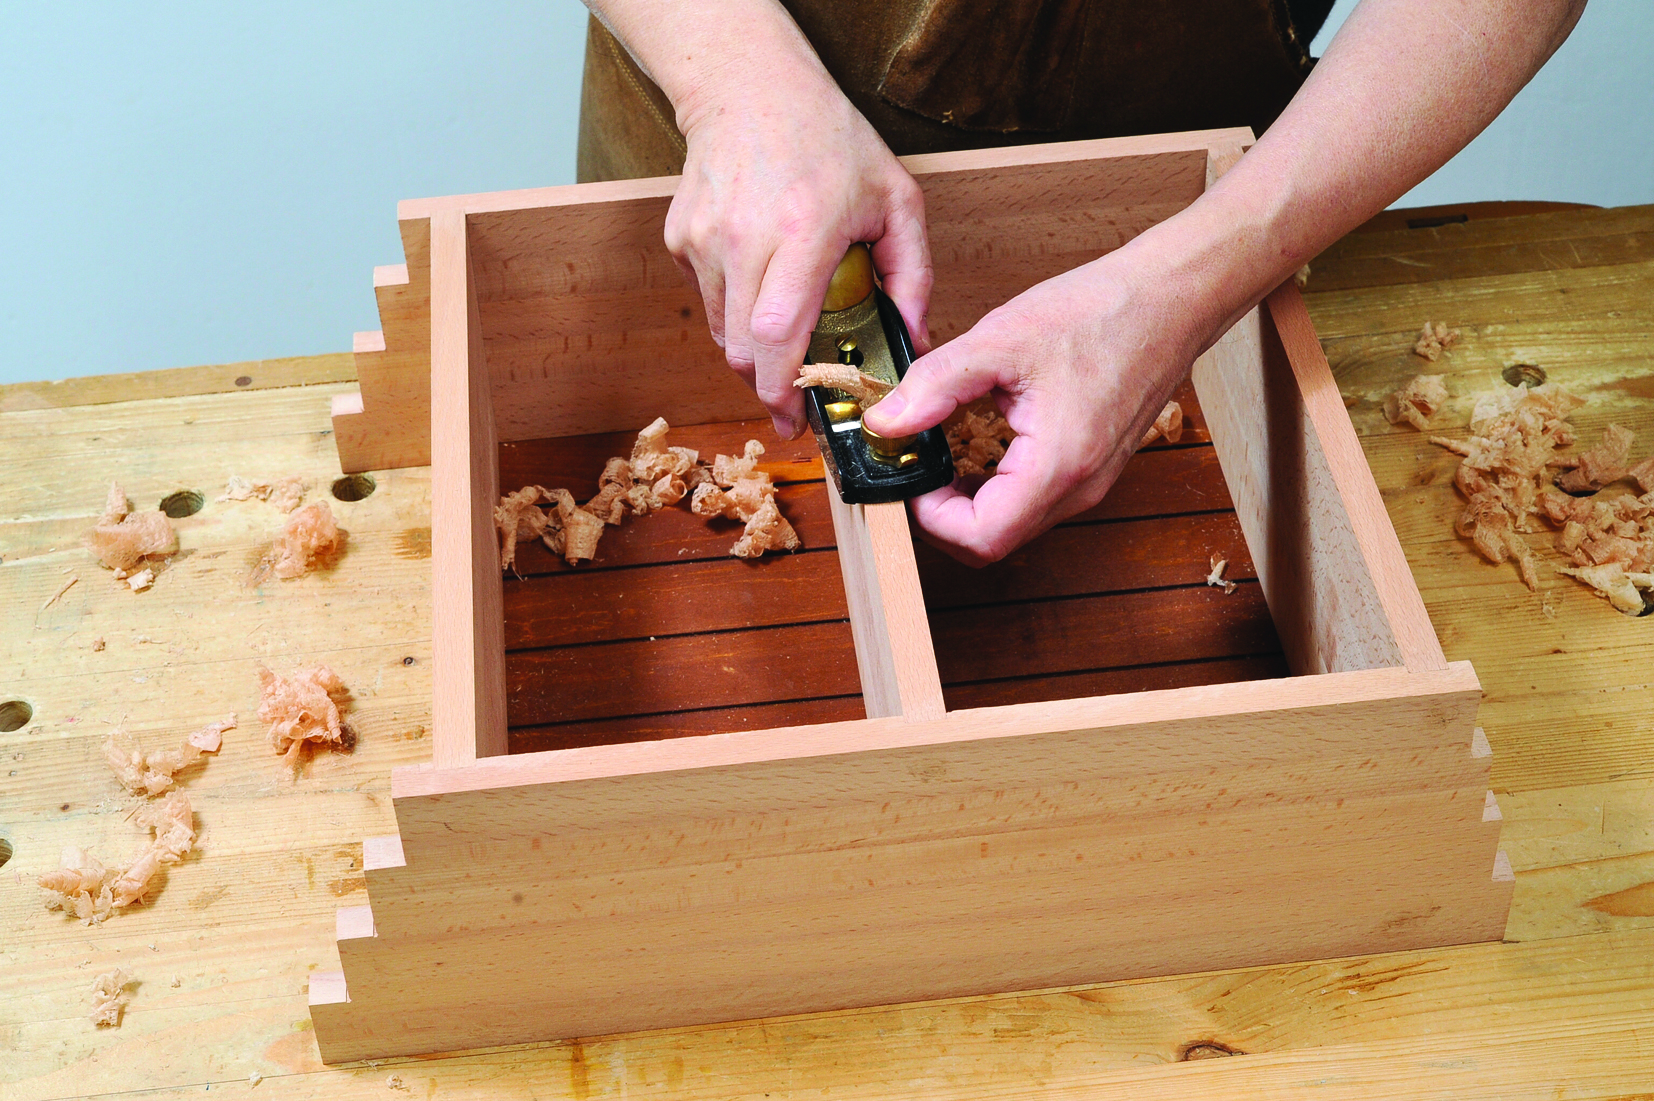
33. Clean up any unevenness with sandpaper or a plane.
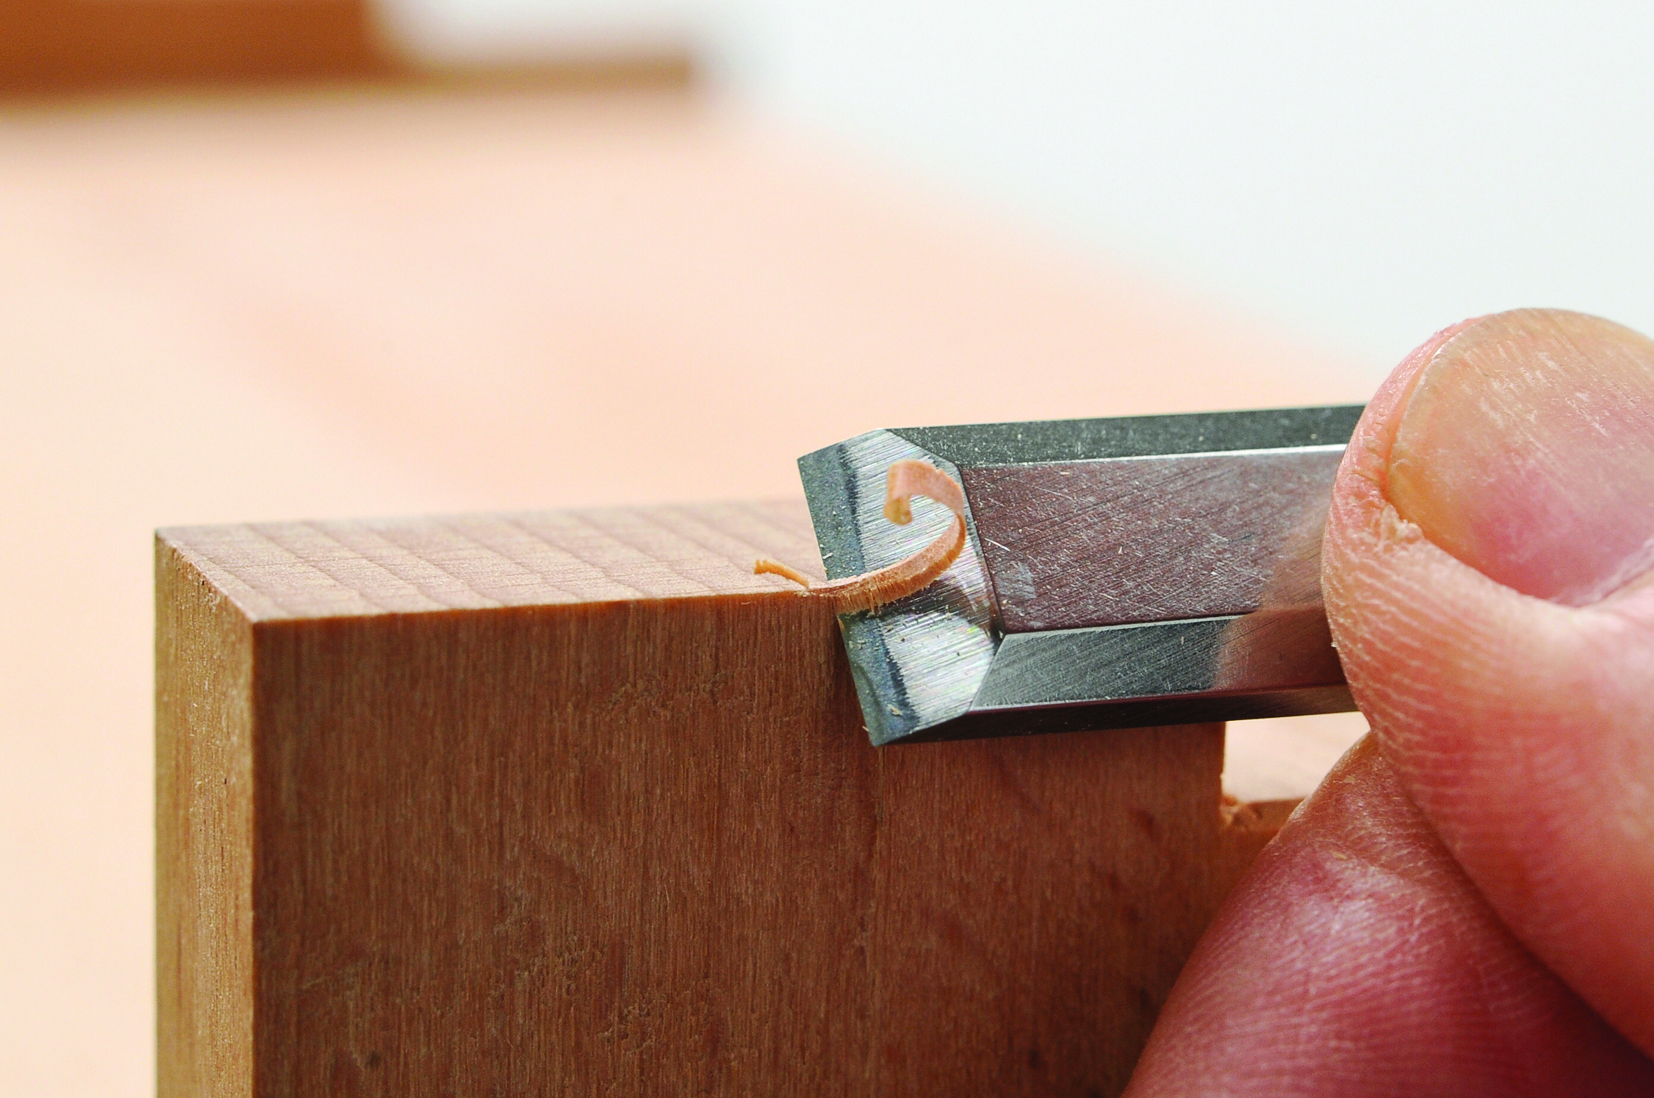
34. Chamfer the edges and clean any shavings or dust.
Painting
35. I often apply sanding sealer, sand that down, and then finish with a matte clear lacquer. The matte finish produces a calm, subdued look.
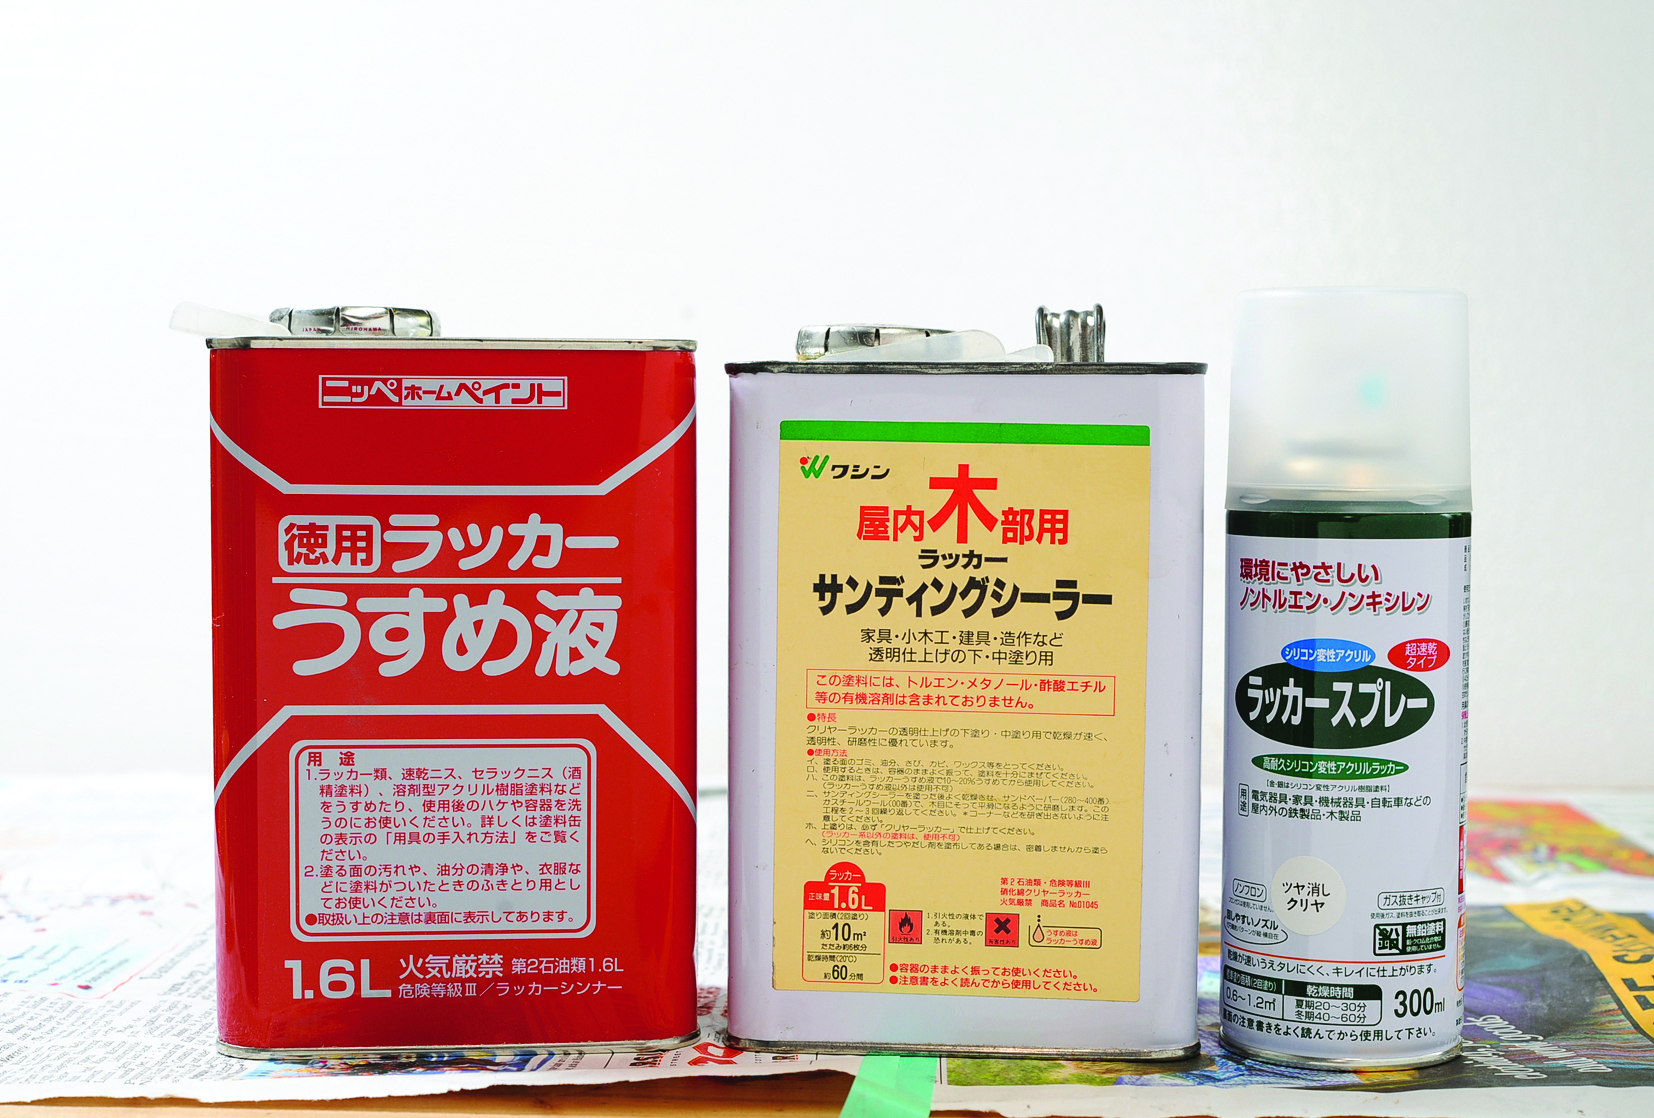
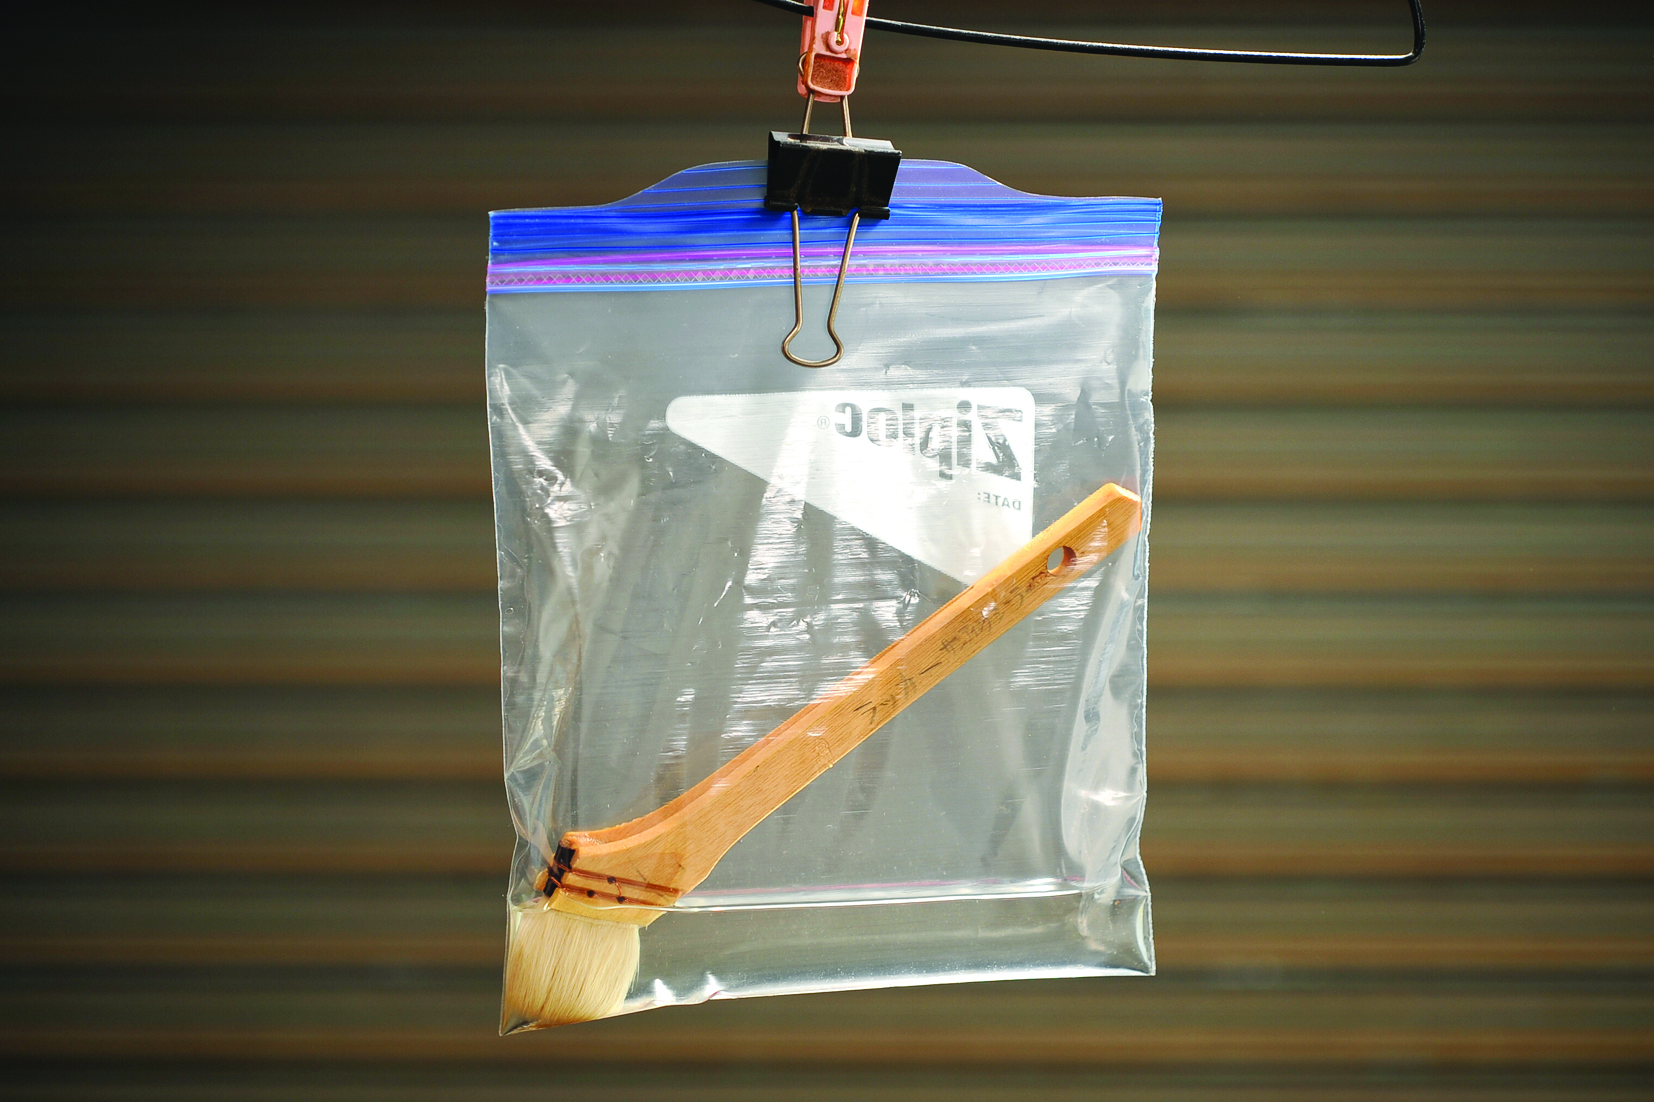
36. Here, we are soaking the brush we previously used to apply sanding sealer in lacquer thinner because it had become stiff. Plastic food bags are very useful for this. Even if you’re painting over several days, you can seal the brush in the bag with a zipper and it will remain usable.
37. Apply sanding sealer as a base coat.
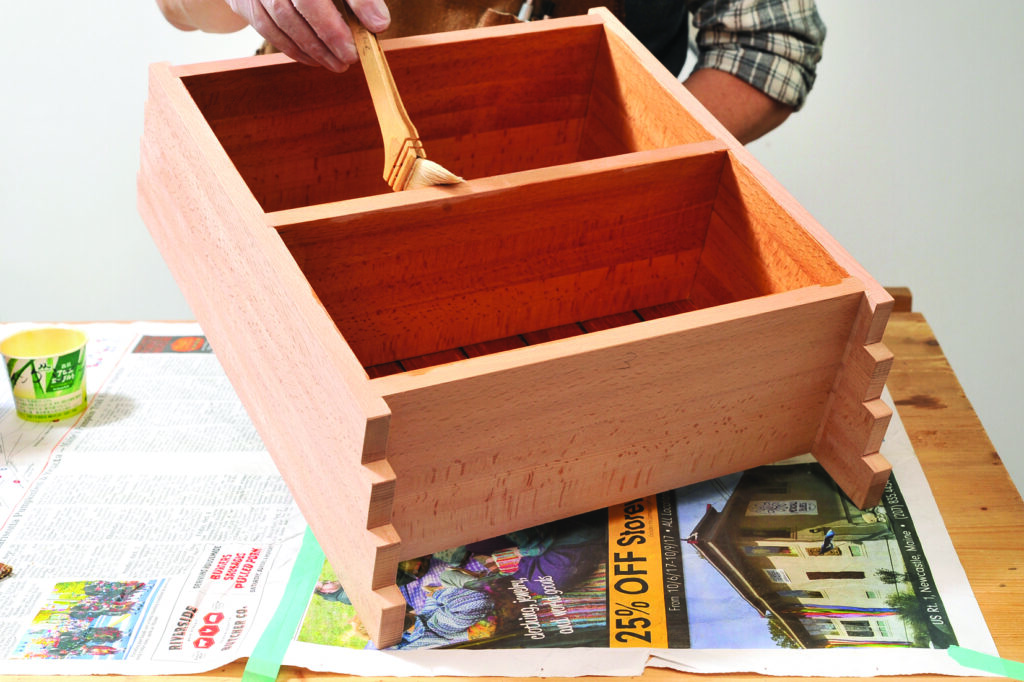
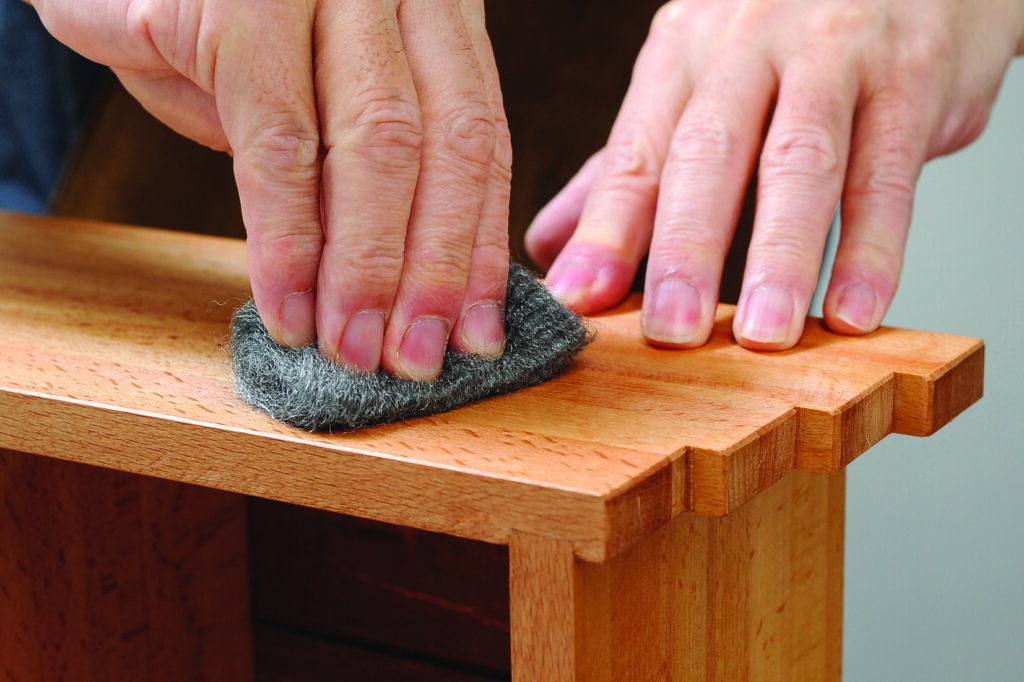
38. Once the sanding sealer dries, the wood surface becomes rough. Normally, you would use sandpaper, but here we used steel wool.
39. I created a simple spray booth using cardboard as a screen and sprayed on the matte clear lacquer.
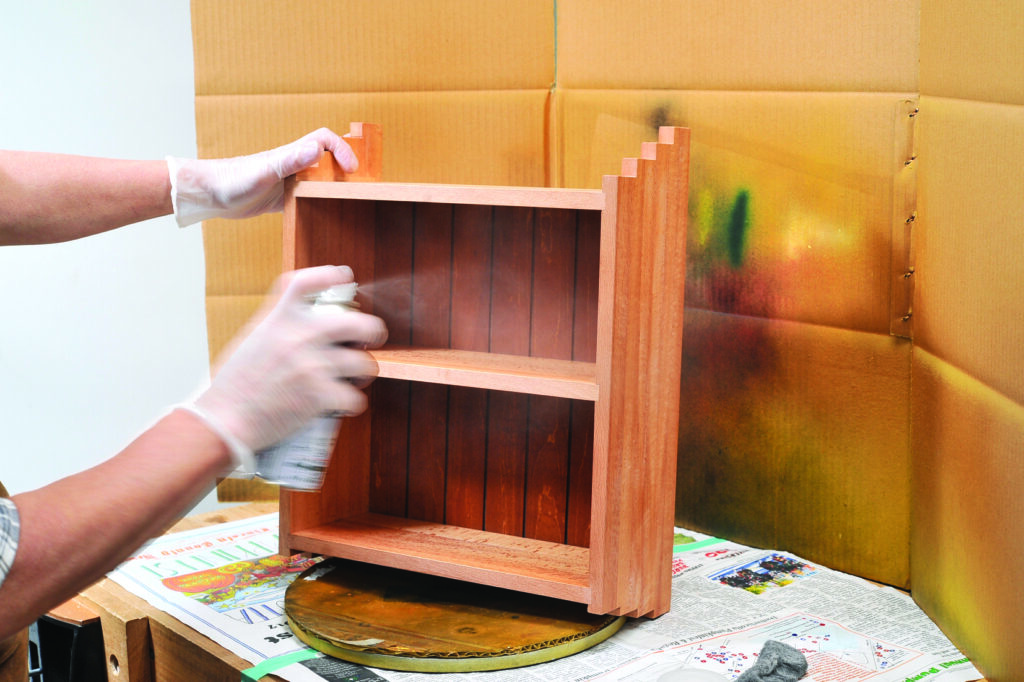
40. To make it easier to spray along the wood grain, we positioned the piece horizontally. It’s on a store-bought turntable so that it can be rotated when sprayed, thus ensuring no missed spots.
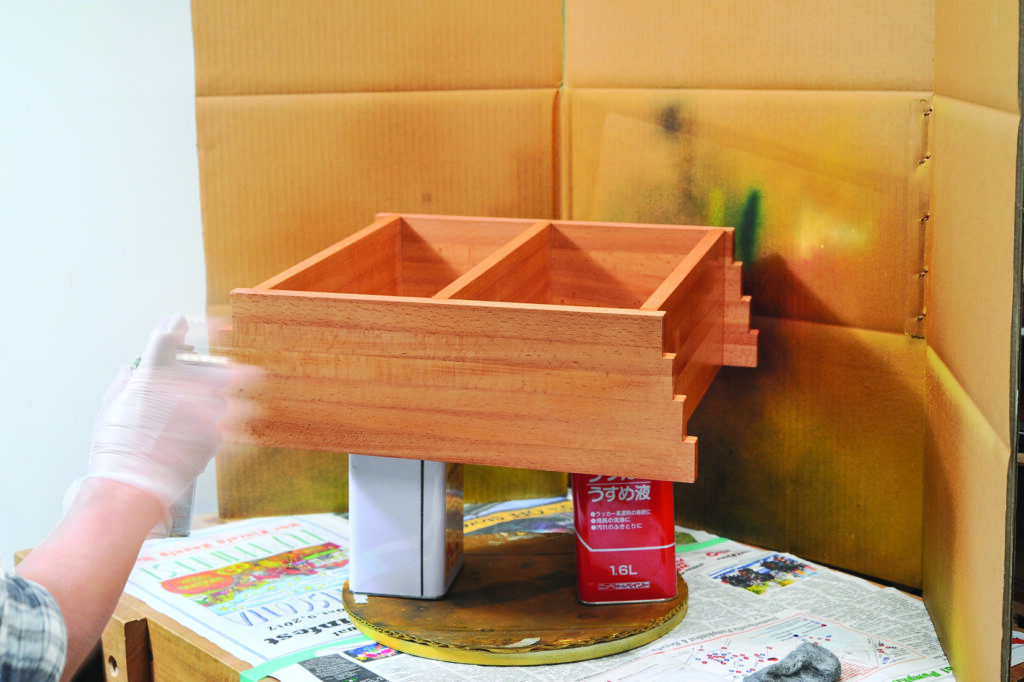
41. The piece has been nicely coated, giving it a calm, refined look. Once the wall-mounting hardware is attached, it’s complete.