Stuart King turns to inspiration from history to create a vessel with a well-worn look, but one thing led to another…
Being not only a woodturner but also an amateur archaeologist used to digging up the odd 2000-year-old pot, one becomes aware of form as applied in the real (ancient) world. A study of rims and bases, of decoration, weathering and wear are essential for dating archaeological finds but such observations can provide useful inspiration for woodturning projects, should that be your thing.
In this vein my project was to create a vessel with a hint of antiquity and of a primitive nature, but as you will see I went off on a bit of a tangent. How many of you have started a project with an idea fixed in your mind and, as things progressed, a change of direction occurred?
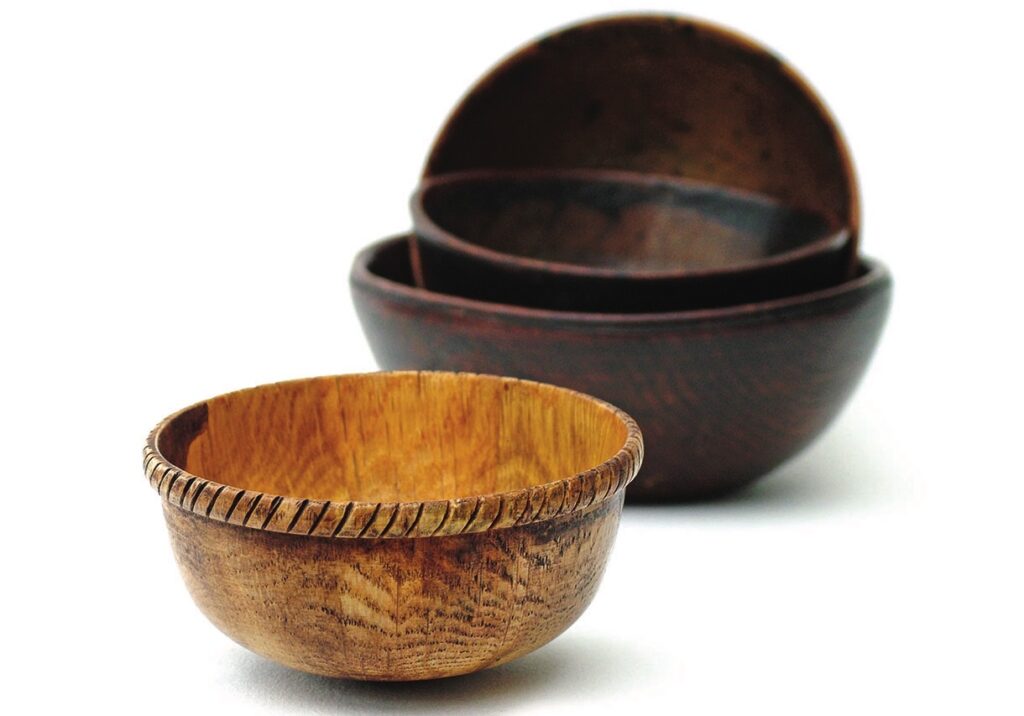
Instead of the rustic, even-walled end grain vessel I had in mind I could not resist creating a thin-walled end grain pot with a convex base – a wobble pot. I first made larger versions of these in the late 1980s. This example is a small tumbler, a drinking vessel of a size occasionally produced in the 17th century which tended to be used then by the upper classes rather than village rustics. A project turned on the hoof rather than from a measured drawing, and yes, with a hint of the contemporary after all.
After the storm a large oak bow crashed to the woodland floor – I own the woodland – and laid there for some six months, then I came along with my saw.
• PPE and RPE • 16mm bowl gouge • 10mm spindle gouge • 4mm parting tool • Small handsaw • Abrasives • Log of timber about 160mm long x 100mm wide • Malt vinegar infused with wire wool • Fine wire wool • Button polish • Burnt umber • Stiff wire brush • Automotive spray paint • Coloured wax • Green spirit stain
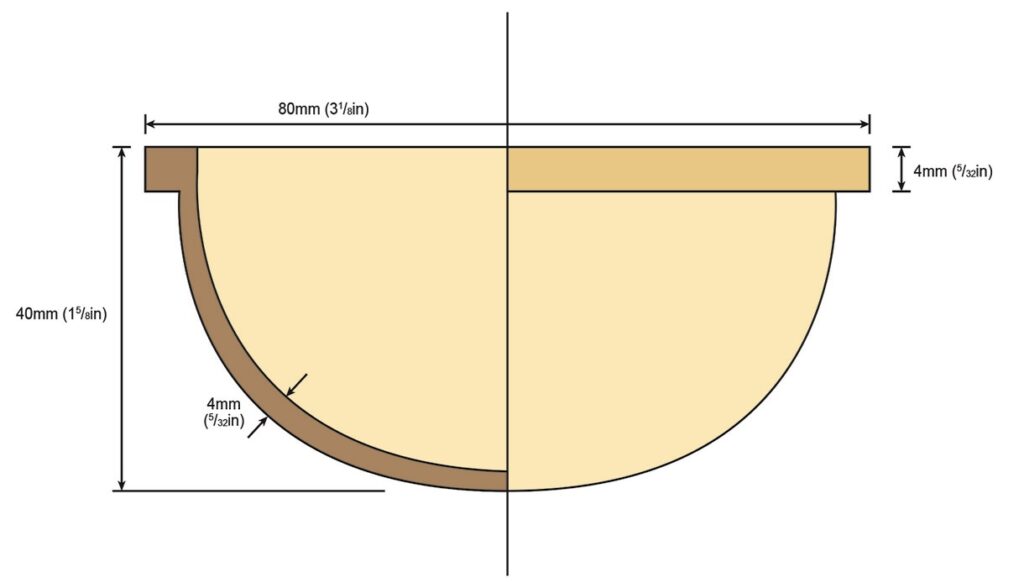
Drawing
Turning the bowl
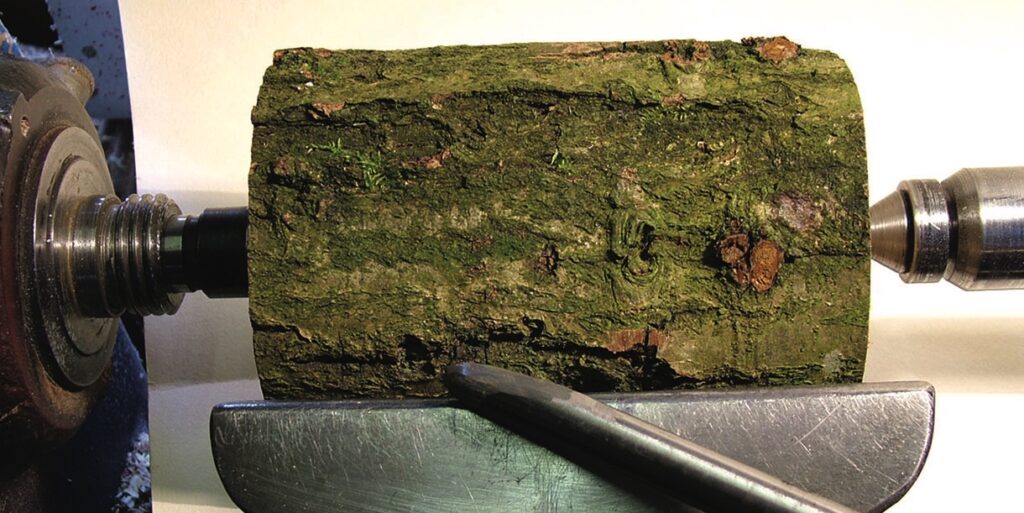
1. Mount your log – in my case a 16 x 10cm semi-green oak (Quercus spp) log – and mount it between centres on your lathe. This size will be enough to produce two small bowls. I will be able to rough down the log and make these bowls using the long-grind bowl gouge shown in the picture. As bark is unpredictable and could fly off erratically during the roughing down process it is prudent to wear a protective face shield and also to stand to one side
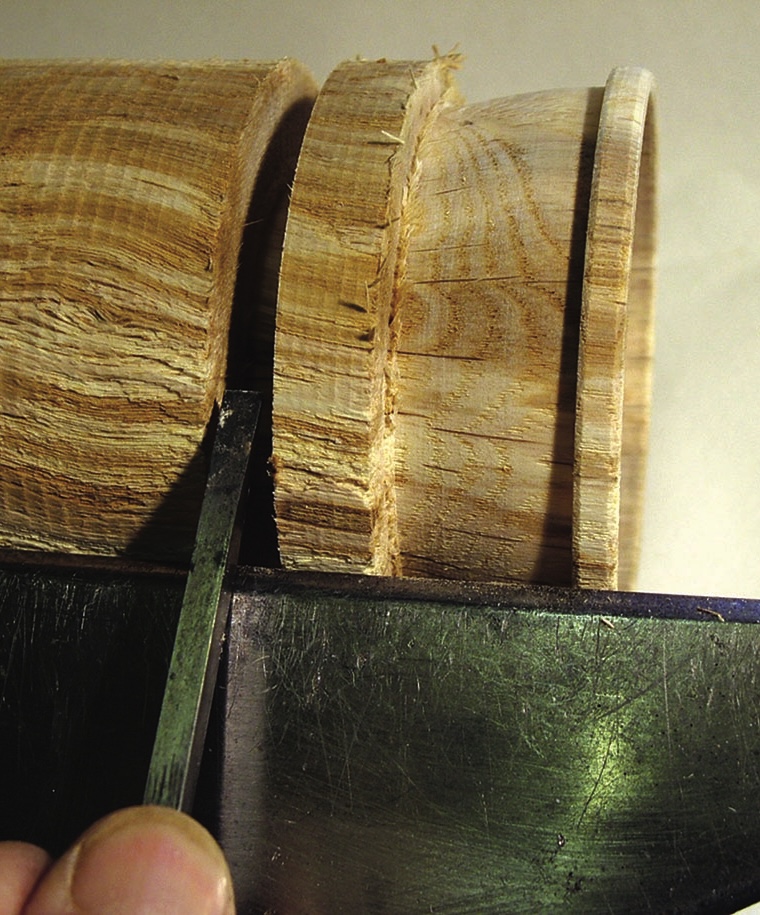
2. To remove the bark, about half of it to start with, lay the gouge at an angle of about 30° off horizontal and have the flute angled to the wood so it is at about the 2 o’clock position. Have the lower wing gently make contact with the wood. Open the flute up to 1 o’clock for a coarser cut or close it down to the 2.30 position for a gentler scrape-type cut. Once you have the cut you require, run the blade along the rest to make multiple cuts to remove the bark down to clean wood. The flute always points in the direction of travel and the cut occurs on the lower wing. Remove half of the bark – you can see how uneven this log was
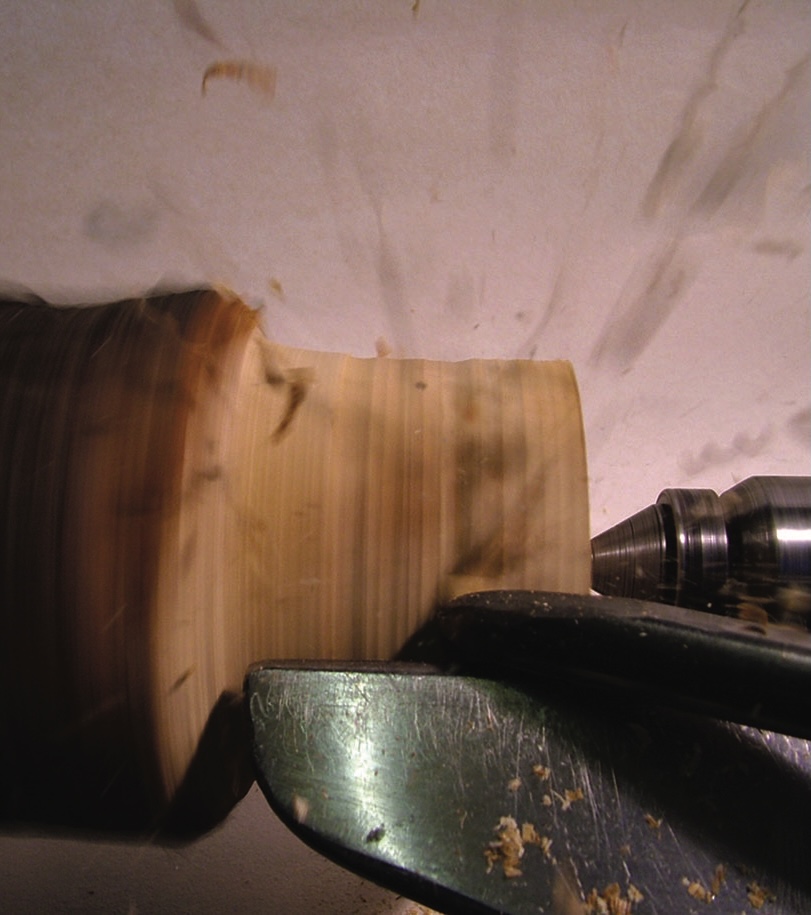
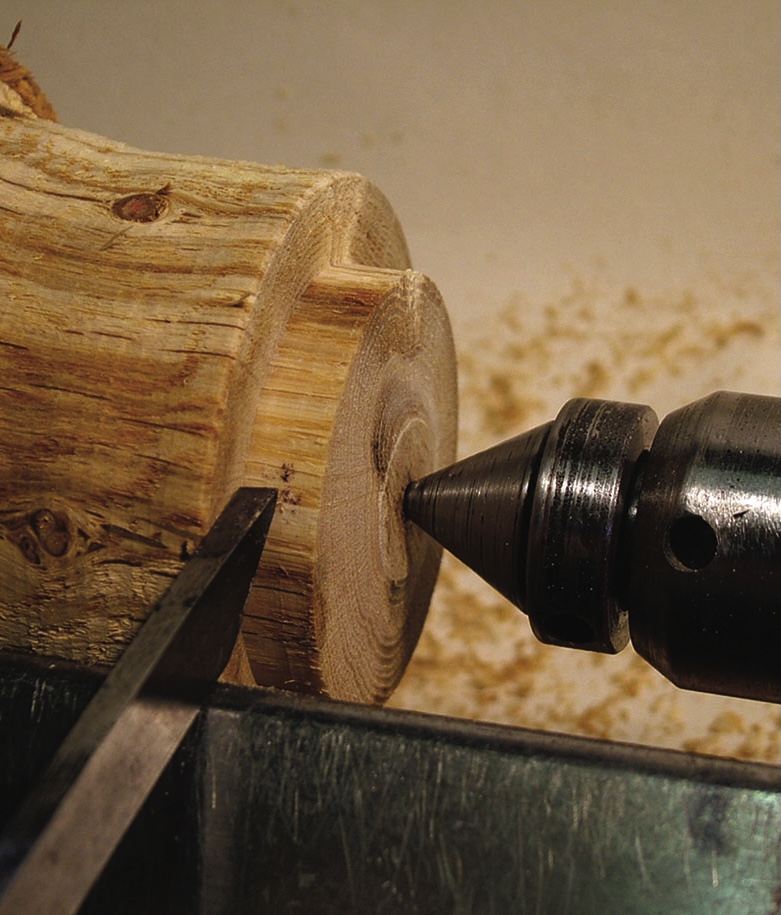
3. Once the bark has been removed, take the diameter of one end of the log down to about 80mm. Using a parting tool, cut a spigot to suit your chuck jaws with a parting tool. Once cut, mount your timber securely in your chuck. Once securely held, bring up the tailstock and rough down the blank to a true cylinder
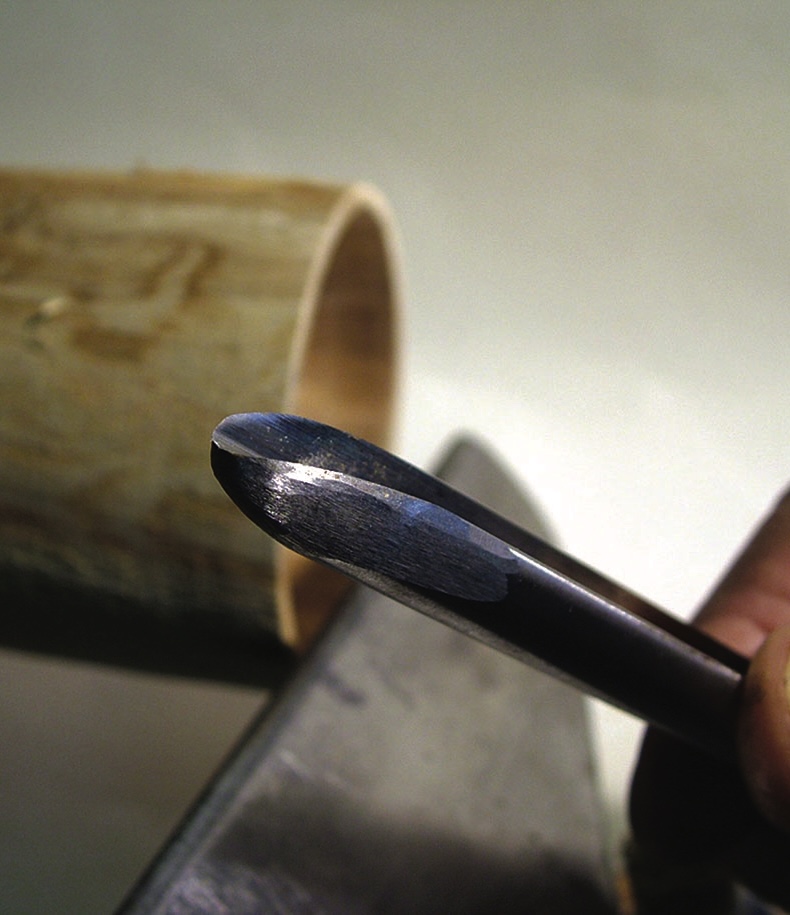
4. Once you have your cylinder the hollowing process can begin. Due to your not going very deep the swept-back gouge used earlier can be used for this too. You can see it has quite a blunt front bevel angle. This will help you reach all of the surface of the tight internal radius curve. Start by either boring a hole in the centre or use the gouge to create a slight hollow and then extend this till you get to the required internal shape. Use a scraper to clean up the shape if you need to
5. Technically you are meant to cut with the grain, from the centre out towards the rim section. Truthfully, on these shallow vessels, you can cut against the grain. It leaves a slightly worse surface than cutting with the grain, but it is easily sanded. Whichever cut direction you use, the entry angle of the gouge should be such that the flute points in the direction of travel and you enter in line with the bevel cutting on the lower wing. Begin in scrape mode and open the flute to get a better cut as you progress. A 3mm or 4mm even wall thickness is required to prevent cracking when it dries. It will go out of shape, but the even wall thickness drastically minimises the risk of cracking
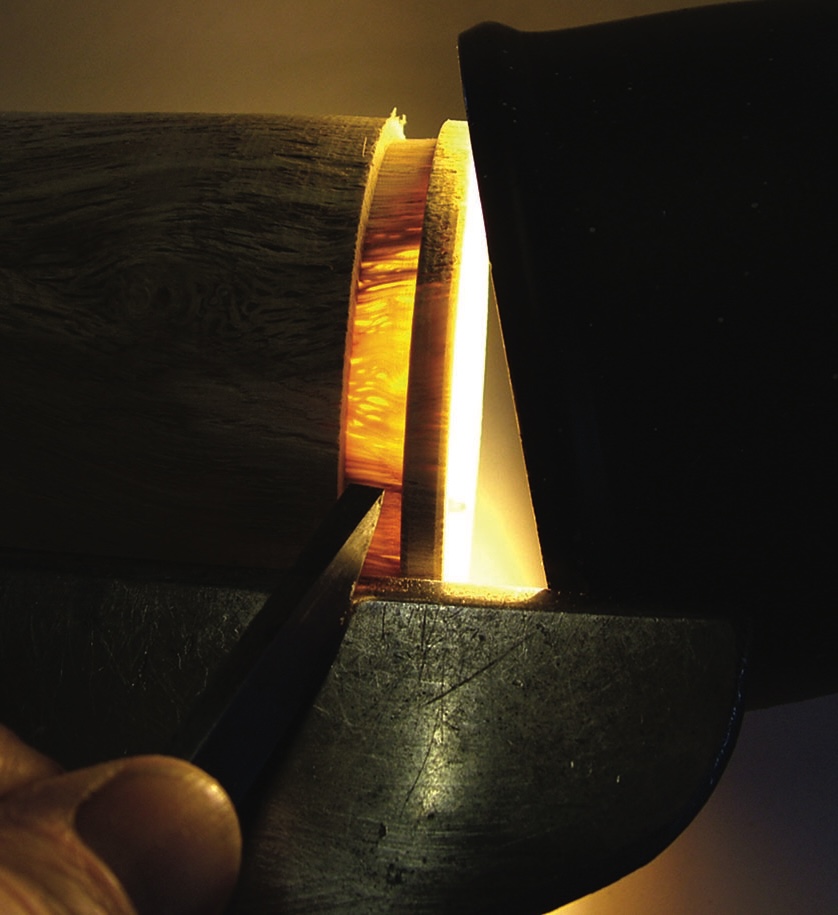
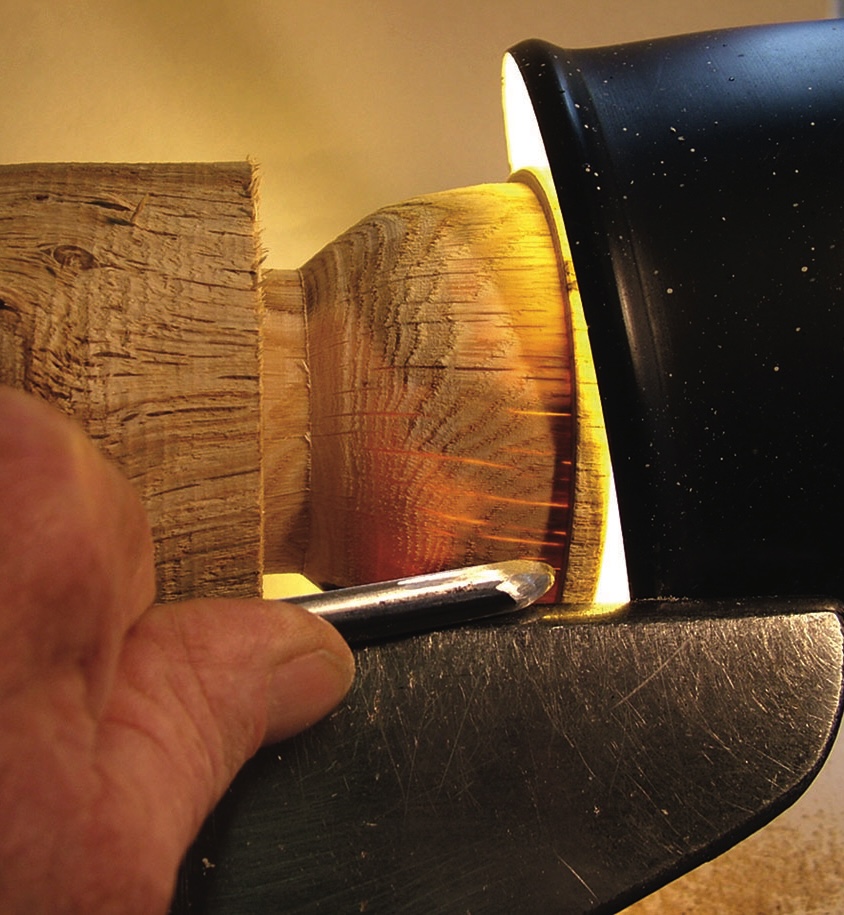
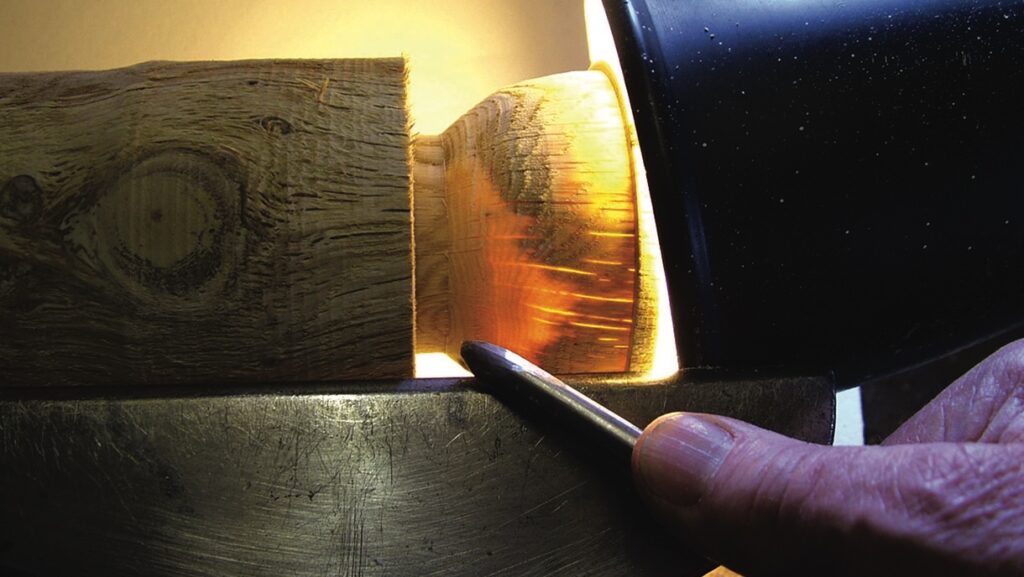
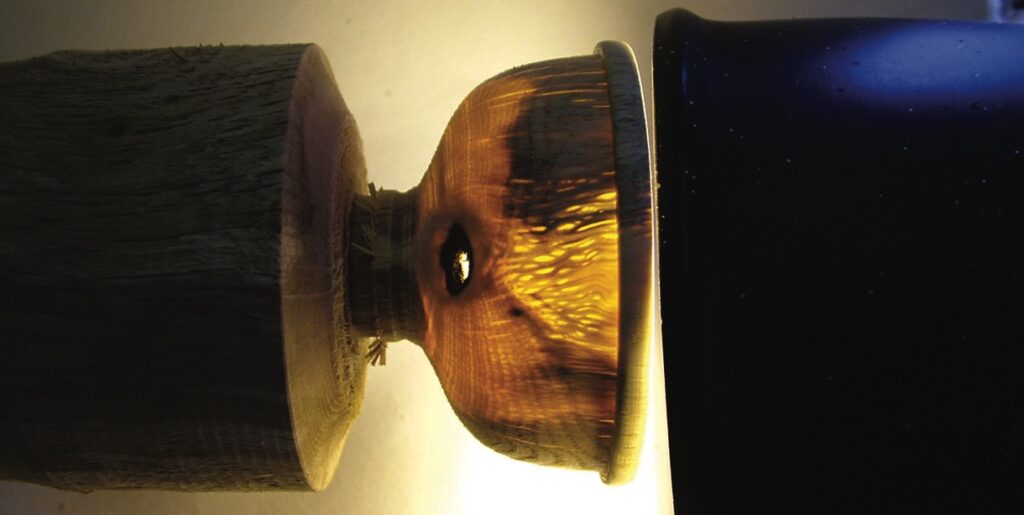
6. This is where I went off at a tangent from my original intent of an even-walled vessel. Instead, I chose to create a thin-walled vessel with a lip. Using the 4mm parting tool I took the wall thickness down to about 2-3mm, being guided by the use of a lamp fitted with an LED bulb so it doesn’t generate heat and I could see the wall thickness. Here the translucence of the thin wall is apparent and shows the cellular structure well. This only works when the wood is wet, the translucence diminishes as the wood dries out
7. To gauge where your base needs to be, use a parting tool and cut a groove down to about 50mm in depth. This cut acts as a guide so you can see what outer timber needs to be removed. Allow a 4mm wall thickness beyond the internal bottom of the bowl curve so you have enough material to adjust the shape and sand to an even wall thickness
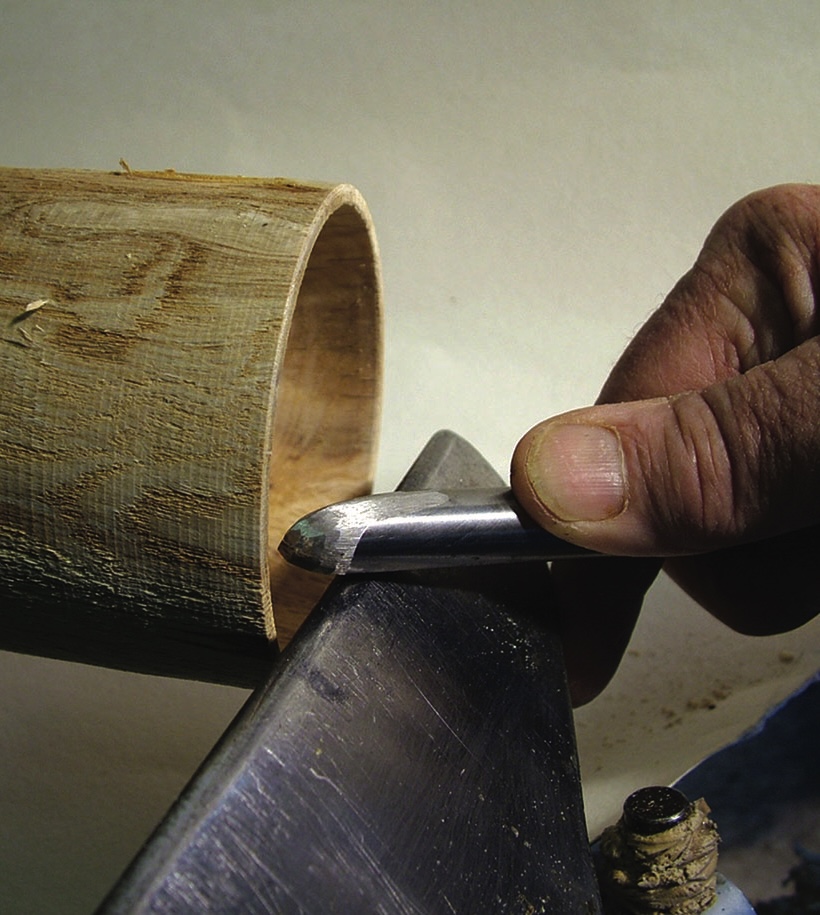
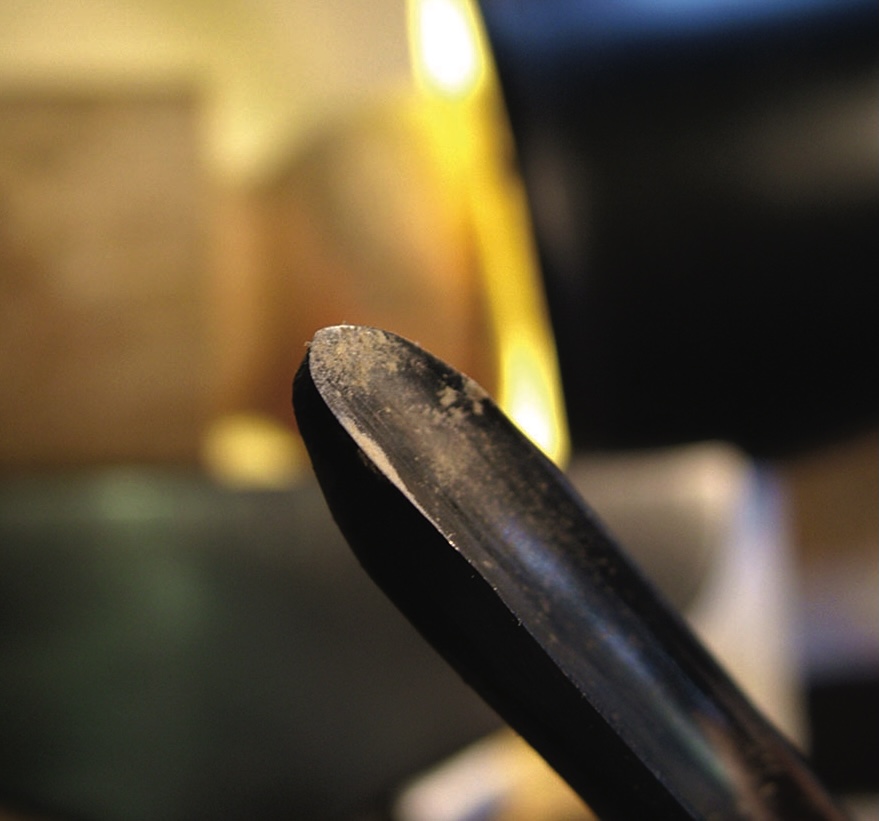
8. Spindle gouges are very versatile, but, like other tools, should be sharpened regularly. Once the shape is roughly what you require, you can refine it by using the gouge in scrape mode
9. To do this, use with the flute facing the wood. As with the bowl gouge, the cut occurs on the lower wing, but the flute points at almost the 9 o’clock position to get a gentle scrape. Work form the rim down as far as you can
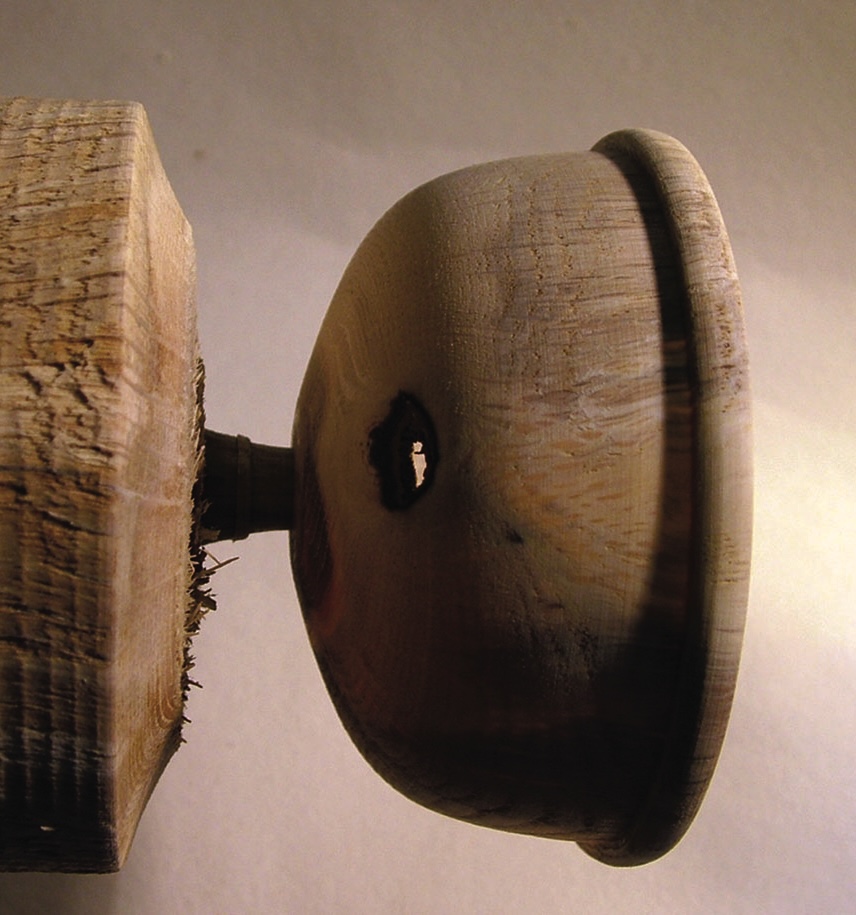
10. After removing most of the waste at the top section use the spindle gouge to work closer to the base. The gouge needs to be reversed to reach the underside section. Instead of a pull cut/scrape you need to make a push scrape. Continue until you have a more consistent outer wall thickness11. This gouge is useful as it can be gently stroked along the surface to obtain a consistent outline. Note the use of the light to see if the wall thickness is even. There is a slight belly in the shape – adjust until you have the curve you want. I wanted to create this profile but noticed a dead knot inclusion. A feature will have to be made of this
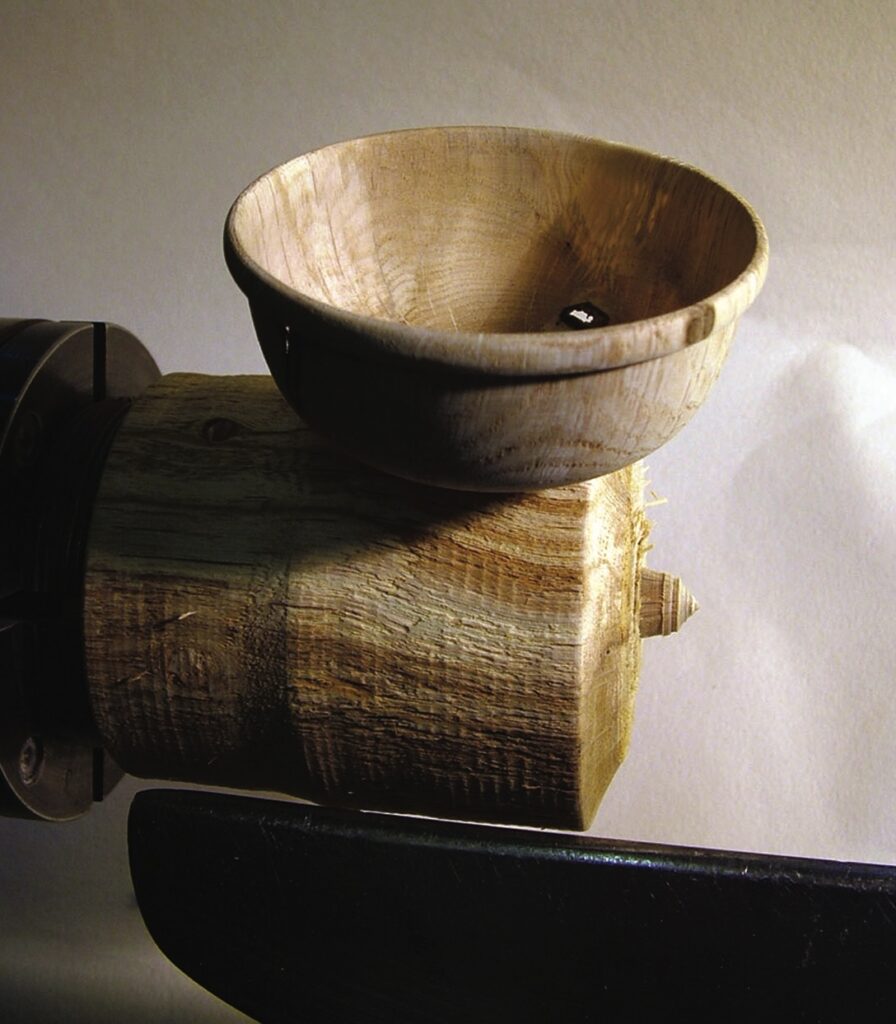
12. Now take a parting tool and reduce the solid waste at the bottom a bit down to about 10-12mm, which leaves enough support for sanding later on. Then refine the shape until you have reached the lower connecting spigot At this stage, the turning could well become a goblet, but not with the dead knot inclusion. The piece is now ready for sanding both inside and out. Once sanded, cut through the waste spigot with a saw while the lathe is stationary and sand bottom round
13. You can see there is enough material for another bowl
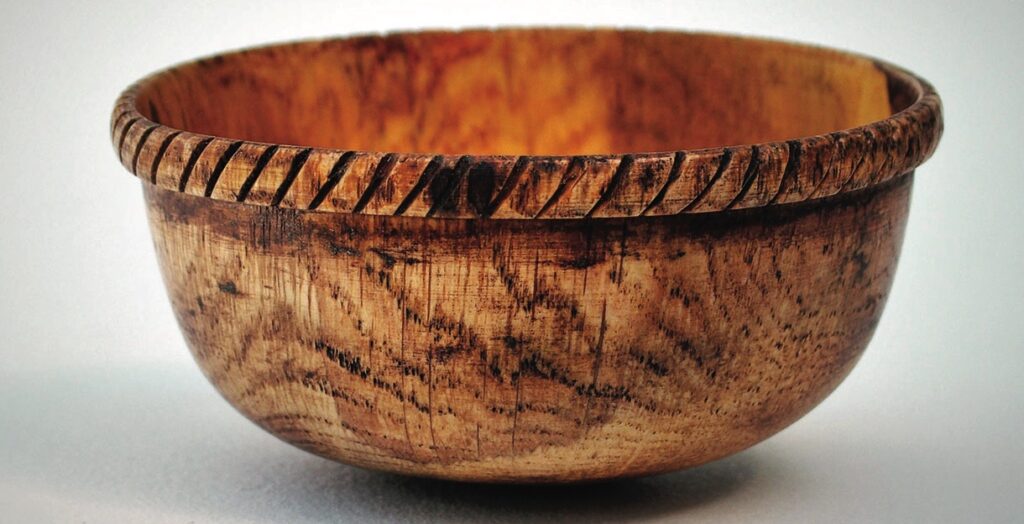
14. You can leave the rim plain or create a simple rope feature. This can be added to the rim by way of simple grooves cut by a saw, or burnt in with a scalpel edge pyrography tip, or cut in with a fine edge bit held in a rotary carving tool or a fine file
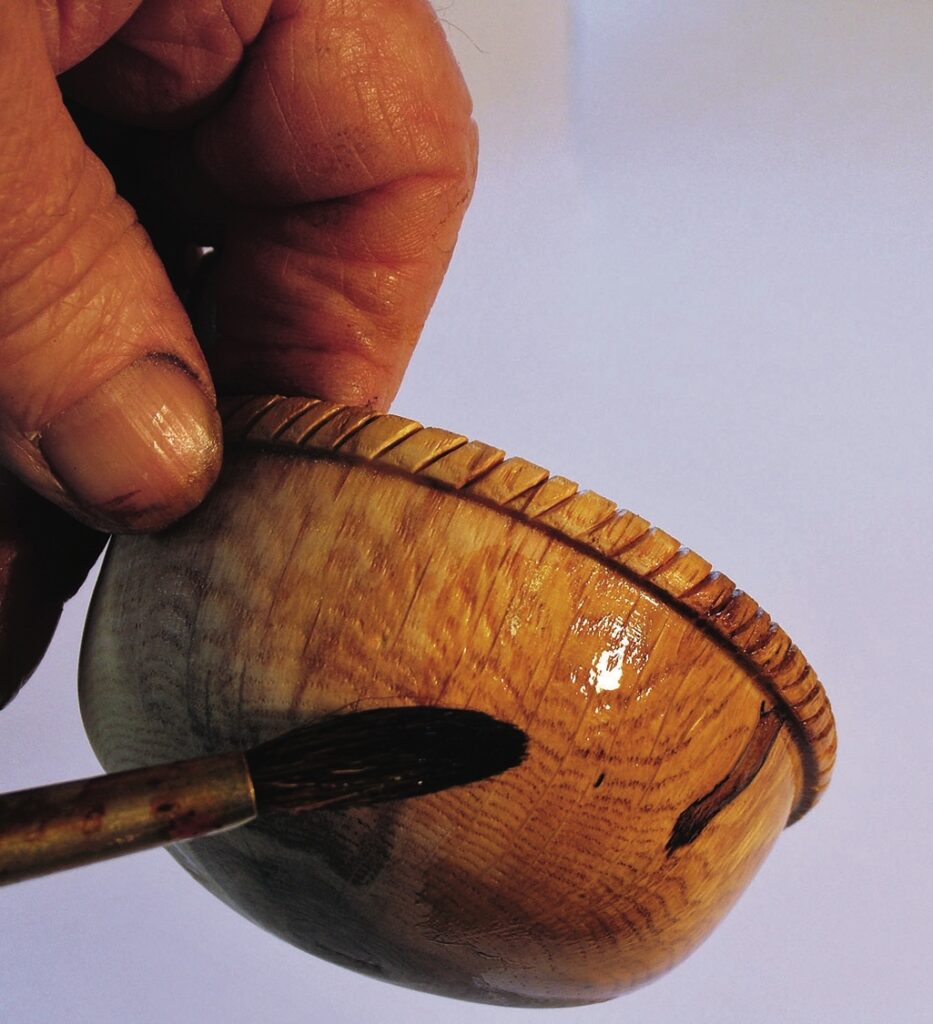
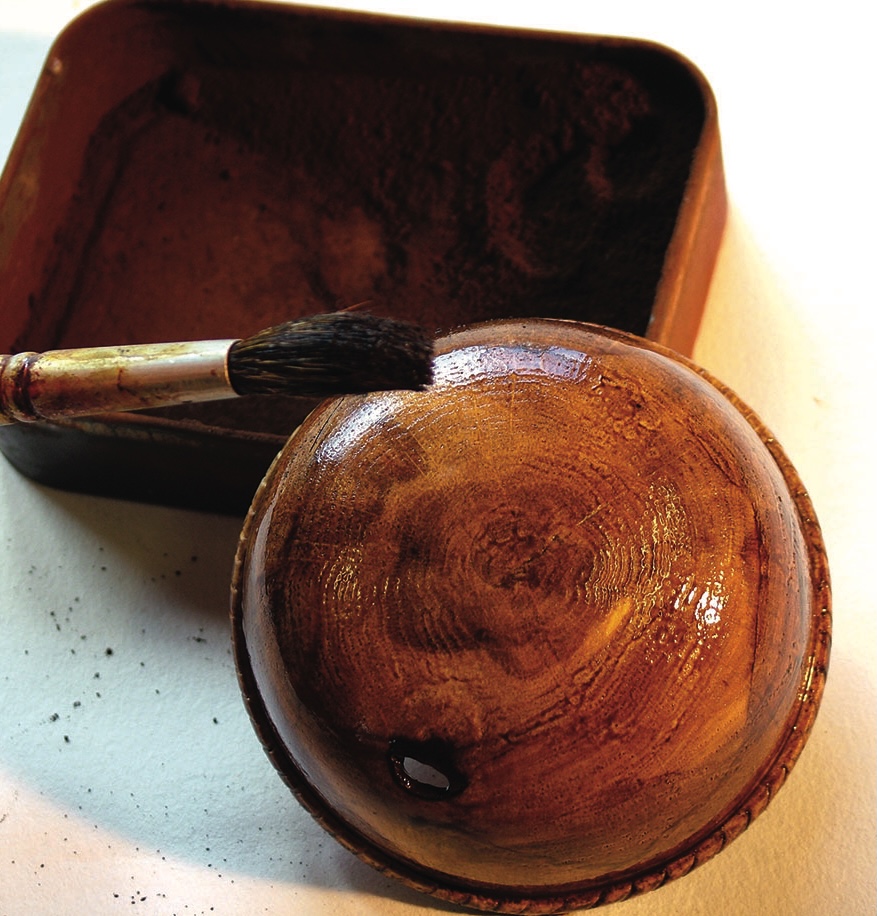
15. Now is the time to apply a finish of your choice. I wanted an old, used, patinated look so chose to use button polish, which is a golden form of French polish. I applied two successive coats with a brush, the second after the first had dried. Once the polish is dry a coat of burnt umber powder suspended in methylated spirit is applied quickly, allowed to dry and then mostly removed with fine wire wool. That which remains gives the impression of age acquired patina
16. If all goes well you will have a completed patinated bowl. Note how the patina has highlighted the rope-effect rim. Since the bowl is round-bottomed it wobbles
Handy hints
• Keep tools sharp. Not only will sharp tools do a better job but blunt tools can be dangerous as more pressure is required and they scrape rather than cut. As the late (very late) Frank Pain would say: ‘Turn the wood as it likes to be turned’ – in other words, use sharp tools and rub the bevel. • Unless strictly following a measured drawing don’t be afraid to change course, whether to ‘improve’ the piece or because of an error on your part or a hidden flaw in the wood. • If woodturning is your hobby there are only so many large fruit bowls that one can make and give away as presents. Try turning small items for a change – they take up much less shelf space and may be more welcome as gifts. • Join a woodturning club for great camaraderie, a wide range of professional demonstrators and generous advice from members.
Alternative options
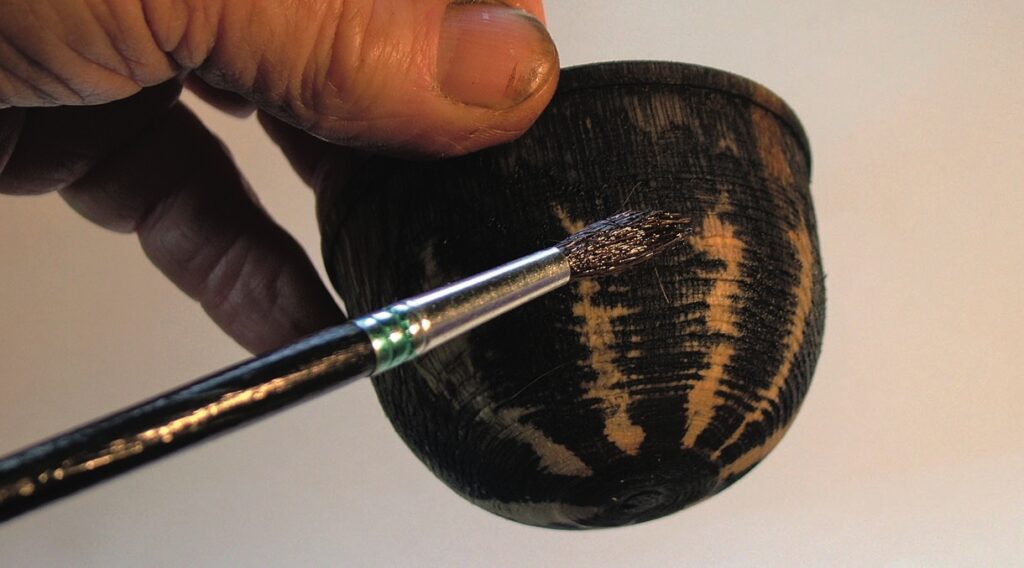
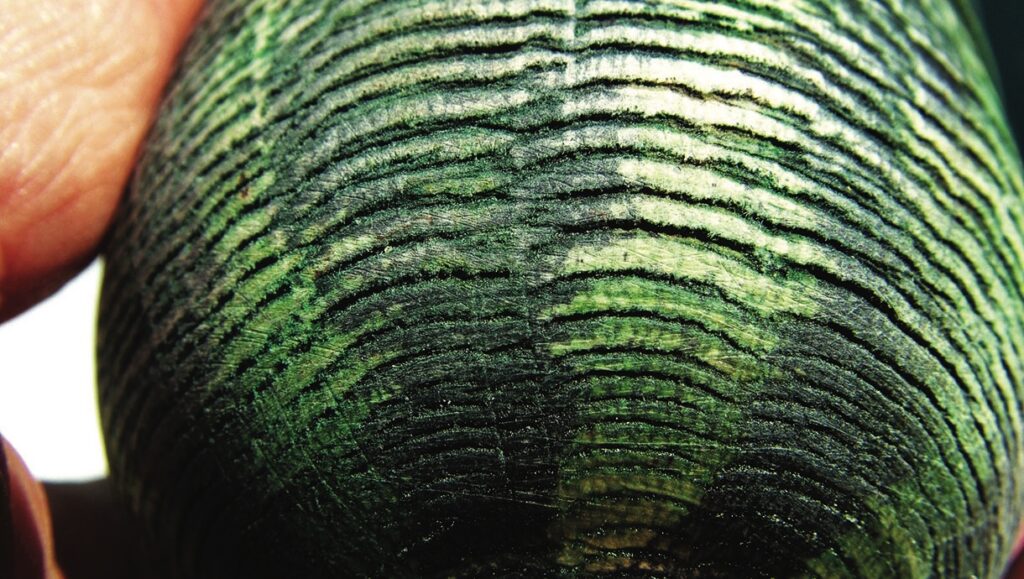
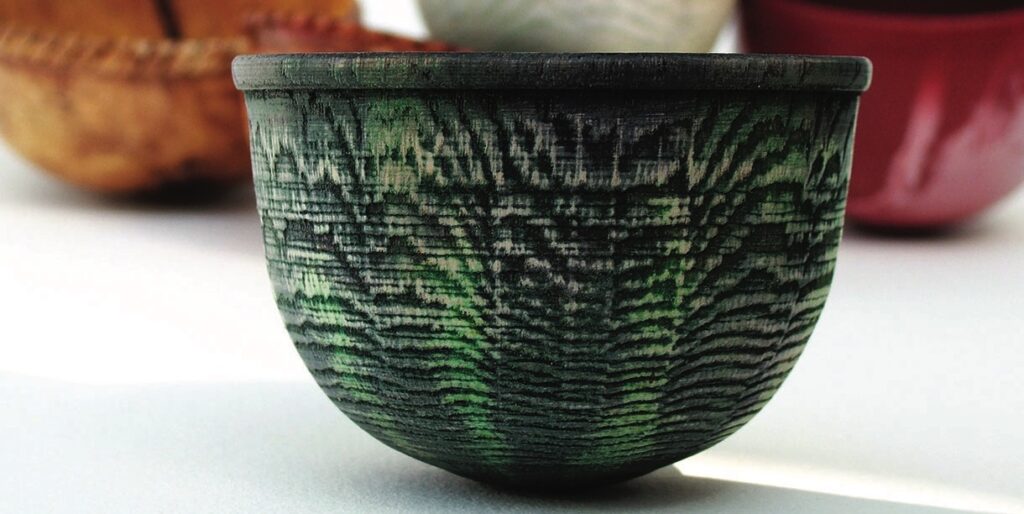
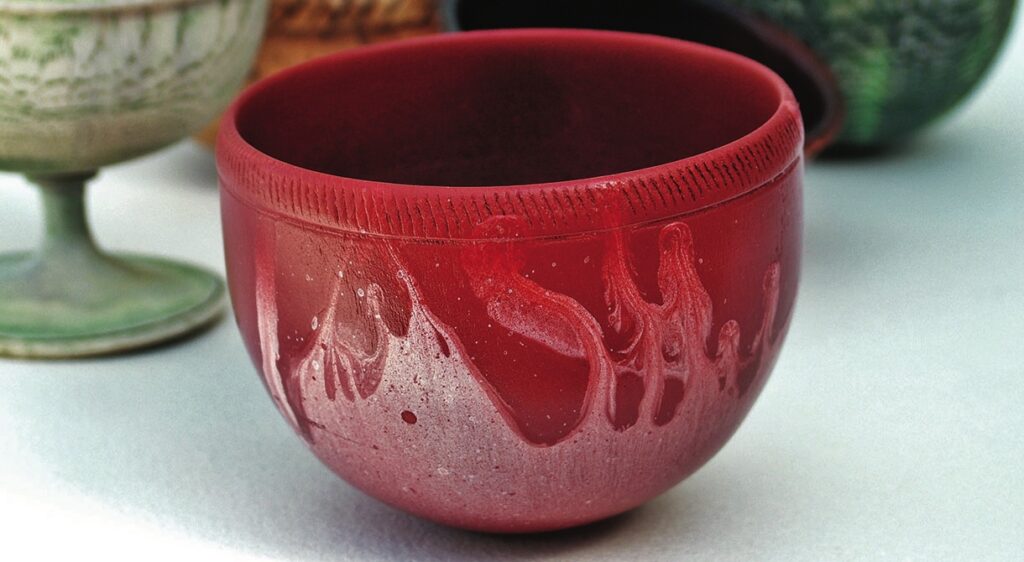
17. Another form of simple ageing is the use of vinegar infused for a few weeks with wire wool. This treatment will only work with woods with a high tannin content such as elm (Ulmus spp), sweet chestnut (Castanea sativa), walnut (Junglans spp) and oak (Quercus spp). Here it is being applied to another oak pot – the effect is immediate and quite dramatic. There are woodshade spirit and water based dyes to explore too18. After drying this pot had its surface brushed over with a wire brush while revolving in the lathe prior to parting-off. The resulting surface texture was further enhanced by using green spirit stain. There are lots of colours to explore19. Some turning folk are not keen on colouring. In this case I think my treatment enhances the grain in its own unique way. Here is the finished green pot20. An alternative is to use spray paints. These are available from DIY and automotive stores. The colours used on this pot were red oxide undercoat with a dash of white. Do experiment in colour as well as the size of pot turned. There are endless shapes and colour combinations awaiting you
Things to consider
• Do not be afraid to experiment. It is easy sometimes to get stuck in a rut and there is more to turning than just another bowl or honey dipper. Have a go at texturing wood or colouring, even applying additional decorative elements – you may amaze your contemporaries with new-found artistic endeavours. • Try the delights of turning wet wood and see where this takes you, and the material is mostly free. Keep an eye open for when a neighbour fells that old laburnum tree in their front garden. Turning wet wood is a completely different discipline to turning kiln-dried or seasoned timber. You will learn so much about the way wood behaves when drying and it is easier on the tools. There will be disappointments but this is a learning process. Tip: don’t turn wet holly for you first exercise, it is almost guaranteed to split while you learn to turn wet wood and may put you off forever. • Visit museums, they are full of inspiration. There is nothing new regarding classical form, you will not reinvent the wheel but much can be gleaned from ceramics, surface treatment, decoration, graffito, texture, narrative (Greek vessels) and purpose. There are many museum collections of treen (small wooden artefacts) to inspire you, or look online.
To provide the best experiences, we use technologies like cookies to store and/or access device information. Consenting to these technologies will allow us to process data such as browsing behaviour or unique IDs on this site. Not consenting or withdrawing consent, may adversely affect certain features and functions.
Functional
Always active
The technical storage or access is strictly necessary for the legitimate purpose of enabling the use of a specific service explicitly requested by the subscriber or user, or for the sole purpose of carrying out the transmission of a communication over an electronic communications network.
Preferences
The technical storage or access is necessary for the legitimate purpose of storing preferences that are not requested by the subscriber or user.
Statistics
The technical storage or access that is used exclusively for statistical purposes.The technical storage or access that is used exclusively for anonymous statistical purposes. Without a subpoena, voluntary compliance on the part of your Internet Service Provider, or additional records from a third party, information stored or retrieved for this purpose alone cannot usually be used to identify you.
Marketing
The technical storage or access is required to create user profiles to send advertising, or to track the user on a website or across several websites for similar marketing purposes.