The Woodworkers Institute

We bring you the very best of woodworking!

“Make it with us”

Display mask

Mark Gough shows how to carve and decorate a display mask
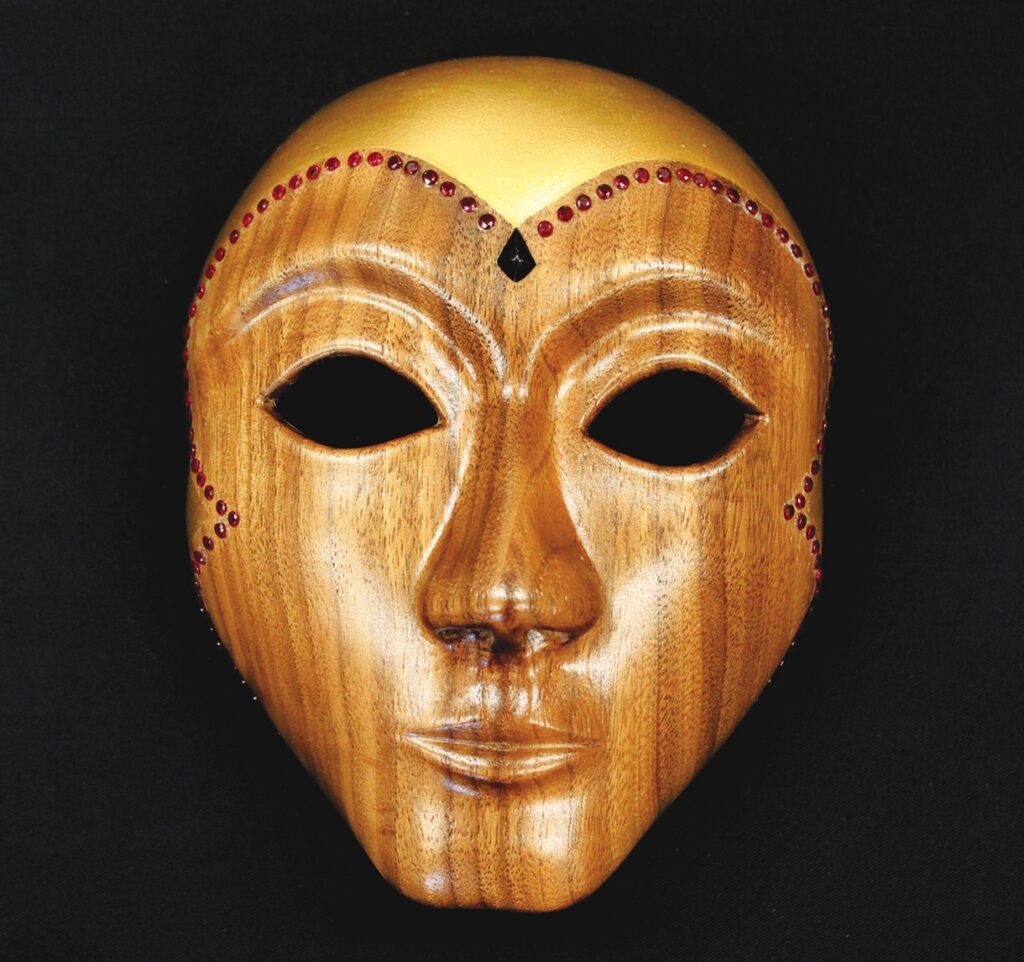
Wooden mask with jeweled decorations on black background.

Having decided on a mask for this carving project the decision was what type of mask to do. The list is endless – tribal, theatrical, carnival, grotesque, fantasy, horror and so on. In the end I settled on a simple female face and chose a piece of American black walnut with a nice grain pattern to show off the contours. I decided to add some decoration to the finished piece, but this is optional. In fact, this type of mask is readily available as a blank to decorate for carnivals and parties in the paper or plastic form. The thickness of the mask is around 10mm. I intended to make it thinner but there was a knot in the blank which was unnoticed at the beginning. One of the main obstacles to overcome was how to hold the piece while carving out the waste from the back. I tried various wooden blocks and wedges then built a box and filled it with sand and leather, but nothing was satisfactory. In the end I made a mould of silicon rubber in a box which worked perfectly. You will not need a vast selection of tools for this project, just a few gouges and rasps. We all have a different selection of tools, so just use whatever you have to suit the purpose.

Things you will need

Tools:
• Personal and respiratory protective equipment (PPE & RPE)
• No.6, 20mm
• 8mm shallow palm gouge
• Coarse wood rasp
• Rotary carving unit
• Rotary burrs: ball burr, bull-nose burr
• 16mm flat bit
• Rifler files
• Double-ended callipers

Materials:
• American black walnut (Juglans nigra), 200 x 150 x 75mm
• Silicone rubber moulding compound
• Abrasives down to 320 grit
• Cellulose sanding sealer
• Finish of your choice
• Hardware for hanging

Drawing
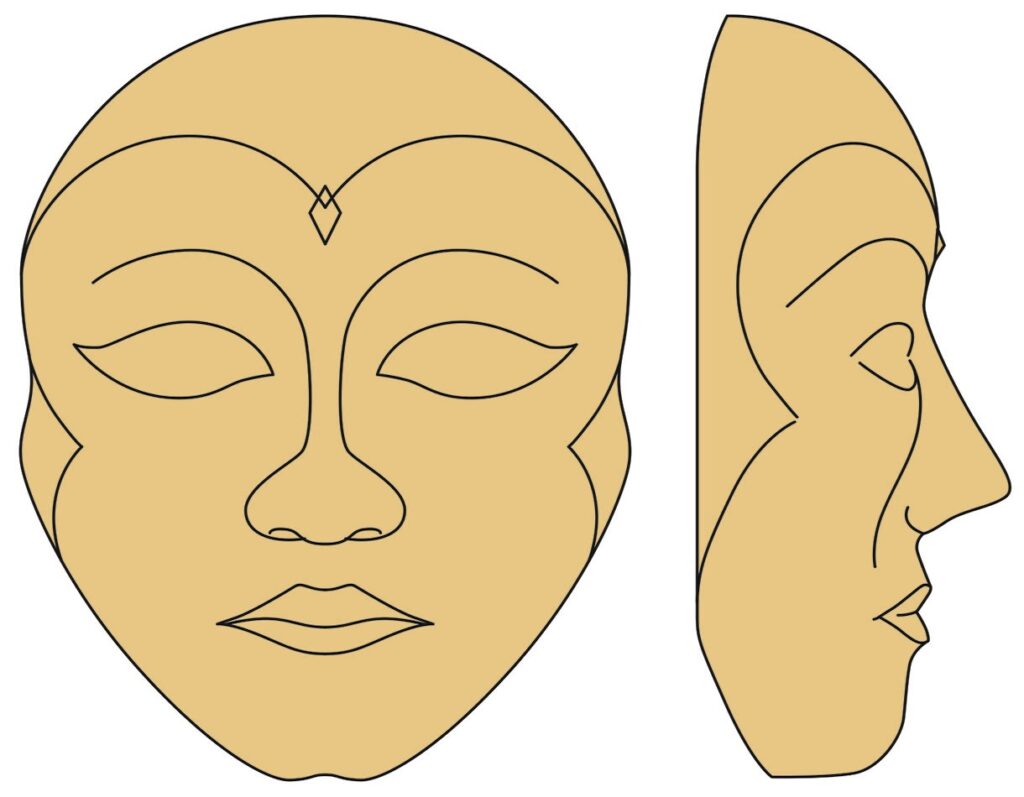
Two views of stylised human face drawing.

Rough shaping

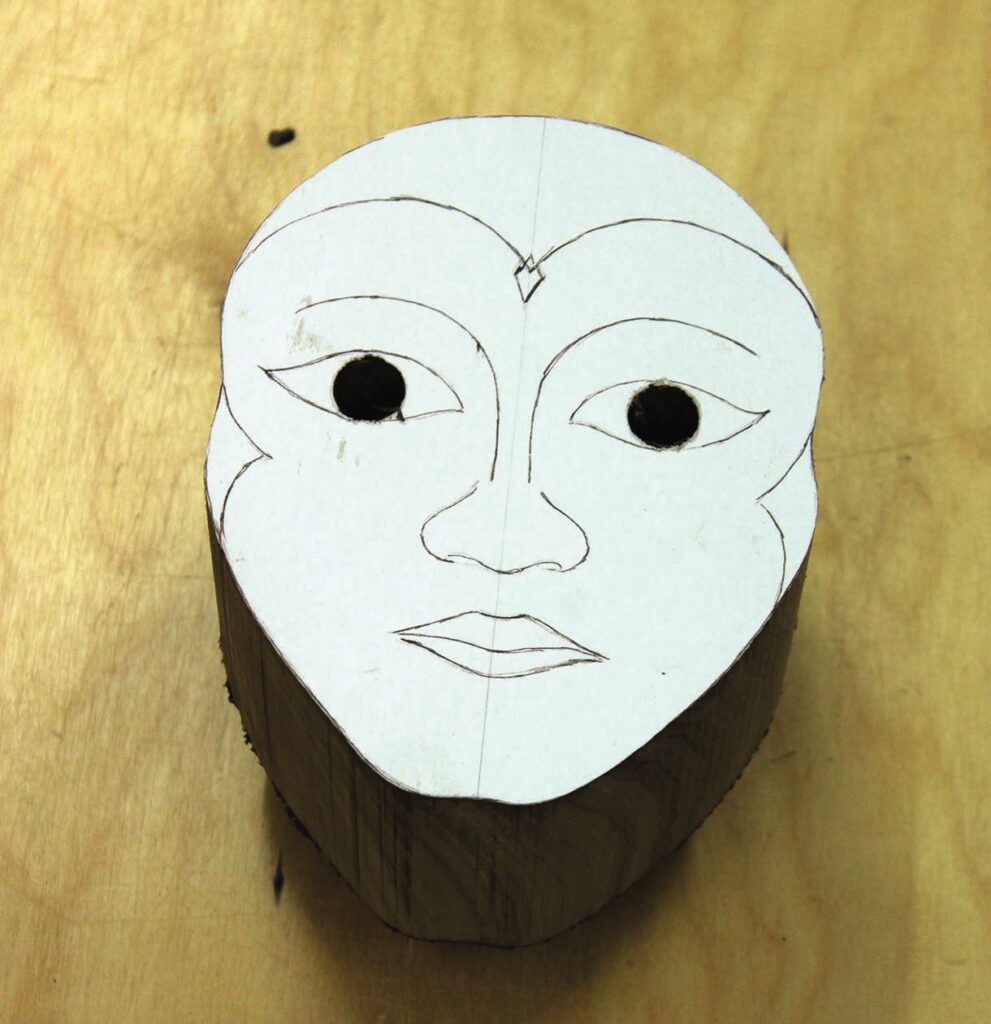
Wood carving face template on block of wood.
1. Make two copies of the pattern. Then, stick one to the blank and cut the outline out on a bandsaw. Using a drill press drill a 16mm hole through the centre of each eye. These will act as reference points throughout the carving process
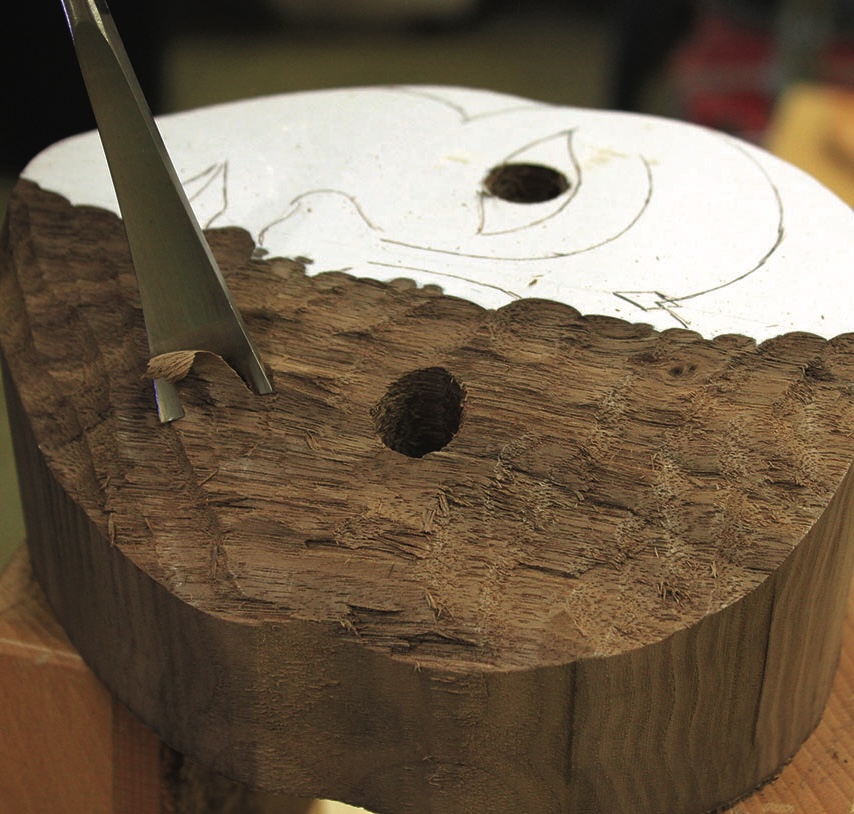
Carving wood with chisel and holes for screws.
2. Fit a suitable clamping block to the underside of the blank and mount in a bench vice or fix directly to a carving vice. Draw a centreline from top of the head to the jaw through the bridge of the nose and start to remove waste from the tip of the nose towards the edges. When viewed from above the human head is oval with the tip of the nose prominent, so this will be the highest point of the carving
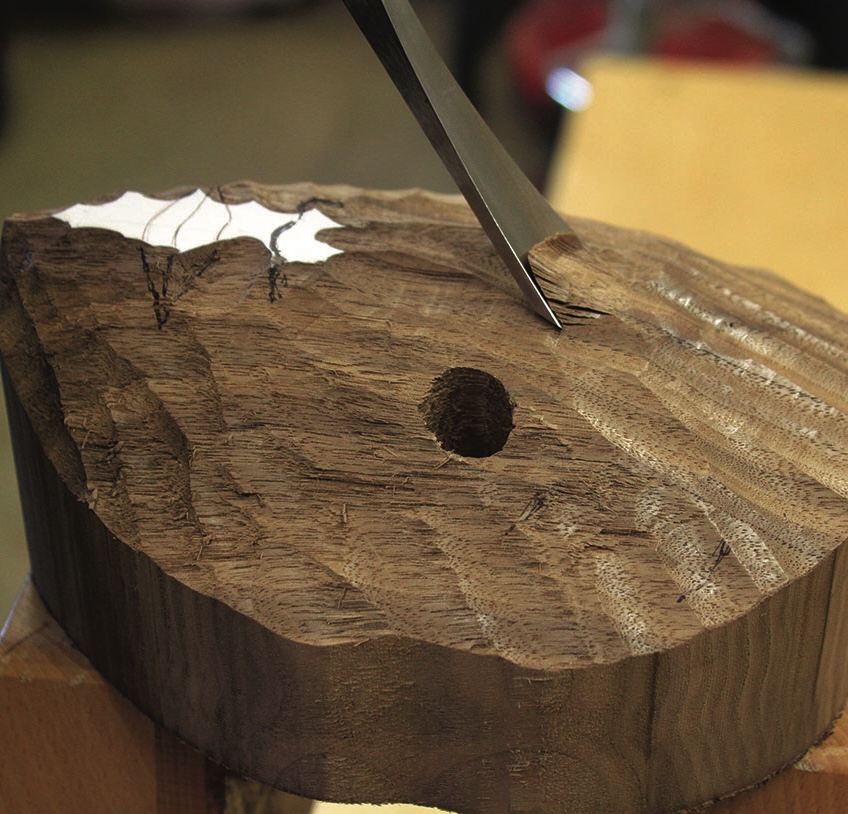
Chisel carving into textured wooden block.
3. The tip of the nose is the highest point, from here taper down towards the top of the head. Refer to the pattern for the depth of cut and direct the taper out towards the sides of the head
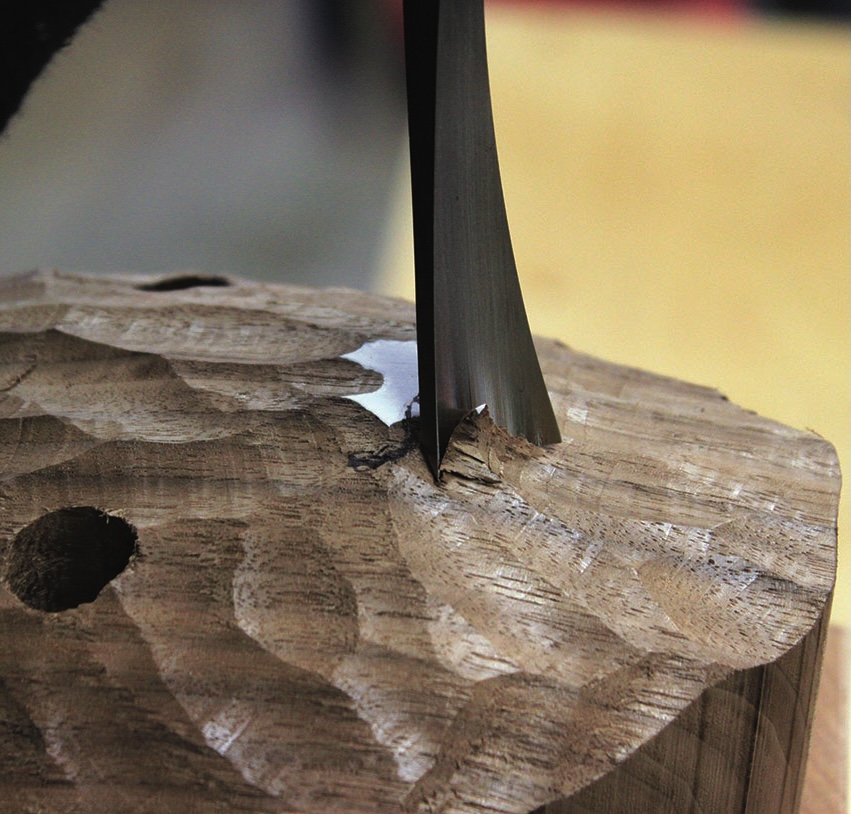
Chisel carving intricate wood texture with precision.
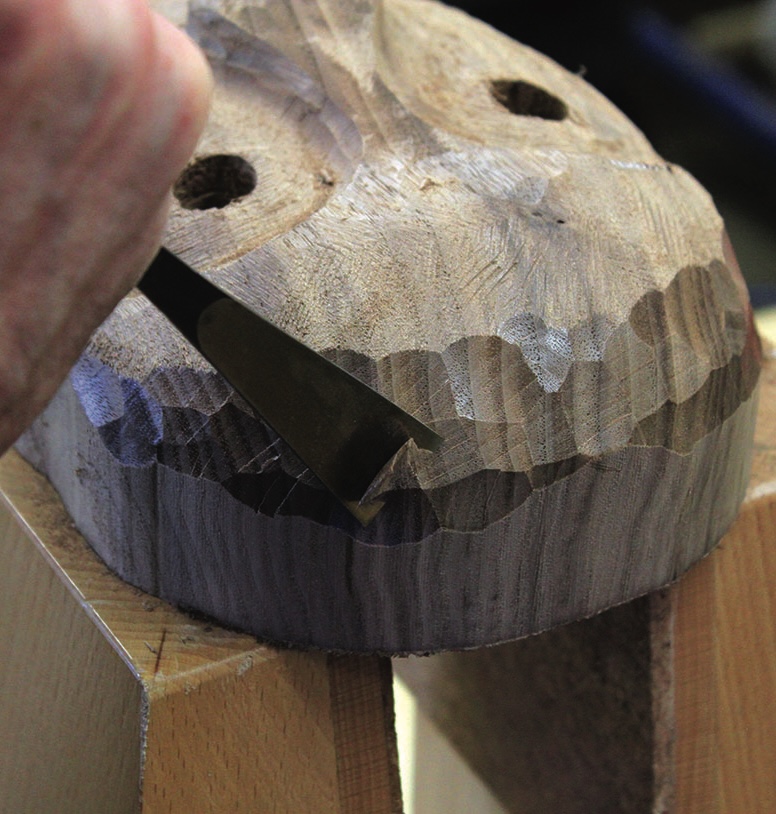
4. Start with an upright cut below the tip of the nose and pull the gouge back to remove waste towards the chin and sides of the lower jaw. Do not remove too much at this stage, just enough to reveal the shape of the nose
Hand filing wood block with metal file tool.
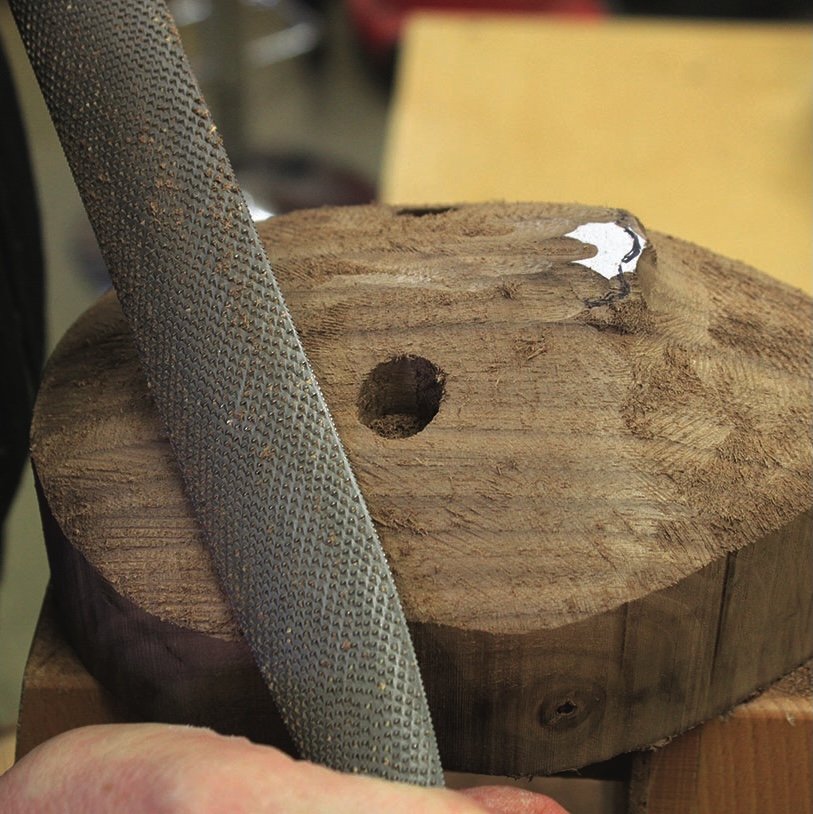
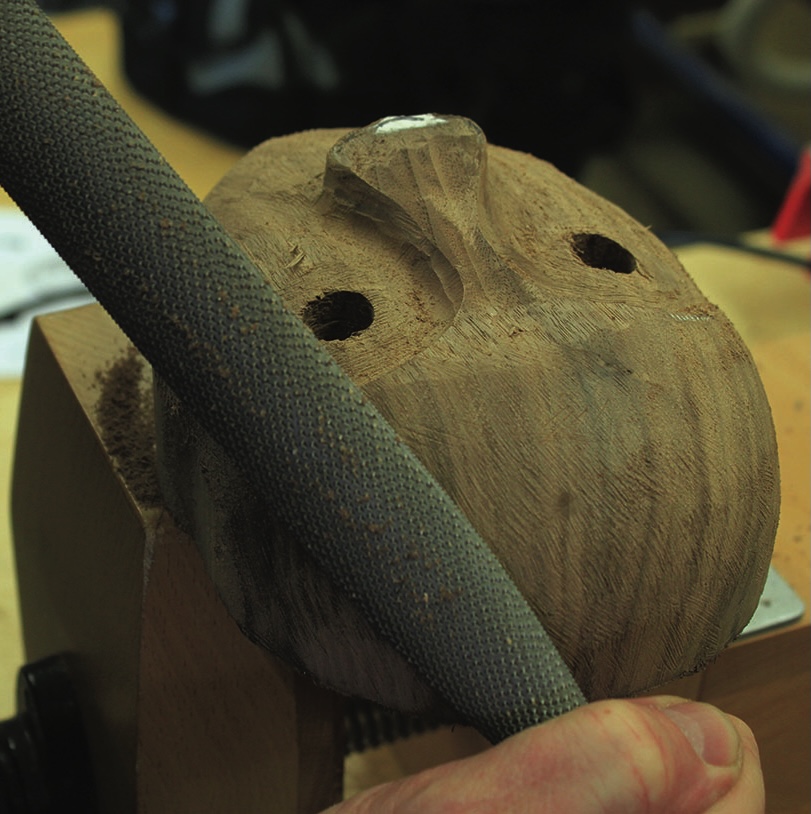
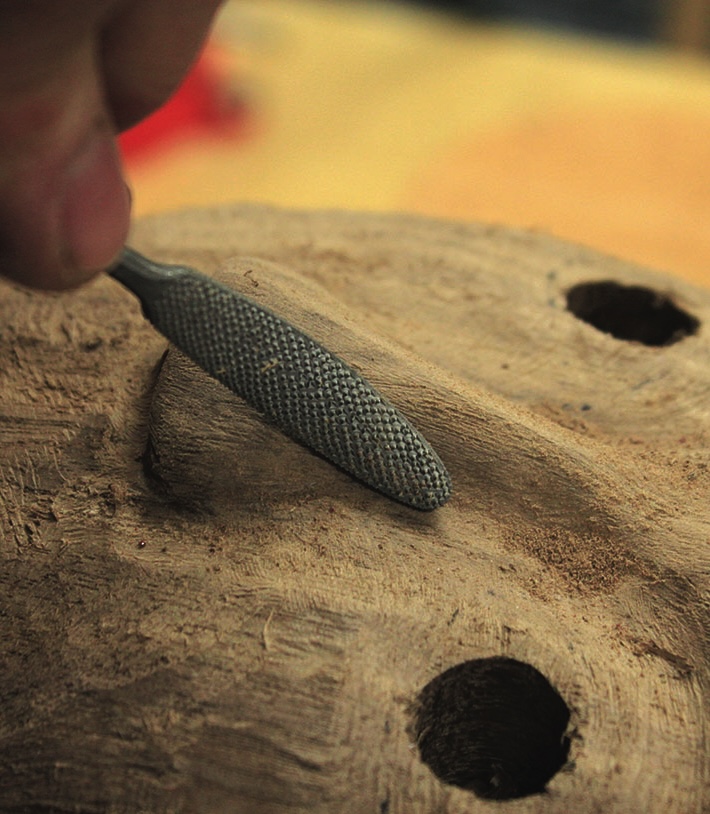
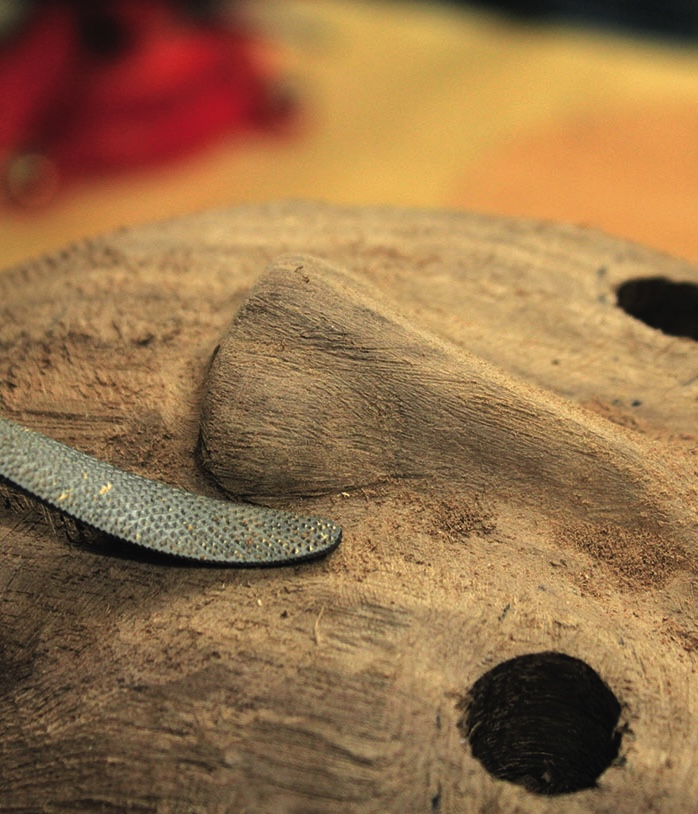
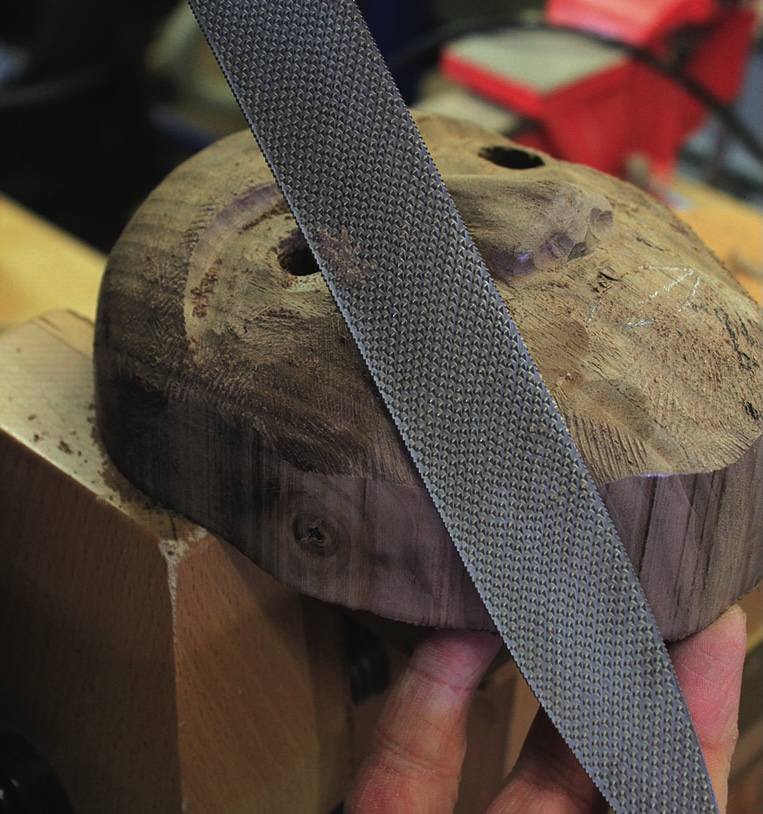
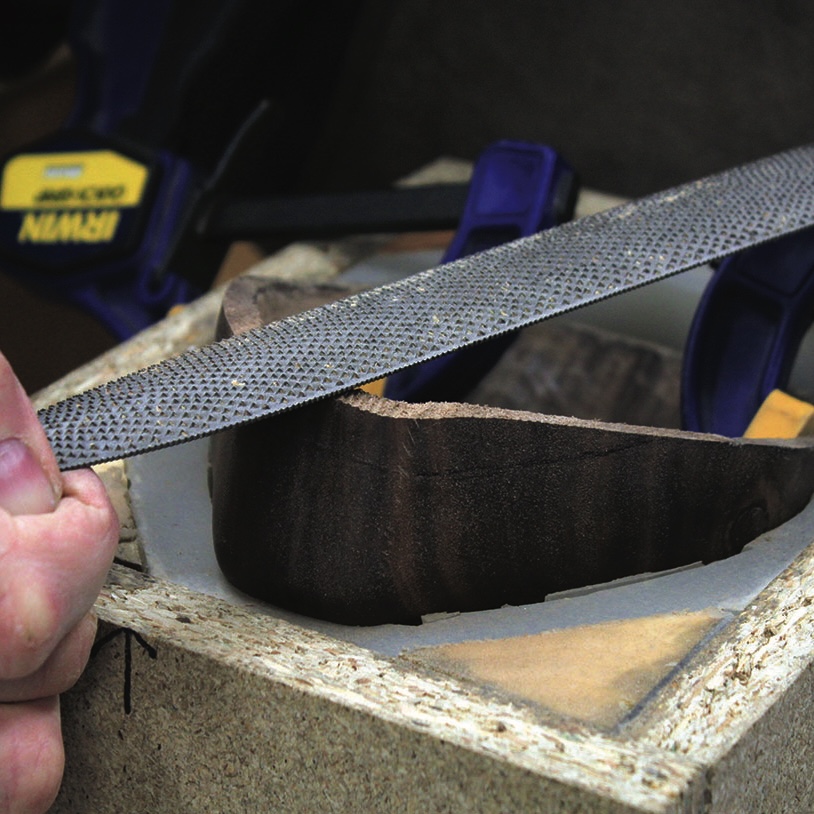
5. Now smooth out the deep tool marks to get an easier surface to mark in the features. You can use a shallow gouge or a coarse rasp

Refining the form

Carving wood with rotary tool
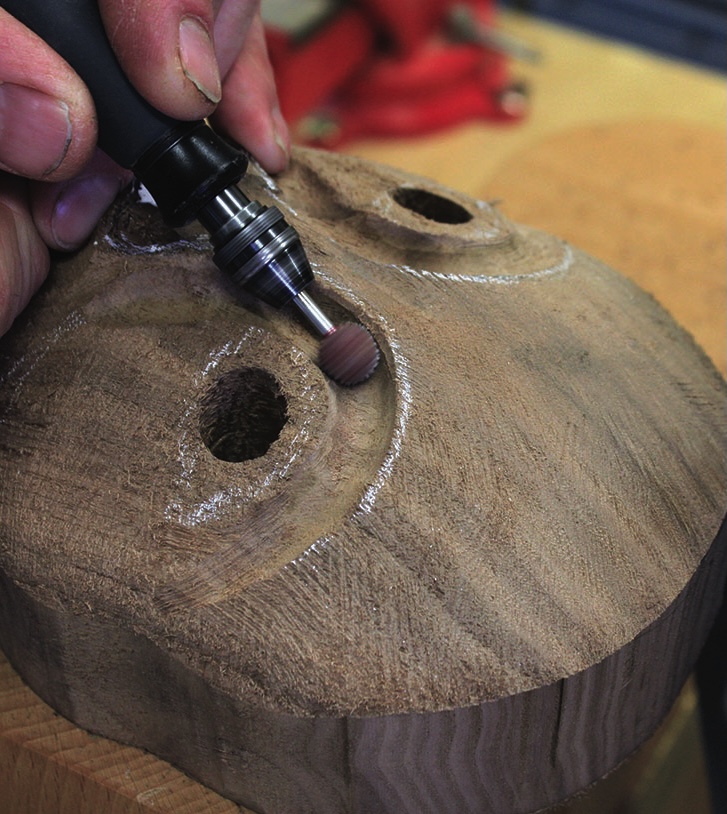
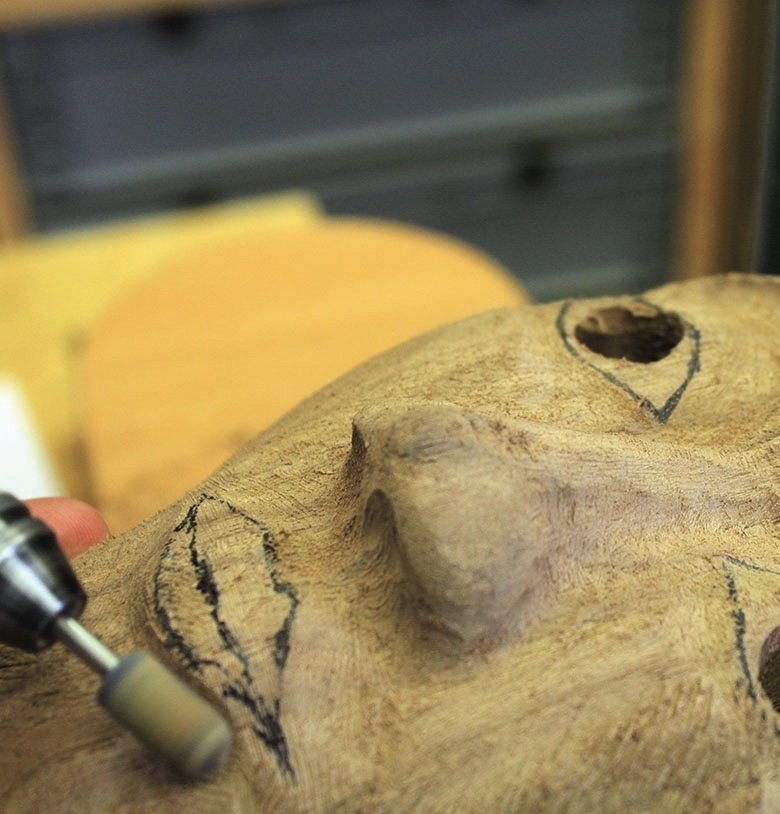
6. You now need to use the second template. Mark in the ridge of the nose and eyebrow line then, using suitable gouges and rotary burrs, hollow out the area below the brow line and each side of the nose to get the basic shape of the cheeks. When using a rotary tool wear suitable PPE and have adequate dust extraction in place at all times. Just like carving with gouges it is important to pay attention to grain direction – if the direction of rotation is against the grain it will tear the fibres out and leave a much rougher finish. Try to cut with the rotation going in the same direction as the grain, although this is not always possible
Black and white abstract mask drawing.
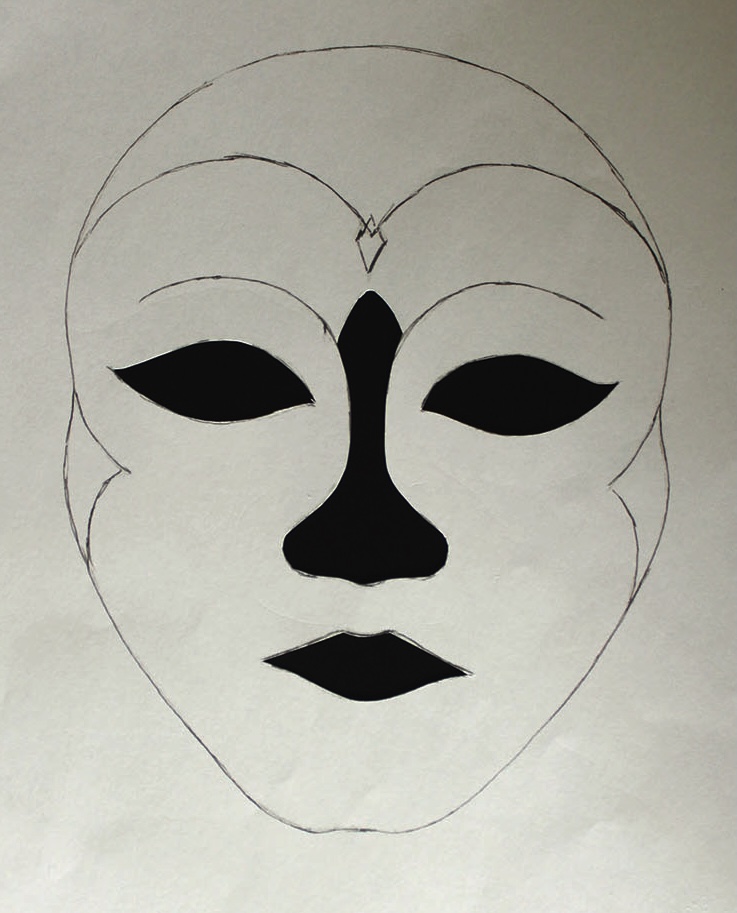
6b. To use the template effectively cut out the eyes, nose and mouth shapes with a craft knife so that you can position the pattern over the carving and mark the features accurately.
Detailed wood carving with rotary tool.
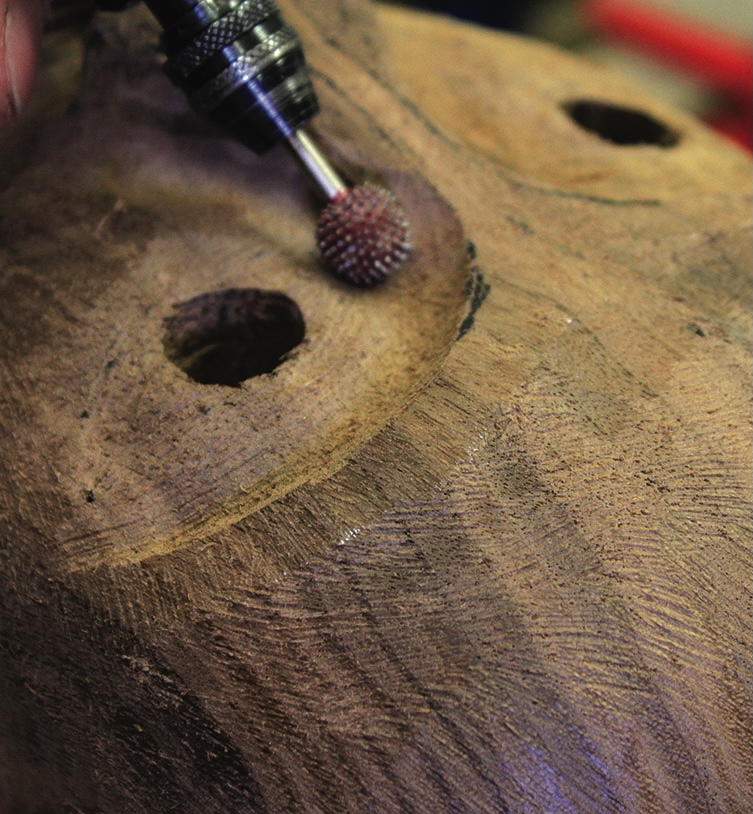
7. Use a combination of gouge and rotary carving burrs to reveal the full depth of the nose and eyes. A V-gouge is useful for shaping the tight angles of the nostrils or you can use the tip of a flame burr
Close-up of wood carving with chisel.
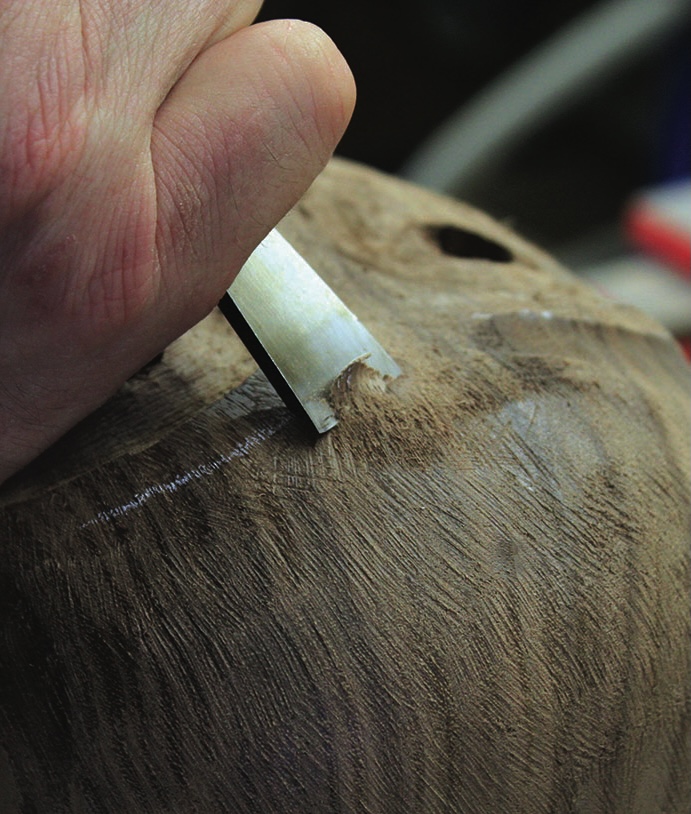
8. With a 20mm, No. 6 gouge or similar round over the forehead, referring to the pattern for the correct shape. Alternatively, user a coarse rasp if you prefer
Hand carving wood with a rasp tool.
9. Complete the shaping of the forehead by smoothing out the tool marks with a coarse rasp. Aim for a nice rounded dome shape. This is the area which will have some sort of decoration added later on so it needs to be symmetrical and even. It will be useful if the carving is overhanging the vice to access the whole area. If this is not possible raise the block slightly to get to the edge. Do not be too concerned about chipping the edges at this stage as these will be cut back and re-shaped later on
Person carving detailed wood sculpture by hand.
10. To form the eyebrows cut a shallow channel just above each eye and join them up in the centre above the nose, reducing the depth of the channel at this point
Craftsman carving wood sculpture with chisel.
11. Now return to the shaping of the nose to complete the detail. Select a suitable tool similar to the one pictured, which is an 8mm shallow palm gouge, and refine the bridge of the nose, removing waste from each side evenly. The nose is straight and symmetrical with a gentle slope from the tip to the top. Cut slightly deeper in the corner of each eye where the cheek bone meets the top of the nose – this will make the eyes look more of a natural rounded shape instead of flat. Turn your attention to the nostrils and form a gentle flare each side with a small shallow gouge. The underside of the nose tapers down from the tip to the top of the upper lip where it meets, as shown in the pattern
Hand carving wood with a metal file.
12. Now use a small medium rifler or 80 grit sandpaper to smooth out all the tool marks. You can make your own sanding sticks by sticking sandpaper to pre-shaped pieces of wood for this stage if you wish
Wooden mask carving with chisel tool
13. The area to each side of the nostrils below the cheeks needs to be reduced to form a sinuous flow down to the lower jaw and to reveal the contour of the cheeks. You can use a fine bull-nose burr and rifler to do this, working symmetrically. Take your time at this stage and make regular visual checks from each side. Any irregularities will show up when the finish has been applied and light reflects on the contours
Wood carving process using a metal file tool.
14. Round over the lower jaw with the rasp. Don’t take too much off at this stage until the mouth has been shaped

Finer detail

Carving details on wooden mask with tool.
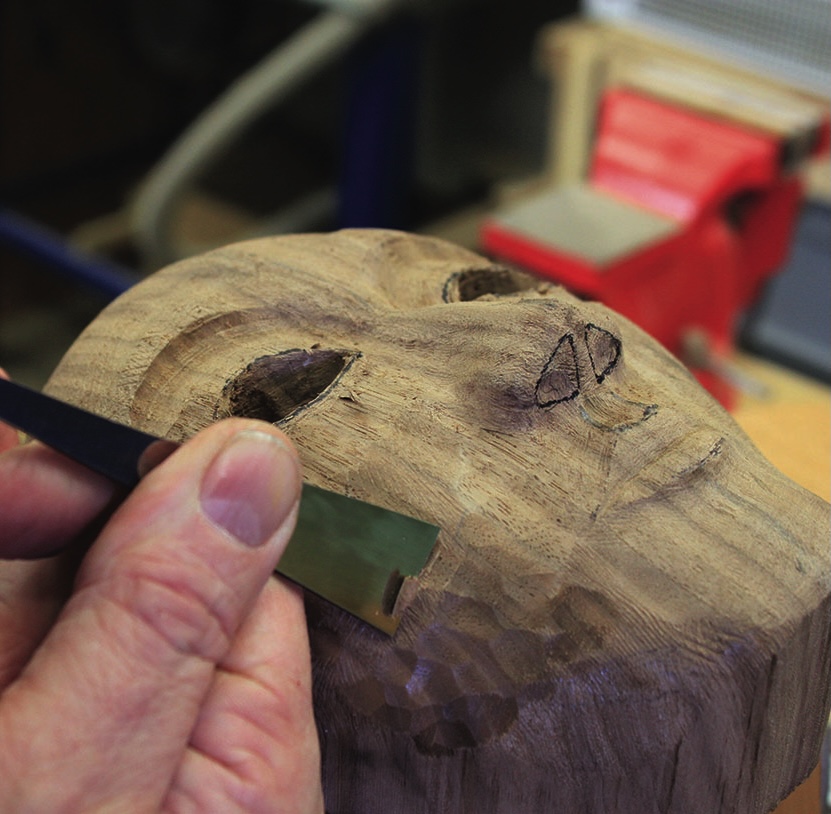
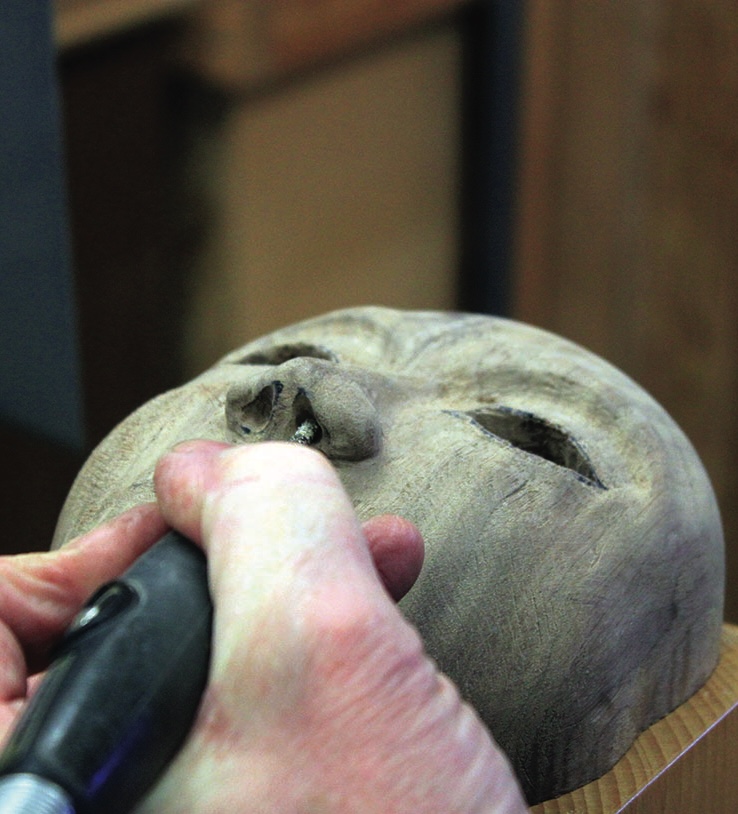
15. Using the template, mark out the mouth and reveal the shape with a bull-nose rotary burr or gouge. Go gently and use a speed on the rotary carving unit that is suitable for the burr used and also that affords you full control of the cutting action. At this stage, you can cut in the nostril positions too
Hand carving lips on wooden sculpture.
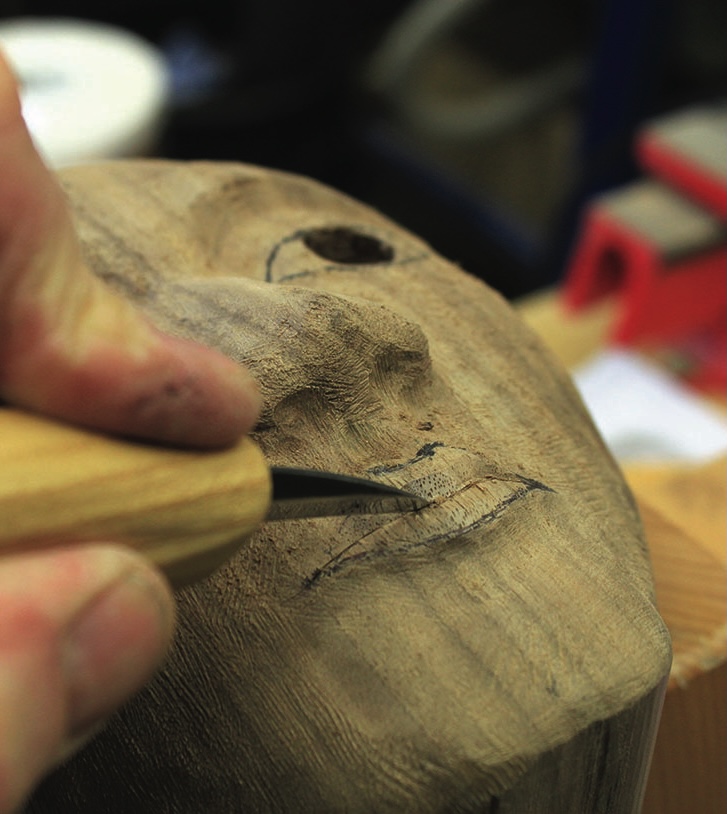
16. Use a knife to cut in the lips and define the shape then use a rifler file to finish the detail
Hand using rotary tool on wooden sculpture face.
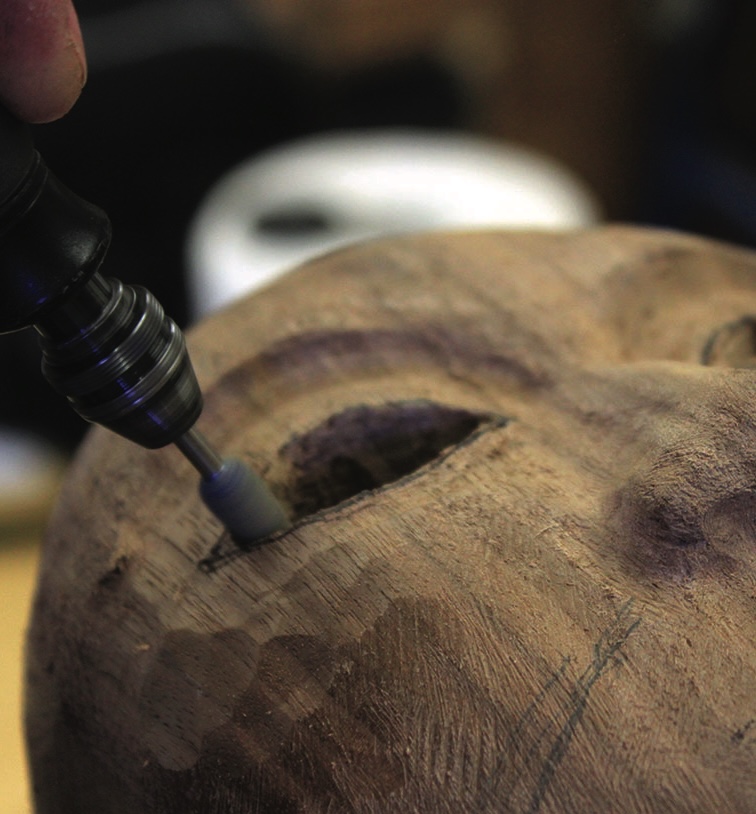
17. Use a bull-nose and flame rotary burr to open out the eyes. A knife and/or chisel will work well too. Be careful in the corners to avoid the tool snagging and keep hands clear at all times
Hand carving wood mask with chisel
18. You can now turn your attention to the final shaping of the face. Use a small shallow gouge to refine the lower cheeks and sand everything down with 80 grit paper to get rid of the tool marks
Hand carving details on wooden face sculpture.
19a. Use a rotary burr…
Hand carving details into a wooden mask statue.
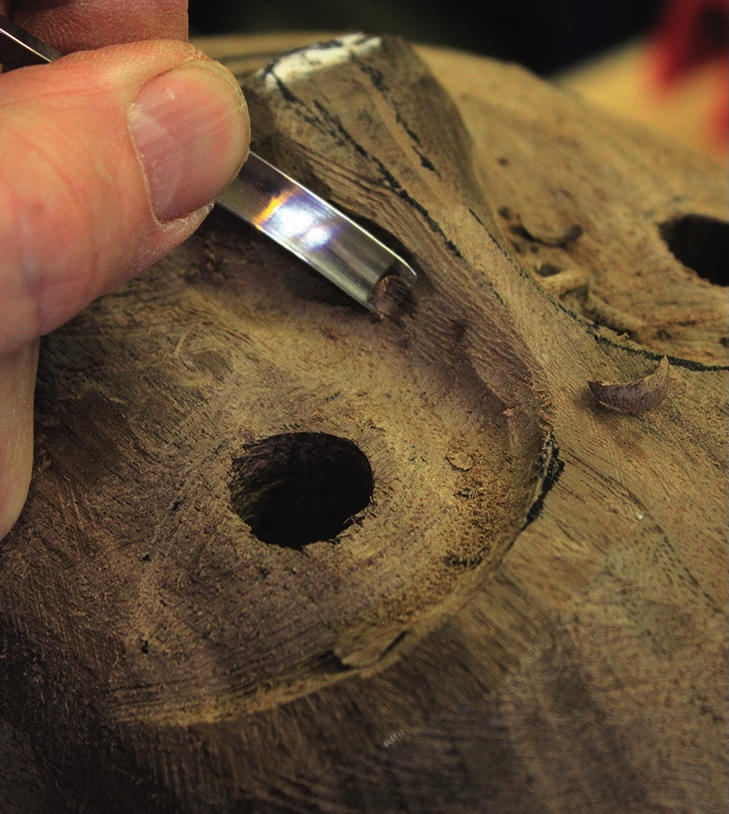
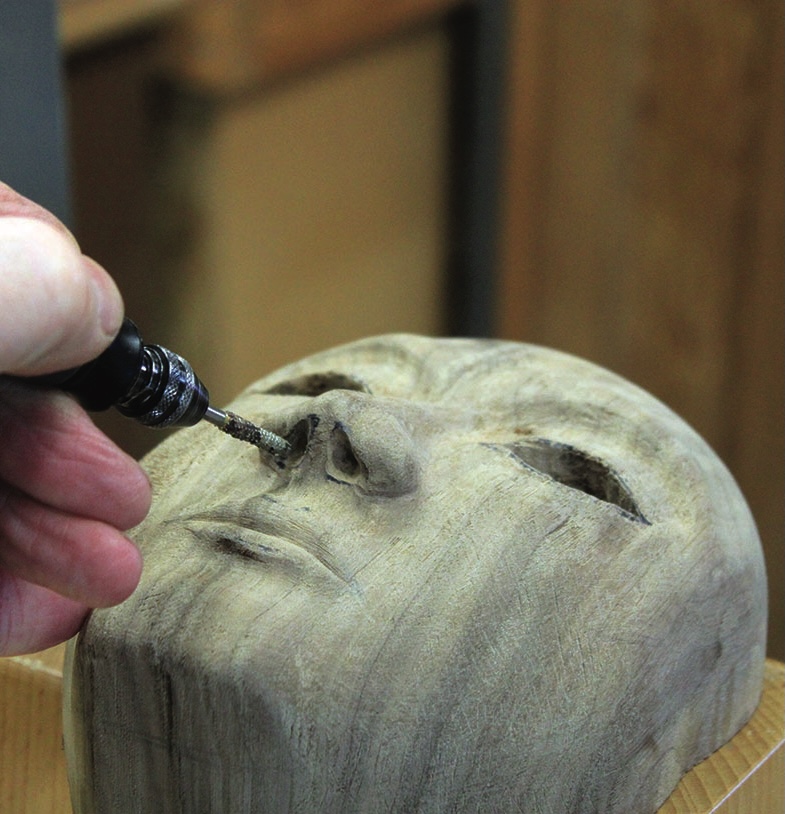
19b. …or small fluted gouge to hollow out the nostrils

Hollowing the back

Chisel carving on wood block close-up.
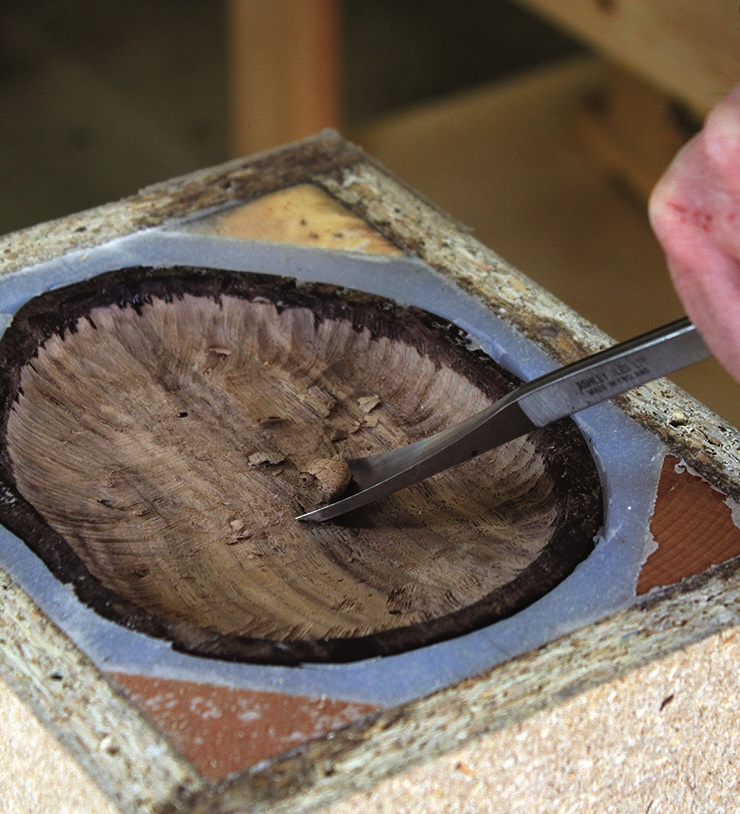
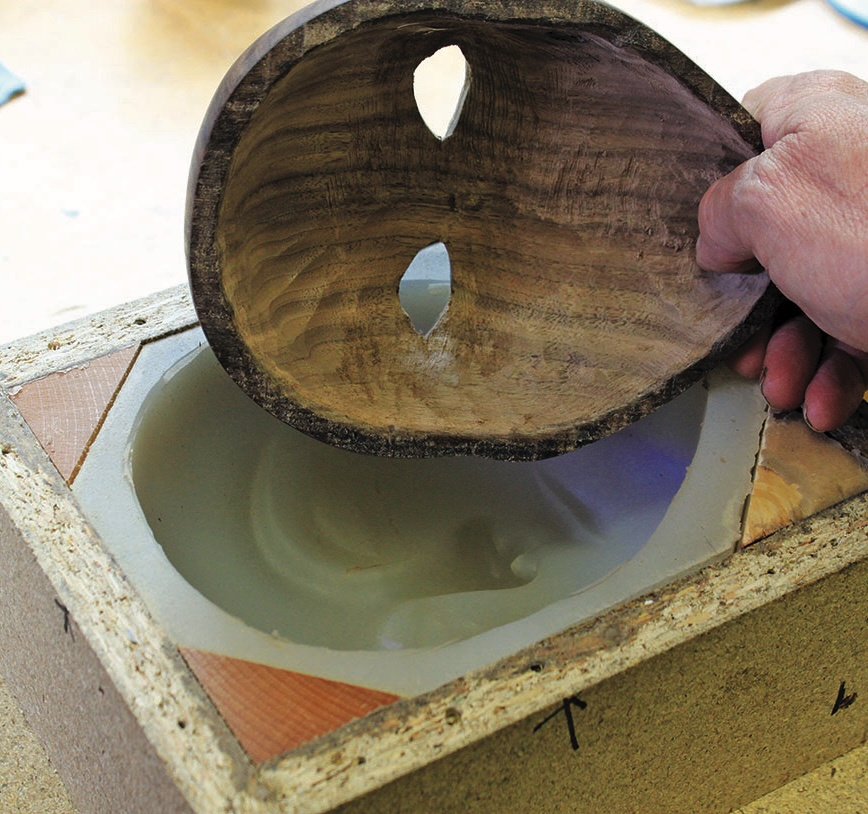
20. Sand the whole face with 80, 120, 180 and 240 grit papers and apply a sealer then, once dry, cover in fine chalk or talc. By trial and error, the next step seems to work best. I made many prototypes before working out this version was the best for supporting the mask. Make a four-sided box with a base and place the mask face up on to the base. Fix triangular fillets in each corner to fill out the voids then fill the box up to the top with silicone rubber moulding compound. When the compound has cured remove the base, flip the box over, screw the base on the opposite side and fix a clamping block. You are now ready to start hollowing out the back
Hand crafting wooden bowl with mold
21. This will support the mask while the back is carved out and you will be able to remove and replace the mask easily whenever you need to check the thickness of the wall without compromising the support
Using blue calliper on wooden bowl in workshop
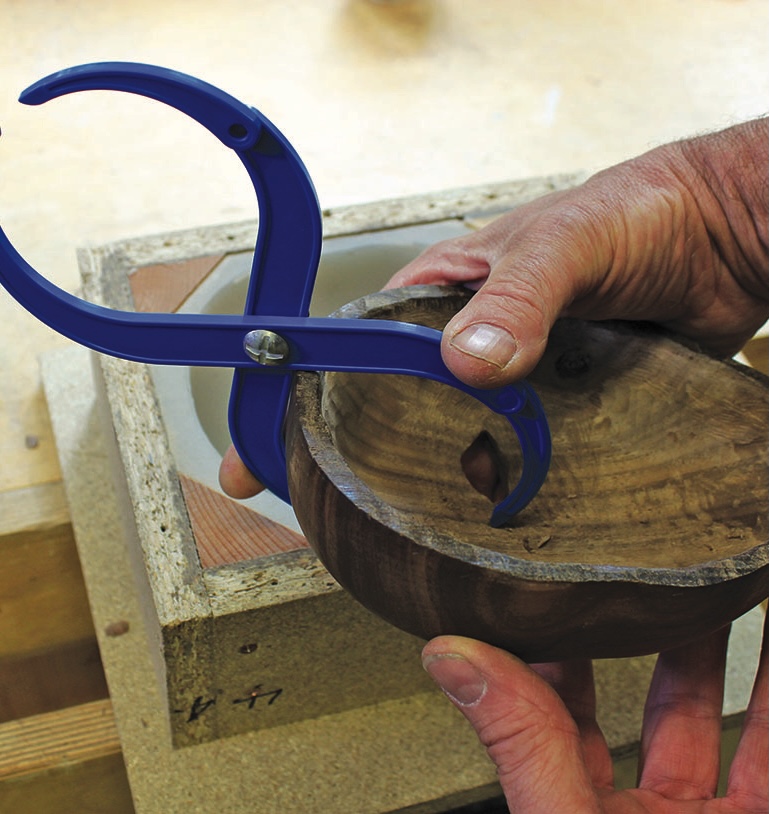
22. Use double-ended callipers to check the wall thickness, aim for around 10mm or thinner if you prefer and leave it slightly thicker to the side of each eye to fit hardware for mounting
Hand filing wood with carpenter's rasp tool.
23. Lift the mask out of the mould slightly and clamp the sides to access the chin. Then, using a rasp file a smooth curve from the lower cheeks down to the chin. Do the same to the top of the head, only less of a curve. This will give a nice overall shape to the whole mask. The back of the mask can be left as a tooled finish, or refined to a smooth finish if you wish, and the heavy tool marks have been sanded down to 120 grit then sealed with cellulose sanding sealer
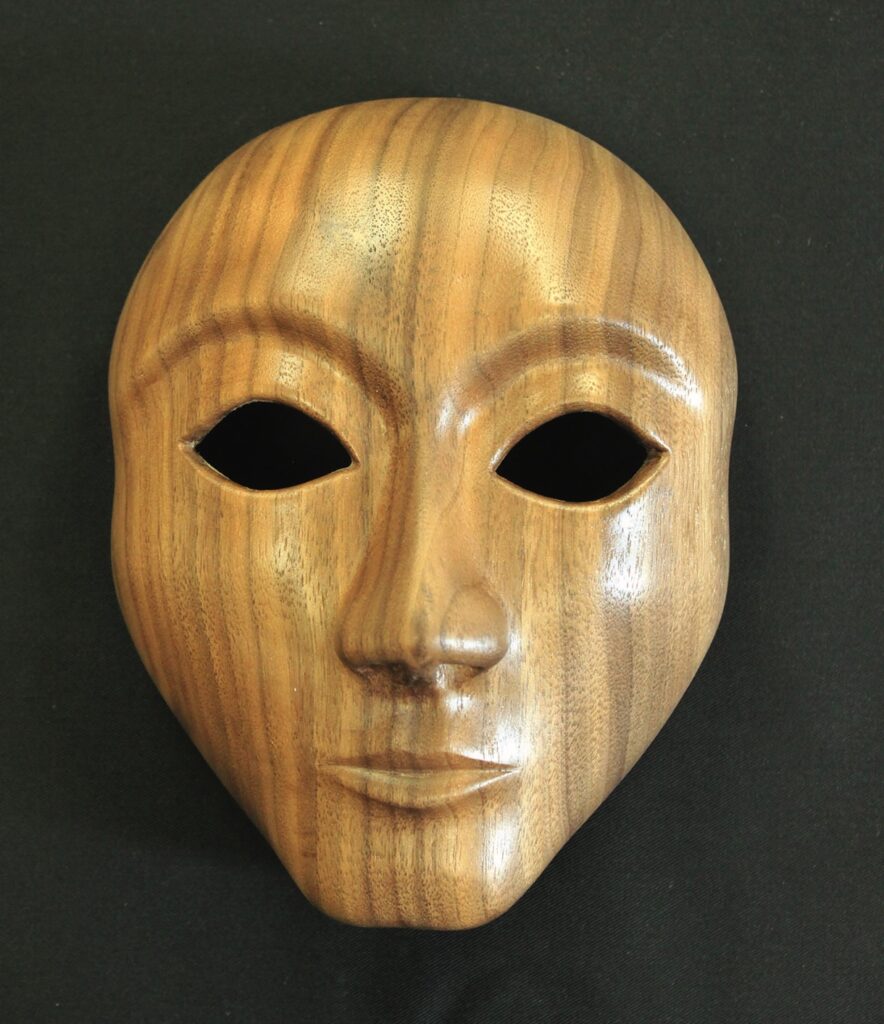
Wooden mask on black background
24. Here is the completed mask prior to adding some decoration which is, of course, optional. You can leave it plain as shown or decorate it whichever way you want. As you can see from the main image at the start of the article, I used gold paint, costume jewels and cubic zirconia to add some decoration

I hope you have had fun with this project. I certainly have. I am wondering what it is like to carve an animal head mask, but that is a story for another day.w

Leave a Reply

Your email address will not be published. Required fields are marked *