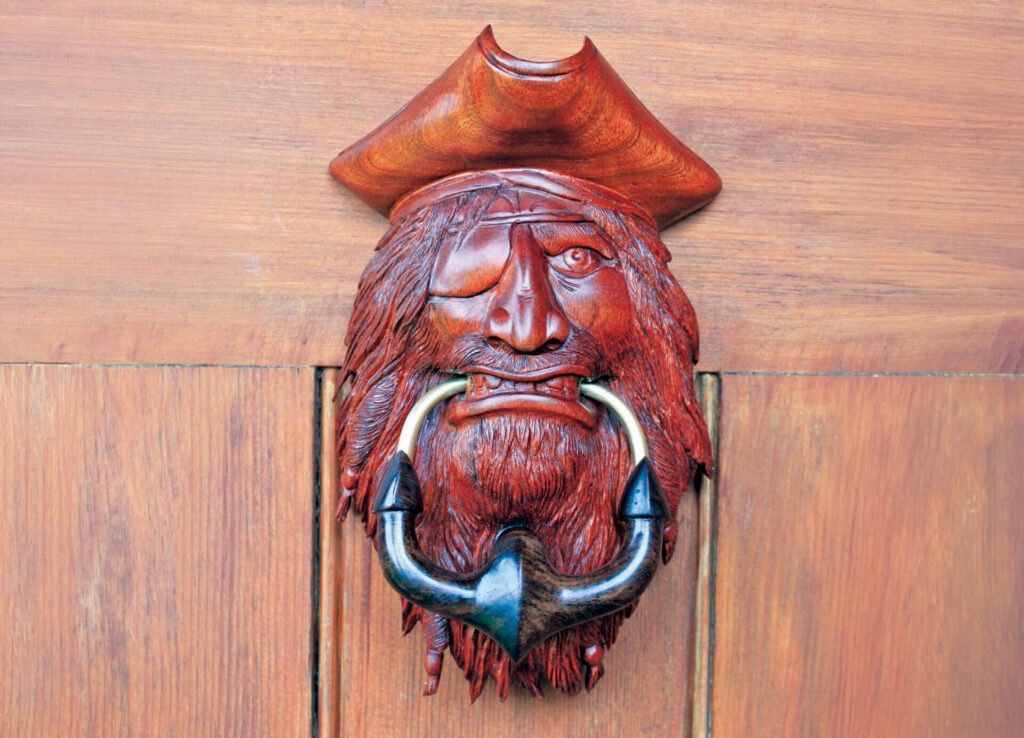
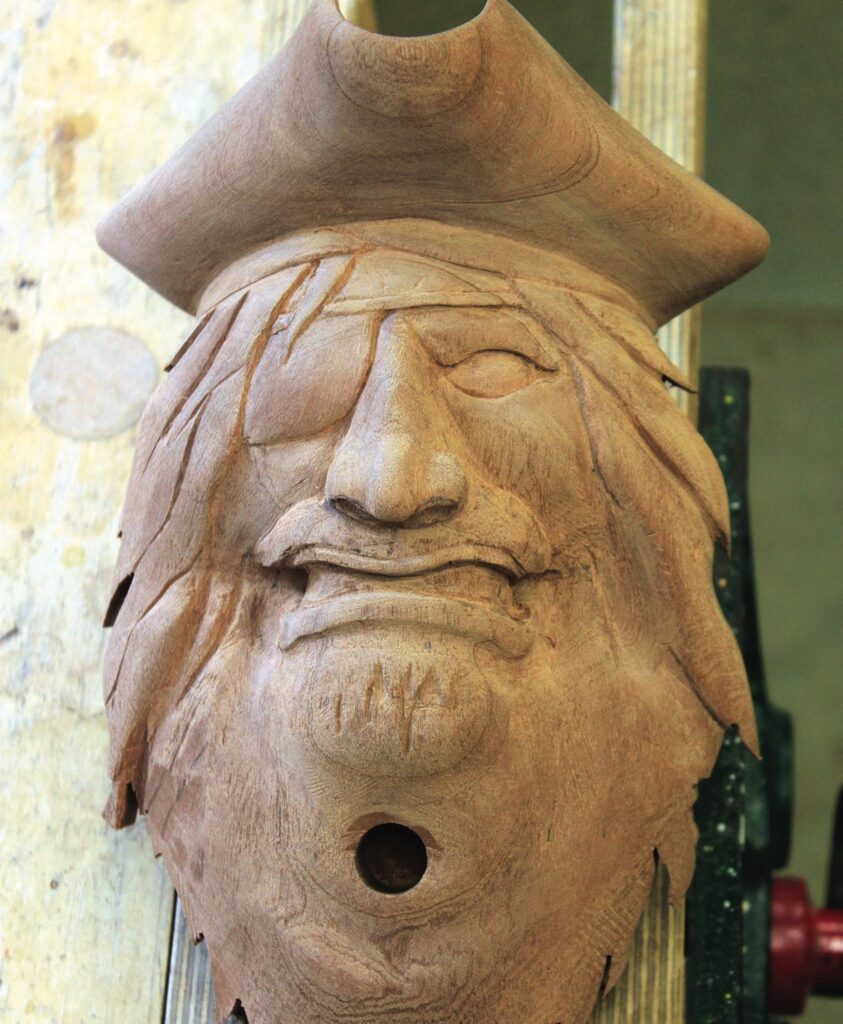
Mark Gough carves a door knocker inspired by that of the sanctuary at Durham cathedral
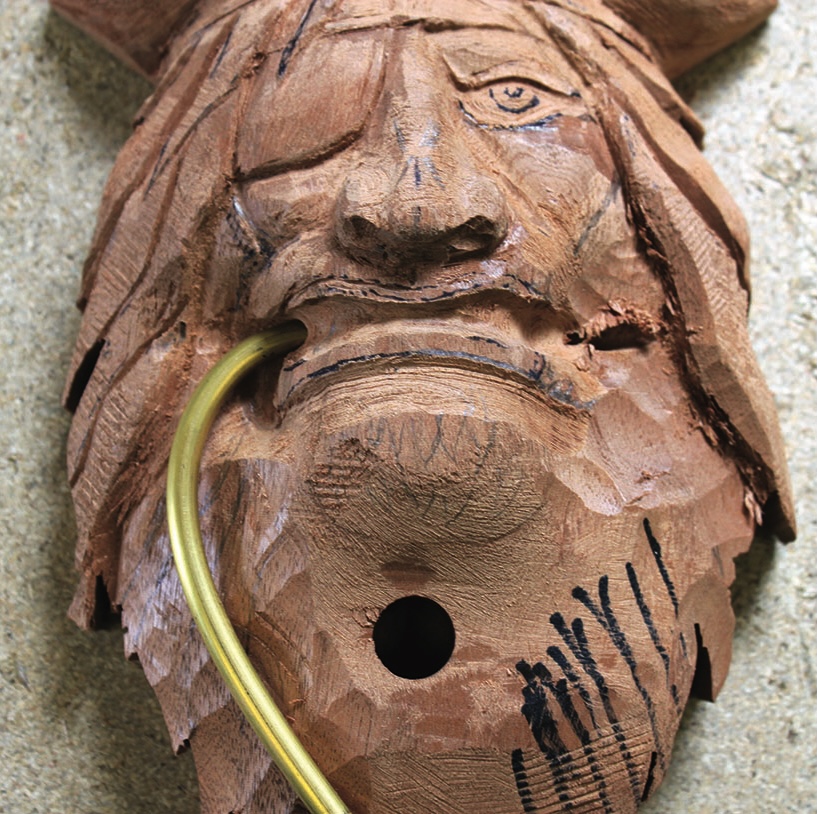
This project was inspired by a photograph of the sanctuary knocker on the door of Durham cathedral, so called because it once offered sanctuary to anyone who touched it. More examples can be found in other cathedrals and churches. I didn’t want to produce a copy, rather take the basic idea of setting the ring through the mouth of the subject and design my own. I decided on the pirate as the main subject. The decision to fashion the knocker from the shape of an anchor just evolved in the drawing process. It needed to be functional as well as decorative, so I chose two relatively hard woods, West African mahogany (Khaya anthotheca), which is fairly easy to carve, and leadwood (Combretum imberbe), which is not. To complete the ring I chose brass rod, which is easy to bend into shape and requires no special equipment other than a small metalworking vice if you have one – if not, a woodworking vice will do. This now adorns my workshop door, which is under cover, so I used Danish oil for the finish, which makes the detail stand out nicely but is not too glossy, much like aged patina. My approach to carving is to use whatever suits me for the purpose and here I have used most of the tools I own – gouges, rotary burrs, rasps, needle files, knives etc. – so select what is best for you from your own toolbox. A lot of the detail is cut with V-tools so at least one of these is essential. What is important is that you enjoy the process and, equally as important, wear the correct protective equipment and have adequate ventilation and dust extraction to suit the tools you use.
Tools: • Personal and respiratory protective equipment (PPE & RPE) • Bandsaw or coping saw • Drill press • Suitable dust extraction • Marking & measuring equipment • 15mm Forstner bit and 7mm drill bit • V-tools 30° and 45° • No.3, 5, 12, 16 & 20mm • No.5, 3mm, a 25mm fishtail, 12mm spoon bent, 13mm swan-neck • Carving knives • Rotary carving unit and selection of burrs
Materials: • East African mahogany, 270mm x 170mm x 75mm • Leadwood, 115mm x 75mm x 32mm • 6mm brass rod x 250mm • Epoxy adhesive • Abrasives down to 240 grit • Danish oil
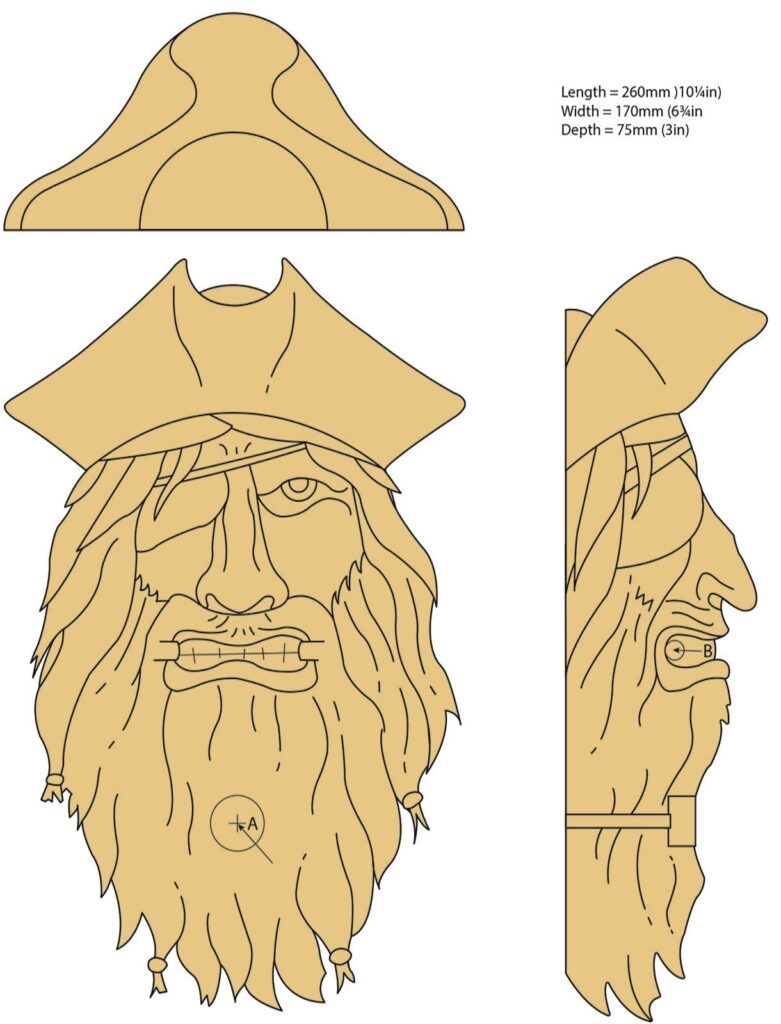
Drawings
The carving
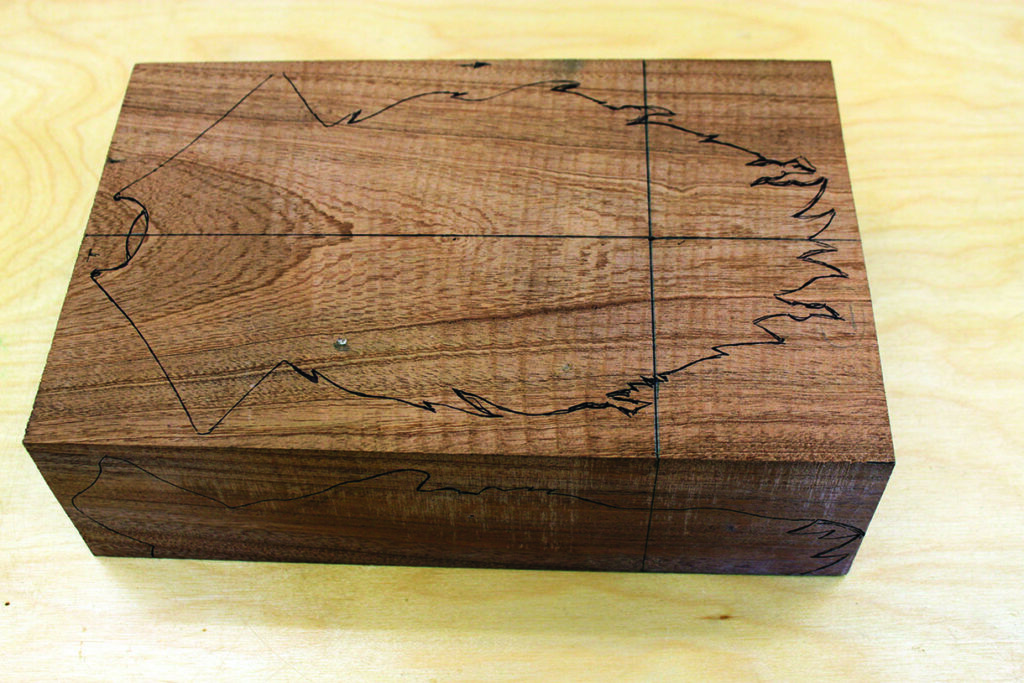
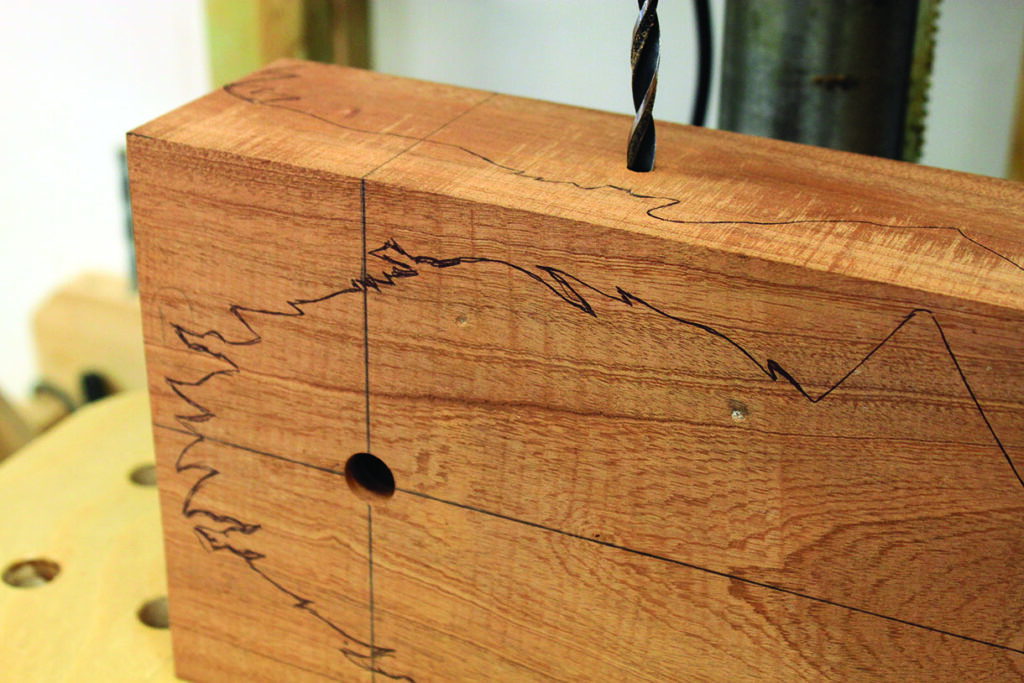
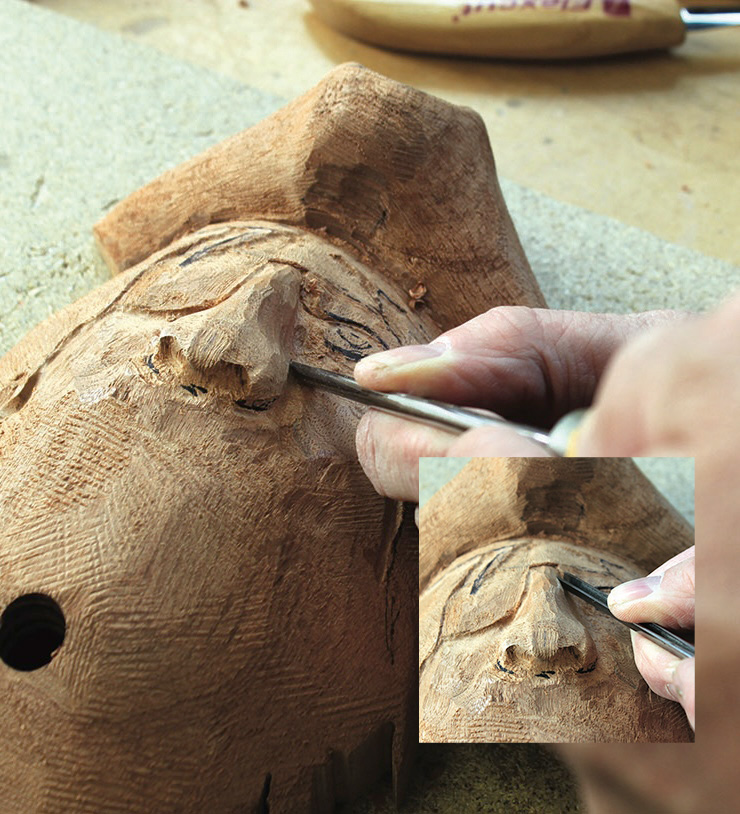
1. Start with a blank 270mm x 170mm x 75mm square on all sides then mark a centreline from top to bottom on the face side and mark a horizontal reference line approximately 70mm up from the bottom edge on the face and sides. Using the template mark the outline on to the face side and then mark the profile on one side, using the reference line to position both accordingly
2. Using a 15mm Forstner bit, drill a hole to a depth of 50mm where the centre and reference lines cross on the face at point Then drill a 7mm hole through the side at point B. If you do not have a long enough drill bit you can extend the hole when the outline has been cut out. Also, before cutting out the outline you may wish to fit a keyhole slot to enable hidden fixing points on the door
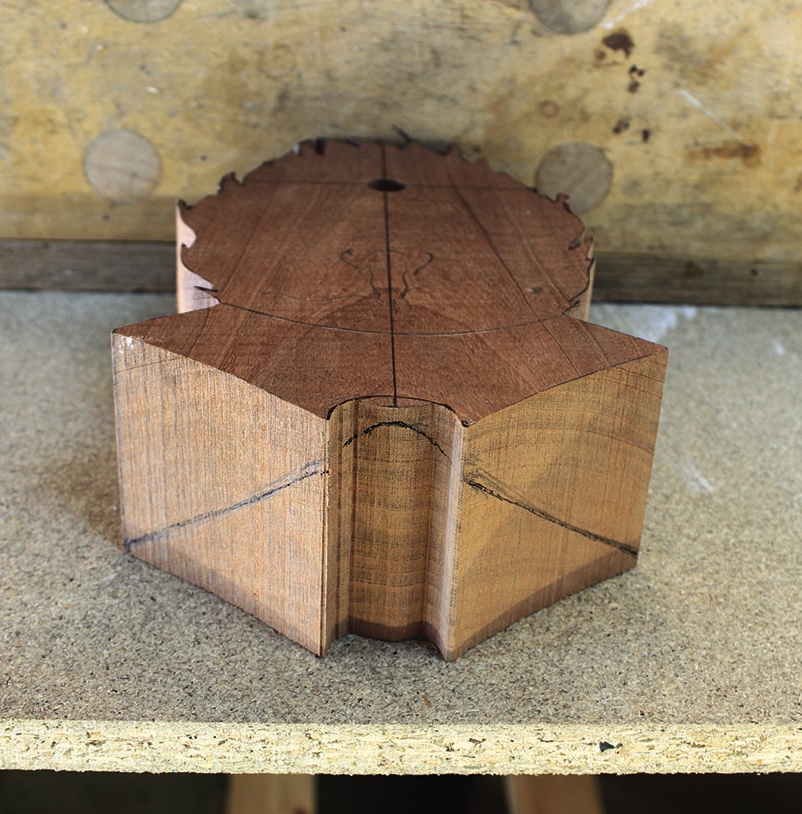
3. Cut out the outline on a bandsaw or drill a series of holes around the perimeter and cut the shape out with a coping saw. Now fix a suitable clamping block to the rear side or fix it to a backboard and clamp to a workbench as seen in proceeding photographs. Mark in the outline for the top of the tricorn hat then, using a V-tool, cut a parting line where the bottom of the hat joins the forehead and start to remove waste down to the mark
4. Now taper the front of the hat from the top down to the forehead in the centre and taper each side out towards the edges to form the triangular shape
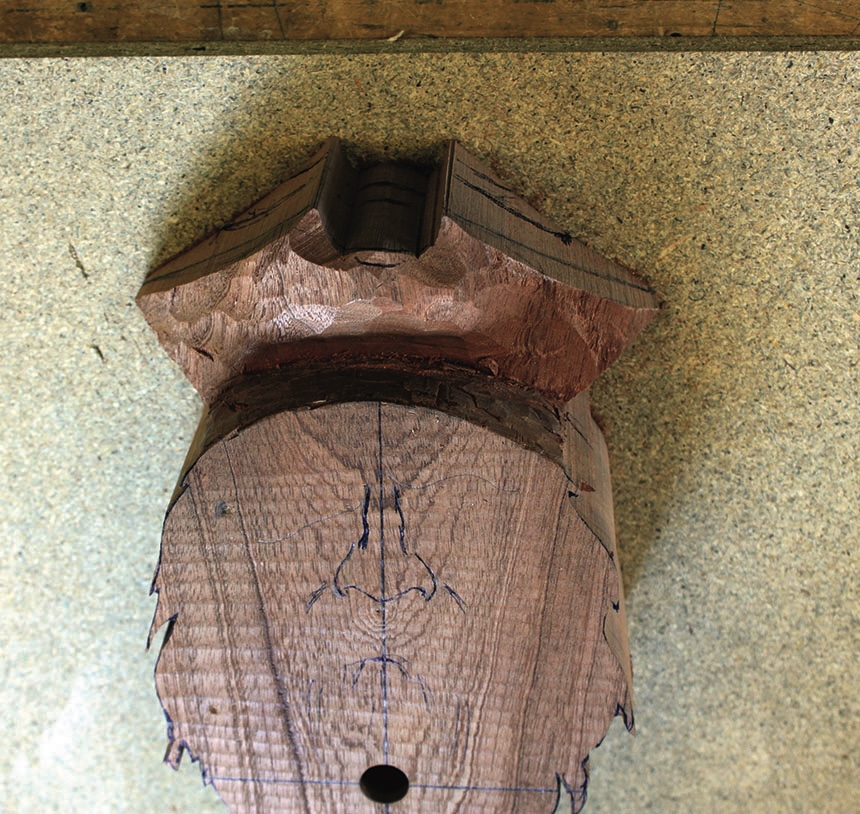
5. The highest point on the face is the tip of the nose the waste above this point can be removed with a saw or plane if preferred. Replace the centreline and cut away from this out towards the perimeter to form the general shape of the face
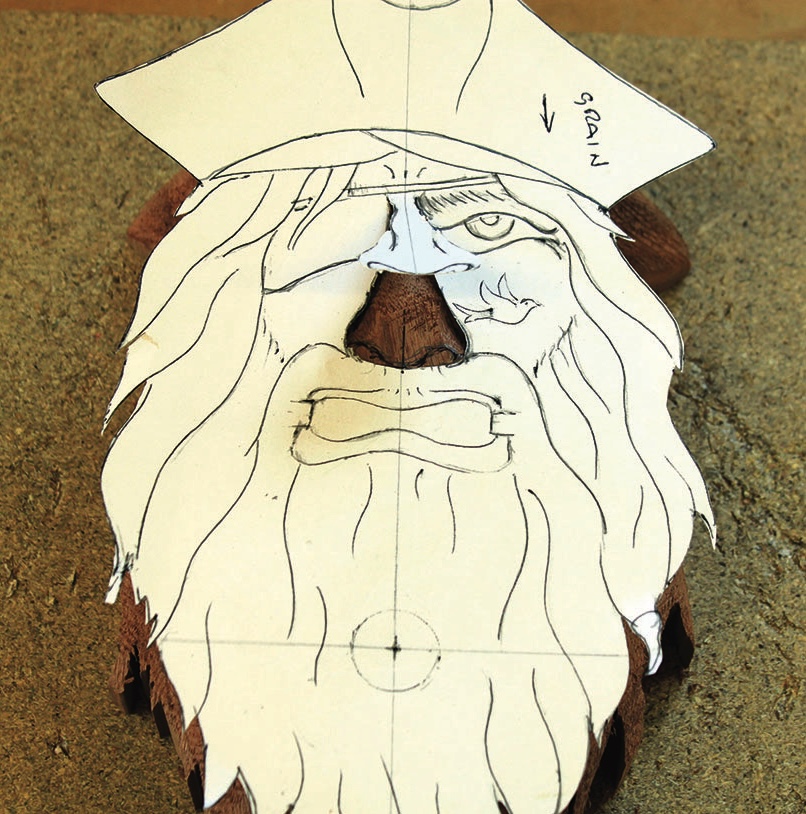
6. Cut the nose outline out of the pattern with a craft knife and use this to transfer the line to the face, then remove waste each side to reveal the shape. Sand away the tool marks and check the shape with the template
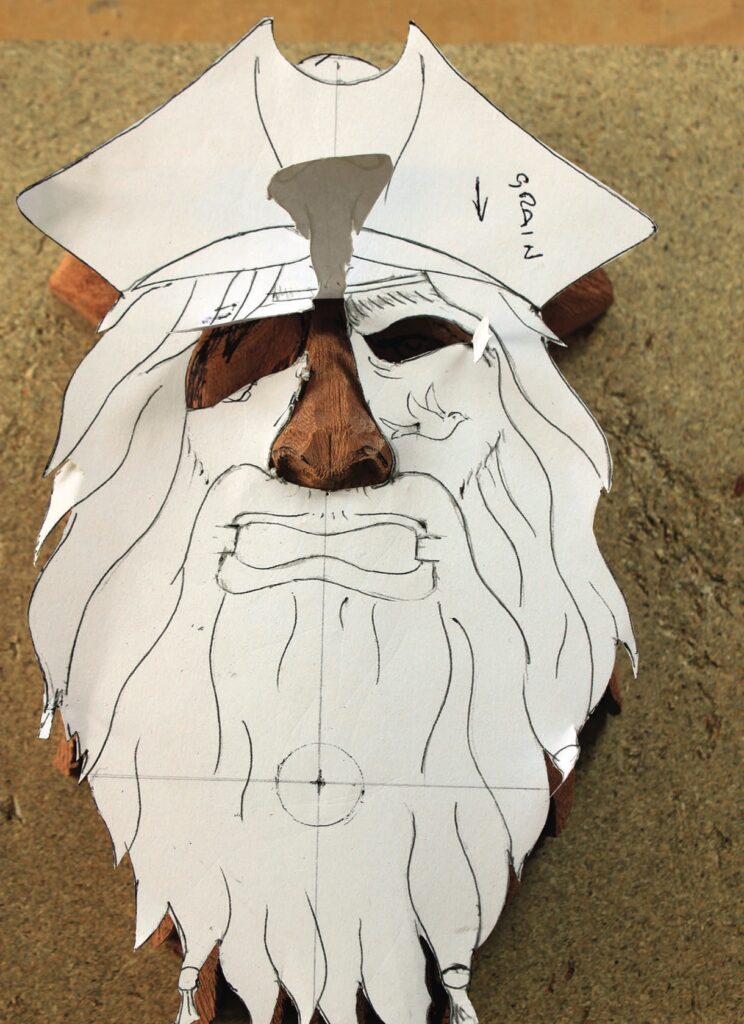
7. Make cuts in the pattern to accurately transfer the detail to the face
8. Use a V-tool to cut the outline of the eye patch and hairline where it sits on the cheek bone
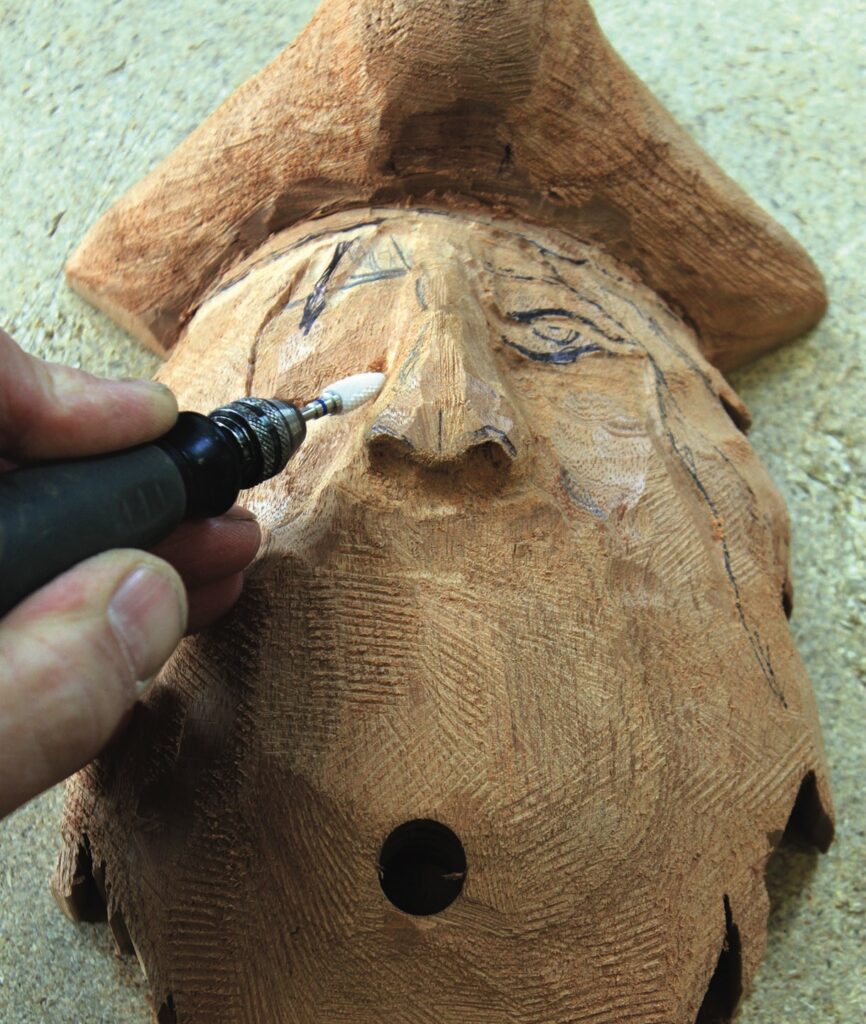
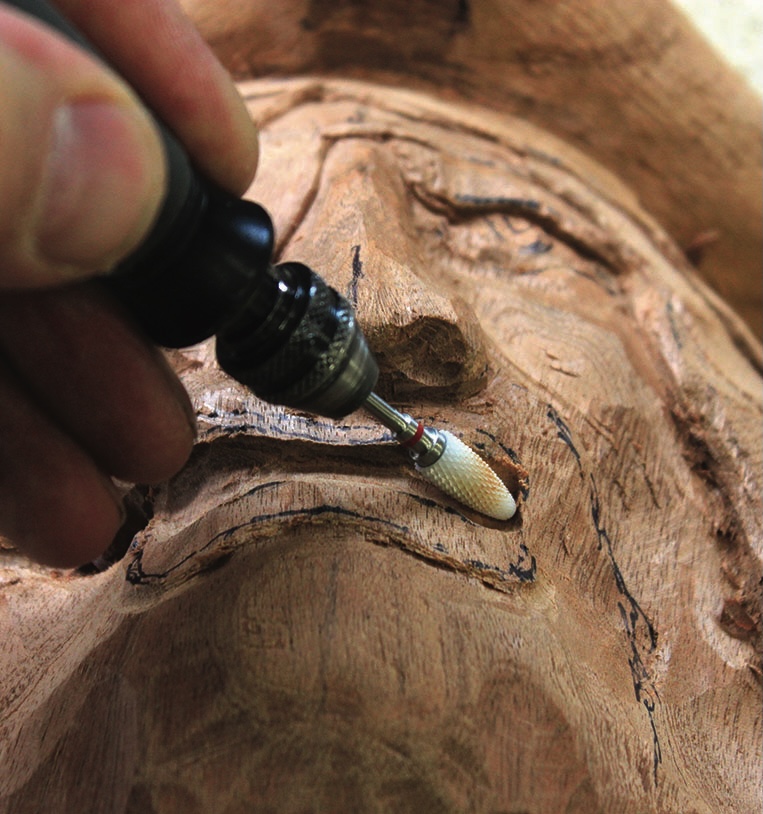
9. Use a small flame burr to shape the sides of the nose and inner cheeks. Be careful not to remove any of the moustache detail at this stage. Be sure to have the correct speed setting when using the rotary tool at all times
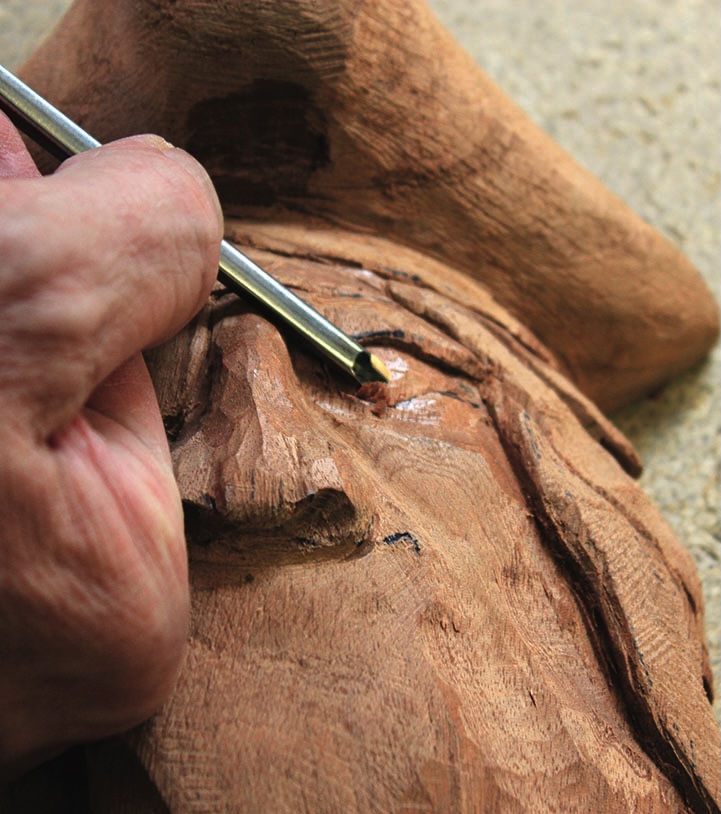
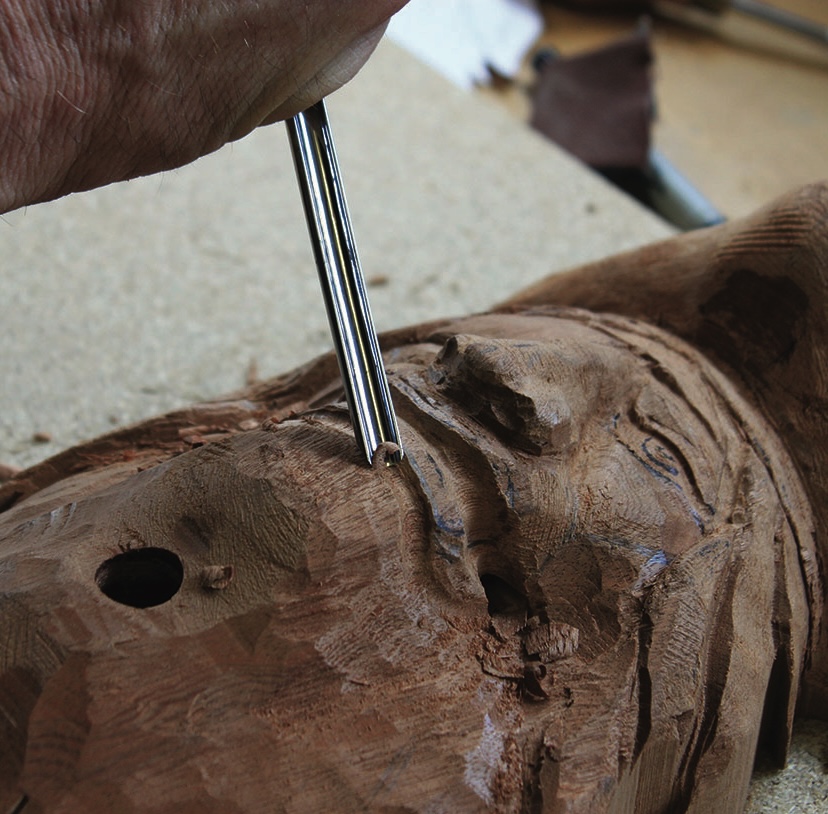
10. Use a V-tool to cut in the shape of the eye and bridge of the nose. You can also cut in the eye patch strap that goes across the forehead and the hairline on the right side at the same time. Select a small, deep gouge and hollow out the inner cheek area each side of the nose. Again be careful not to remove any of the moustache
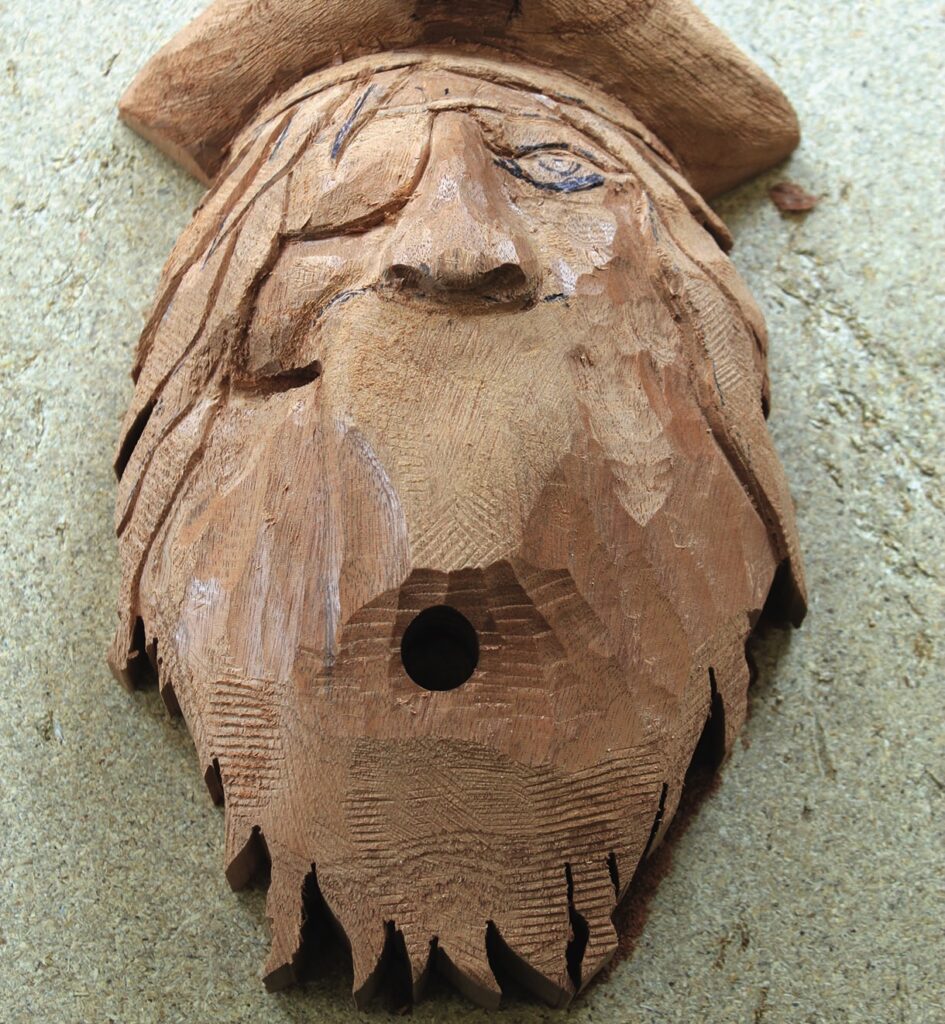
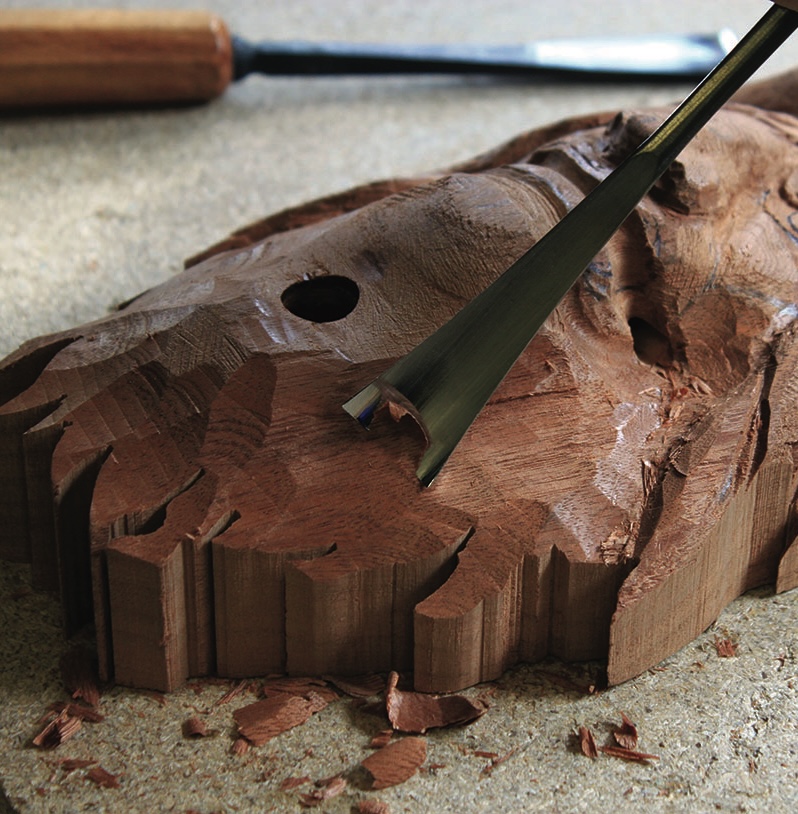
11. At this stage you can rough out the lower beard area to get some idea of the final shaping. Use something like a No.6, 20mm gouge or coarse rasp. Cut deeper around the centre hole beneath the chin as shown
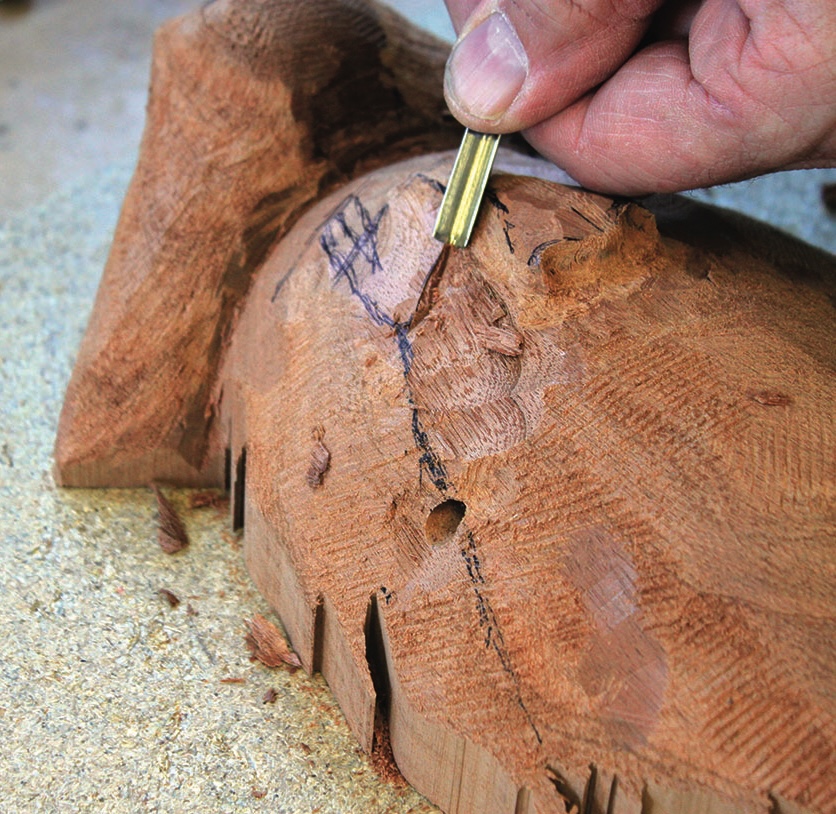
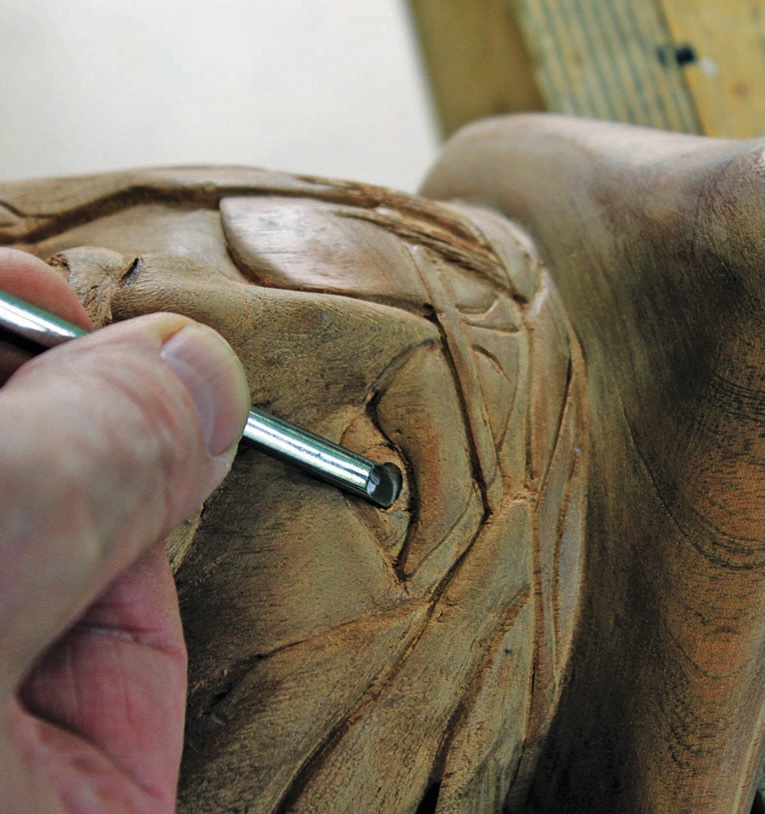
12. Cut the shape of the eye in with a sharpened knife – try to make one sweeping curve top and bottom to form the eyelids. Round over the eye with the inside of a No.3, 5mm, cut from the centre towards the knife cuts, taking thin slivers away each time to form the convex shape
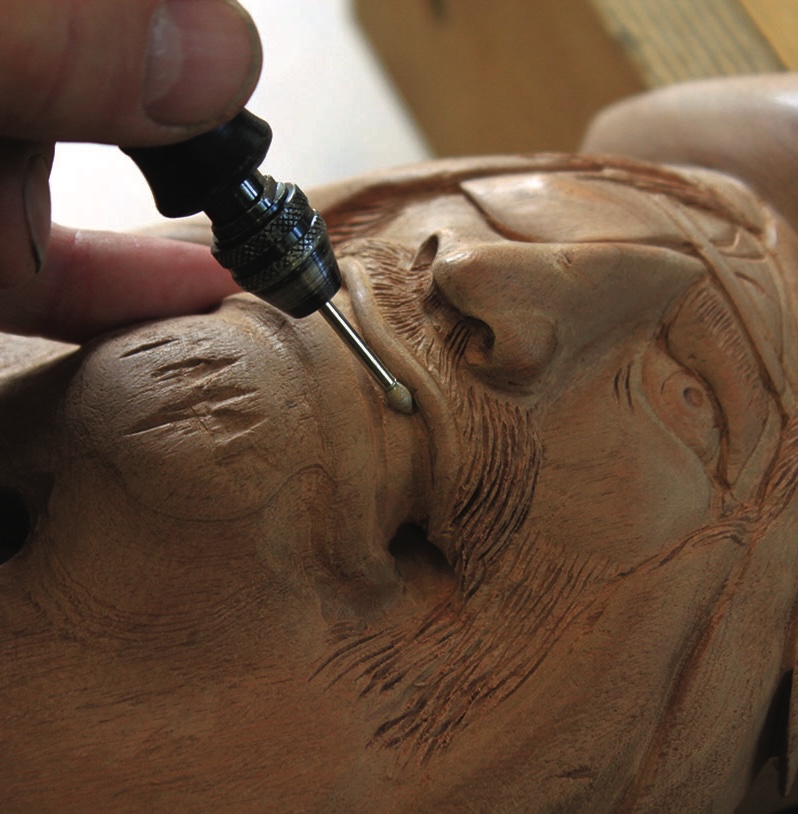
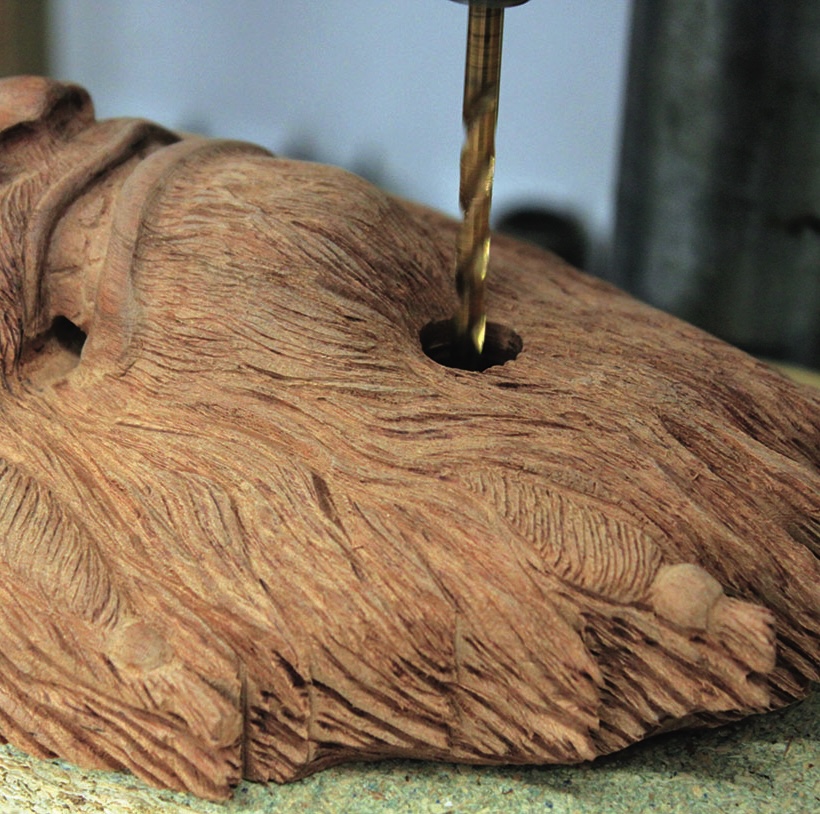
13. Transfer the mouth detail from the pattern as before and select a small flame-shaped rotary burr to cut away the inside of the mouth. Do not cut too deep – the finished detailing will show clenched teeth so make allowances for this. If you have not already done so, now is a good time to extend the 7mm hole through the jaw. This can easily be done with a hand-held drill
14. Separate the main locks of hair with a V-tool and remove the waste each side of the mouth to accommodate the brass ring. Check the clearance with a piece of the brass rod bent to fit. It does not need to accurate at this stage, it will be bent to the correct shape later on
15. Select a small, deep gouge and cut beneath the lower lip to reveal the full mouth shape, turn the cut upwards towards the 7mm hole each side. This will give a snarling expression to the face
16. Further refine the shape of the beard with something like a No.6, 25mm, to remove sizeable cuts. Cut away plenty of waste below the chin where the anchor knocker will sit
Top tip
All of the processes involved are straightforward and are completed in a logical sequence. If you are unsure at any stage, take a break, have a cup of tea or do something different for a bit, then go back to the project with fresh eyes and check what needs to be done.
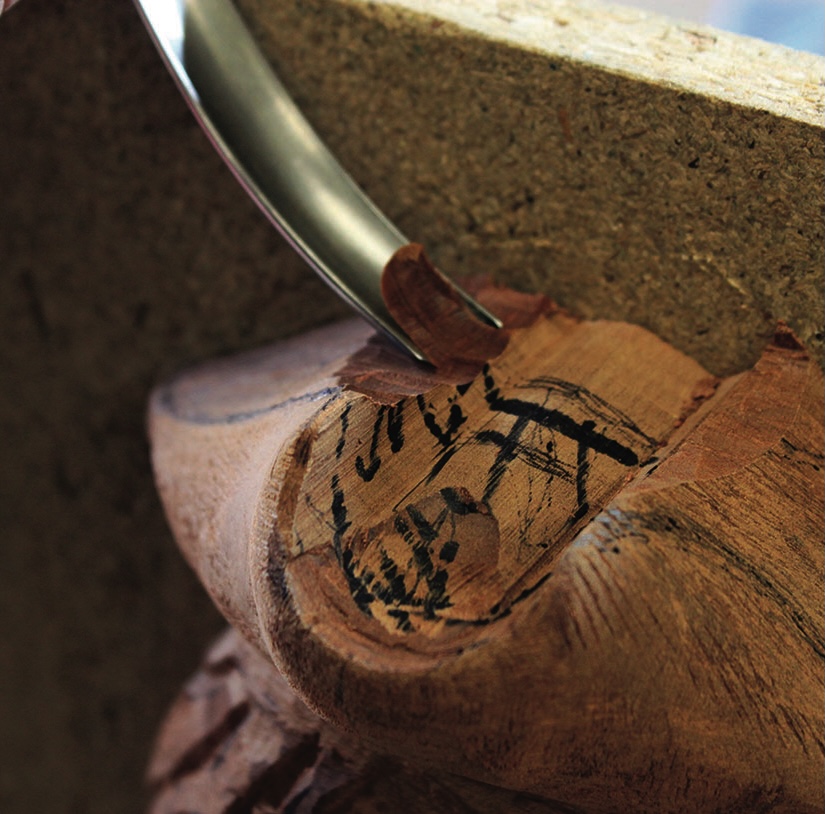
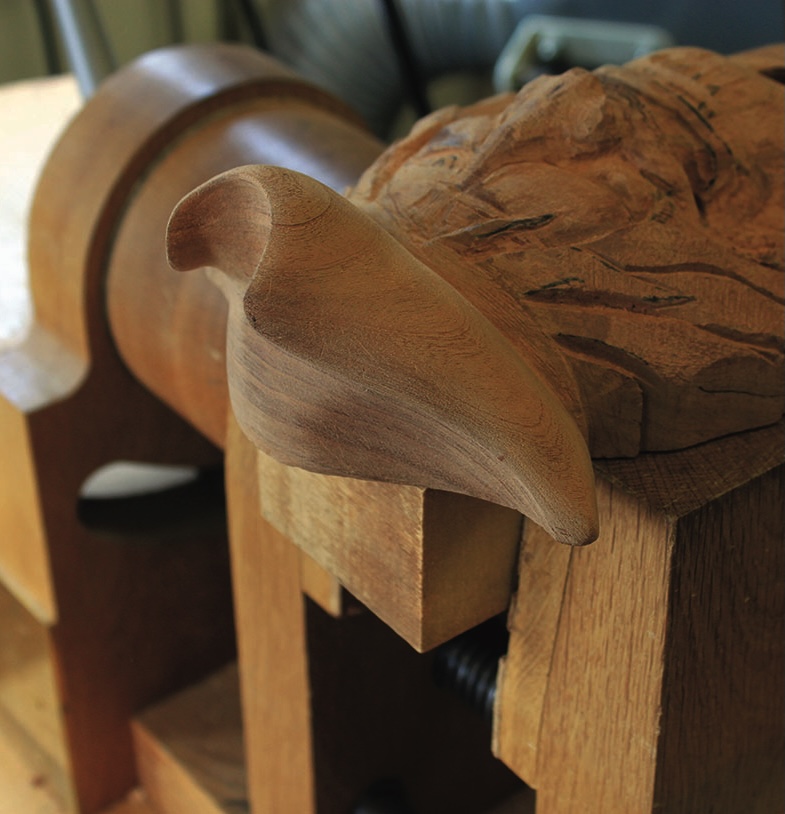
17. Now that the basic shape and features are defined, turn your attention back to the top of the head. If you have mounted the carving on a board as in the photos it may be easier to clamp the upturned board in a vice to get better access to the hat. Cut out some of the bulk behind the front of the hat to get an even surface to mark in the hat lines
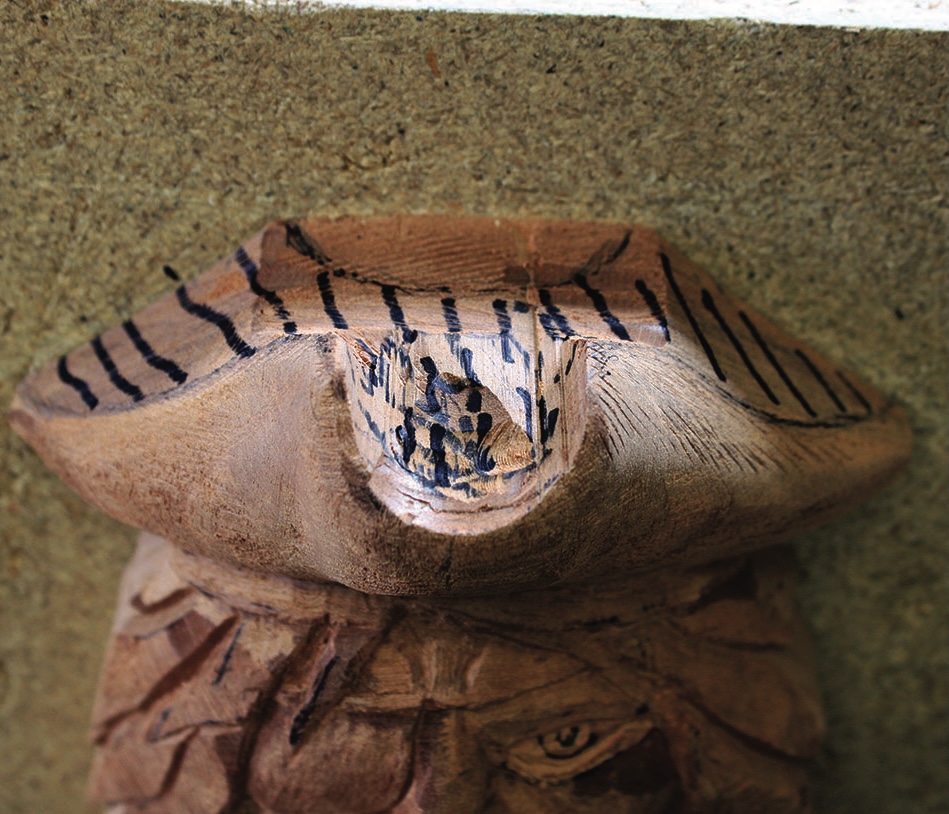
18. Draw in the dome of the hat and mark the waste area
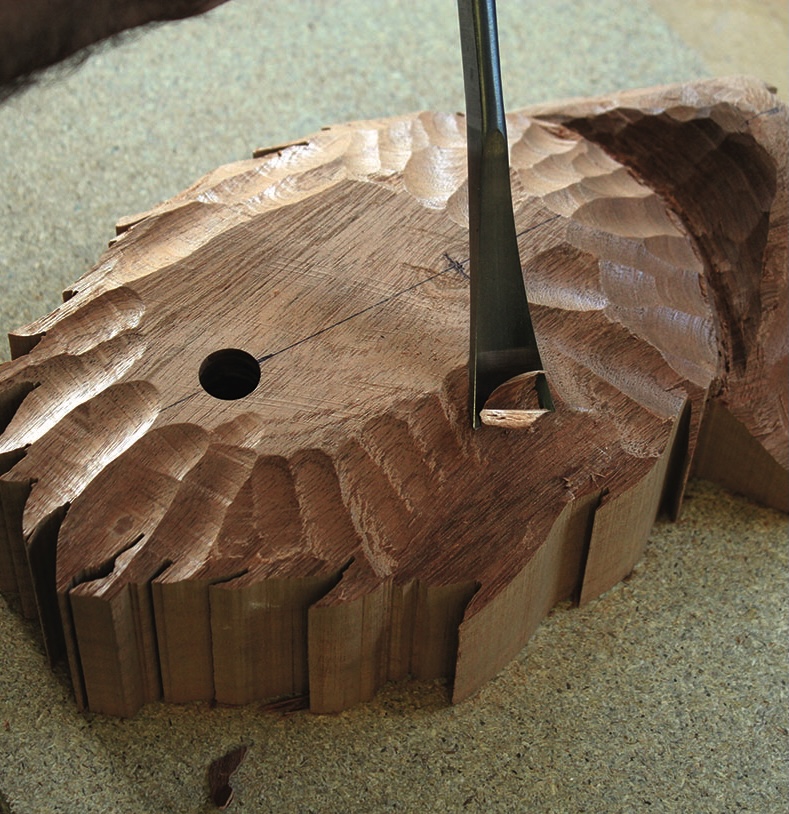
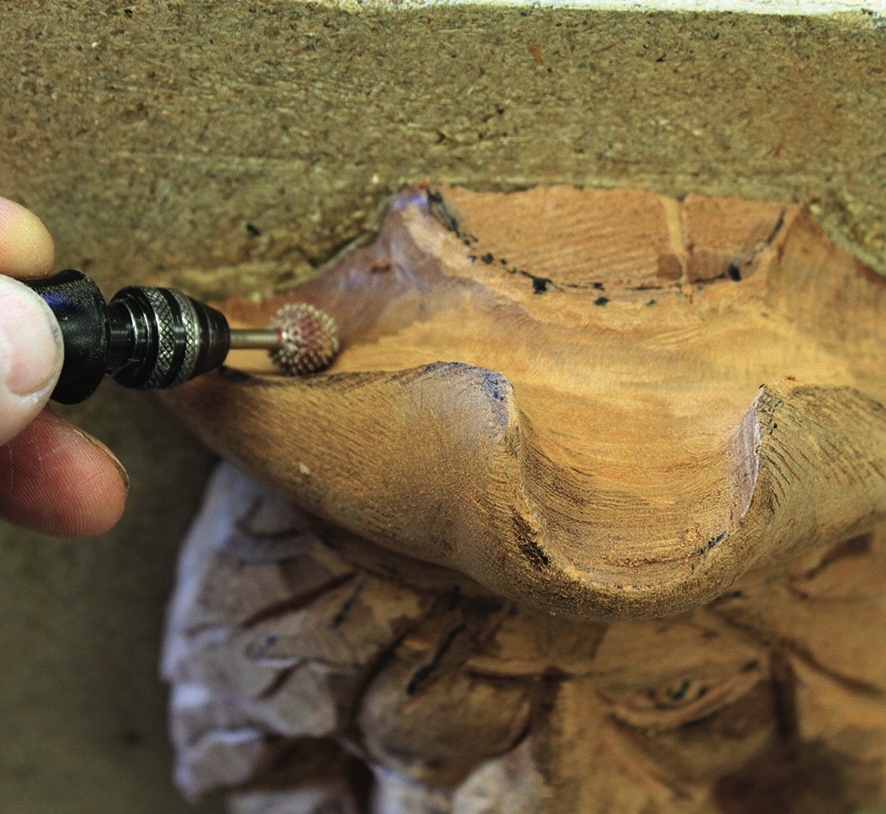
19. Carefully cut out the waste with a deep spoon bent gouge, working inwards from the edge to the dome. Alternatively, use a ball rotary burr working in the same direction
20. Remove the carving from the back board and fix a clamping block to allow access to the bottom edge all round and sand the whole hat down to 180 grit
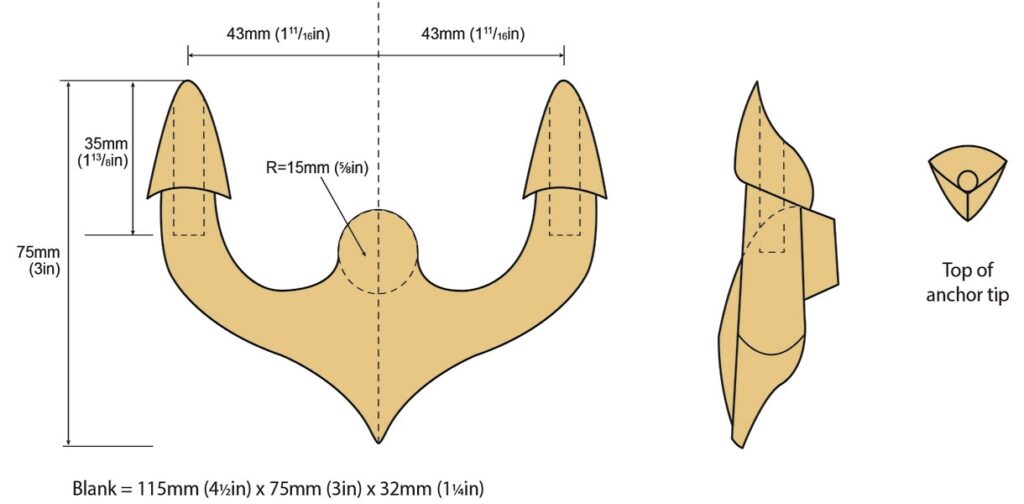
21. Cut in the outline of the moustache with a V-tool and sand the front of the carving down to 180 grit ready to start working on the final detailing
22. Once done, work from the top of the carving and sand smooth as you go. Start by cutting a small groove just below the rim of the hat with a 3mm flute gouge and smooth with folded sandpaper. Next cut in the bandana folds and forehead creases with a V-tool then move on to the eye. Cut in the pupil with a small rotary burr then use a suitably sized small gouge to form the circle. With a light stabbing action, cut in the outline of the iris – you can use the tip of a knife for this if you do not have a suitable gouge. Now, with the back of a 6mm shallow gouge, pare away a fine shaving from the pupil towards the line of the iris to achieve a slightly convex shape and create a shadow line
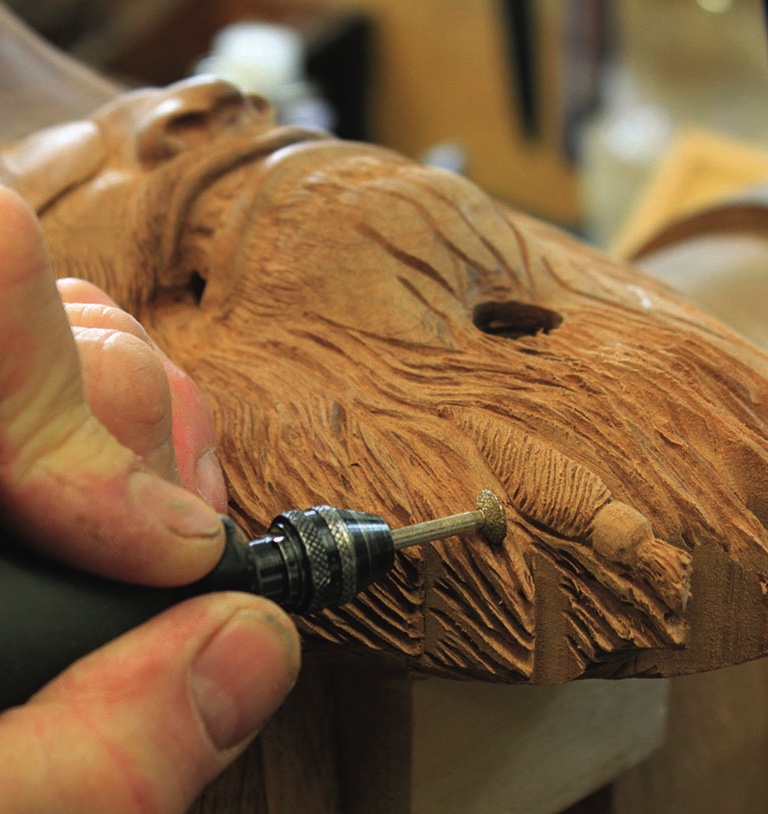
23. Hollow out the nostrils with a small rotary ball burr and cut in the inside of the lips with small flame diamond burr. You can carve the hair that frames the face as you go if you wish. To do this use a 30° V-tool or, as here, a nail head rotary burr, which is very effective for this purpose
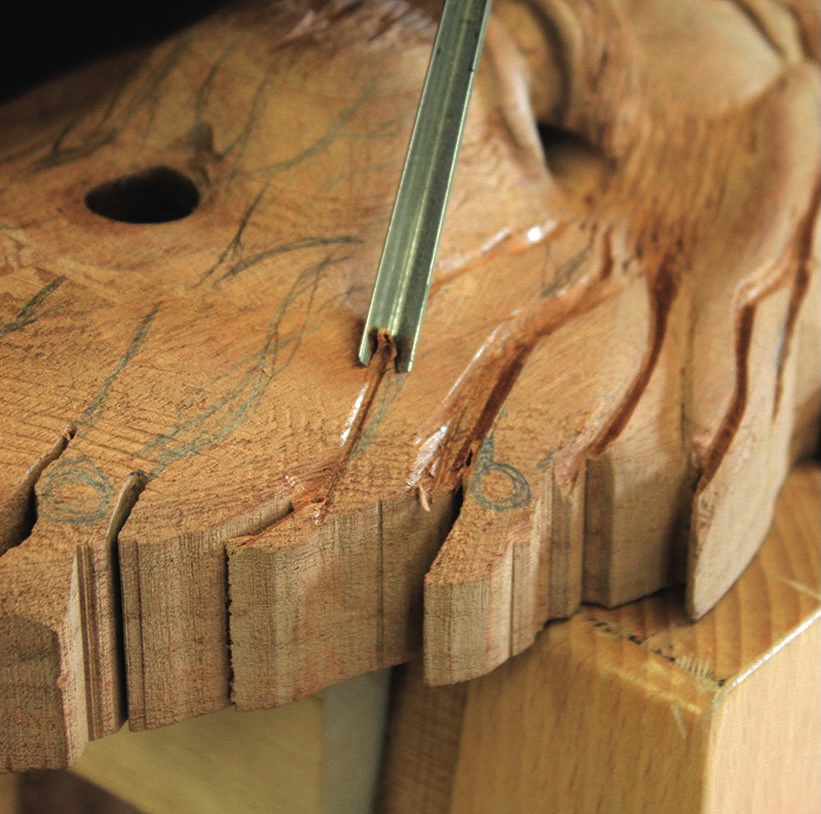
24. Draw in the beard locks freehand using the pattern as a guide and separate with deep V-cuts. Try to achieve natural-looking swirls
Top tip
While I chose to use the woods I had in my wood pile, you can use any that you have that will be suitable. The knocker timber section and striking block need to be resilient, dense, close-grained timber but the pirate face can be any timber of your choosing from your timber store. Choose contrasting timber if you want a visual difference. Alternatively, select a bland timber and use dyes or colours to create the effect you are after.
25. The back of the beard at the bottom and lower sides is rounded over so that is does not touch the surface when it is hung on the door. It is simply sanded smooth as it will not be visible
26. The final detailing of the hair is done with nail head rotary burrs of various sizes but you can use a V-tool if you prefer
27. Drill a 5mm hole through the centre of the striker hole for a hidden fixing
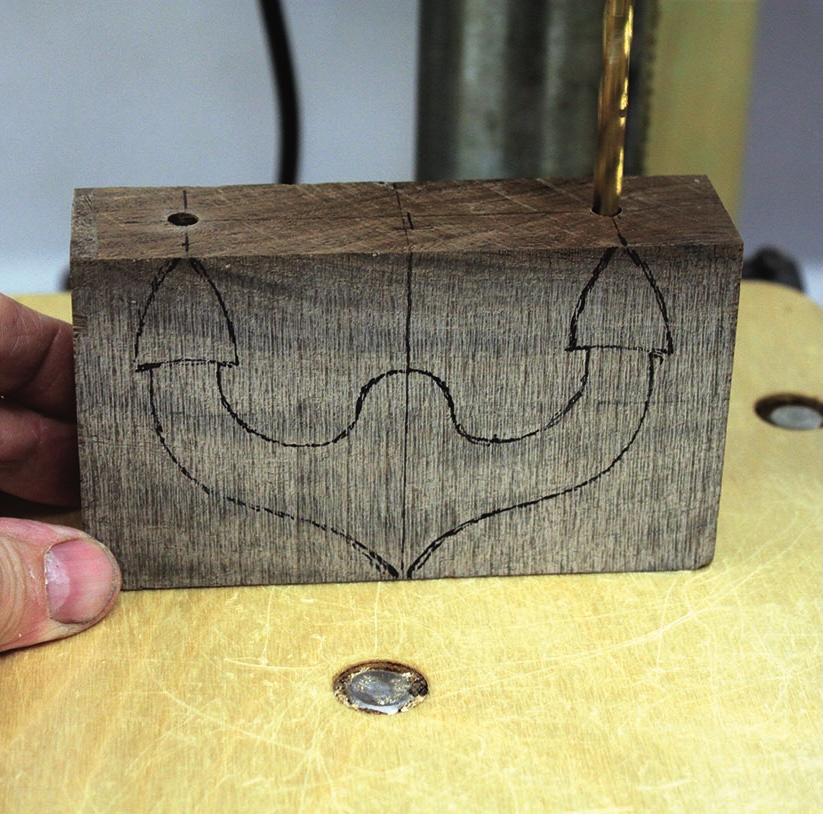
28. The anchor knocker has been shaped from leadwood, but any suitable dense hardwood offcut will do, 115mm x 75mm x 32mm in size. Mark out the outline and centrelines and drill the holes to the correct depth. Be accurate here to avoid opening up the holes when shaping
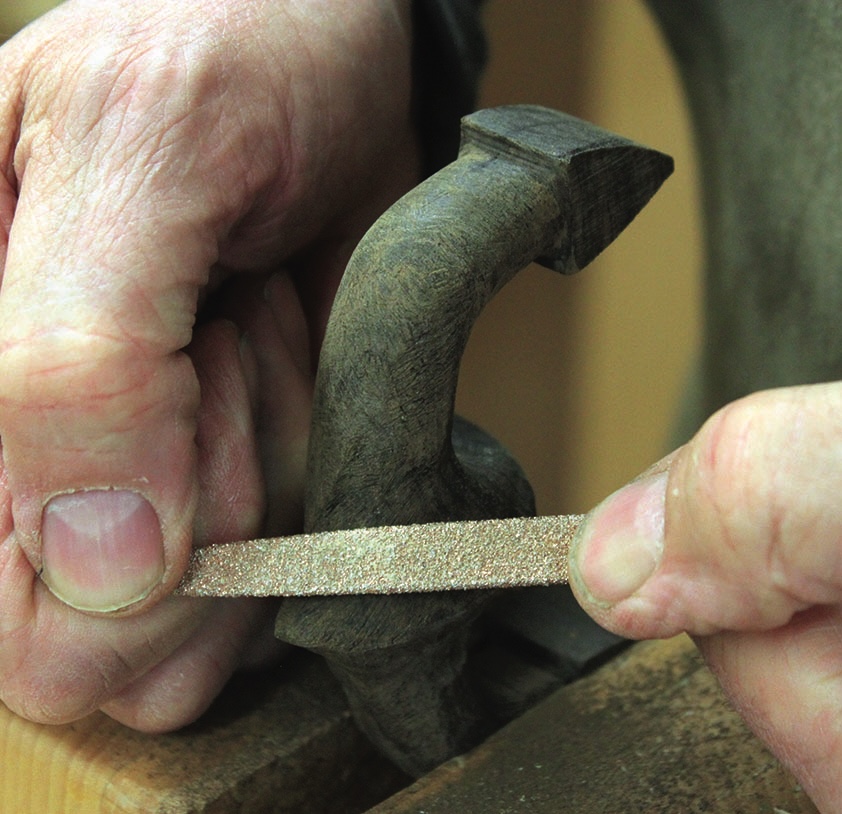
29. Leadwood is a difficult wood to carve so the shaping is done with a rotary tool and several shaped burrs. Be extra careful if you wear protective gloves to avoid snagging the material, a proper carving glove is best with a rubber inner surface. Finish the anchor shaping with small files or rasps and strips of sandpaper and sand down to 240 grit
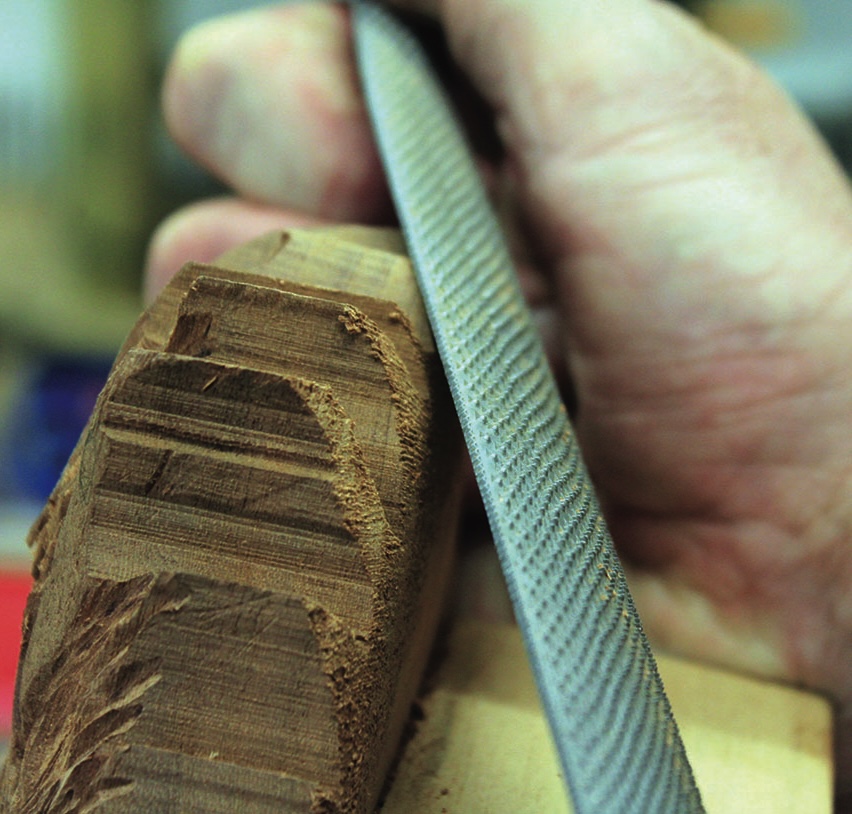
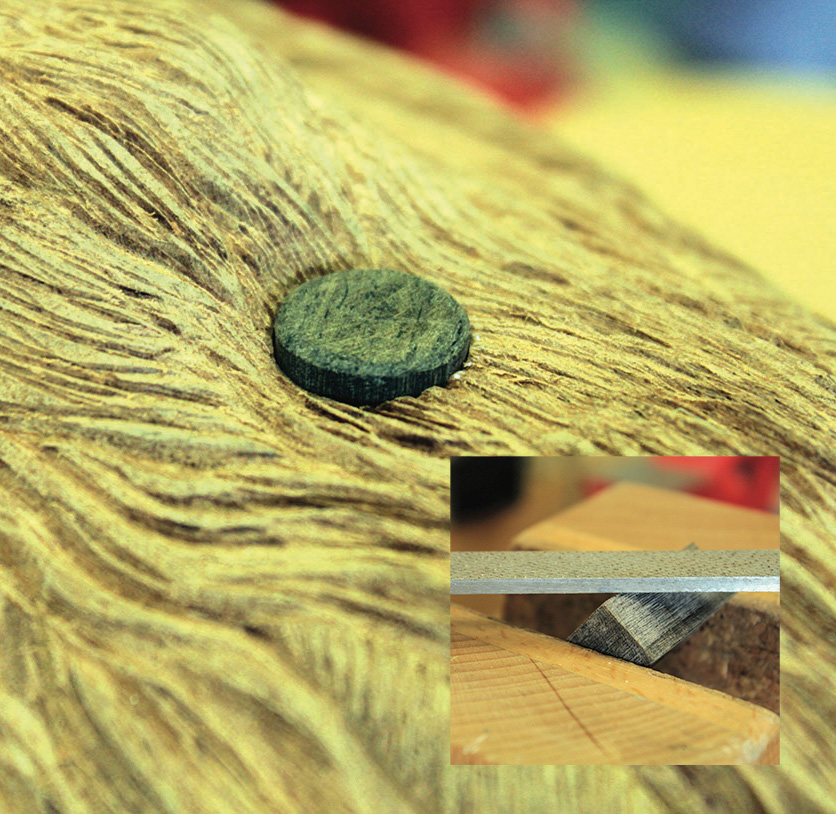
30. To make the striker use a small offcut from the anchor blank and cut a rectangle with approximately 18mm square sides then file off the corners to get an octagon shape then file off all eight corners and so on to get the round profile to fit the hole. It will help if you slightly taper the plug for a snug fit. There is no need to glue this in place – in fact, when the finish has been applied, rub a little wax round the striker before plugging the hole so it will be easier to remove if needed
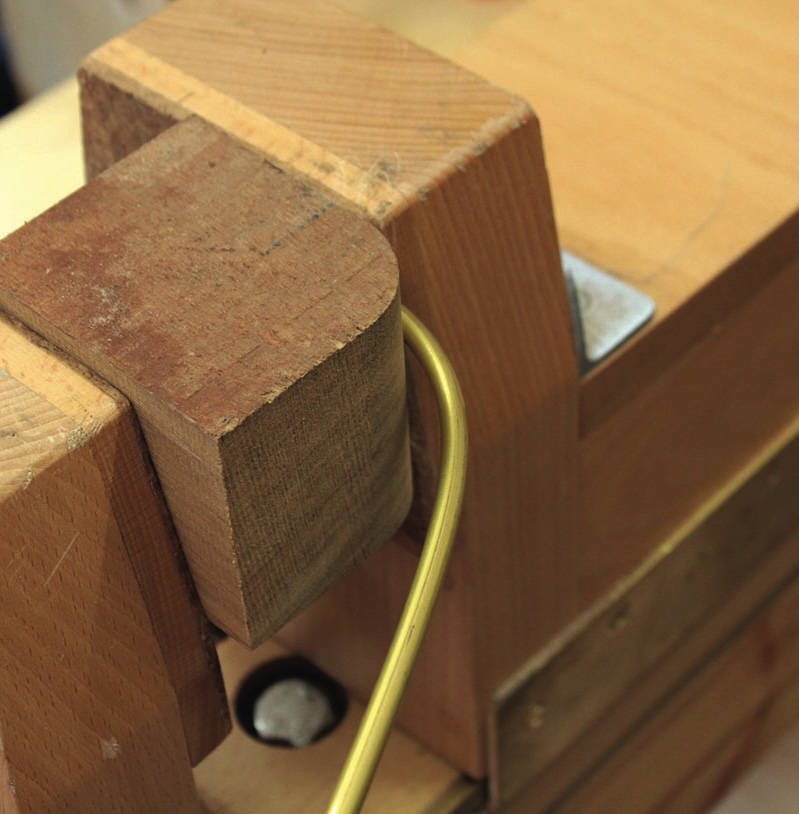
31. You will need two brass rods to hold the knocker. I used brass, which is readily available and can be bent to the required shape easily. These need to be bent to a shape that looks right to fit into the already drilled holes and also into knocker. To bend the brass rod, simply shape a section of wood that will create the right-shaped bend in the rod. Once shaped, the wood can be held in a vice along with the brass rod, which can then gently be bent around the former. Once the bend is formed cut to length and create another one
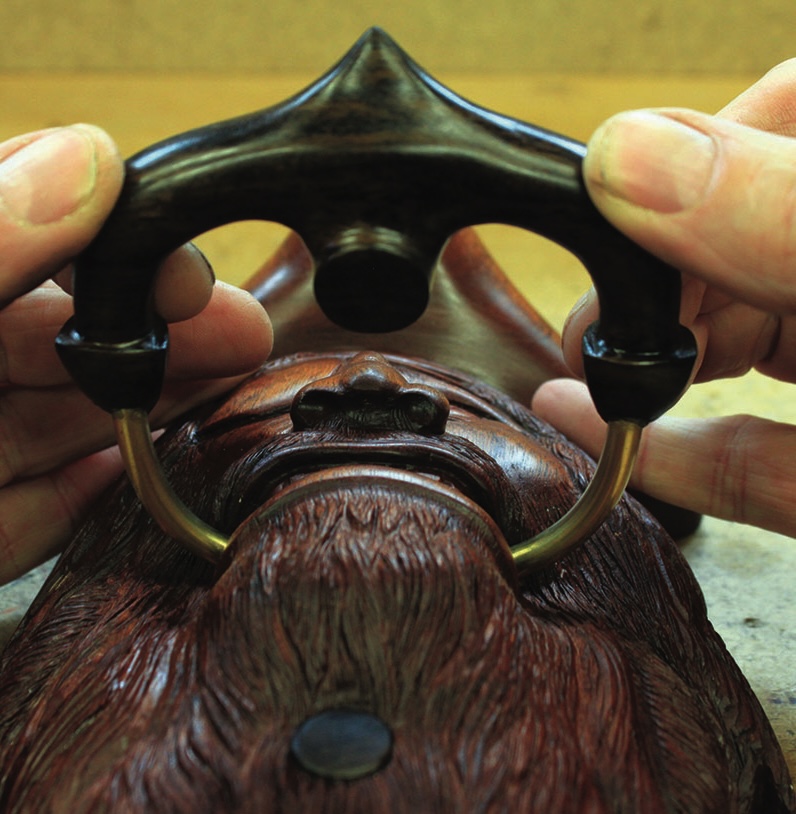
32. Select the finish of your choice and apply several thin coats, be sure not to let it puddle in the detailing. When it is completely dry you can assemble the parts. First fit the brass hangers into the sides of the mouth and lay the head flat on a bench, then check the fit of the anchor knocker and make sure it sits flat on the striker, make adjustments if necessary. When ready to glue up, place a few drops of epoxy in each hole in the anchor. Position on to the brass fittings, check the fit again and secure with elastic bands until cured. To mount the knocker on the door, drill a blind hole and cut fit a keyhole slot plate. Once done, you have a finished pirate door knocker
To provide the best experiences, we use technologies like cookies to store and/or access device information. Consenting to these technologies will allow us to process data such as browsing behaviour or unique IDs on this site. Not consenting or withdrawing consent, may adversely affect certain features and functions.
Functional
Always active
The technical storage or access is strictly necessary for the legitimate purpose of enabling the use of a specific service explicitly requested by the subscriber or user, or for the sole purpose of carrying out the transmission of a communication over an electronic communications network.
Preferences
The technical storage or access is necessary for the legitimate purpose of storing preferences that are not requested by the subscriber or user.
Statistics
The technical storage or access that is used exclusively for statistical purposes.The technical storage or access that is used exclusively for anonymous statistical purposes. Without a subpoena, voluntary compliance on the part of your Internet Service Provider, or additional records from a third party, information stored or retrieved for this purpose alone cannot usually be used to identify you.
Marketing
The technical storage or access is required to create user profiles to send advertising, or to track the user on a website or across several websites for similar marketing purposes.