
Even in the modern world – with every conceivable tool with a plug on it, some things still have to be done the old-fashioned way, using skill and ‘grunt’ to get things done. Sometimes this can seem a real burden, but it doesn’t have to be. Even if you don’t have a natural aptitude for hand work, you can learn and improve your skills, and turn hard work into something much more satisfying. Even fun!
Types of saw
There are two basic types of saw.
Traditional
The traditional kind, with a steel blade that can blunt easily if you aren’t careful.
Hardpoint
And the modern hardpoint variety. This can cut through a wider variety of materials, but is disposable when it becomes blunt. Choose the former type for fine work such as cabinetmaking and the latter type for general carpentry.

Cost
The more you pay, the better the tool. Really top-quality traditional saws can be expensive, so they deserve looking after. They come in two basic types – with a ‘back’ to stiffen the blade for joint cutting and larger handsaws without a back, designed for panel cutting. There are many variants though for very specific tasks.
Saw care
Look after your saw or saws. The teeth are particularly vulnerable on traditional pattern saws, so keep them safely stowed in a toolbox or cabinet. Stop sawblades from rusting with a light wipe of oil.
Mark your cuts
You can’t make accurate, neat cuts without marking out your cut lines correctly. A try square and marking knife, or carpenter’s pencil sharpened to a ‘chisel edge’ is the usual method, but an engineer’s square is more accurate. Alternatively, a combination square is adjustable and very handy working on site.
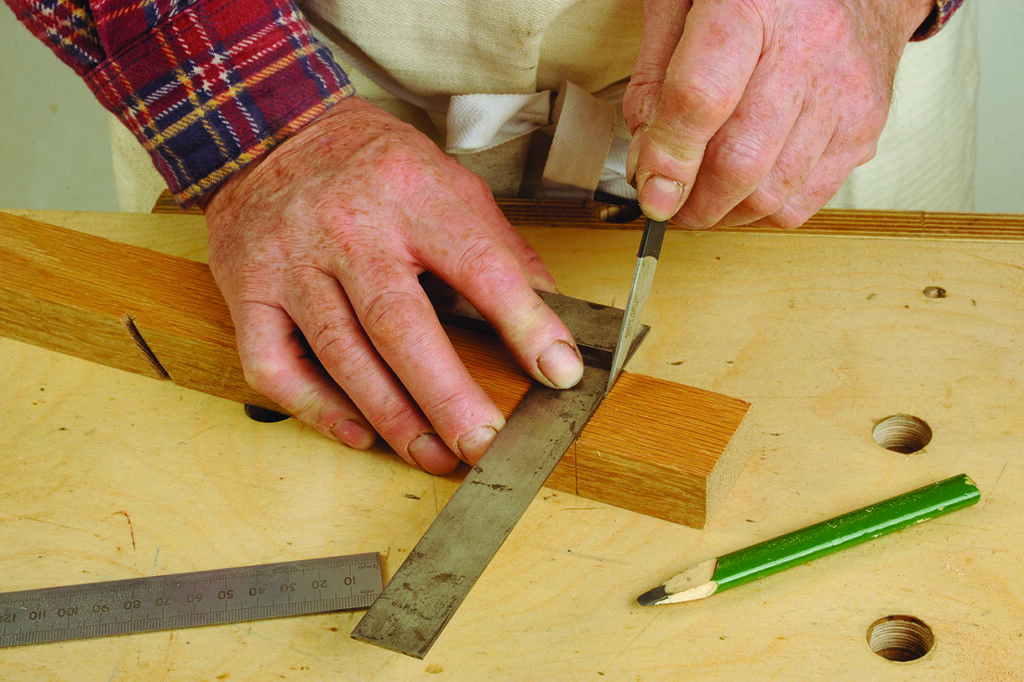
Work surface
Use proper work supports at a suitable height and fix the workpiece so it cannot move while you are sawing. If it keeps slipping around it can be tiring and the finished result rather inaccurate. On a workbench, use a bench hook.

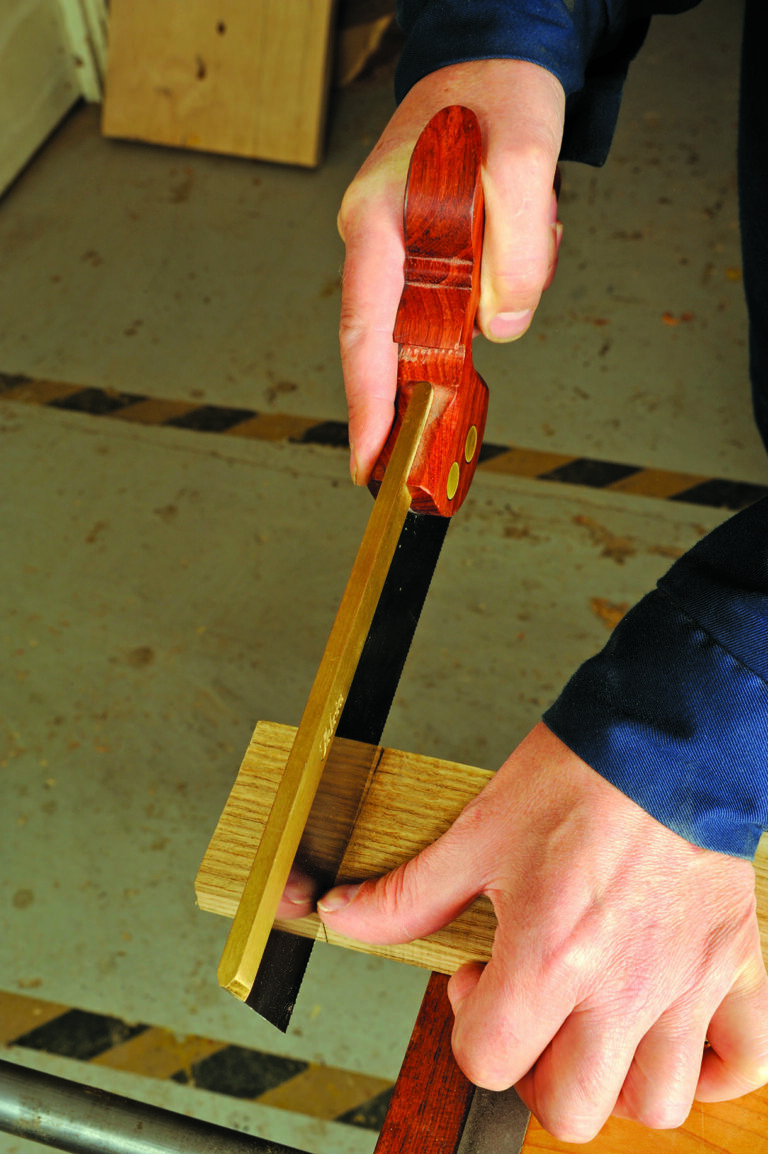
Starting the cut
Use a sharp chisel to form a slant to your cut line, for the blade to sit in.
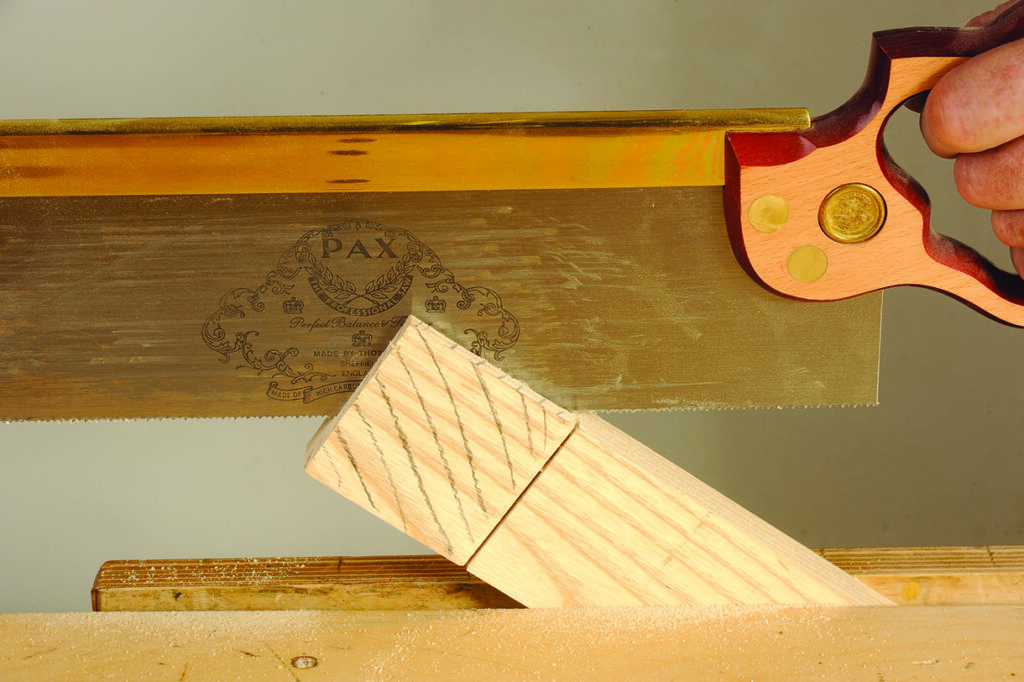
Sawing technique
When sawing, place the blade on the waste side of the pencil line and draw the saw back to start the cut, then push forward and keep the back and forth motion going while siting directly with your eyes down the sawn and marked line. Use your thumb or knuckle to keep the blade on track to start with, but don’t get yourself cut!
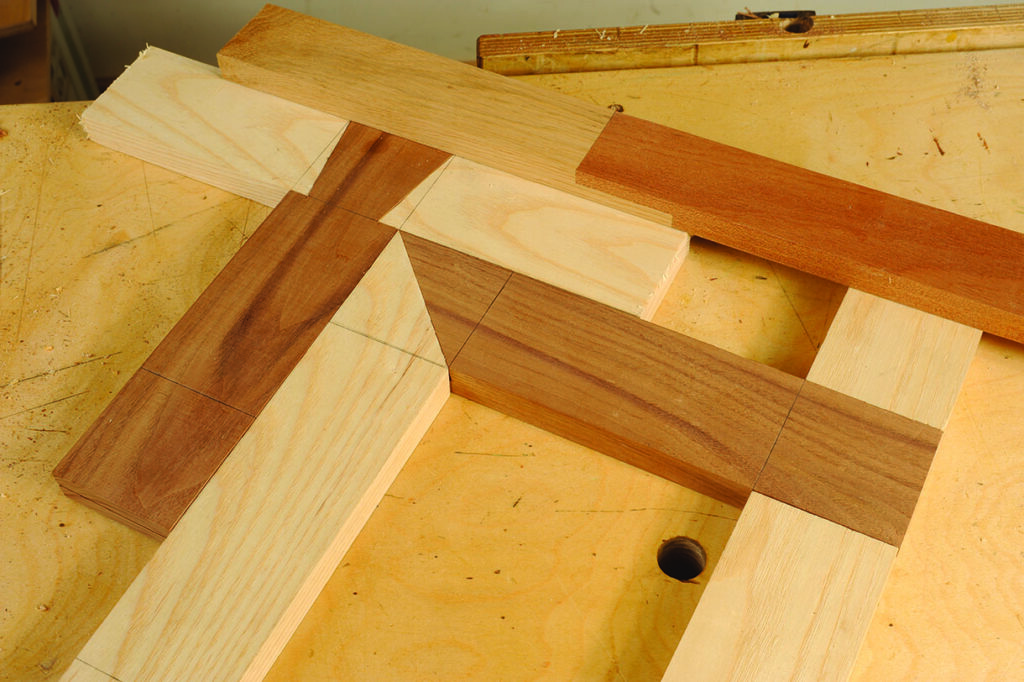
Cut accuracy
Joints need to be precise to work properly when they lock together, such as a mortise and tenon for example. It is standard practice to start the cut from one side or face of a workpiece and then turn it around and cut from the other so the cuts follow the marked lines and when they meet, any inaccuracy is therefore halved.
Practice!
If you aren’t very experienced don’t set to work on your prize project without first doing some trial cuts in waste wood so you can gain some valuable practice learning how to saw properly.
Don’t force it
Remember, force is not needed – let the weight of the saw carry it through the wood and guide it as carefully as possibly using hand and eye coordination – a key requirement of woodworking by hand rather than machine. With practice maybe you can produce joints this good!
2 responses
Try using the verb ‘practise’. ‘Practice’ is the noun. ‘ I shall practise the piano’, as opposed to I went to a medical practice’. It can be remembered as ‘ice’ is a noun. Old retired English teacher here.
Use the full length of the saw blade, not just a short section.