Whale Tails

Cedric Boyns carves unusual jewellery display stands

Six wooden whale tail sculptures on display
Silver hoop earrings displayed on wooden stand.

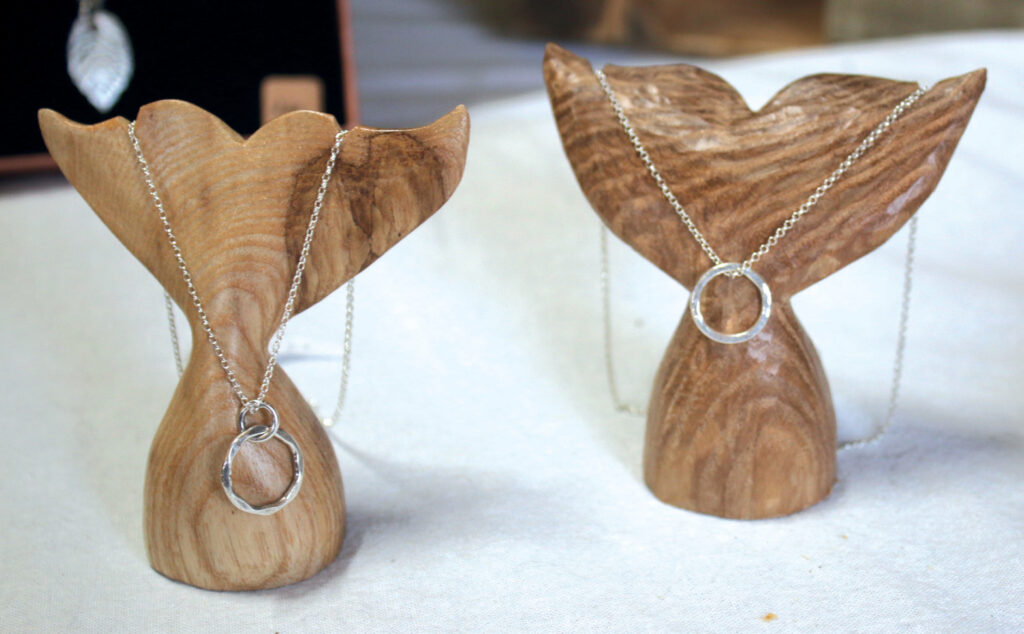
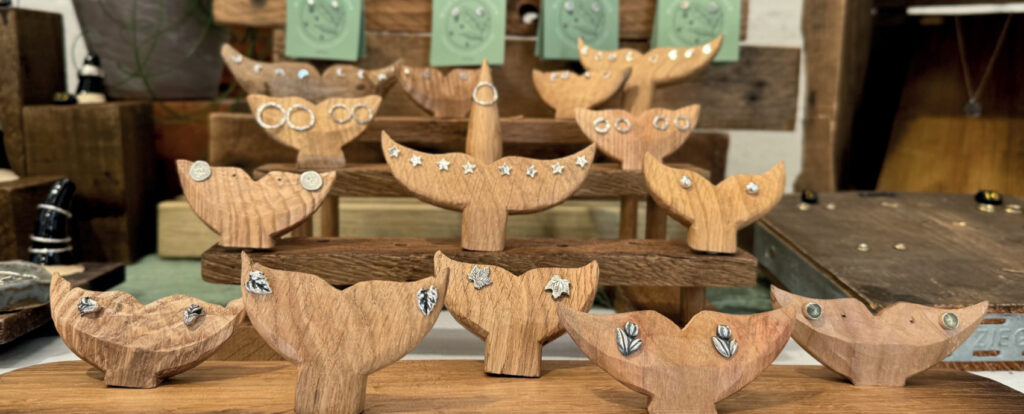
Following a trip to the Antarctic at the beginning of last year, I had a chance chat with the very talented local Cornish silver jewellery designer and maker Vicky Sage of Wild, Sage & Silver (wildsageandsilver.co.uk) at a craft market just before Christmas. I had shown an interest in some of the wooden items she was using on her displays, and she told me she would be interested in new and different ways of displaying her jewellery. This gave me the idea for creating some carvings that I felt would fit the bill for showing some of her lovely creations, such as rings, earrings and necklaces, on those craft stalls and I told her I would put my mind to it. A criterion for the design was that the carvings should preferably be reasonably small as too many bulky, heavy items would be rather cumbersome to take around the various craft stall venues she attends.

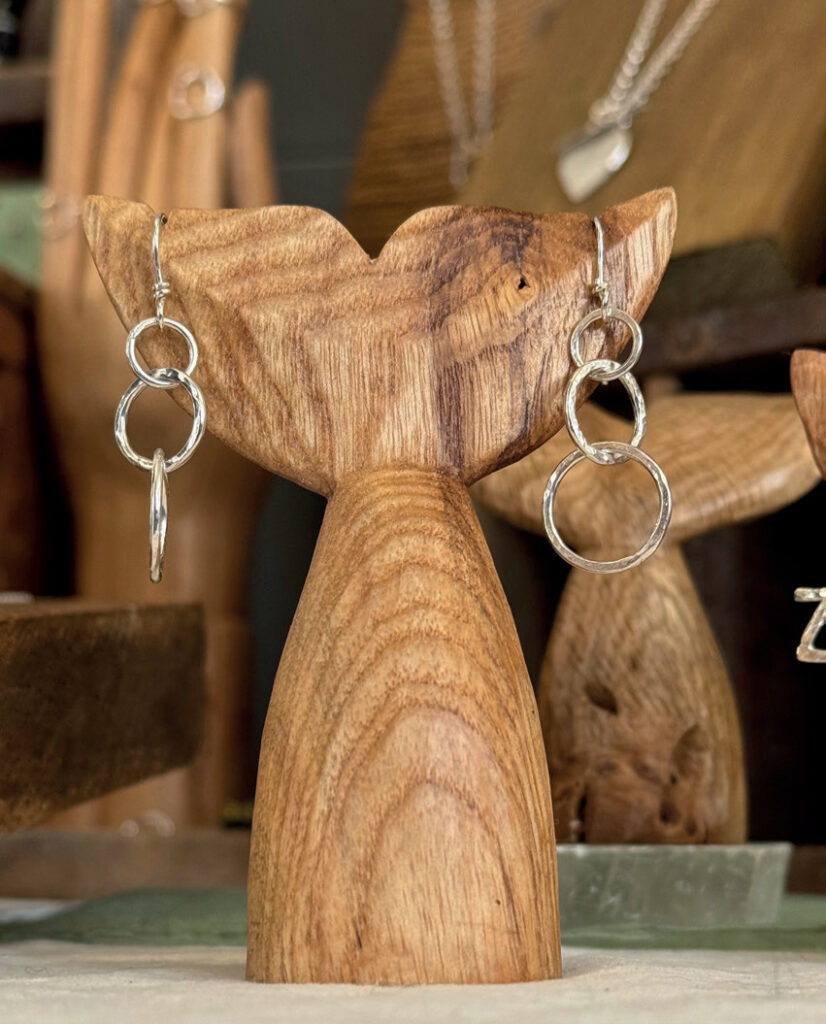
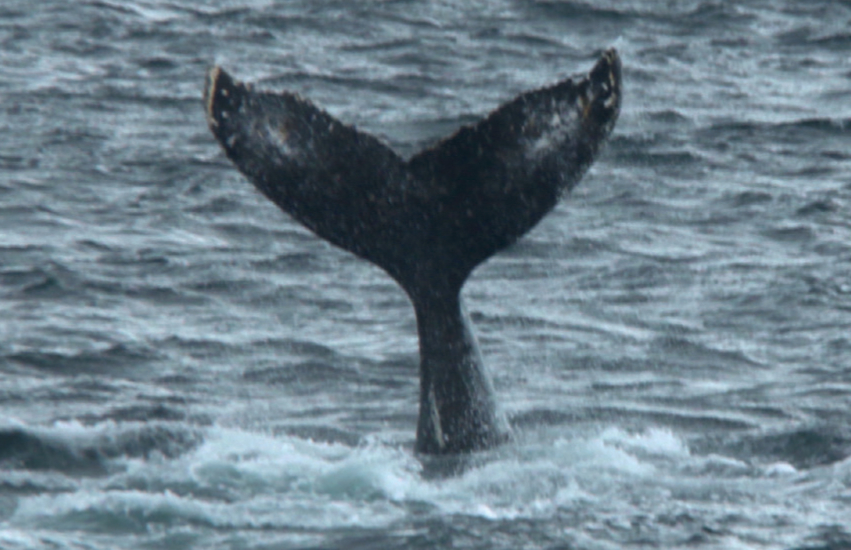
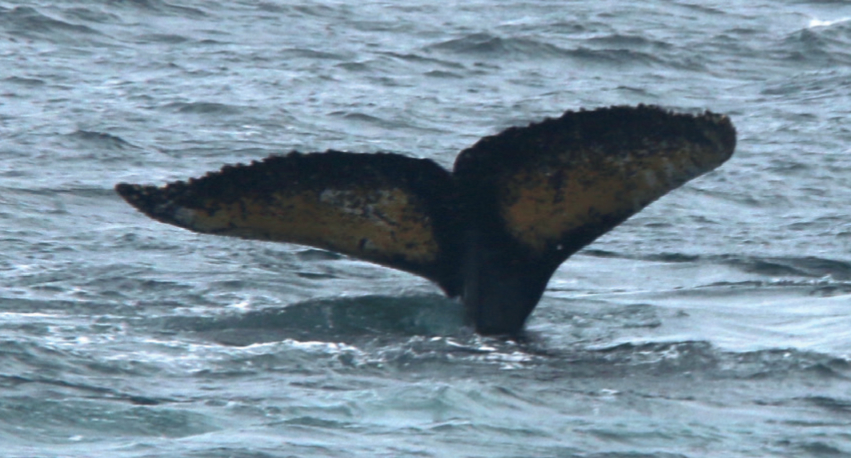
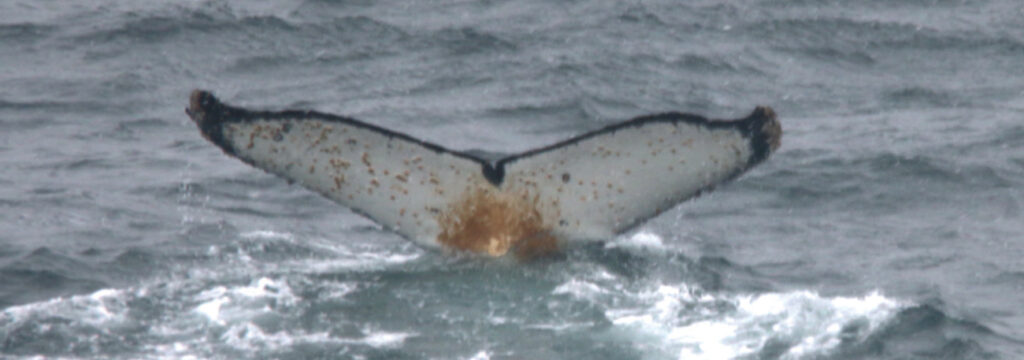
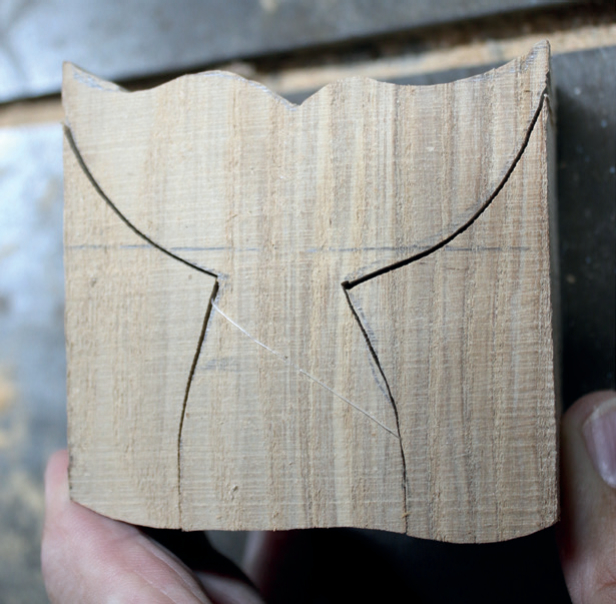
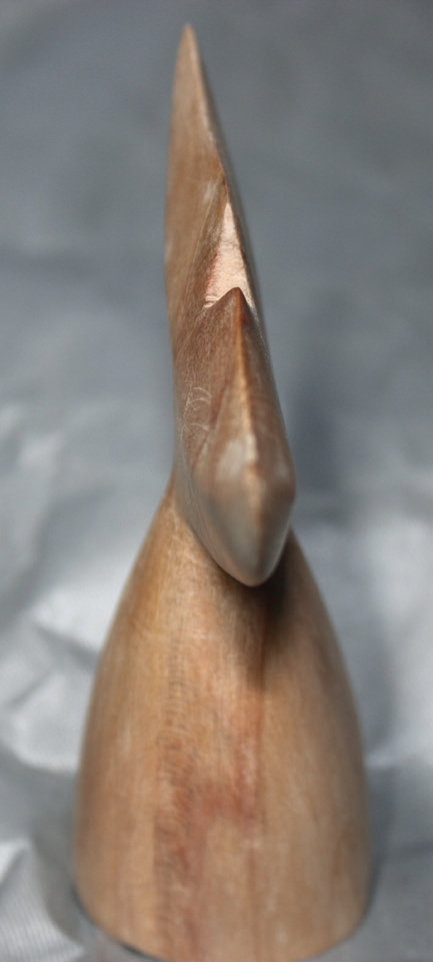
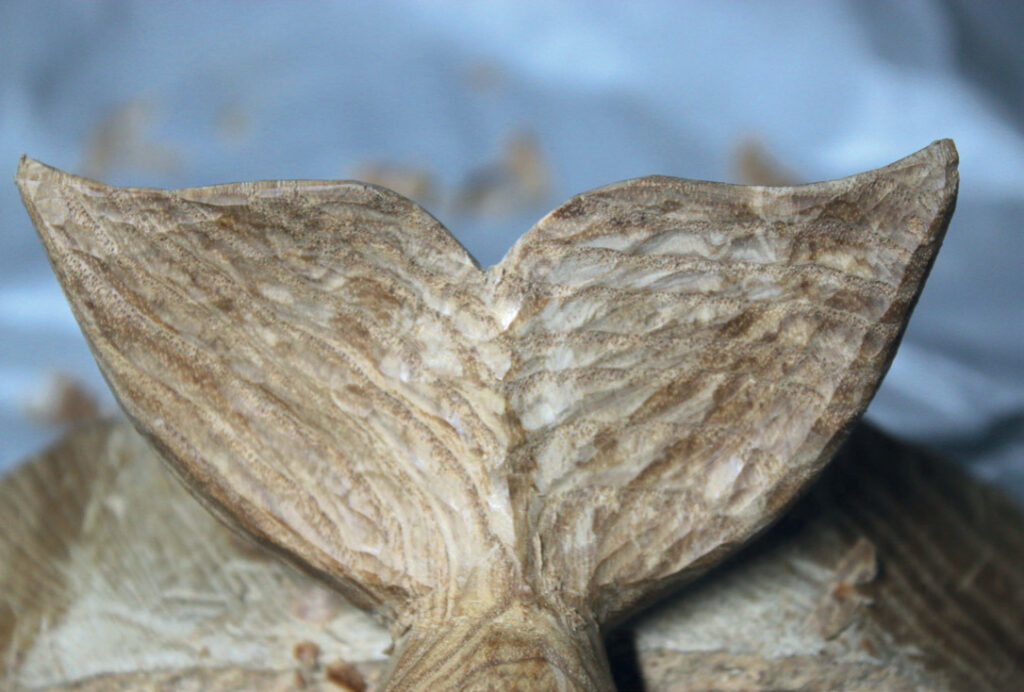
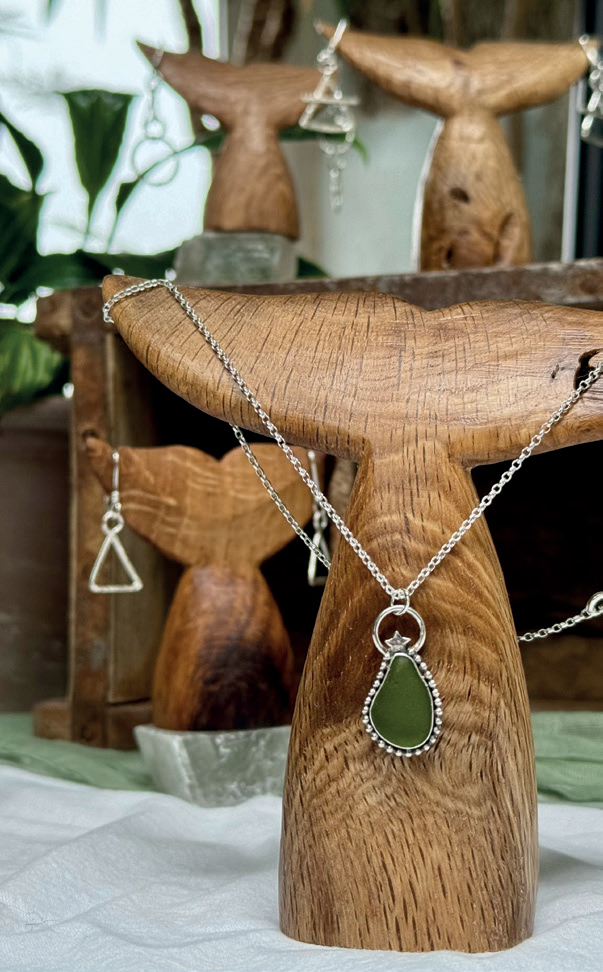
I spent a fair amount of time observing the antics of humpback whales during my trip down south. The humpback is one of the species of whale that shows its tail flukes when it dives, and I chose to base my main jewellery stand design on this, as I thought it could be used to display all three items of jewellery mentioned above. In addition, I felt the links to the ocean would fit in well with the fact that Vicky uses Cornish sea glass in several of her ring and pendant necklace designs, which she collects on many of the beautiful beaches here in the south west.

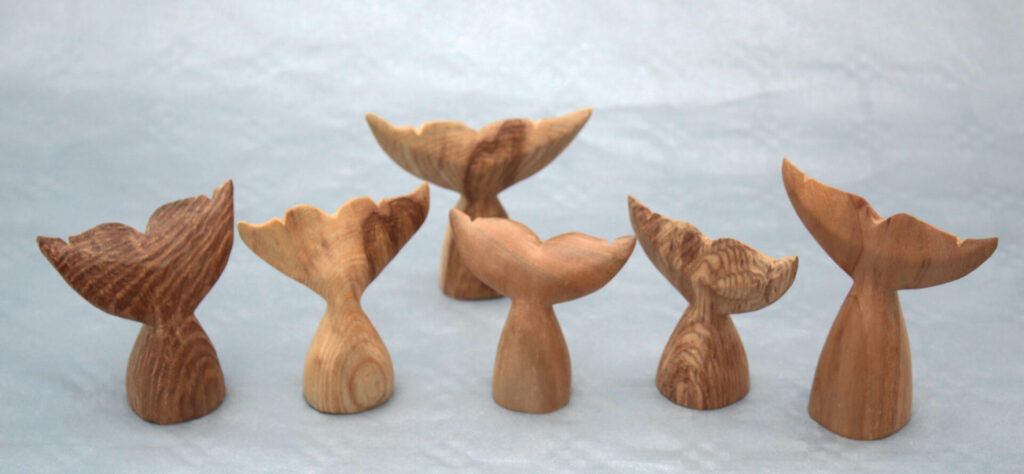
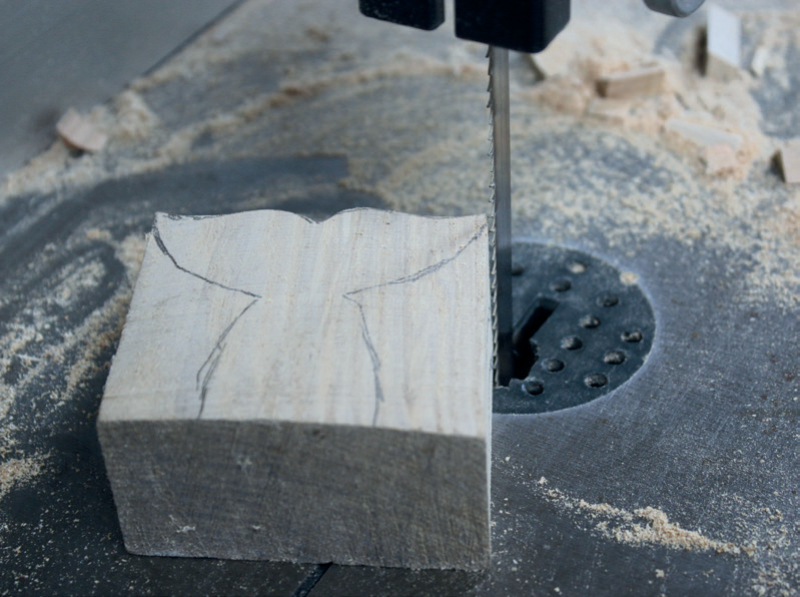
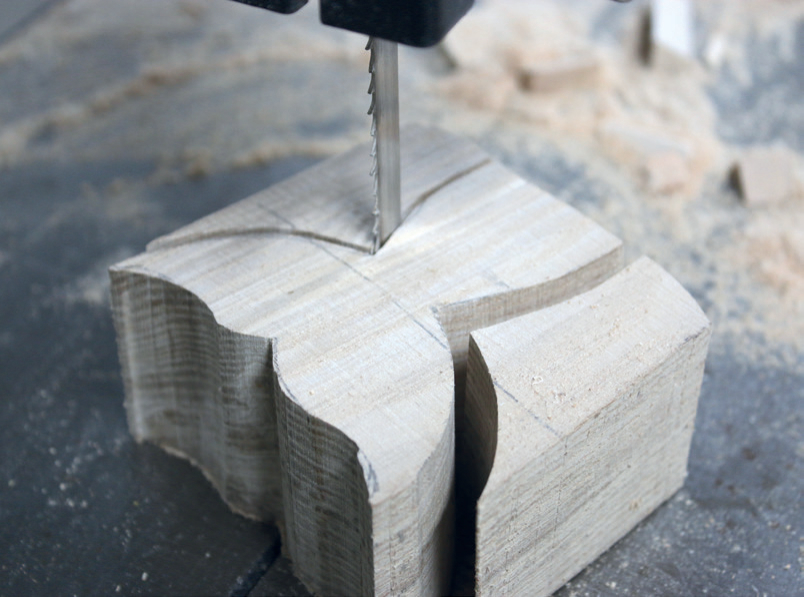
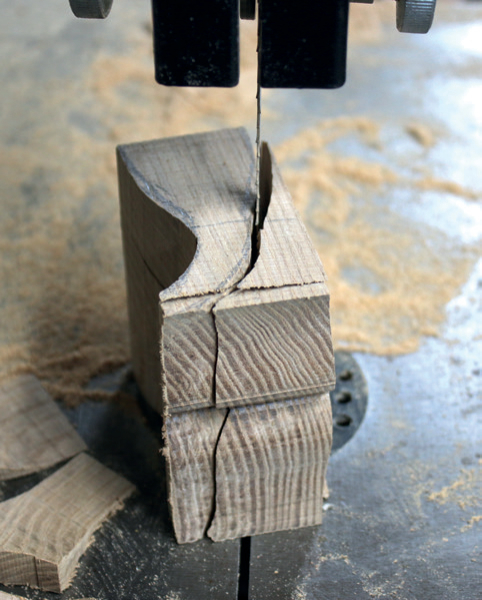
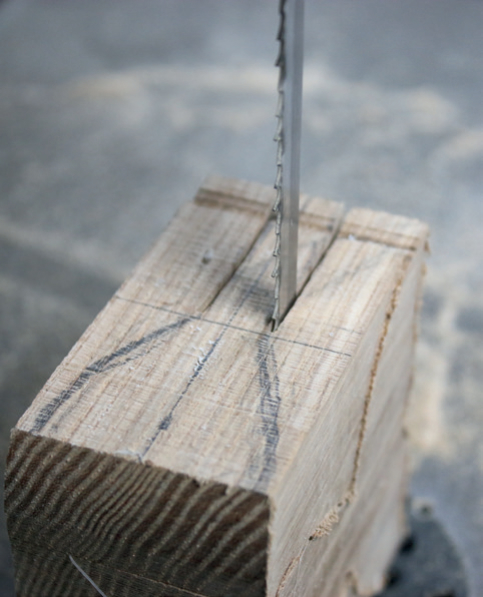
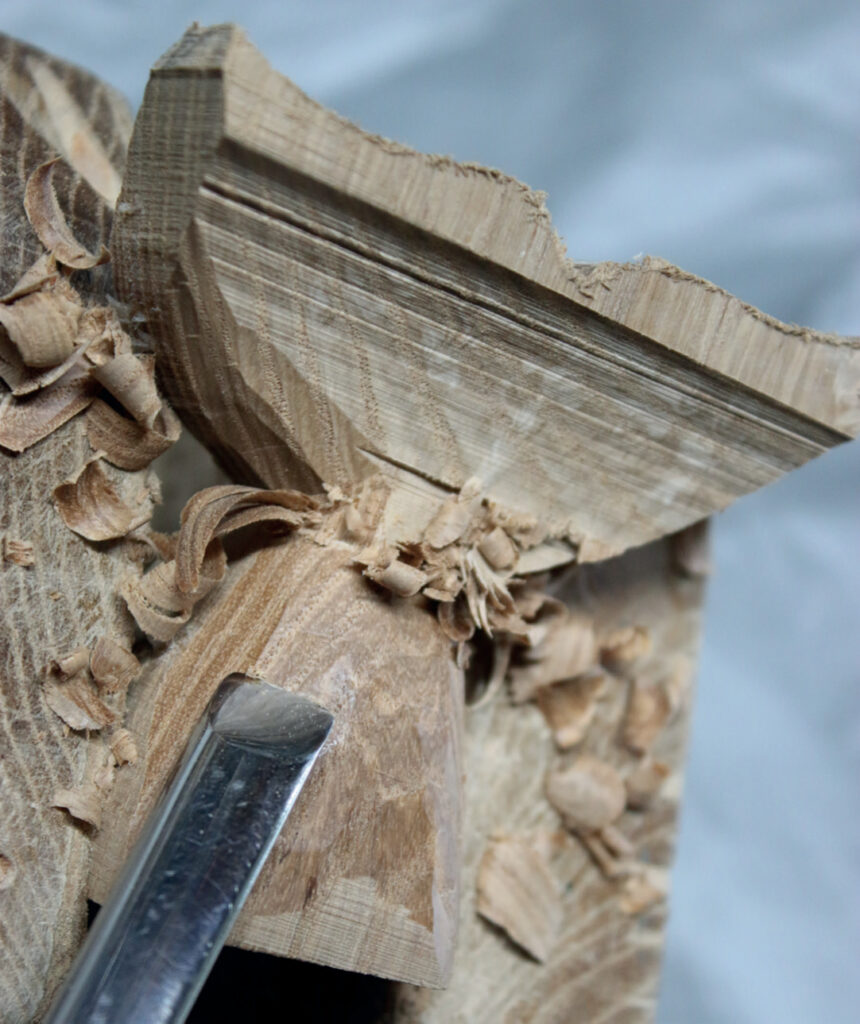
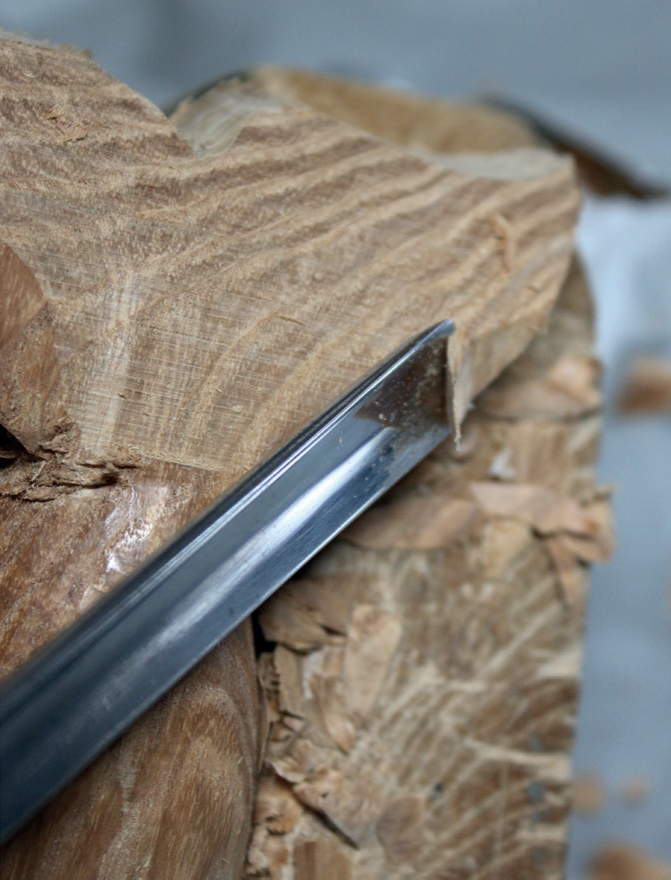
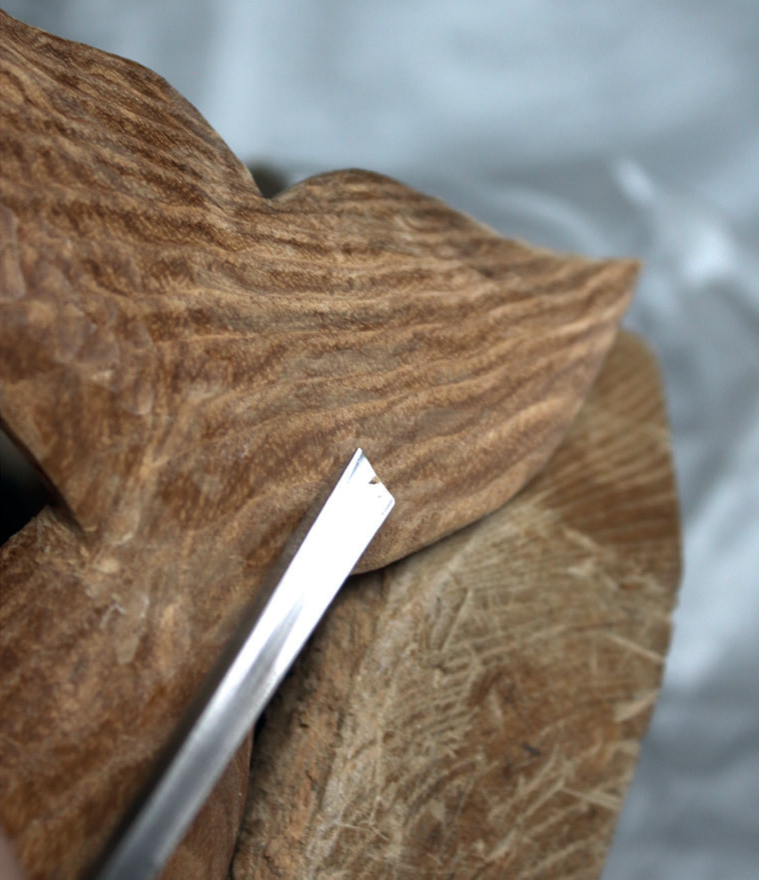
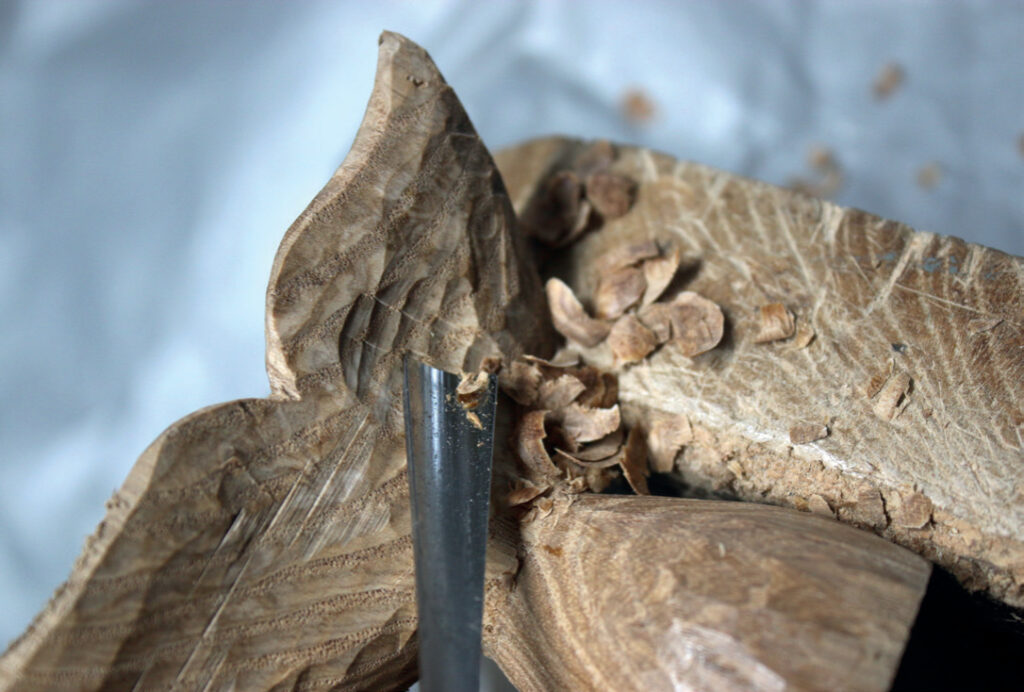
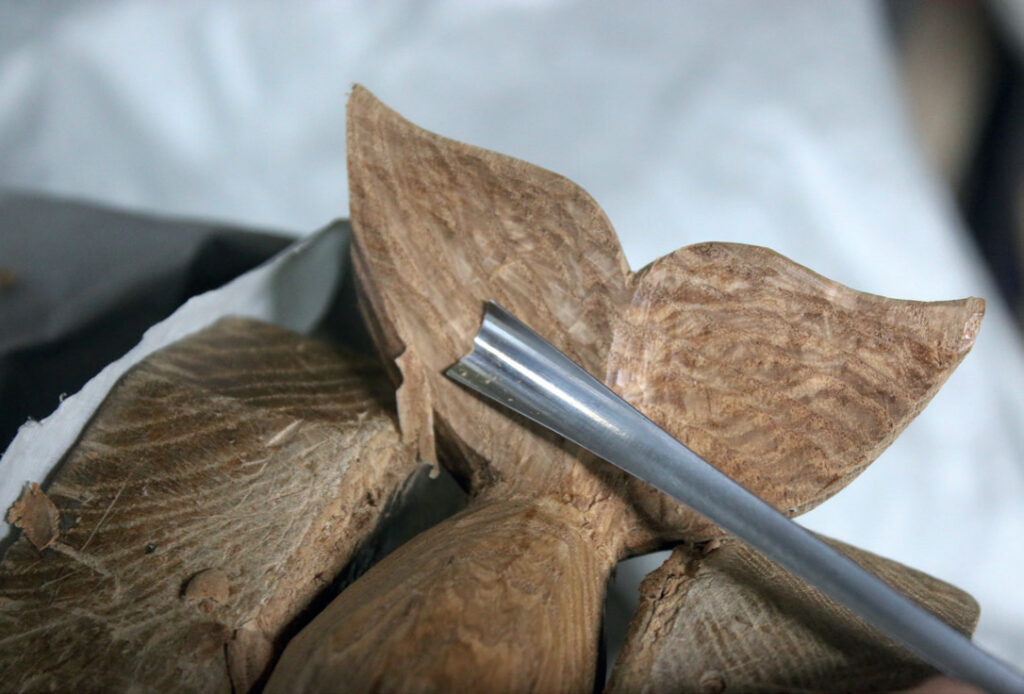
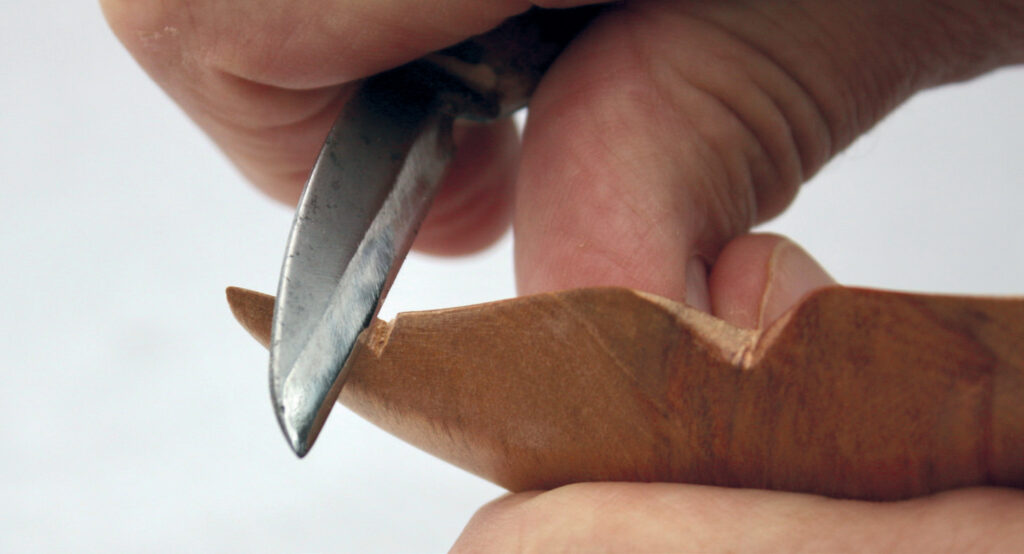
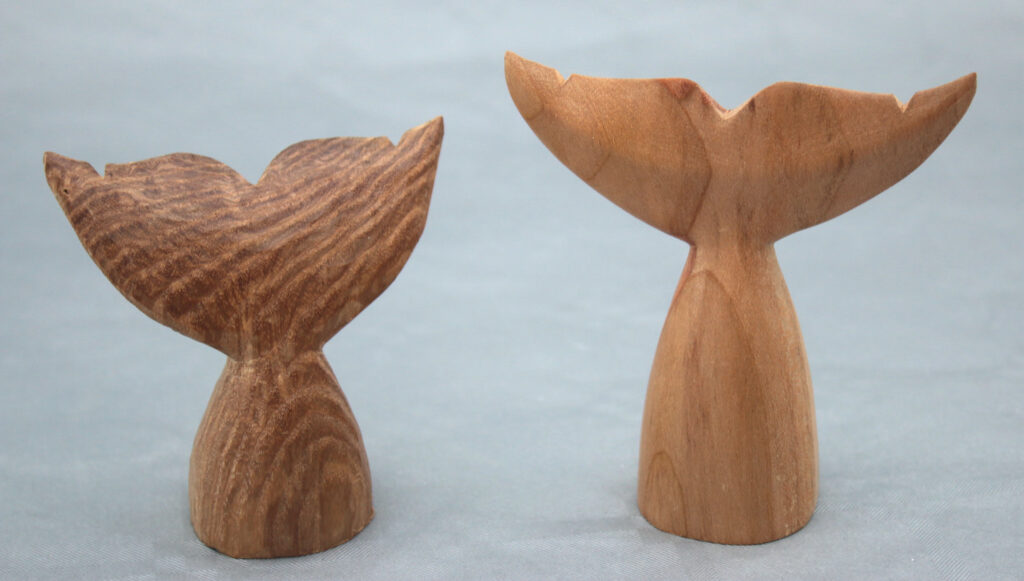
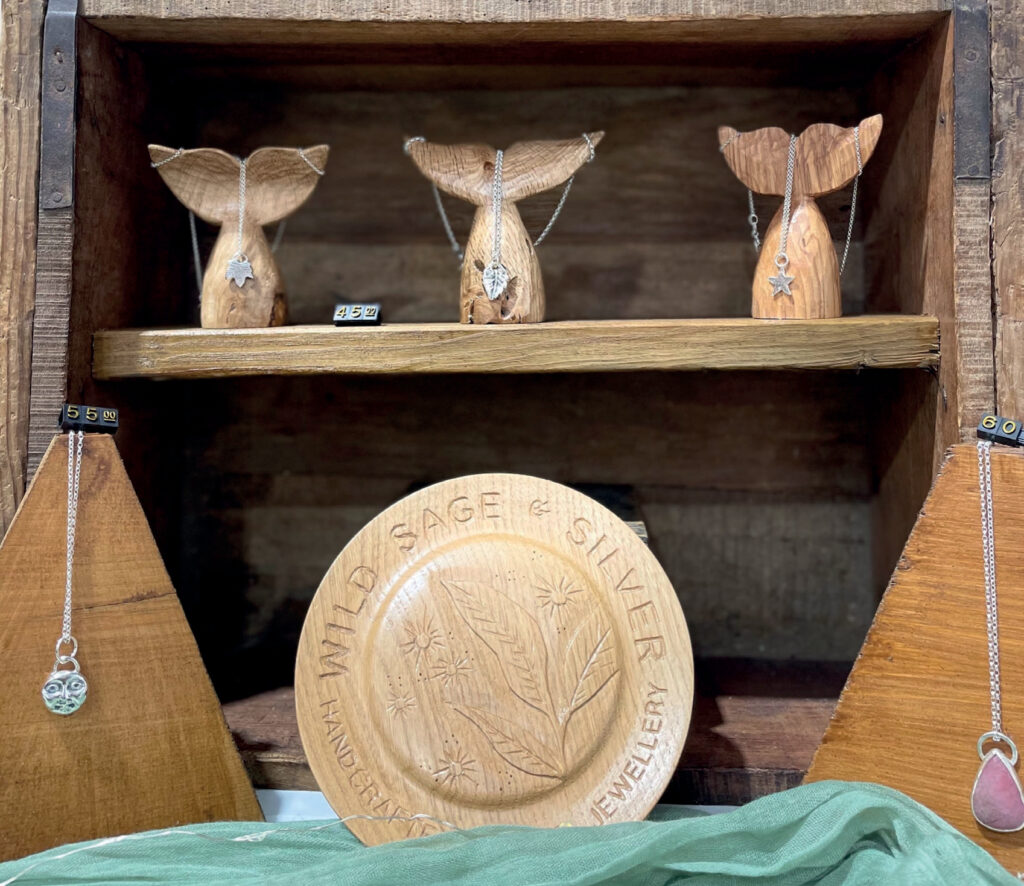
This is a reasonably straightforward carving suitable for beginners to take on with ease, and can be achieved either with just a few gouges, as a whittling project, or a combination of both. I feel it also makes quite an attractive ornament. I made a few in several different woods which Vicky used on her Christmas market stalls, and her feeling was that the oak and ash versions were most effective, particularly the rich brown colour of the old oak that I used.

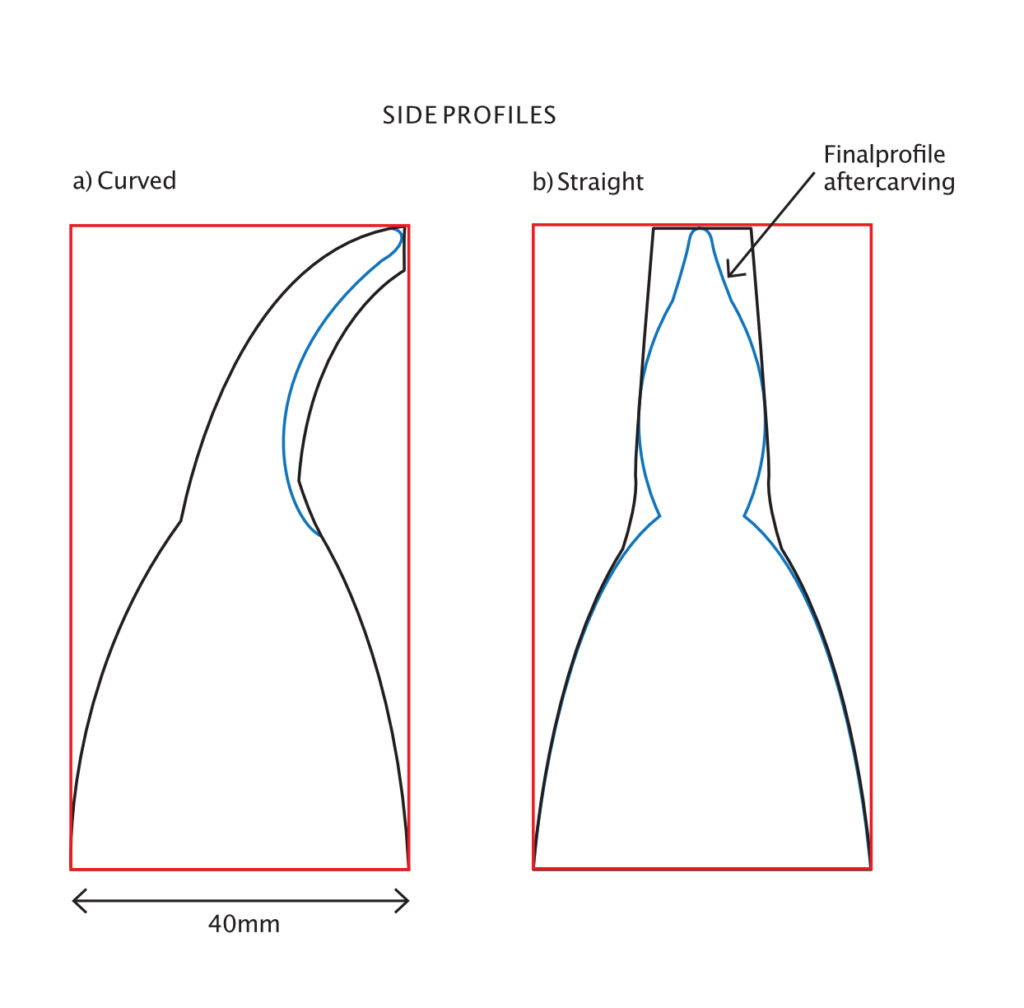
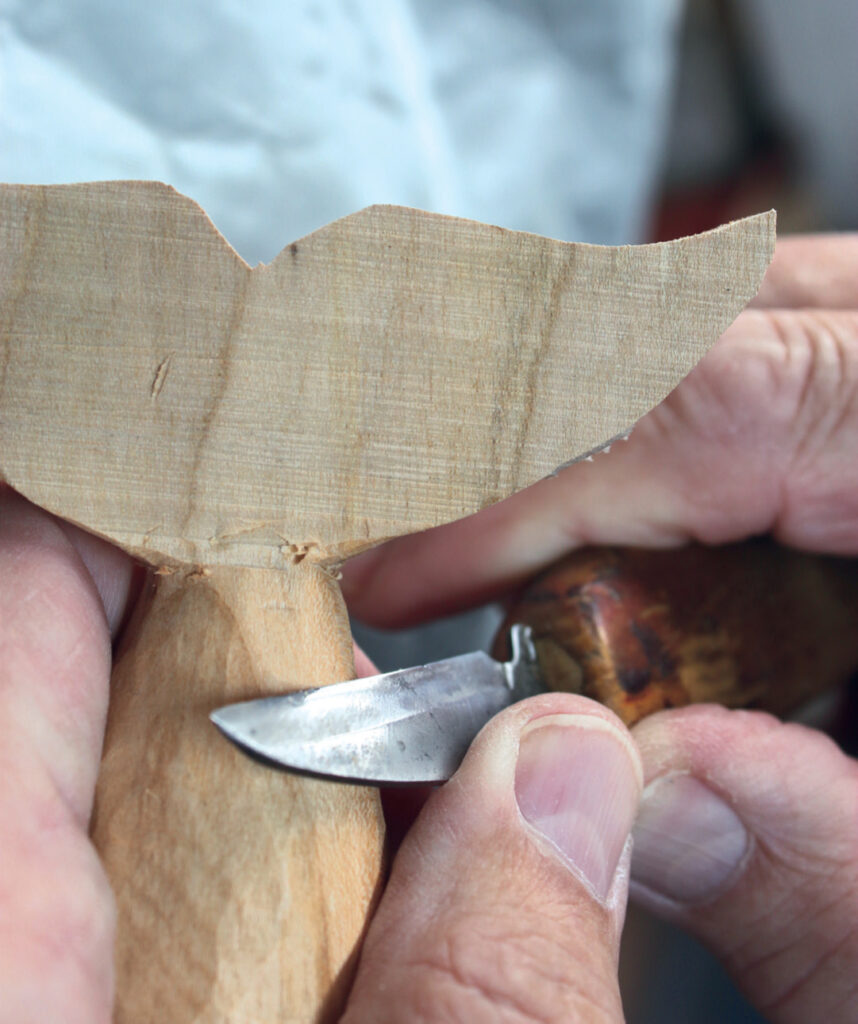
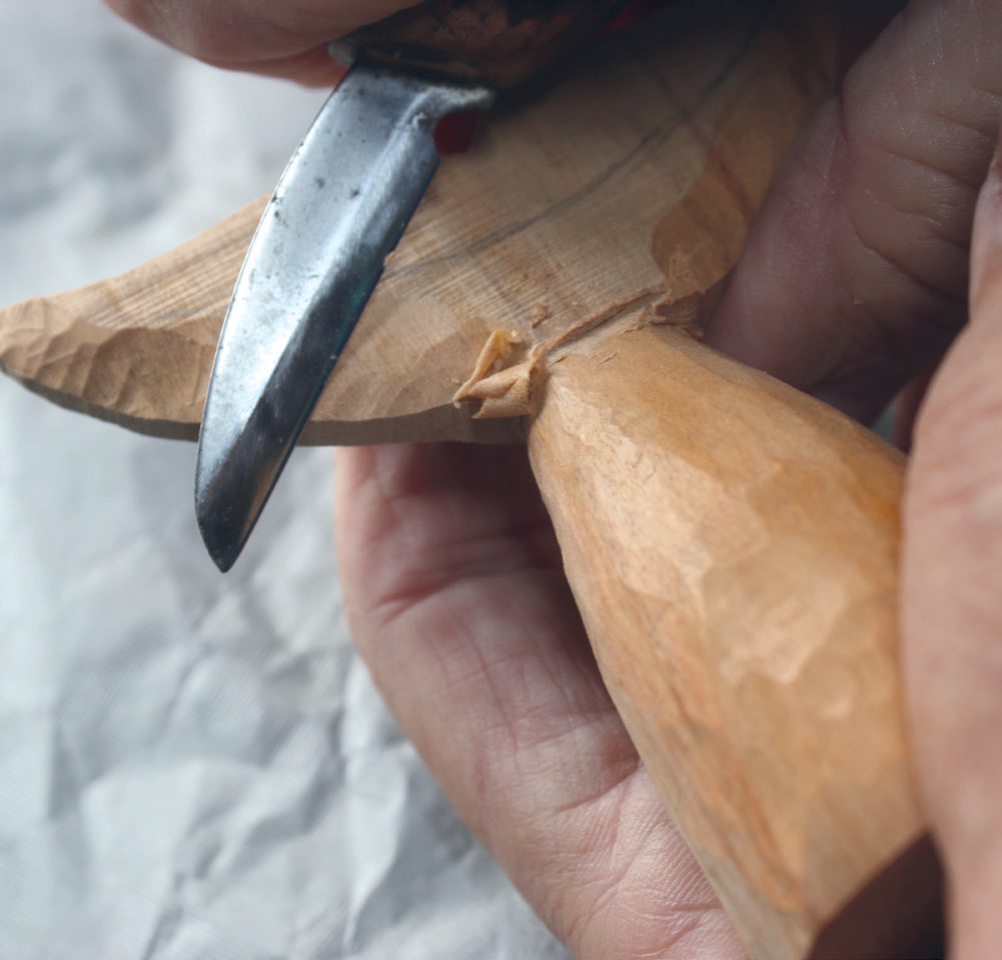
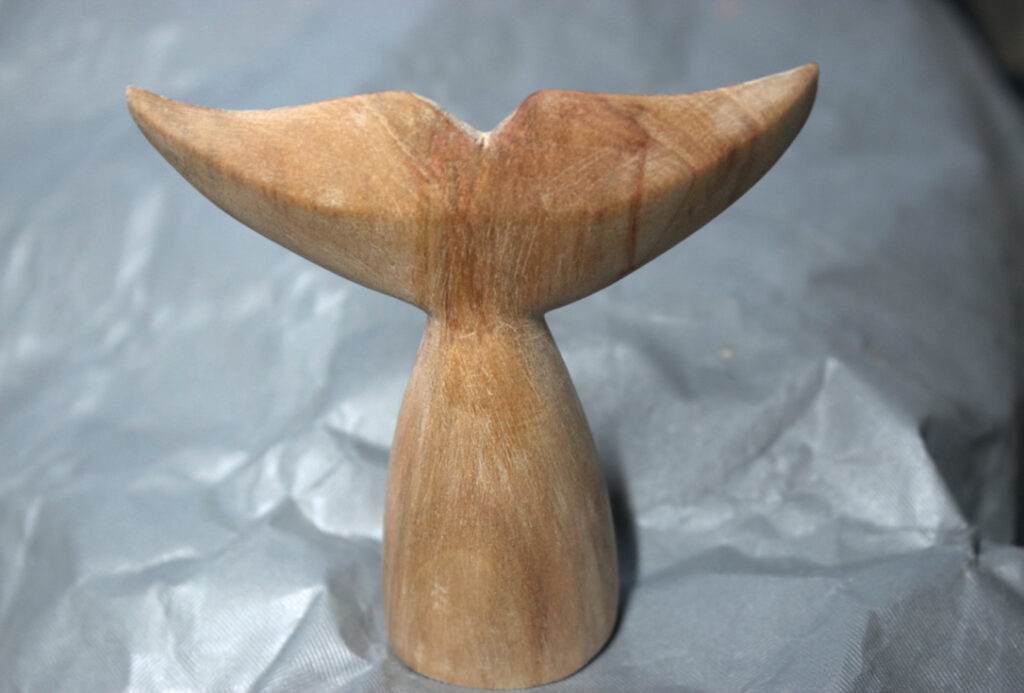
I decided to make two designs. The first with the flukes sloping back, which I felt would be most useful for displaying small pendant necklaces. I decided to carve this using gouges. The second design has the flukes in a vertical position, which is perhaps more suitable for displaying rings and earrings. I whittled this one.

Whale tail emerges from the ocean surface.
Whale tail above ocean surface
Humpback whale tail emerging from ocean waves
Whale tail profile with dimensions
Diagram of curved and straight side profiles.
Diagram of tailstock profile, 100mm wide, extended 20mm.
Wood block on bandsaw with markings for cutting.
1. Make a copy of the front and side profile templates from the drawings. Use these templates to draw these profiles on to the block
Scroll saw cutting intricate wooden block design.
2. Cut out the front profile first, using the bandsaw with a suitable narrow blade
Close-up of wood carving pattern.
3. Glue back the waste with small blobs of hot-melt glue (or masking tape if you prefer)
Bandsaw cutting wood with sawdust around.
4a & 4b. Cut out the side profile. I have included two side profiles in the drawings to cover both of the designs. I am basing the main theme of this article on the first design with sloping back flukes
Close-up of saw cutting wood block.
4b
Wood carving detail with chisel and shavings.
5. I used my carver’s chops to hold the whale tail during the carving process, but any small vice can be used. Start by removing all the straight edges of the tailstock and round it down to the thinner region where it meets the base of the flukes. This can be achieved with a No.3, 12mm gouge or similar. To ensure that the whale tail will be stable in order to hang an item of jewellery on, I made the tailstock circular in cross section
Wood carving with a knife close-up
6. This process can also be completed with a suitable whittling knife
Close-up of wood carving with chisel tool.
7. Shaping of the flukes can begin and can be completed with the same No.3 gouge. I started by rounding over the upper surface. I wanted to make the surface area quite large so that it would easily support a piece of jewellery such as a pendant necklace
Wood carving with chisel on a textured surface.
8. I used a No.3, 6mm fishtail gouge to complete the shaping and smoothing of this convex upper surface
Close-up of hand carving wood with knife.
9. In the case of the straight, whittled version, the flukes were tapered from both sides to create a ridge in the centre, the positioning of which is indicated by the pencil line in the photo. In order to follow the direction of the grain, I found that a pull cut was needed as shown. This was to prevent the tips and trailing edges of the flukes from breaking off when wood was removed in the process of making them quite thin
Wooden abstract sculpture with pointed top
10. Once completed, the side profile will look something like this
Close-up of wood carving with chisel and shavings.
11. The underside of the curved flukes was first hollowed as far as was possible using the No.7 gouges, tapering the trailing edge to a thickness of about 2-3mm. The region of the notch between the two flukes can be left a bit thicker during the shaping process
Chisel carving intricate wooden flower design.
12. The leading edges of the flukes were left a bit thicker at about 5-6mm. They were also rounded over to give the streamlined profile
Wooden mermaid tail carving, detailed texture close-up.
13. After tidying up the join between the tailstock and the flukes with a suitable small No.9 or No.11 gouge, or indeed a knife, I decided to leave a tooled finish as shown here.
Wooden whale tail sculpture on grey background
14. Alternatively, the whole carving can be left with a smooth finish by sanding through the grits to 400, as shown here with a straight tail
Hand carving wood with sharp knife.
15. Two small nicks or notches were then cut into the trailing edges of the flukes to support the items of jewellery to be displayed. Alternatively, or in addition, a small (1.5mm) hole can be drilled through the tip region of the flukes to take the posts of the earrings
Two wooden whale tails displayed upright
16. The whale tails were then given a couple of coats of clear wax polish and buffed up with a soft brush or cloth. They should then look something like this
Silver necklaces displayed on wooden stands
17. A couple of the tails in oak and ash
Wooden whale tail with silver pendant display.
18 & 19. Several of the tails displaying pendant necklaces and earrings on the jewellery stall. Clearly, different sizes of tails can be made by scaling up the measurements given. I did make a couple of larger tails to display the heavier sea glass necklaces
Wooden jewellery display with silver leaf and star pendants.
19.
Wooden whale tail earrings display stand

PHOTOGRAPHY BY CEDRIC BOYNS

Further reading

Leave a Reply

Your email address will not be published. Required fields are marked *