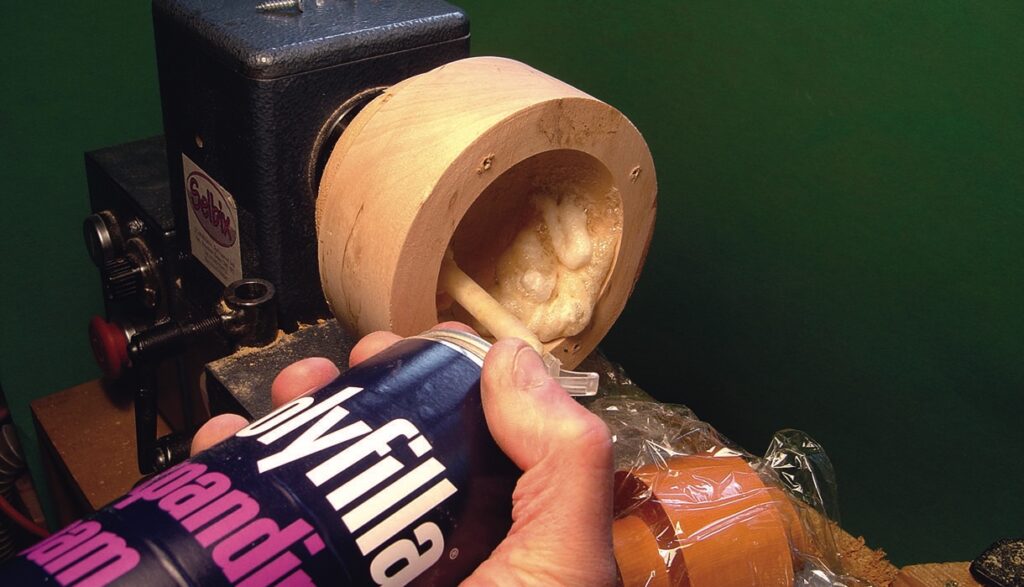
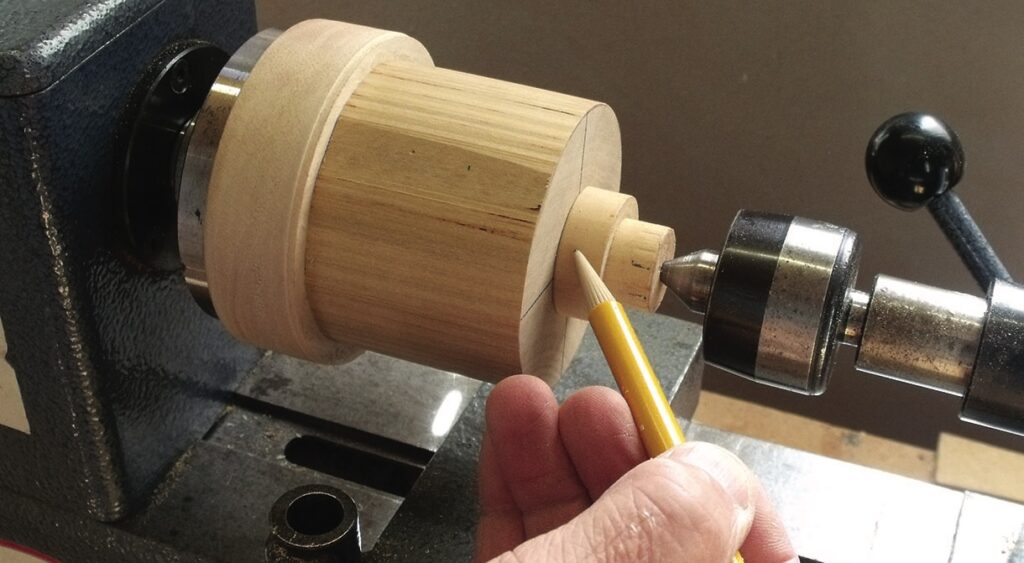
This is a method of holding an awkwardly shaped part so that it can accept additional turning. Start by turning a hollow into a prepared softwood chuck. This hollow has to be of sufficient size to accommodate the awkwardly shaped part you want to hold.
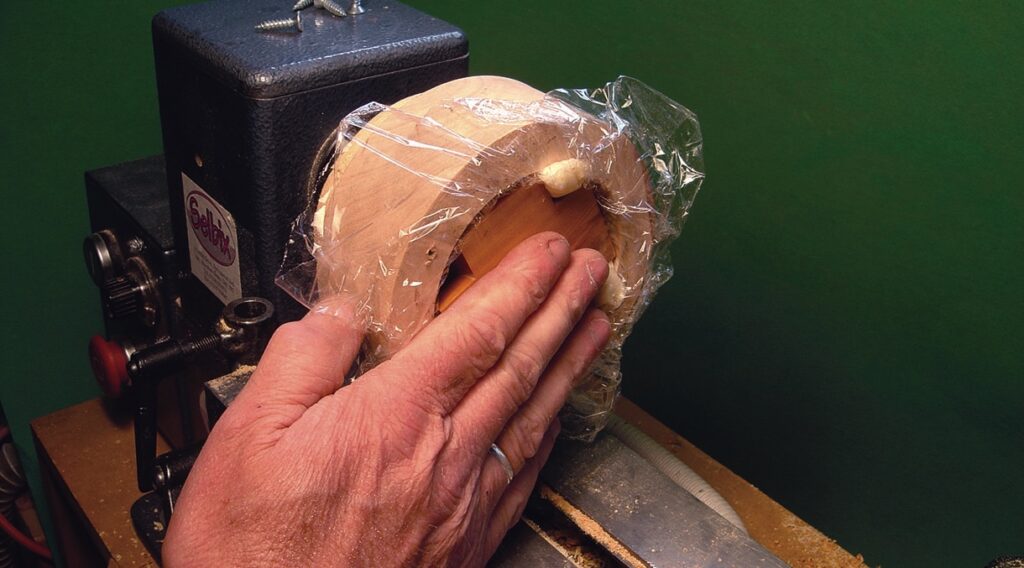
Make a collar with opening which will fit over the turned hollow and hold the shaped part firmly in that hollow. Wrap the part to be held in cling film and set on one side. Now for the fun.
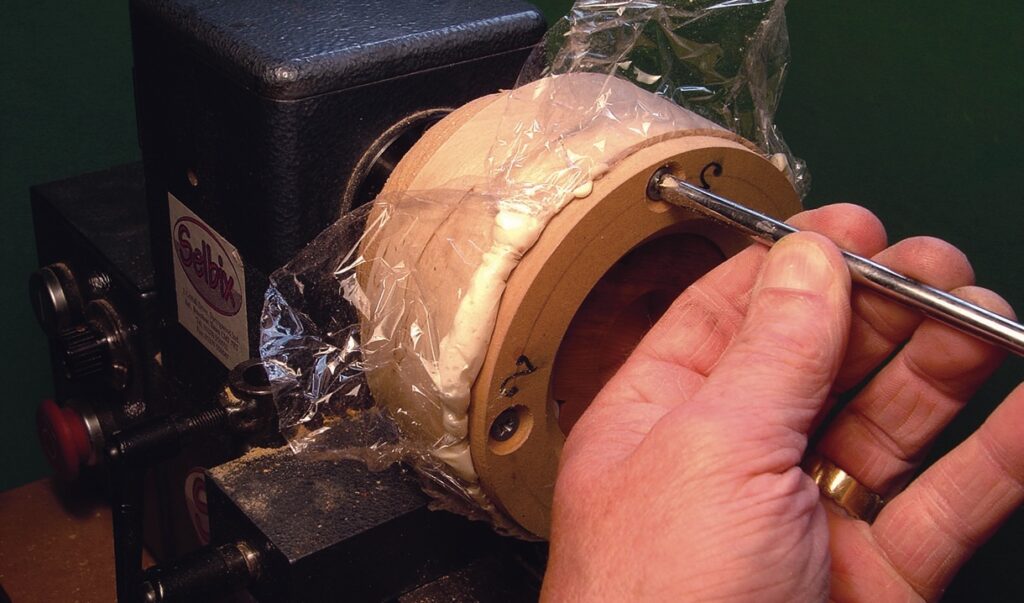
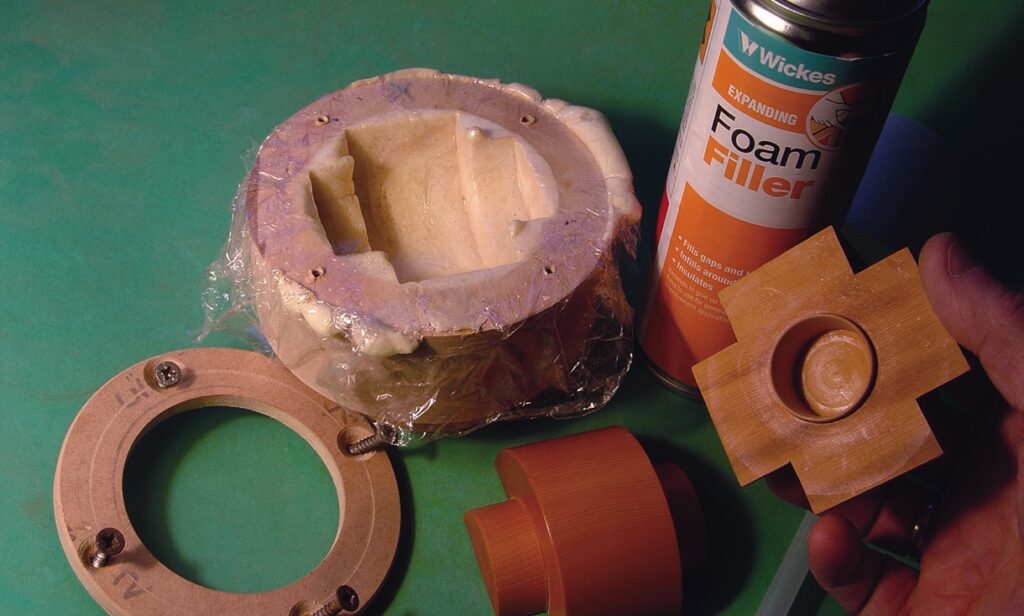
Into the turned hollow spray builder’s expanding insulation foamPress the cling-filmed part into the foamed hollow, making sure the edges of the cling film are wrapped over the edges of the chuck. This will stop the collar from being permanently glued in placeScrew down the collar, locking the shaped part in place and stopping the foam from over expanding, keeping the foam firm and compressedLeave the foam to set. Check the tin for setting times for your foam. Remove the collar and slip out the shaped part exposing the bespoke hollow. Identical turned parts will fit the newly formed foam chuck
2. Old techniques, new ideas
Don’t dismiss old techniques and ideas as being of little use now that you own all the hi-tech ‘stuff’. Think how you can bring those old techniques up to date.
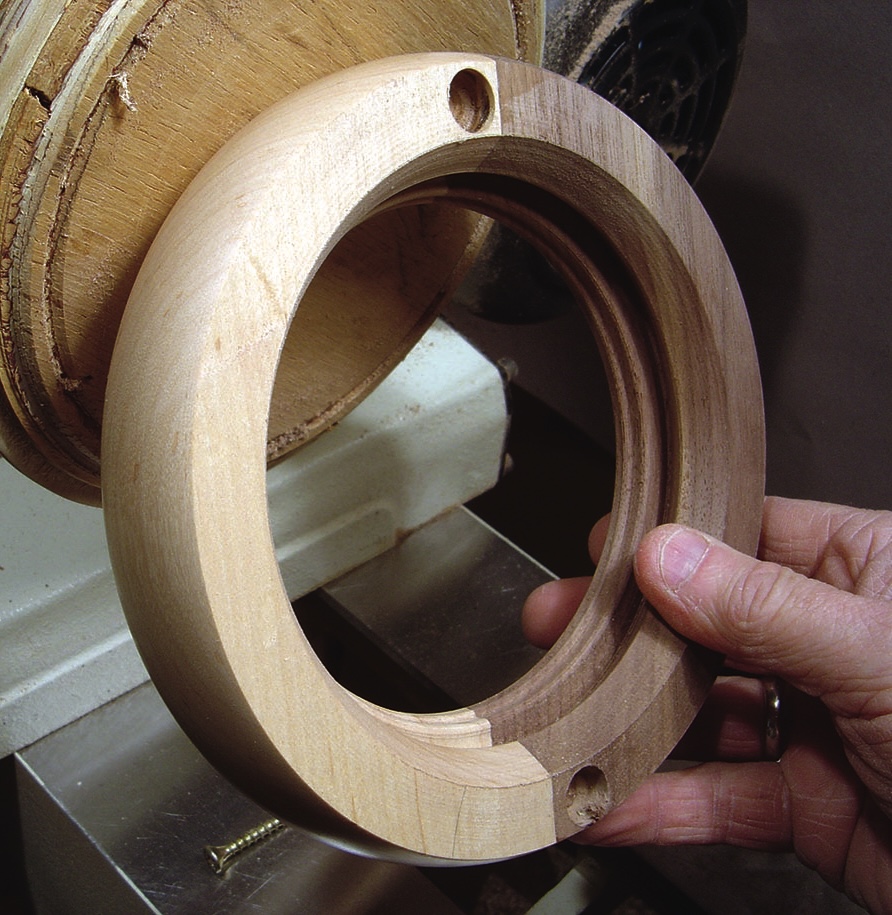
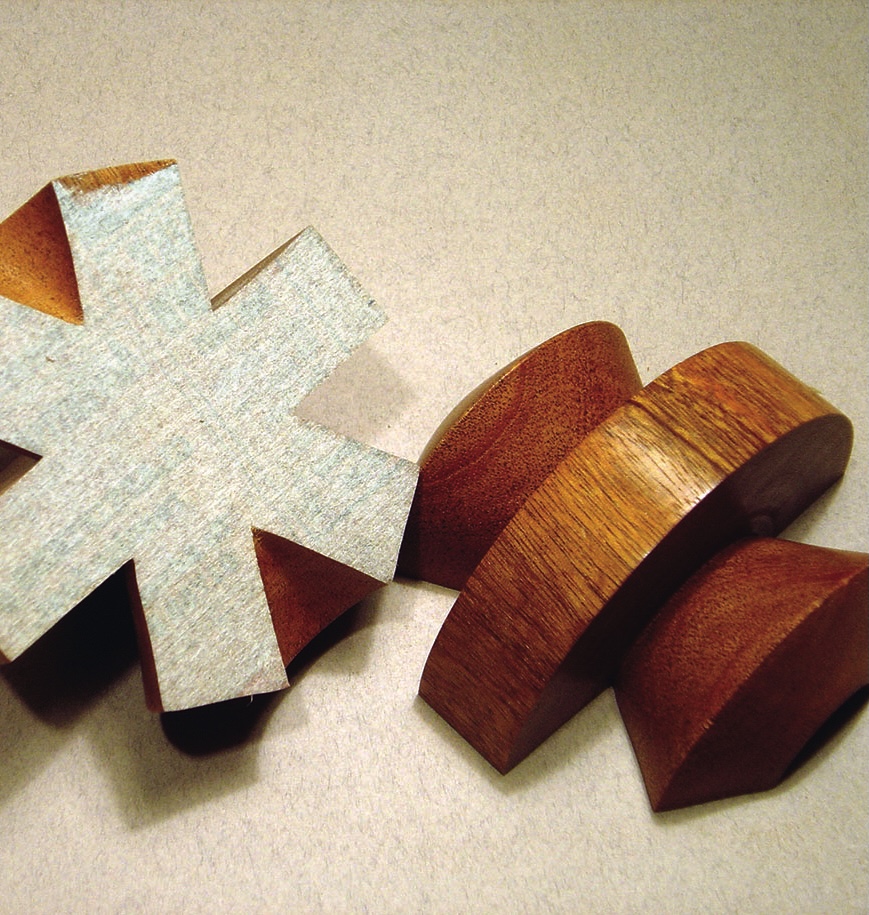
You know the problem with turned chess sets, it’s the knight. Do you turn a form and have to explain that this really is a knight or do you carve a knight? It suddenly came to me – ring turning, that old technique traditionally used to produce animal forms could be used to turn a knight profile.
Here is the ring I turned. I used a few templates and careful measurements to get the right shape
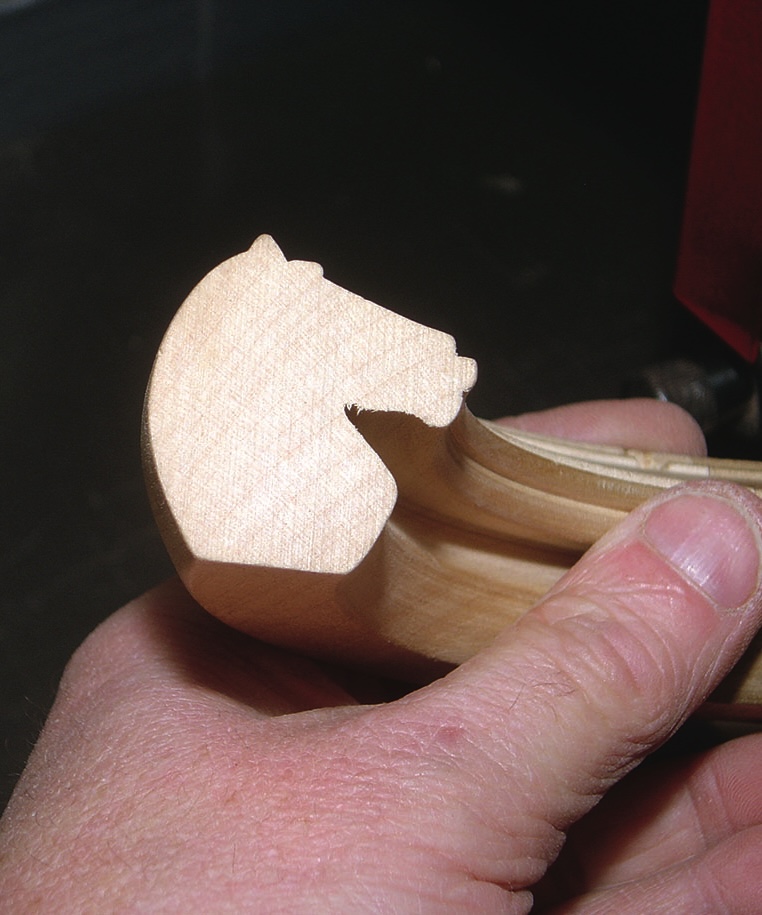
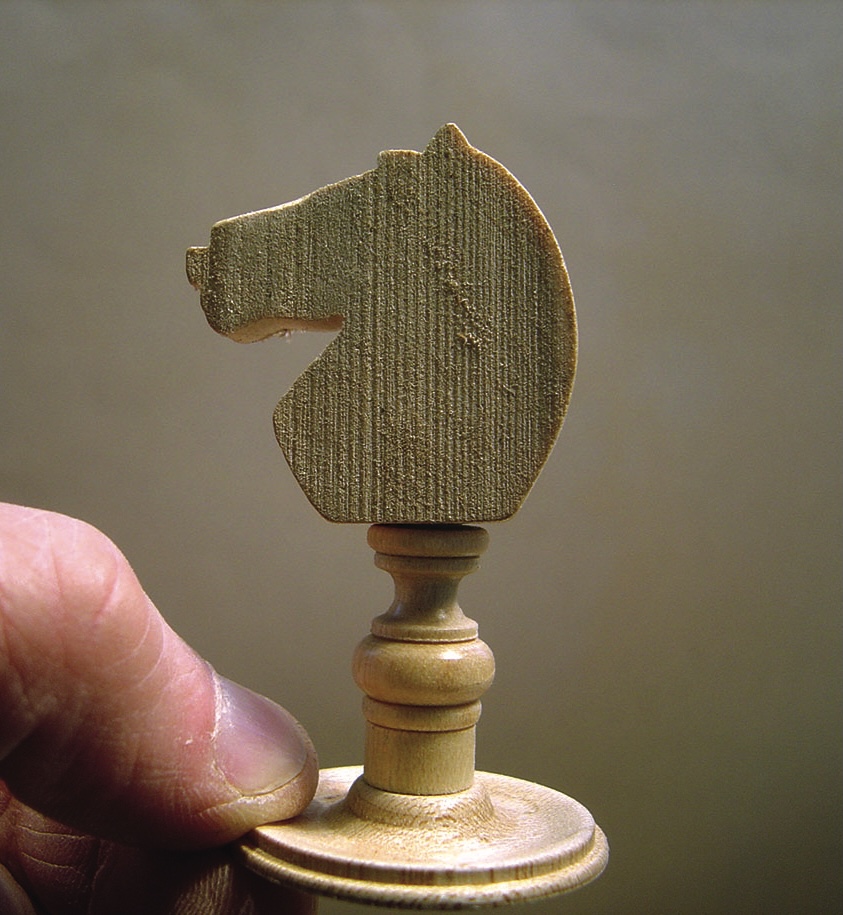
When it is cut the knight profile is revealed. The blank for the ring was made up of two halves, light sycamore and dark walnut, so both light and dark knights were produced from one blank
The profile ring, when sliced, obviously produces multiple identical shapes. How can you develop this idea?
3. Hot melt glue a temporary fixing
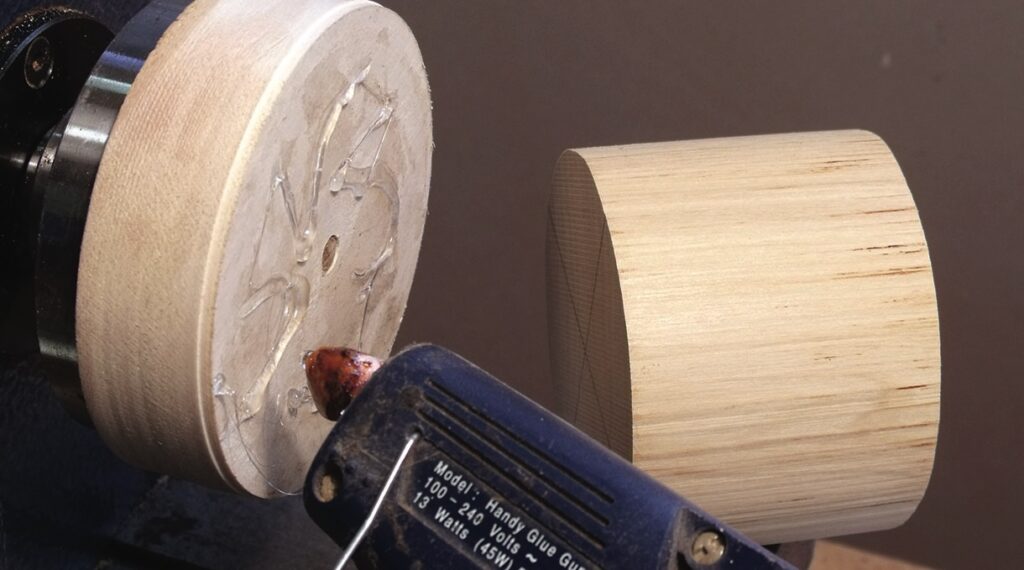
Some of you may remember John Sainsbury, who worked for Record Tools’ education department. It was he who, in the ’70s, introduced me to the benefits of using hot melt glue to hold wood when turning. At the time it was a novelty to me, but over the years it has proved to be an invaluable holding method.
Smaller pieces can be hot melt glued directly on to a wood faceplate. It helps if both the faceplate and work piece are first warmed to prevent the glue from chilling, which would form a weak bond. Both parts can be warmed in a microwave [15 seconds on full power] then the hot melt glue is applied. The parts are pushed together with pressure from the tailstock holding them until the glue cools. The wood can then be turned, but do take light cuts and wear a face shield. The joined parts can be separated if they are placed in a microwave on full power for 20-30 seconds. But take care – too much heat will cause the glue to become runny and it may soak into the grainFor larger pieces a hot melt glue weld will be enough to hold the work. Do make sure that the weld is substantial. When the turning is complete the weld can be picked off or the glue can be softened using a hot air gun
4. Never dismiss what you think is a crazy idea
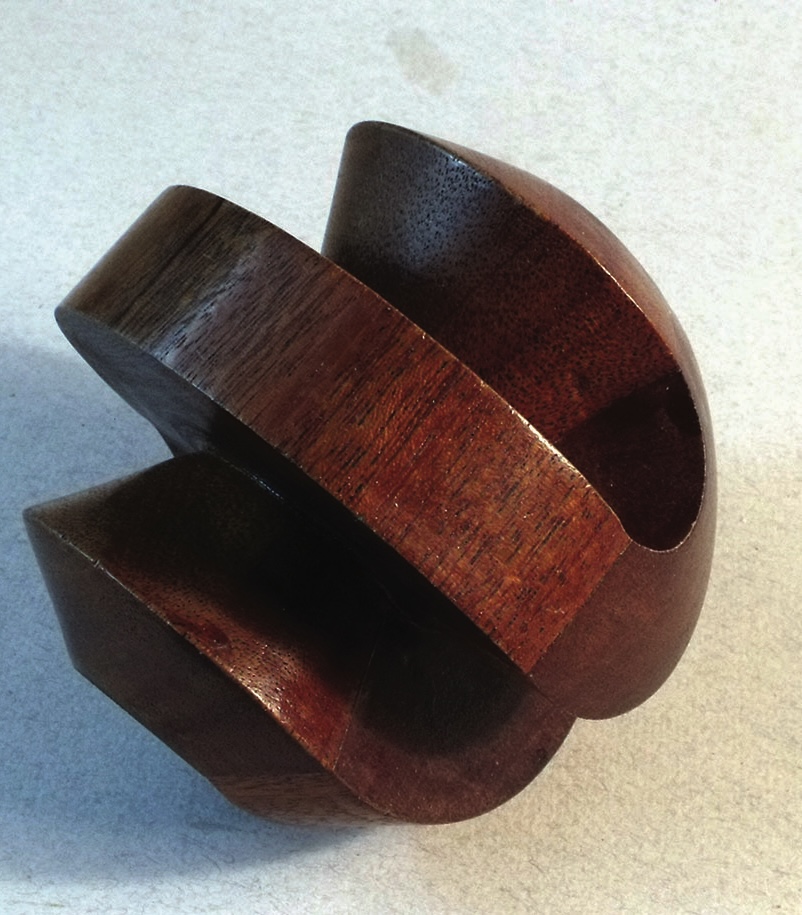
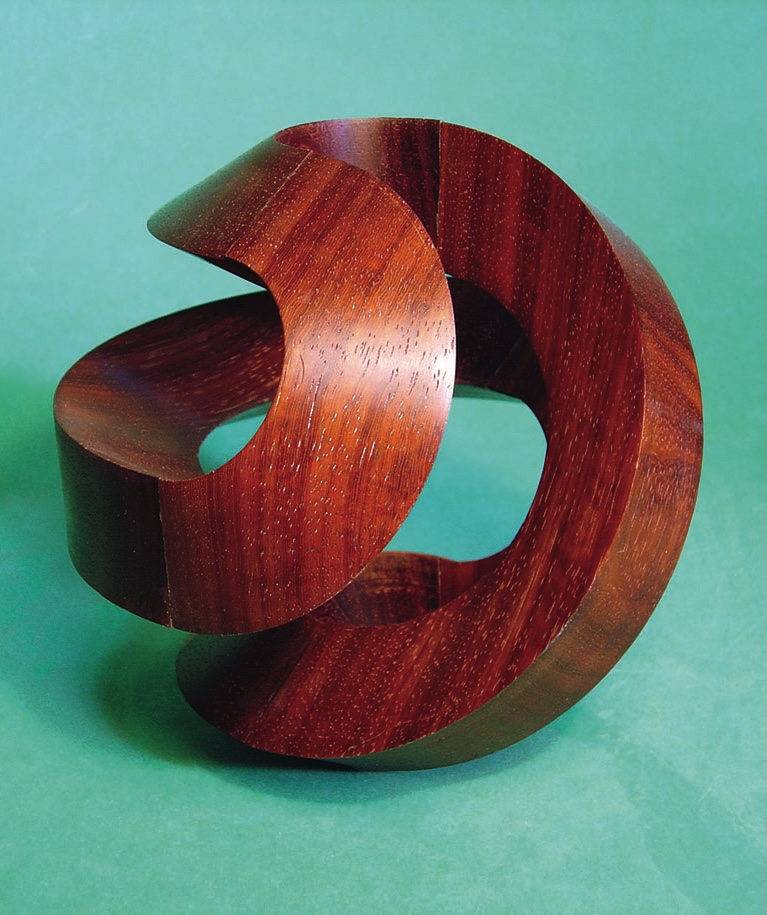
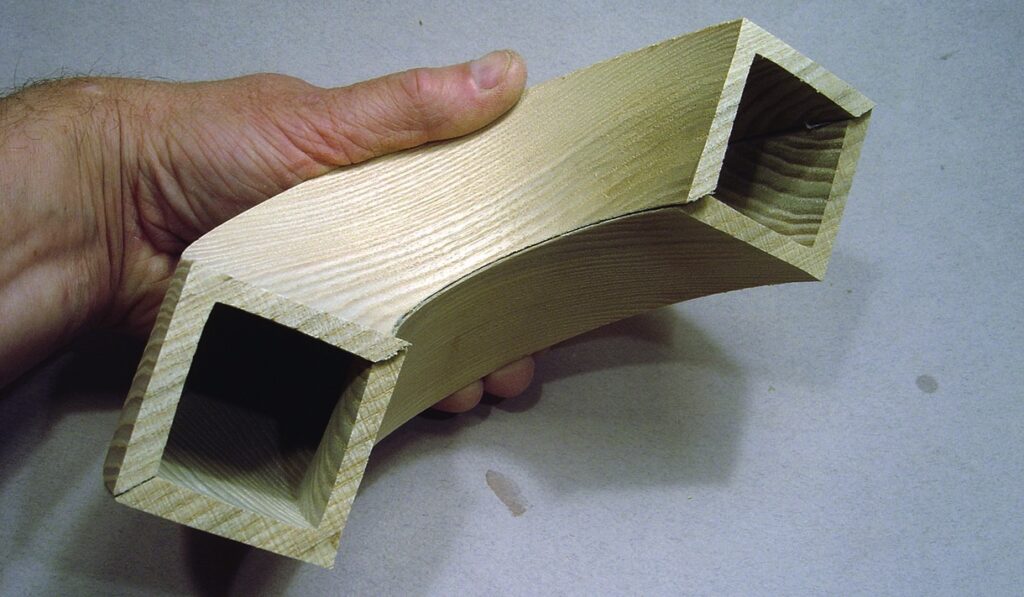
I had been turning a variety of shapes which, when split, exposed their cross-section which had ‘rotational symmetry’
One half could be rotated upon the other, which when rejoined and glued produced interesting, and sometimes unexpected, twisted forms
Once I showed the finished piece to a non-woodturning friend and he said: ‘It’s a pity it is solid in the middle. Can’t you turn it without its centre?’ Foolish remark, he doesn’t understand, he’s not a woodturner, it can’t be done. But thinking about it, I realised that it could be turned without its ‘centre’
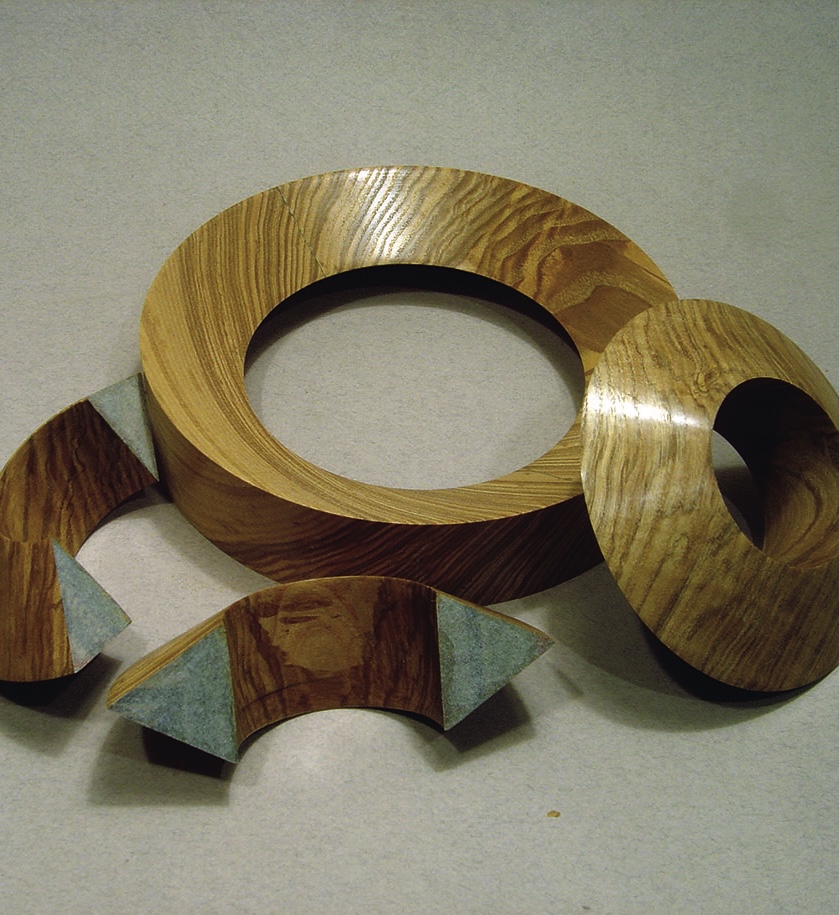
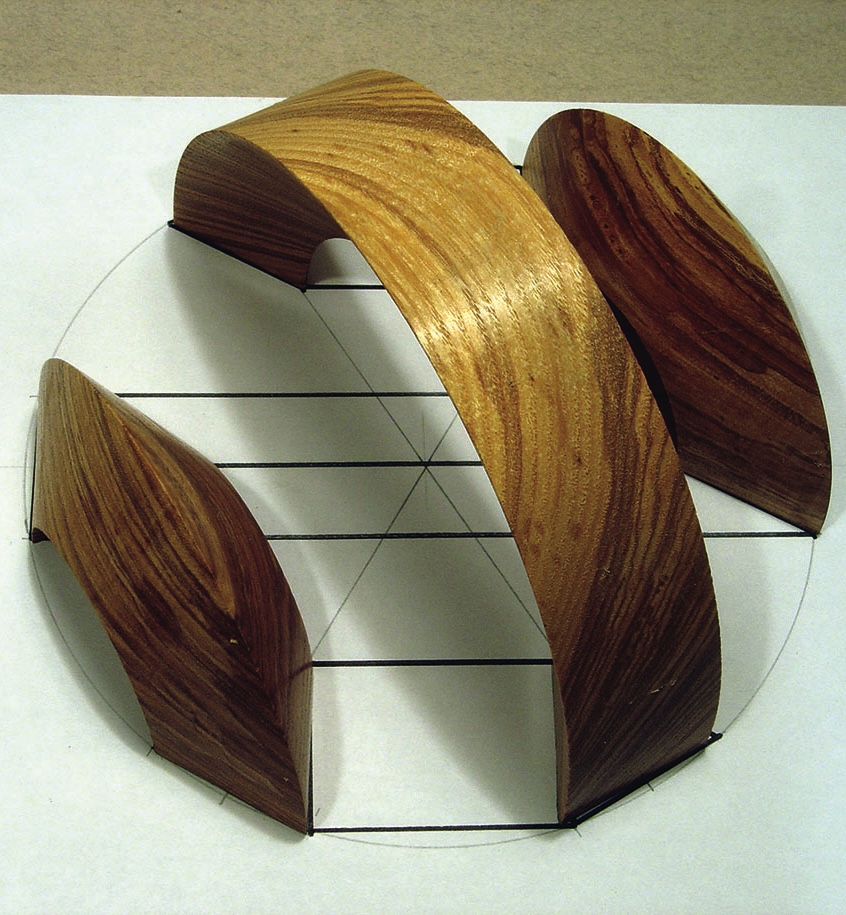
I was forced to think differently. It could be turned as three distinct rings – one large and two identical smaller ones
These rings, when split and rotated and reformed, would go on to produce a most interesting ‘ribbon’ form
I am so grateful for that ‘foolish’ remark. Don’t dismiss suggestions, even if you think they are foolish for they can make you think in a completely different way
5. Tomato sauce bottle glue dispenser
While washing out a plastic sauce bottle ready for recycling it occurred to me that it would make an excellent glue bottle. As I buy my PVA glue in bulk it seemed sensible to pour off a small quantity into one of these clean bottles. It works so well.
6. Shelf tool rest
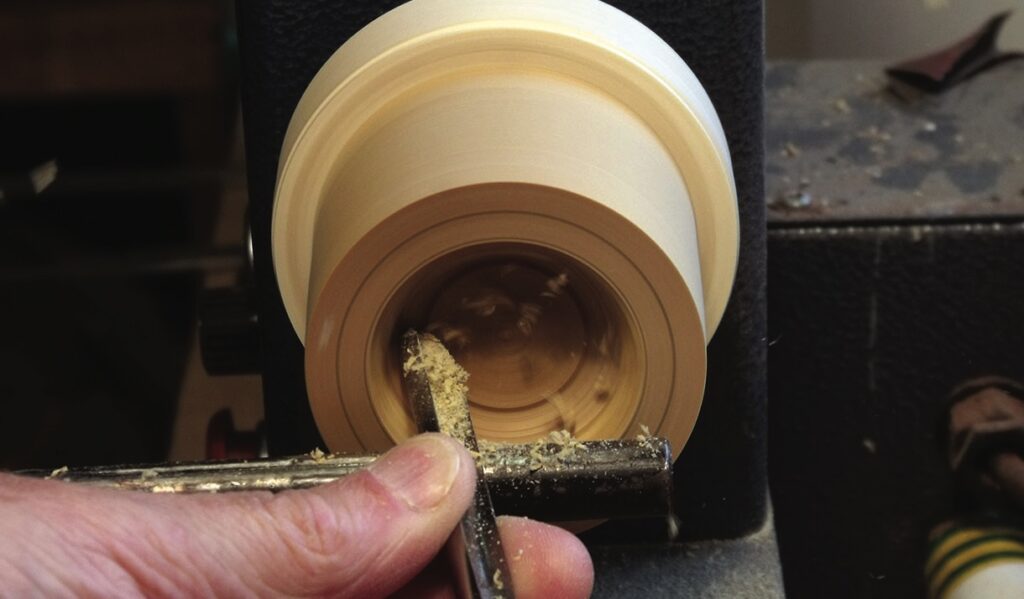
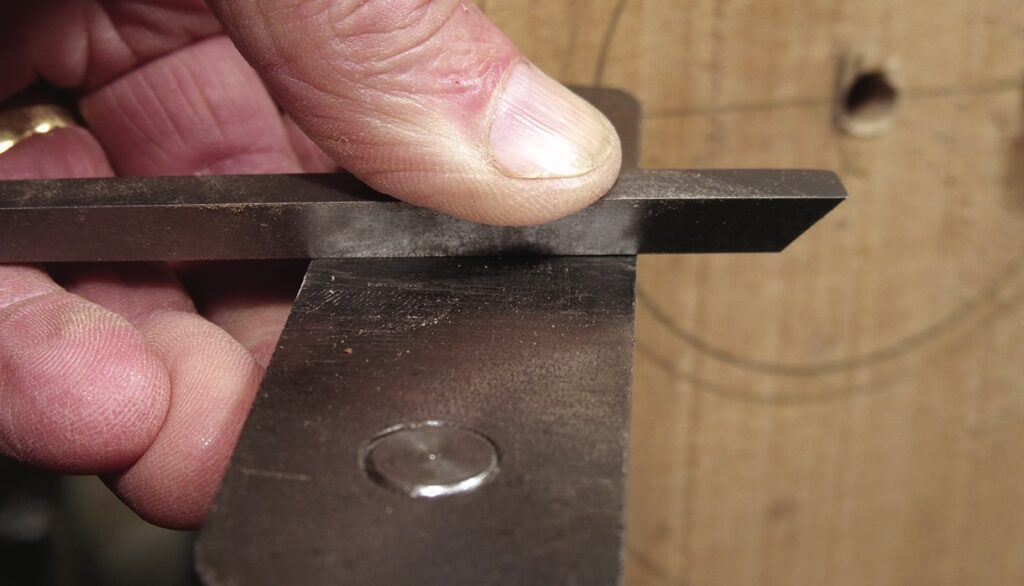
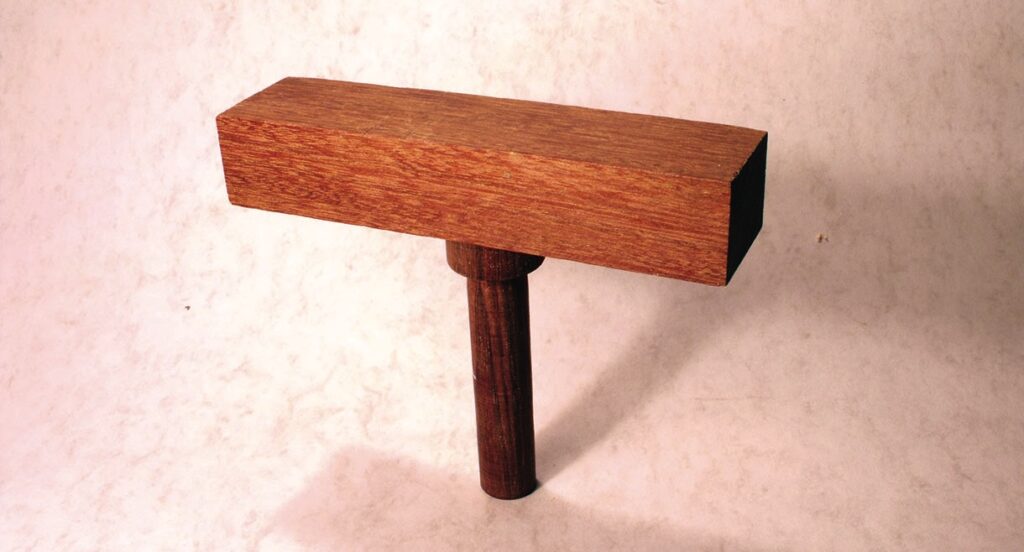
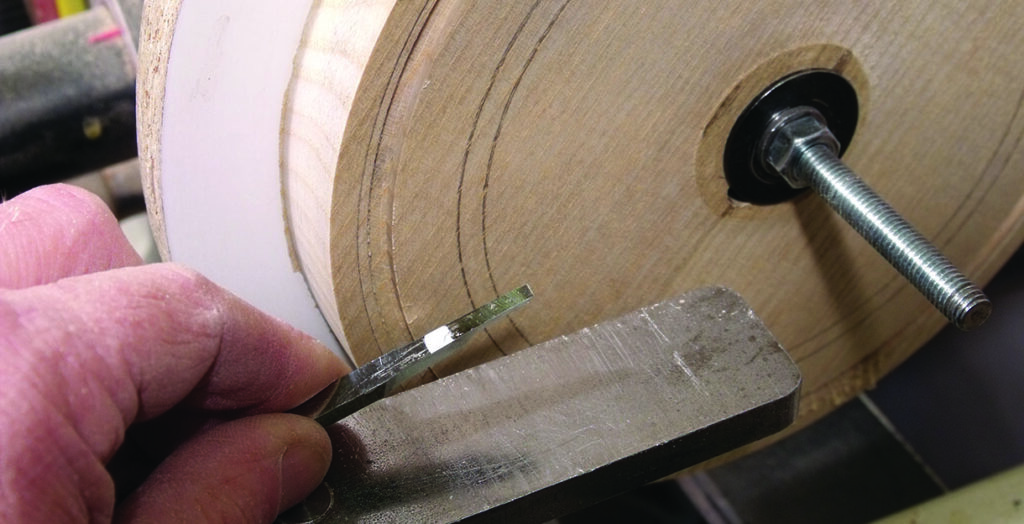
This tool rest is sometimes called a box tool rest. It is unconventional for it supports the tool flat, allowing only horizontal movement. Don’t reject it as it is extremely useful. I often turn flat-bottomed hollows using what I call a ‘square-end tool’. This tool can be seen supported on the tool rest in the photoWhen turning deep grooves or flat-bottomed hollows with this tool supported on a conventional tool rest the slightest catch would pull the tool into the work. In this case the conventional rest would act as a fulcrum. The problem is resolved if this particular tool is supported flat upon the shelf tool rest. But when using this tool rest it is vital to keep the tool completely flat on the rest and to ensure that it cuts at, or slightly below, centre height. If you wish to try out this form of rest you can easily make your own
7. Typist correction fluid
I find typist correction fluid very useful when you need to temporarily mark a position on a turning tool, or even on a tool rest. I use it regularly when marking a position on a tool to indicate the depth I wish to reach. If the mark needs to be precise then a dark line can be drawn upon the dried white surface using a fine tipped black marker.
Temporary marks on tools
‘Fit a pair of nuts and washer on to the threaded rod. Next a section of wood with a hole drilled through the same diameter as the threaded rod. Now a rubber bung, another drilled section of wood, a rubber bung and the final section of wood, followed by a washer and two nuts. It will look like a kebab’
8. Rubber bung mandrel
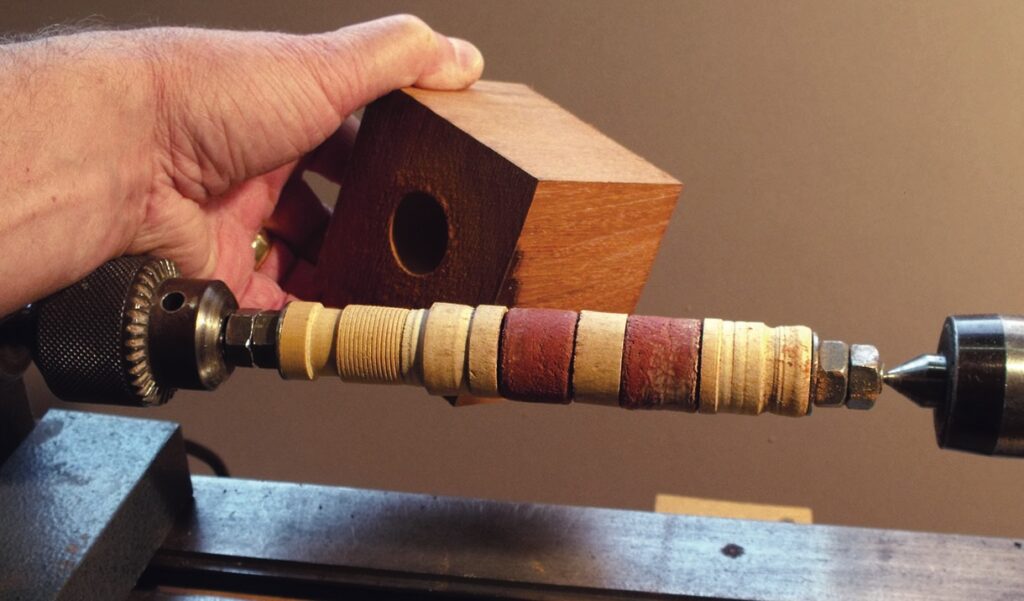
I needed to fully turn a piece with a hole through its centre, so I developed this mandrel with expanding centre. Here’s how you can make your own. Take a threaded rod and at one end drill, using an engineer’s centre drill, a conical hollow. The revolving centre will fit neatly into this drilled end.
Next you will need four nuts, two washers, two rubber bungs and some sections of wood. Drill the hole through the blank about to be turned. In this case it was 25mm [1in] and set it aside. Fit a pair of nuts and washer on to the threaded rod. Next a section of wood with a hole drilled through the same diameter as the threaded rod. Now a rubber bung, another drilled section of wood, a rubber bung and the final section of wood, followed by a washer and two nuts. It will look like a kebab.
Set the threaded rod ‘kebab’ on to the lathe holding it, at the headstock end, in a Jacobs chuck and supported at the tailstock with revolving centre fitted into the prepared conical hole.
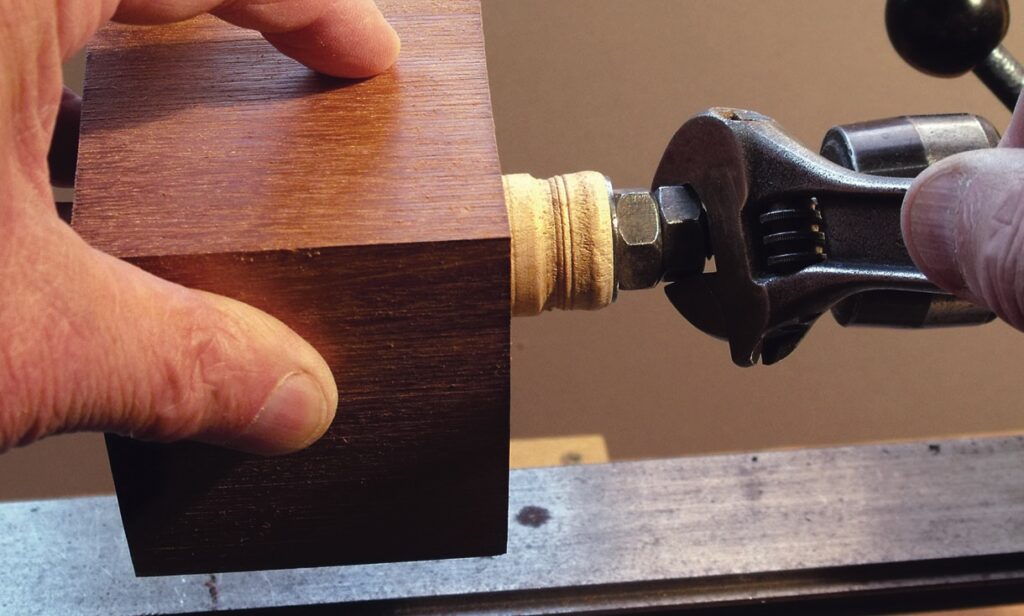
Tighten the nuts at one end to lock the rubber bungs and wood sections tightly together. Turn the whole ‘kebab’ until it is the same diameter as the hole in the blank, in this case 25mm. Position the blank on the mandrel so that the rubber bungs are inside the hollow. The exposed sections of wood at either end will allow a turning tool to make safe contact when turning over into this areaNext, at the tailstock end, begin tightening the nut closest to the wood section. This will squeeze the wood section against the rubber bungs inside, forcing them to expand and grip the drilled hole in the blank. Continue to tighten the nut until the blank is firmly locked in place. Now tighten the second nut against the first, locking the two together. This will prevent them from rattling loose when turning. Turn the blank as normal. When complete the work is simply removed by undoing the nuts and slipping it off the mandrel
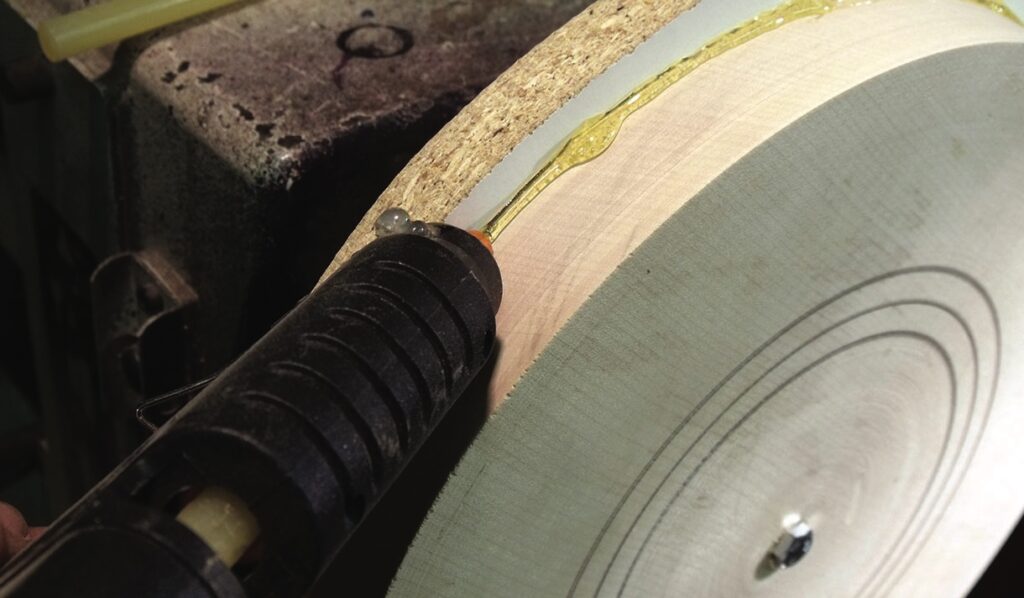
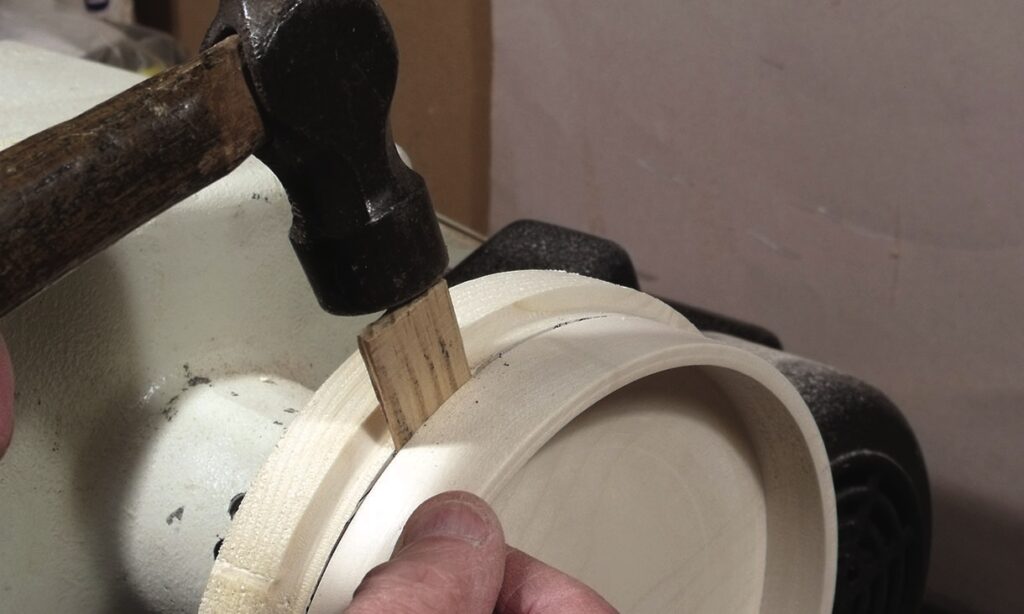
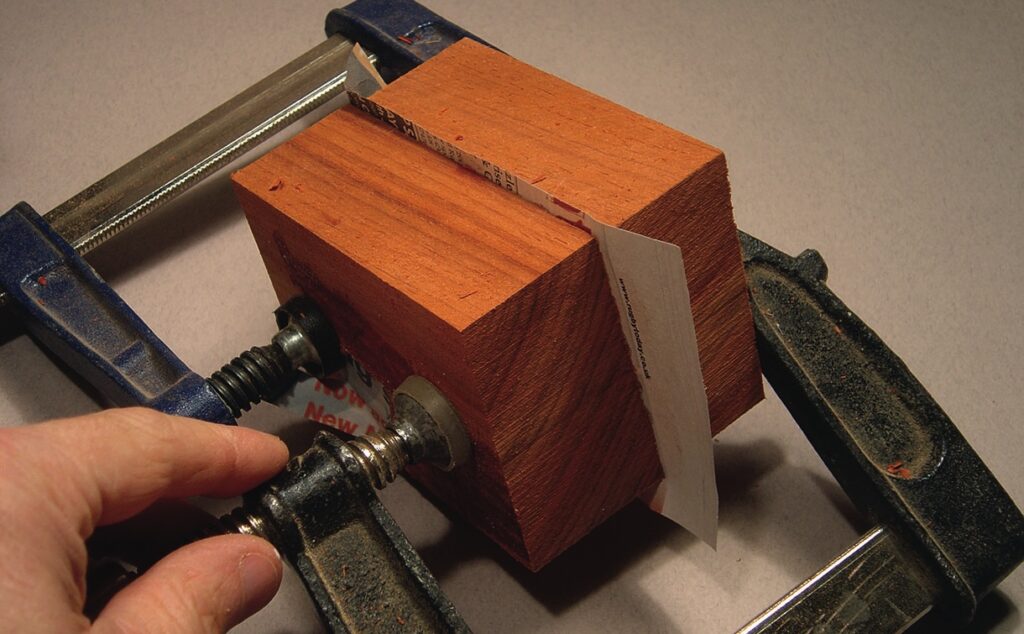
9. Newspaper/glue joint – another temporary fixing
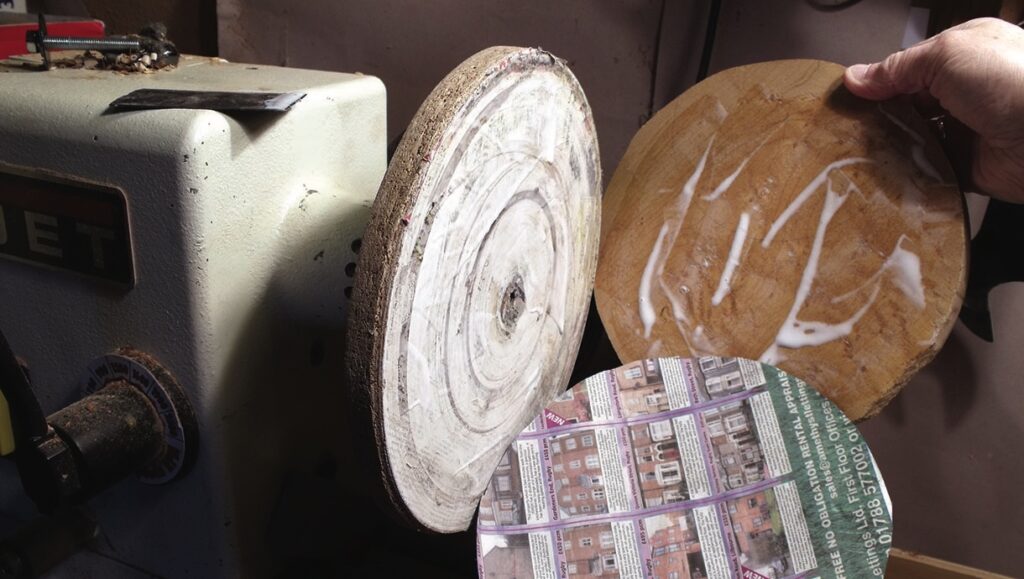
All you need is white PVA glue, a sheet of newspaper and two flat surfaces on the parts to be joined.
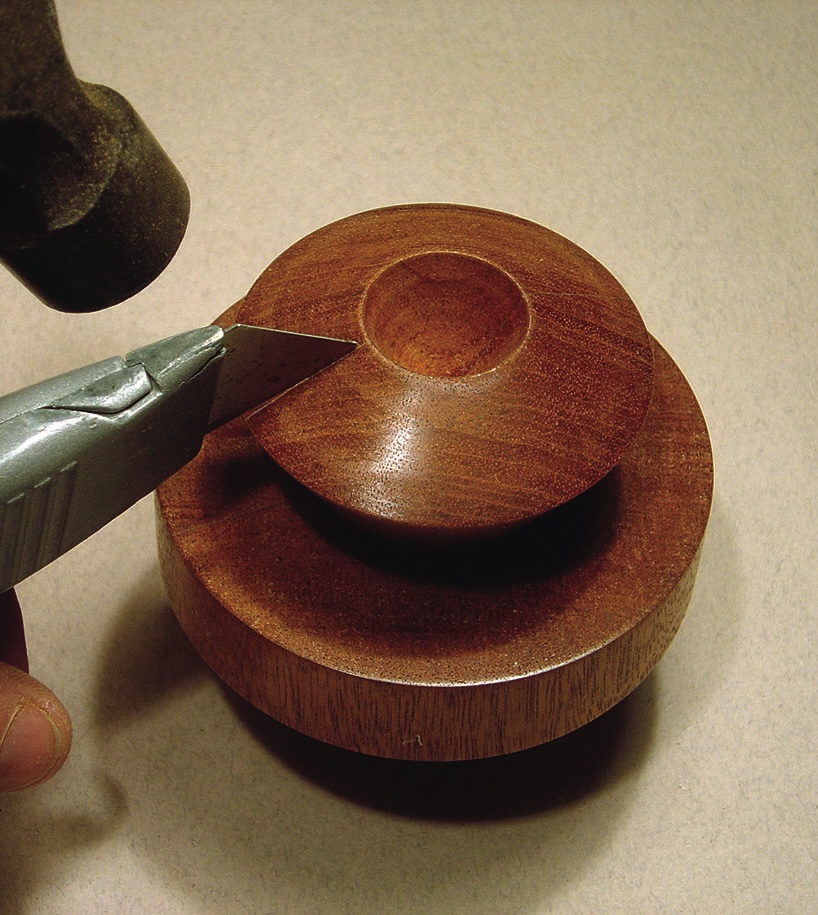
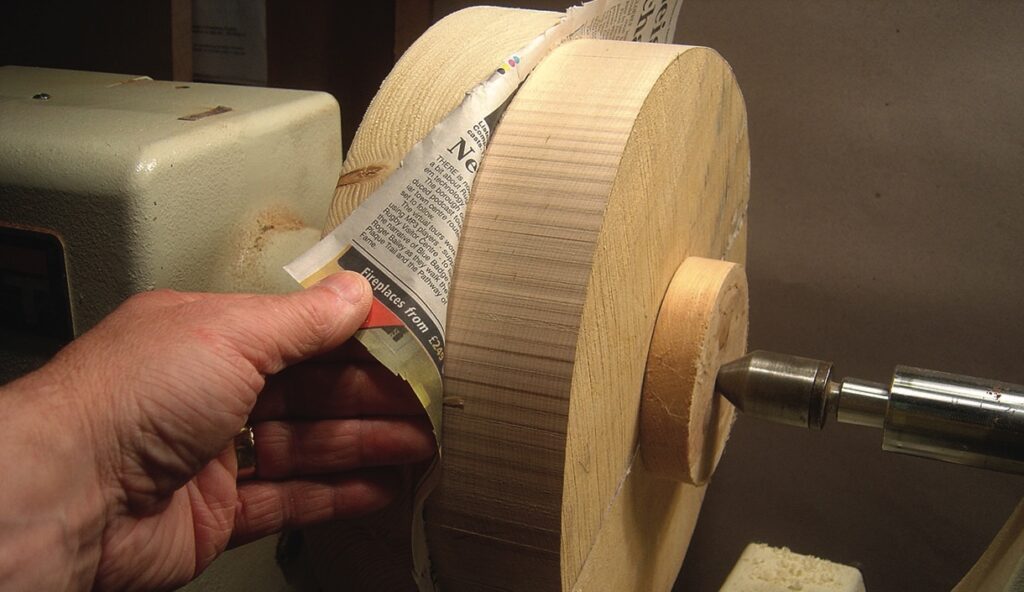
Apply a moderate layer of white PVA glue to the flat wood faceplate and also to the flat surface of the work piece. Press a sheet of newspaper on to the glued wood faceplate then press the glued surface of the work piece on to the newspaper covering the faceplate. This will make a wood/glue/newspaper sandwichBring the tailstock forward, with centre, and apply pressure while the glue dries. If you don’t want to mark the surface of the wood with an indent then place a piece of scrap wood between it and the centre. Leave overnight until the glue has thoroughly dried. Turn the piece as normal but do not take aggressive cuts and remember to wear a face shieldTo remove the turned part use a craft knife, tapped with a hammer, to begin to open the glue joint between work and faceplate. It is always best to use wood wedges to fully open the joint as this prevents damage to the workI have found that white PVA glue is best for this method. Other glues may soak through the newspaper and make the joint permanent (ask me how I know…). And don’t forget a newspaper/glue joint is ideal for split turning
10. And my final tip
A friend once said to me: ‘If someone else can do it, so can I.’ So never defeat yourself before you begin. Be positive – who knows what you might achieve? The lathe is as versatile as you make it so now go and turn some square holes.
To provide the best experiences, we use technologies like cookies to store and/or access device information. Consenting to these technologies will allow us to process data such as browsing behaviour or unique IDs on this site. Not consenting or withdrawing consent, may adversely affect certain features and functions.
Functional
Always active
The technical storage or access is strictly necessary for the legitimate purpose of enabling the use of a specific service explicitly requested by the subscriber or user, or for the sole purpose of carrying out the transmission of a communication over an electronic communications network.
Preferences
The technical storage or access is necessary for the legitimate purpose of storing preferences that are not requested by the subscriber or user.
Statistics
The technical storage or access that is used exclusively for statistical purposes.The technical storage or access that is used exclusively for anonymous statistical purposes. Without a subpoena, voluntary compliance on the part of your Internet Service Provider, or additional records from a third party, information stored or retrieved for this purpose alone cannot usually be used to identify you.
Marketing
The technical storage or access is required to create user profiles to send advertising, or to track the user on a website or across several websites for similar marketing purposes.