Dave Western explores carving a stylised Celtic crow

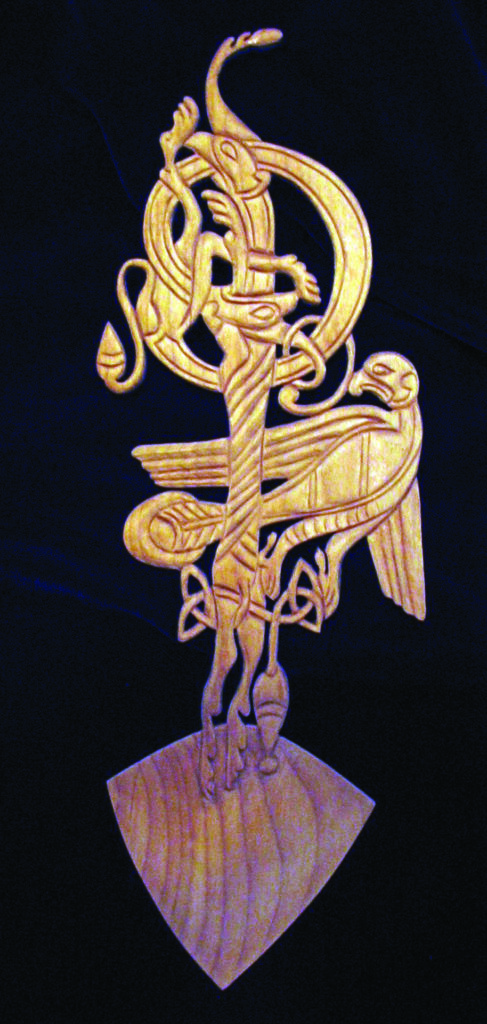
Although I am a massive fan of Celtic knotwork and love to carve it whenever I can, I am equally fond of the elegant zoomorphic creatures that grace many types of Celtic art. Whether found on sturdy pot handles and dagger hilts or among the delicate line drawings of the Book of Kells, there can be no doubt that beasts both mythical and real have enthralled Celtic artists for centuries.
Over the years, these zoomorphic animals and humans have evolved, taking ever-changing forms. Initially, most would have their bodies rendered quite realistically and then would have their limbs woven into fantastic knot patterns which swept through the design.
In our modern era, many artists working in the Celic form have used the elaborate knotwork more like a ‘skeleton’, allowing us to see into the animal while retaining a realistic outline of its form.
Designing Brân
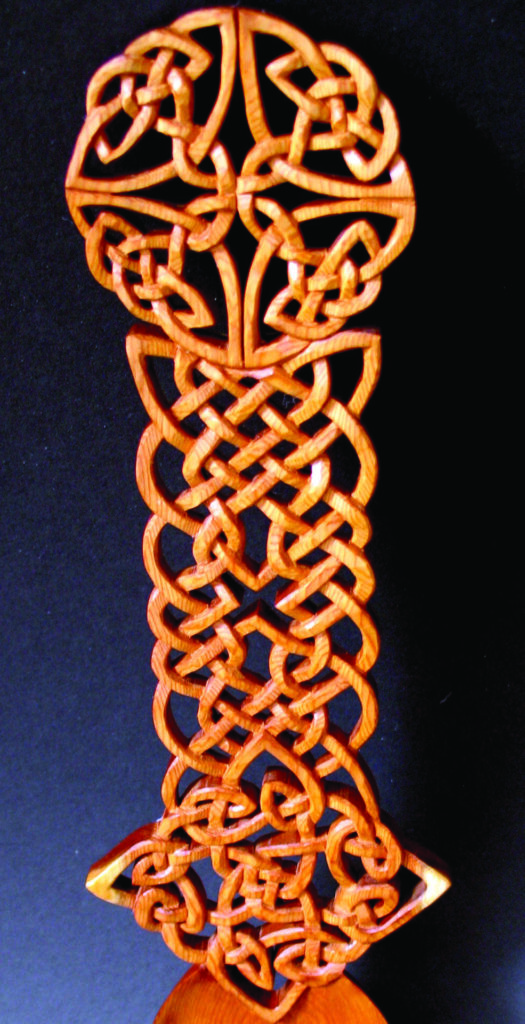
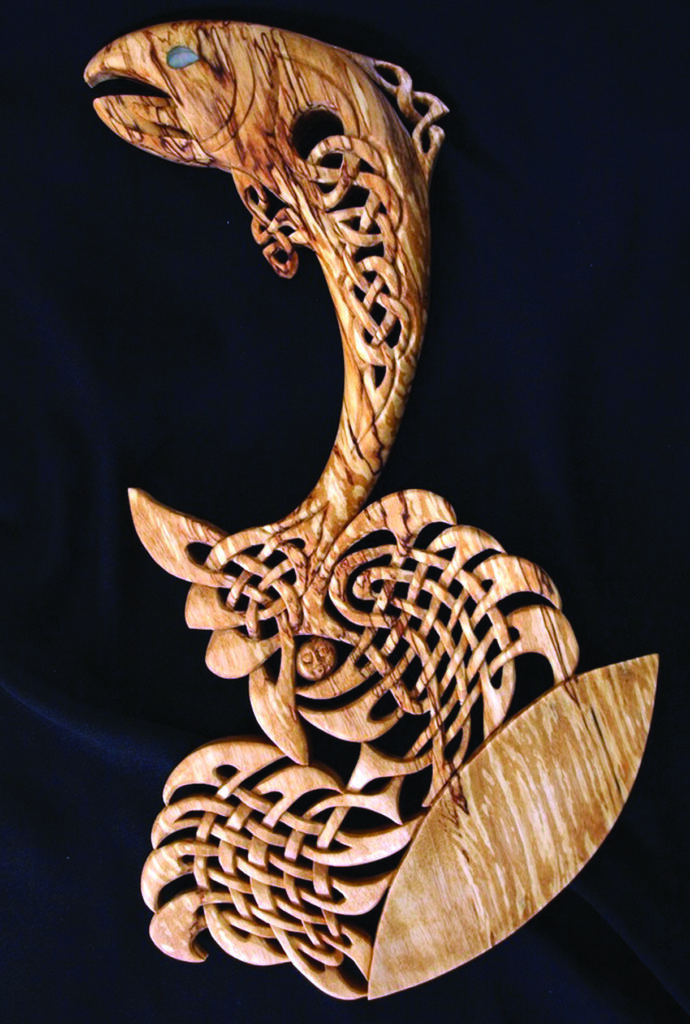
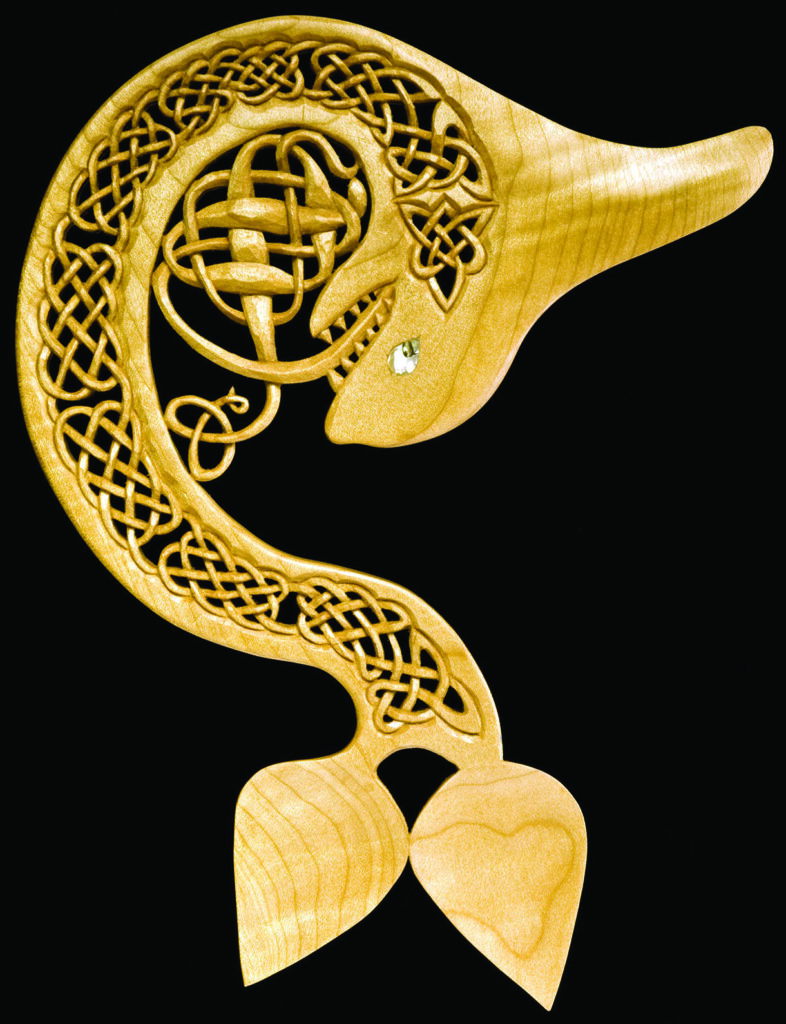
For this project, I have taken things a step further. Abstracting the body of a raven, I have carried the design around a circle, breaking the form into two halves, which are united by uncarved central strips that follow a line similar to a yin-yang curve. In the upper left quadrant (as you view the header photo) you’ll see the bird’s beak gripping a shiny pearl, the design sweeps up and around to the left taking in the bird’s gleaming eye (symbolised with a rounded three-point knot) and the pointed tuft of his head feathers (the sharp three-point knot at the very top of the design). Things then sweep around to the left and descend the design in the form of a large Celtic knot symbolic of the bird’s chest and belly.
The knot is contained by a solid strip on the outer edge of the circle and by the two yin-yang strips in the centre. These strips represent the mid-point of the design, allowing opposite sides of a three-dimensional animal to be viewed at once in two dimensions. The design’s right side begins in the bottom right quadrant, where the shoulder joint is symbolised with a four-point knot and stylised feathers indicate the bird’s wing. Beside the wing, another large Celtic knot represents the bird’s chest and belly, and a yin-yang strip mirroring the left side indicates the ‘join’.
If that all seems a bit too artsy and precious, just think of it as an excellent exercise in Celtic knot carving and knife-work. Either works for me.
The disc I carved has a softly domed face so that the knotwork becomes a bit more vibrant when viewed from any angle other than face-on. Doming requires a fair bit of effort, so if you lack the tools, time or inclination, the design will still look great rendered on a completely flat board.
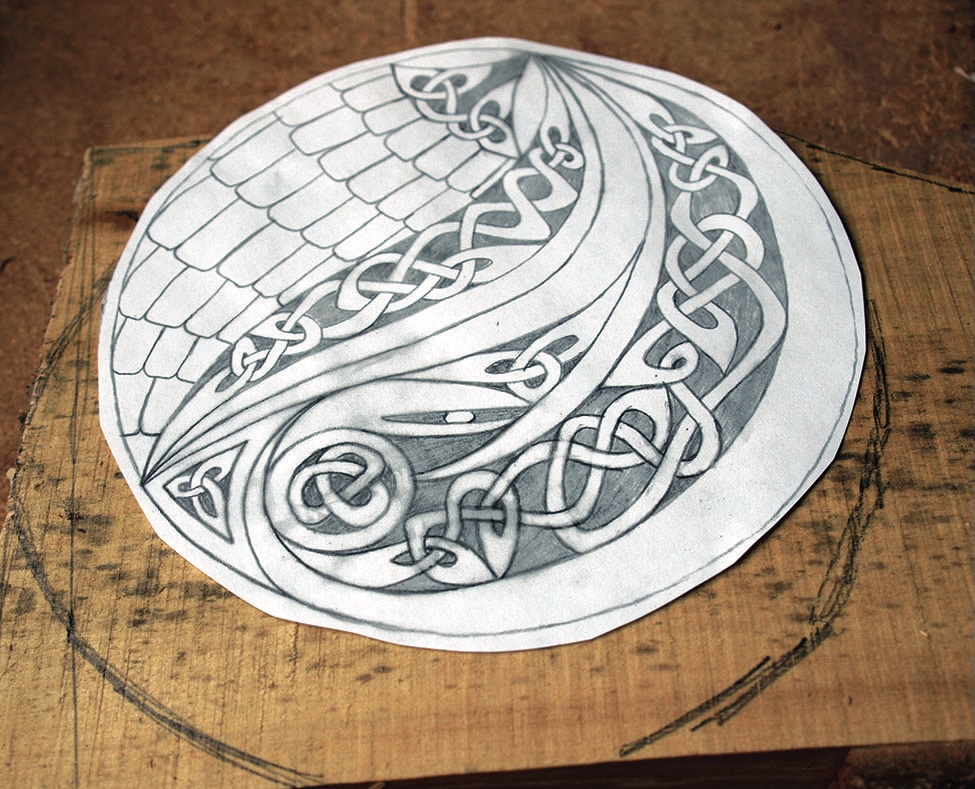
Medallion drawing

Cutting and creating the medallion
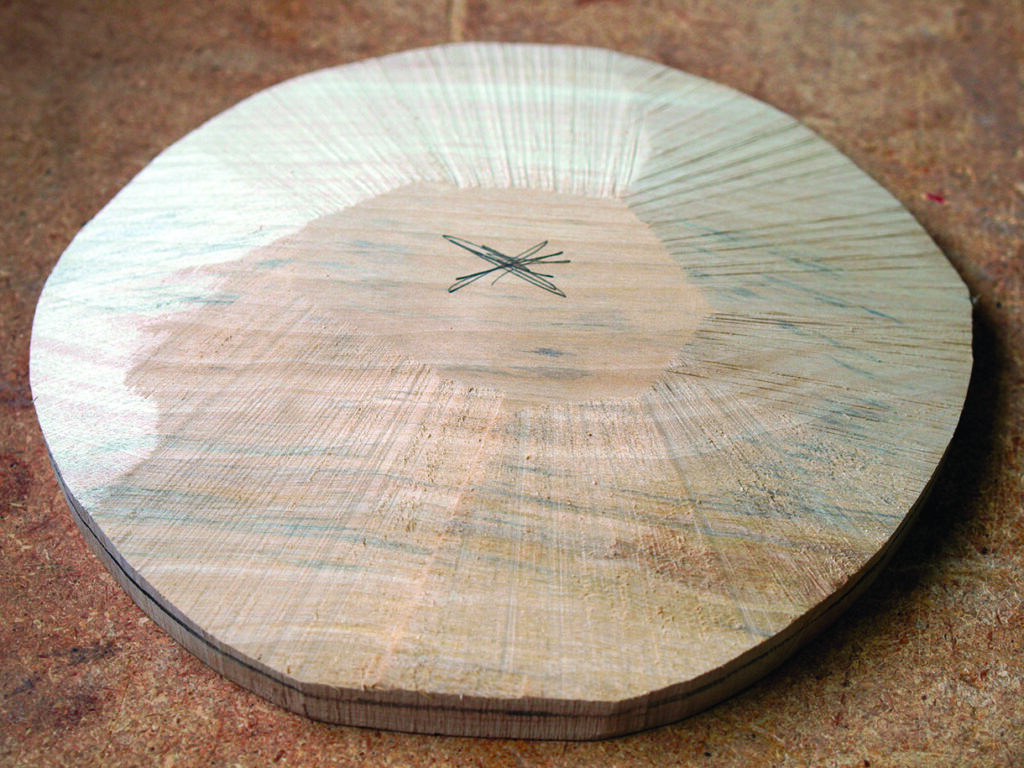
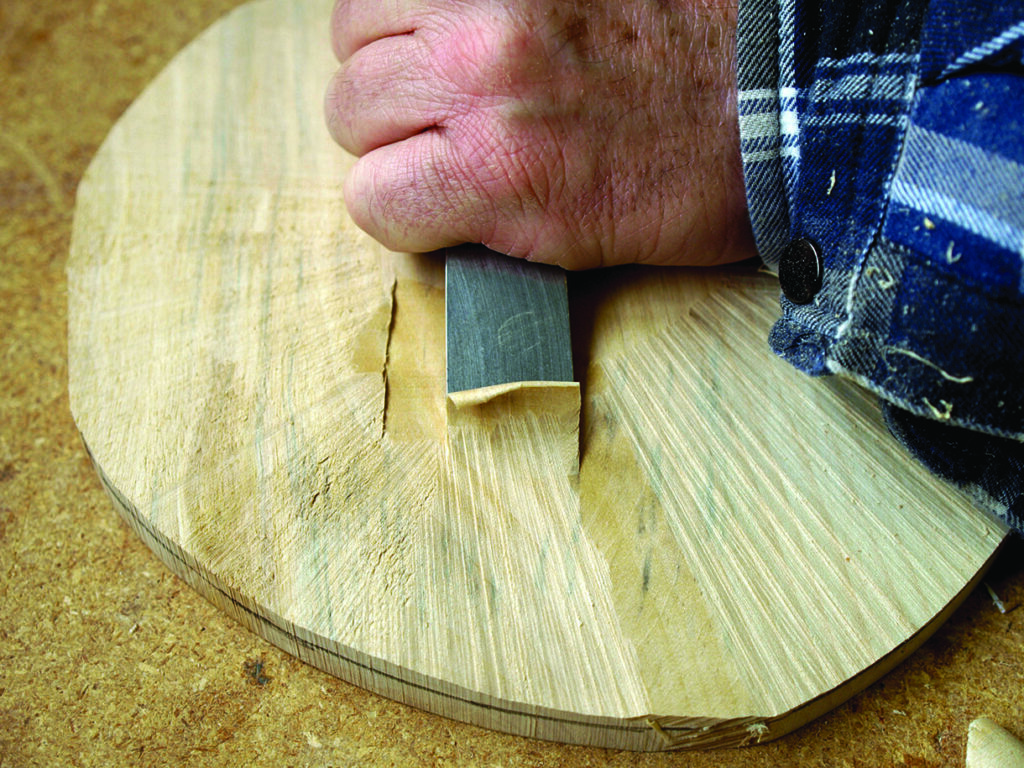
For this particular carving, I used a piece of silver birch (Betula spp.) which had colour tones I felt would allow the carving to really come out. I’d be wary of using really dark wood such as walnut, or using stains to darken a light wood as the delicate knotwork will easily get lost. I’ve found that lighter to medium amber-type woods tend to give the best effect with this type of carving. I also was careful to align the design so the wood grain ran down through the carving from top to bottom (again, oriented with the main photo). I roughly marked a pencil circle around the design and then cut out the piece using a bandsaw. I didn’t worry too much about refining the circular cut at this point as it will be cleaned up later.
Next, I used a pencil to scribe a line about 1⁄3 depth right around the outer edge of the piece and marked a rough X in the centre of the work face. These pencil marks became my guide for the doming process, which I again undertook with a coarsely bladed bandsaw. If you lack a saw, just use an axe or large chisel to hog the bulk of material away.
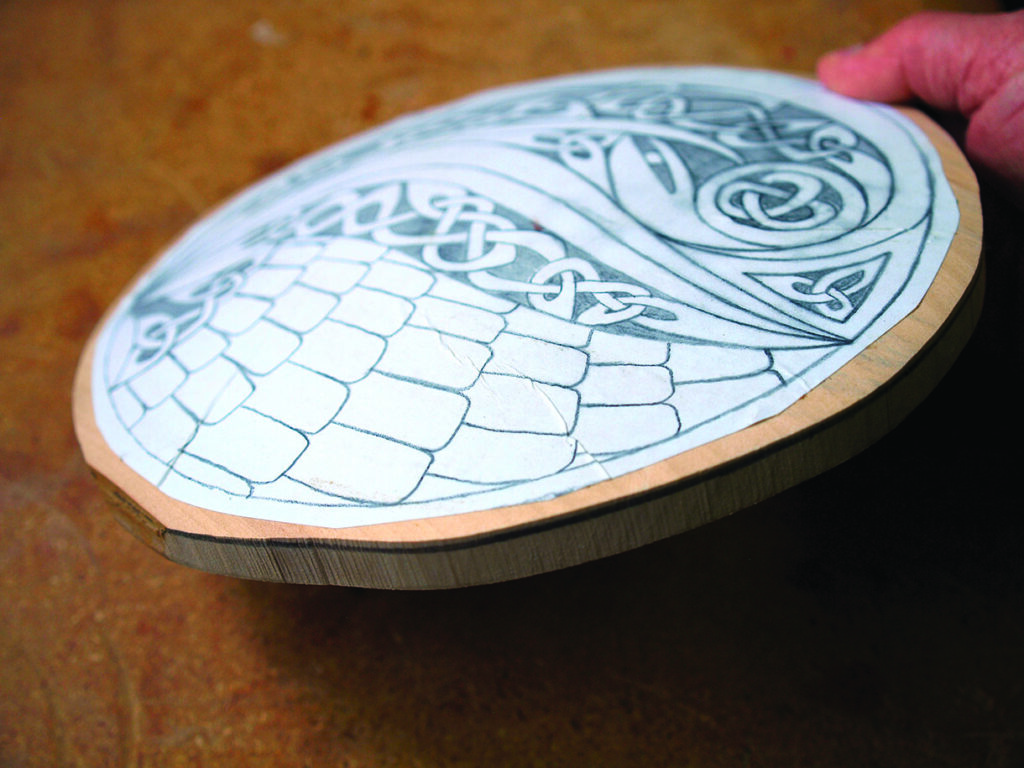
With the crude cutting done, use a finishing chisel, a block plane or scrapers to refine the dome. Aim to keep the curving as uniform as possible as you travel around the circle. Although I generally avoid sanding carved work until the very end, I will often give the dome a good sanding down to 320 grit to ensure the work face is as perfect as possible before I begin cutting. When I’m satisfied there’s no blemishes and scratches left, I use a common glue stick to fasten my photocopy to the piece. This allows me to avoid repetitive drawing on the work face, keeping things cleaner and the lines more accurate.
Refinement
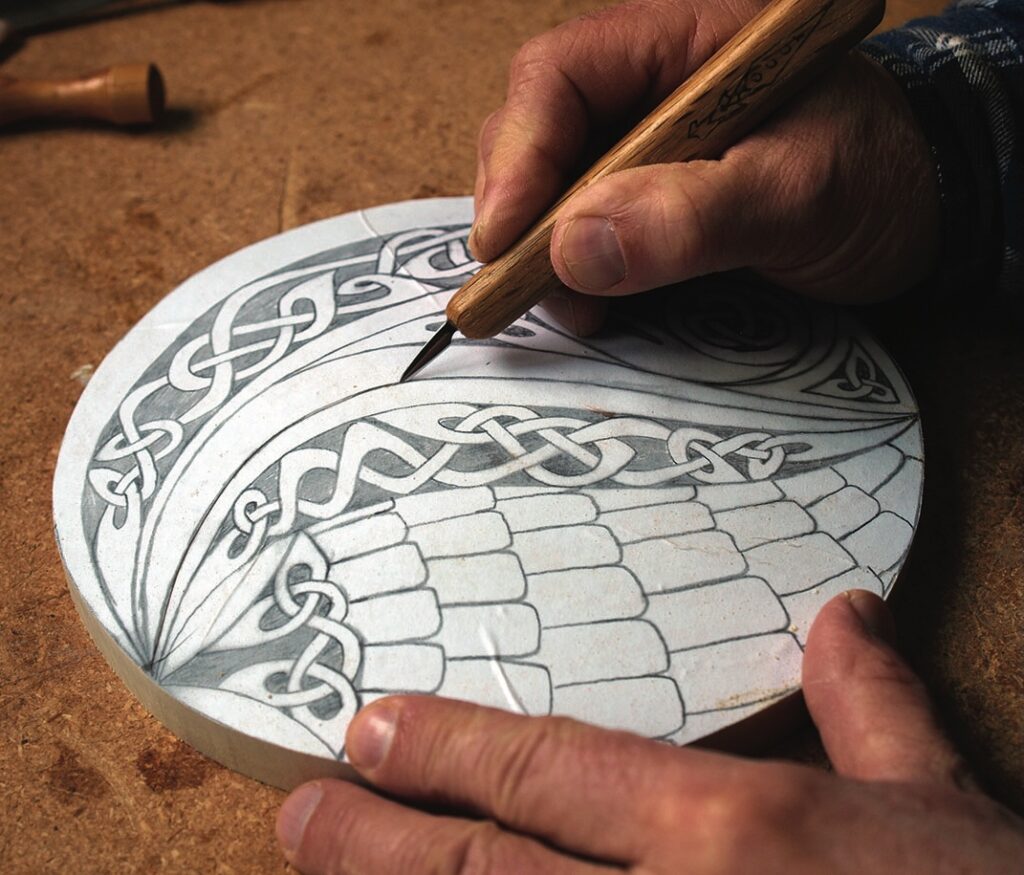
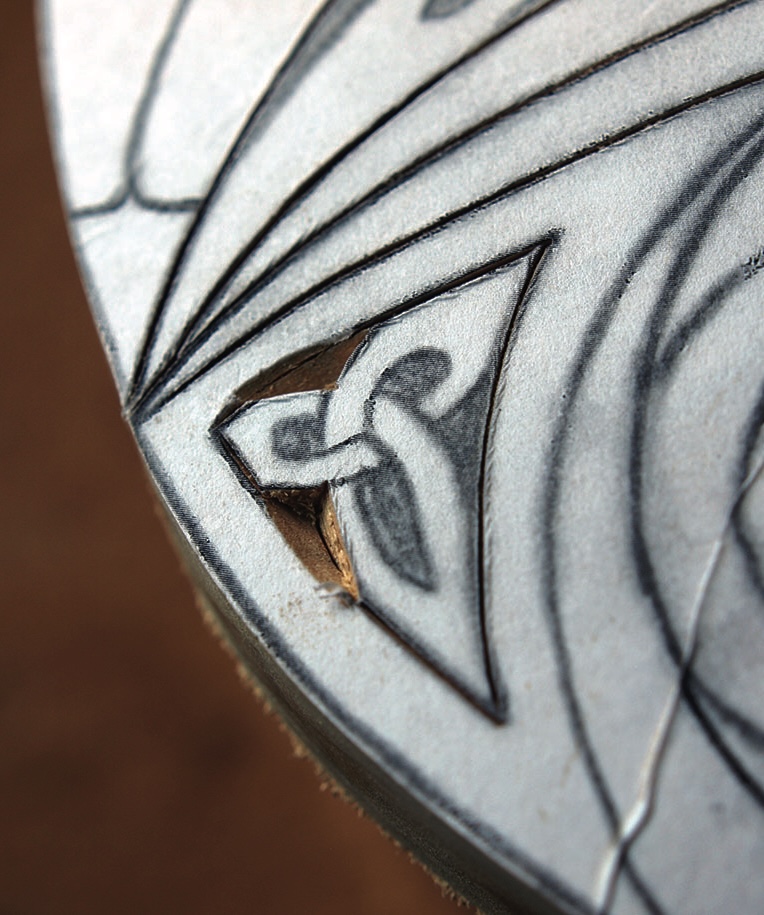
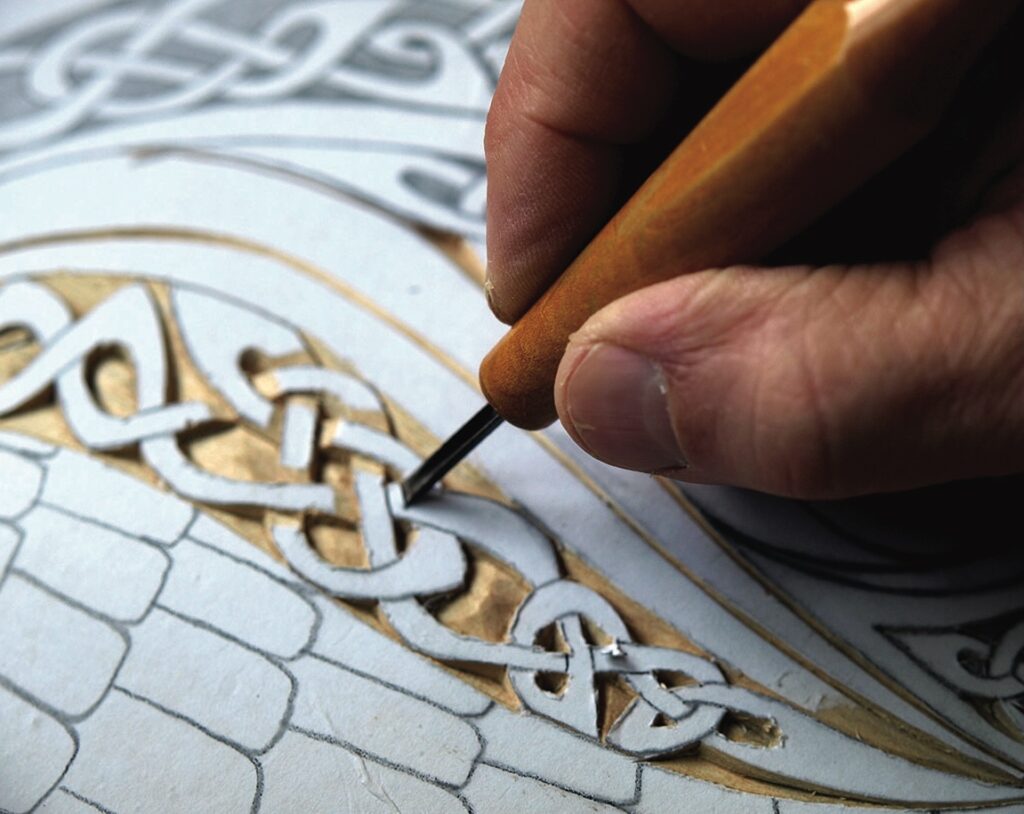
At this point, I cut the circle to its final shape. Since I want to be as accurate as possible and give myself the smoothest finish possible, I use my scrollsaw with a nice fine blade. If you lack one of these, you can cut down with hand saws or just use a large chisel to nibble your way around the edge. Once I am satisfied that the circle is neat and clean, I begin marking out the drawing with shallow, vertical 1mm-deep cuts along the design lines. I use a small, straight knife for this operation and I take my time so that I get pulled off line should I hit sweeping grain underneath the paper.
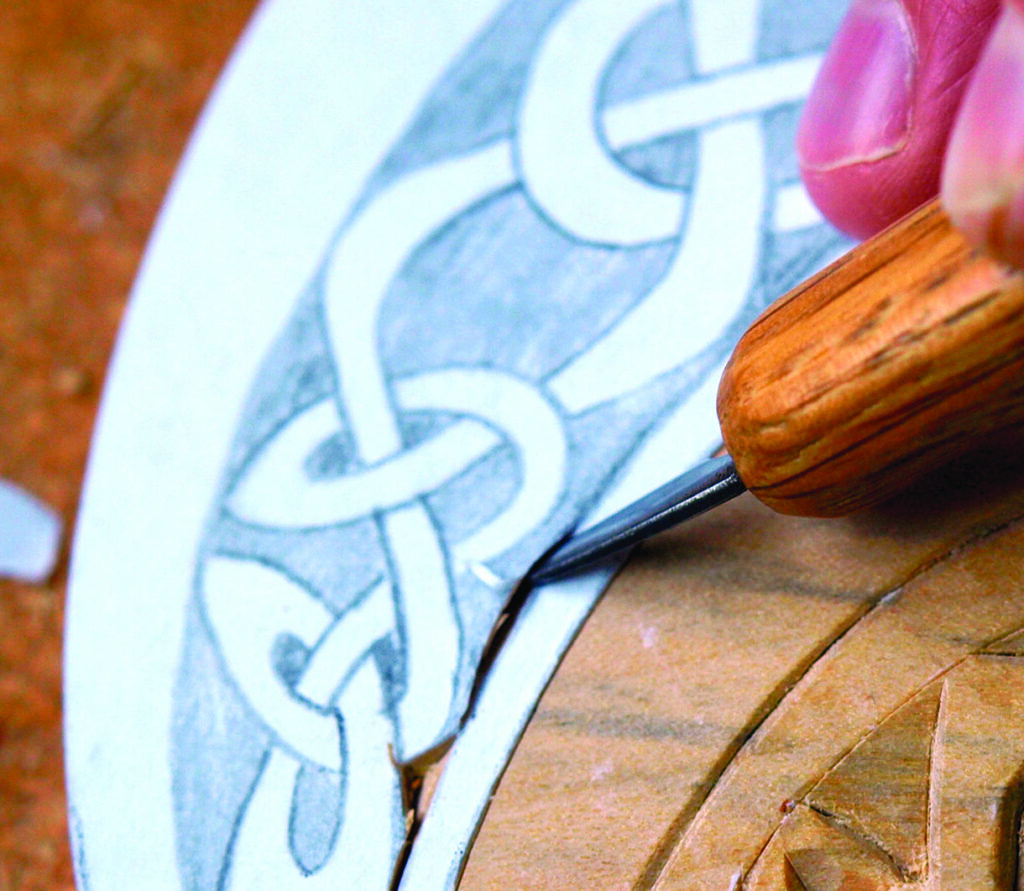
Avoid vertical cuts along edges which border knotwork. In these areas, tilt the knife to allow a chip to be removed when you vertically cut the lines of the actual knot. In the close-up shot overleaf, you’ll see the angle required to remove a chip cleanly. You’ll also note the difference between the bottom border cut in the second picture, which has been done correctly, and the upper border cut, which shows the unsightly line left behind by an errant vertical cut.

Knotwork
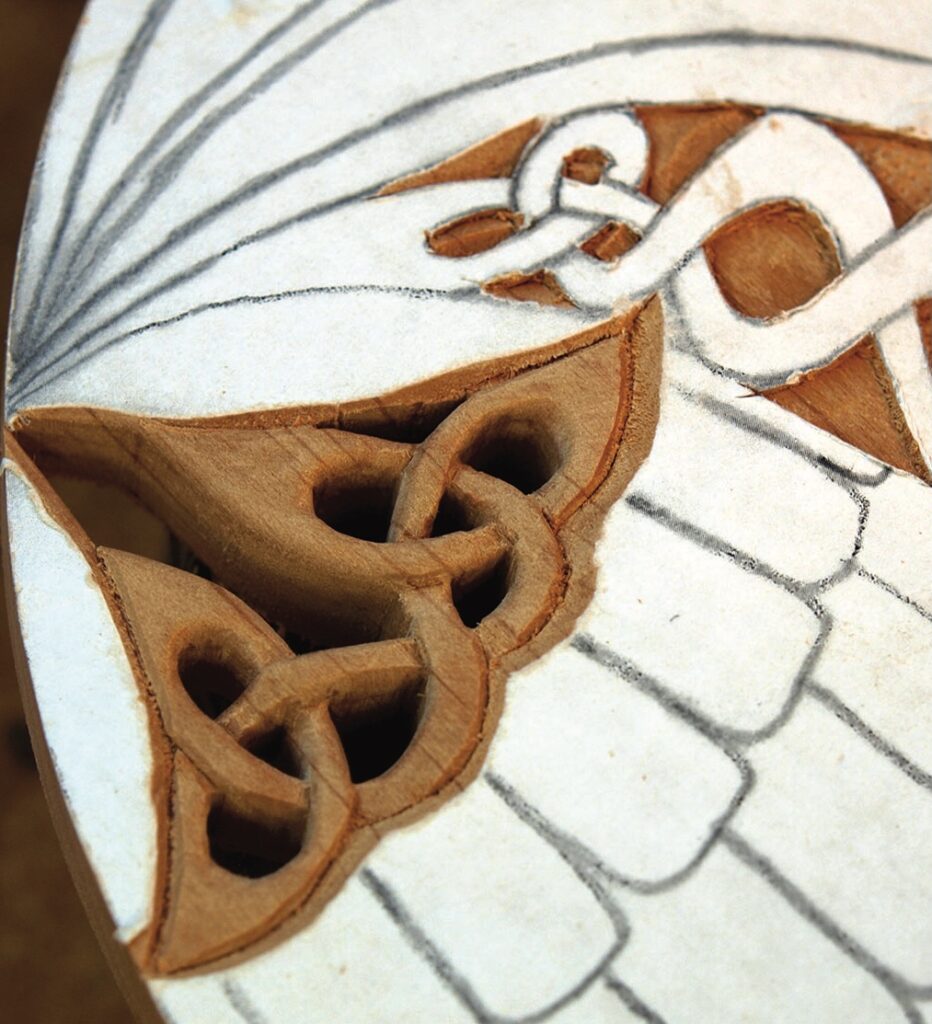
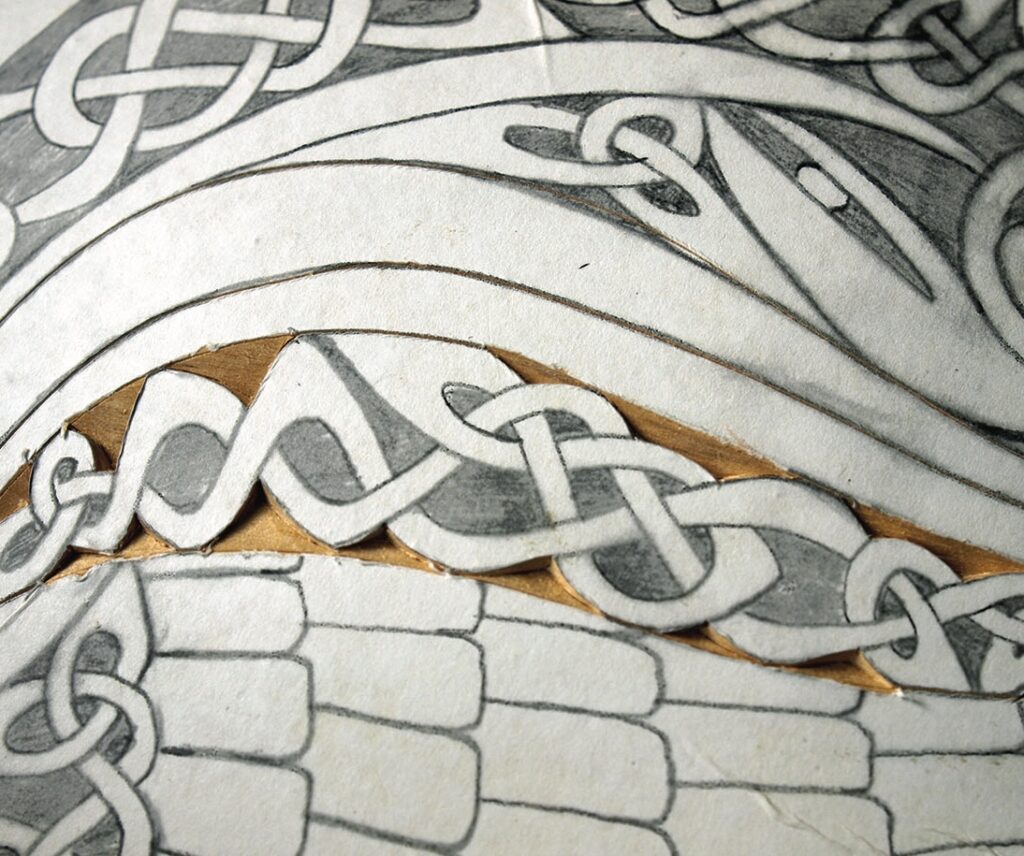
Once your lines have all been marked and you are ready to start with the knotwork, there are a number of ways to proceed. In the three photos below I show a small section of carved work illustrating three possible ways to raise the knot pattern. The four-point knot has been fretted right through the board, enabling deep overlapping of the knotwork. Just above it, the area of six very small sections has been simply chip-carved to form a point through the middle of each knot. Finally, the four larger sections to the right have been carved with vertical sides along the knotwork and a flat bottom in the hollowed out section. The flat bottom can also be textured with a punch to pattern if desired. For this project, I wanted to keep things as simple as possible, so I have opted to utilise a chip pattern that I have domed rather than keep strongly angled. This gives a softer look and allows me to deal with some of the really oddly shaped sections. To achieve the pillowy look I am after, I carve out a chip from either side with a straight knife. I then curve the wedge-shaped peak down with a small chisel to round it over and soften it out.
Orderly cutting
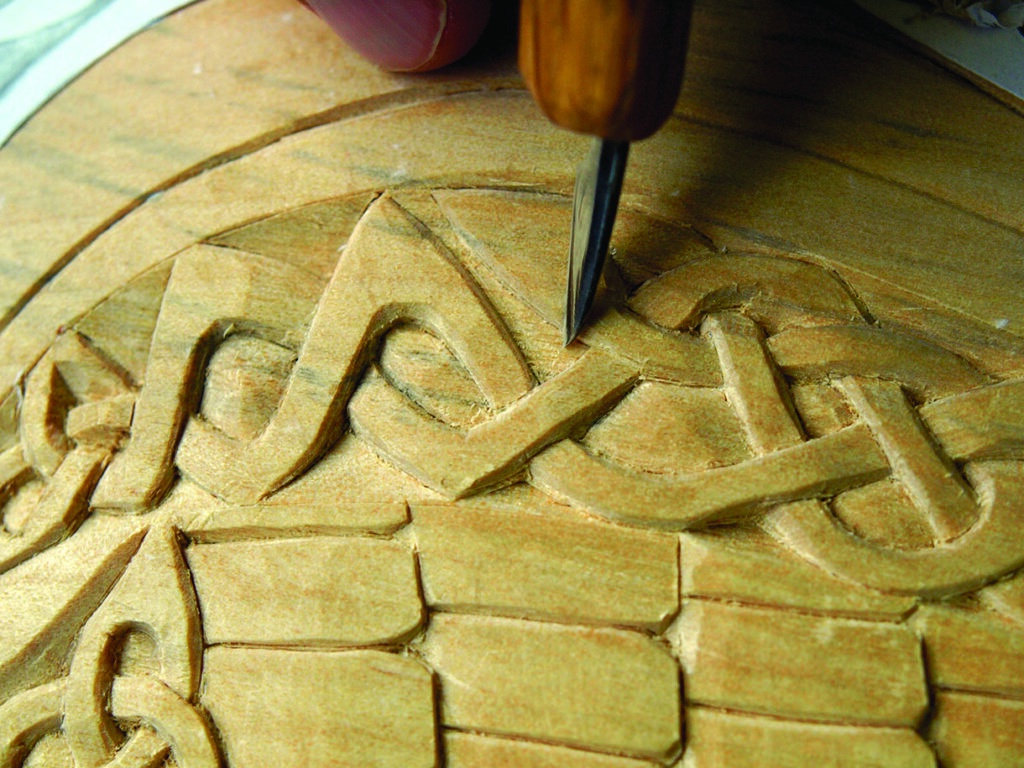
A good order of business is to begin your knotwork at the outer edge and get everything cut and shaped before proceeding to the inner sections. Once the outer and inner sections have all been cleared, use a small chisel to separate each section of the knotwork. Resist the urge to dig much deeper than about 1⁄16 of an inch (1.5mm) until all the sections are cut away. When everything is done and you are happy that all the ‘overs and unders’ are as they should be, proceed to deepen the cuts to about 3mm.
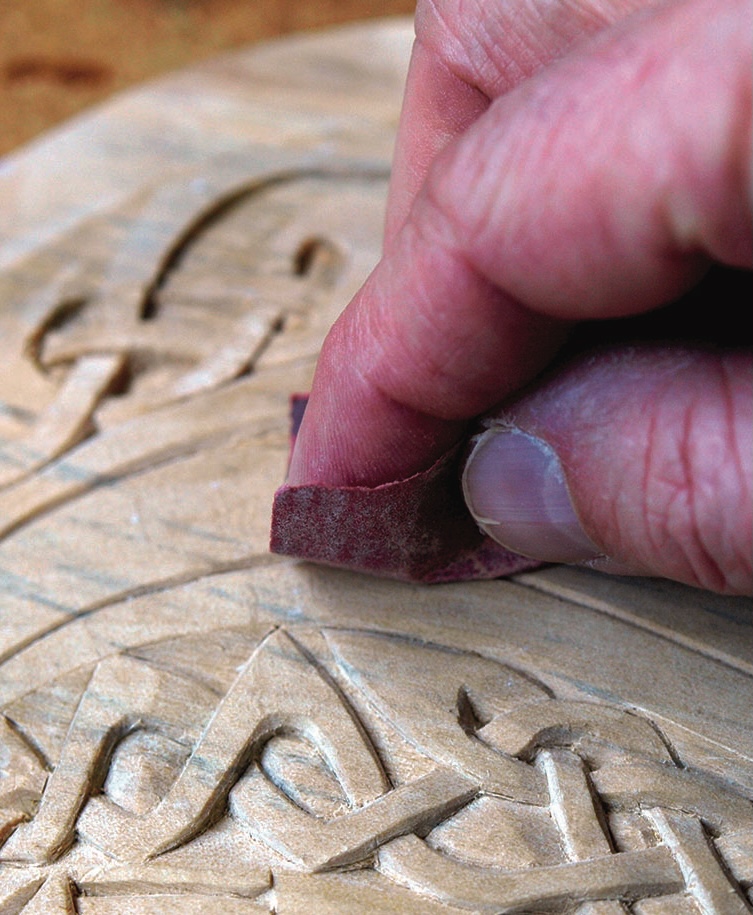
When you are happy that all the knotwork has been sufficiently cleared and the overs and unders cleanly defined, go back with a straight knife and redefine the vertical edges of the knotwork. Aim to get nice, crisp cuts that leave no chips or stringy bits behind. Then, carve a very gentle chamfer off the edges of the knot strands to clean them up and to soften the look and feel of the knot.
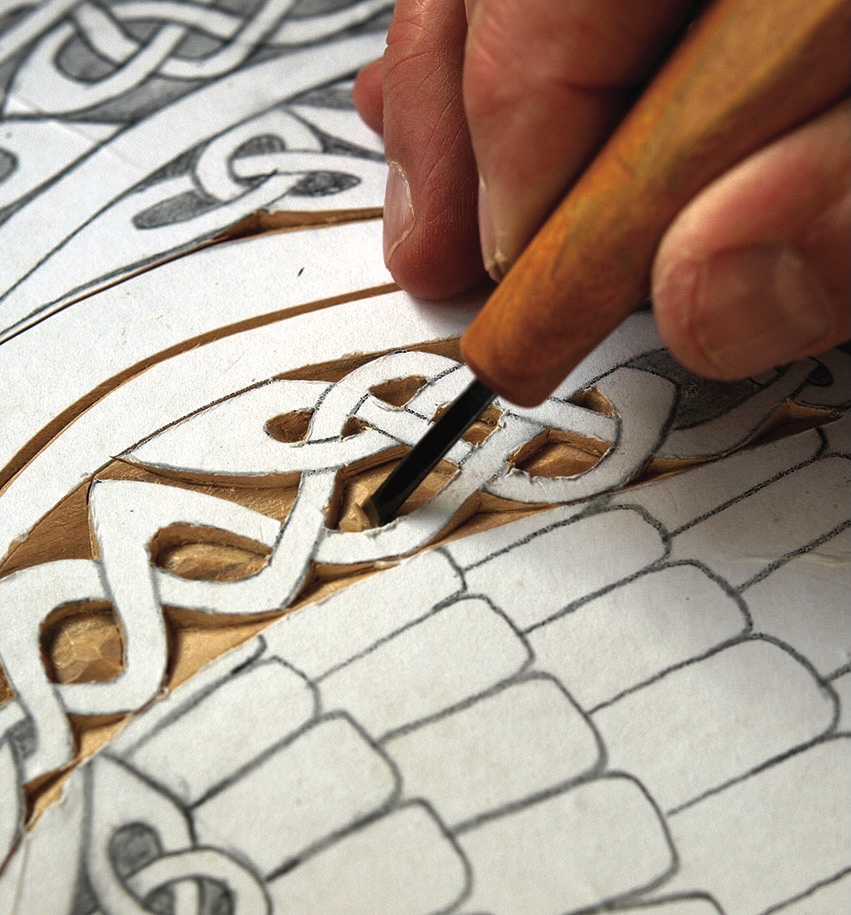
As more of the knotwork is completed, take the opportunity to go back over some of the lines you previously defined and open them up a little bit more. I like to take out a nice V-shaped chip of about 2mm depth and width, to give the line some presence without it being overwhelming and heavy.
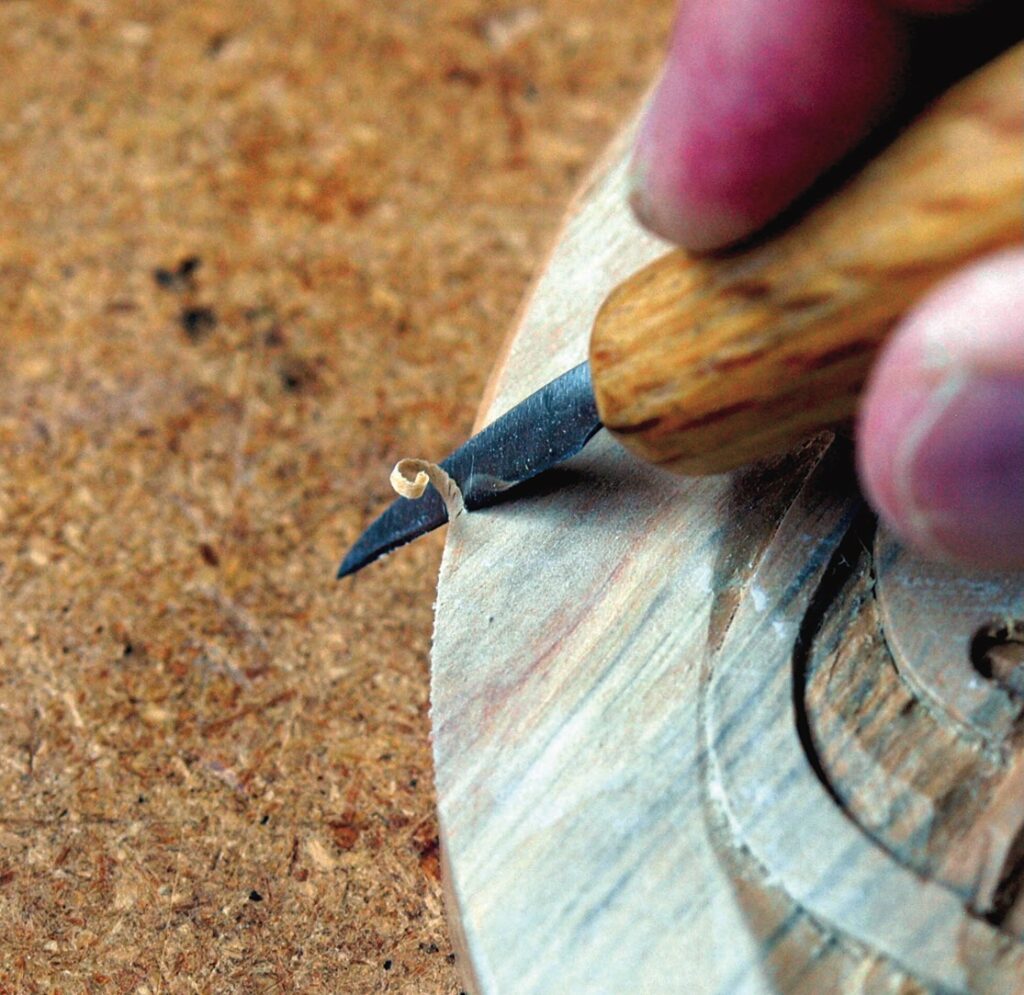
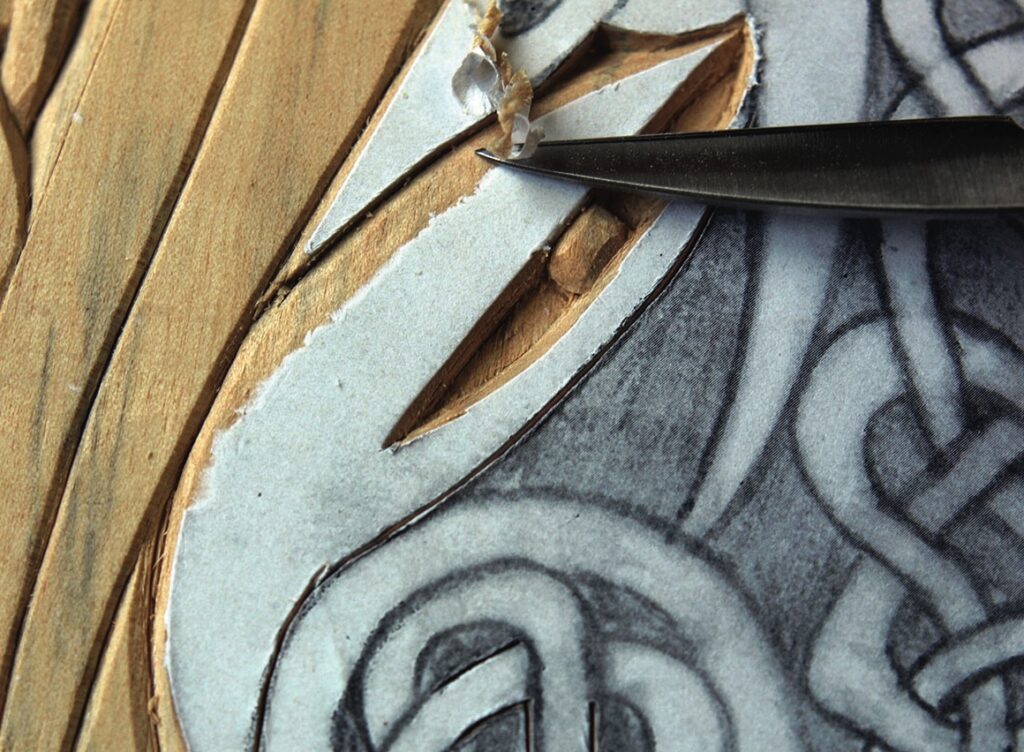
As you get more toward the central area of the pattern, you may find you need a longer straight knife to reach all the sections that require trimming. The raven’s beak needs to be gently curved, a job which requires a longish blade that can be leaned to the appropriate angle without the handle contacting the work. For this part, I used a 38mm long blade rather than the 20mm blade I used for the rest of the detailing.
Because the turns are tight in some of the knotwork, you may find it easier to cut these sections with a small gouge rather than trying to negotiate your way around the curves with the straight knife. I have a couple of small gouges that I can match to whatever diameter curve I am working on. It is quick and saves a lot of clean up.


Wing section
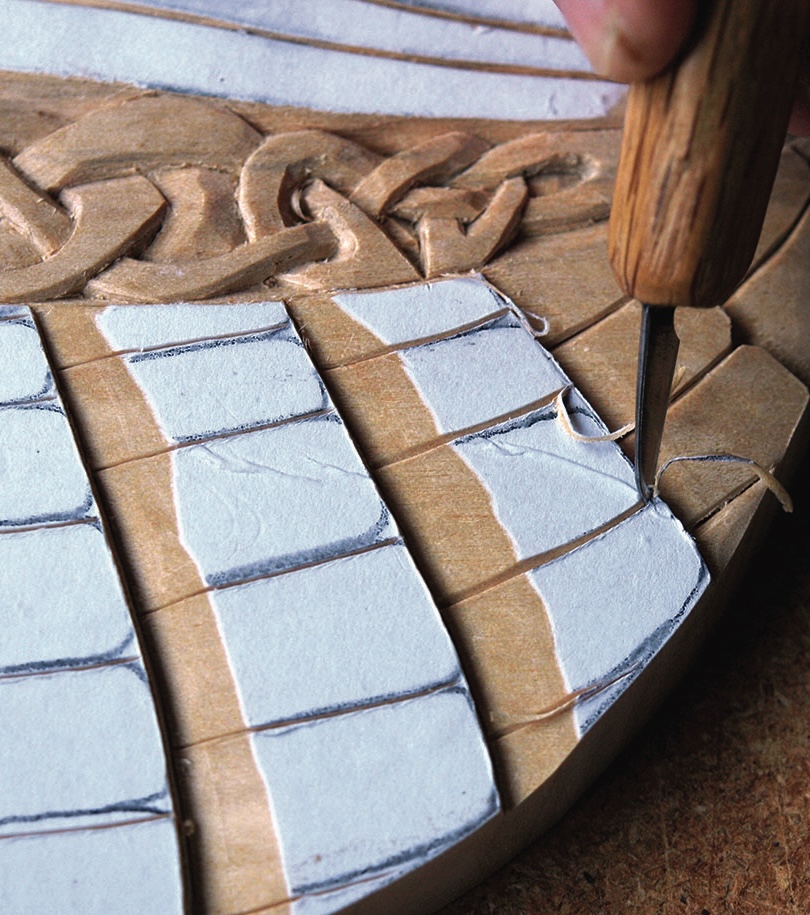
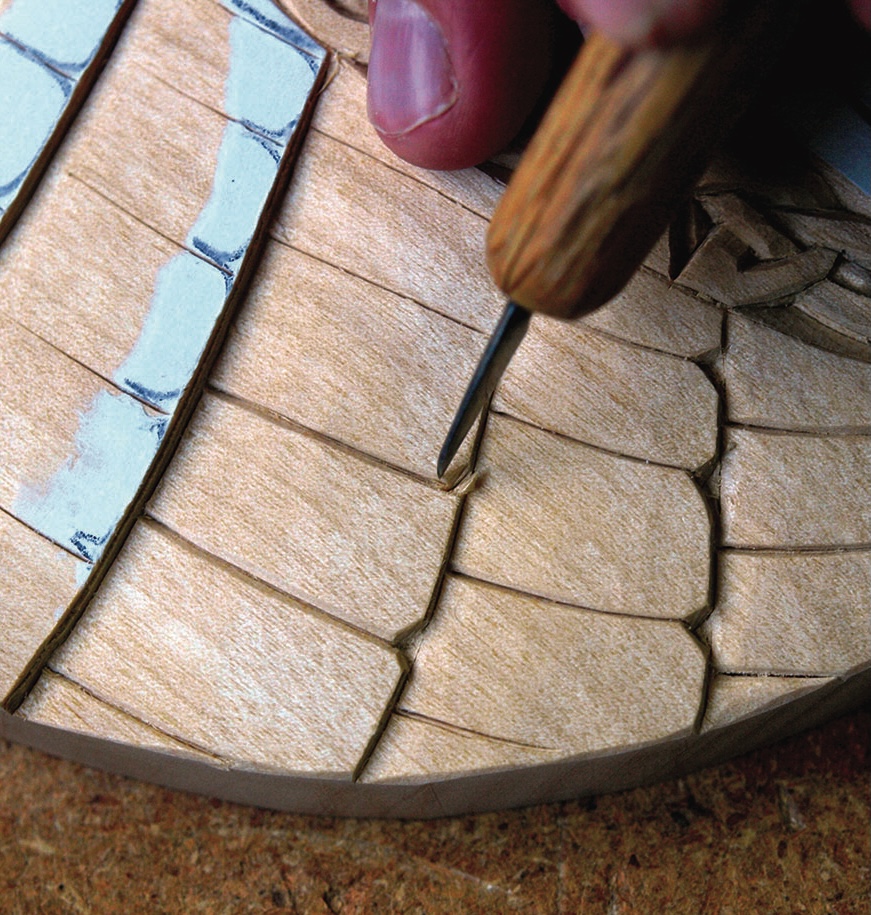
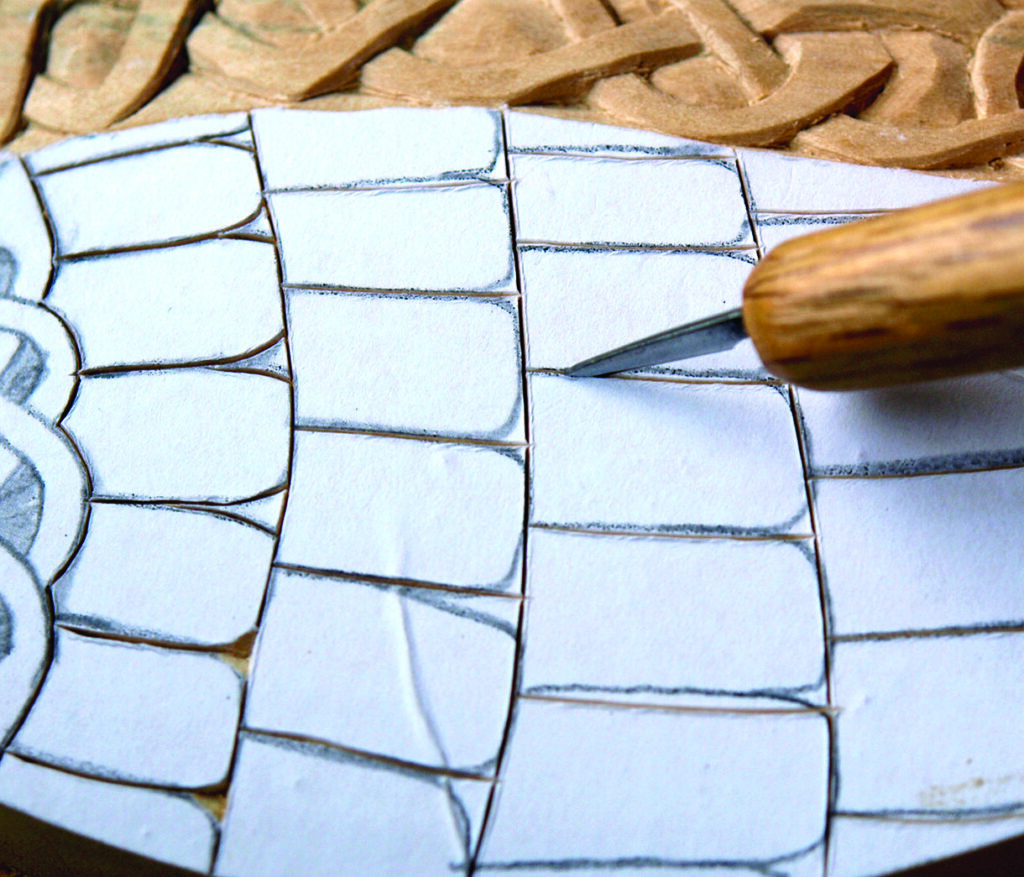
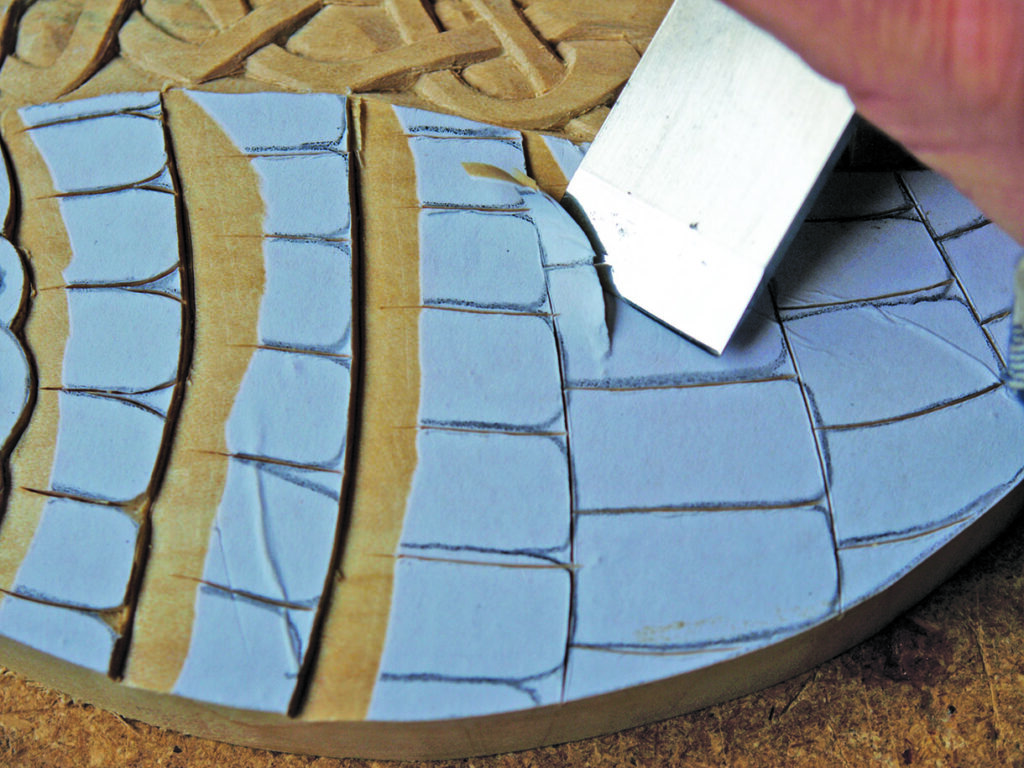
With the knotwork complete, move on to the wing section and mark out each feather with a vertical knife cut. Then make a vertical cut along the bottom of each row of feathers to a depth of approximately 3mm. Use a large chisel to cut an angled chip to the line at the bottom of the row. Start shallow and deepen to about 3mm when you are confident that all is in order. Once each row has been marked out, use the straight knife to define the lines between each feather. Avoid the urge to remove too much material, as you want the feathers to appear tight together. Finally, round the bottom edges of each feather with your straight knife to refine things a bit. You can opt for a small rounding as I have done or you can go for a full semi-circular rounding if you are enthusiastic.
Finishing touches
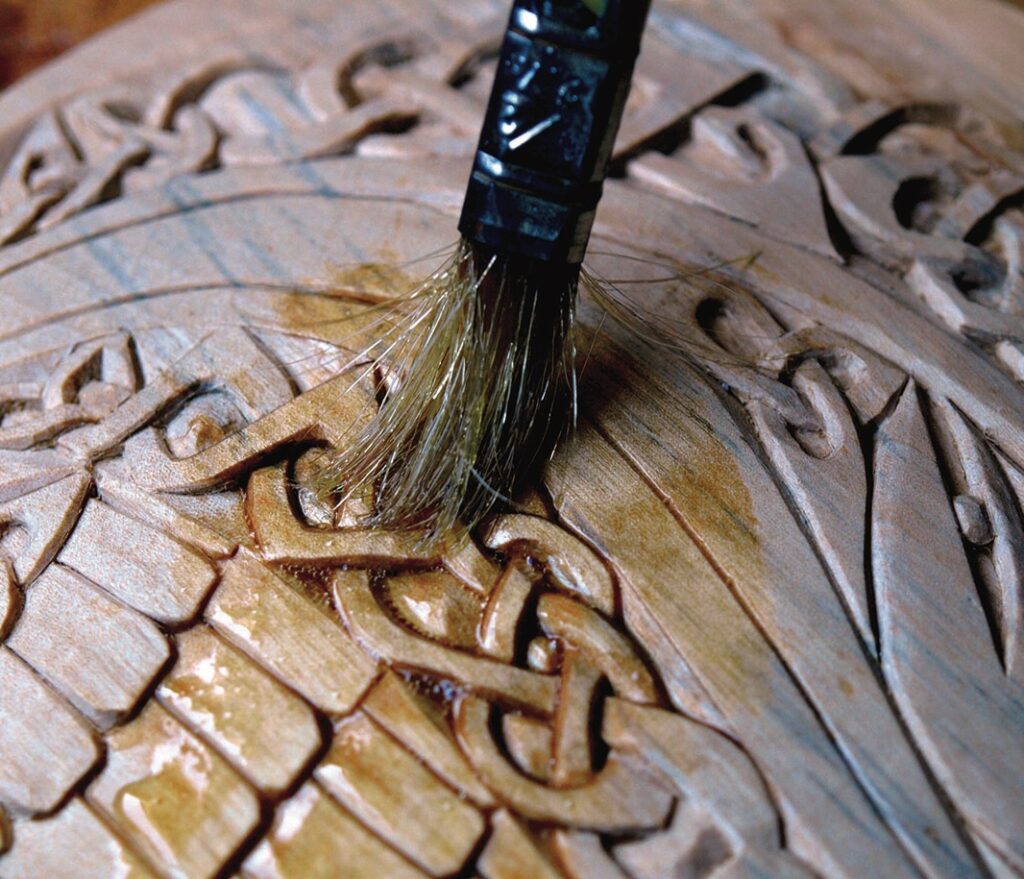
Finally, go over the flat areas with some really fine 320 grit abrasive paper to clean up any pencil marks, scratches or thumb prints. You don’t have to get too carried away – a quick once over should do nicely. Then use your straight knife to chamfer a small edge along the outer lip of the carving. This will make it nicer to handle and less likely to catch on anything. Finally, give it a light coat or two of oil if you want to bring up the grain and the colour a bit. I definitely don’t recommend surface finishes such as varnish, Varathane or lacquer for Celtic-style projects. They are too heavy and kill the crisp look of the knotwork. Stay with penetrating oil or just a wipe with some beeswax.
The disc I carved was approximately 200mm in diameter, which is a size that fits comfortably on a regular sheet of photocopy paper. At that size, it is small enough to be manageable but big enough that the knotwork doesn’t get too onerous.