Louise Biggs repairs a broken handle
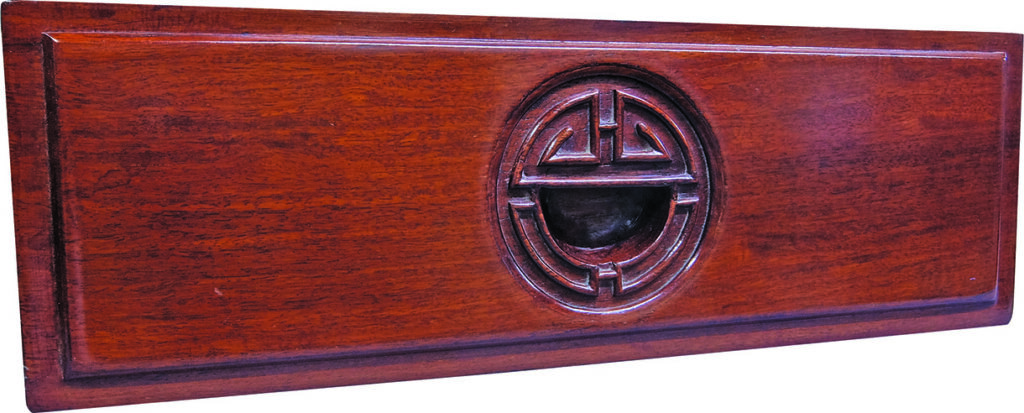
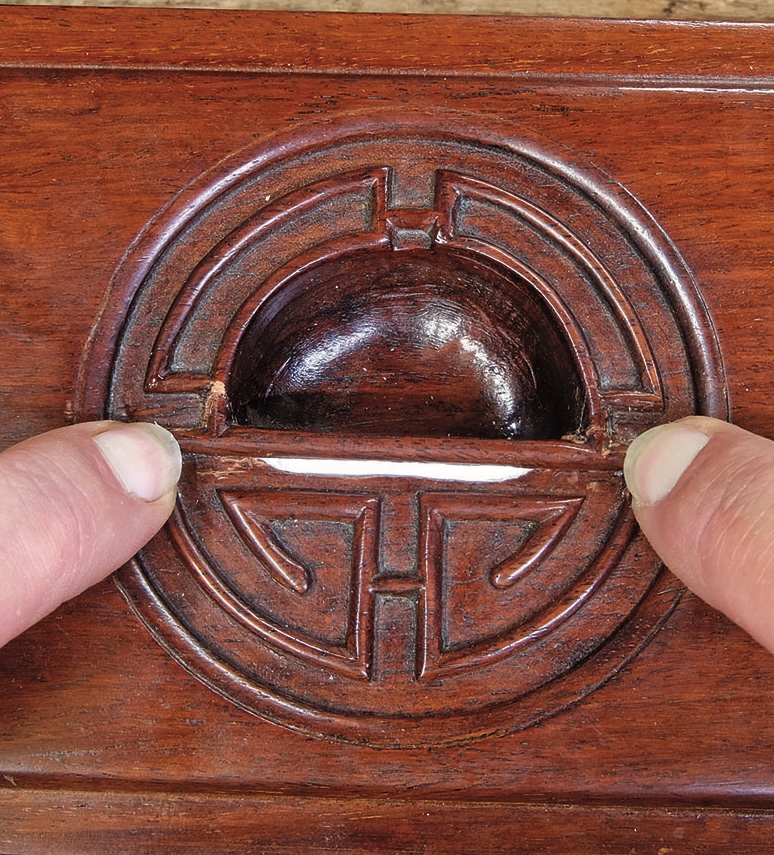
This repair to a finger-pull handle of a Chinese cabinet was only a small job, but fiddly. My clients had the small decorative bar section and had attempted to re-glue the piece as it formed the pull handle, but it was not strong enough.
Table of Contents
Tools used
• Block plane
• Chisels – various sizes
• Carving tool
• Dovetail saw
• Small jaw vice
• Small ‘G’ clamps
• PPE – dust protection
Stages of restoration
Having assessed the break and checked the other drawer handles it was found the area above the bar should be filled and not open as shown; this supported the centre bar on solid timber and made the finger-pull stronger.

infill piece
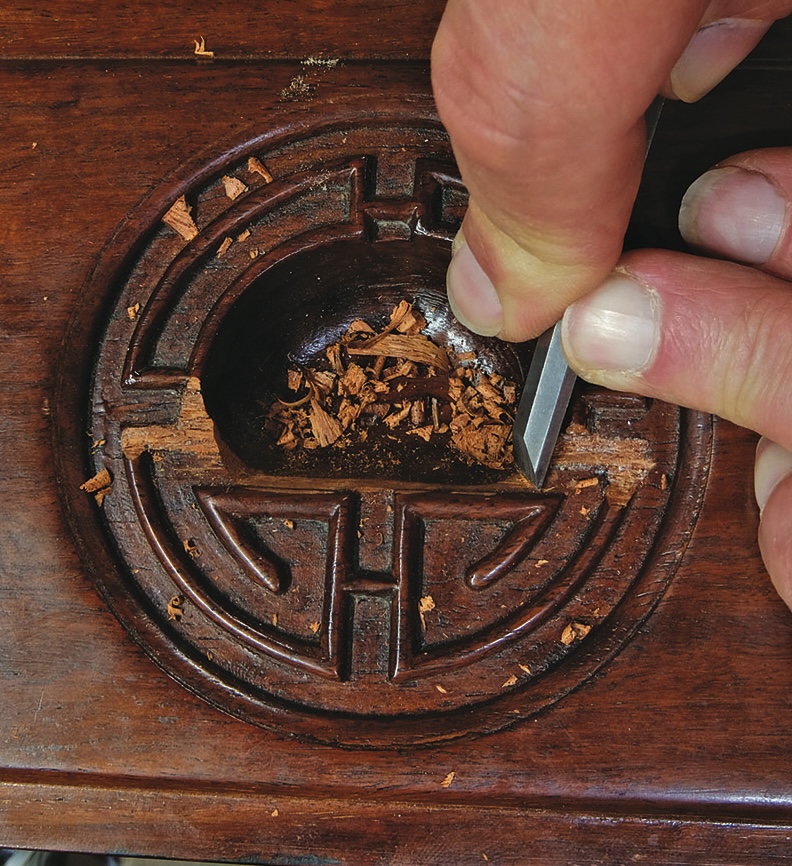
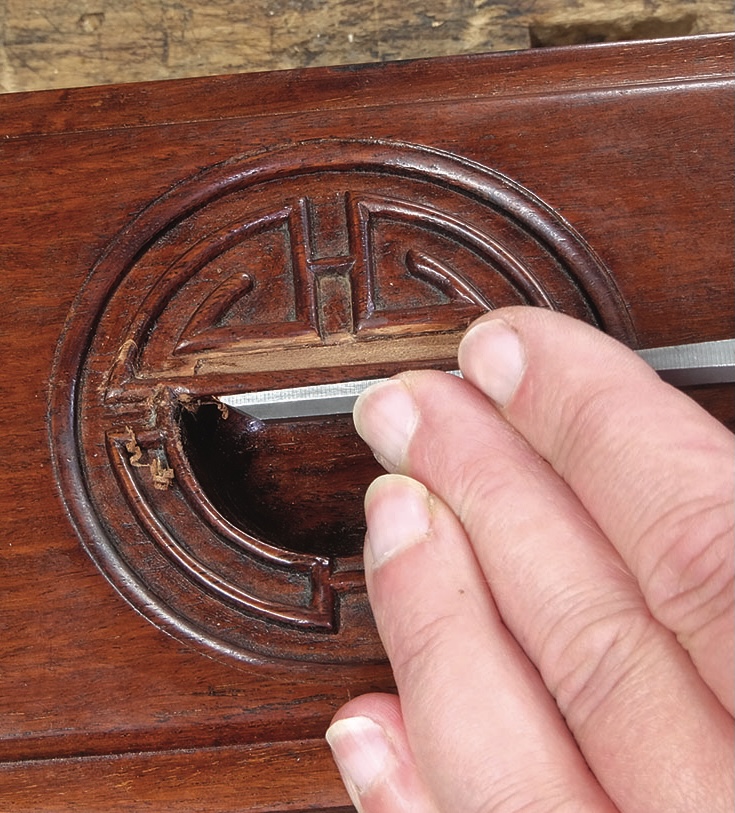
The old glue was carefully removed with a chisel from the broken section and the drawer front where it joined until the broken part seated in the correct position. Holding the piece in place I had a clear indication as to how much back support was missing and I cut a small piece of paper as a template for the infill.
To increase the surface area of the joint for a larger gluing area the drawer front was trimmed at an angle, cutting in from both ends with the chisel and running the front edge up to the beaded decoration which would help to hide the joint while cutting back as far as possible. The two ends were then trimmed at an angle supporting the chisel so as not to cut into the remaining decoration.
Having found what I thought was a suitable piece of timber with a similar grain I wiped some methylated spirits over an area which had been abraded to get some idea of the timber’s colour compared to the drawer front.
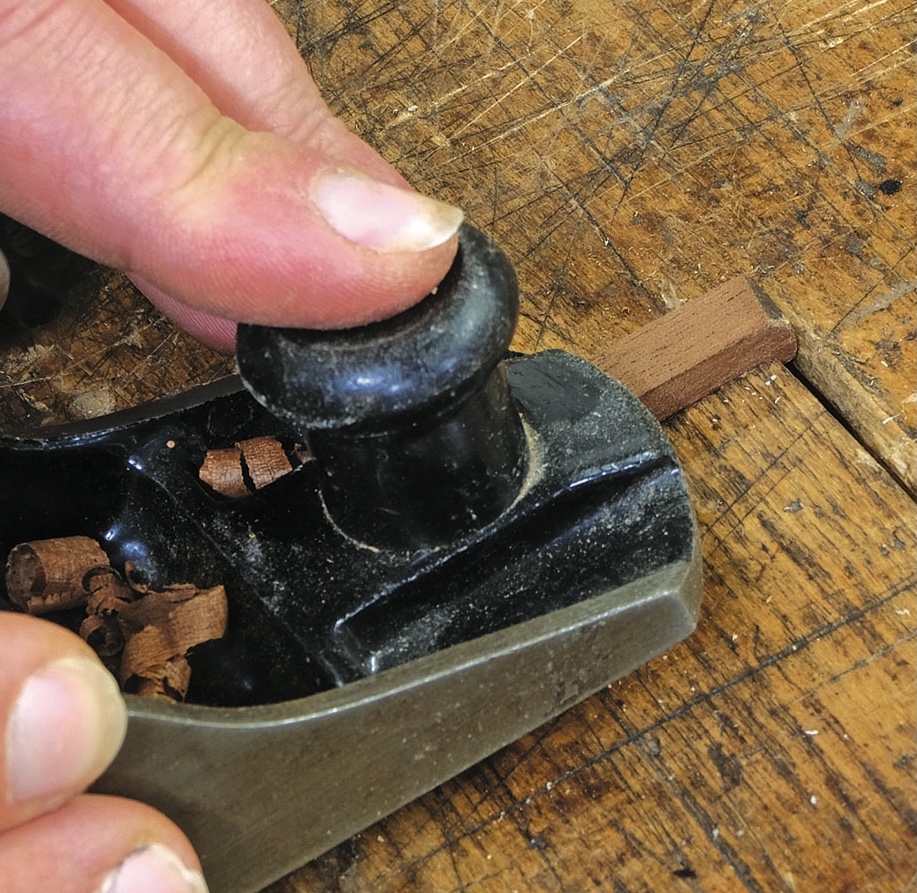
Satisfied that the colour would be lighter than required I cut a larger enough section with a dovetail saw
and started to form the angled side using a small block plane.
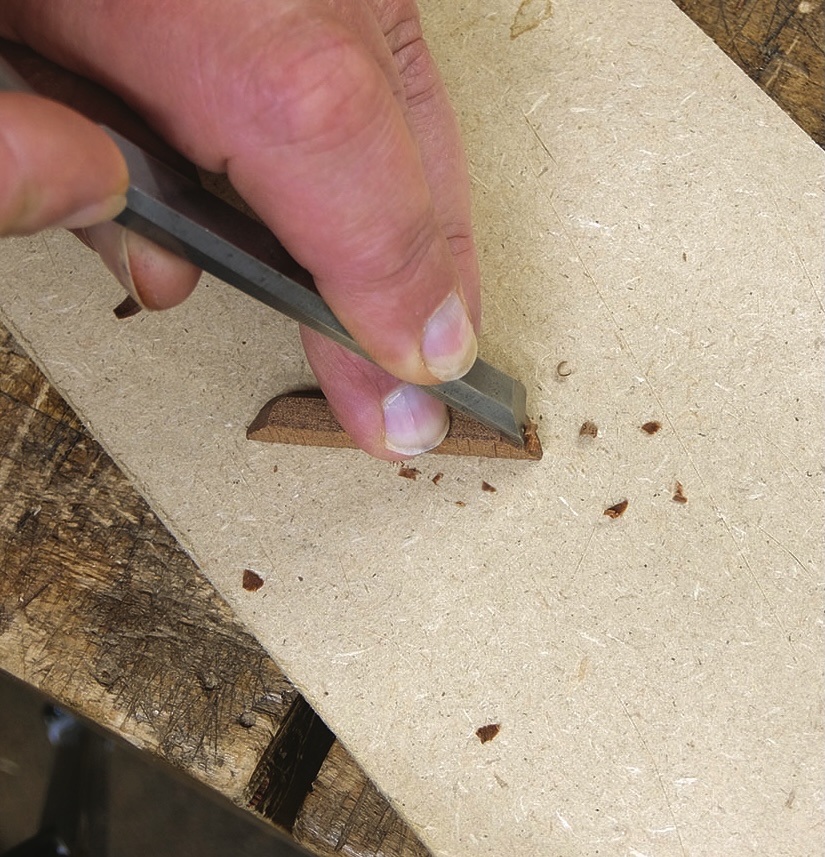
Having lined the piece up on the drawer front, the ends were pared off to the required angles using a chisel. The timber section was held on a waste piece of board with double-sided tape to safely aid holding the piece.
Fitting
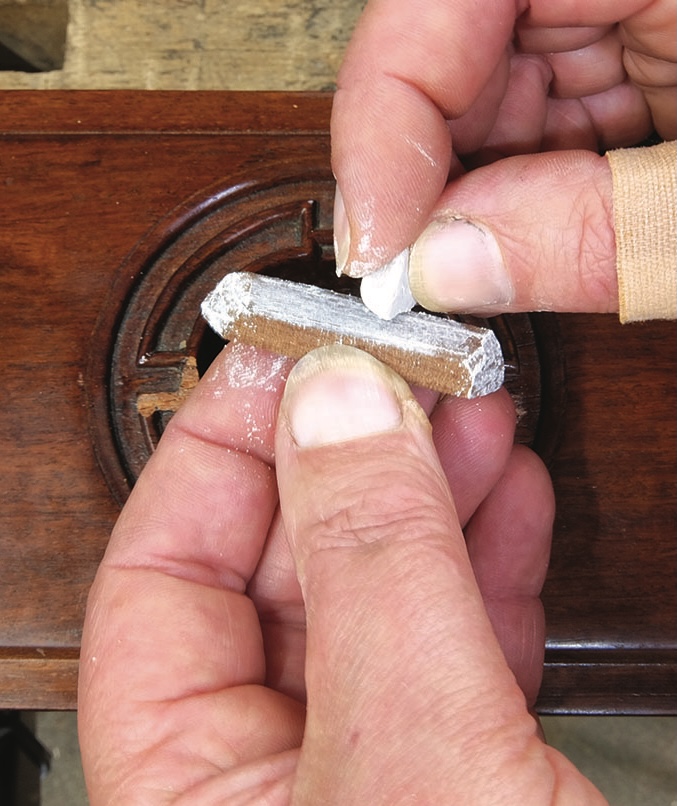
The fit was almost right, but the piece appeared to be rocking on a couple of points. Being small it was difficult to see the high spots, so I rubbed some French chalk onto the section and fitted it into place again; when the piece was removed the chalk had transferred onto the drawer front indicating the high spots. A smear of white glue will work the same as the chalk, but remember to remove it before it dries.
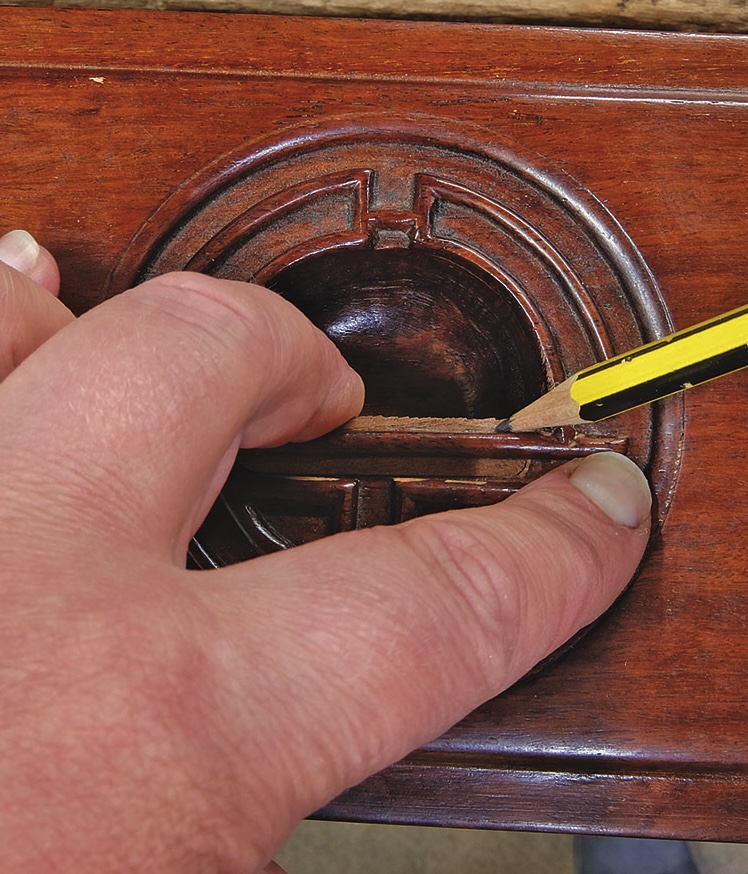
With the piece fitted tightly I carefully held both sections in place and marked the replacement piece for the correct width, finishing level with the decorative bar. By using a short pencil I also marked inside the finger-pull as much as possible to give an indication as to the internal shape.
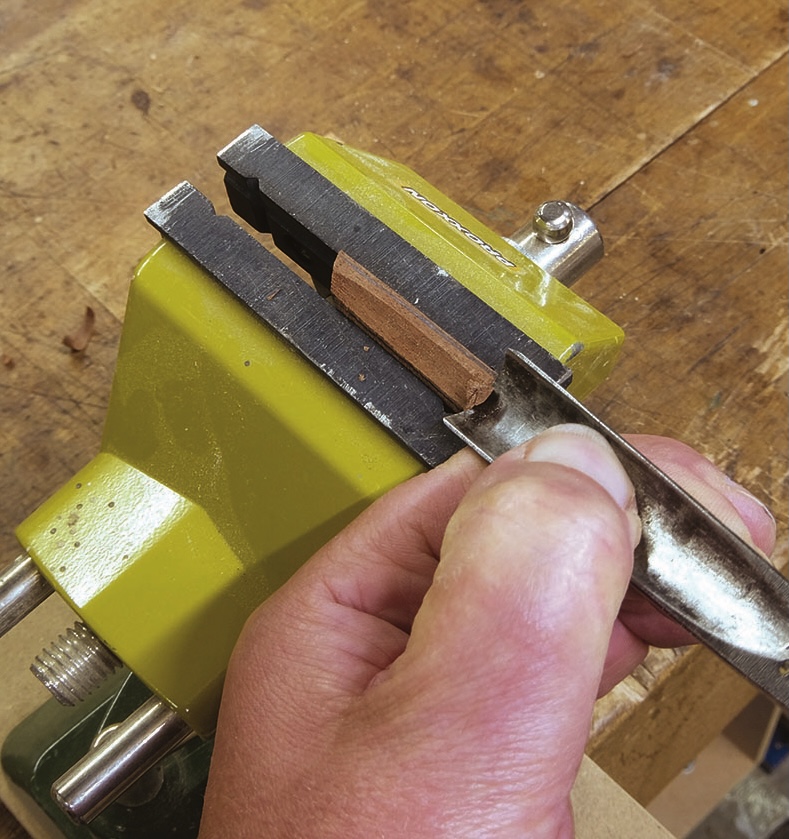
Before gluing the infill section in place the back edge needed to be curved off in order to create the front shape of the finger pull. Holding the section securely in a small vice the curved shape was formed using a carving tool until it corresponded with the two lines marked. The piece was fitted several times to check the curved shape against the drawer front to allow the maximum room for fingers.
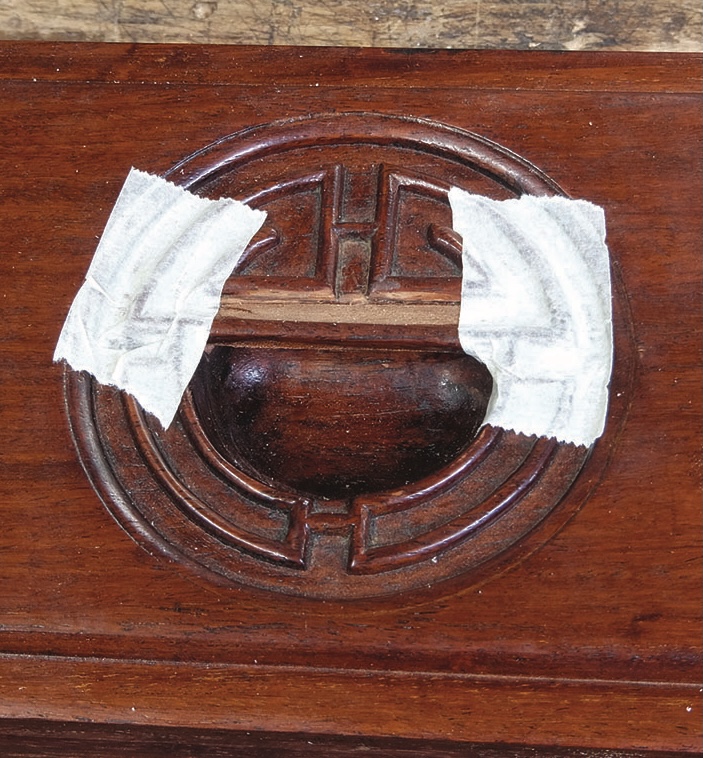
The section was glued and clamped in place. When dry the front surface was trimmed back level with the surrounding timber using a chisel before being finished with abrasives. Several thicknesses of low-tack masking tape were placed around the area to protect the surface finish during this process. The decorative bar was then glued in place over the infill and held in place with masking tape before being clamped.
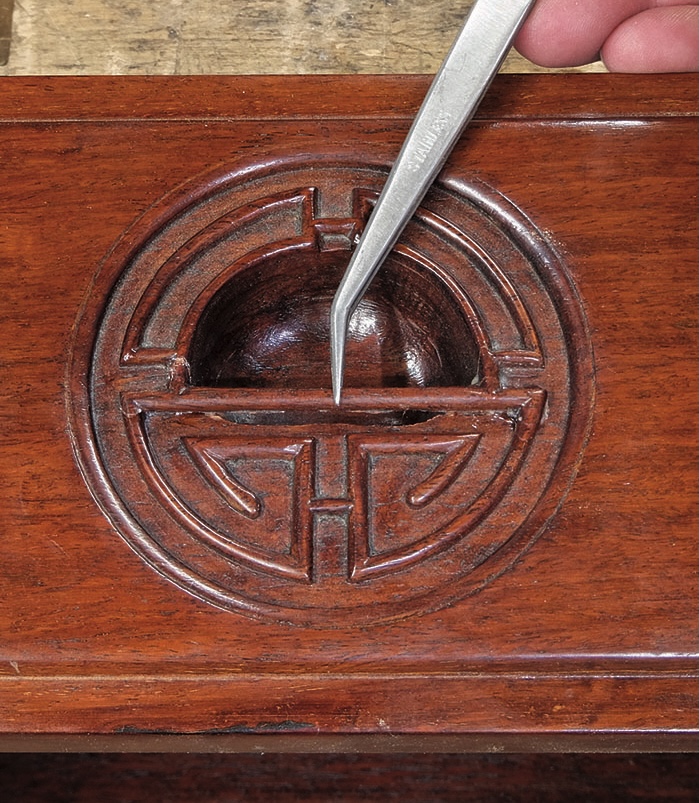
Once dry, any final trimming was done to the lead edge using a chisel and the areas around the breaks were cleaned up of excess glue.
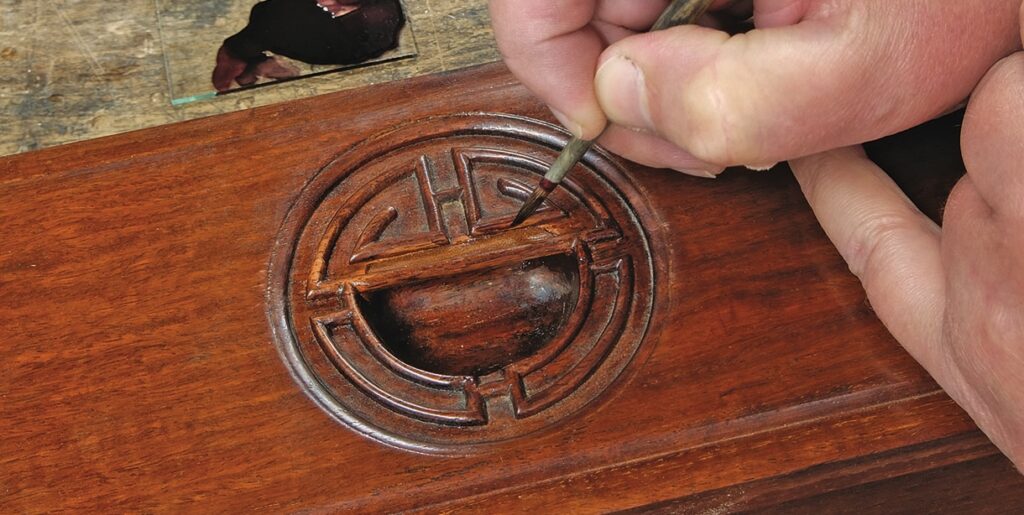
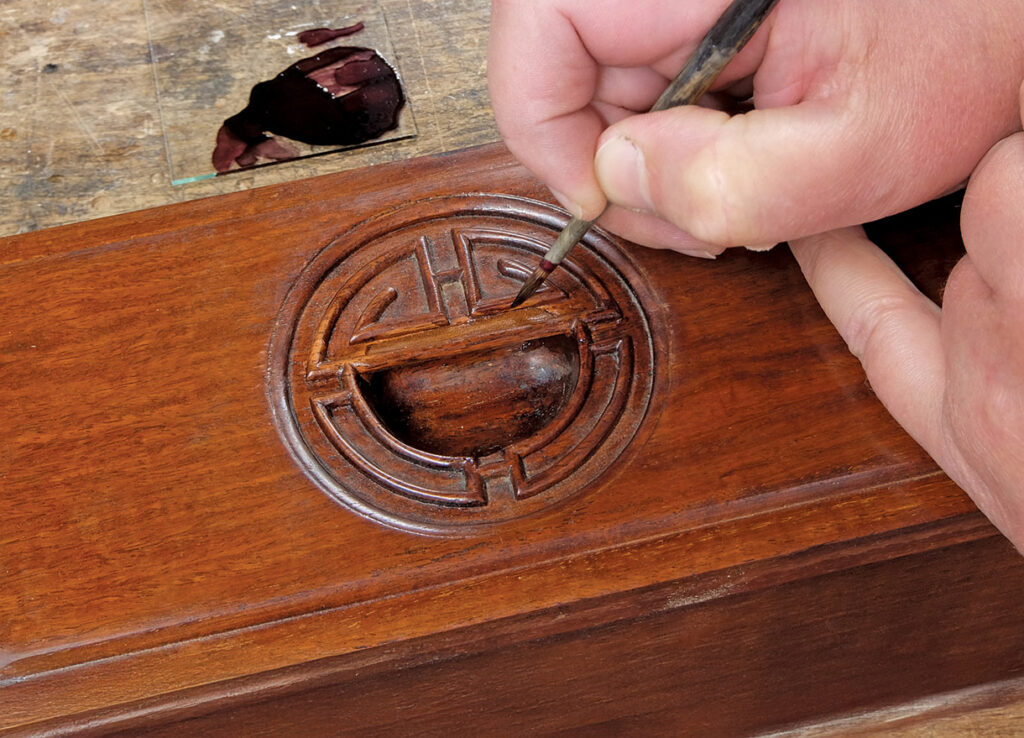
The repairs were given a coat of sealer before blending a small amount of red and black polish with a pale French polish to colour out the repairs. With the colouring dry a few more coats of polish were applied to finish the repair.
When dry the repaired area was wired and waxed to tone in the polish repairs and the drawer front was completed and returned with a functioning handle.